Outlook for Windows - POP Access
- Log in to your Zoho Mail account to enable POP access. (Login to www.zoho.com/mail >> Settings >> Mail Accounts >> POP >> Enable POP Access by clicking the checkbox).
- Launch the Microsoft Outlook application in your system.
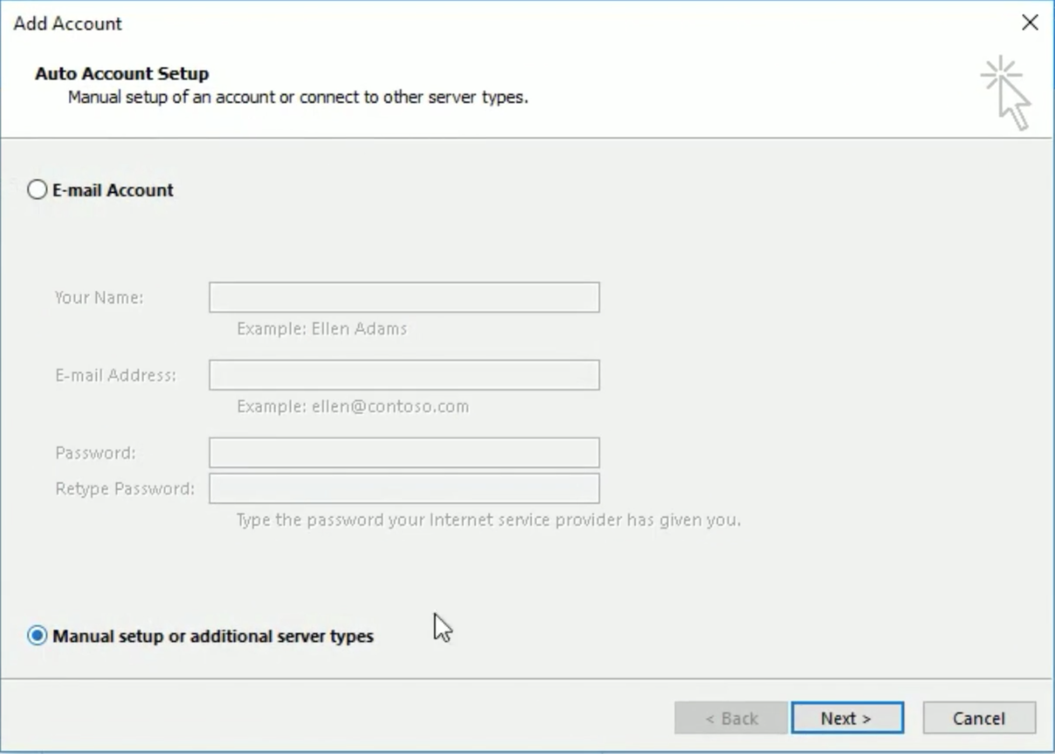
- Click File and select Add Account.
- Locate and select 'Manual setup or additional server types', and click Next
- In the ‘Choose Service’ page, select 'POP or IMAP', and click Next.
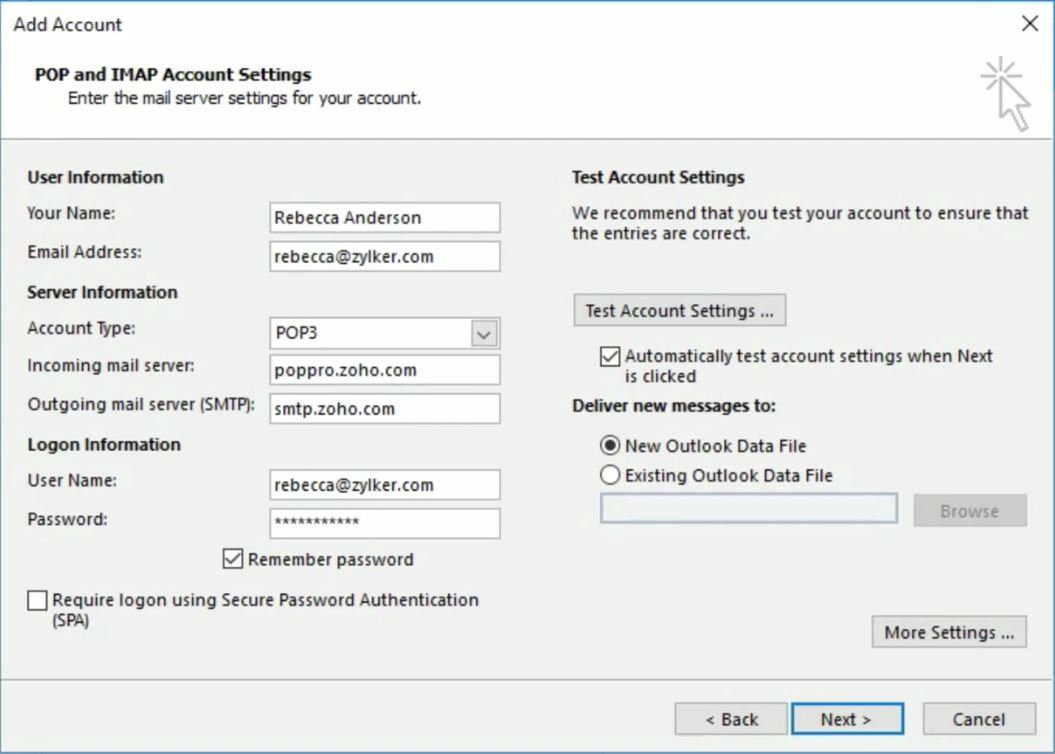
- In the 'Add Account' page, provide the following details:
- User Information
- Your name: Your preferred display name. This will be used in the emails you send from Outlook.
- Email address: Your Zoho account email address (user@domain.com or email aliases for organization accounts or username@zoho.com, if you have a personal account)
- Server Information: For specific configuration related to your account, check this section.
- Select POP3 from the Account Type menu.
- Incoming server: poppro.zoho.com - for organization accounts (if your domain is hosted with Zoho).
- Incoming Server: pop.zoho.com - for personal accounts (if you have a personal @zoho.com account)
- Outgoing Server: smtp.zoho.com
- Logon Information:
- Username – The email address of your Zoho account (user@yourdomain.com for Email Hosting users / username@zoho.com for personal users).
- Password – Zoho Account Password (Use Application-specific Password if Two-Factor Authentication is enabled for your account.)
- Ensure that 'Remember Password' is checked, and click More Settings.
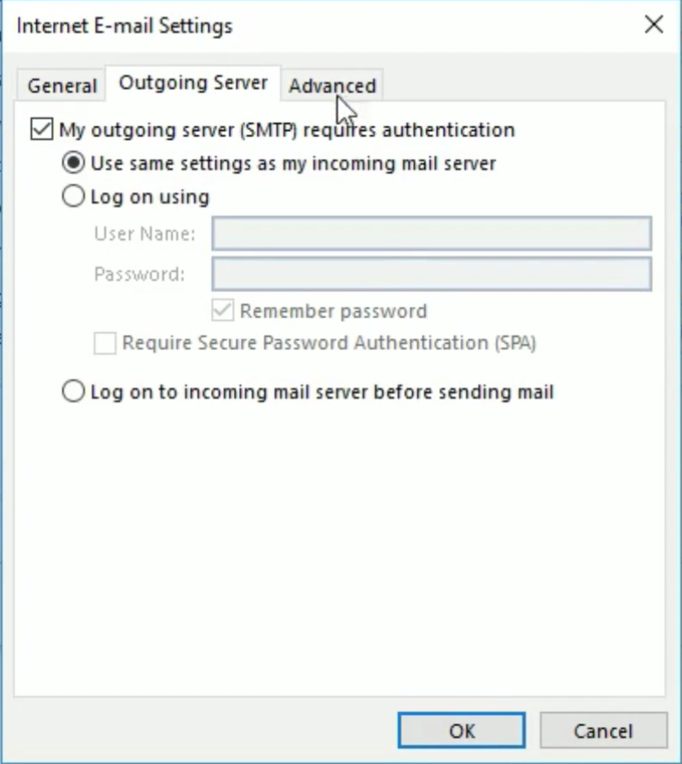
- Outgoing Server tab: Select My outgoing server (SMTP) requires authentication and ensure that Use same settings as my incoming server is checked.
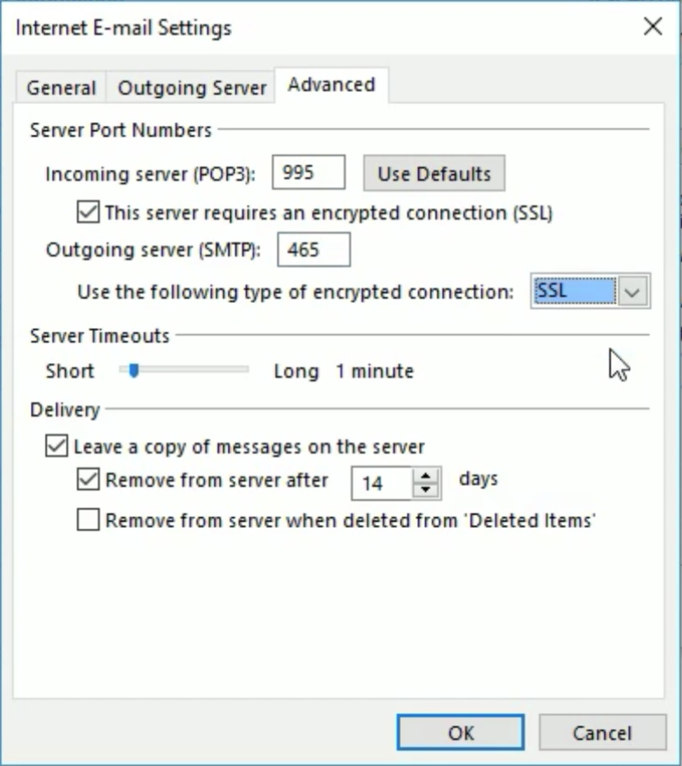
- Select the Advanced tab and configure the Settings as follows:
- Incoming Server (POP3): 995
- Select the This server requires an encrypted connection (SSL) checkbox.
- Outgoing Server (SMTP): 465
- In Outgoing Server, Select SSL from the drop down for the encrypted connection.
- Click OK
- You will be redirected back to the 'Add New Email Account' section.
- Click Test Account Settings to check the configuration info.
- When the tests are successful, Outlook will display a popup as shown below.
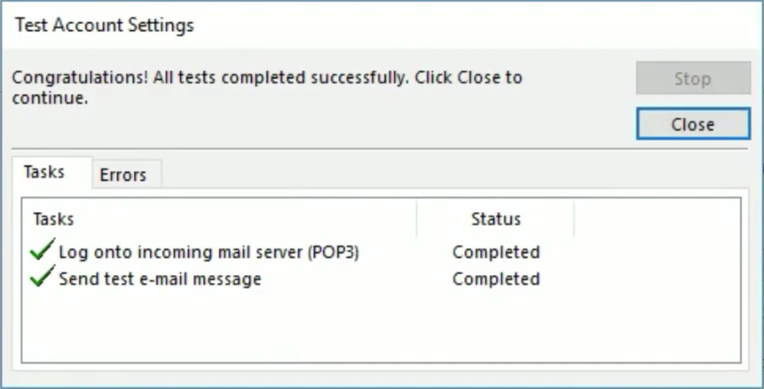
- Click Close. If you see any errors, check the troubleshooting section.


