Authorizing Zoho Mail to access Google Workspace
Overview
To authorize Zoho Mail to access your organization's Google Workspace users, email, contact, and calendar data, Google Workspace mandates the following authorization process. First, the organization's admin will have to create a Google Workspace service account, then permit Zoho Mail to access the required services in Google Workspace and then define the scopes that can be accessed by the service account that you are creating.
Ensure that this entire authorization process is done in a browser where no Google Workspace or Gmail account, other than the one from which you will be creating the service account is open.
Google Workspace Authorization
As an administrator, you can use one of the below options to authorize Zoho to access your organization's Google Workspace account:
Authorize using the Cloud Shell method
Follow these steps to authorize Zoho Mail to access your account using the JSON method:
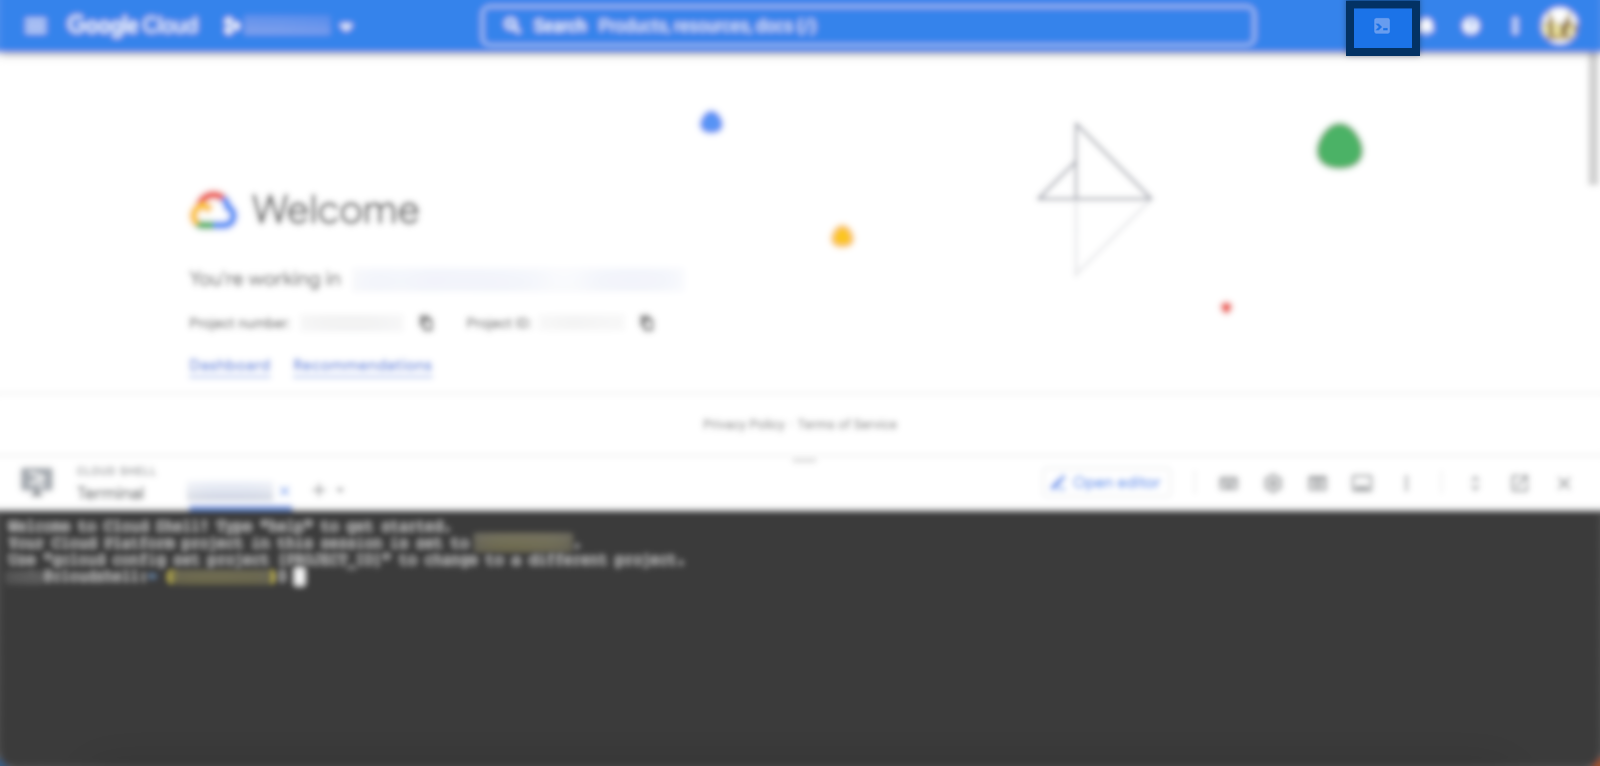
- Log in to the Google Developers Console with your admin credentials.
- Click Activate Cloud Shell from the upper right corner.
- Copy the below script and paste it into the Cloud Shell console.

wget -cO - https://workdrive.zohoexternal.in/external/a83f1d8431988d1c834a7feaa8373cc8be06cd80cff03d8d7befbc658f72b822/download?directDownload=true > "gcp.sh";sh gcp.sh
Enter a project id in the Cloud Shell.
Note:
If you receive an error, follow the project id criteria that appear on the screen.
- Select AUTHORIZE and then click DOWNLOAD to save the JSON file to your computer.
- Open the JSON file and make a note of the client_email and client_id.
- client_email - this is the Service account email address which you should enter at the time of migration creation.
- client_id - Enter this in the Client ID field during granting access to the service account.
Once you download the JSON file you can proceed to the Granting access to Service Account step.
Authorize using Google Developers Console
Authorizing Zoho Mail to access your account using the P12 method involves the below steps:
Creating G Suite Service Account
This section will guide you through the process of setting up a service account in your Google Workspace account.
- Log in to the Google Developers Console with your admin credentials.
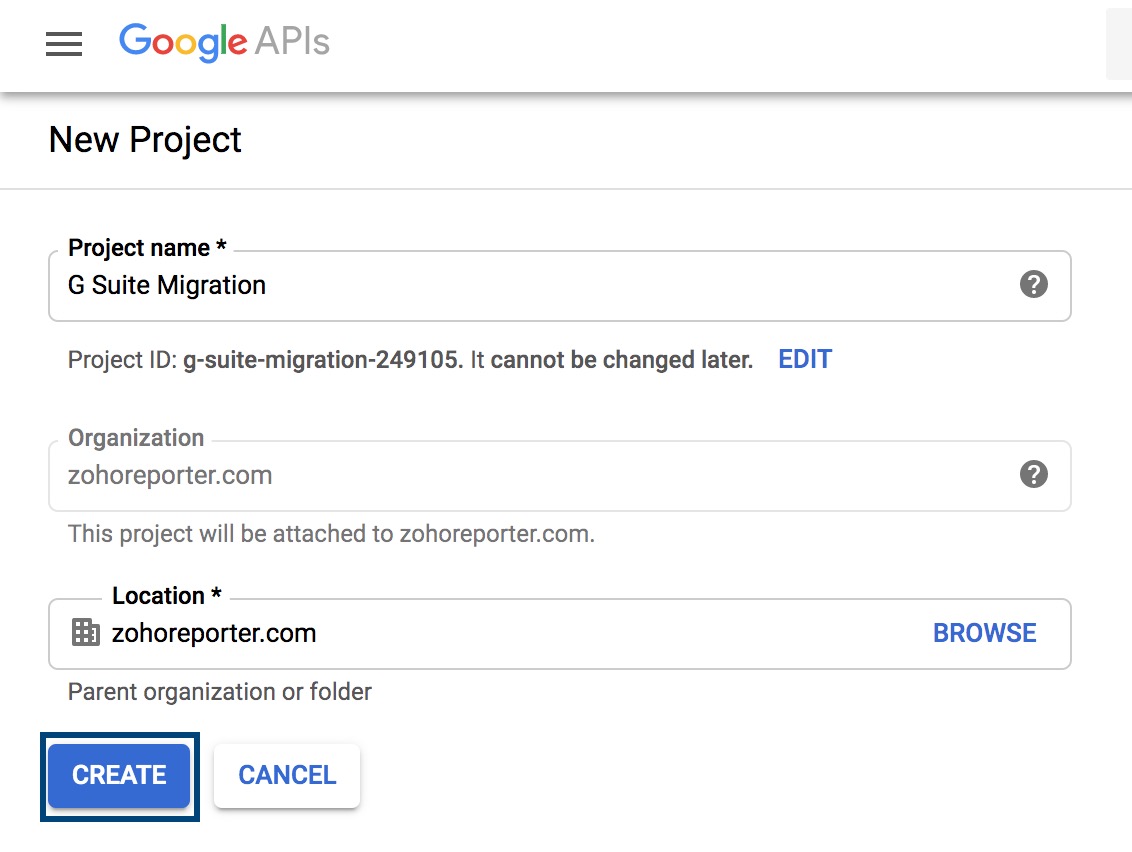
- Click on the dropdown next to your organization's name from the top of the window, and select New Project.
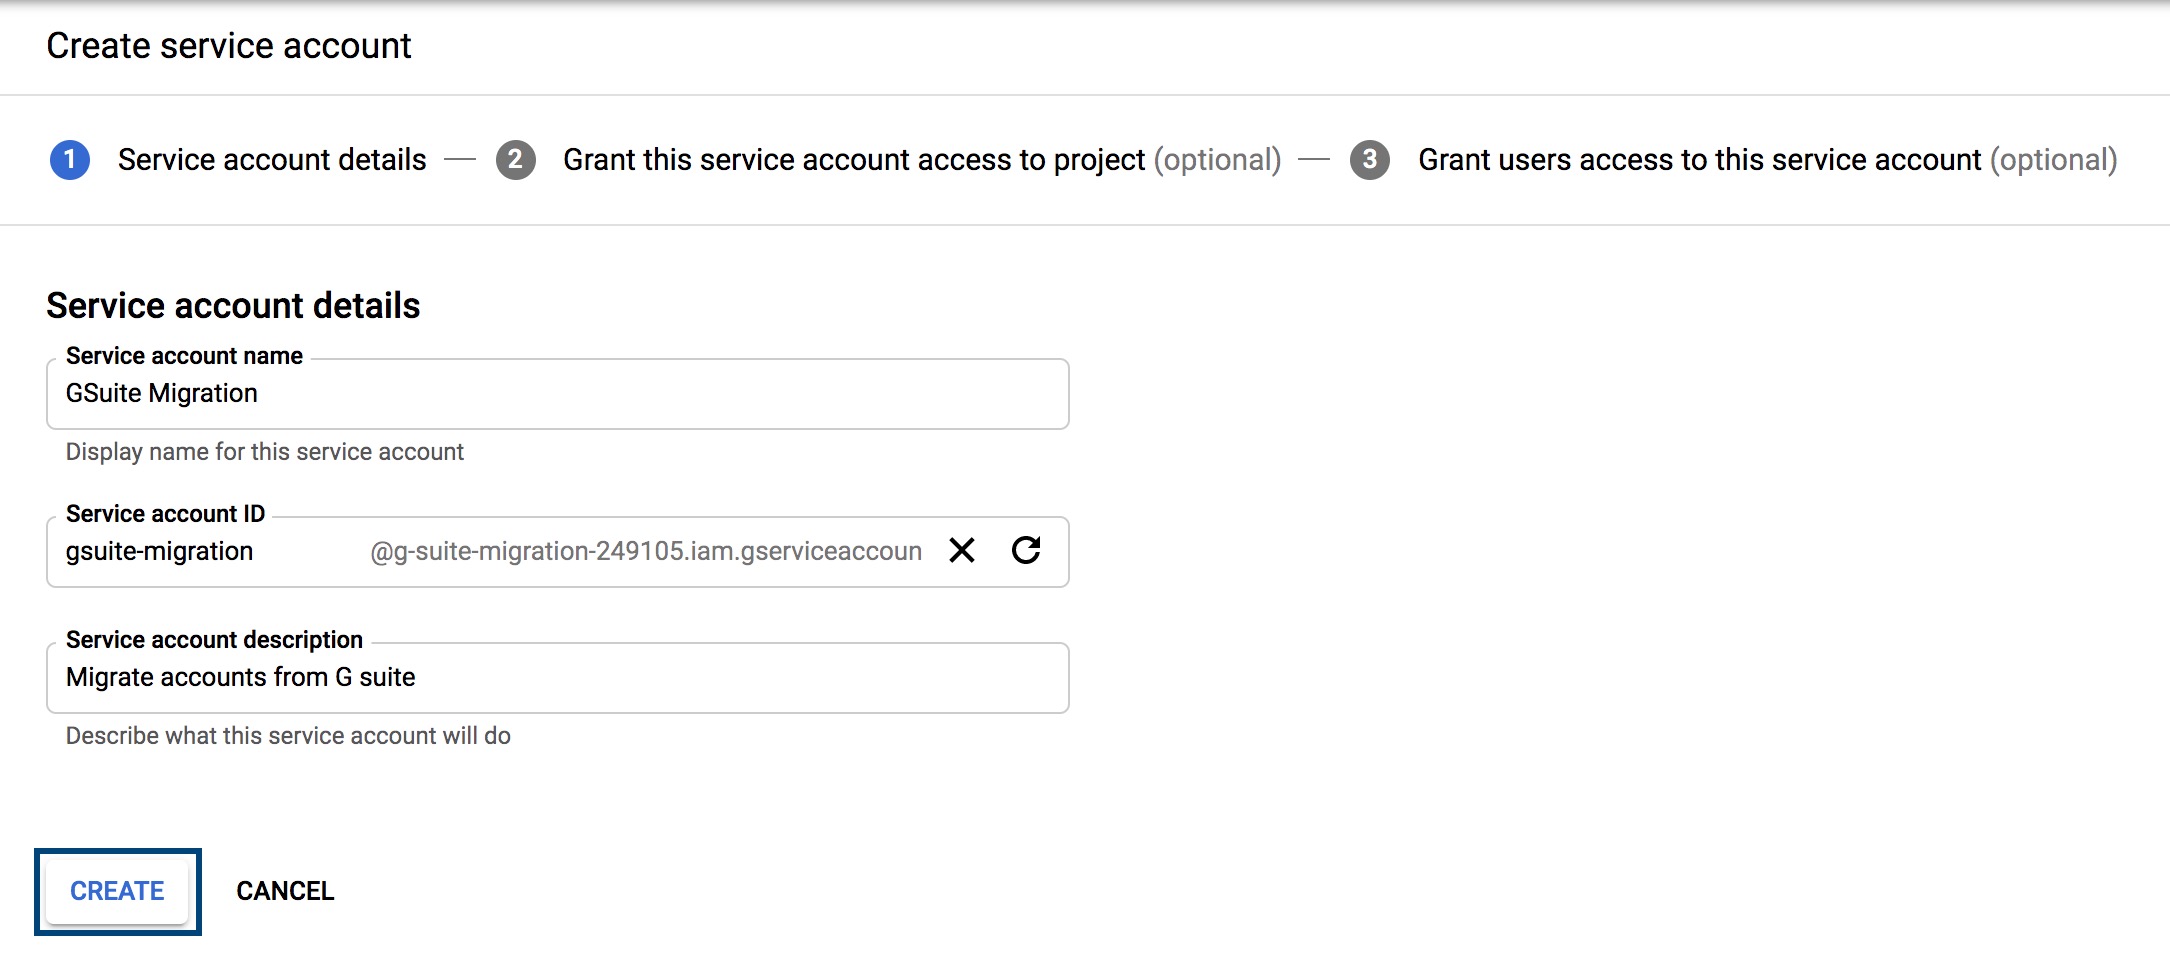
- Enter a name for your project in the Project Name field and click Create.
- Select the Create Service Account option.
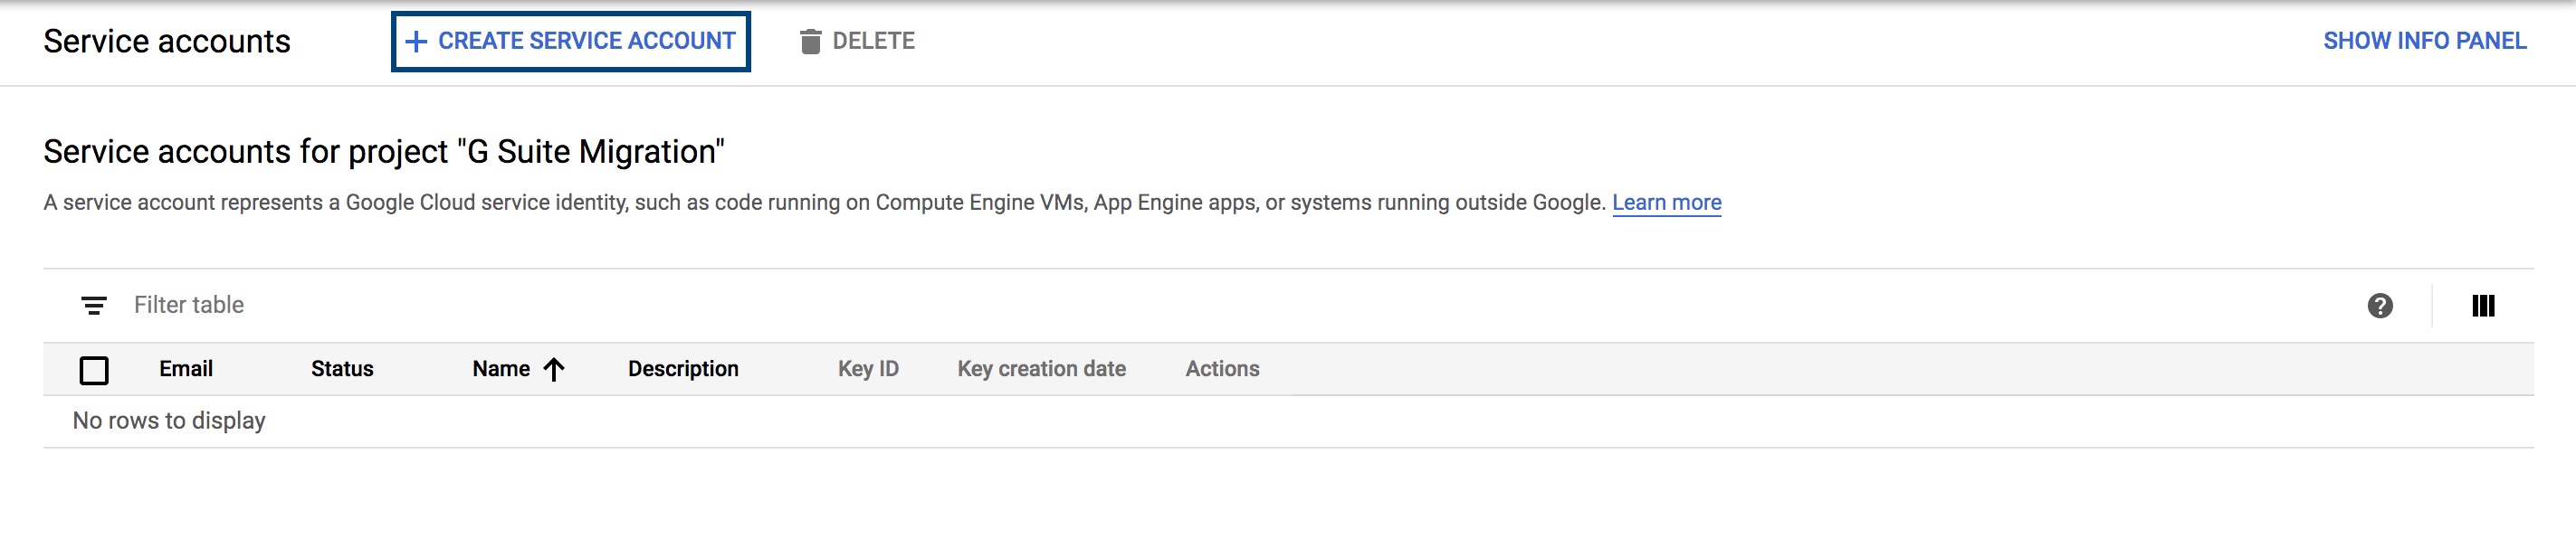
- Enter a service name in the Service account name field, and a description for the service in the Service account description field, and click Create.
- In the next step, select the role that you want to assign to this service account. In the Role field, select Project > Owner, and click Continue.

- If you'd like to assign roles to users and admins, enter the relevant data and click Done.
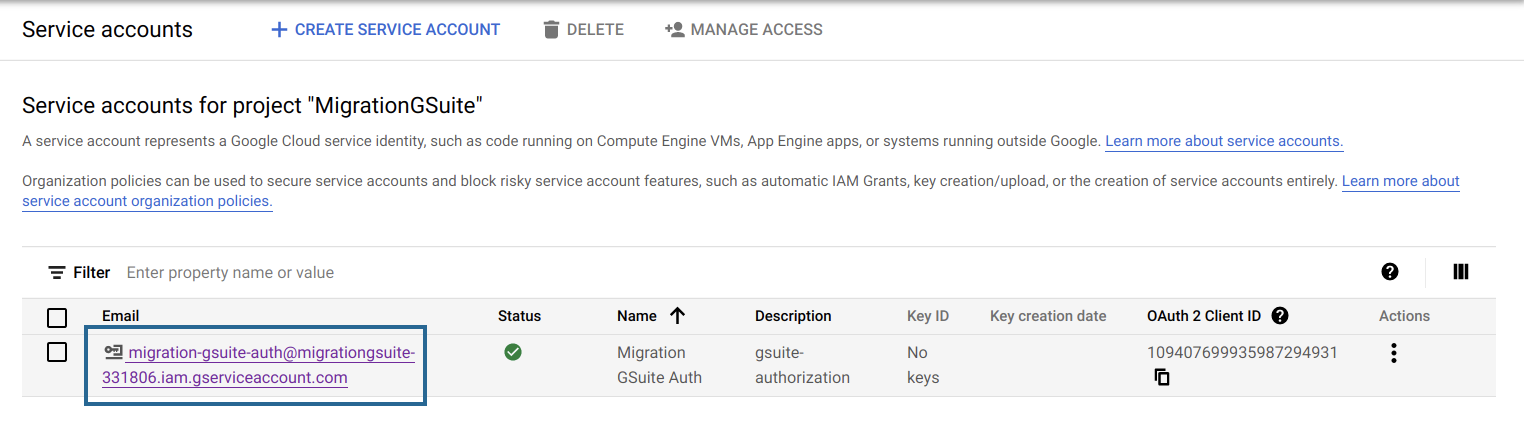
- Click the email address under the Email field. This will be the Service account email address. Make sure that you note this down, as you will have to enter it in the Zoho Mail Admin Console.*
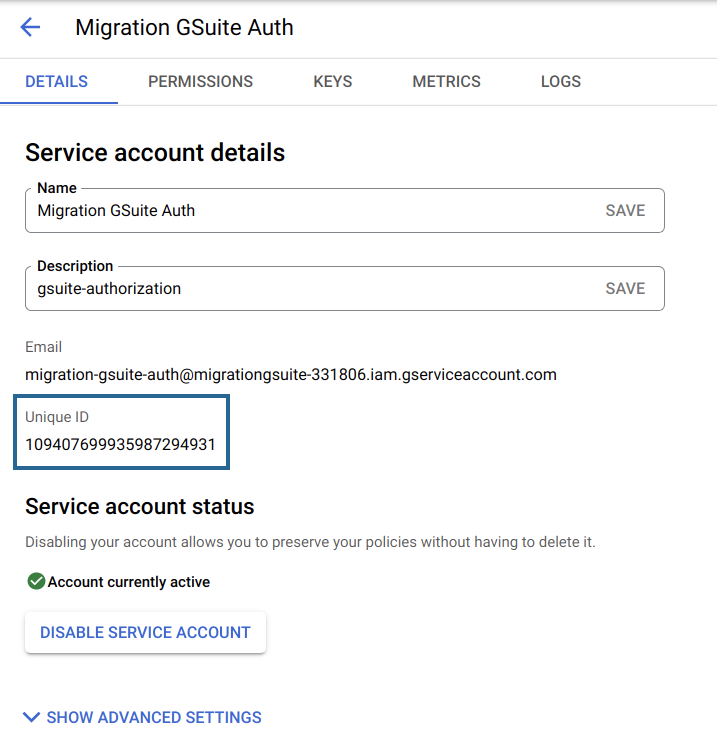
- The value generated in the Unique ID field is the Client ID. Please make note of this value as you will need it for later use during the authorization process.
- Now, navigate to the Keys tab, click Add Key, and select the Create New Key option.
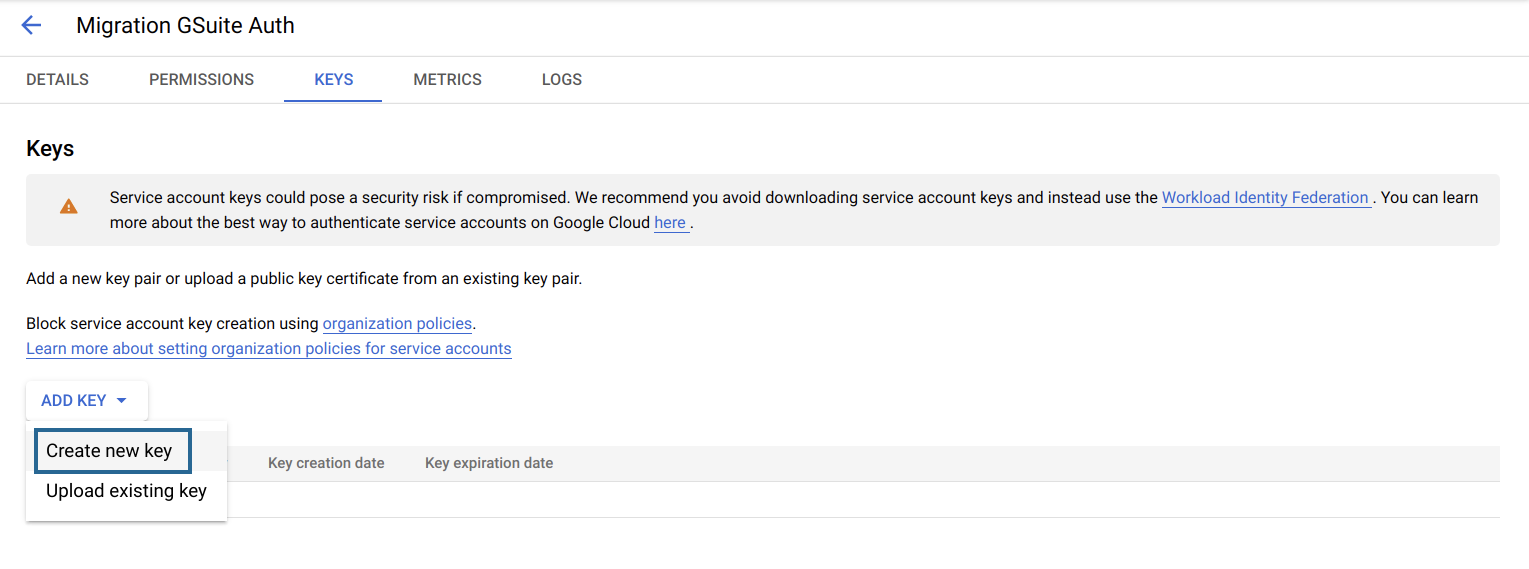
- Select P12 and click Create.

- Once you've created the key, you will notice that a file was downloaded onto your system. Please make sure that you save a copy of this file for later use during the migration.*


Enabling API Access
You will have to enable access to some of these APIs. Follow the below instructions to enable access.
- Log in to the Google API Library.
- Locate the Gmail API and click Enable.
- Locate the Google Calendar API and click Enable.
- Locate the Contacts API and click Enable.
- Locate the CalDAV API and click Enable.
- Locate the Admin SDK and click Enable.
- Locate the Google People API and click Enable.
Granting access to Service Account
This section will aid you in granting access to the service account and defining the scopes that can be accessed by the service account.
- Log in to your Google Workspace Admin account.
- Go to the Security menu, and select API Controls under Access and data control.
- Under Domain-wide delegation, click MANAGE DOMAIN-WIDE DELEGATION.
- On this page, click Add New.
- In the Client ID field, enter the client_id that was generated.
- Copy the following values and paste them in the One or more API scopes field, and click Authorize.
https://www.google.com/m8/feeds/contacts/default/full,
https://www.google.com/m8/feeds,
https://www.googleapis.com/auth/gmail.readonly,
https://www.google.com/m8/feeds/groups/default/full,
https://www.googleapis.com/auth/admin.directory.user.readonly,
https://www.googleapis.com/auth/admin.directory.domain.readonly,
https://www.googleapis.com/auth/admin.directory.group.member.readonly,
https://www.googleapis.com/auth/admin.directory.group.readonly,
https://www.googleapis.com/auth/calendar,
https://www.googleapis.com/auth/admin.directory.resource.calendar,
https://www.googleapis.com/auth/contacts.other.readonly
Once done, this will grant access to the service account and the mentioned scopes will be made accessible.
Details to be entered in the Zoho Mail Admin Console
The service account email address and the JSON/ P12 file that you downloaded will be required when you create a new migration.