Email Journaling
Email Journaling is a system-level feature that automatically captures a copy of every email your organization sends and receives and forwards it to a destination email address. It captures the entire message along with the metadata, so that the complete, unaltered record of the email communication is captured.
The main purpose of Email Journaling is to help the organization meet legal and compliance regulations and support internal investigations, or audits.
Note:
- Email Journaling is available only to the organization users who have subscribed to one of our paid plans.
- This feature is released in a phased manner. If you want to enable Email Journaling to your organization, please write to support@zohomail.com
Steps to create Email Journaling
- Log in to Zoho Mail Admin Console.
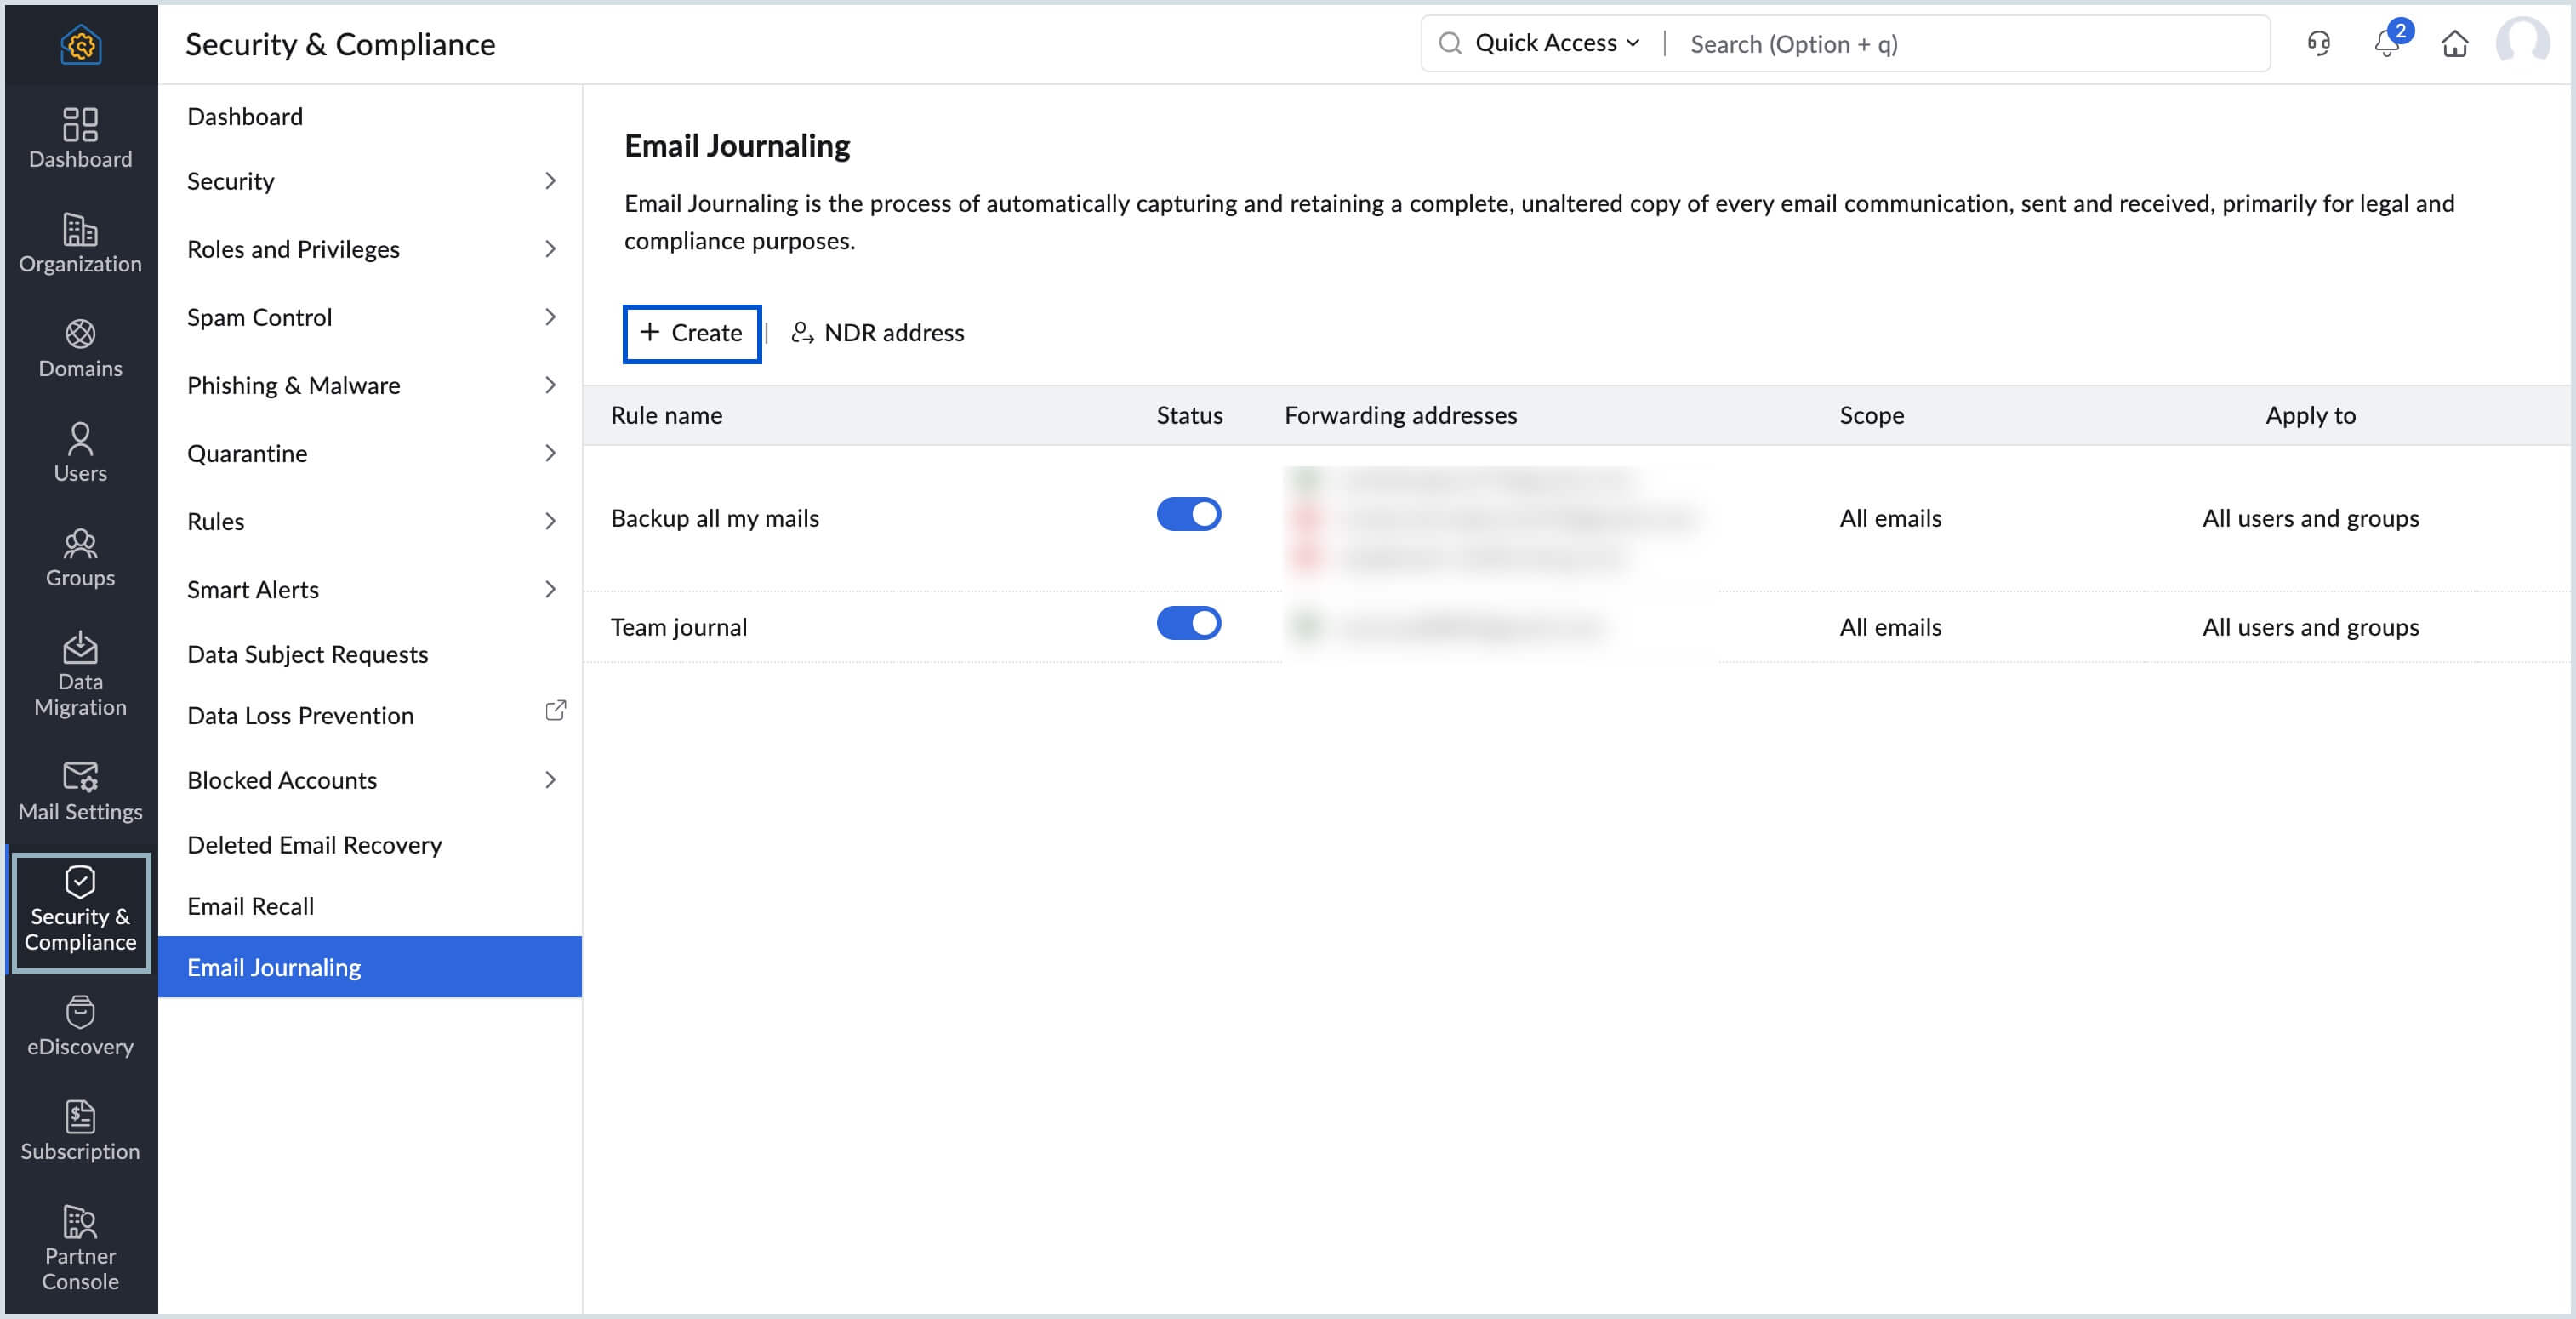
- Navigate to Security & Compliance > Email Journaling.
- Click + Create or Create Email Journal on the home page.
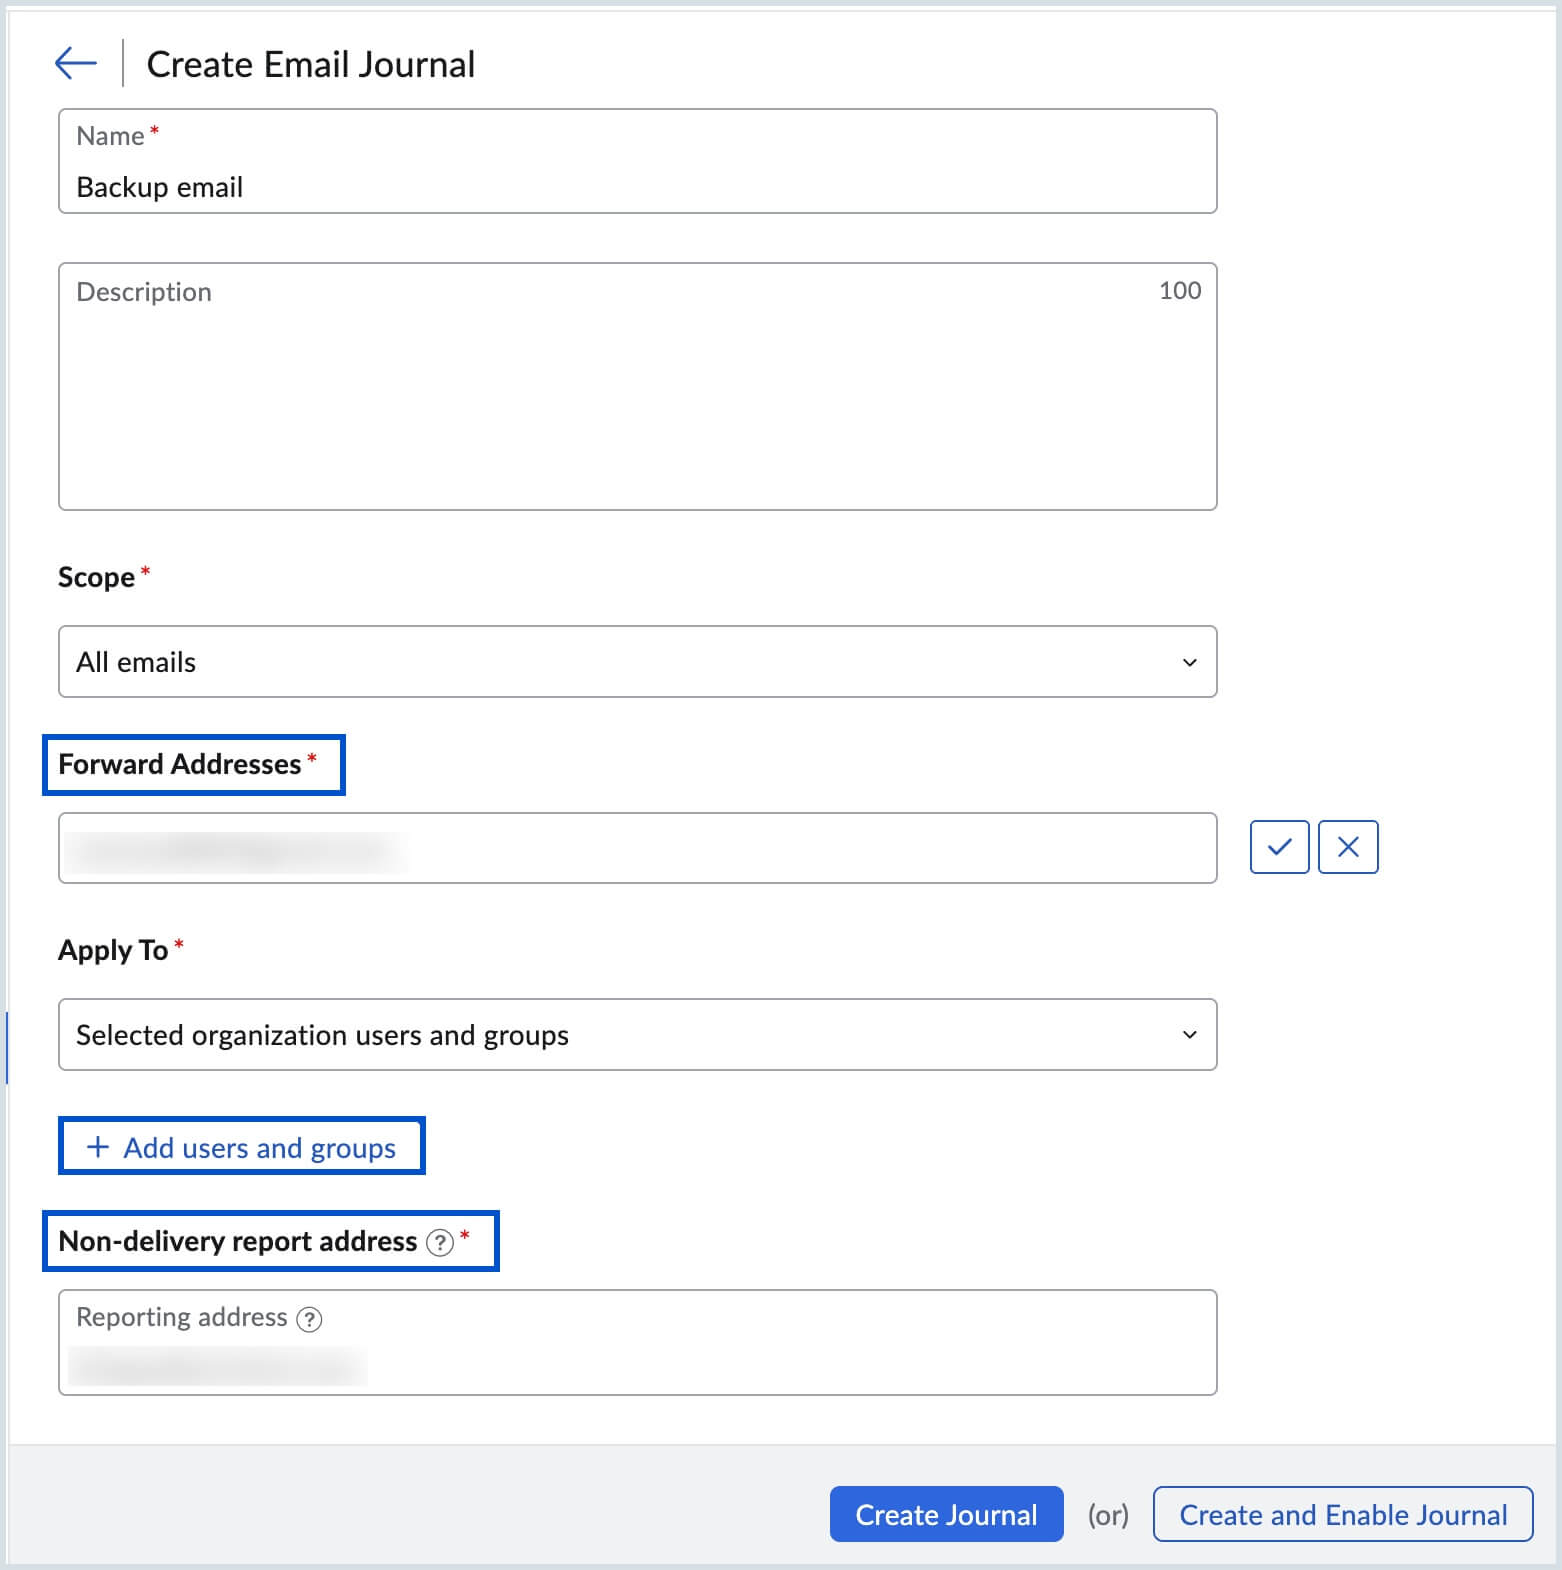
- Enter the Name and Description field in the Create Email Journal dialog box.
- Select any one of the following values under the Scope field:
- All emails - If you wish to capture both incoming and outgoing emails.
- Incoming emails only - If incoming emails alone needs to be captured.
- Outgoing emails only - If outgoing emails alone needs to be captured.
Enter the destination email address where you wish to save the captured emails in the Forward Addresses field.
Note:
- The Forward Address cannot share the same mail server (MX) as your organization. For example, if your organization is hosted on Zoho Mail, the Forward Address must be on a different mail server (external) and cannot be another Zoho-hosted email address.
- You can add a maximum of 3 email addresses as Forward Address, of which atleast one should be verified.
- Enter the OTP (One Time Password) sent to the mentioned forward email address and complete the email verification.
- Select either of the below values in the Apply To section:
- All users and groups - If you wish to apply the Email Journal created to all the users and groups across your organization.
- Selected organization users and groups - If you wish to apply the Email Journal created only to specific users or groups in your organization.
- Click + Add users and groups when Selected organization users and groups option is selected from the Apply To drop-down.
- Add the desired users and groups by selecting Users or Groups from the drop-down and click Submit.
- You can remove the selected values by clicking on the Remove icon or select Remove All to reset the selection made.
Enter the Reporting address in the Non-delivery report address field. This email address will receive an email whenever the Forward address entered is unable to receive the mails due to any discrepancies like storage issue, or failed email delivery.
Note:
- The Non-delivery report address (NDR) should be a user email address (not a group email address) that exists within the organization. Ensure that no email restrictions are applied to this address, so that NDR emails are delivered successfully.
- The NDR can hold upto 50 delivery failure emails, after which the Email Journaling feature will be disabled.
- Admins will be notified when the Email Journaling is disabled, so that necessary action can be taken to rectify the email delivery issue.
- Select Create Journal to only create the Email Journal or Create and Enable Journal to enable the created journal.
Note:
You can create a maximum of 5 Email Journaling rules.
Steps to update NDR address
The Non-delivery address entered during the creation of Email Journaling rule can be updated to a different address at a later period. Follow the below steps to update the NDR address:
- Log in to Zoho Mail Admin Console.
- Navigate to Security & Compliance > Email Journaling.
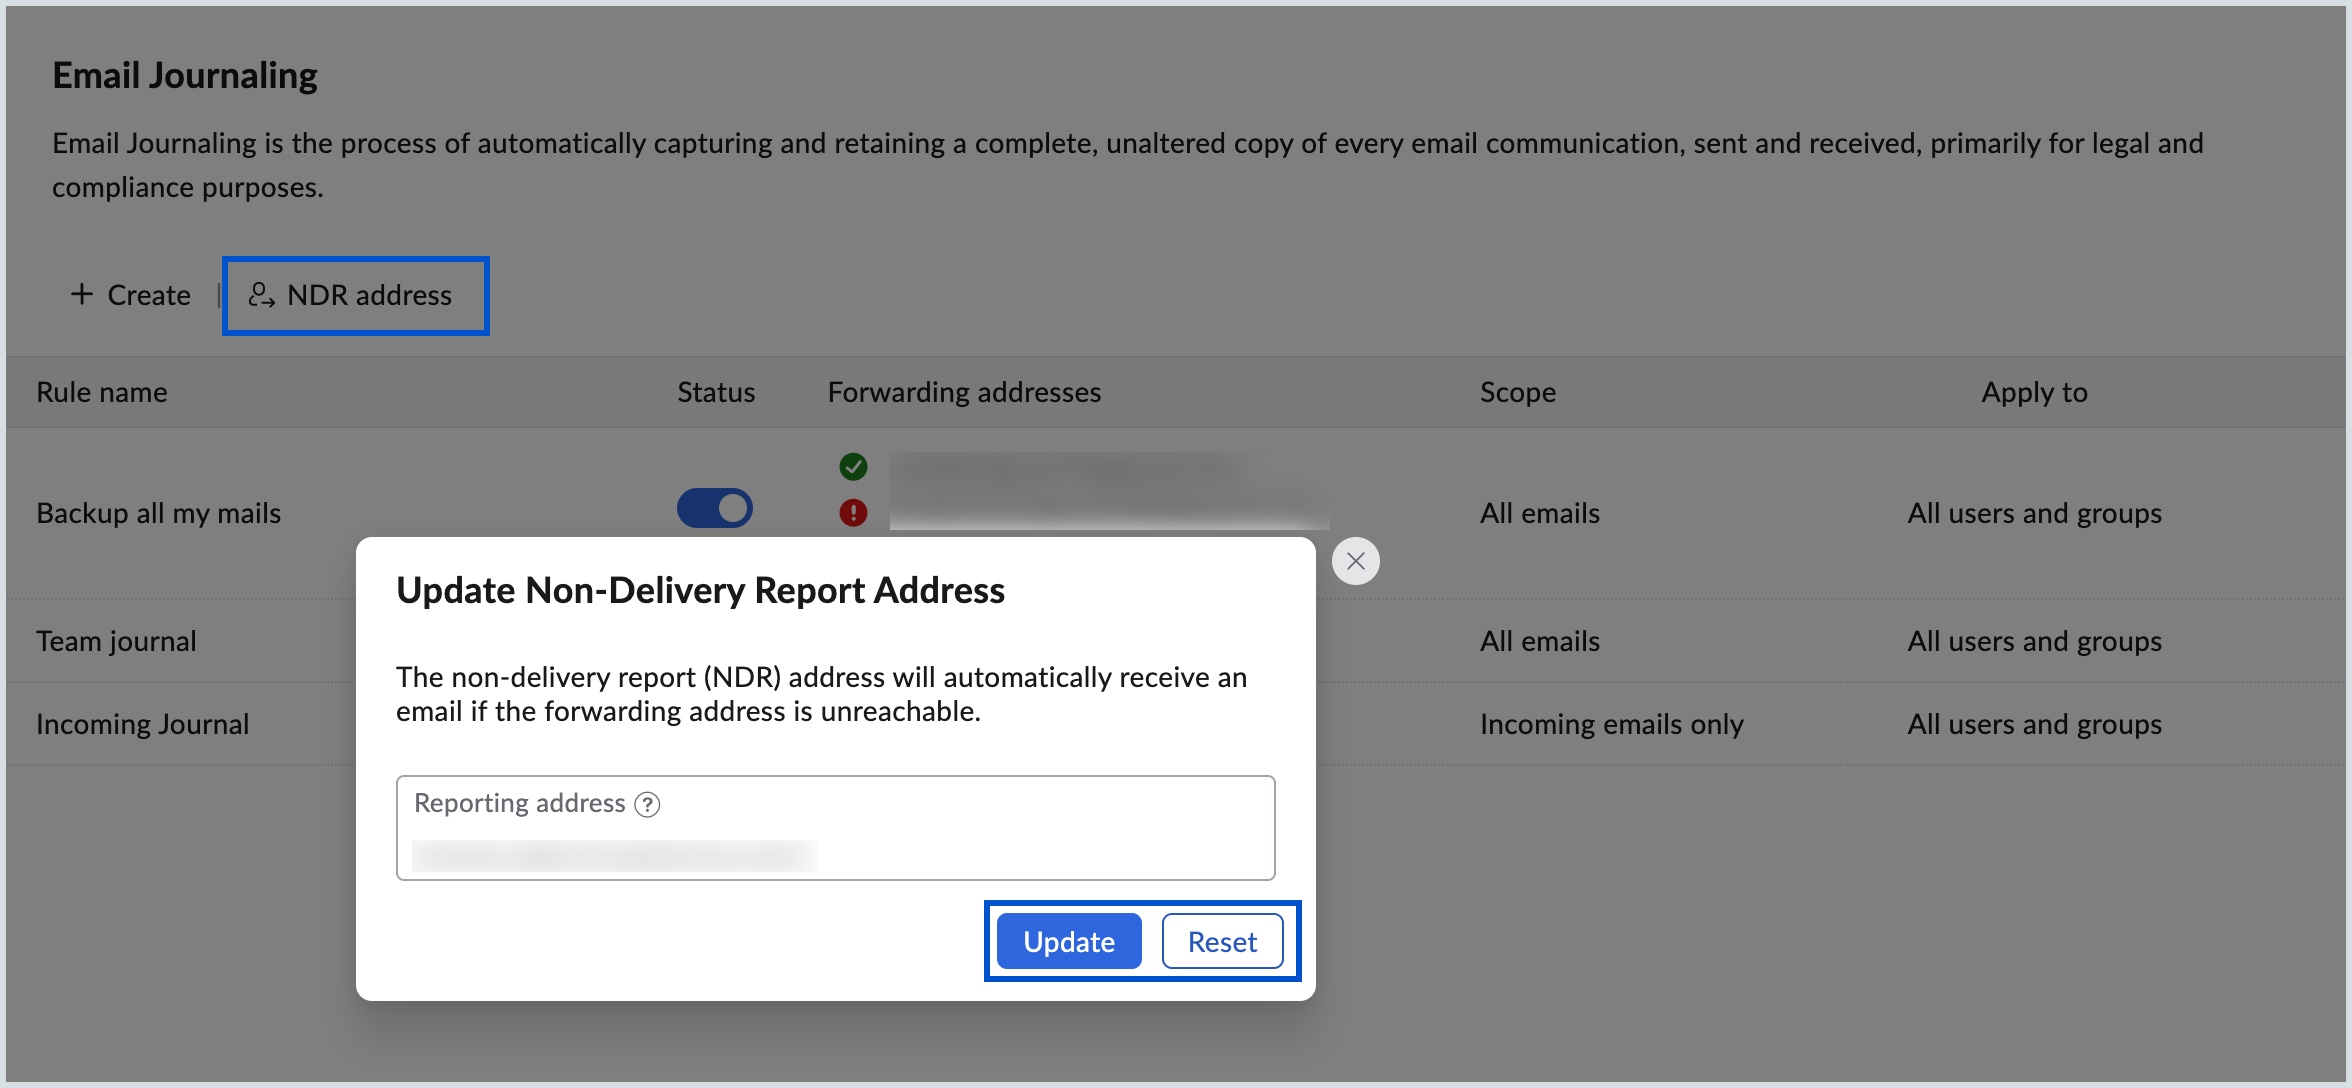
- Select NDR address in the Email Journaling home page.
- Remove and add the desired NDR email address in the Update Non-Delivery Report Address dialog box.
- Select Update to confirm the change, else select Reset to add a different address.
Steps to enable a Email Journaling
- Log in to Zoho Mail Admin Console.
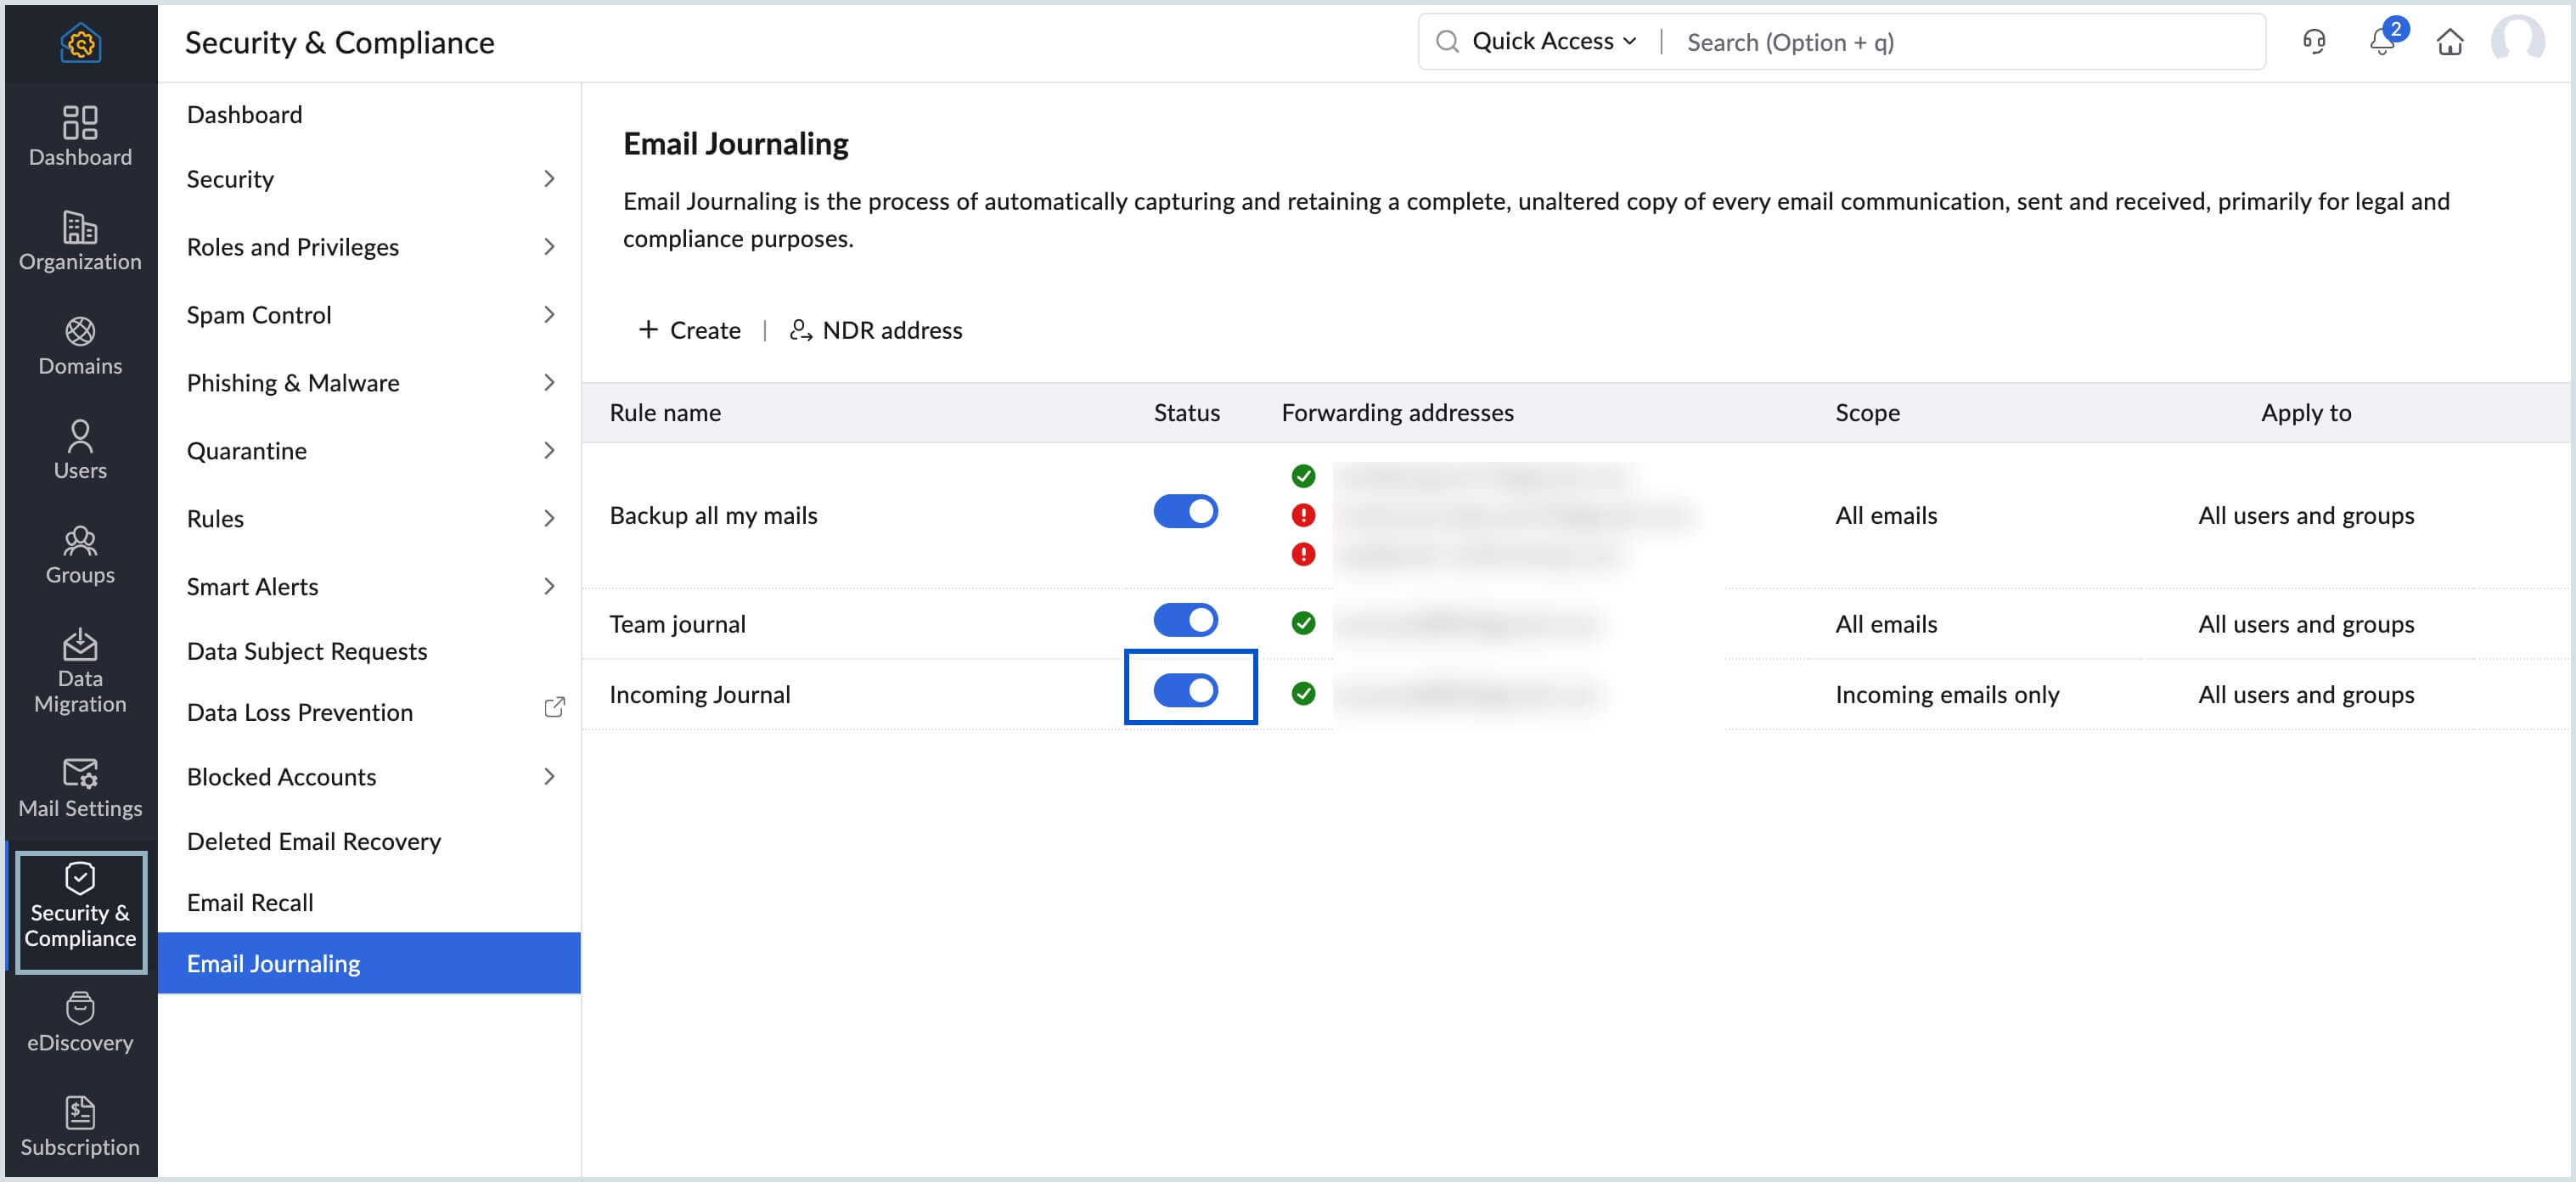
- Navigate to Security & Compliance > Email Journaling.
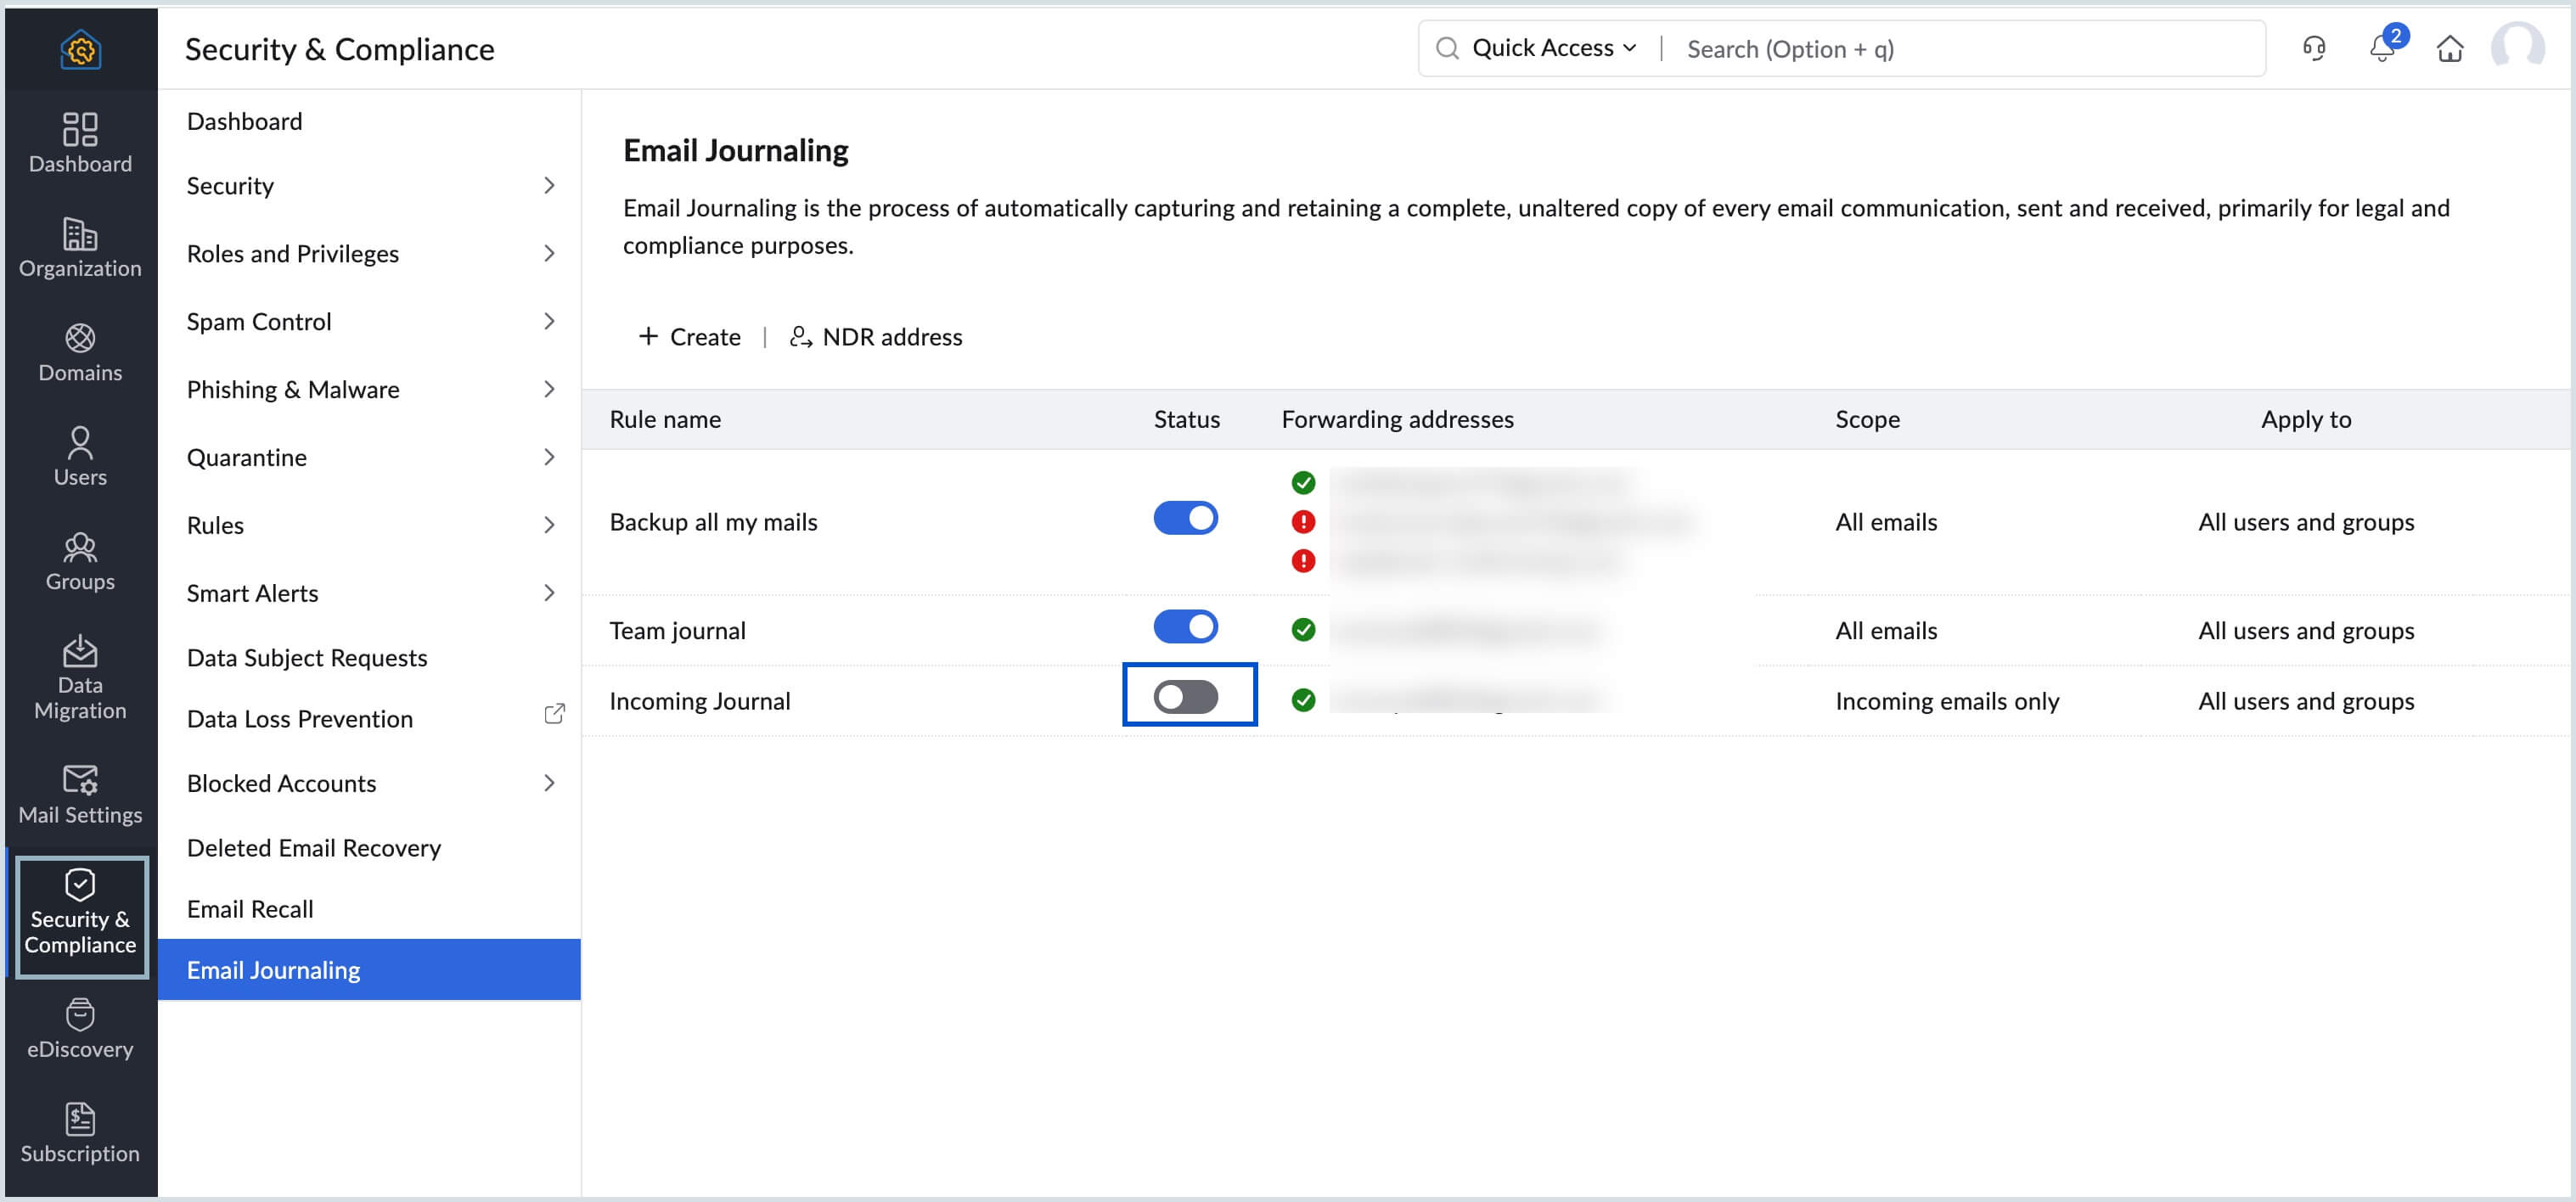
- Hover over the Email Journal you wish to enable.
- Switch the toggle button ON under Status column.
- Select Enable in the Confirm Action! dialog box.
Steps to disable a Email Journaling
- Log in to Zoho Mail Admin Console.
- Navigate to Security & Compliance > Email Journaling.
- Hover over the Email Journal you wish to disable.
- Switch the toggle button OFF under Status column.
- Select Disable in the Confirm Action! dialog box.
The email journal is disabled and you can enable the email journal whenever required.
Steps to delete a Email Journaling
- Log in to Zoho Mail Admin Console.
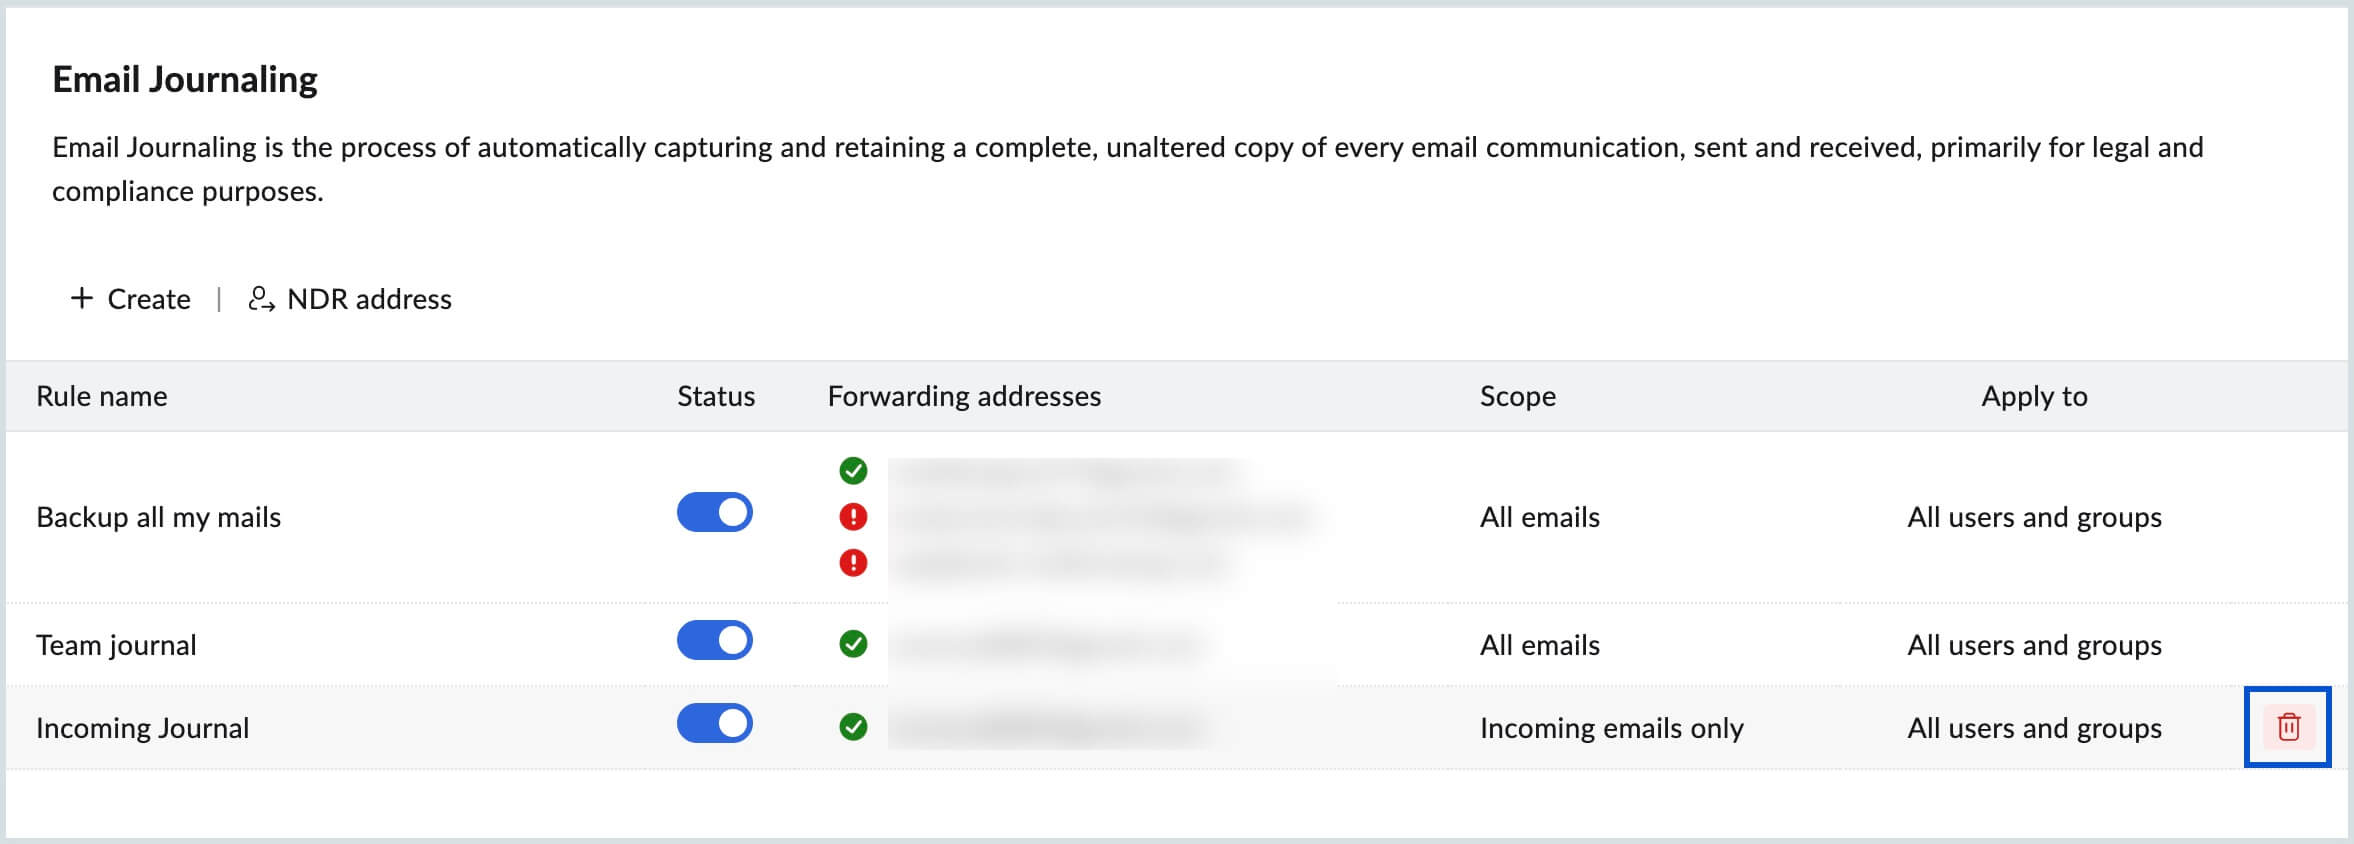
- Navigate to Security & Compliance > Email Journaling.
- Hover over the Email Journal you wish to delete.
- Enter remarks, if any, in the Remarks column.
- Select Delete in the Delete Confirmation dialog box.
If you are using a third-party email service and require email journaling, eProtect is the recommended solution to get started.