Back
How do I create a Bill of Entry in Zoho Inventory?
Enabling Bill Of Entry:
In order to create Bill of Entry in Zoho Inventory you will have to enable Do you want to enable overseas trading option under GST settings. Follow the below mentioned steps to get started.
- Click the Gear icon and select Taxes.
- Select GST Settings.
- Check the Do you want to enable overseas trading option for Overseas Trading.
- Select an account to track overseas trading.
- Click Save.
Note: If you haven’t configured GST settings in Zoho Inventory, click here to know more.
To create a bill of entry, follow the below mentioned steps:
Note: Bill of entry can be generated only for Vendors who are in SEZ or overseas.
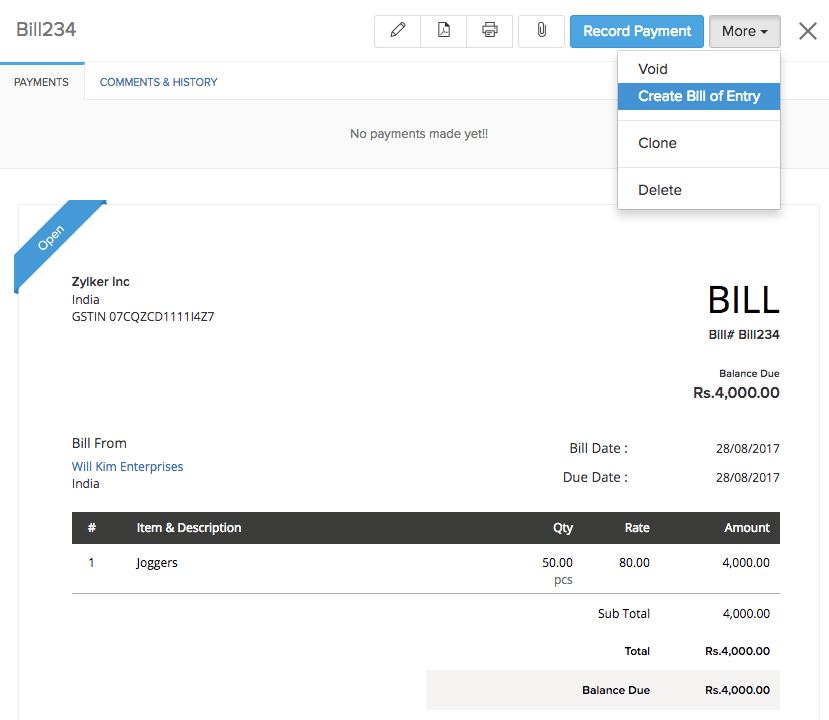
- Go to the Bills module on the side bar.
- Select the bill for which you wish to create a bill of entry.
- Click the More button and select Create Bill of Entry from the dropdown.
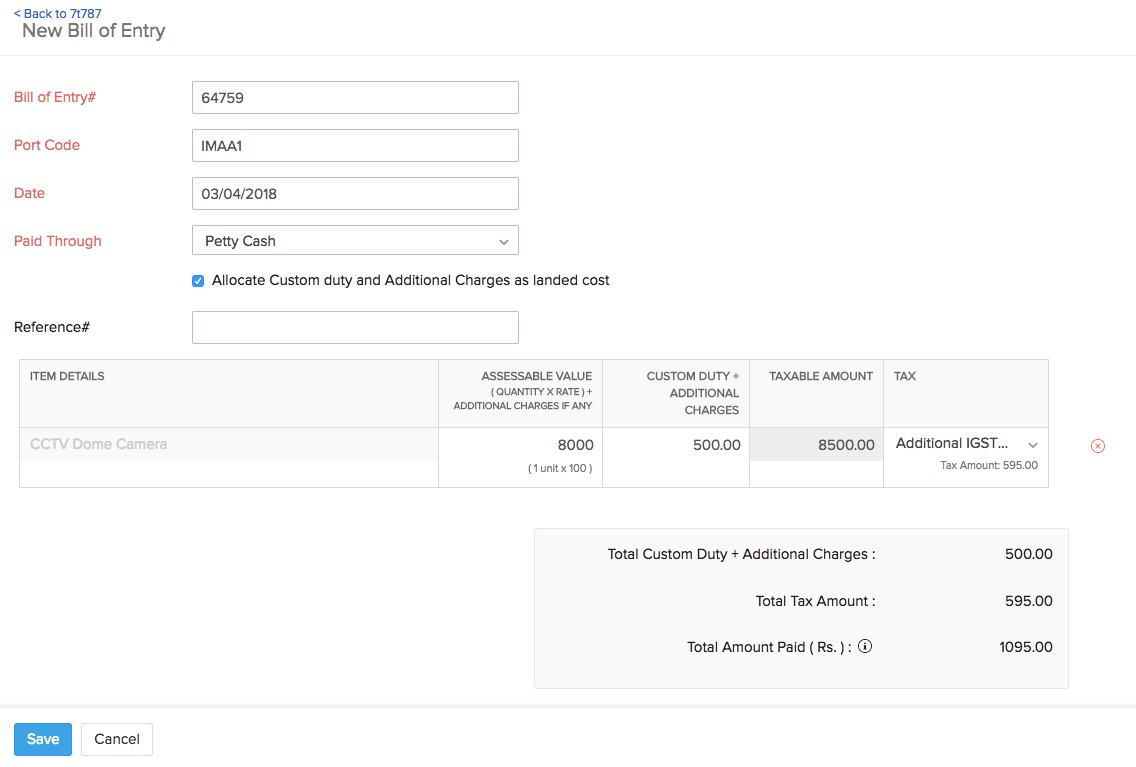
- In the following bill of entry creation page, enter the details of the bill of entry, custom duty charges and other additional charges that you incurred for that transaction.
- Click on Save button to proceed.
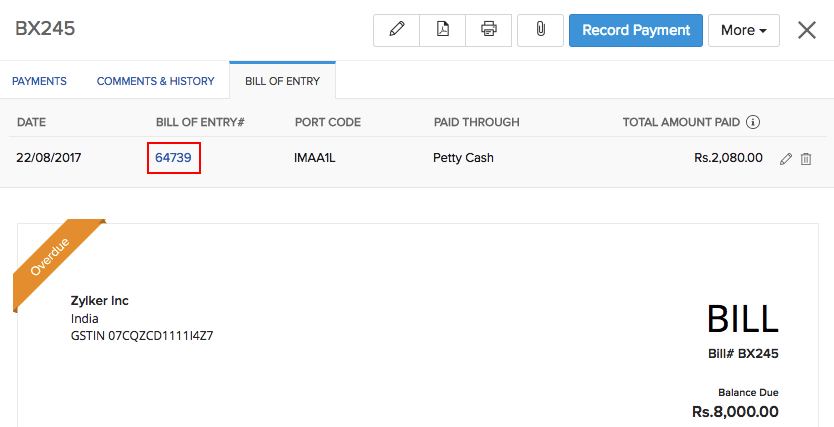
- Under the Bill of Entry section, you can find the associated bill of entry number.