Summary
Paytm is one of the leading payment platforms that lets businesses accept payments from multiple payment instruments. Millions of users perform their transactions hassle-free on Paytm everyday. Payments are done through EDC (Electronic Data Capture) machines and through device-less QR code scanners.
Step 1: To integrate Paytm
Go to Settings > Payments > Payment Providers.
Select Paytm, then click Set up Now.
Configure Paytm by providing the following details: Merchant ID, Merchant Key.
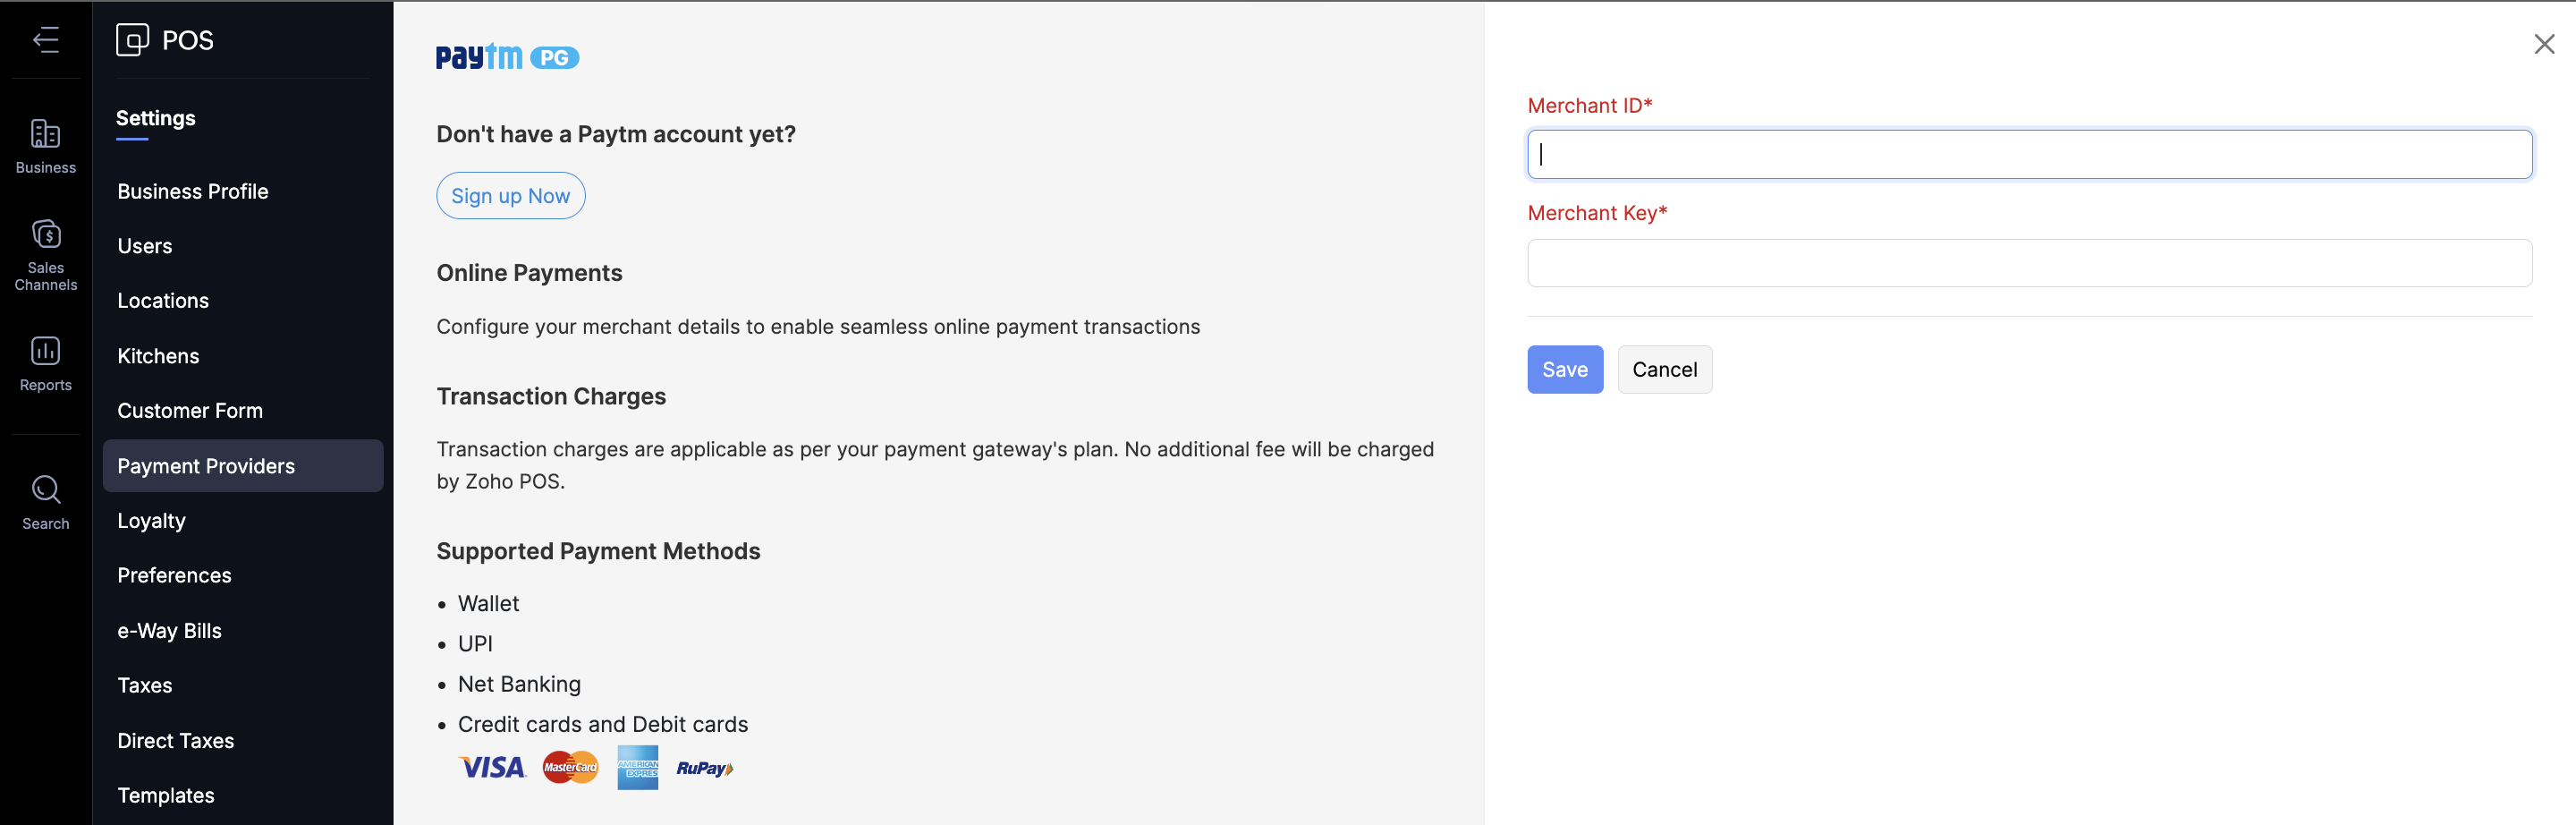
Click Save.
Note
The merchant should have registered as a merchant in the payment gateway, after which the credentials can be obtained from the Paytm business or sales team.
Step 2: To add tender types
Go to Settings > Payments > In-Store Payments.
Click Add Tender Type to add a new tender type.
Choose Processing Type as Integrated Payment Terminal (for EDC device) or Dynamic UPI QR Code (device-less).
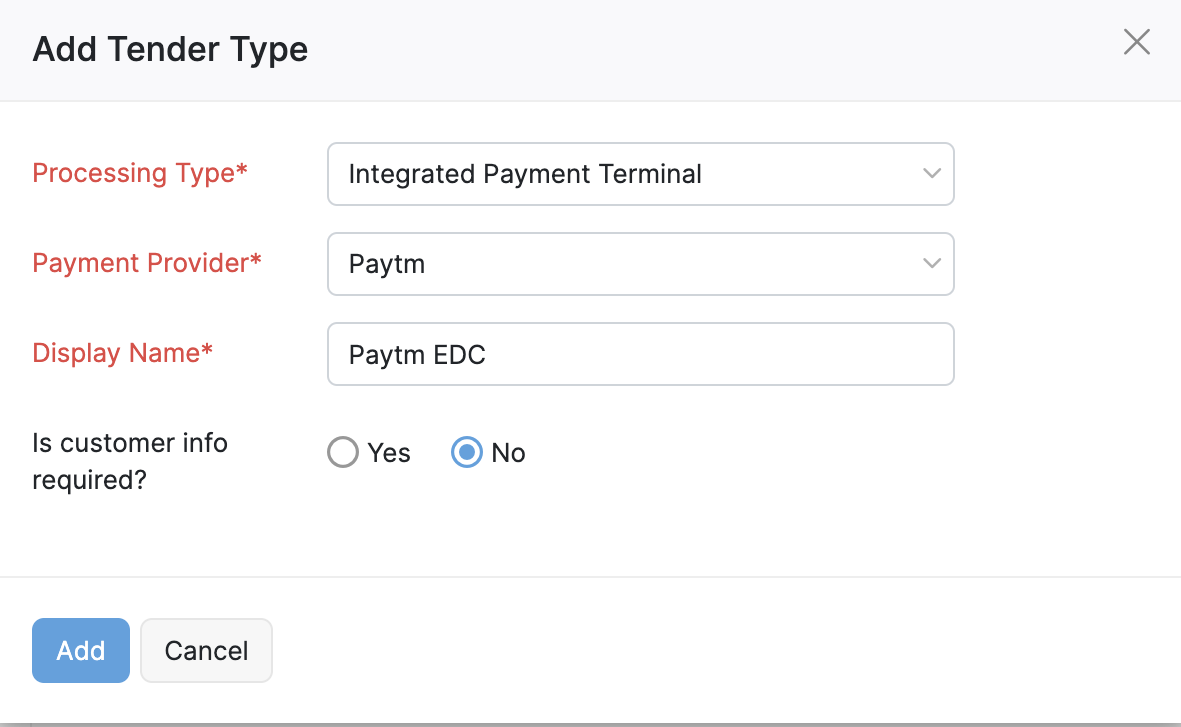
Choose the corresponding Payment Provider as Paytm.
Set the Display Name as you would like for it to appear on the display buttons.
Click Add.
Click Change Order and drag the options to re-order them on the display screen. The first six tender types will be listed in the Zoho POS desktop billing application.
Click Save.
Note
Once you have configured the different modes of payment, click the Incremental sync icon in the Zoho POS desktop and mobile apps to sync the latest changes.
For device-less payments through Paytm QR, please skip steps 3 and 4.
Step 3: To add terminals
Click Add Payment Terminal to add a device.
Select the Payment Provider as Paytm.
Set up a unique name to identify the device as the Display Name.
Provide the Terminal ID(TID) associated with the device.
Click Add.
Note
The TID of the EDC device can be found from Paytm Payments app > Menu > Device details.

Step 4: To map a terminal with a register
Go to Settings > Payment Terminal from the Zoho POS desktop billing application to map a terminal with a register.All the added terminals are listed here.
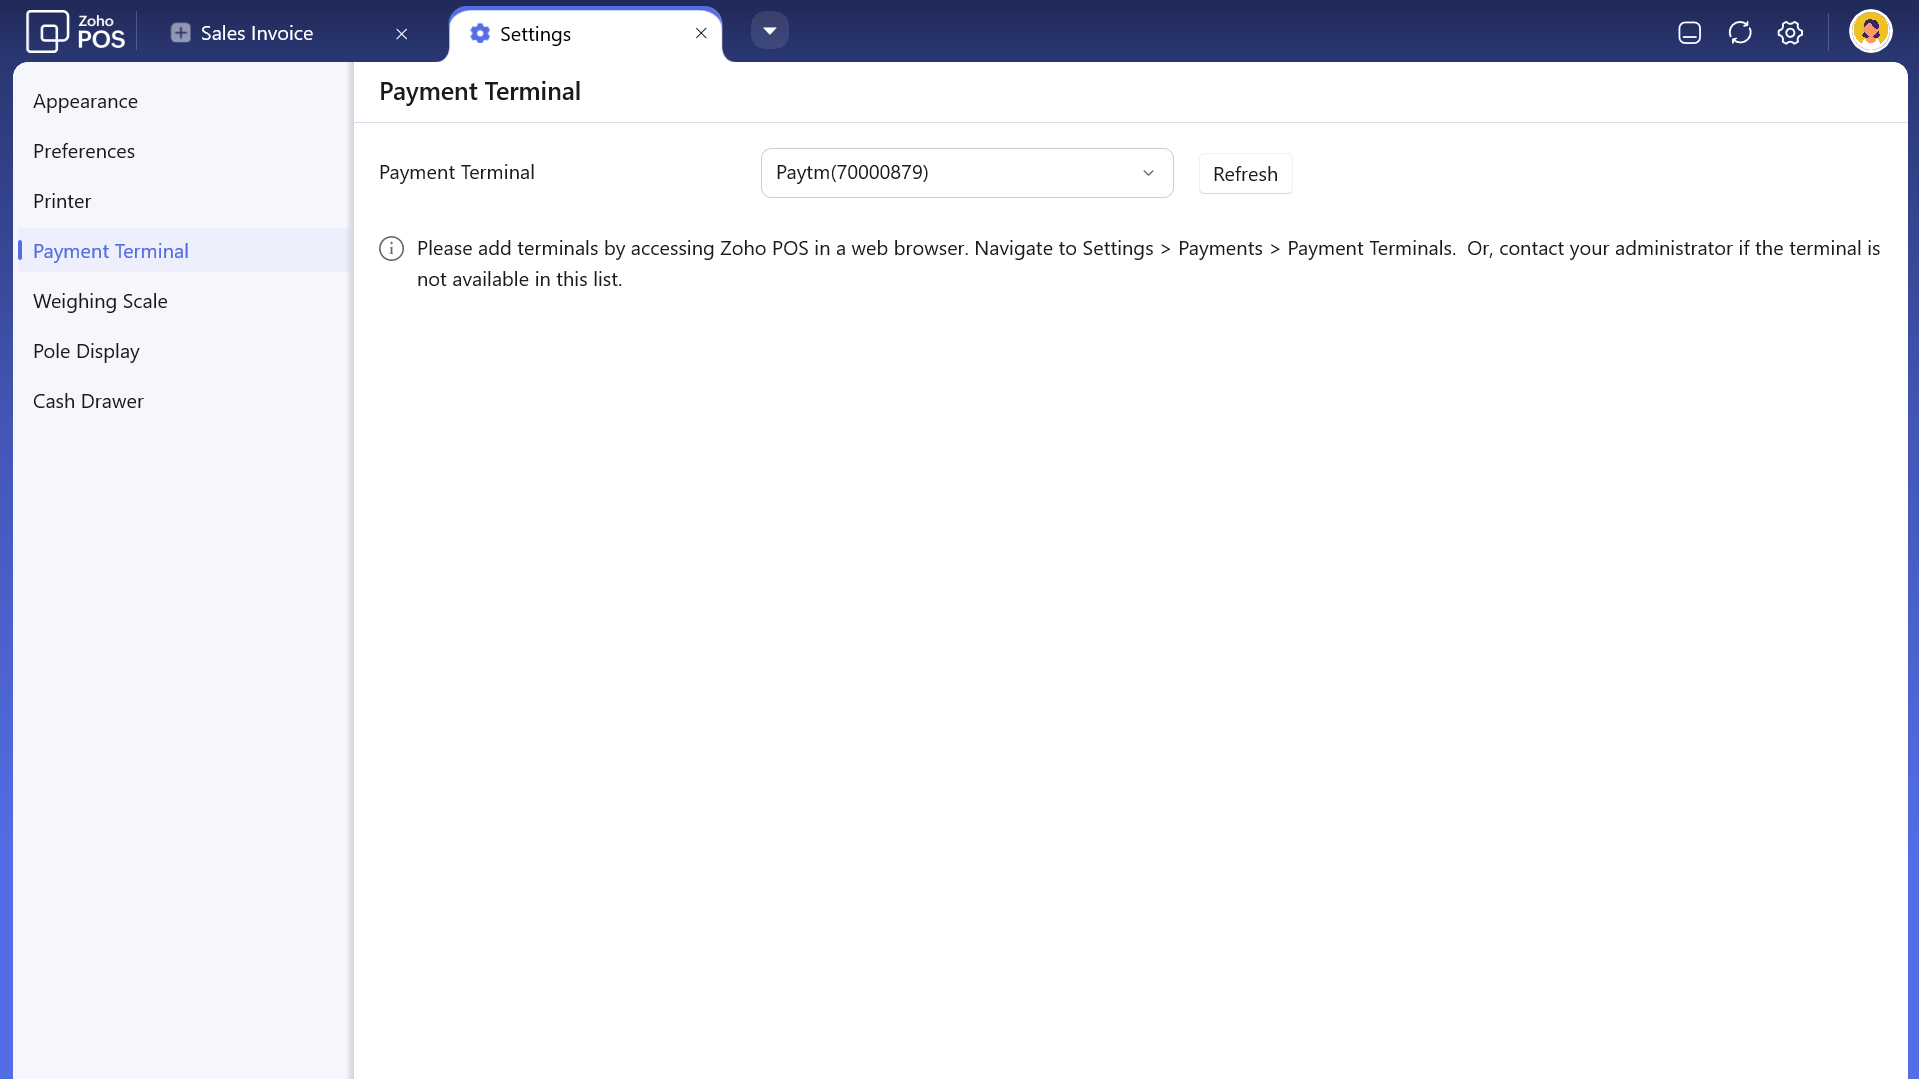
Choose the relevant terminal and map it with the device.
Initiate Transactions through Paytm
Once all items are added to the cart, the salesperson can proceed to bill by clicking on the corresponding tender type. Payment through Paytm can be processed through EDC Device as well as QR payment (device-less).
To enable integration on Paytm EDC device
Restart your EDC device and then go to Paytm payments app > Menu > Device settings > Enable Integration mode.
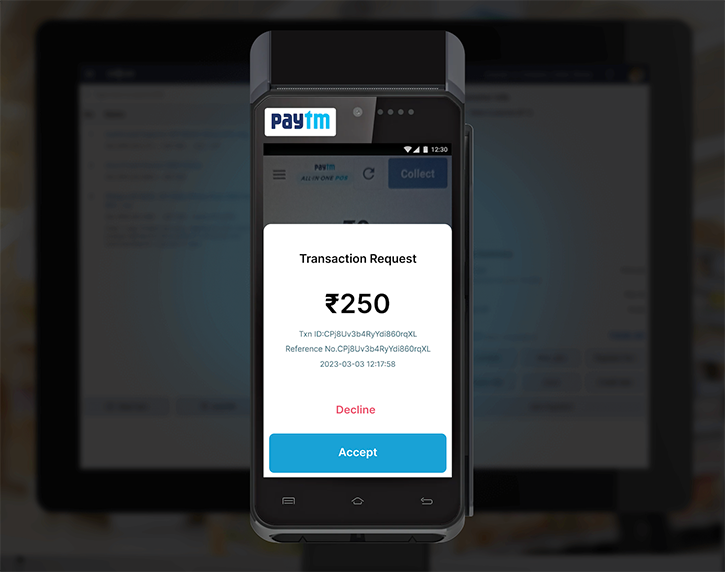
Step 5.1: To initiate a payment through Paytm EDC:
Click the corresponding tender type to initiate the payment through Paytm EDC device. This sends the request automatically.
Accept the payment request initiated on the EDC device.
Insert the card directly to proceed with the payment.
Step 5.2: To initiate a payment through Paytm QR:
Choose the corresponding tender type to generate a dynamic UPI QR code for the payment. This QR code will appear in the Zoho POS desktop and mobile applications.
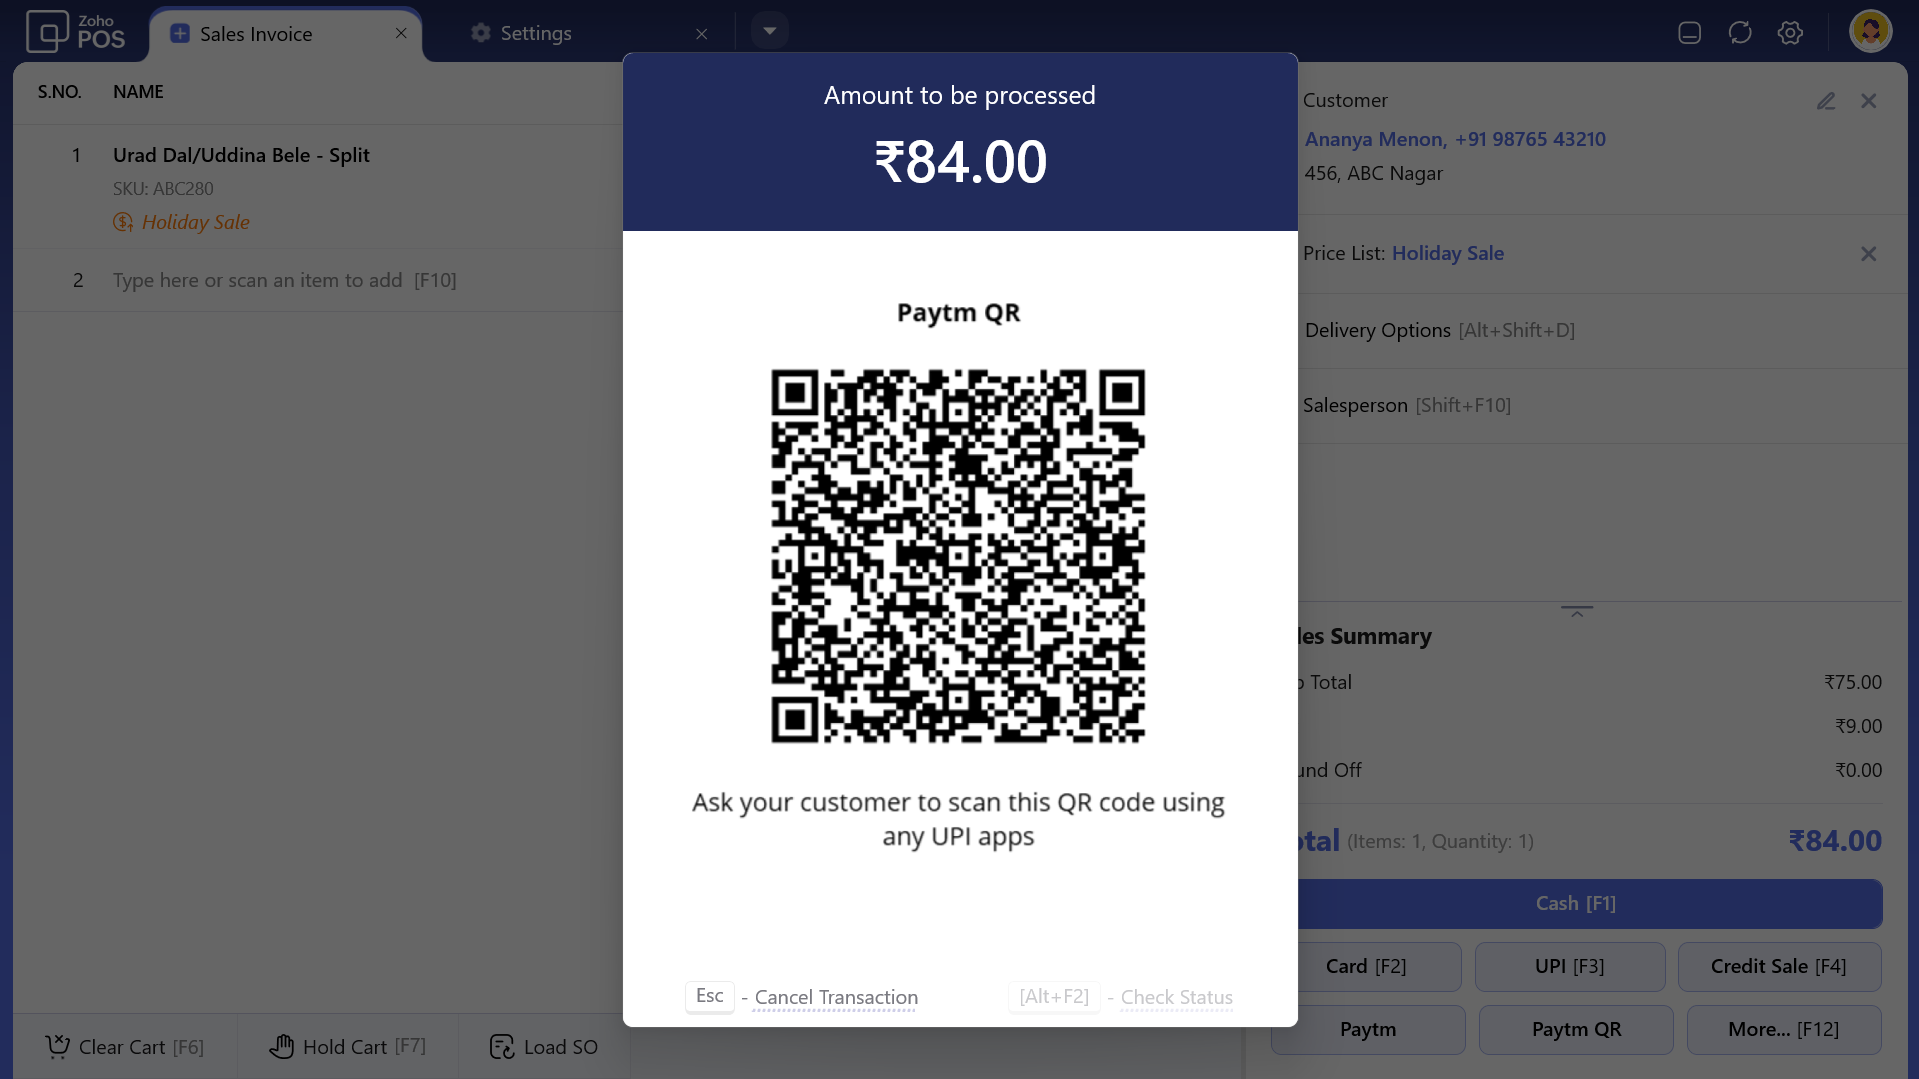
Customers can scan the QR code using any UPI application and complete the payment.
Note
The QR code generated is valid for ten minutes after which a new QR code is generated by re-initiating the transaction.
If you want to cancel a transaction for any reason, you can do so through the following steps.
Click Cancel Transaction in the popup that appears in the desktop application while your transaction is processing. This will open a second popup.
Click Cancel Transaction in this popup again. You can now either reinitiate a transaction or record it manually.
Note
You can cancel a transaction through Paytm by canceling it on the EDC device first, followed by the billing application, as it is not reflected automatically.