Building a Server Side Application
You can create an extension to provide single sign-on using Zoho CRM to a number of web and mobile applications using SAML and OAuth 2.0 protocols. Read this link to know more about creating a connected application with any third-party web service. You can also configure SSO to any custom php application that you've created and wish to provide them along with the extension bundle.
There are 3 steps involved in establishing a SAML SSO
- Creating a connected application in Zoho Developer Console
- Configuring SAML settings in your php application
- Configuring SAML settings in Zoho Developer Console
This guide will help you add SAML based SSO support to your existing application with minimal or no modification to the existing code, using a sample "Hello World" application as example.
Create a connected application
Before you configure the SSO settings in your php application, you will have to create a connected app in Zoho Developer Console to get the IdP credentials.
To create a connected app
- In the Zoho Developer console homepage, click Extensions for Zoho CRM.
- Click Edit below the extension for which your app will be created.
- Click Connected App in the left pane of the Extension Details page.
- Click Create Connected App.
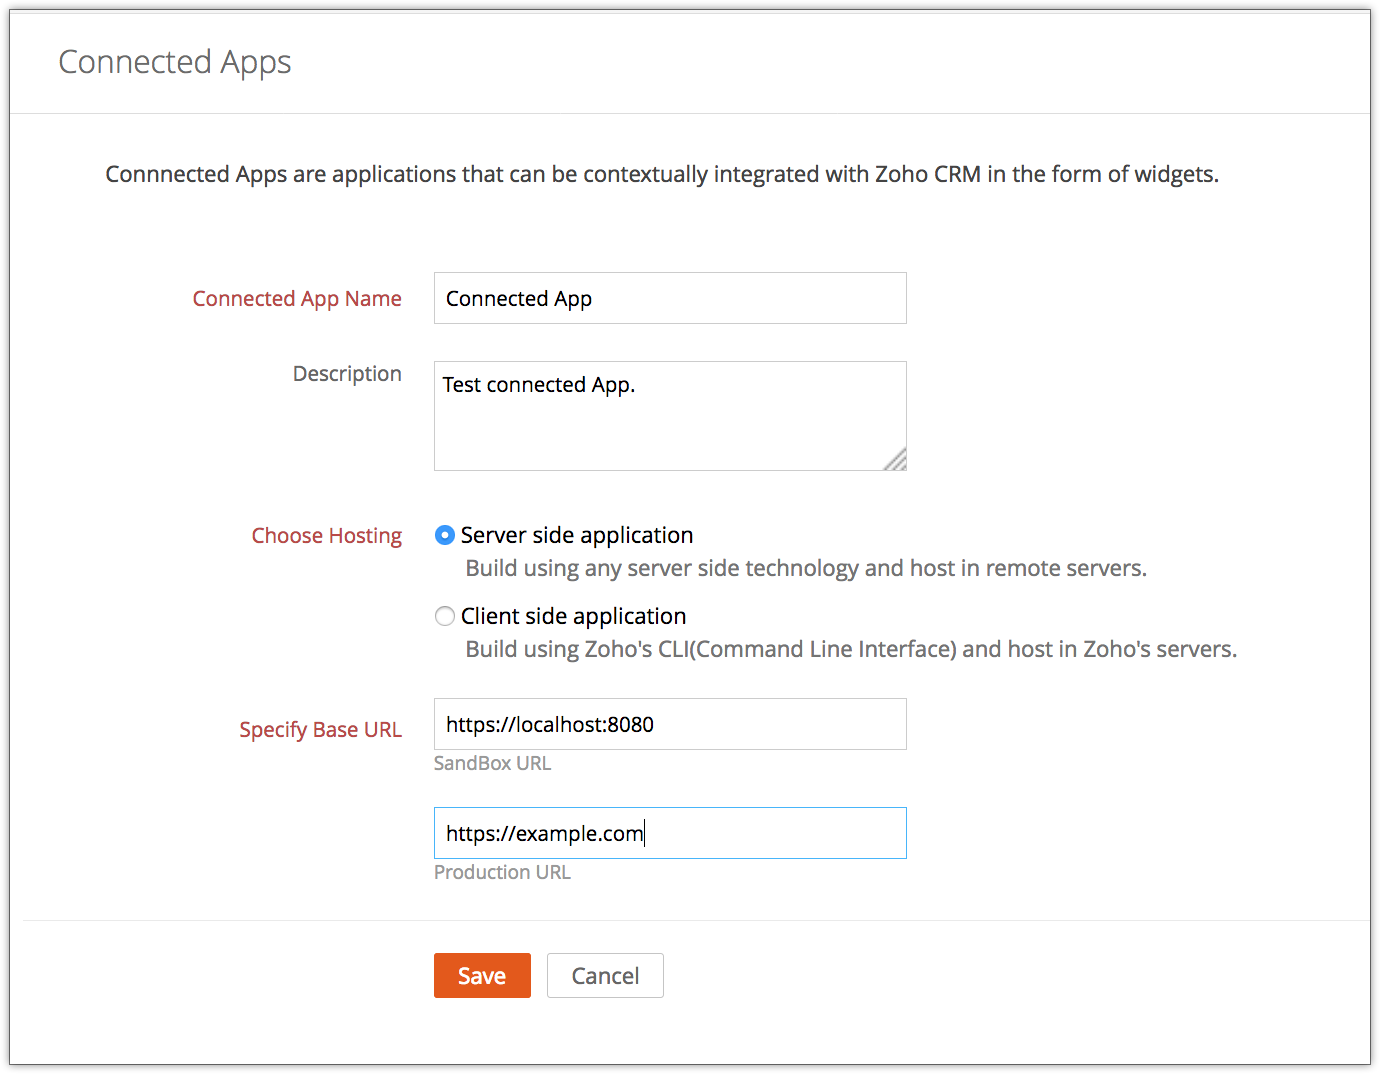
- Provide a name and description for the app.
- Choose Hosting : Select Server side application
- Specify Base URL : https://<your local_server_site : port_no>, Production URL : https://<your production_site.com>
- Click Create.
- The connected application will be created and you will be redirected to the Connected App Details page where you can configure SAML Settings.

Configure SAML settings to the Hello World Application
To connect your custom application with Zoho CRM, you will have to configure the SAML Identity Provider details in your application.
To configure SAML IdP settings to your application
- Download the HelloWorld files from this link to add them to your php project.
- Extract the files and keep them in your root folder from the downloaded zip file and rename it as SAML.
- Add this folder to your php project.
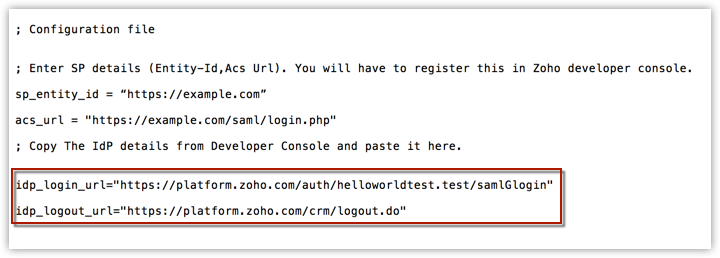
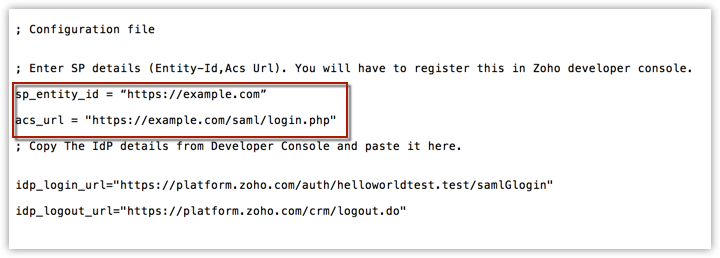
- In your php project, open the file, saml_config.ini from the config subfolder in the saml folder.
Please note that, this folder name will be a part of your ACS URL and hence the name should be in lowercase. - Update the Entity ID and ACS URL of your application.
- ACS URL - <https://yourdomainname.com/saml/login.php>
- Entity ID - <https://yourdomainname.com>
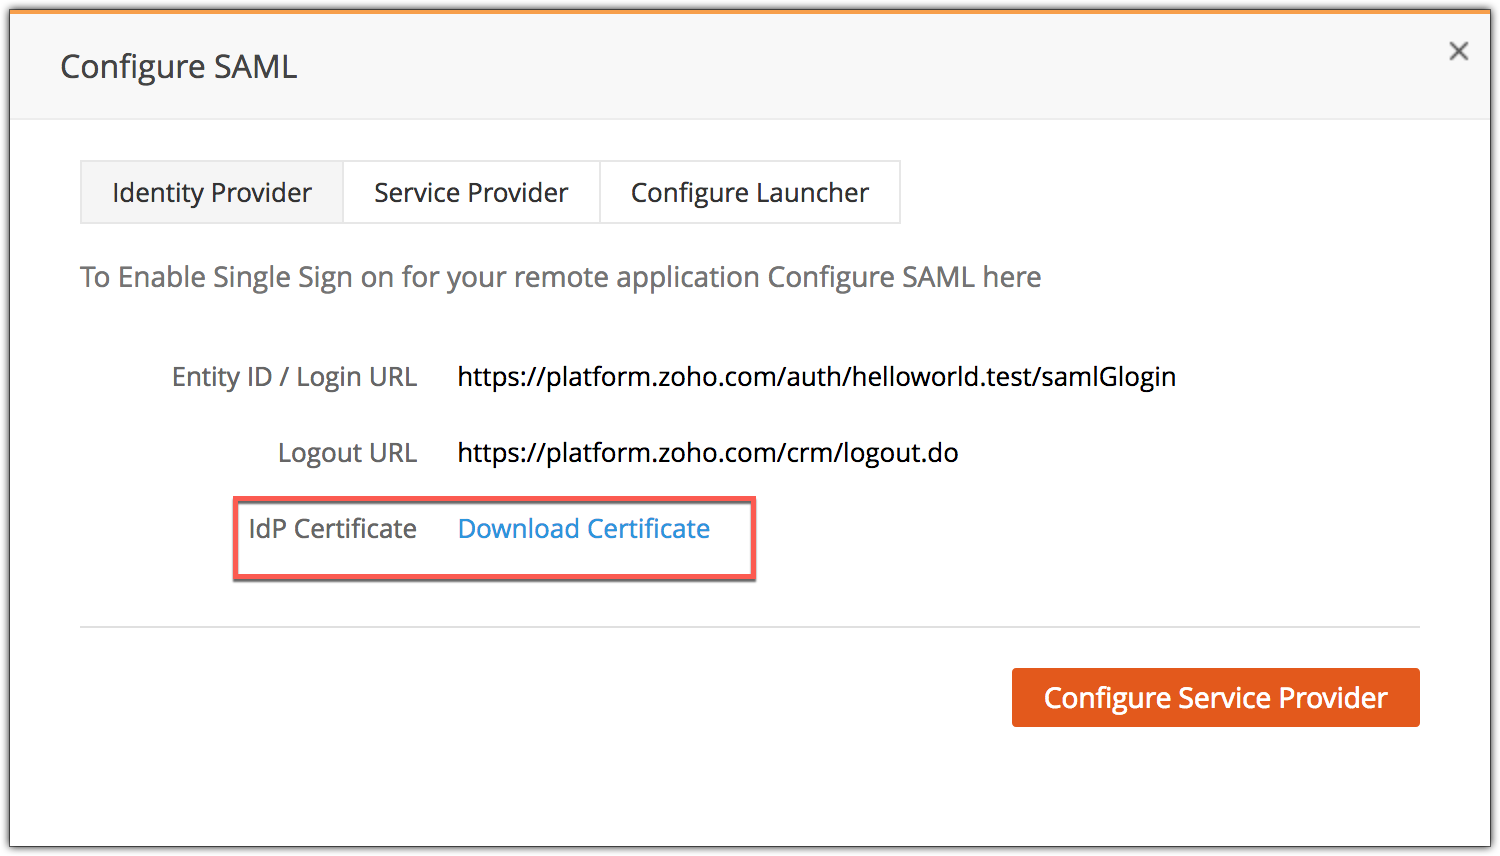
- Obtain the IdP, Login and Logout URLs of the connected app you've created and paste it here.
These details can be obtained from the SAML settings page of your connected app in Zoho Developer Console.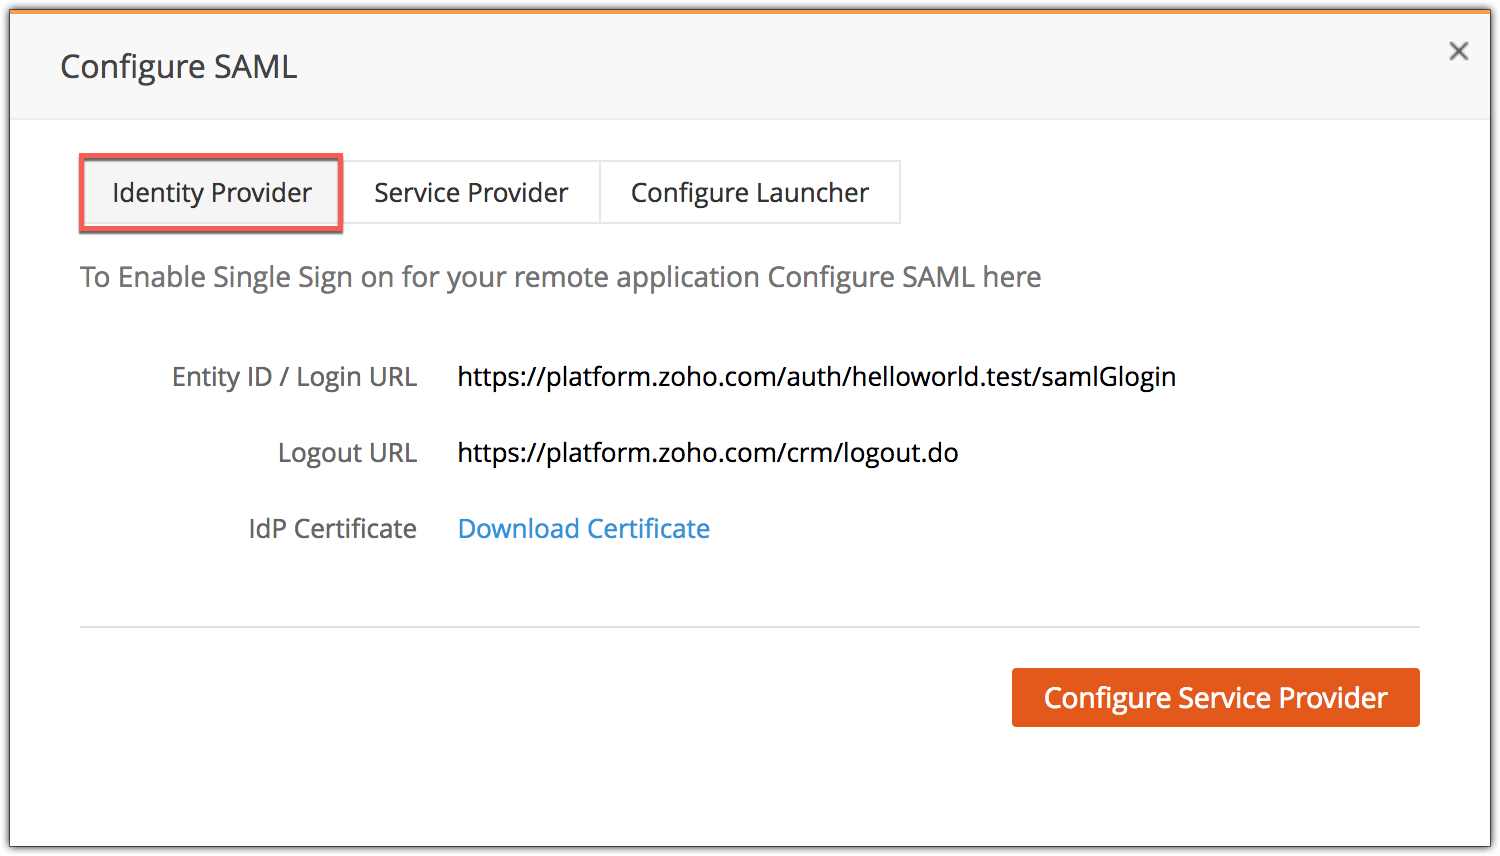
- Save and update the saml_config.ini file.
- Download the IdP certificate from the Connected App Details page in Zoho Developer Console.
- Open the certificate in a word editor and copy the certificate text.
- Now, open the cert.pem file from the Resources folder of your application and paste the certificate text and save the file.


Configure SAML settings in Zoho Developer Console
Once you've configured the SAML settings in your application, copy the Service Provider's Entity ID and ACS URL from the Saml_config.ini file and paste it in Zoho Developer Console.
To configure SP settings in Zoho Developer Console
- On the Connected Apps page, click Configure SAML.
- Provide the Entity ID, ACS URL, and Start URL obtained from your application.
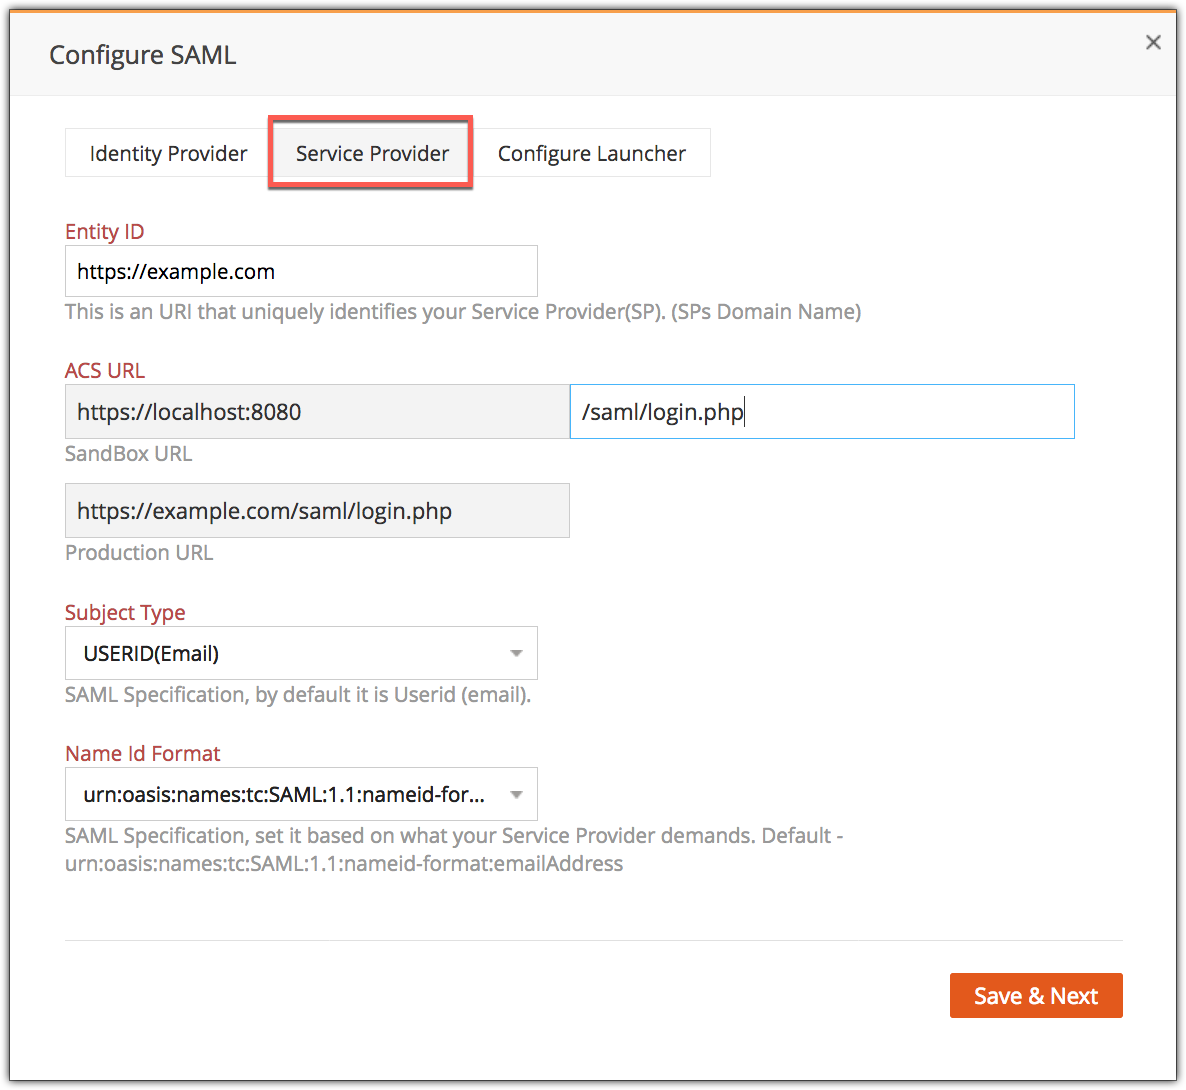
- Select a Subject type and Name ID format from the drop-down list.
- Click Save and then click OK.


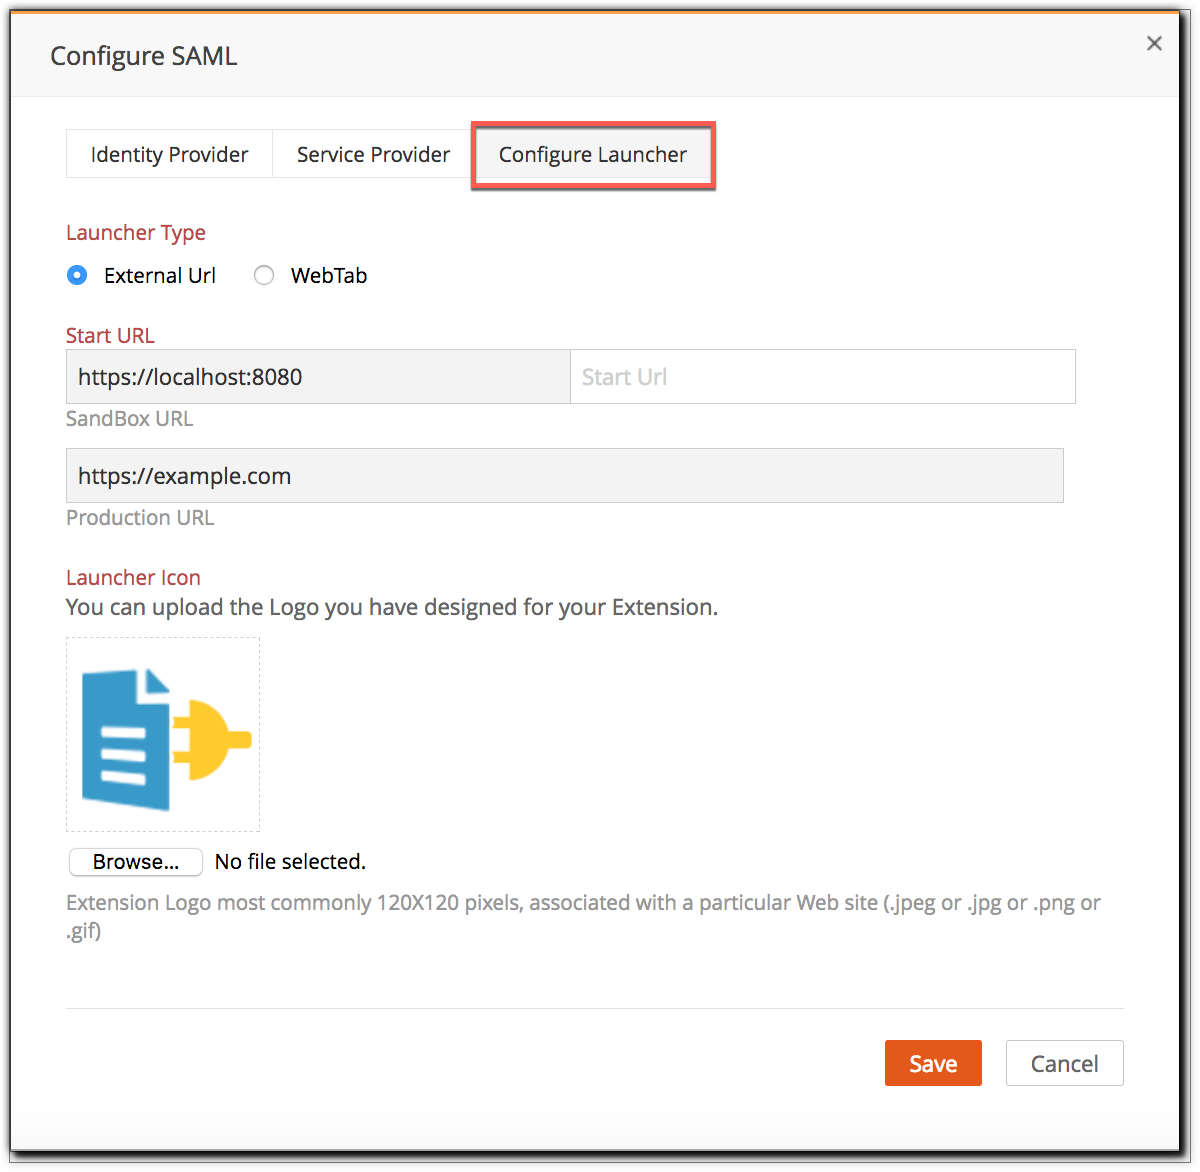
Now you can configure a launcher for your Connected App. It can either be a web tab or a link in the launcher.
Give a Start URL for the launch link and a logo, if you want to make your Connected App appear in the launcher.