Project Templates
How Can I...
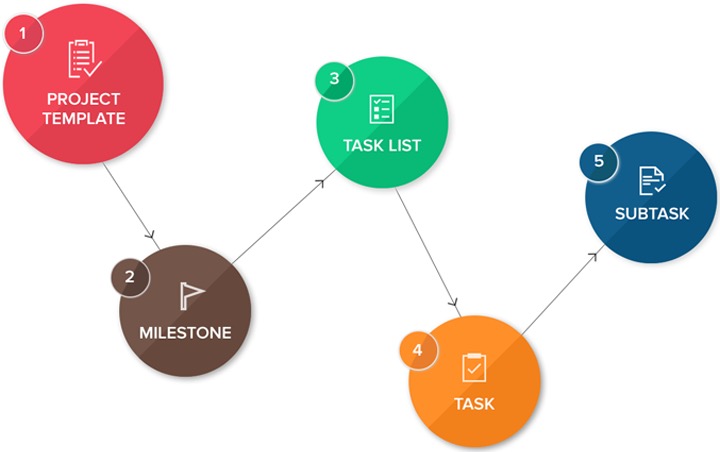
The following sections will cover what a project template, milestone, task list, task, subtask are, and how they can be created and managed.
The following diagram shows the relationship between the aforementioned items:
Project Template
This is the design for creating a project. The same template can be used to create multiple projects. For example, you can create a CRM for Construction and Manufacturing vertical. You can add project templates for road laying, bridge construction, house construction, or apartment construction. These templates can be used by the end users to create actual project plans.
Add a Project Template
- Log in to Zoho Developer Console and click Vertical Solutions.
- Select the application to modify and click Edit.
- Click Zoho Apps in the left pane.
- Click the Configure button for Zoho Projects.
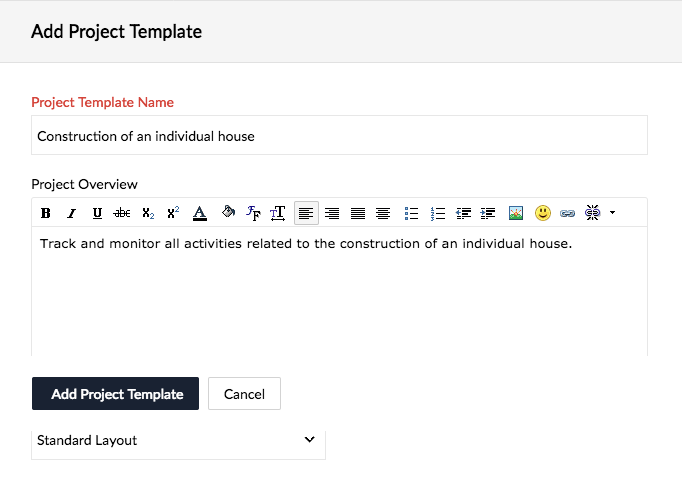
- In the Add Project Template page, perform the following:
- Enter a name for the template in Project Template Name field.
- Enter a description for the template in Project Overview field.
- Use the default Standard Layout from the Layout dropdown.
- Click Add Project Template.
Note
When accessing the Zoho Projects extension for the first time, the Add Project Template page will be displayed. Once a project template is created, new ones can be created by clicking the New Project Template button in Project Templates page.

Manage a Project Template
You can edit and delete the project templates that you have created.
- Log in to Zoho Developer Console and click Vertical Solutions.
- Select the application to modify and click Edit.
- Click Zoho Apps in the left pane.
- Click the Configure button for Zoho Projects.
- In the Project Templates page, hover over the project template name you want to edit or delete.
- Click the more options icon [
 ] and select Edit Template or Trash Template.
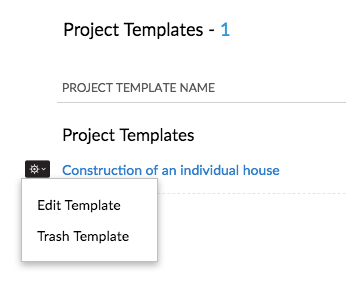
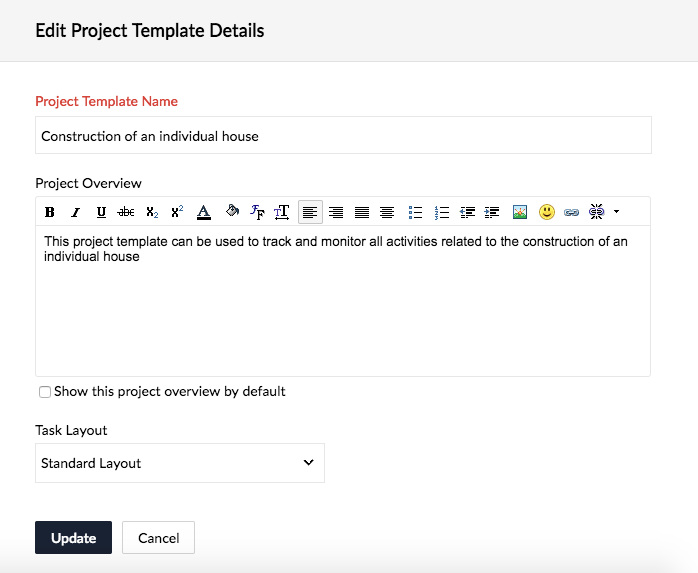
- Select Edit Template to make changes to the project template.
- Make changes in the Edit Project Template Details overlay, then click Update.
- Select Trash Template to delete a project template.
- Click Move To Trash in the confirmation message to confirm deletion.


Milestone
A milestone is the topmost container for holding items within a project. Inside Milestone, tasklist, tasks, and subtasks can be added. Refer to this table for an example.
Add a Milestone
- Log in to Zoho Developer Console and click Vertical Solutions.
- Select the application to modify and click Edit.
- Click Zoho Apps in the left pane.
- Click the Configure button for Zoho Projects.
- In the Project Templates page, click on the project template name you want to edit.
- Click Milestones in the left navigation bar.
- In All Milestones page, click Create New Milestone (if creating for the first time) or Add Milestone.
- In the New Milestone overlay, perform the following:
- Provide a name in the Milestone field.
- In the Start After field, provide the number of days, weeks, or months after which the milestone should commence.
- Provide a value for the Duration of the milestone.
- Set the value of Milestone Flag as Internal if the milestone is to be visible only to project users, and as External if it is to be visible to client and project users.
- Click Add.

Note
You can also create a milestone from the Tasks menu in left navigation bar.

Manage Milestones
You can edit and delete the milestones that you have created.
- Log in to Zoho Developer Console and click Vertical Solutions.
- Select the application to modify and click Edit.
- Click Zoho Apps in the left pane.
- Click the Configure button for Zoho Projects.
- In the Project Templates page, click on the project template name you want to edit.
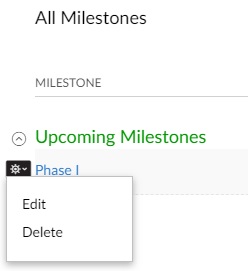
- In the All Milestones page, hover over the milestone name you want to edit or delete.
- Click the more options icon [] and select Edit or Delete.
- Select Edit to make changes to the milestone.
- Make changes in the Edit Milestone overlay and click Update.
- Select Delete to delete the milestone.
- Click Delete in the confirmation message.

Note
A milestone can also be deleted from inside the milestone page. In the All Milestones page, click the name of the milestone you want to delete. Click the more options icon [![]() ] and select Delete.
] and select Delete.
Task List
A list of tasks that will achieve a certain objective or result. Refer to the table for an example.
Add a Task List
- Log in to Zoho Developer Console and click Vertical Solutions.
- Select the application to modify and click Edit.
- Click Zoho Apps in the left pane.
- Click the Configure button for Zoho Projects.
- In the Project Templates page, click on the project template name you want to edit.
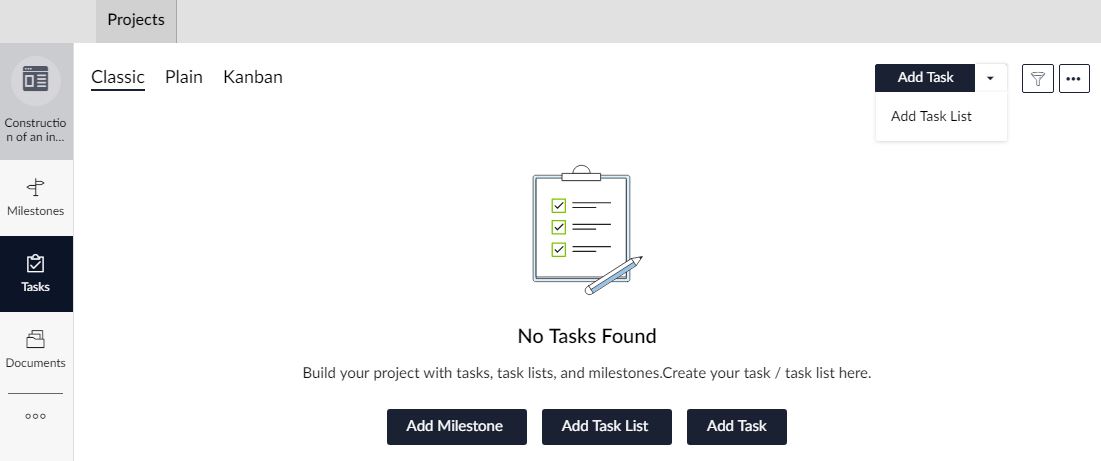
- Click Tasks in the left navigation bar.
- Click the Add Task List button or the Add Task List option from the dropdown in the top-right corner.
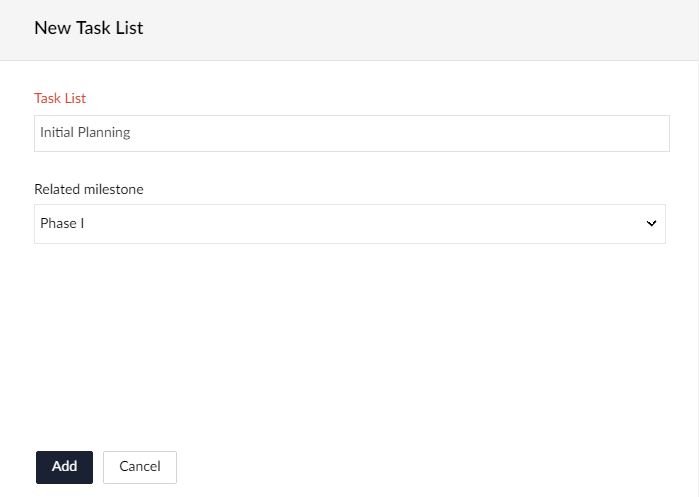
- In the New Task List overlay, perform the following:
- Provide a name for the task list in Task List field.
- Select a value from the Related milestone dropdown that you want to associate your task list with.
You can leave this field empty. It can be related to a milestone when creating a task list from Milestone.
- Click Add.


Create Task Lists from Milestones
You can create Task Lists from Milestones option in the left navigation bar:
- Log in to Zoho Developer Console and click Vertical Solutions.
- Select the application to modify and click Edit.
- Click Zoho Apps in the left pane.
- Click the Configure button for Zoho Projects.
- In the Project Templates page, click on the project template name you want to edit.
- Click Milestones in the left navigation bar.
- Click on the milestone you want to edit.
- Click Add Task List.
- In the Add Task List overlay, perform the following:
- Provide a name for the task list in Task List Name field.
- Click Add Task List.
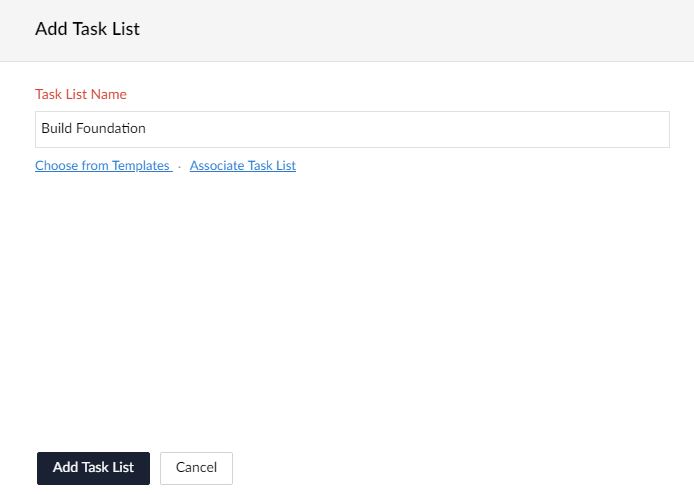
Or - Click Choose from Templates.
- Select a task list from the list of available templates prefilled in the dropdown.
- Click Add Task List.
Or - Click Associate Task List.
- Select a task list from the list of available task lists prefilled in the dropdown.
- Click Associate Task List.

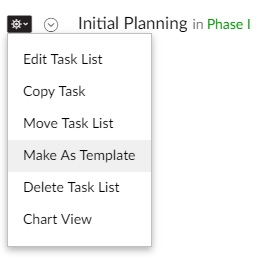
Make as template
- Click Tasks in the left navigation bar.
- Hover over the task list name you want to make as template.
- Click the more options icon [] and select Make as Template.

Manage Task Lists
You can perform several actions on task lists.
- Log in to Zoho Developer Console and click Vertical Solutions.
- Select the application to modify and click Edit.
- Click Zoho Apps in the left pane.
- Click the Configure button for Zoho Projects.
- In the Project Templates page, click on the project template name you want to edit.
- Click Tasks in the left navigation bar.
- Hover the cursor over the task list name.
- Click the more options icon [] and select one of the following:
- Edit Task List: Make changes to the task list.
- Move Task List: Move the task list to another project template.
- Delete Task List: Delete a project template.
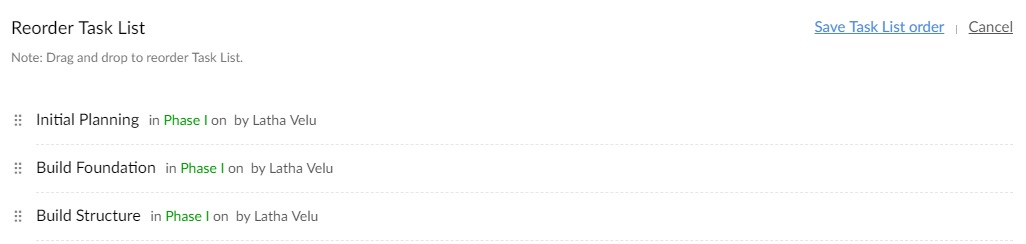
Reordering Task Lists
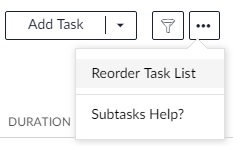
- Click Tasks in the left navigation bar.
- Click the ellipses (...) in the top-right corner and select Reorder Task List.
- Place the cursor over the symbol (::) and move the task list to the desired position.
- Click Save Task List order.


Task
The individual items in a Task List.
Add a Task
- Log in to Zoho Developer Console and click Vertical Solutions.
- Select the application to modify and click Edit.
- Click Zoho Apps in the left pane.
- Click the Configure button for Zoho Projects.
- In the Project Templates page, click on the project template name you want to edit.
- Click Tasks in the left navigation bar.
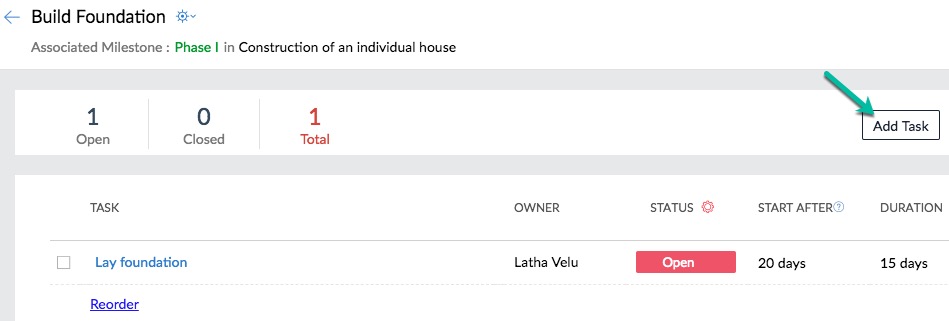
- Click on Add Task button.
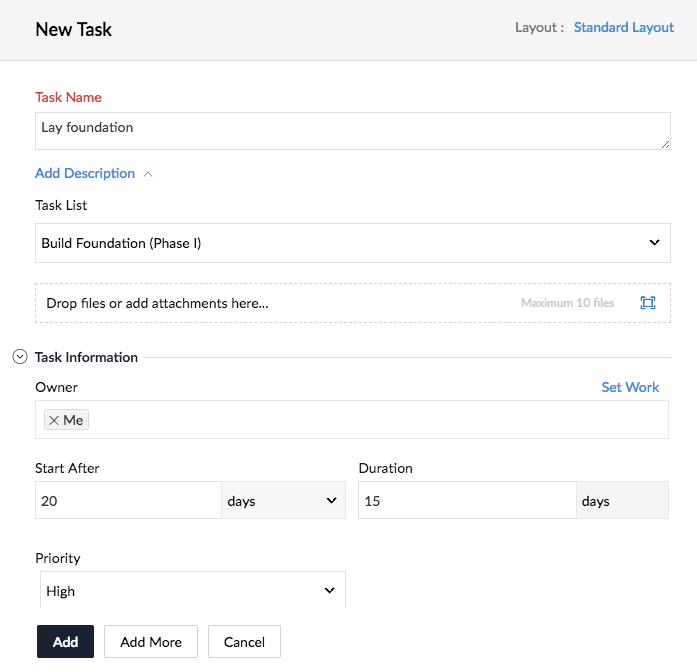
- In the New Task overlay, perform the following:
- Provide a name for the task in Task Name field.
- Enter details about the task in Add Description field.
- Select a value from the Task List dropdown that you want to associate your task with. The task list can be external or internal. Internal task list will be visible only to project users, and External task list to client and project users.
- Add any files, screenshots, or other attachments, if necessary.
- Click Set Work to assign the work hours. Enter a value in terms of Work hrs per day, Work % per day or Work hrs, and click Done.
- Work hrs per day: You can set work hours per day for the task owner. The hours per day is the number of hours work must be done on each day of the task. If the work per day is 4 hours for a span of 5 days, then the task takes 20 hours.
- Work % per day: You can set the work percentage for the task owner for each day. If the business hours per day is 8, and the resource is allocated to only 50%, then the work per day is 4 hours.
- Work hrs: You can set the total work hours for the task owner. The work per day is automatically calculated based on the task duration. If the task owner is allotted a total of 20 hours, and the duration of the task is 5 days, then the work per day is automatically set as 4 hours per day.
- In the Start After field, provide the number of days, weeks or months after which the task should commence.
- Provide a value for the Duration of the task.
- Set a priority for the task by selecting a value from the Priority dropdown.
- Click Add. Click Add More to save the task and remain in the overlay.

Tasks can also be added in the following ways:
- Using the Add Task link beneath a Task name. The link will be available in the Task Lists page accessible from the Tasks menu in left navigation bar.

- Using the Add Task button within a Task List. Click on the task list name in the Task Lists page accessible from the Tasks menu in left navigation bar.
- Using the Add Task button within a Task List. Click on the task list name in the Task Lists page accessible from the Milestone menu in left navigation bar.


Manage Tasks
- Log in to Zoho Developer Console and click Vertical Solutions.
- Select the application to modify and click Edit.
- Click Zoho Apps in the left pane.
- Click the Configure button for Zoho Projects.
- In the Project Templates page, click on the project template name you want to edit.
- Click Tasks in the left navigation bar.
- Click on the task name you want to edit.
- In the task page, click the edit icon [
 ] for fields to make changes, or click the delete icon [
 ] to delete the task.
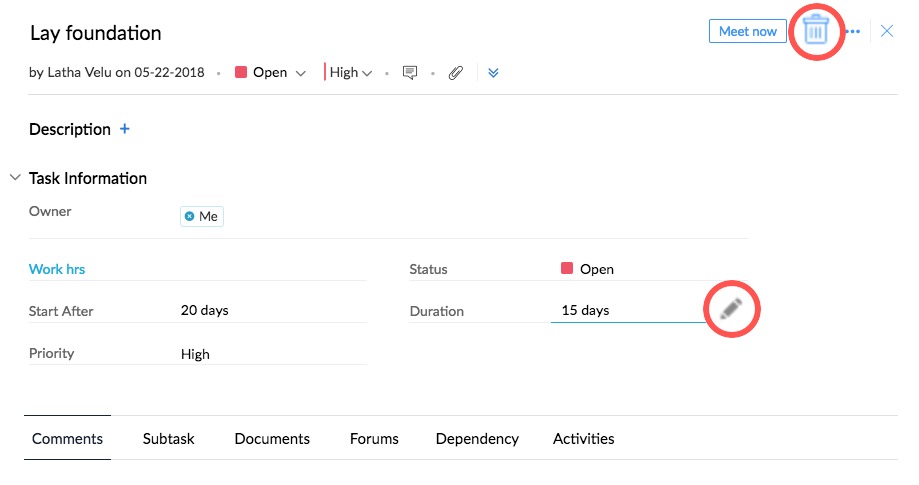
The above screen can also be accessed through the Milestone menu in the left navigation bar.
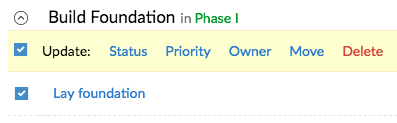
Tasks can also be deleted from the list view by selecting the task and clicking Delete. The link will be available in the Task Lists page, accessible from the Tasks menu in the left navigation bar.
The above screen can also be accessed through the Milestone menu in the left navigation bar.


Move Task
You can move a task to another task list or project.
- Click Tasks in the left navigation bar.
- Click on the task name you want to edit.
- Click the ellipsis (...) in the top-right corner and select Move.
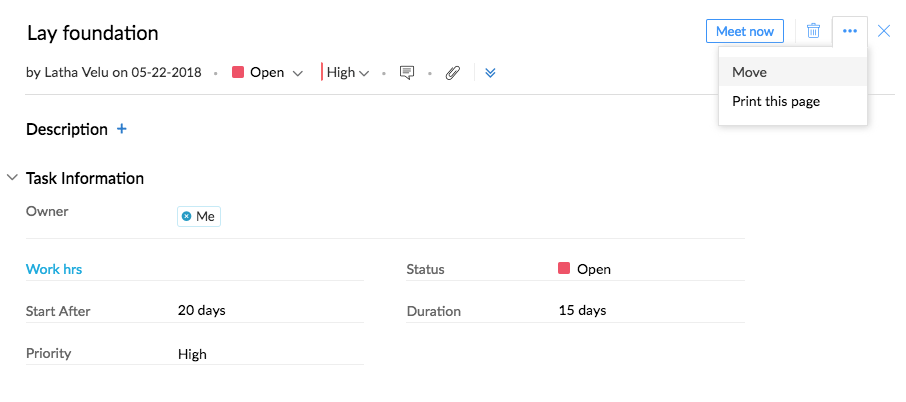
The above screen can also be accessed through the Milestone menu in the left navigation bar. - You can select the task list from the dropdown that you want to move the task to. Click Move to Another Project to move the task to another project.

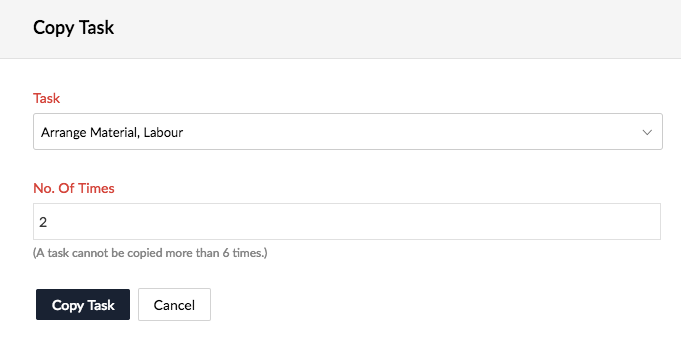
Copy Task
You can copy a task to another task list.
- Click Tasks in the left navigation bar.
- Hover the cursor over the task list name.
- Click the more options icon [] and select Copy Task.
- In the Copy Task overlay, select from the dropdown the Task to be copied and enter the No. Of Times the task needs to be copied.
- Click Copy Task.

Reorder Tasks
- Click Tasks in the left navigation bar.
- Click Reorder at the bottom of the tasks list.
- Move the tasks to the desired position and click Save Order.

Subtask
Any additional activity that needs to be associated with a task.
Add a Subtask
- Log in to Zoho Developer Console and click Vertical Solutions.
- Select the application to modify and click Edit.
- Click Zoho Apps in the left pane.
- Click the Configure button for Zoho Projects.
- In the Project Templates page, click on the project template name you want to edit.
- Click Tasks in the left navigation bar.
- Click on the task name you want to edit.
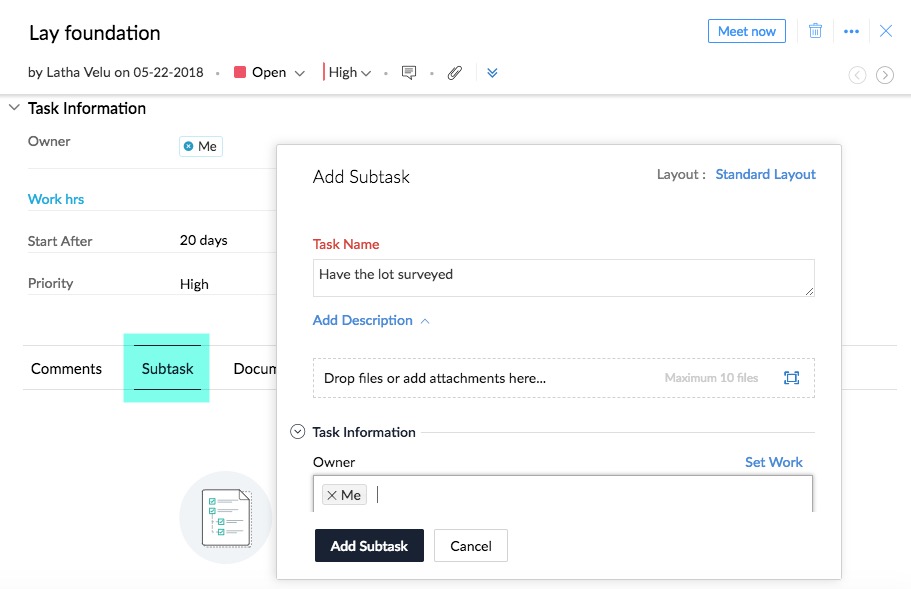
- Select Subtask tab from the menu at the bottom of the page and click the Add Subtask button.
- In the Add Subtask pop-up, perform the following:
- Add a name for the subtask in the Task Name field.
- Enter details about the task in the Add Description field.
- Add any files, screenshots, or other attachments, if necessary.
- Click Set Work to assign the work hours. Enter a value in terms of Work hrs per day, Work % per day, or Work hrs and click Done.
- In the Start After field, provide the number of days, weeks, or months after which the milestone should commence.
- Provide a value for the Duration of the milestone.
- Set a priority for the task by selecting a value from the Priority dropdown.
- Click Add Subtask.

Example
| Milestone | Task List | Task | Subtask |
| Phase I | Initial Planning | Understand house requirements | |
| Plan for Labour | |||
| Plan for Building Materials | |||
| Estimate Cost | |||
| Prepare Floor Plan | Get approval from owner | ||
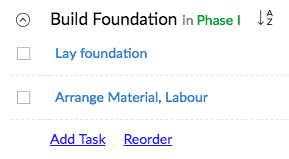
| Build Foundation | Arrange Material, Labour | ||
| Lay foundation | Have the lot surveyed | ||
| Start digging | |||
| Install the footings | |||
| Seal the footings to protect them from moisture | |||
| Phase II | Build Structure | Get Materials | |
| Construct Pillars and Beams | |||
| Construct Walls | |||
| Finish plumbing work | |||
| Finish electrical cable work | |||
| Furnish Interiors | Design Interiors | ||
| Select Furniture | |||
| Choose light fixtures | |||
| Procure furniture | |||
| Procure light fixtures | |||
| Affix lights and fans | |||
| Phase III | Landscaping | Install sprinkler | |
| Lay walkways | |||
| Set up lawns | |||
| Plant saplings |