Install the iOS UI framework for the customer app
In addition to the capabilities of the core framework, the UI framework offers predefined view controllers for the components in your Creator application. This allows you to directly include forms, reports, and pages from your Creator app into your iOS app, and build custom UI that can interface with the data in your Creator app.
1. Prerequisites
- Xcode IDE 26.0 (Required for latest SDK version)
- iOS 15 and above
- CocoaPods
Note:
- If your Mac is powered by Apple Silicon (M1, M2, etc.), it is recommended to run Xcode with Rosetta enabled, as simulator support in Xcode is currently available only via Rosetta destinations.
- It is recommended to use the latest SDK version to ensure compatibility and access to the newest features. CocoaPods installs the latest stable version by default. To use a specific or earlier version, specify it explicitly in your Podfile.
For the list of supported SDK versions and compatible Xcode versions, refer here.
2. Register your iOS app with Zoho
- Edit your Zoho Creator application.
- Navigate to its Settings page.
- Click Mobile SDK under Developer Tools.
- Under the For Customers section, click For iOS. A pane will slide in from the right.
- Select the UI & Core library.
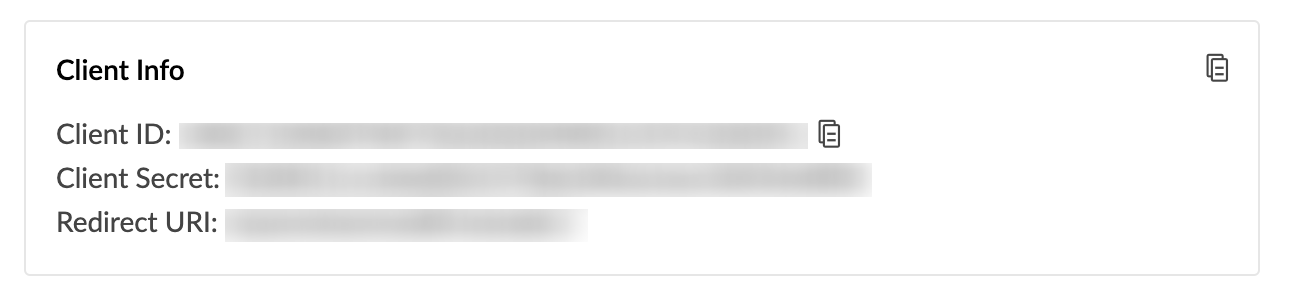
Click the Generate Client Credentials. This will generate the client ID, client secret, Portal ID and redirectURI for the iOS app that you want to integrate with your Creator application.
Downloaded the ZCAppInfo.plist file and add it to your project.


3. Install the iOS UI framework for the customer app
Install the Zoho Creator SDK using Pod:
target 'Demo' do
use_frameworks!
pod 'ZohoPortalAuth'
pod 'ZCUIFramework'
end
post_install do |installer|
installer.generated_projects.each do |project|
project.targets.each do |target|
target.build_configurations.each do |config|
config.build_settings['CODE_SIGNING_ALLOWED'] = 'NO'
config.build_settings['IPHONEOS_DEPLOYMENT_TARGET'] = '13.0'
end
end
end
endAdd the following to your Objective-C bridging header:
#import <ZohoPortalAuthKit/ZohoPortalAuth.h>Import ZCUIFramework to use Zoho Creator's iOS UI framework:
import ZCUIFrameworkConfigure your project with the following code, for example in the SceneDelegate file:
class SceneDelegate: UIResponder, UIWindowSceneDelegate { var window: UIWindow? func scene(_ scene: UIScene, willConnectTo session: UISceneSession, options connectionOptions: UIScene.ConnectionOptions) { if let windowScene = scene as? UIWindowScene { let window = UIWindow(windowScene: windowScene) } let scope = ["aaaserver.profile.READ","zohocontacts.userphoto.READ","ZohoContacts.contactapi.READ","ZohoCreator.meta.CREATE","ZohoCreator.meta.READ","ZohoCreator.meta.UPDATE","ZohoCreator.meta.DELETE","ZohoCreator.data.CREATE","ZohoCreator.data.READ","ZohoCreator.data.UPDATE","ZohoCreator.data.DELETE","Stratus.stratusop.READ","ZohoCRM.modules.READ","ZohoCRM.users.READ"] let clientID = "<Your Client ID>" let clientSecret = "<Your Client Secret>" let portalId = "<Your Portal id>" let urlScheme = "<Your Url Scheme>" let accountsUrl = "<Your Portal URL>" // This should be your portal URL. For eg: 'https://demoapp.zohocreatorportal.com' ZohoPortalAuth.initWithClientID(clientID, clientSecret: clientSecret, portalID: portalId, scope: scope, urlScheme: urlScheme, mainWindow: self.window!, accountsPortalURL: accountsUrl) // To verify if the app is already logged in ZohoPortalAuth.getOauth2Token { (token, error) in if token == nil { // Not logged in self.showLoginScreen() } else { // App logged in already. // Ensure to use the following line of code in your iOS app before you utilize any of Creator SDK’s methods Creator.configure(uiDelegate: self) } } } func scene(_ scene: UIScene, openURLContexts URLContexts: Set <UIOpenURLContext> ) { if let context = URLContexts.first { let _ = ZohoPortalAuth.handleURL(context.url, sourceApplication: context.options.sourceApplication, annotation: context.options.annotation) } } } extension SceneDelegate: ZCUIServiceDelegate { func oAuthToken(with completion: @escaping AccessTokenCompletion) { ZohoPortalAuth.getOauth2Token { (token, error) in completion(token, error) } } func openURL(for openURLTasks: [OpenUrlTask]) { // Get Call back here when openurl have query string "zc_MobileSDK_HandleOpenURL=true" } }
Code to allow Zoho Portal login to your iOS app:func showLoginScreen() { ZohoPortalAuth.presentZohoPortalSign( in: { (token, error) in if token != nil { //login success } }) }
Code to provision logout from Zoho Portal:func logout() { ZohoPortalAuth.revokeAccessToken { (error) in if error == nil { //Logout Successfully } else { //Error Occurred } } }Add values for the following keys in info.plist. These are mandatory parameters for Apple's privacy compliance because their respective services are used in the UI framework.
'NSCameraUsageDescription', 'NSContactsUsageDescription', 'NSLocationWhenInUseUsageDescription', 'NSMicrophoneUsageDescription', 'NSPhotoLibraryUsageDescription' and 'NSPhotoLibraryAddUsageDescription'
FAQ
- I'm a M1 Mac user and I'm facing issues while adding dependencies. What should I do?
To proceed further, please use the arch=x86_64 pod install command.
References
- Please refer to our iOS SDK documentation for detailed information about the various SDK methods.
- Familiarize yourself with Mobile SDK for iOS by trying out our sample application here.
- To configure push notifications for iOS, refer here.