Configure QuickBooks connection
This help page is for users in Creator 5. If you are in the newer version (Creator 6), click here. Know your Creator version.
To configure QuickBooks connection:
- Navigate to the Account Setup page.
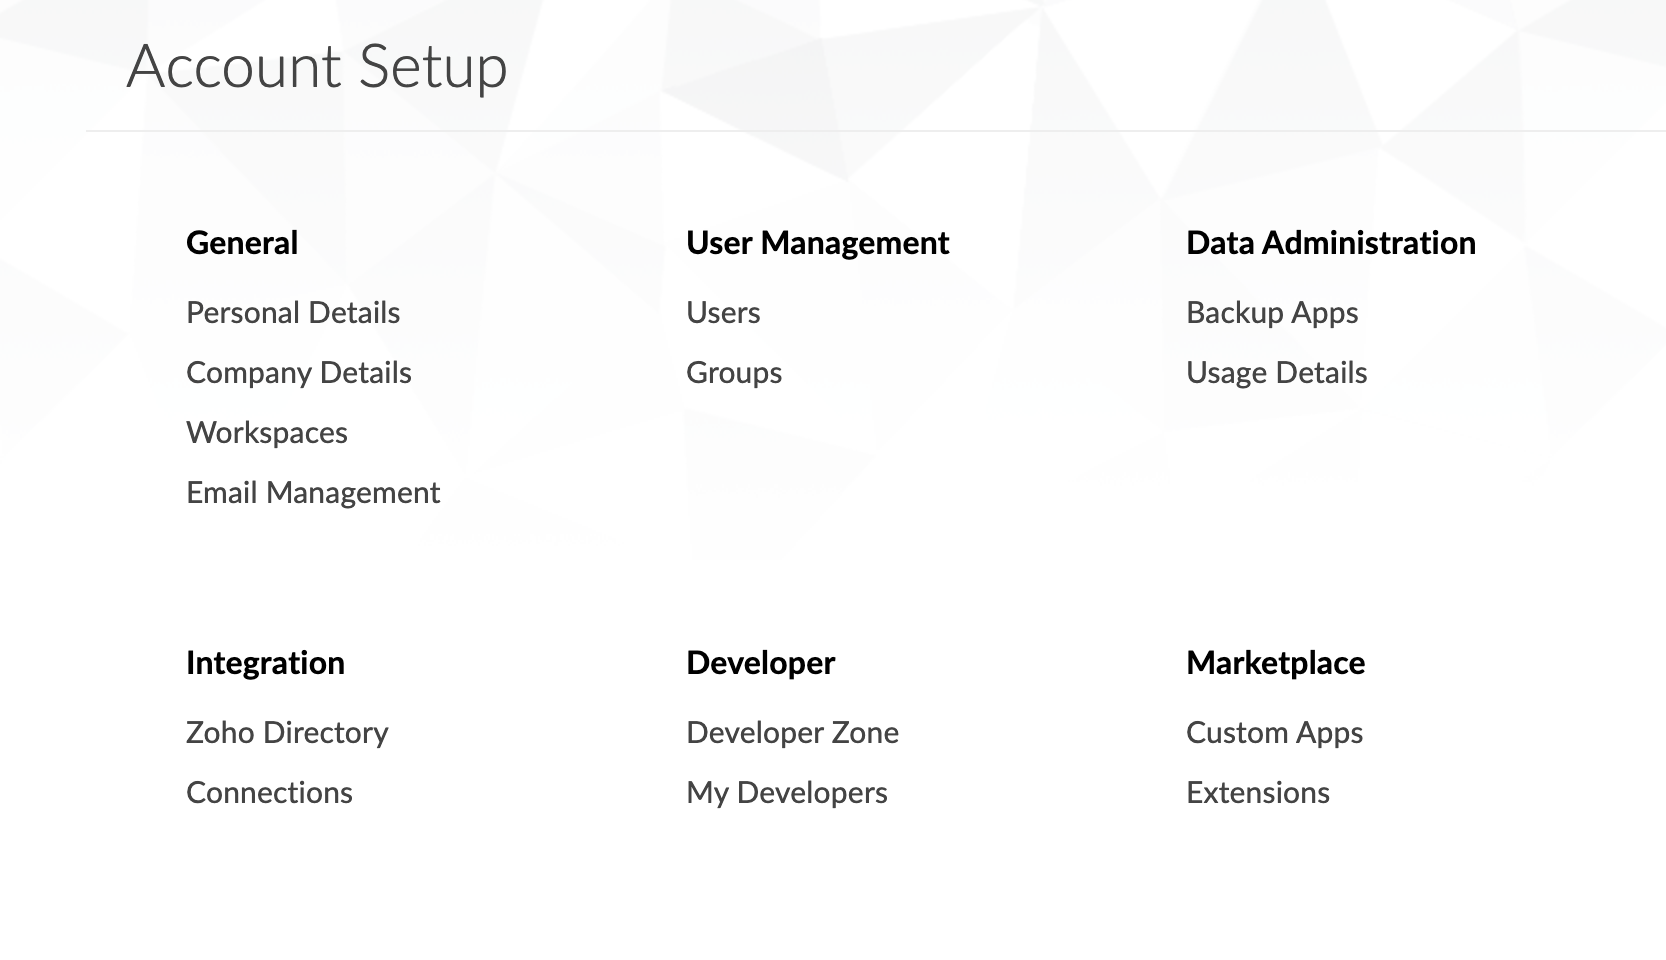
- Click Connections. The Connections page will appear.
- Click the Add Connection button. The list of services will appear.

- Select QuickBooks connection.
- Enter a Connection Name of your choice to uniquely identify this connection to QuickBooks.
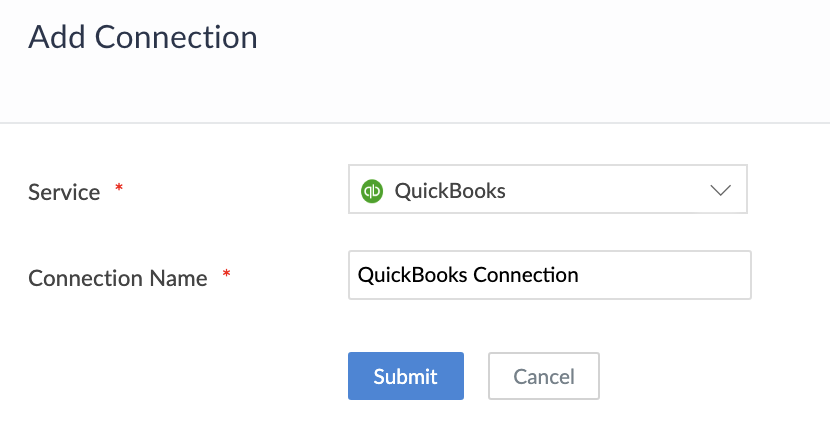
- Click Submit button. The connection is created and you will be requested to link an account.
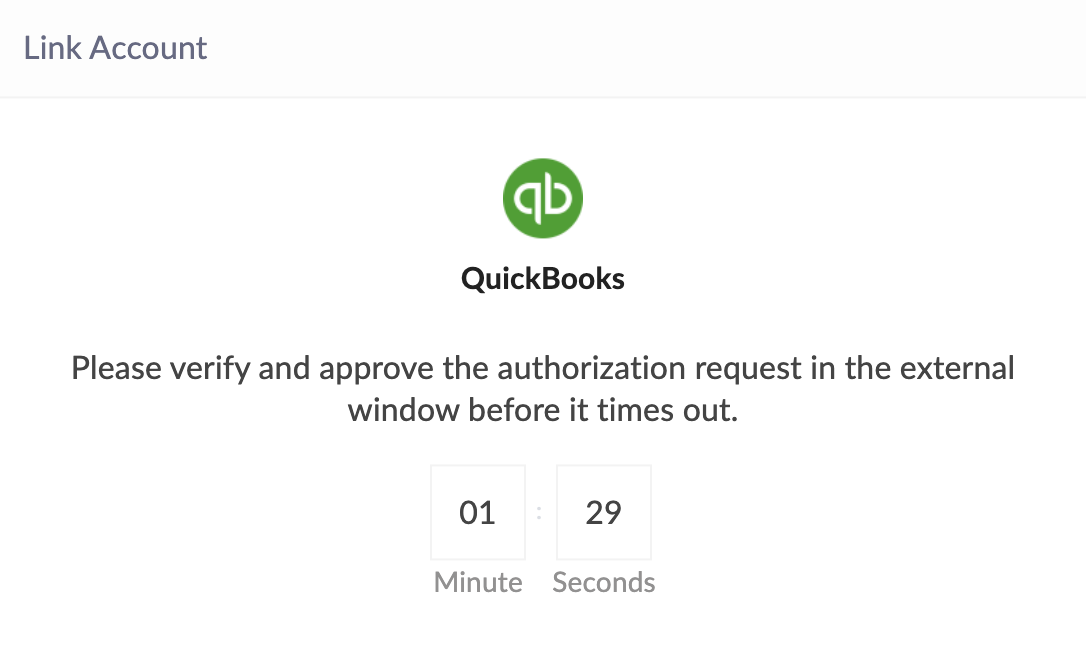
- Enter Name of the Authorized Account values to link the new account. (The name provided is used to identify the authorization.)

- Click Authorize button and a timer of 90 seconds will be triggered. You will be redirected to the QuickBooks authorization page.
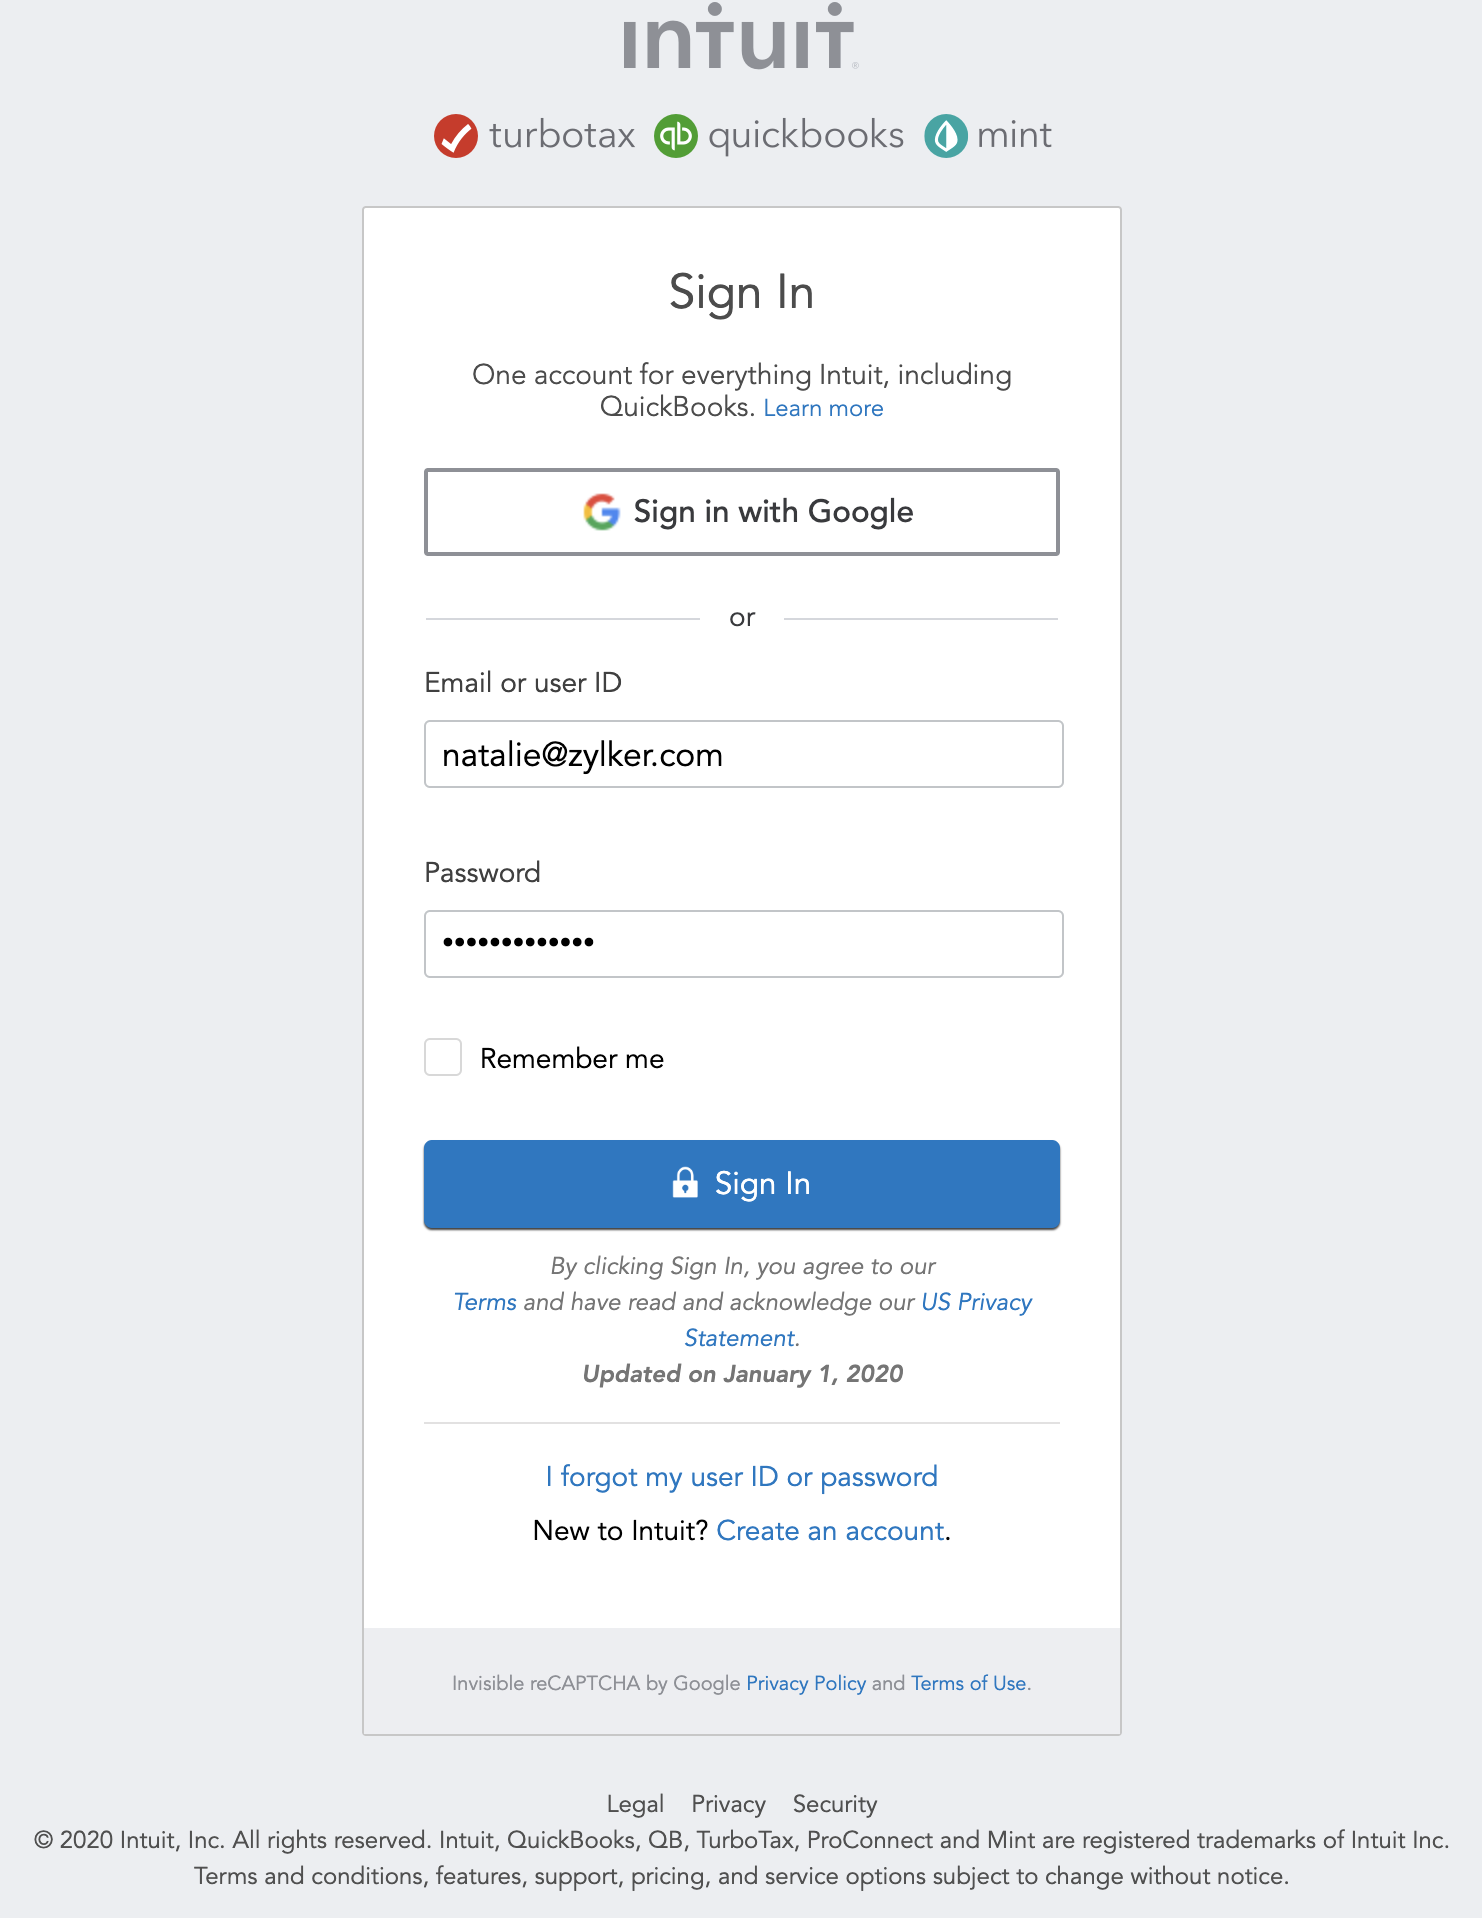
- Enter your QuickBooks account's credentials, then click Sign In. If you're logged in to your QuickBooks account from the current web browser, you'll be directly be taken to step eight.
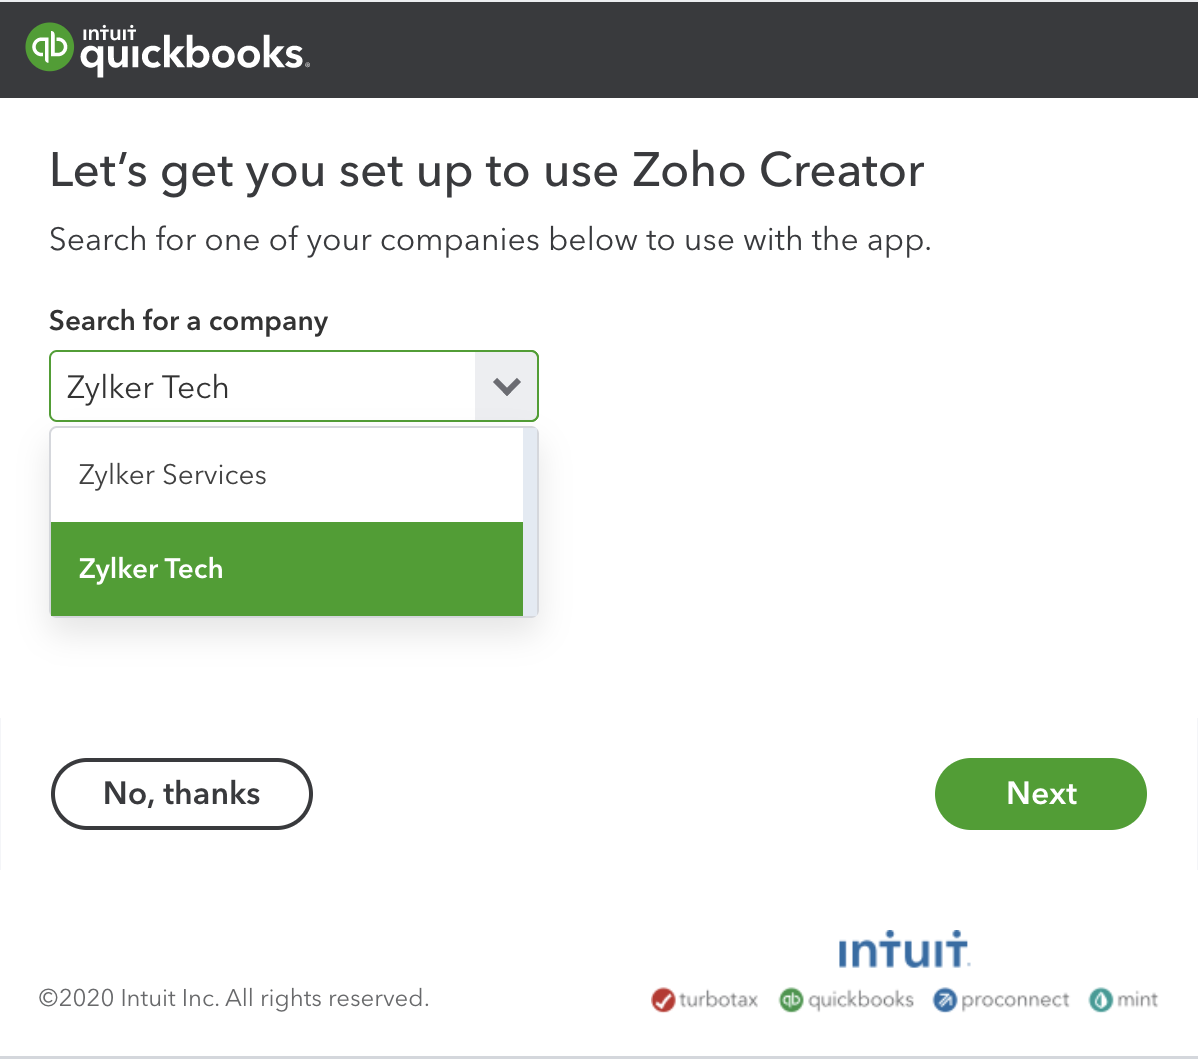
- If there are multiple companies in your QuickBooks account, you'll need to select the one you want to connect with, then click Next. When only one company exists, it will be selected automatically and you'll be directly taken to step nine.Tip:
- You can add multiple Quickbooks connections to your Zoho Creator account, thereby integrating with the data of the required companies in your QuickBooks account.
- You can also add multiple Quickbooks connections for the same company in your Zoho Creator account.
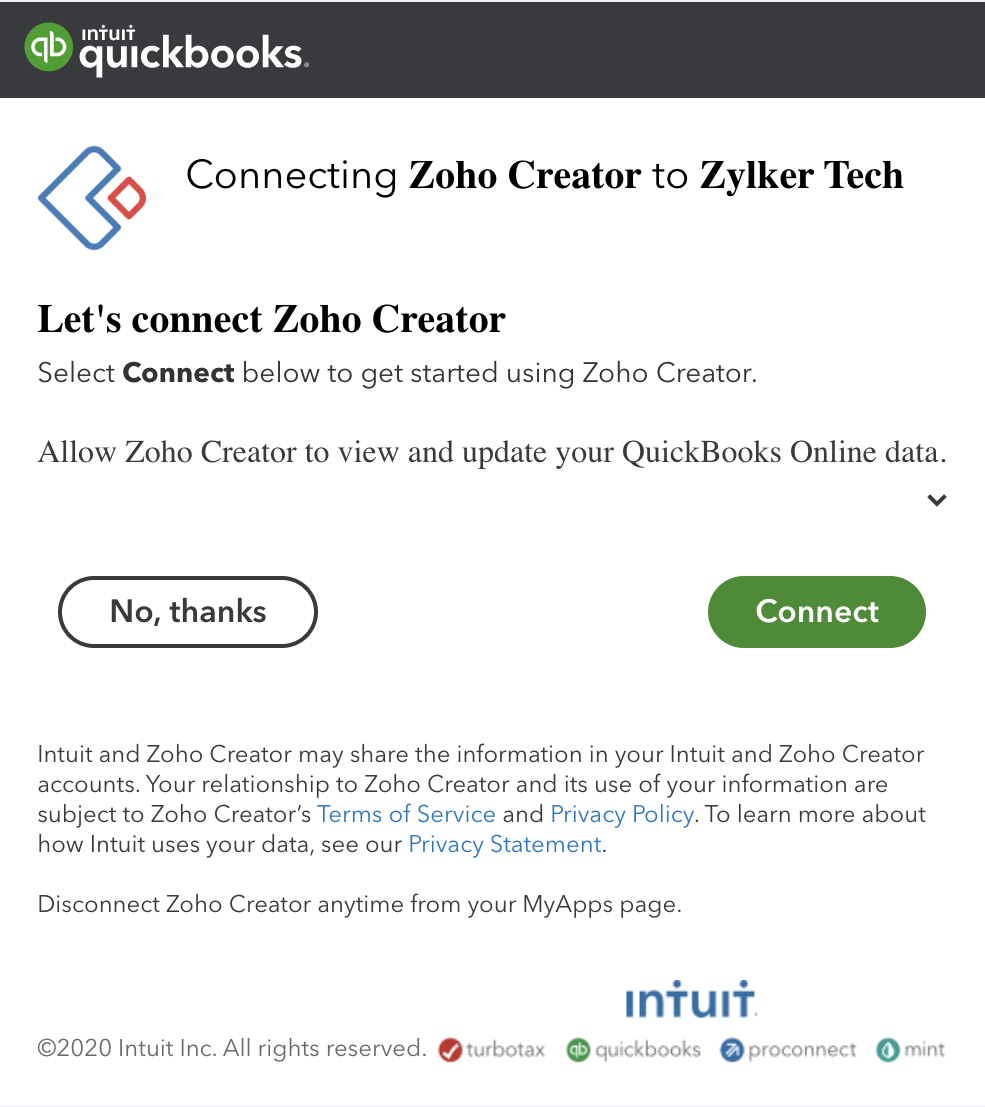
- Click Connect to authorize Zoho Creator to access your Company's data in QuickBooks:


After authorization, the connection is ready to be used in your applications. The connection that you created is authorized to access the specified service.