Take the Zoho Cliq Tour
Get a comprehensive view of Cliq's features to understand how they can help your team communicate and collaborate better than ever.
Cliq home
Home screen
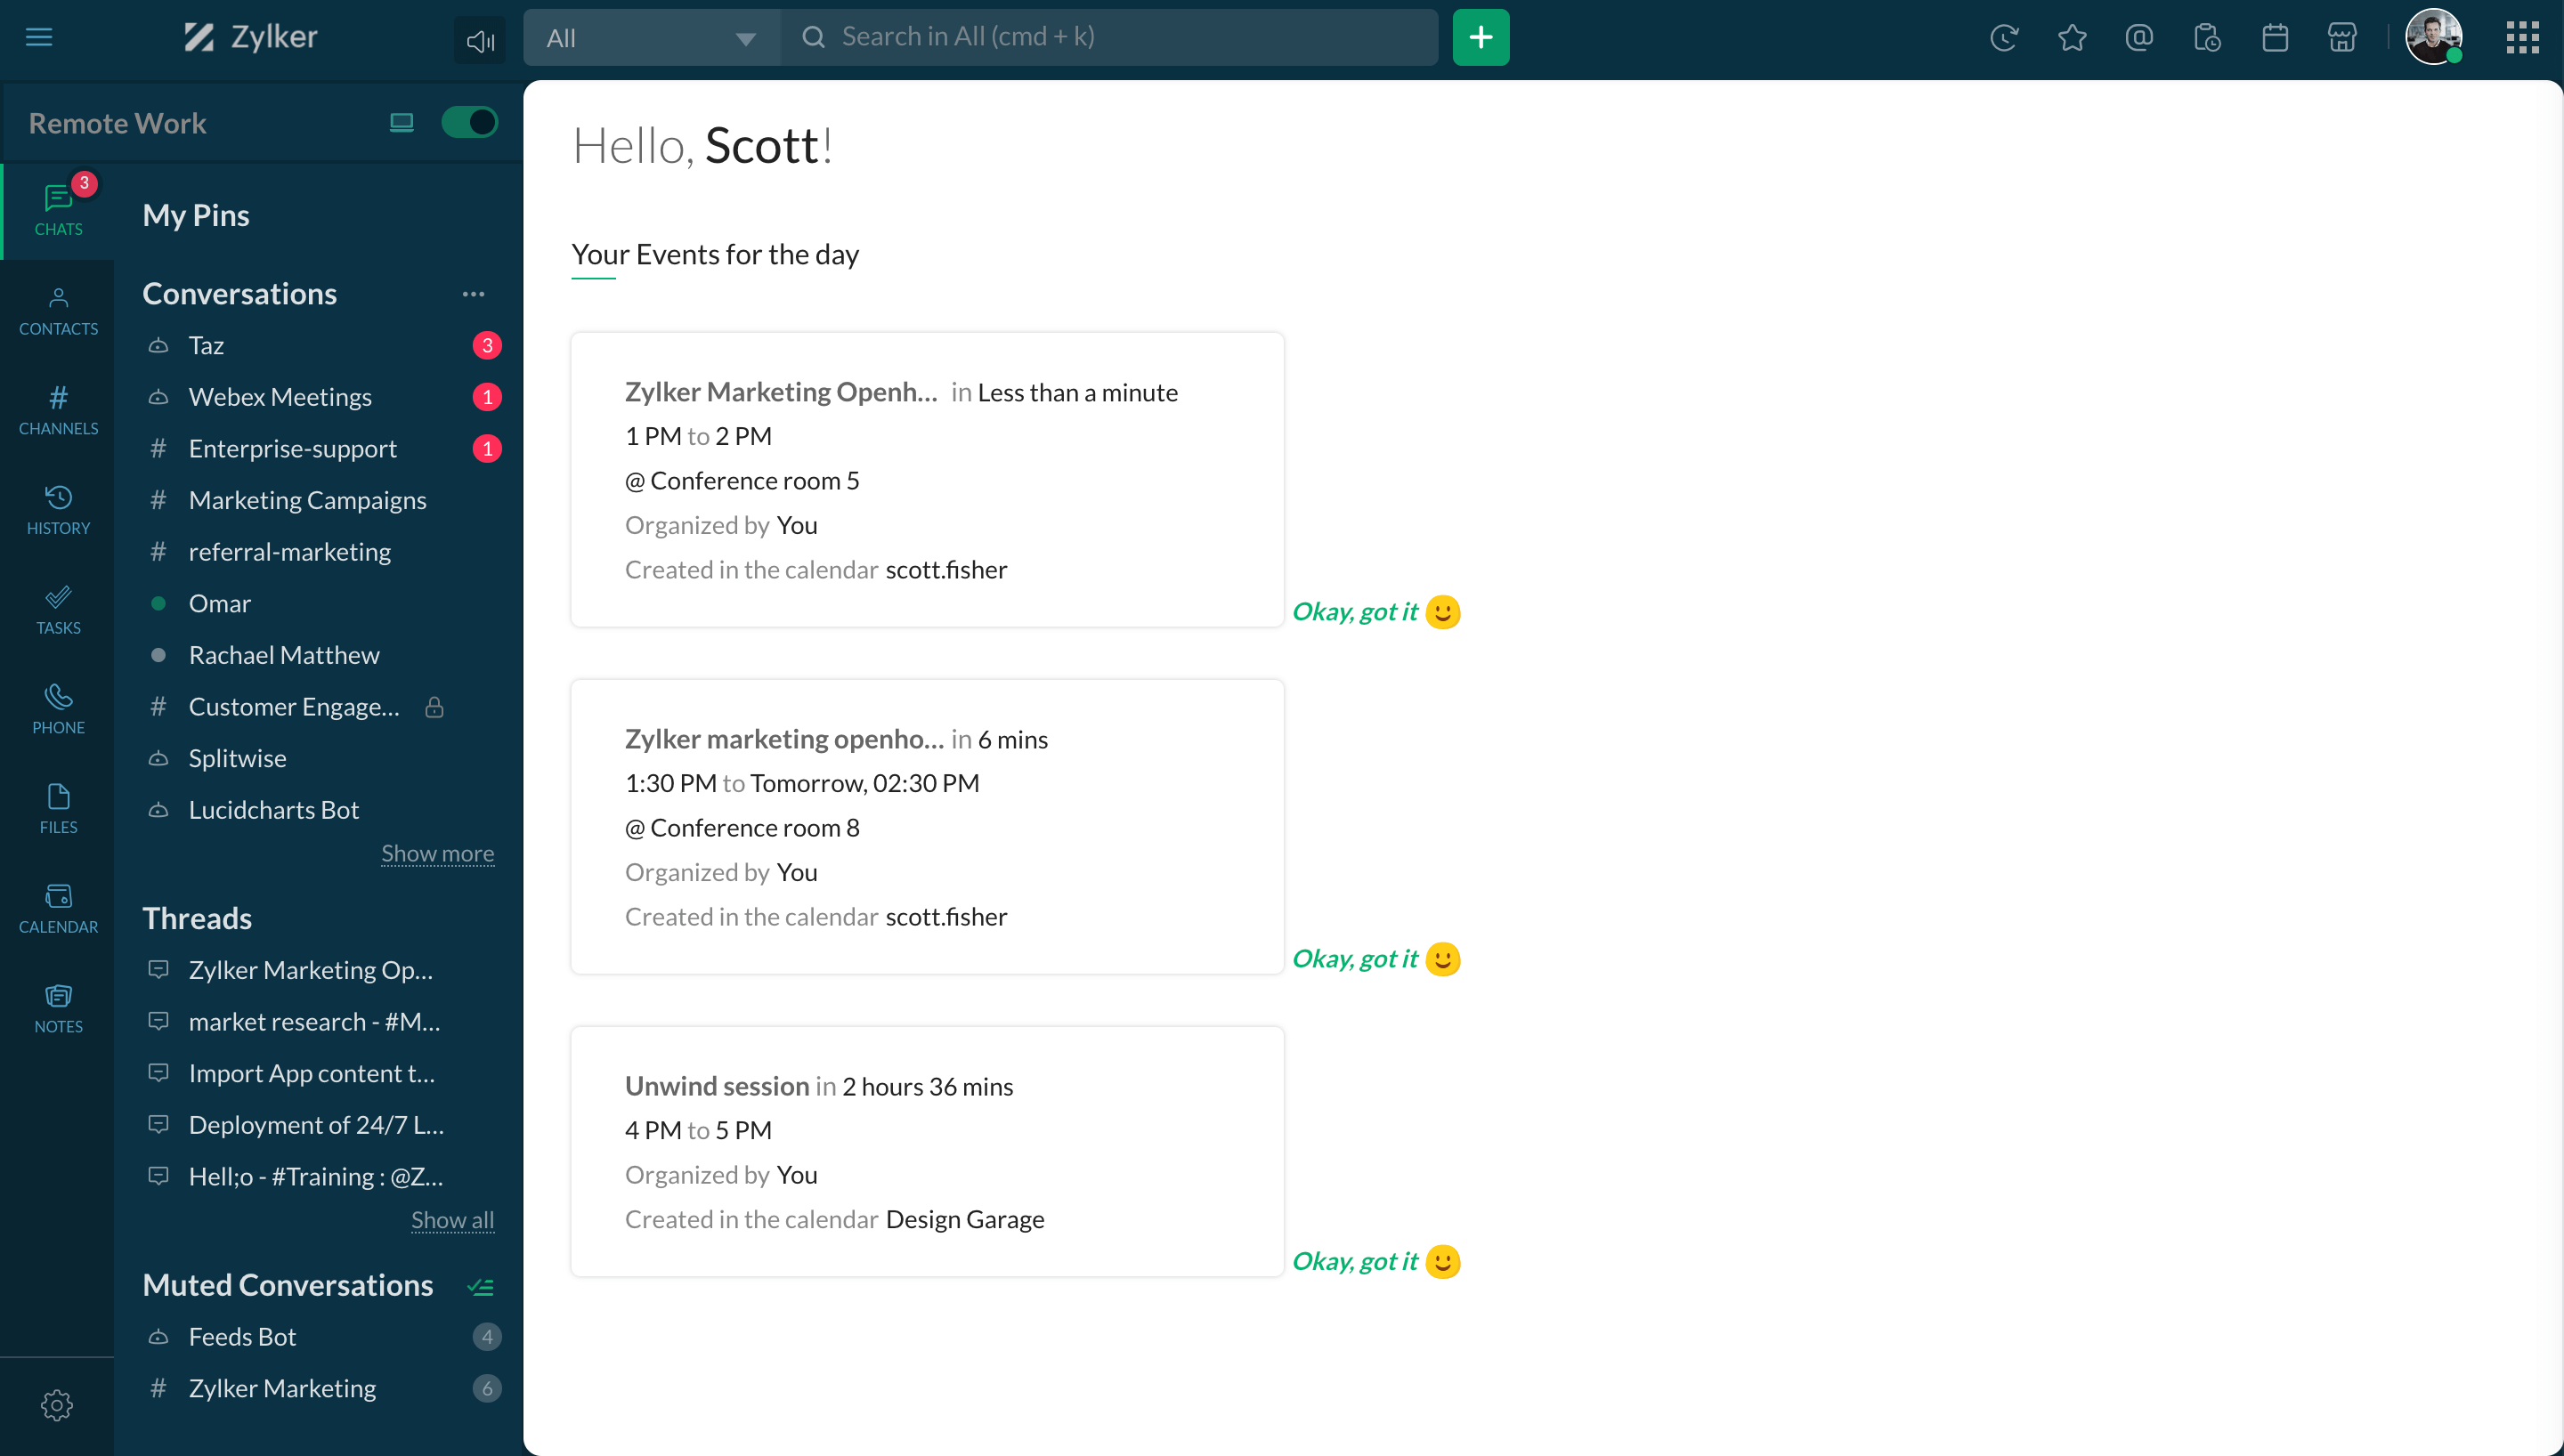
The Cliq home screen displays the upcoming events and reminders, new bots and commands, and offline chat notifications.

Remote work
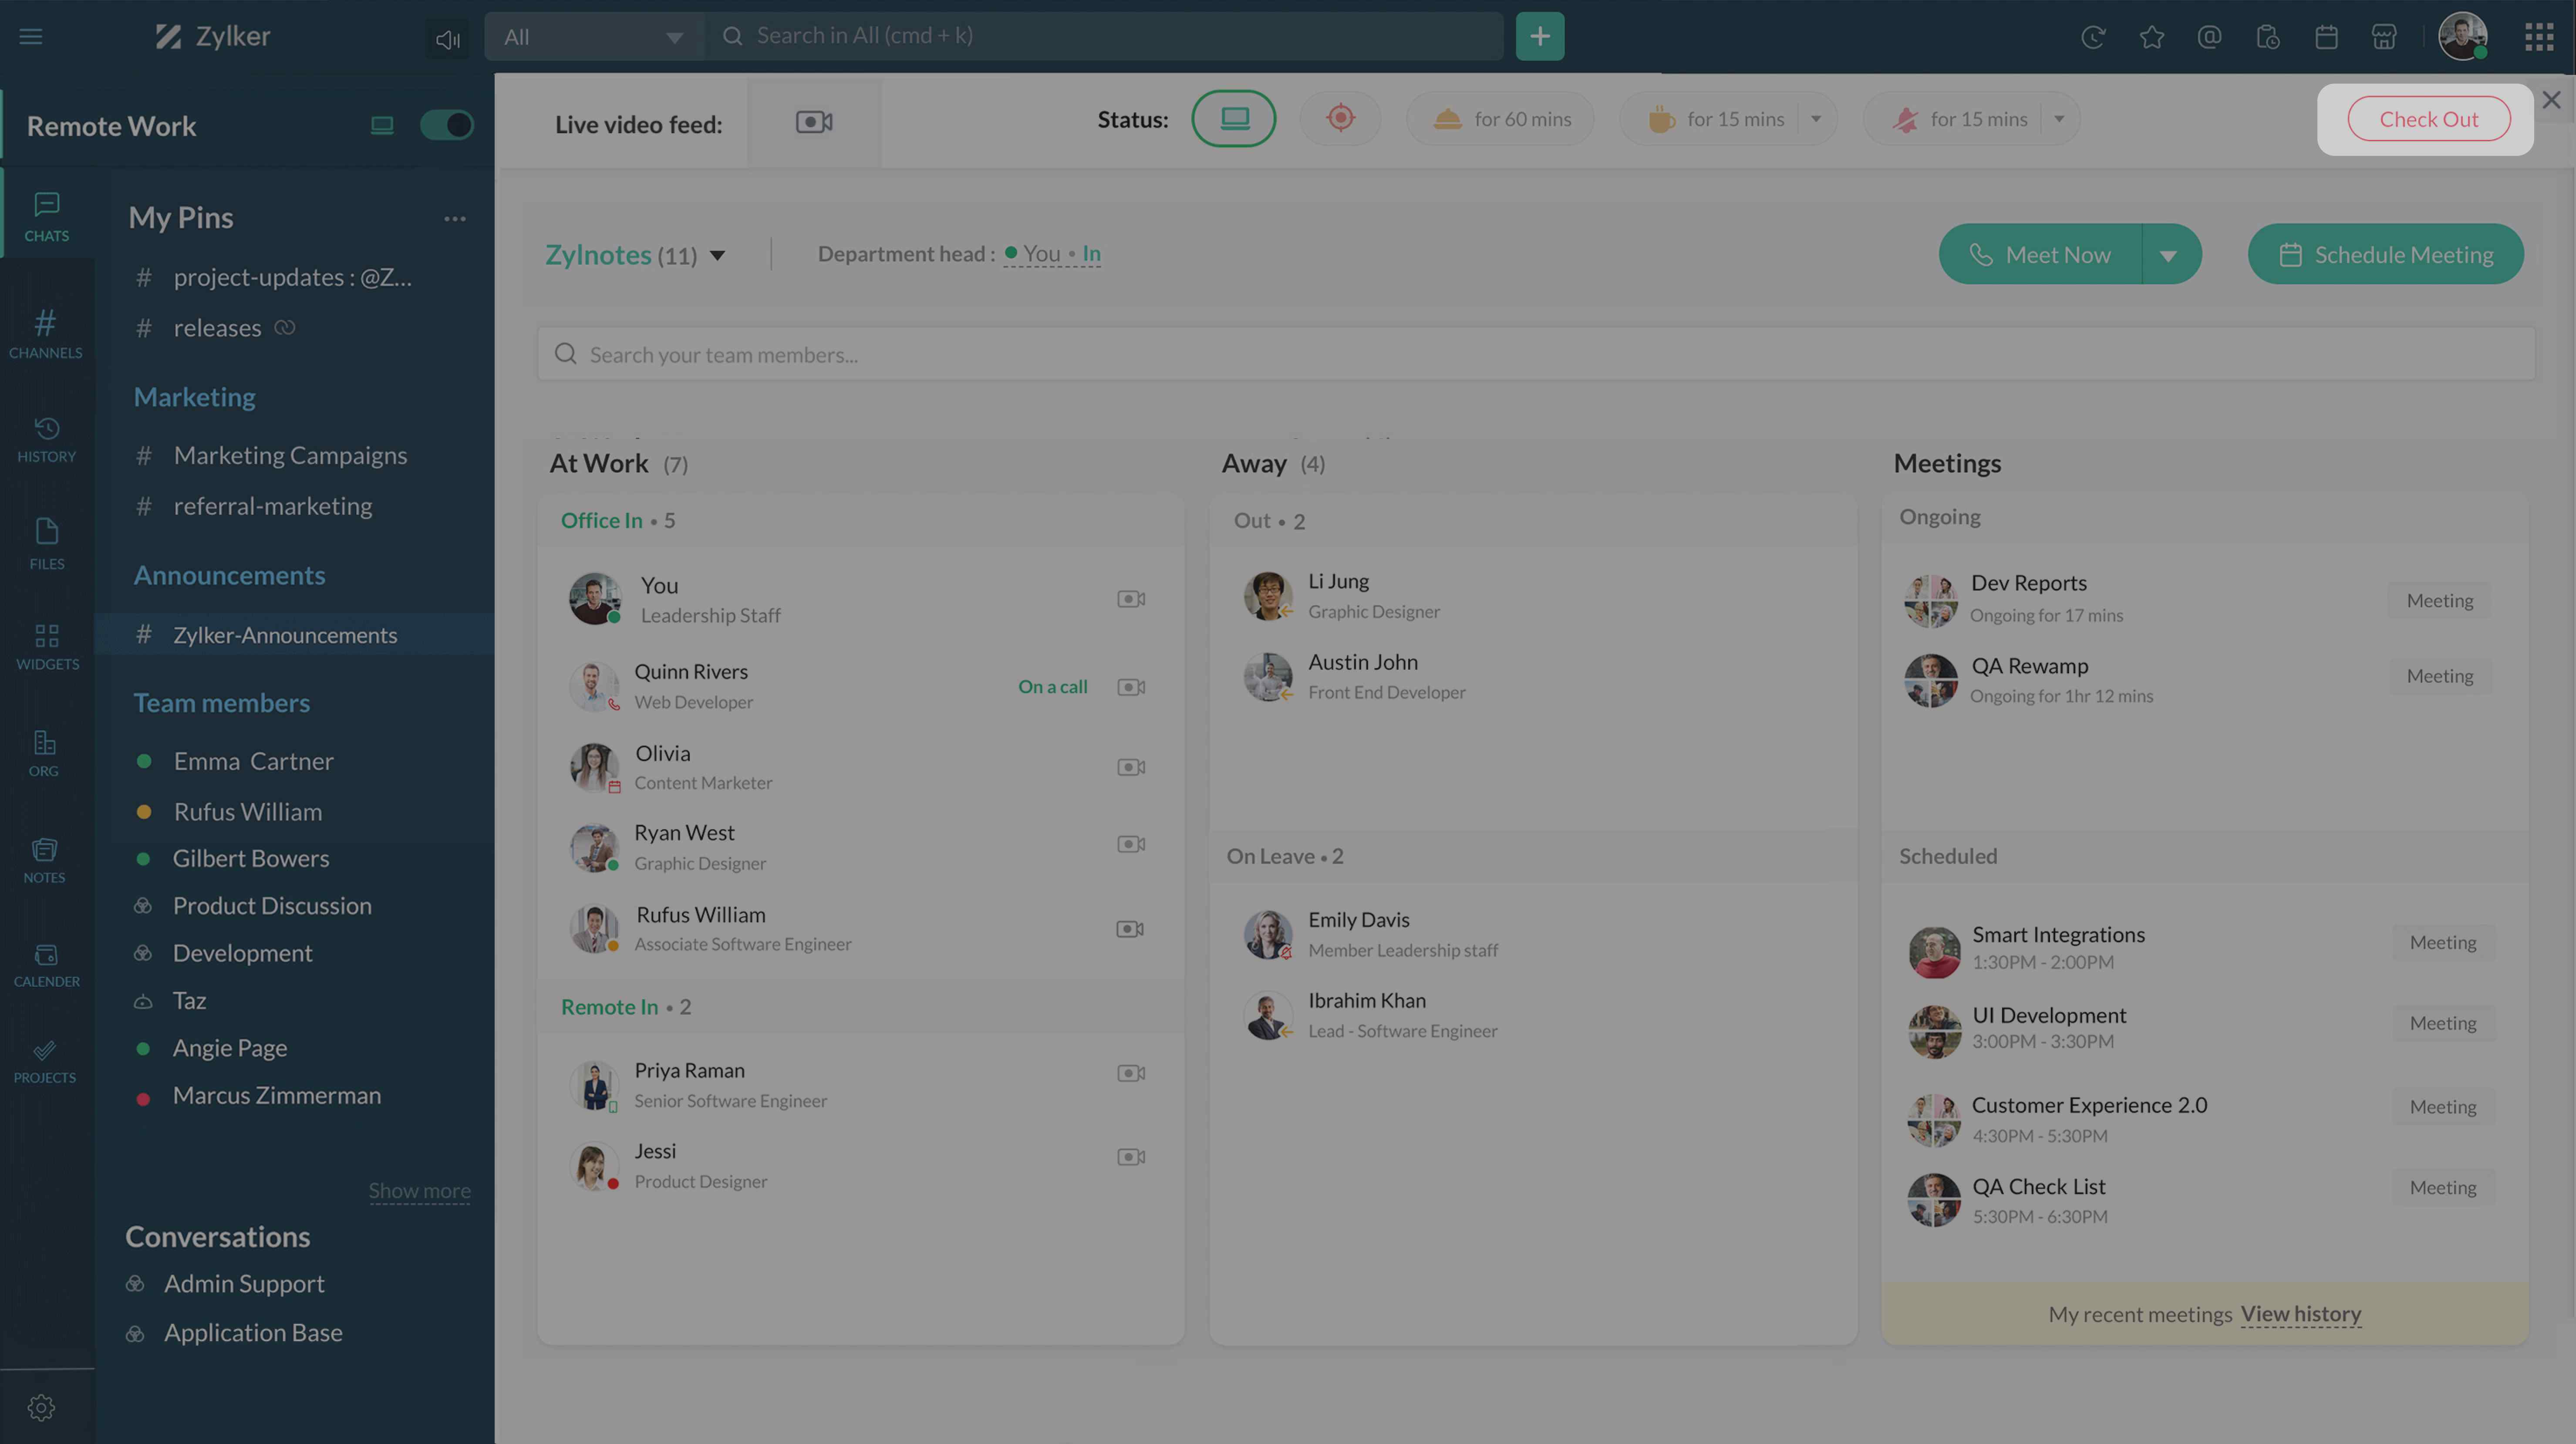
Check in and check out
Track your hours and help co-workers see when you're working by using Cliq's check-in feature.
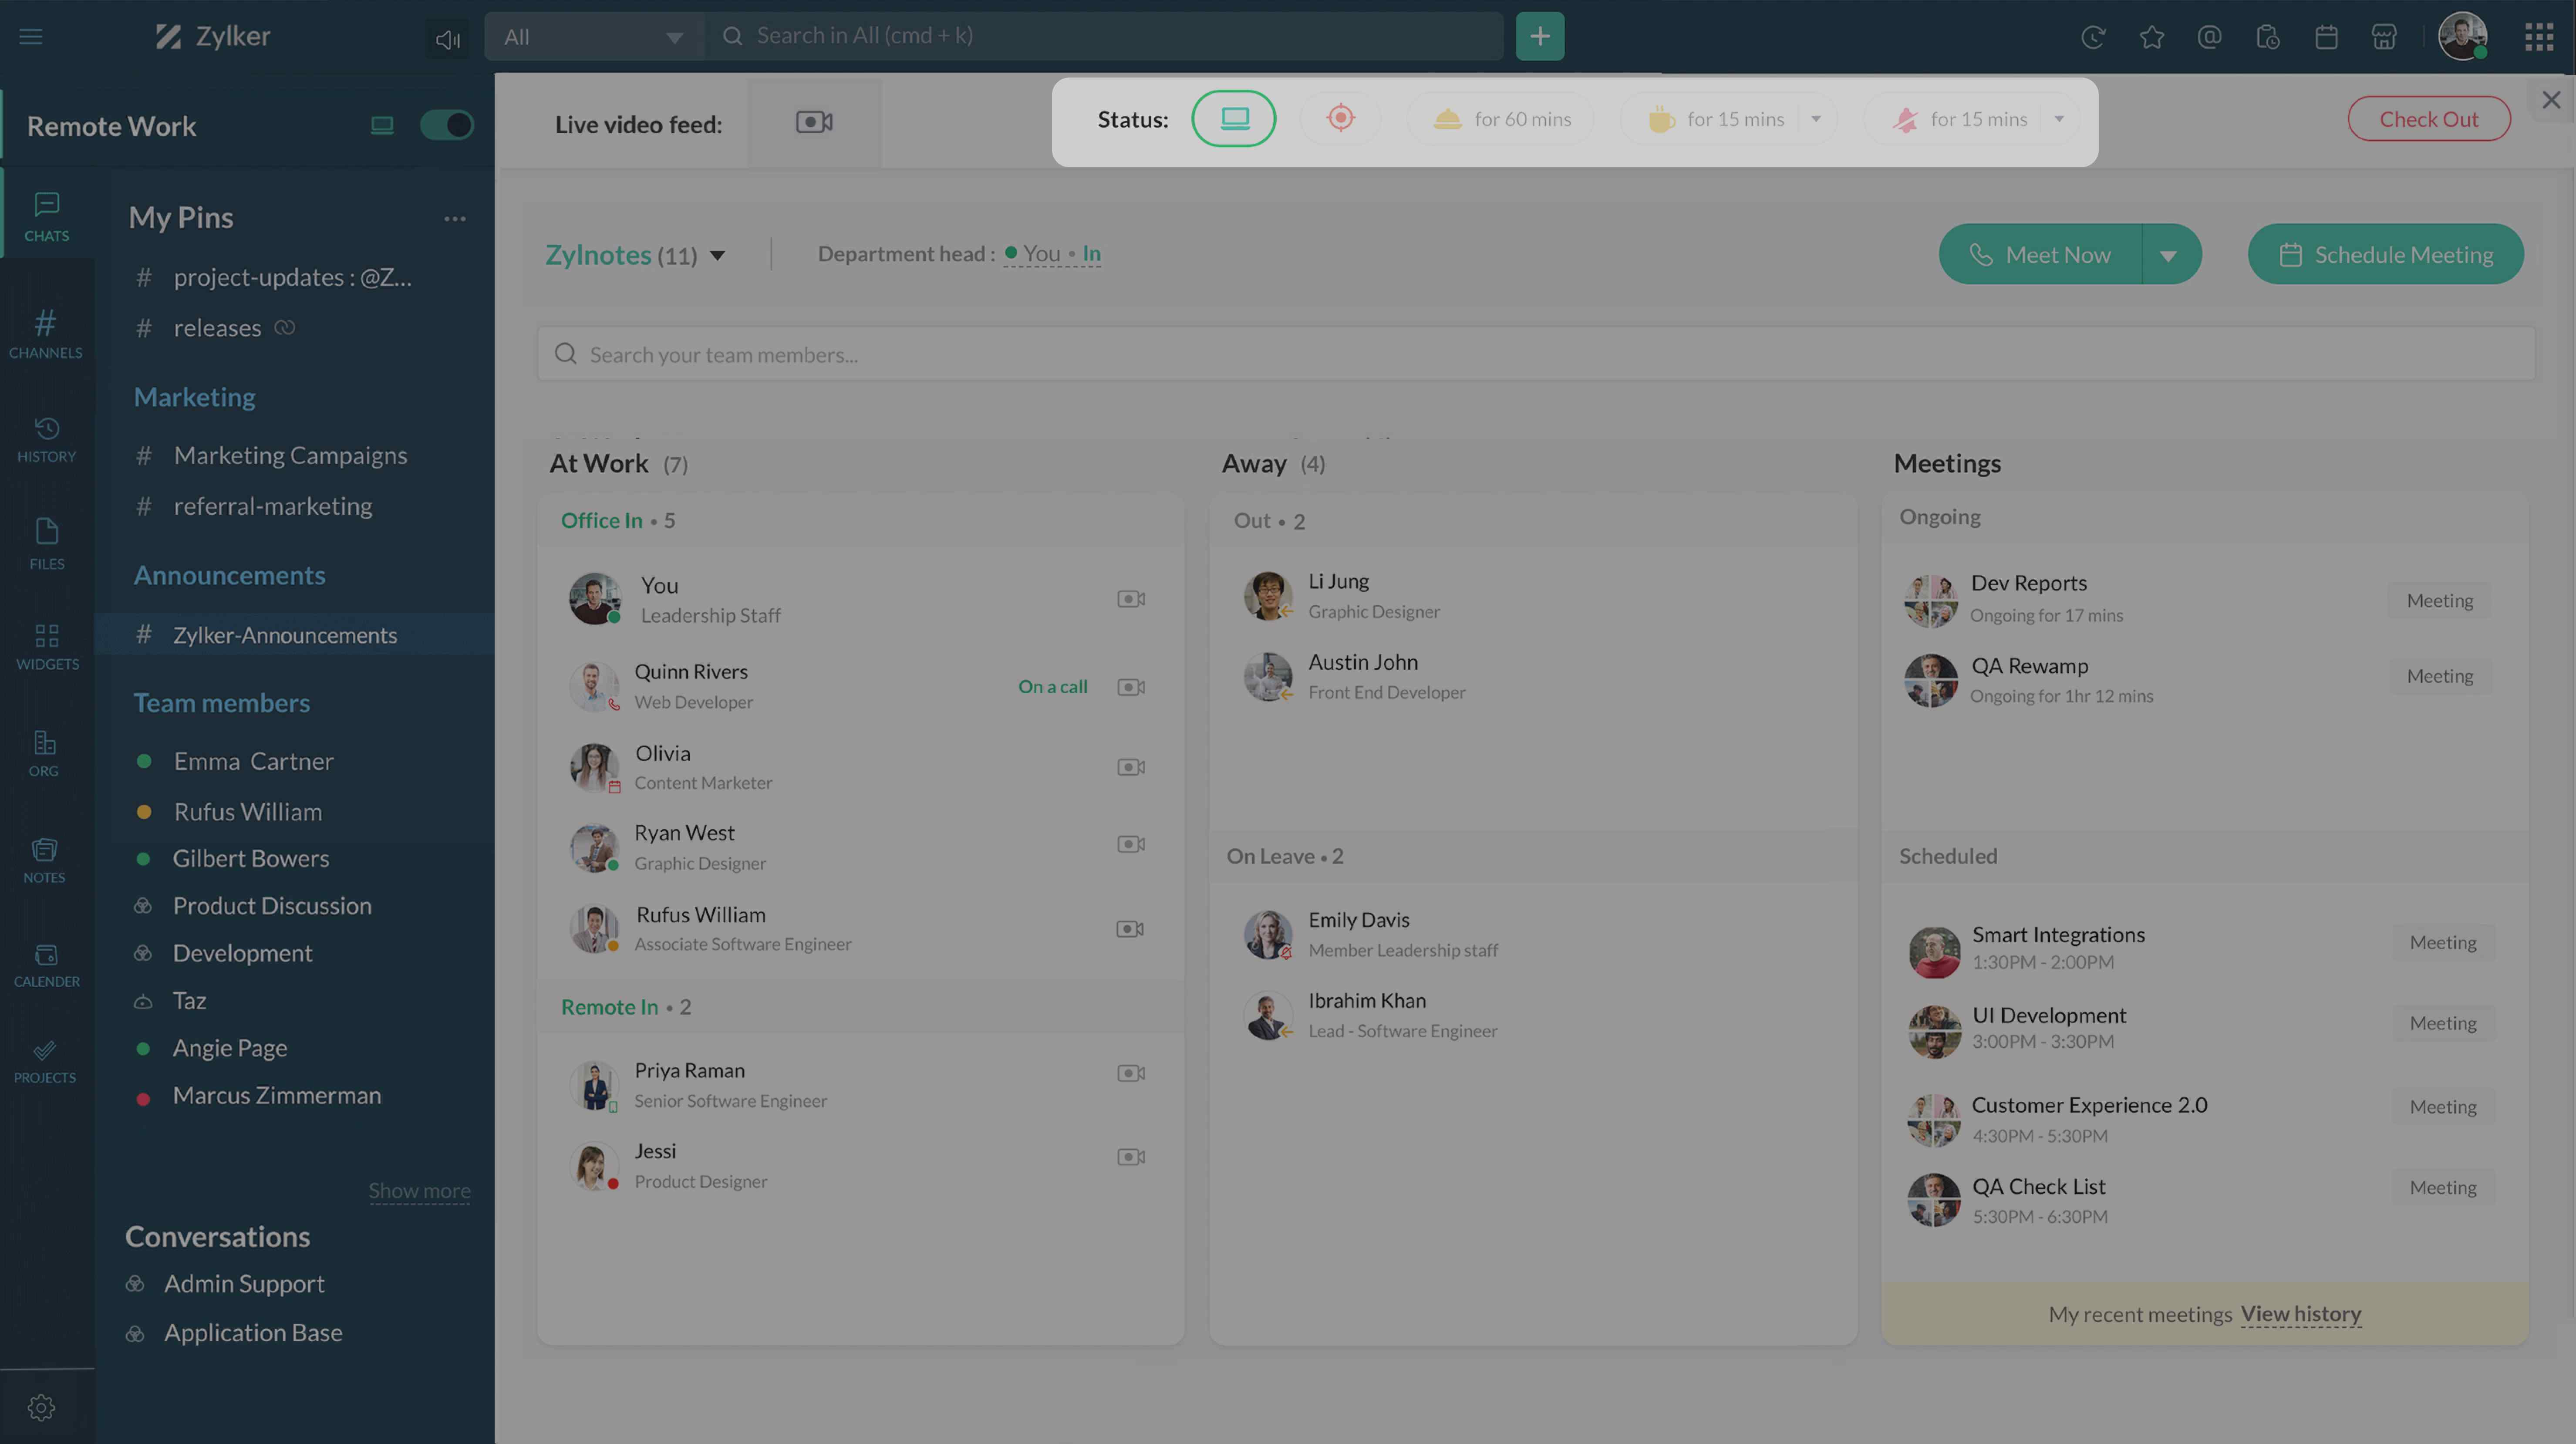
Update status
Let people know about your availability, and make it easy for colleagues to collaborate with you by picking an appropriate availability status.
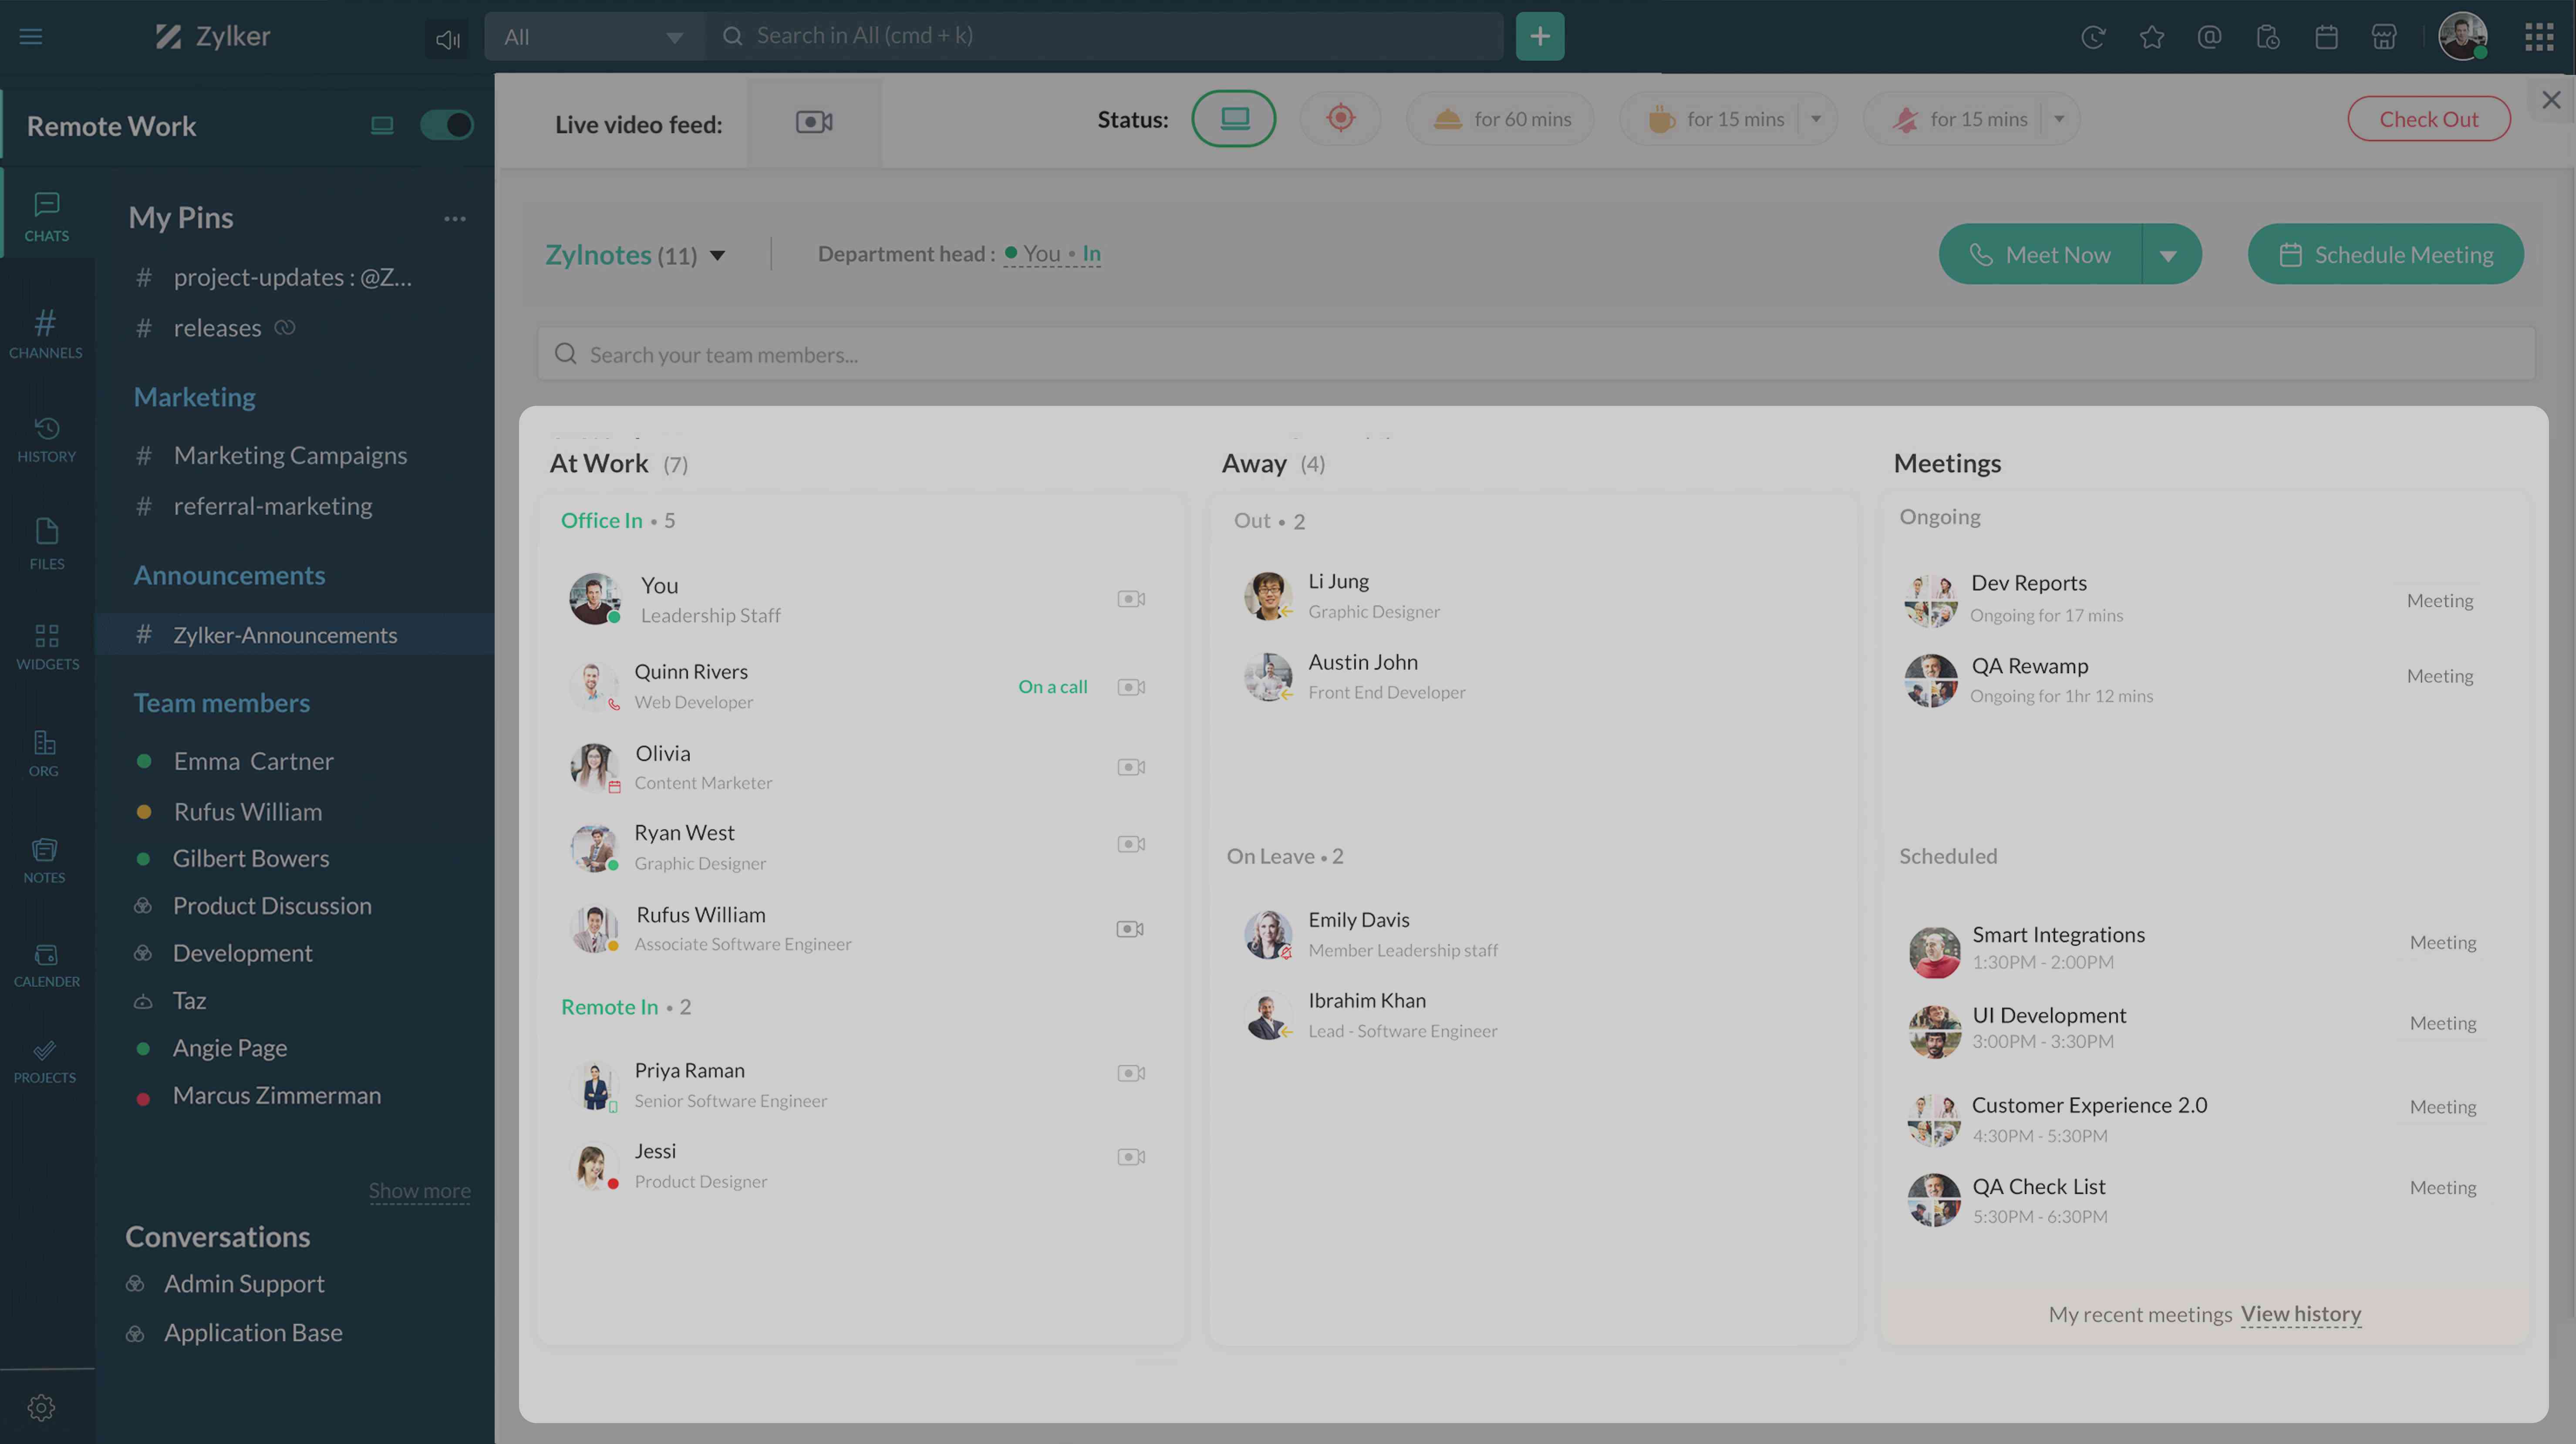
View employee availability
Find out who is at work, on leave, away on break, or engaged in a meeting from the Remote Work tab.
- Check in and check out
- Update status
- View employee availability


Chats
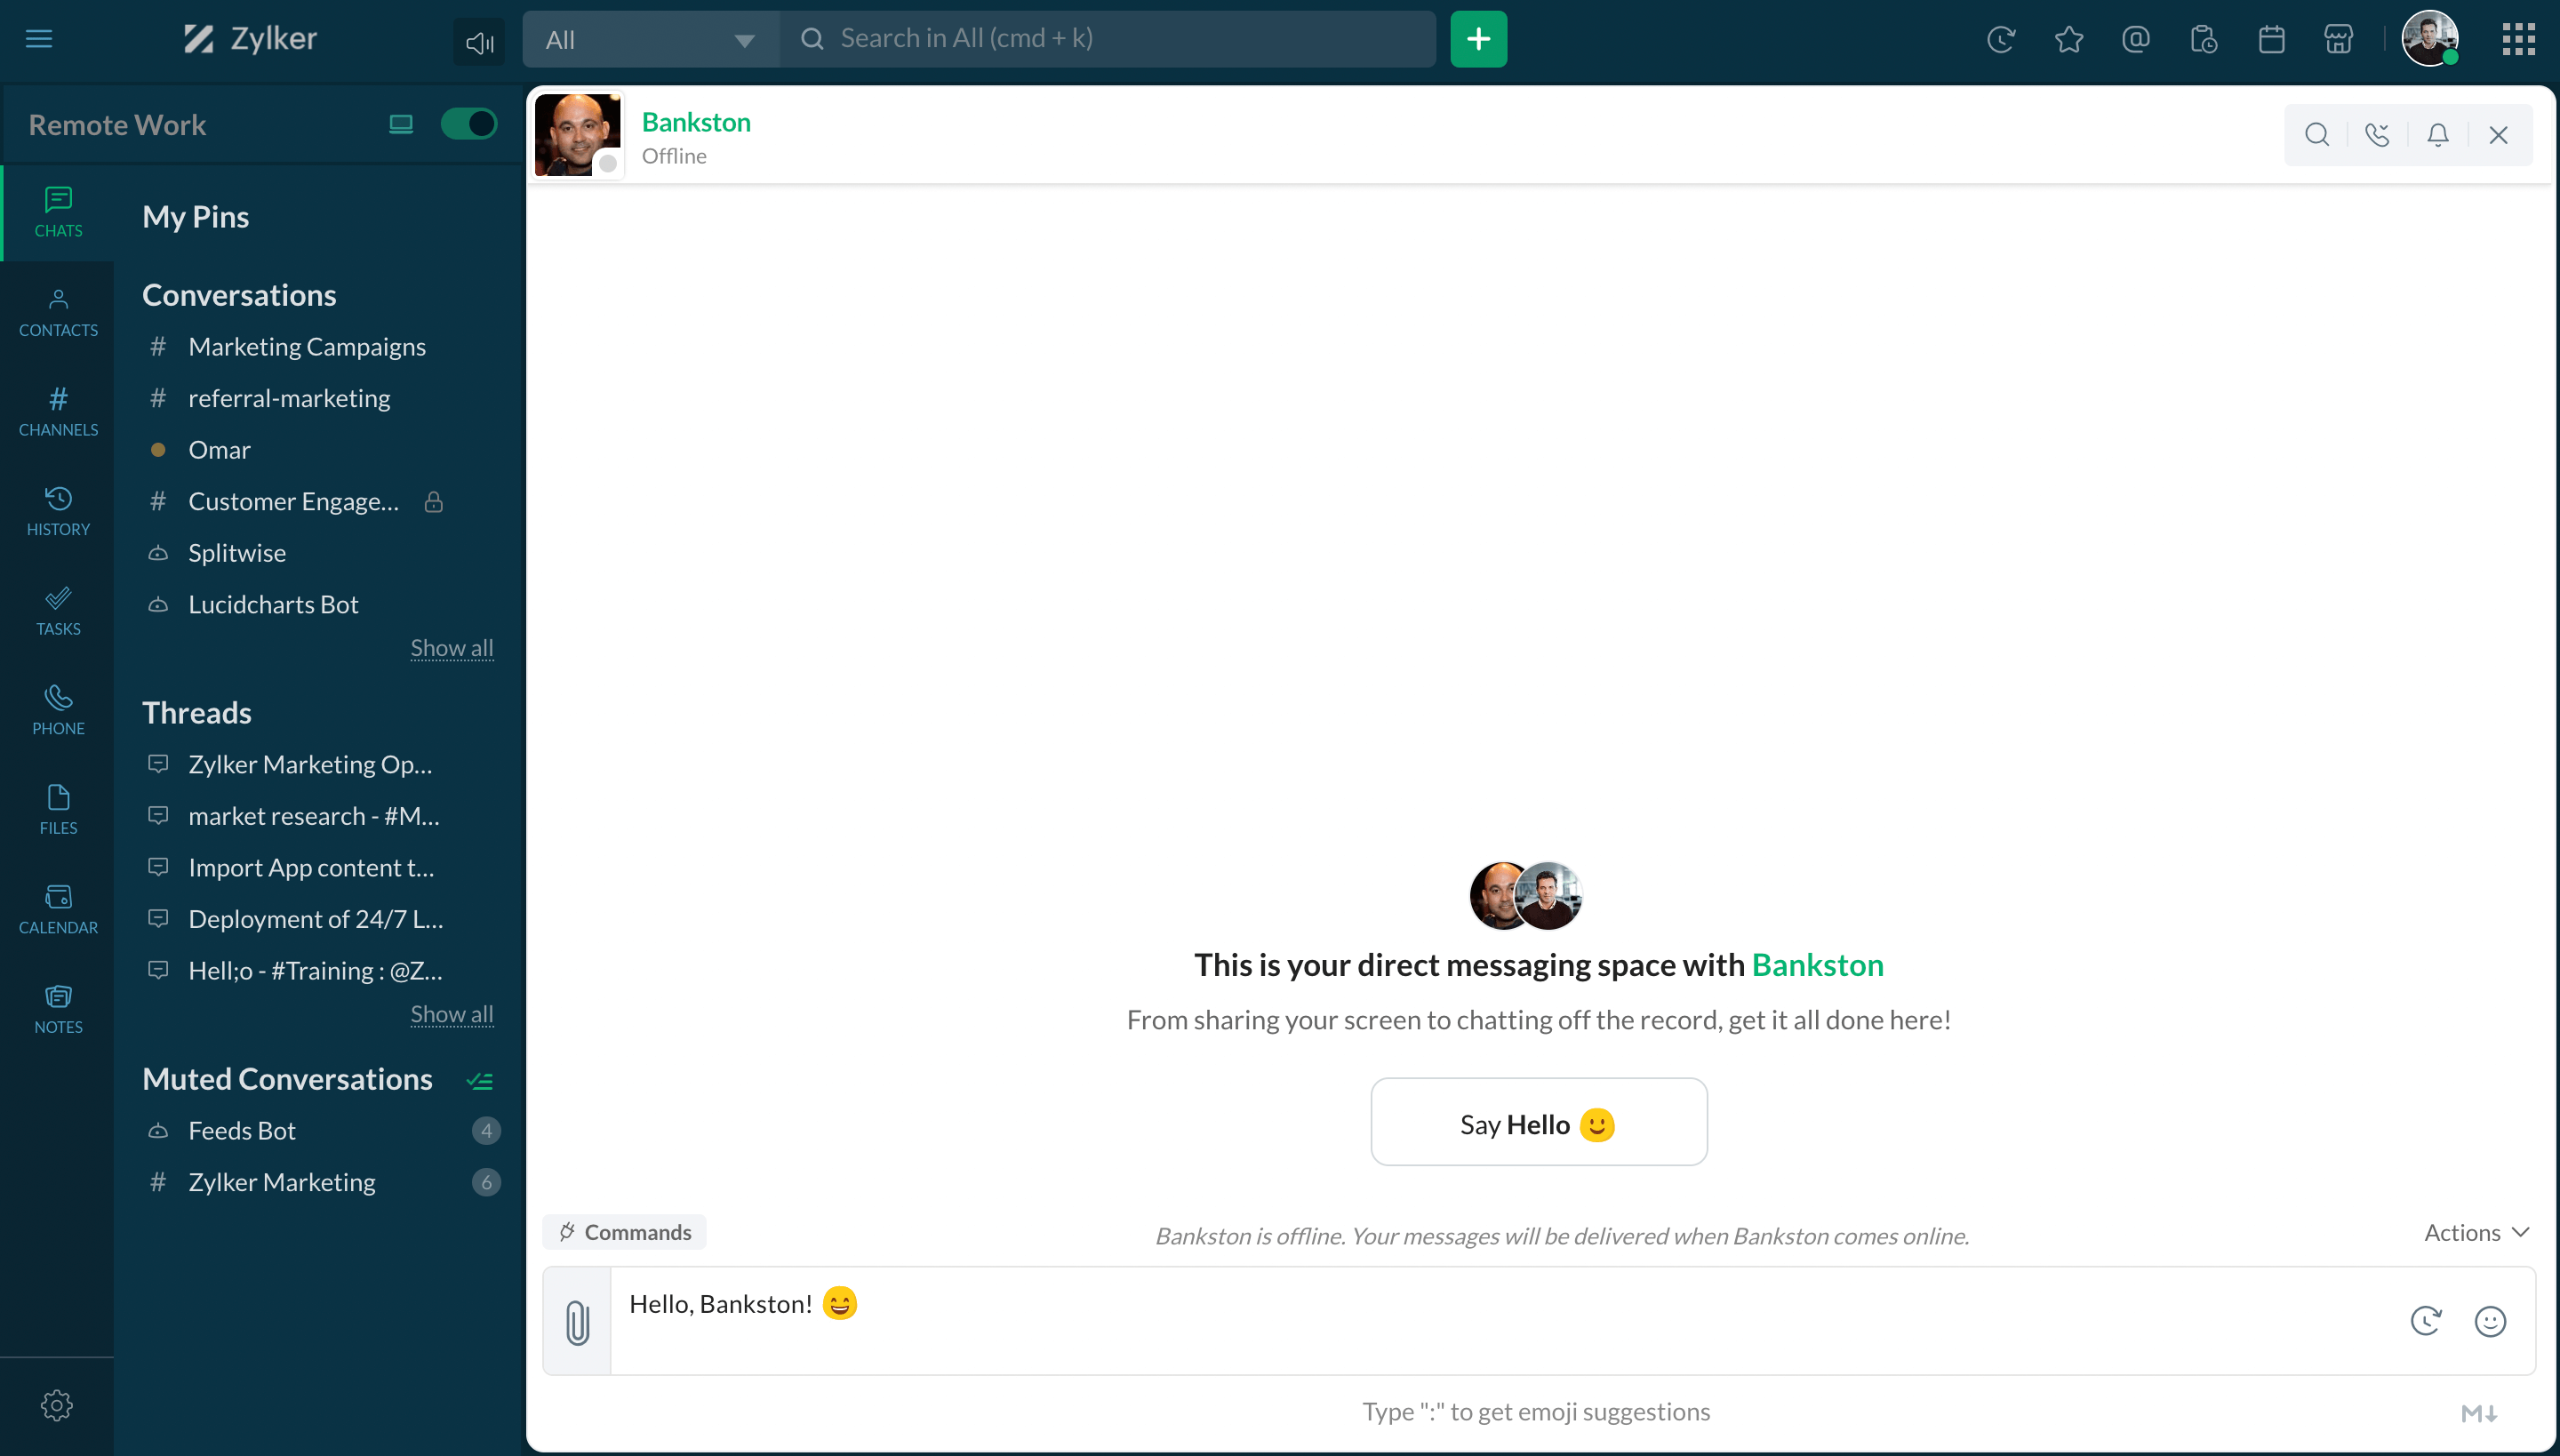
Send message
To send a direct message, click on the contact name and start typing in the text box.
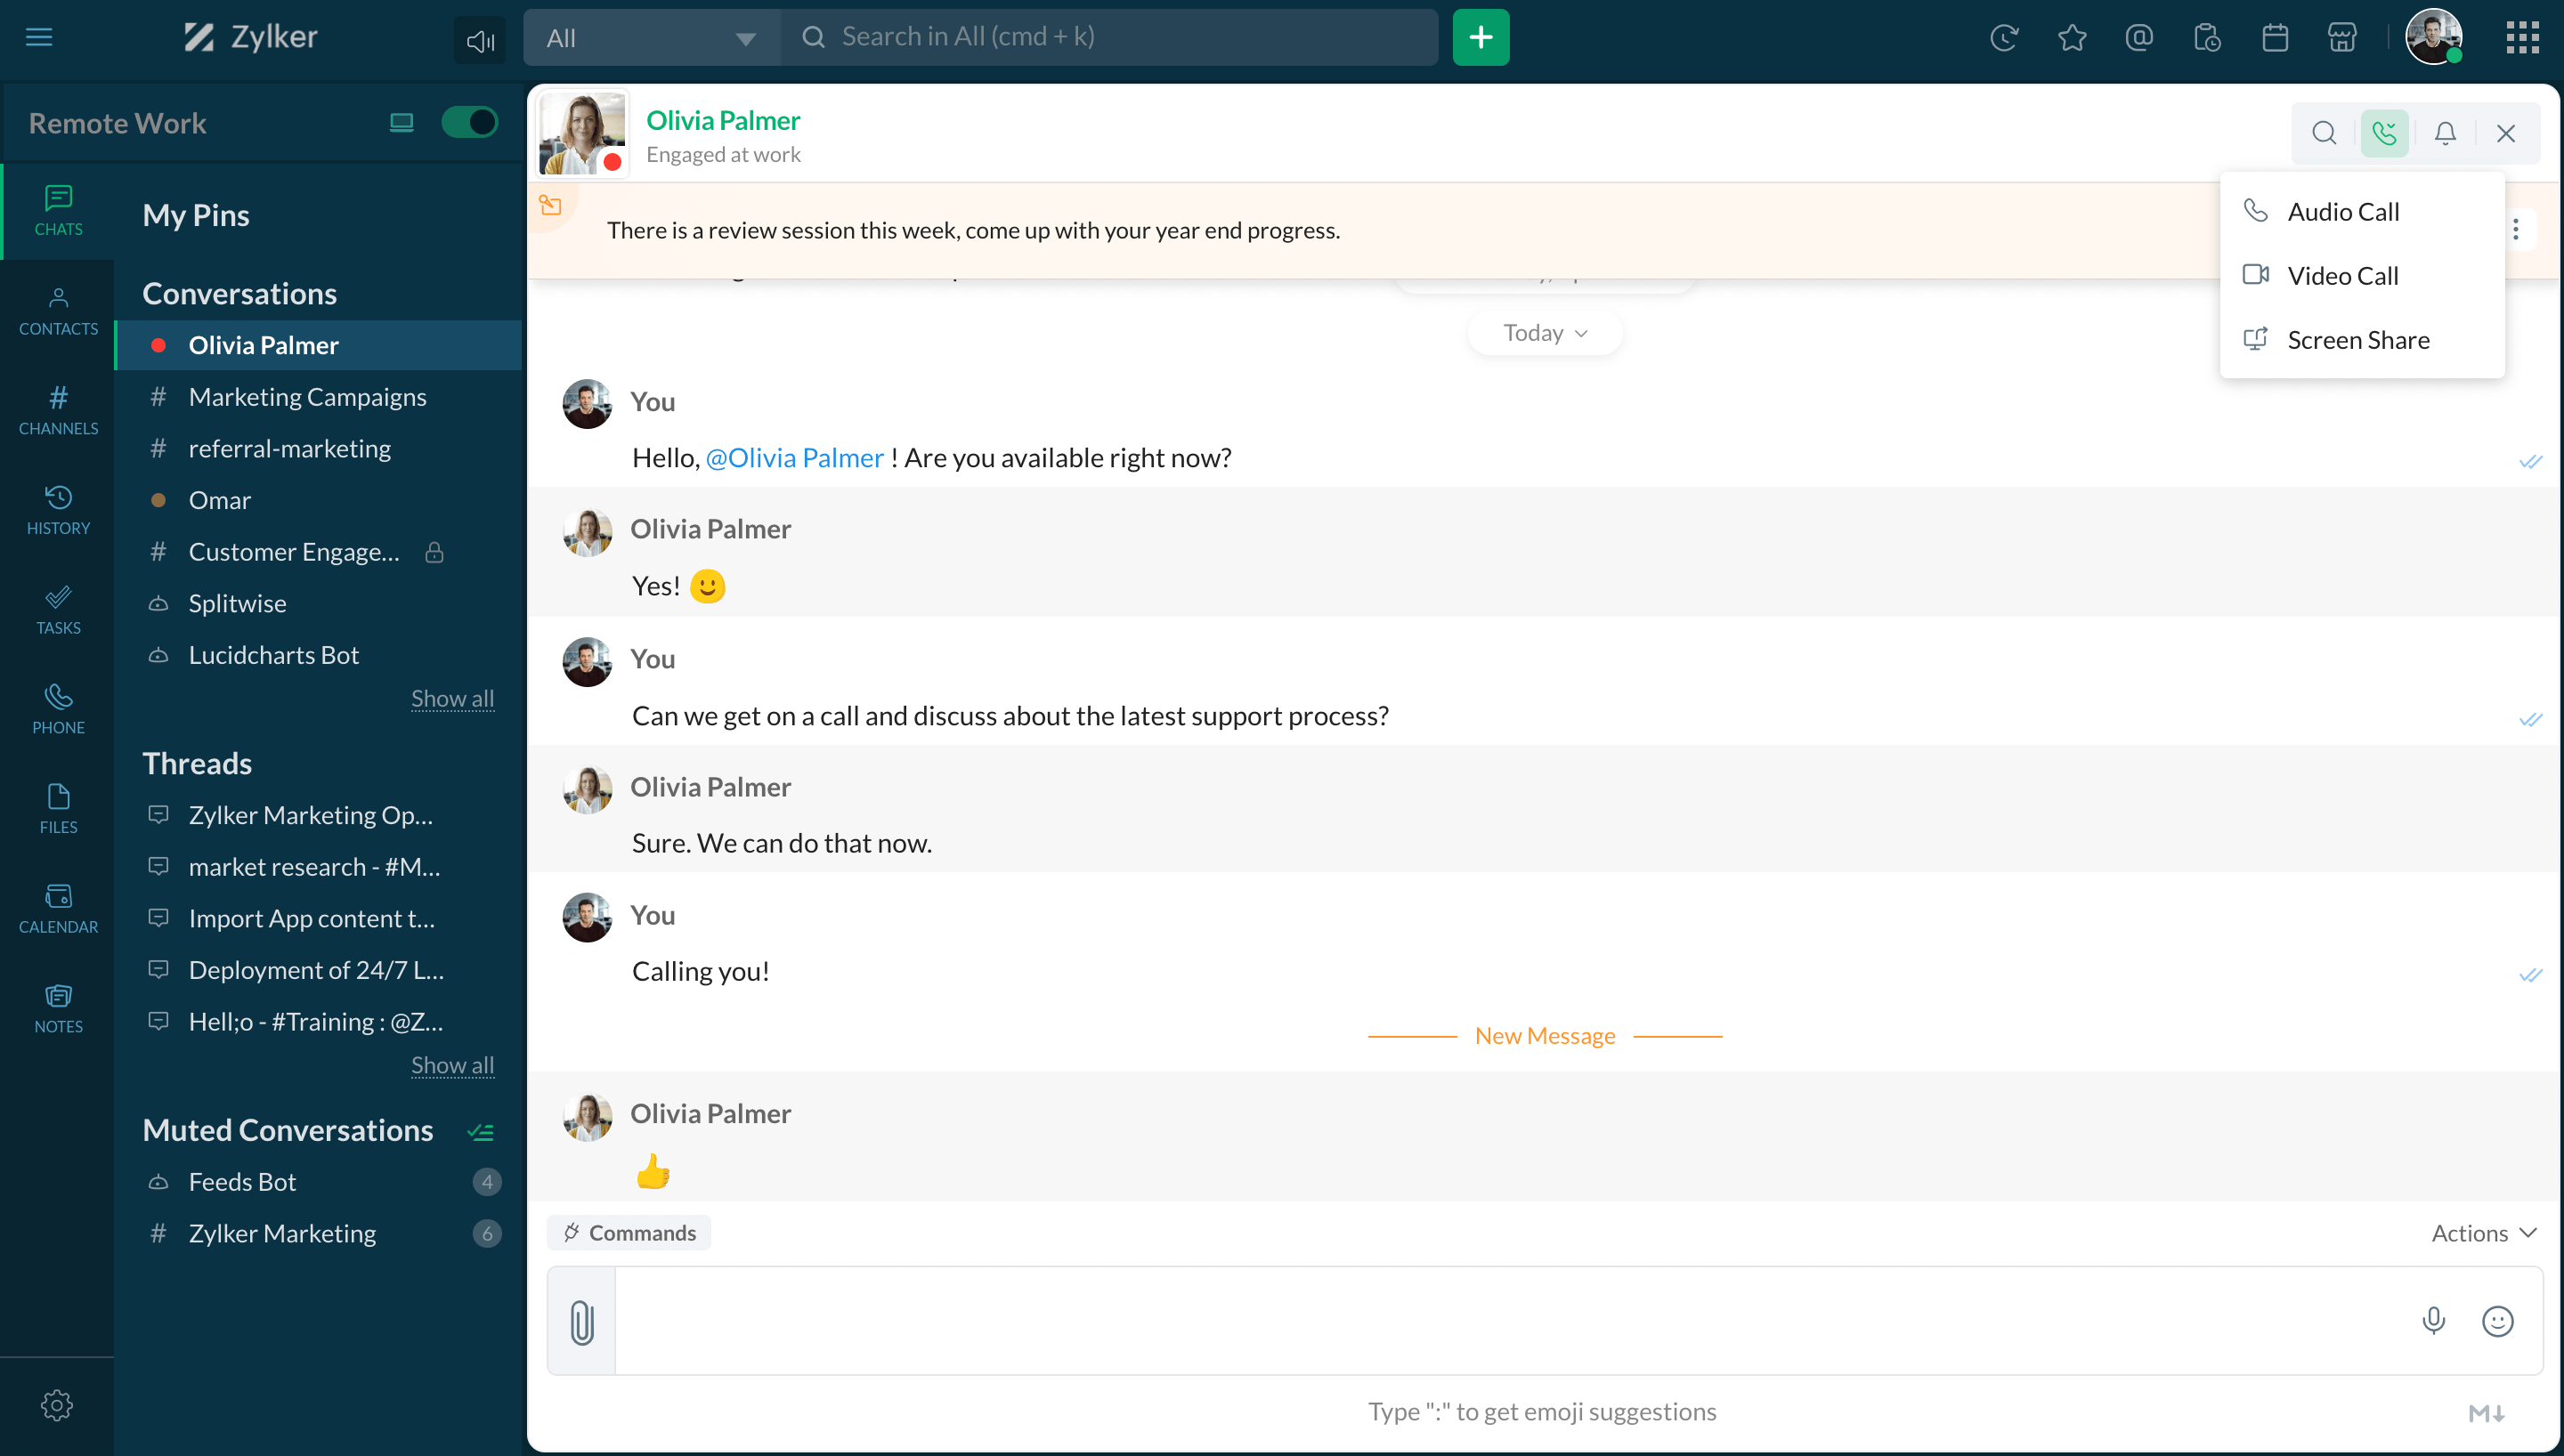
Audio and video calls
Hop on an audio or video call to connect with your teammates anywhere and from any device.
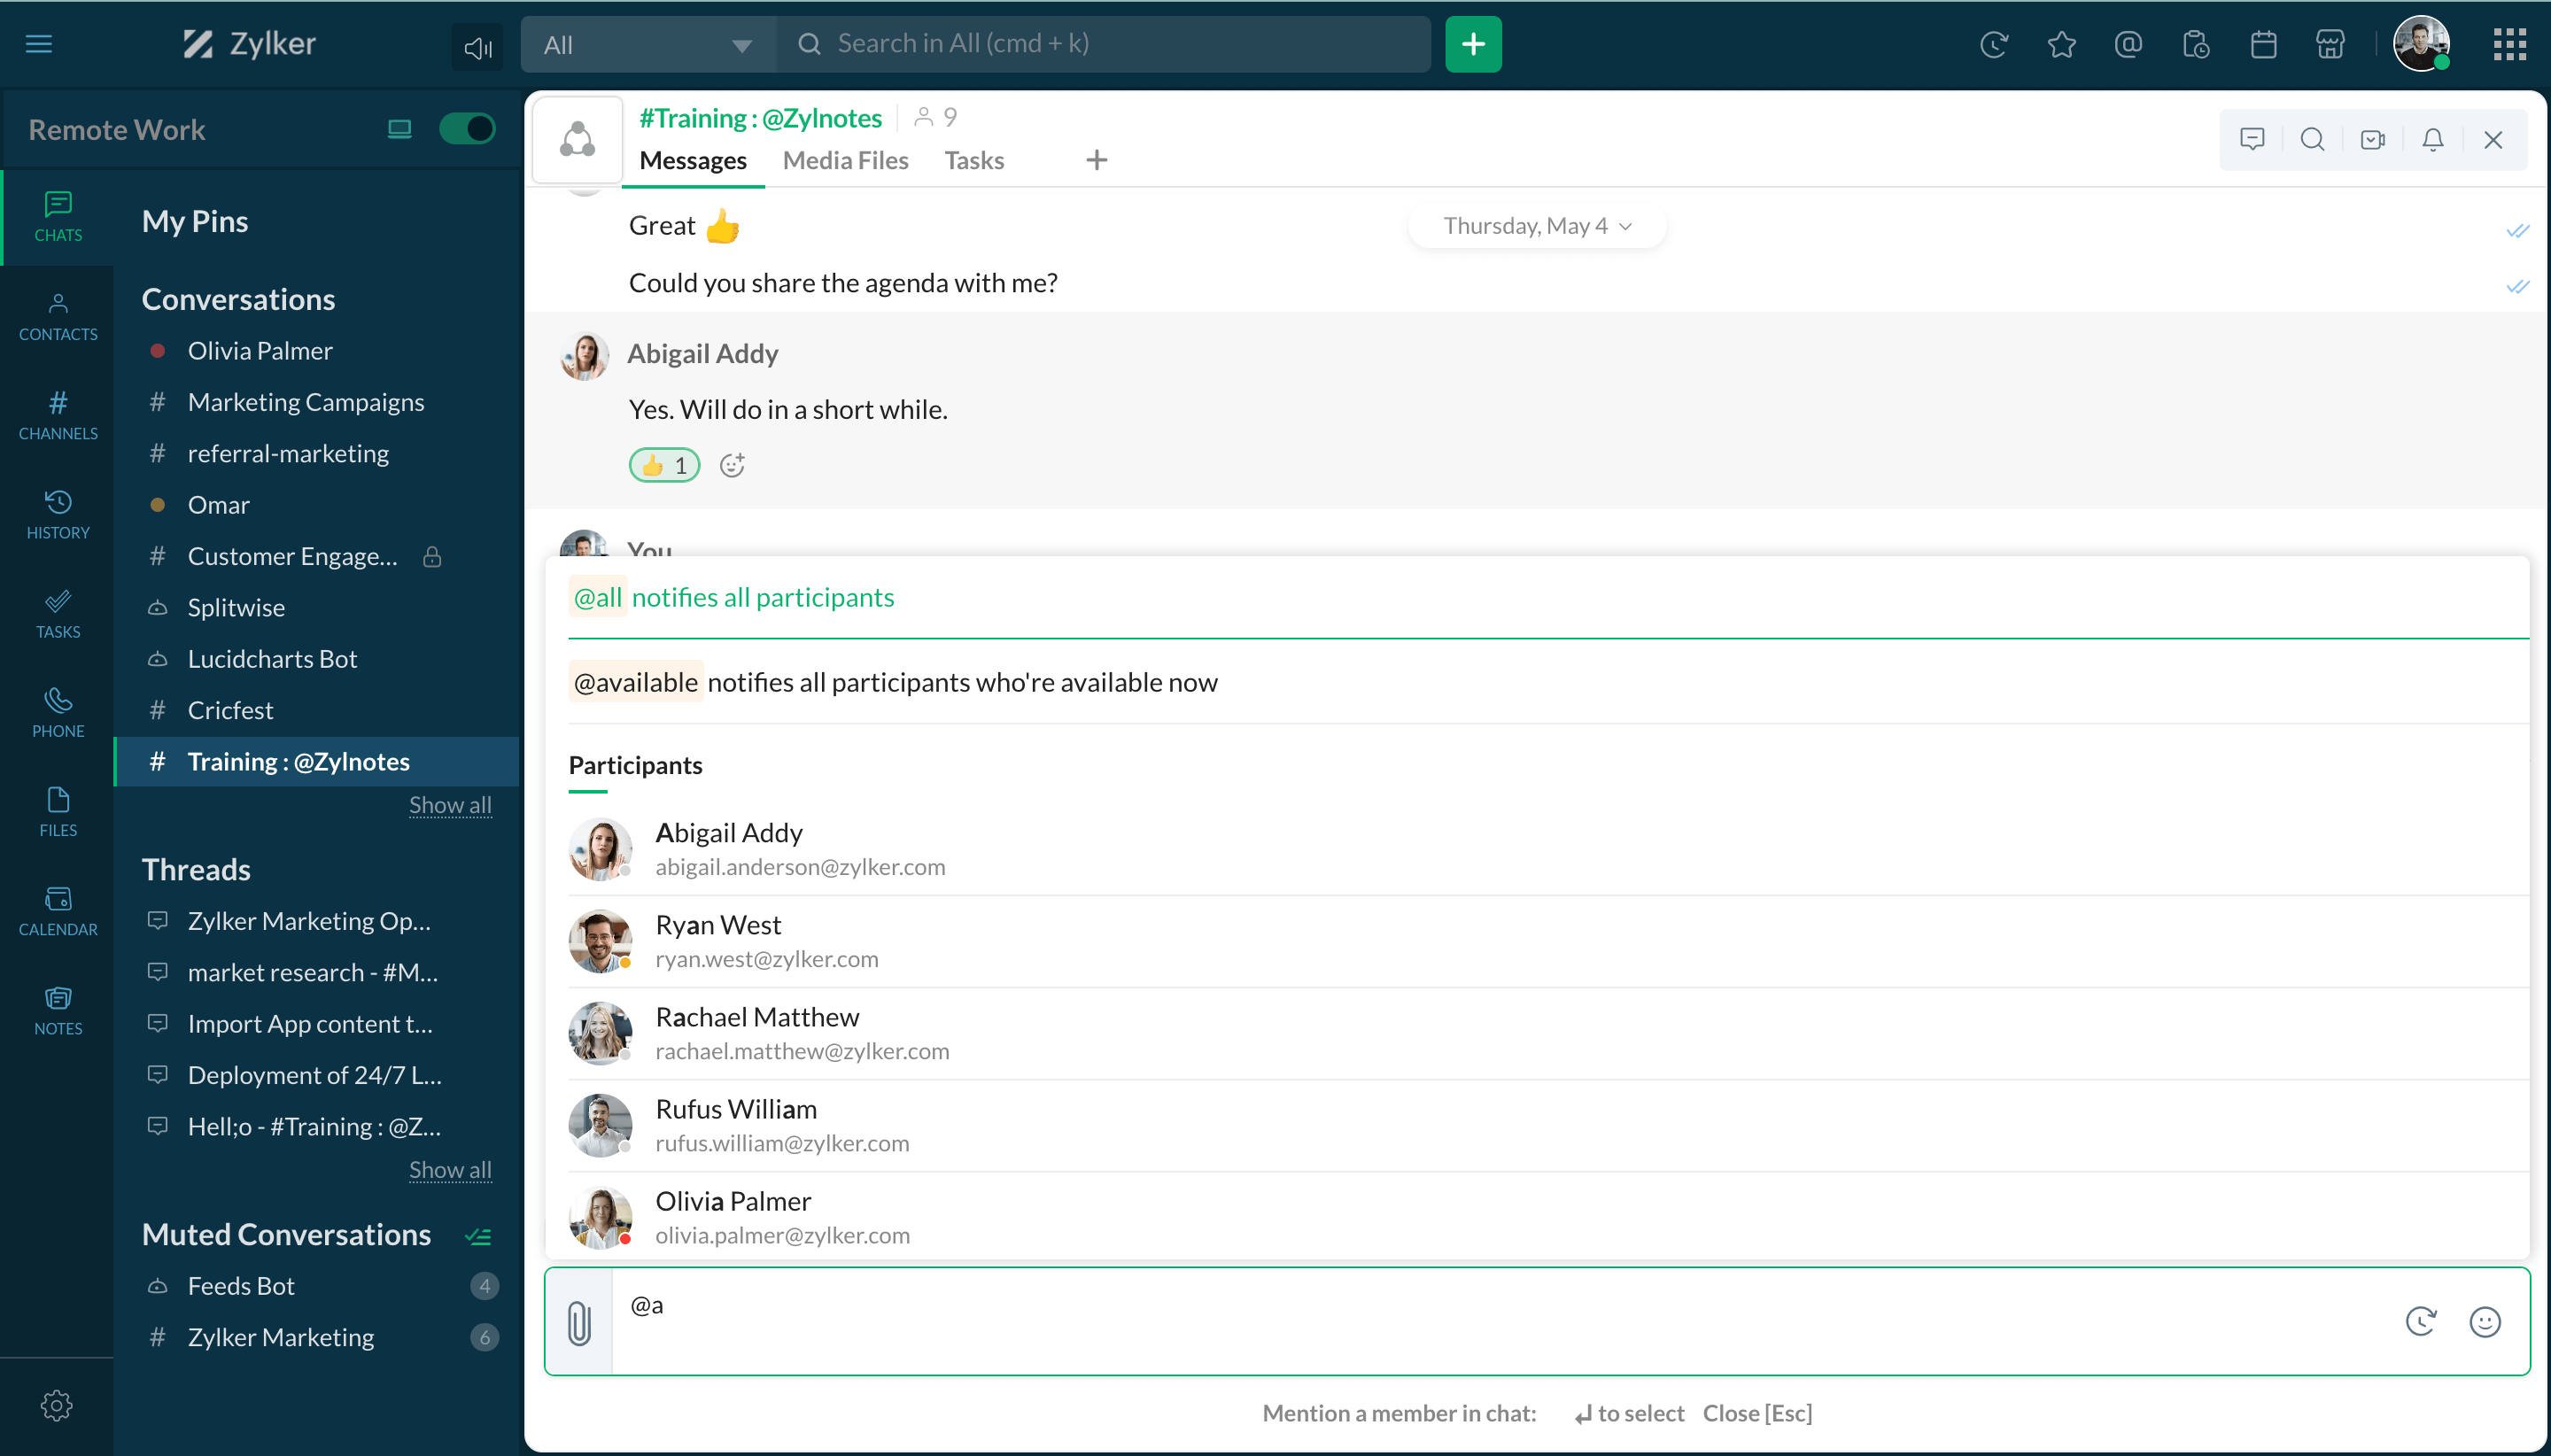
@mention users
@mention a user in chat to notify them. You can also use @all to address everyone in the channel or @available to get the attention of all channel participants who are currently available in Cliq.
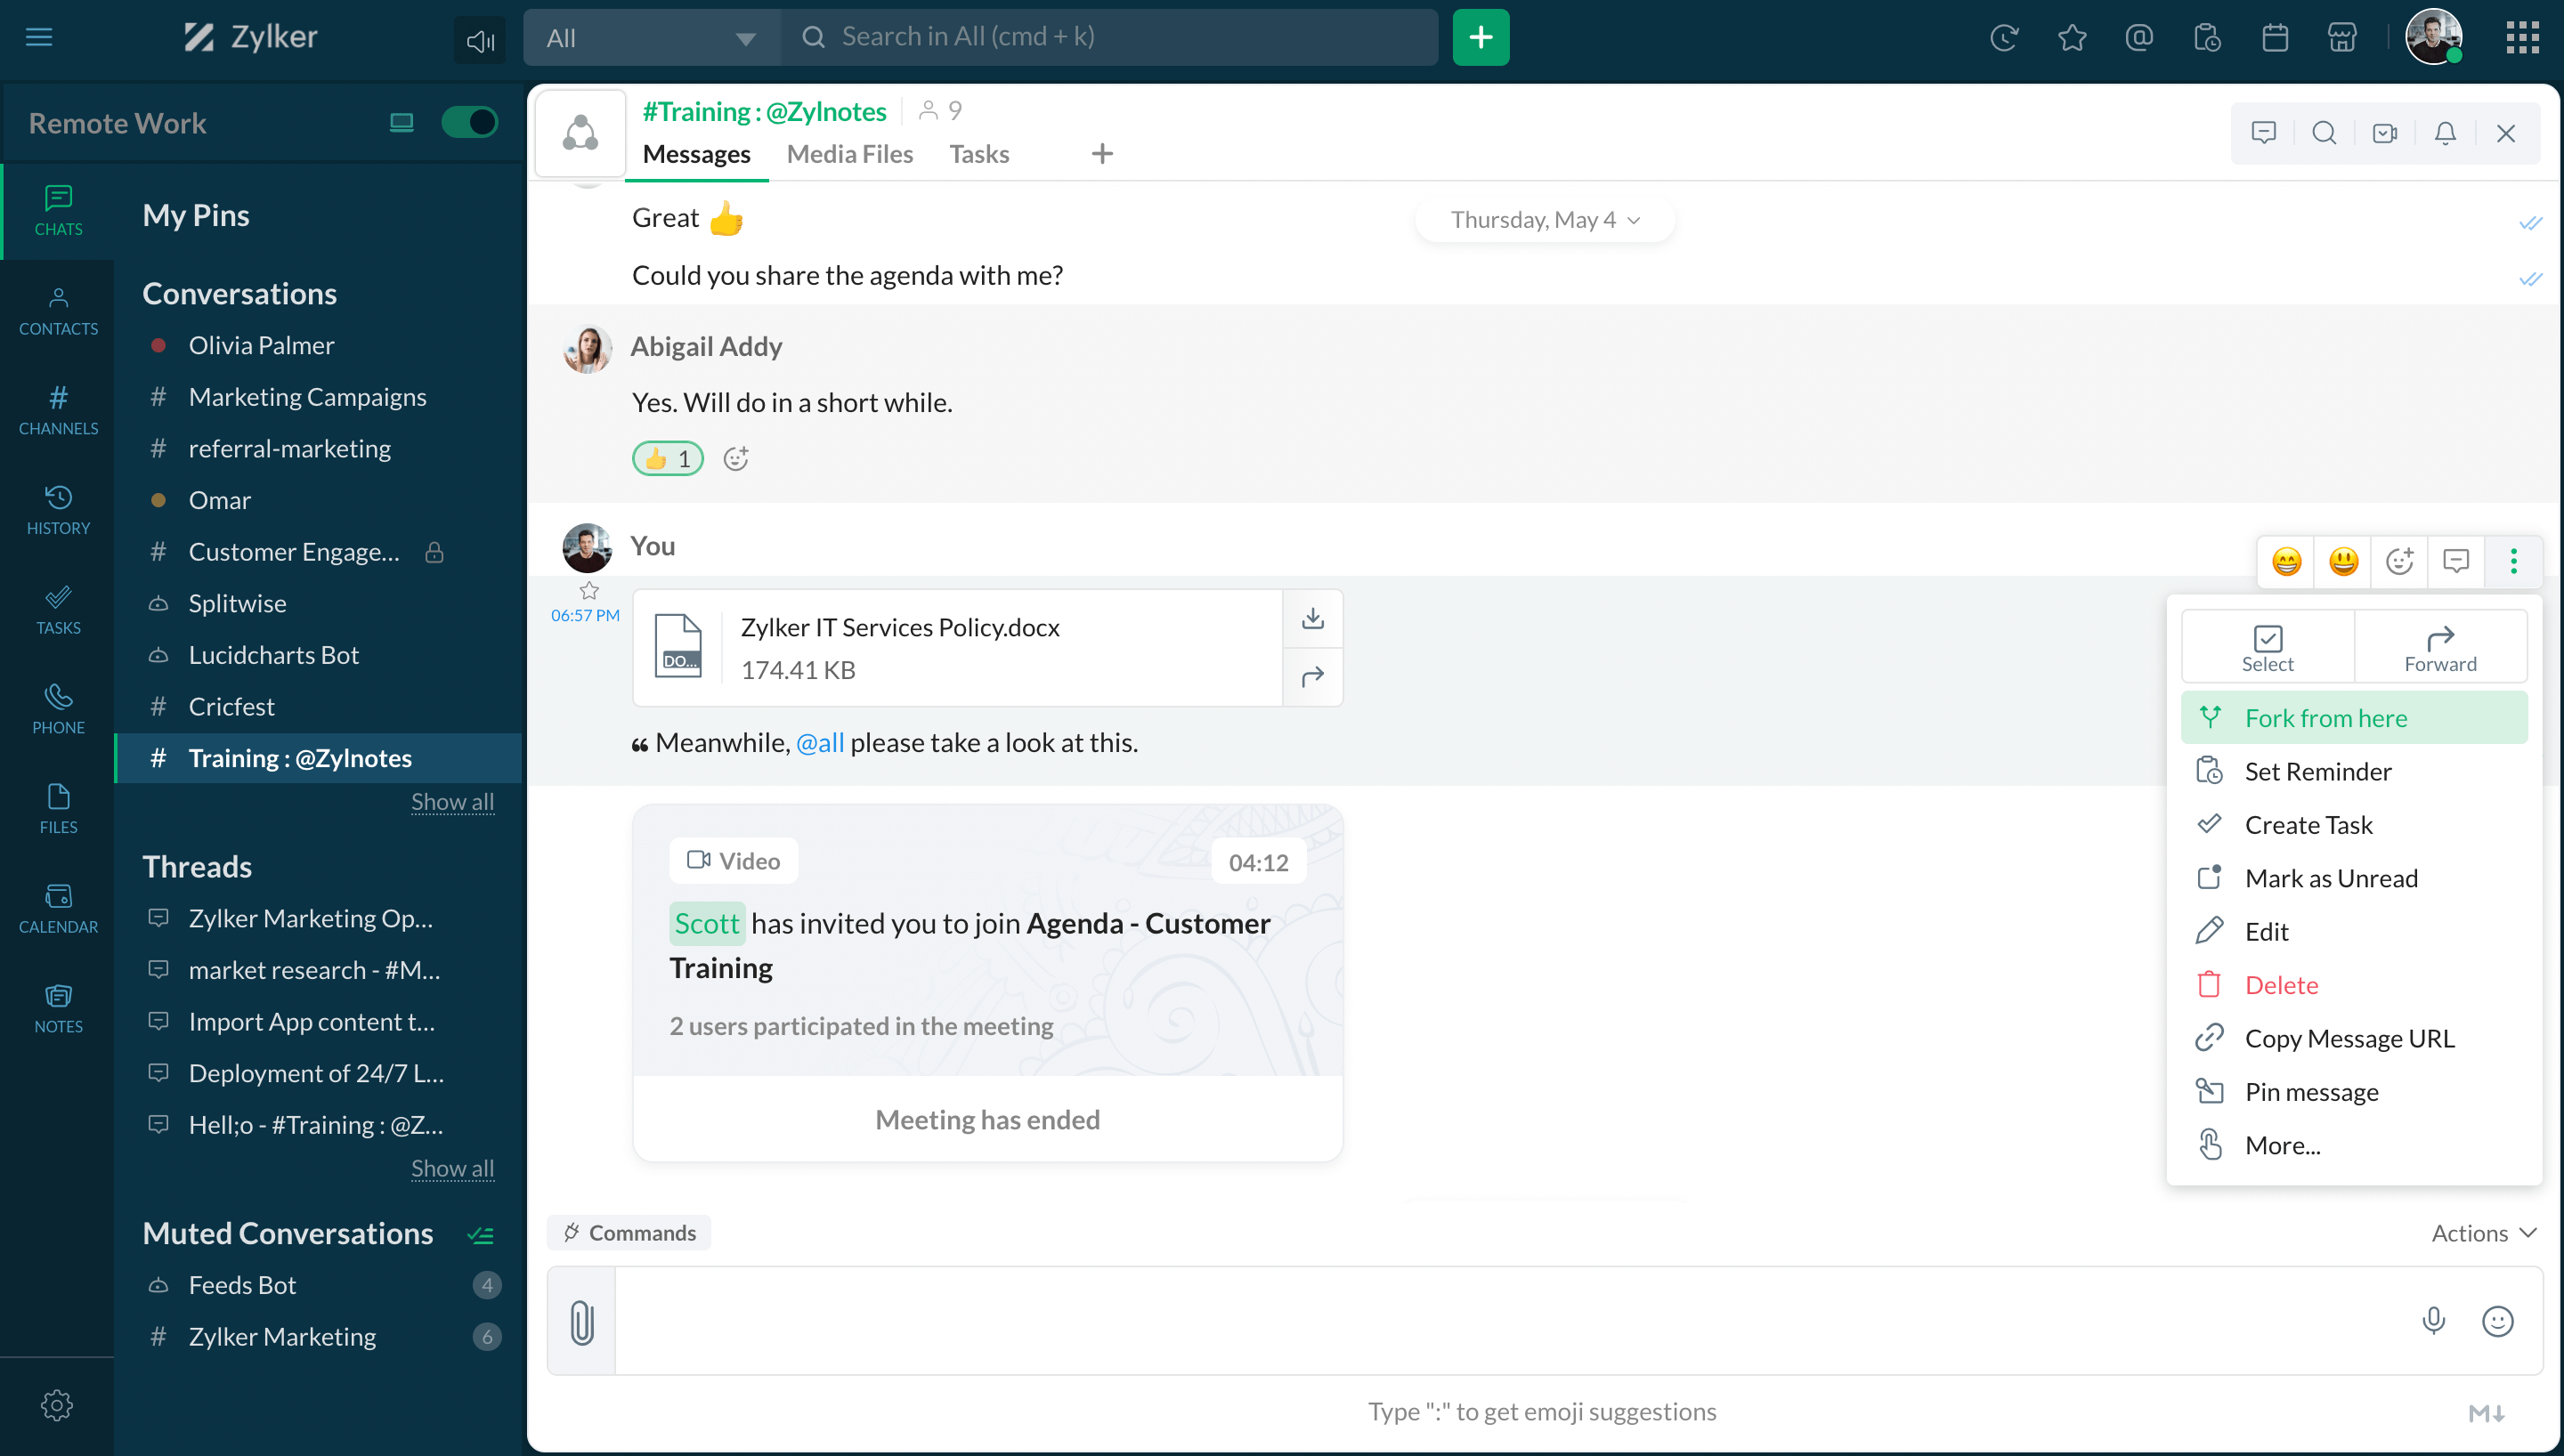
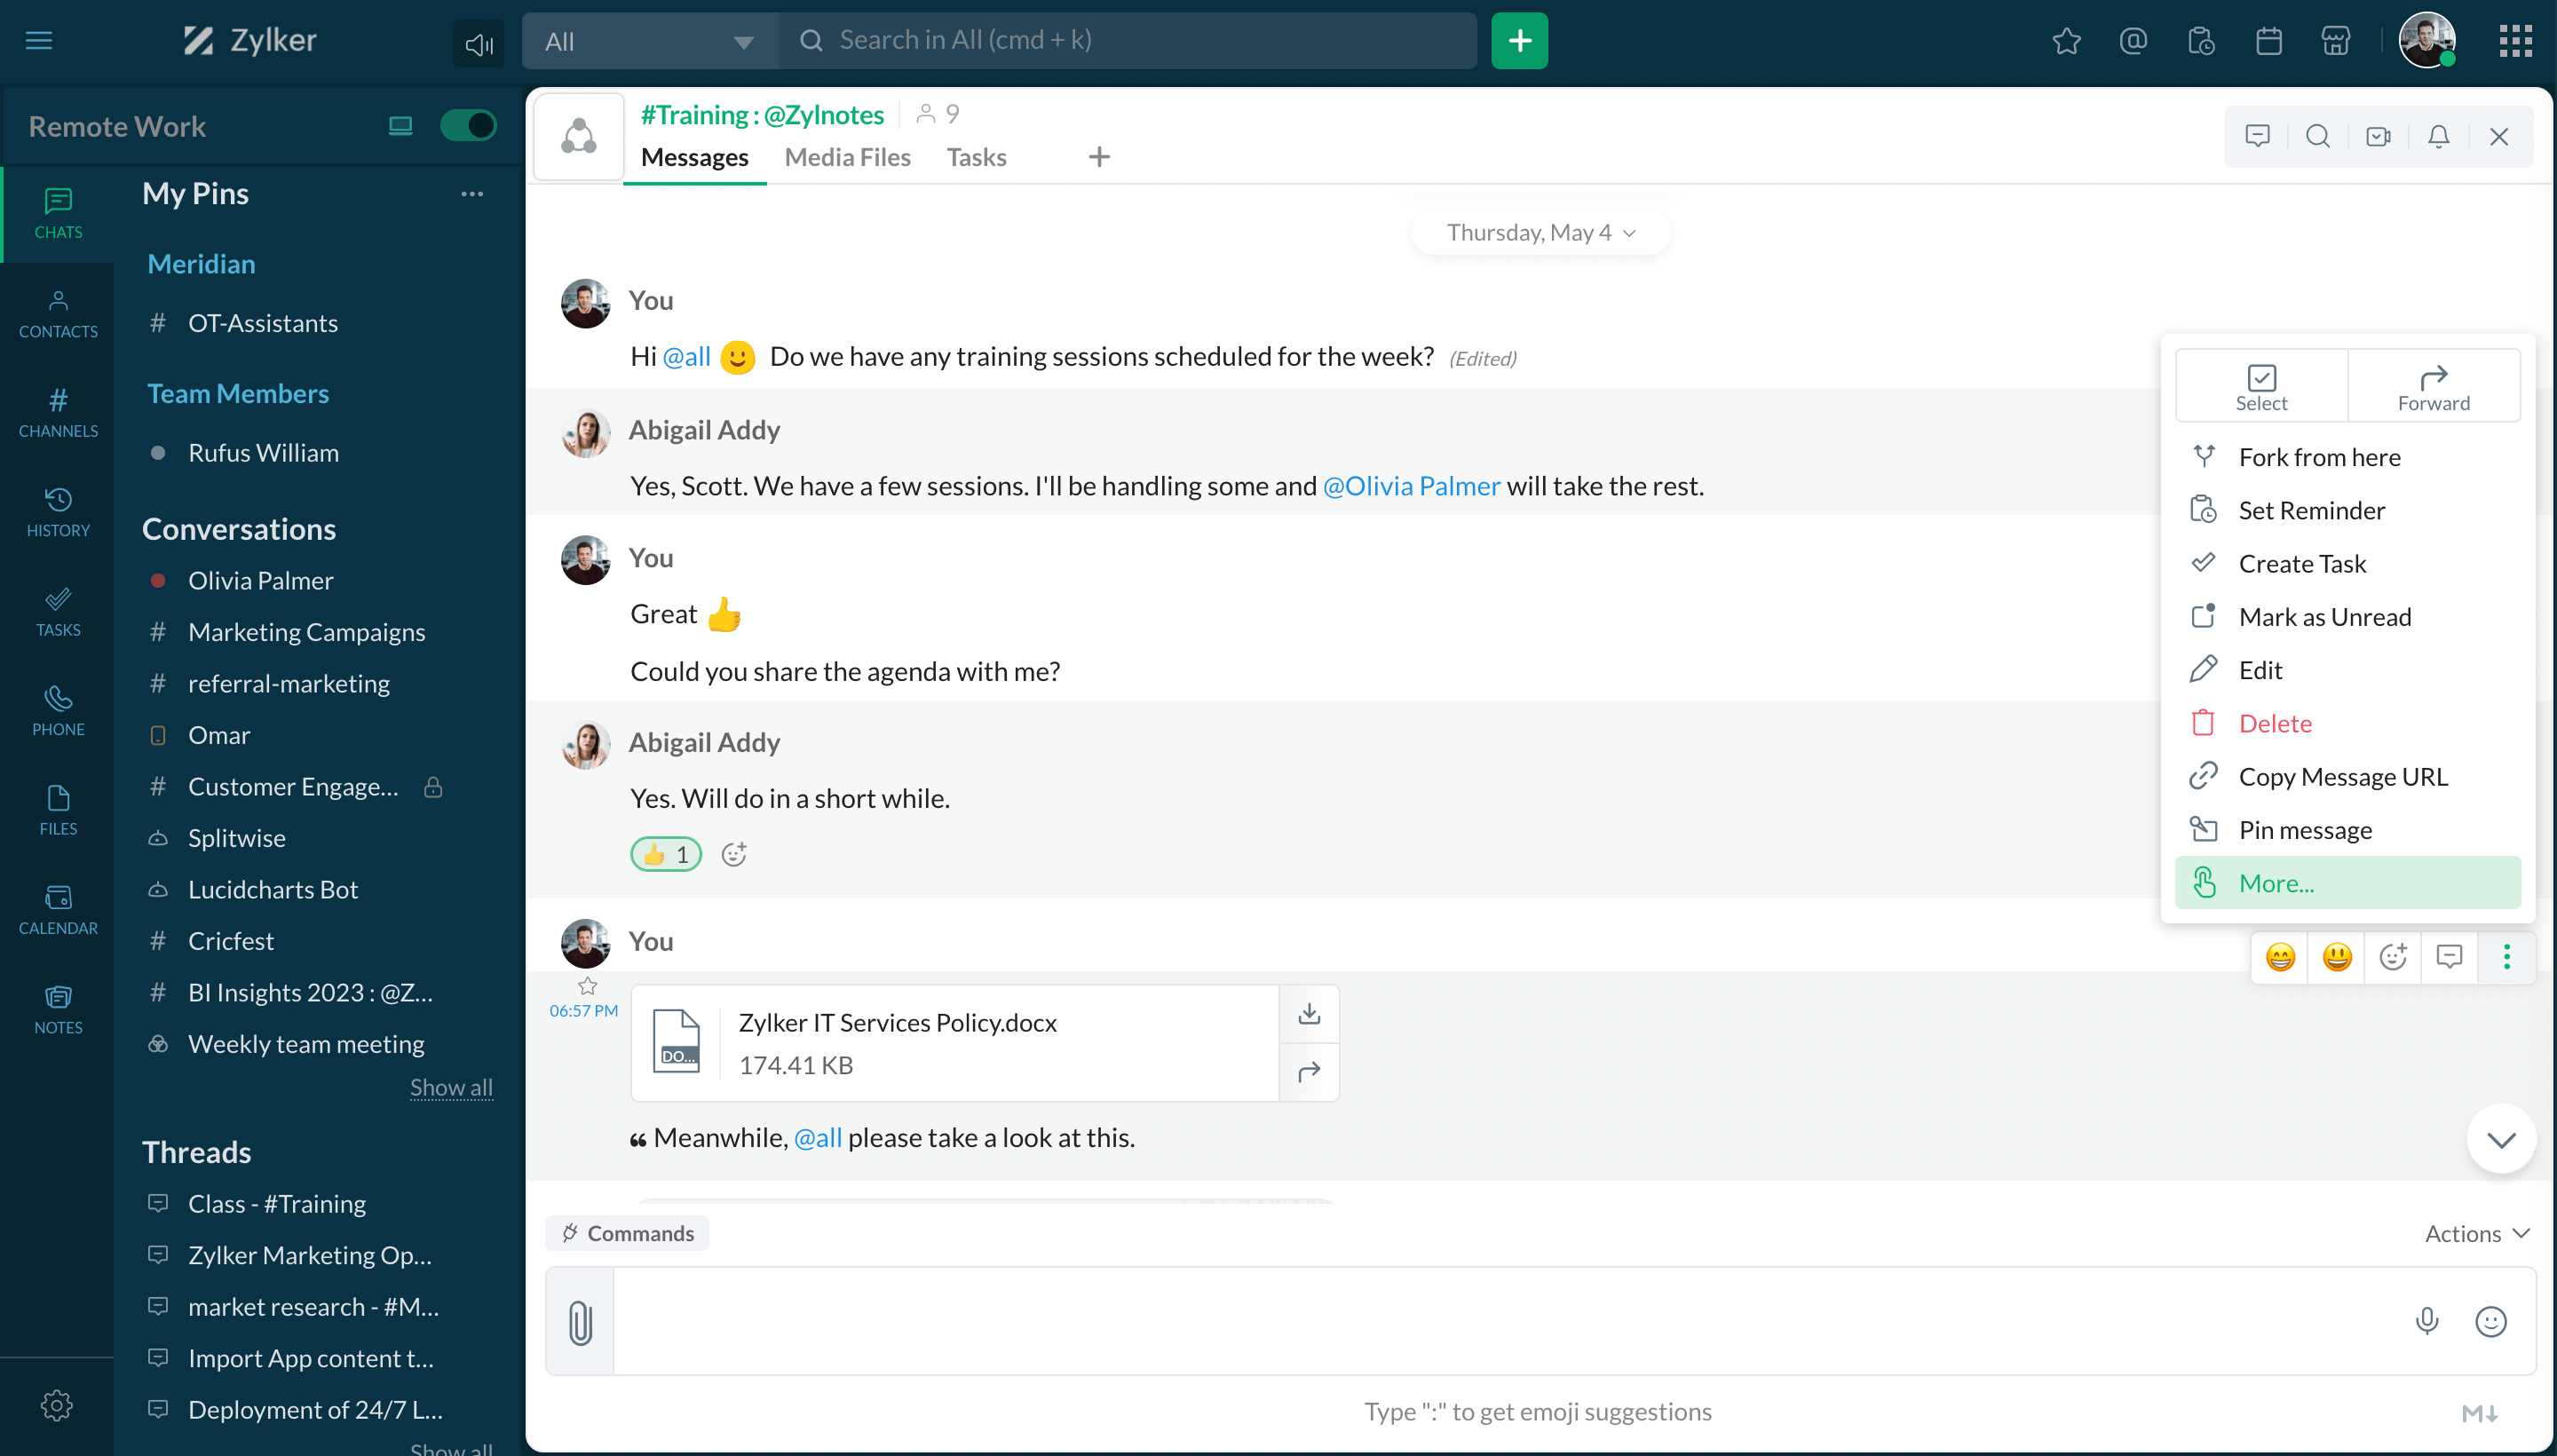
Fork conversation
Create a group chat and continue chatting with context by forking conversations. You can do this by hovering on any message in a conversation and clicking the Fork from here option under Message Actions.
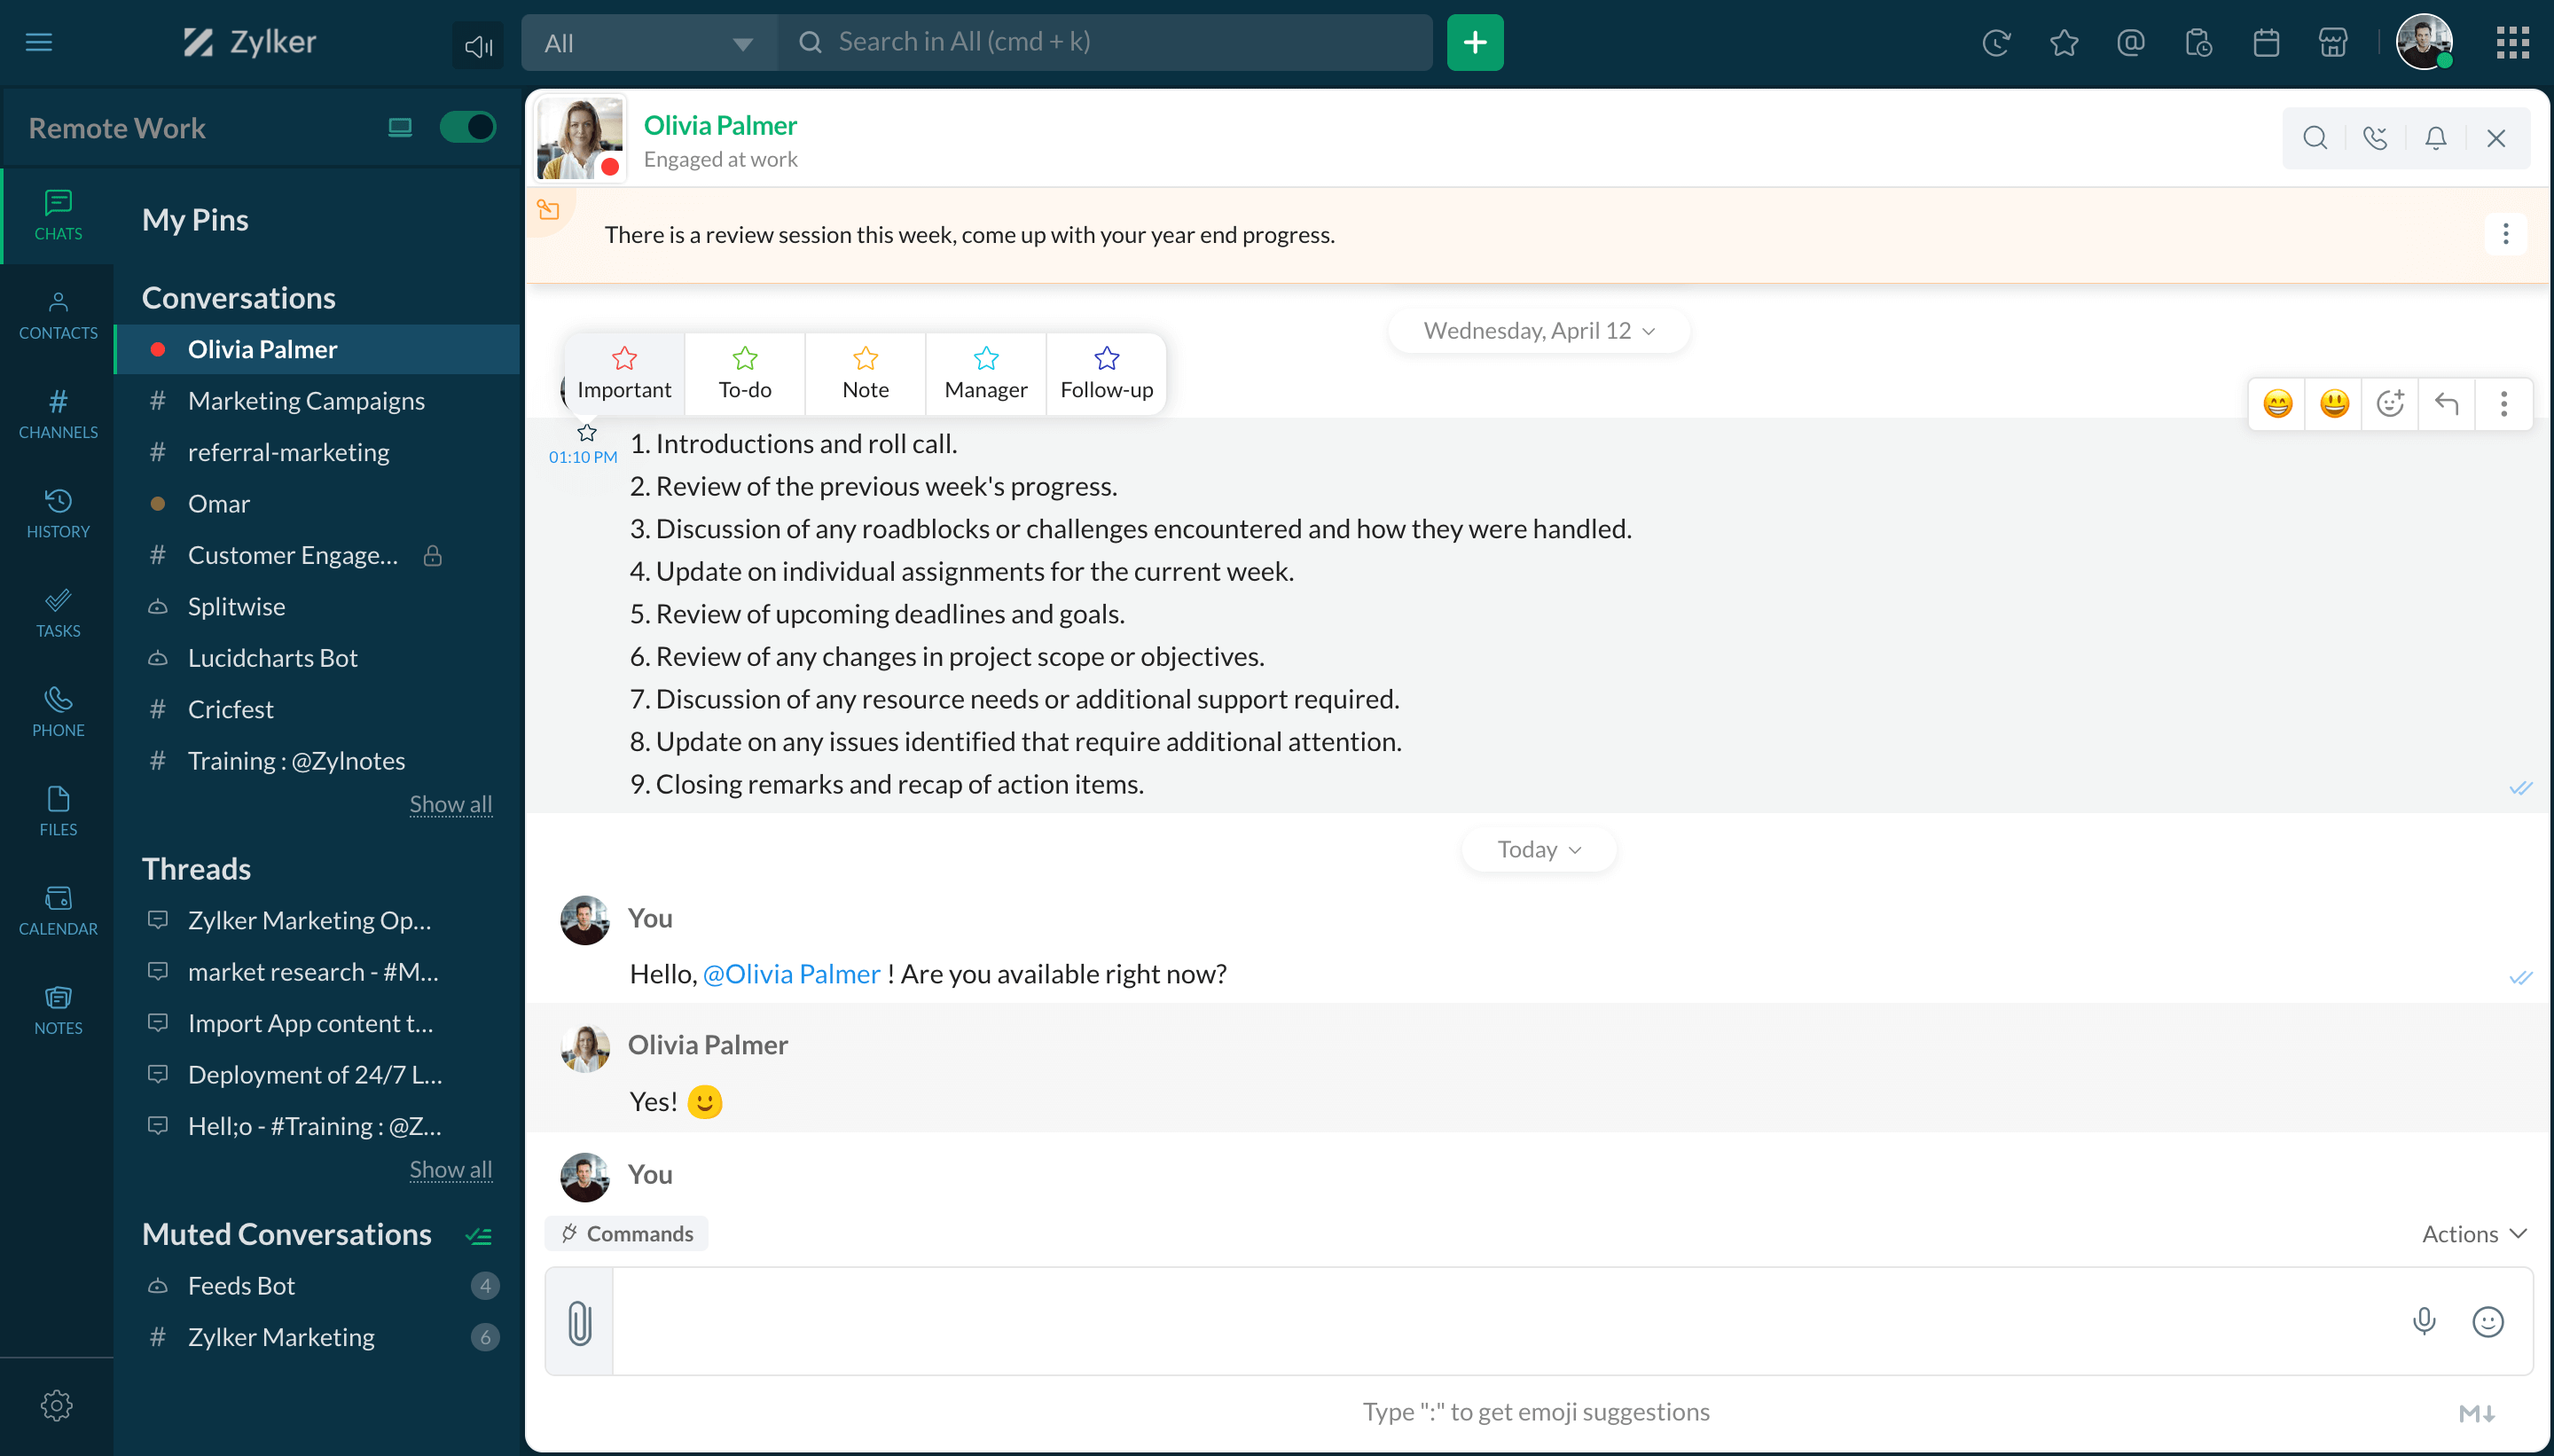
Star messages
Bookmark important messages in a conversation by starring them by category. Click on the star icon in the header to view the list of all starred messages.
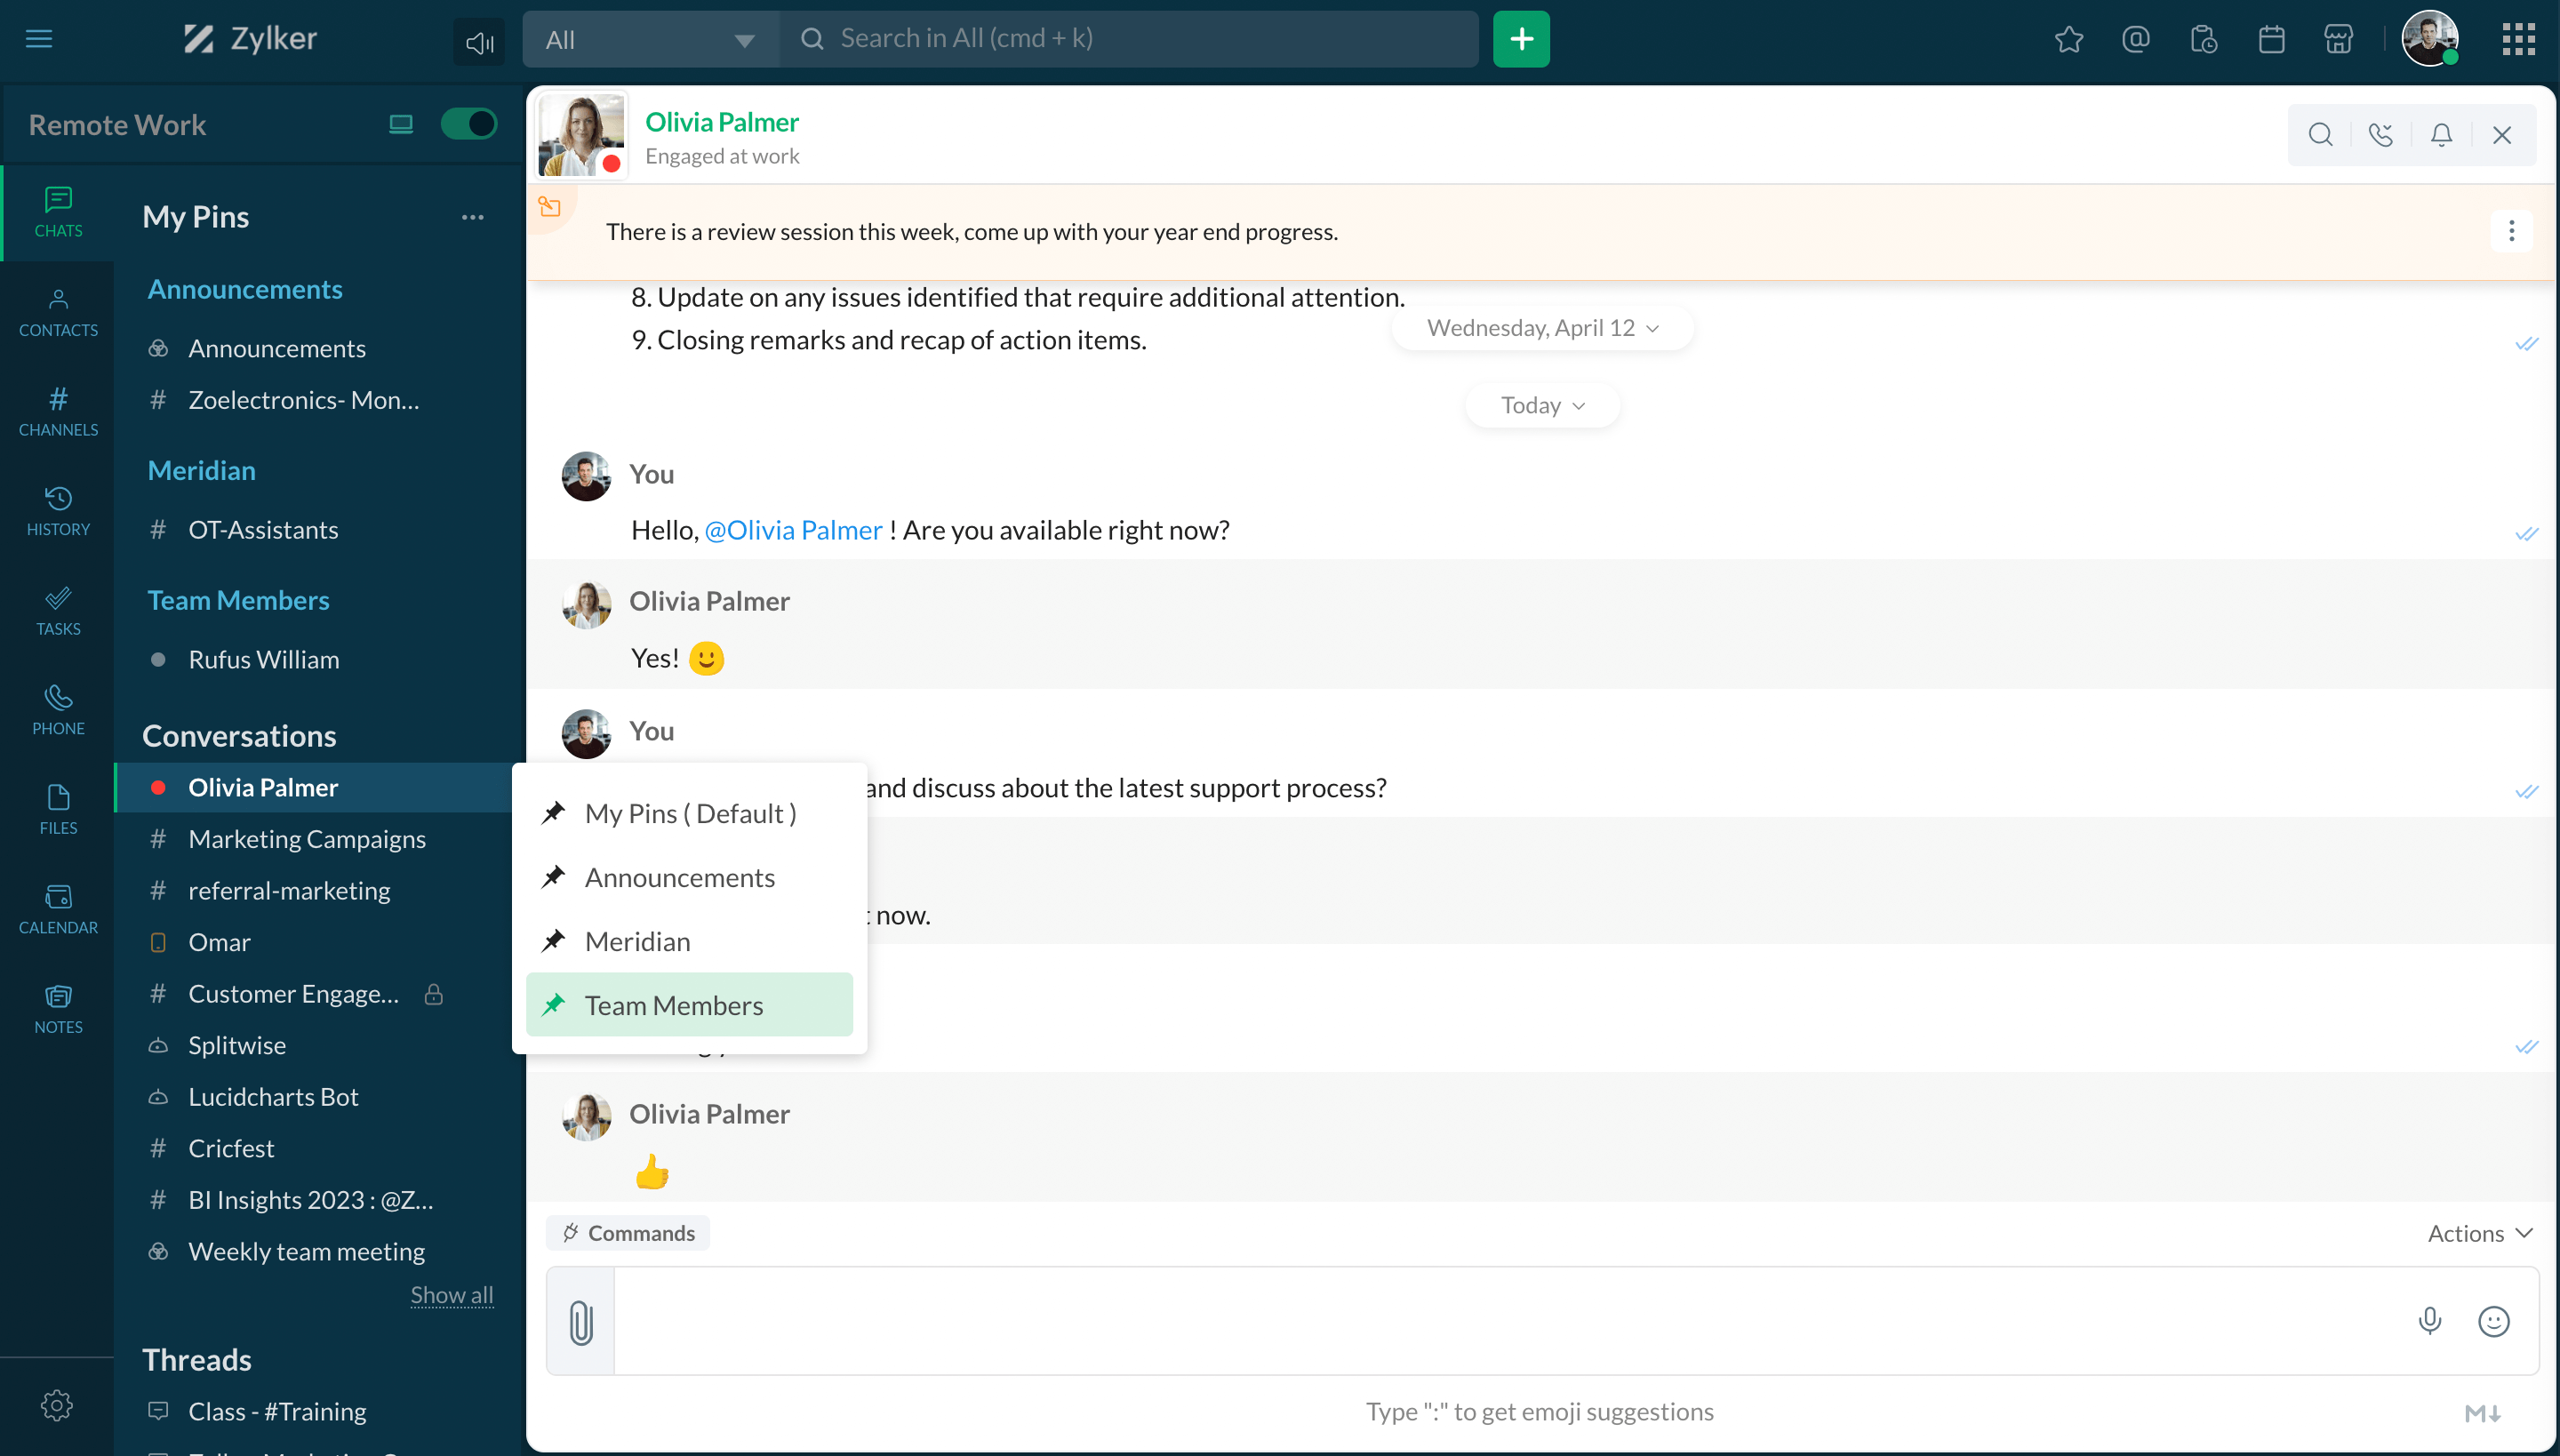
Pin chats
Pin important chats for easy access. Hover over the chat name and click on the pin icon. You can also categorize your pinned chats into different folders.
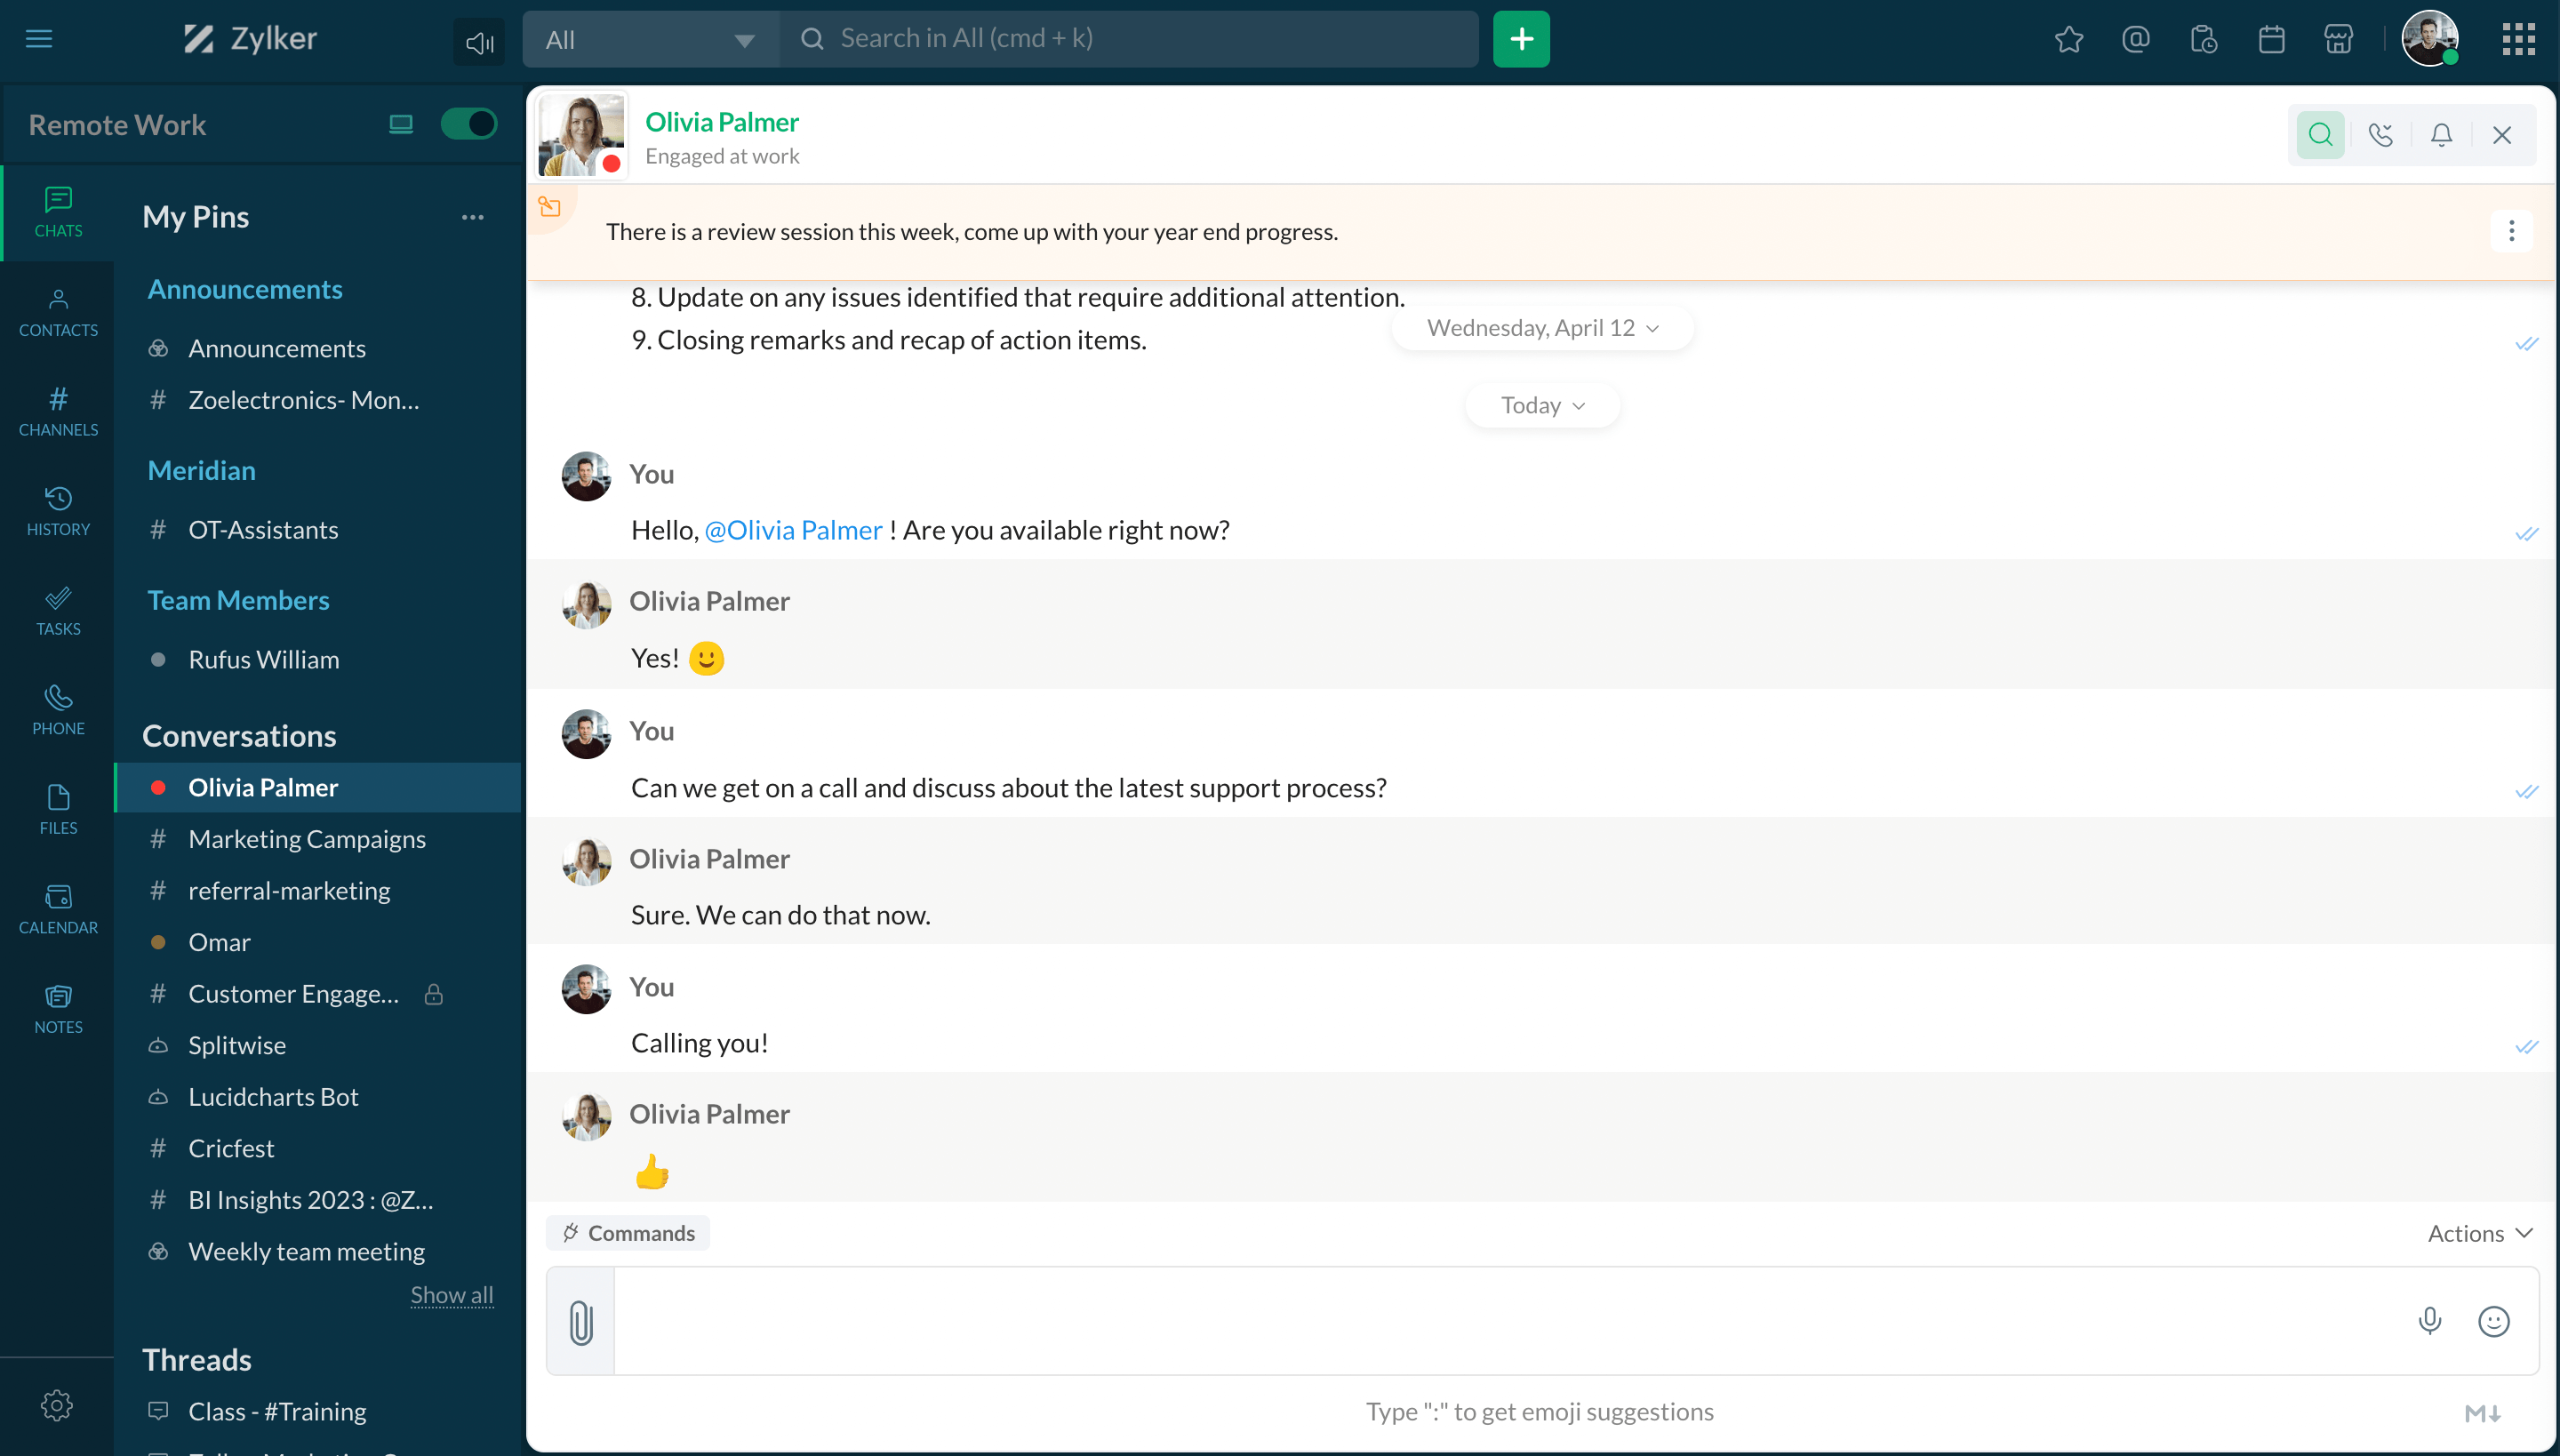
Search in chat
To search inside specific conversations, click on the search icon inside the chat or channel, and enter the keyword for your search.
Quick actions
Use the quick action menu to perform instant actions. Create a channel, set a reminder, host meetings, and more with quick actions in Cliq.
Summarize conversations
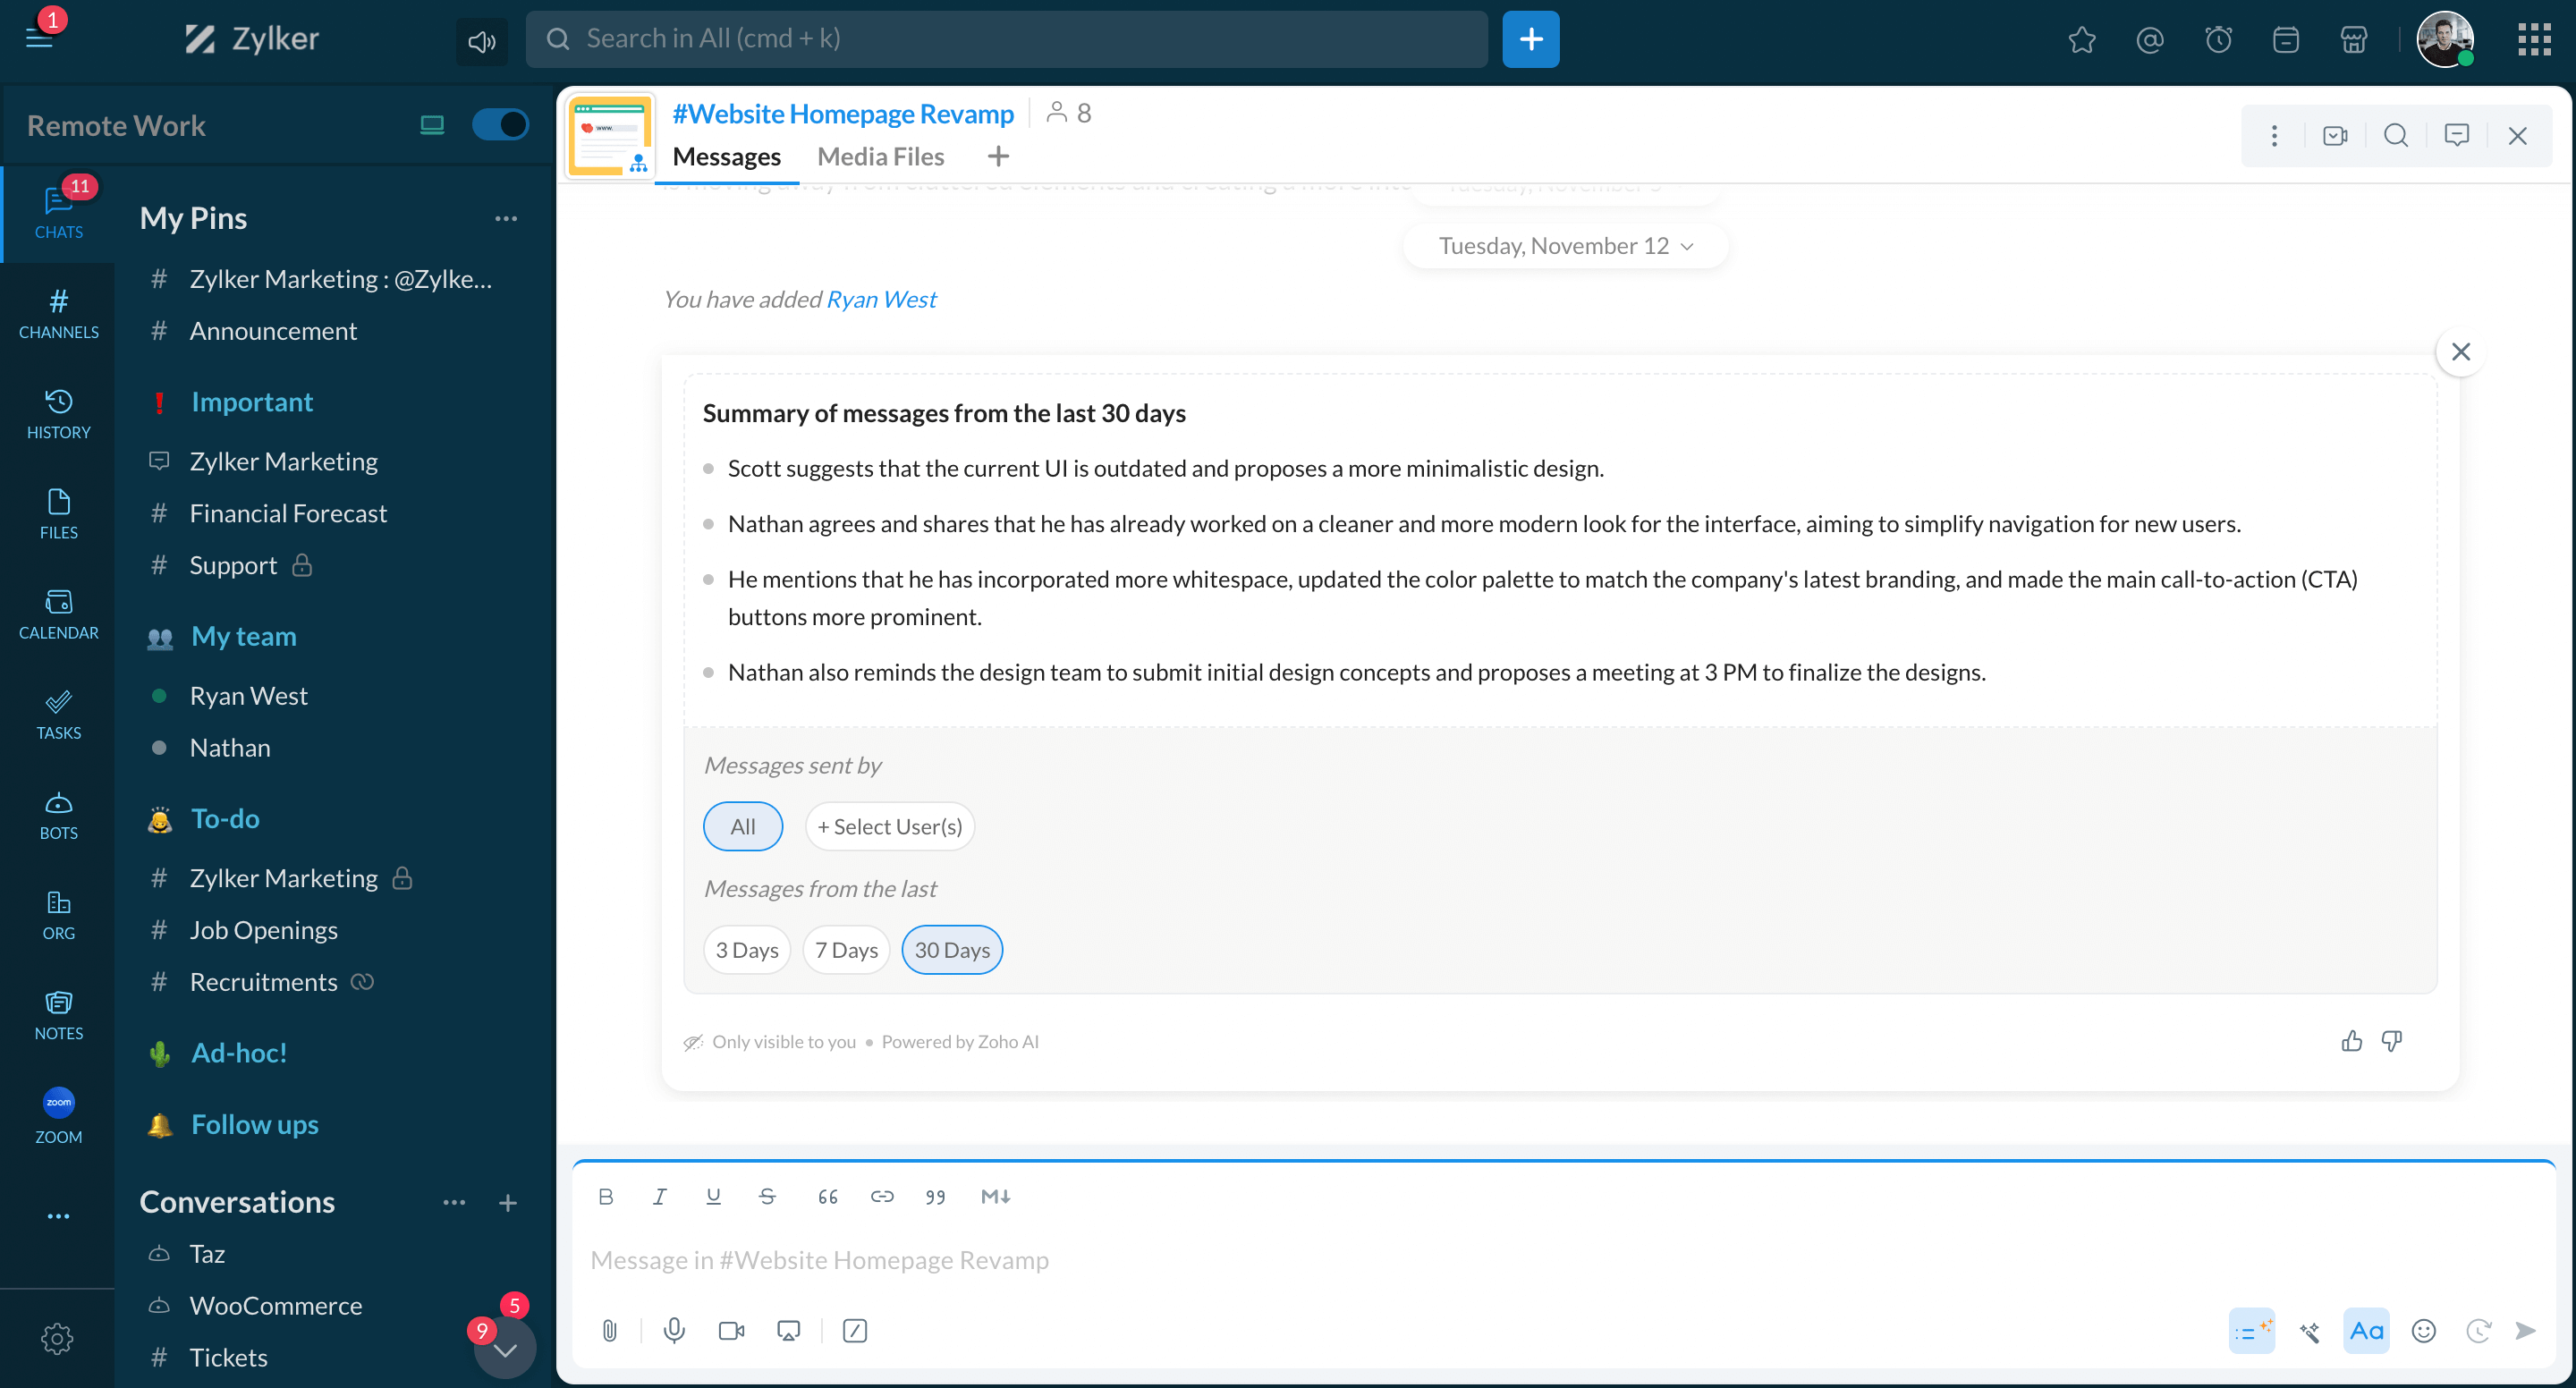
Get a summary of conversations that happened in the last 30 days with on-demand summaries for messages. Click on the Summarize conversation icon in the bottom right of the chat and filter the summary based on specific users and duration.
- Send message
- Audio and video calls
- @mention users
- Fork conversation
- Star messages
- Pin chats
- Search in chat
- Quick actions
- Summarize conversations


Channels
Create channel
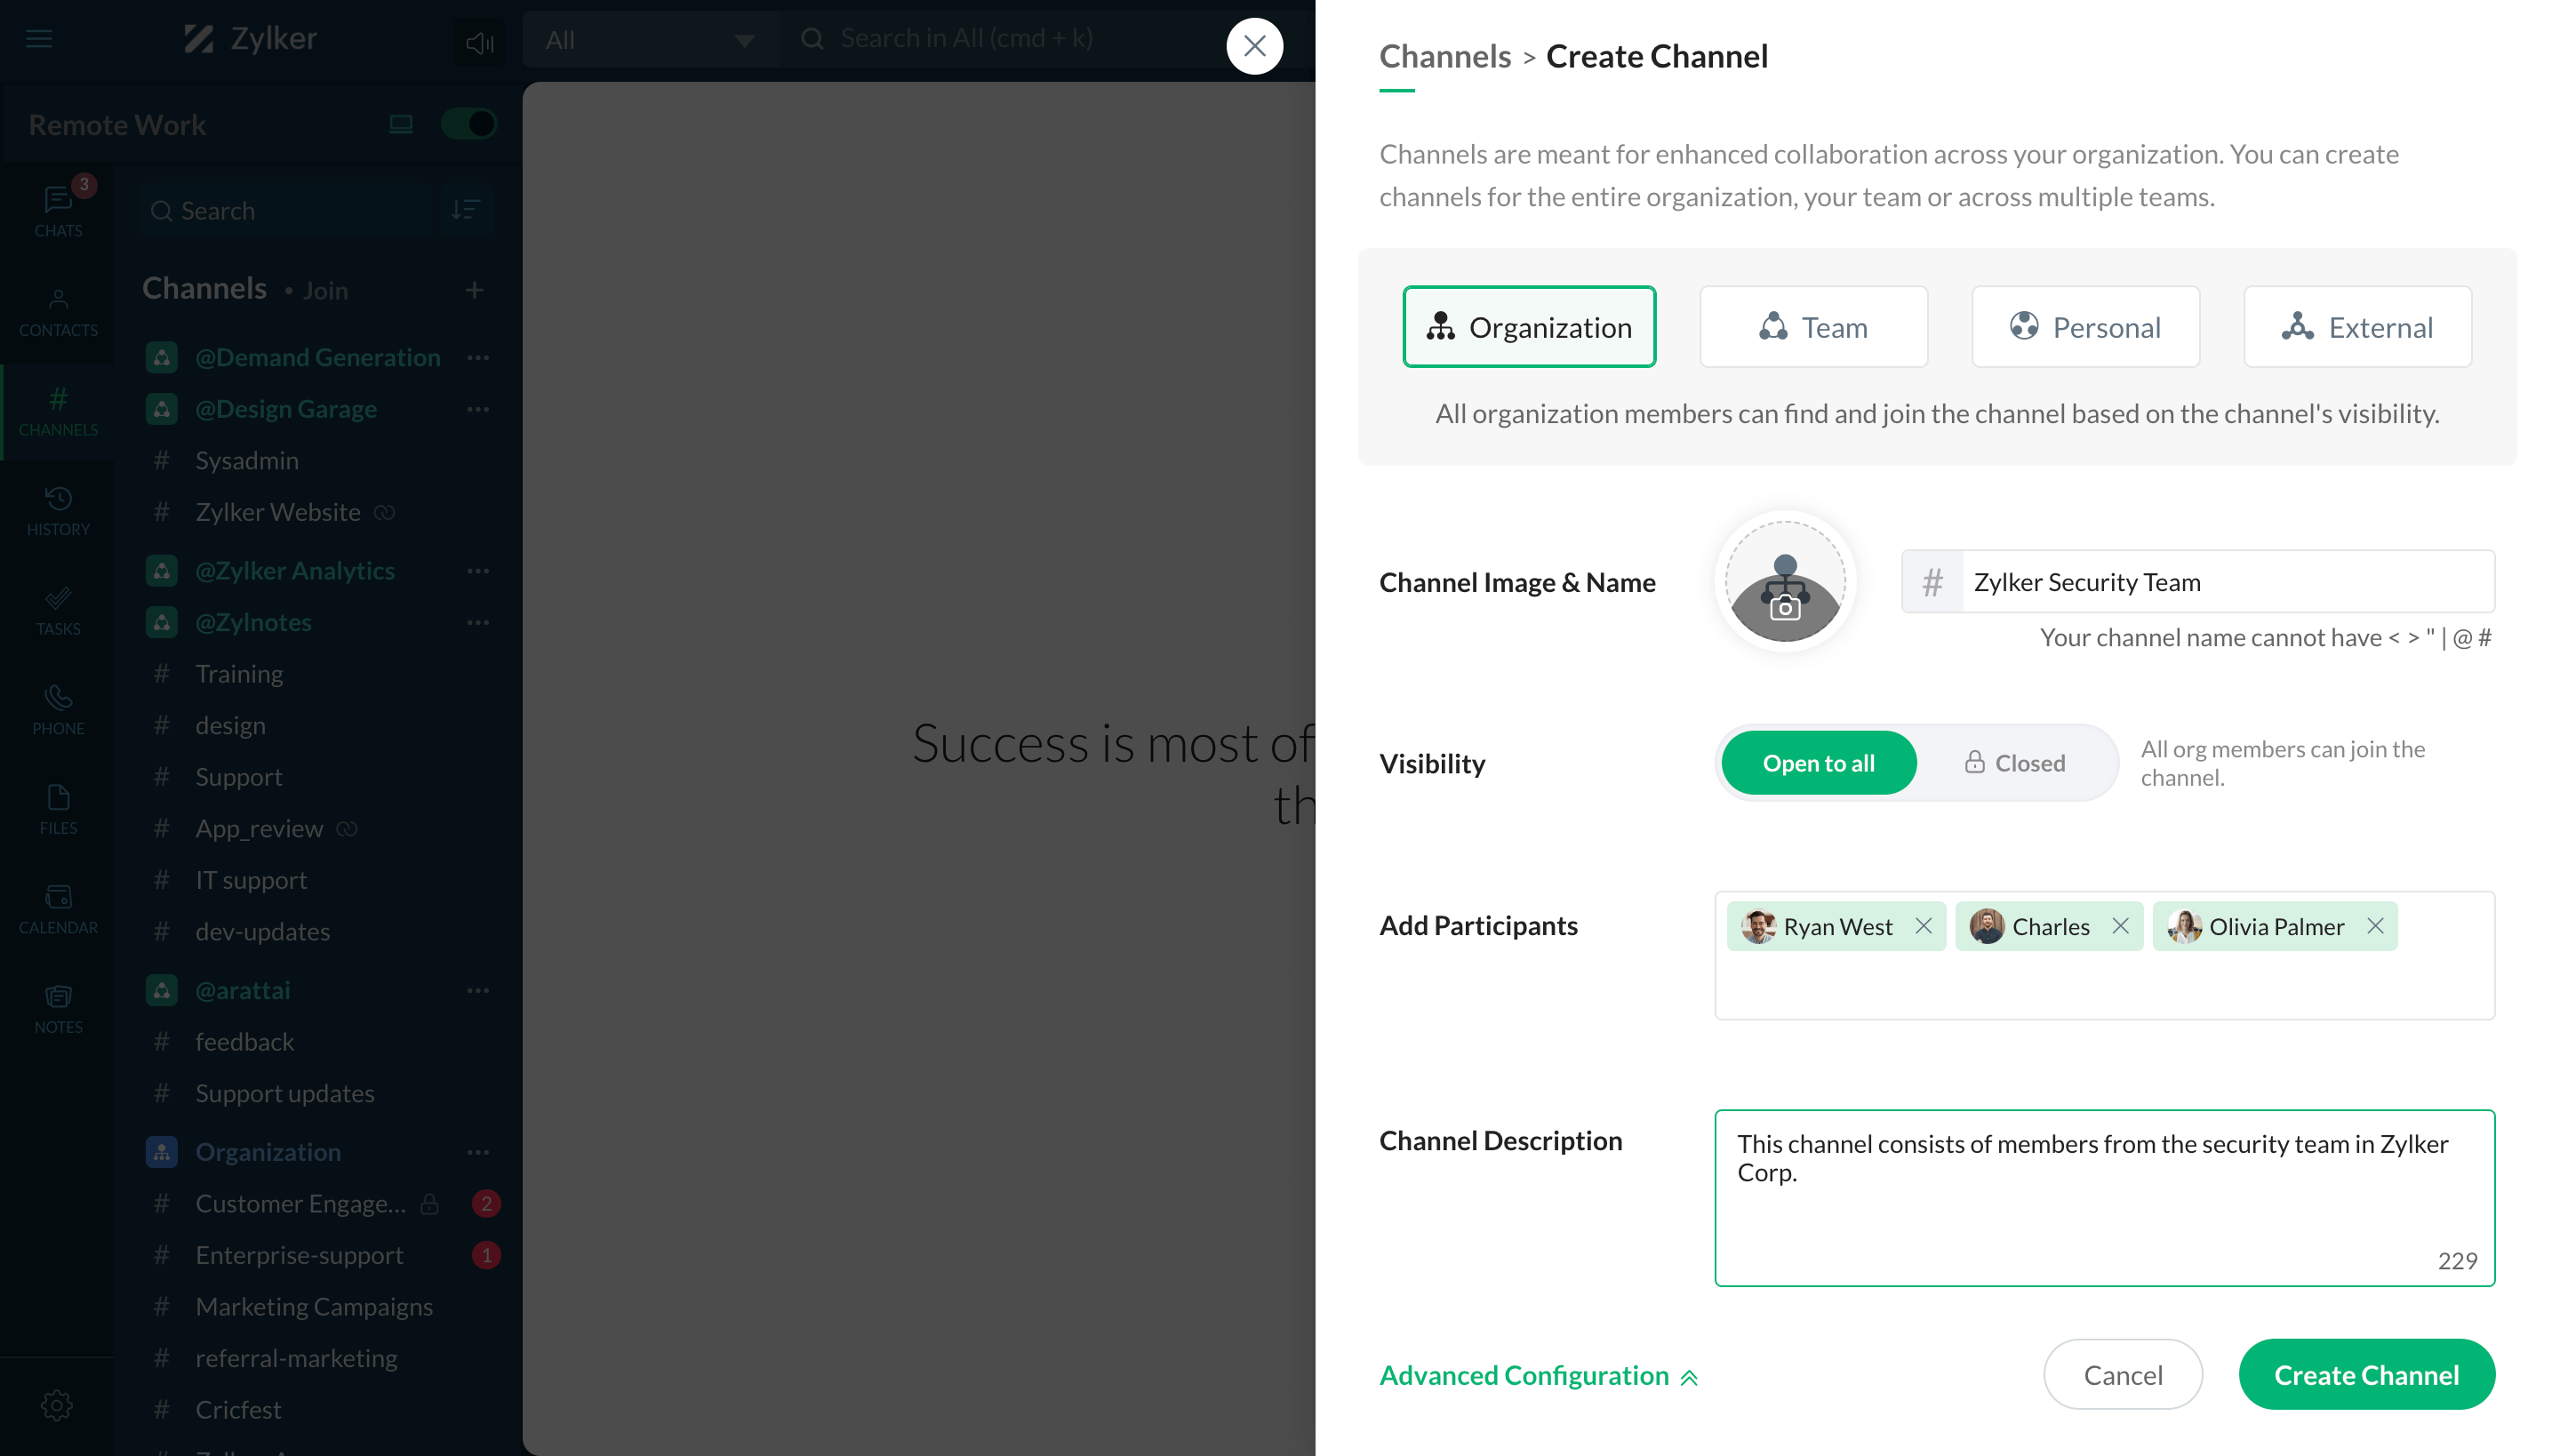
Create a channel by navigating to the Channels tab and clicking on the + icon next to Channels in the navigation sidebar. Search and join existing channels from the channels section.
Start thread
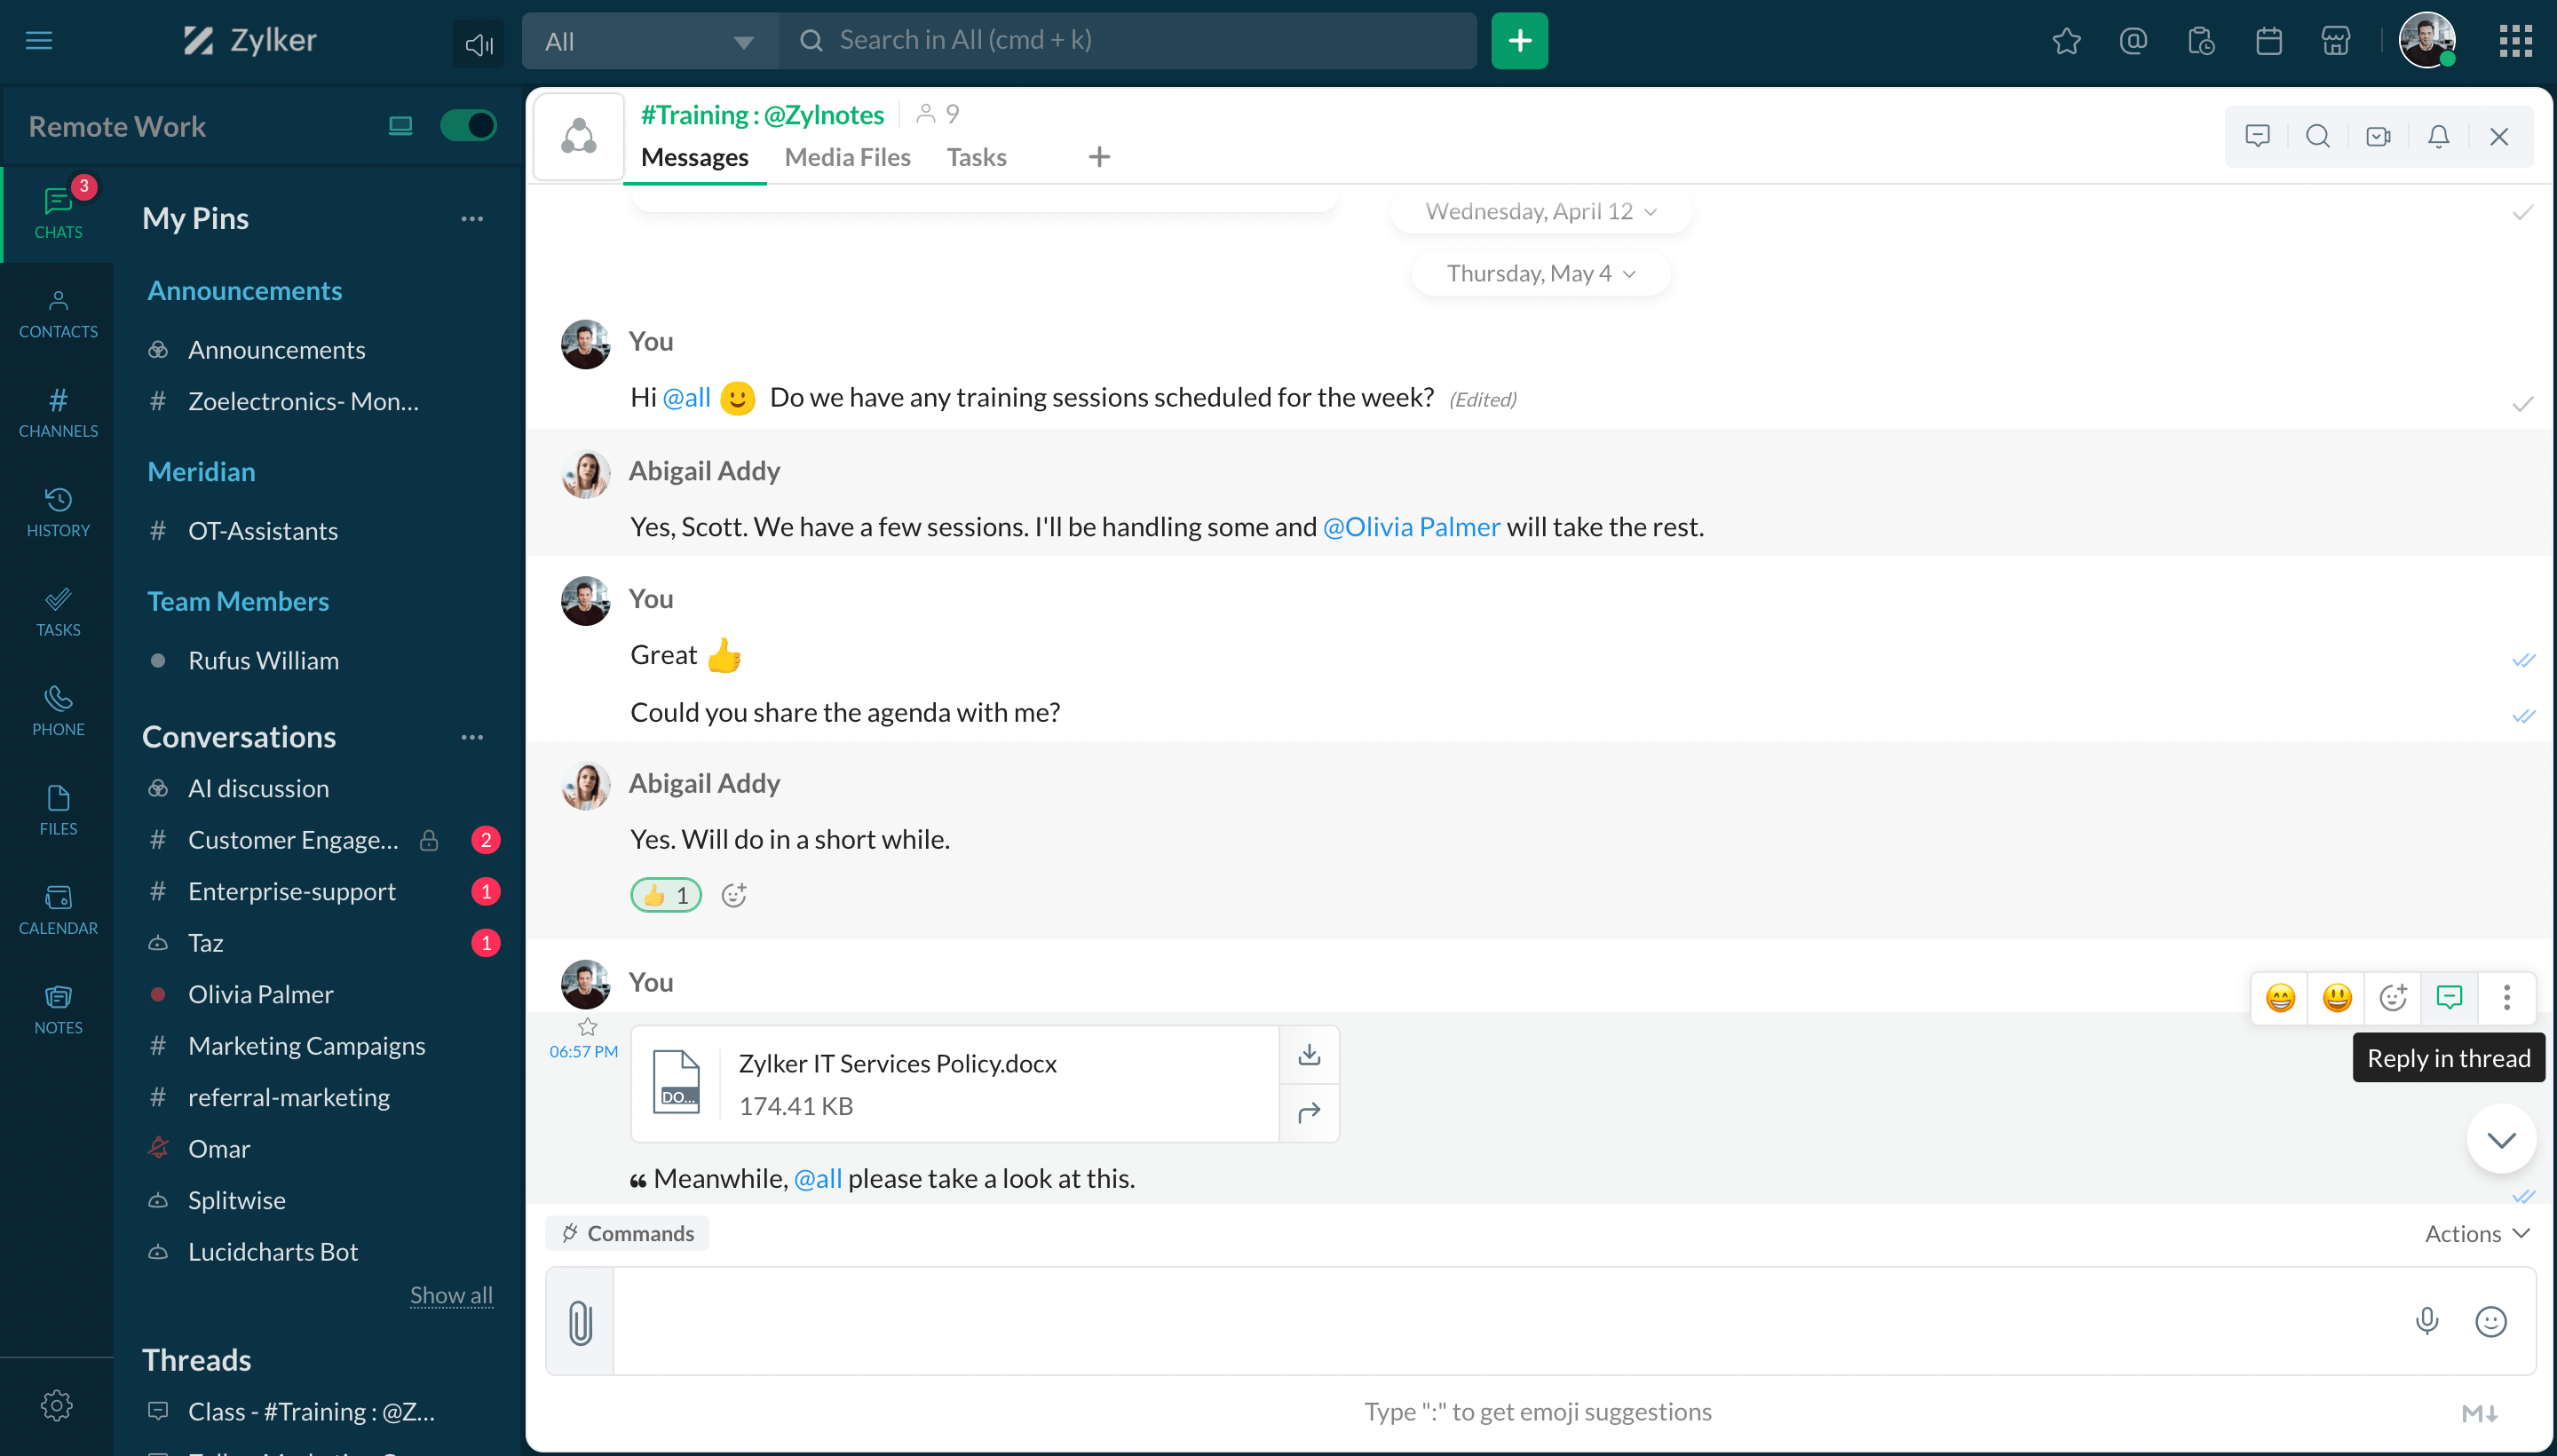
Configure threads as the reply mode in a channel. Click on the Reply in thread option while hovering on a message to start a thread.
Channel participants
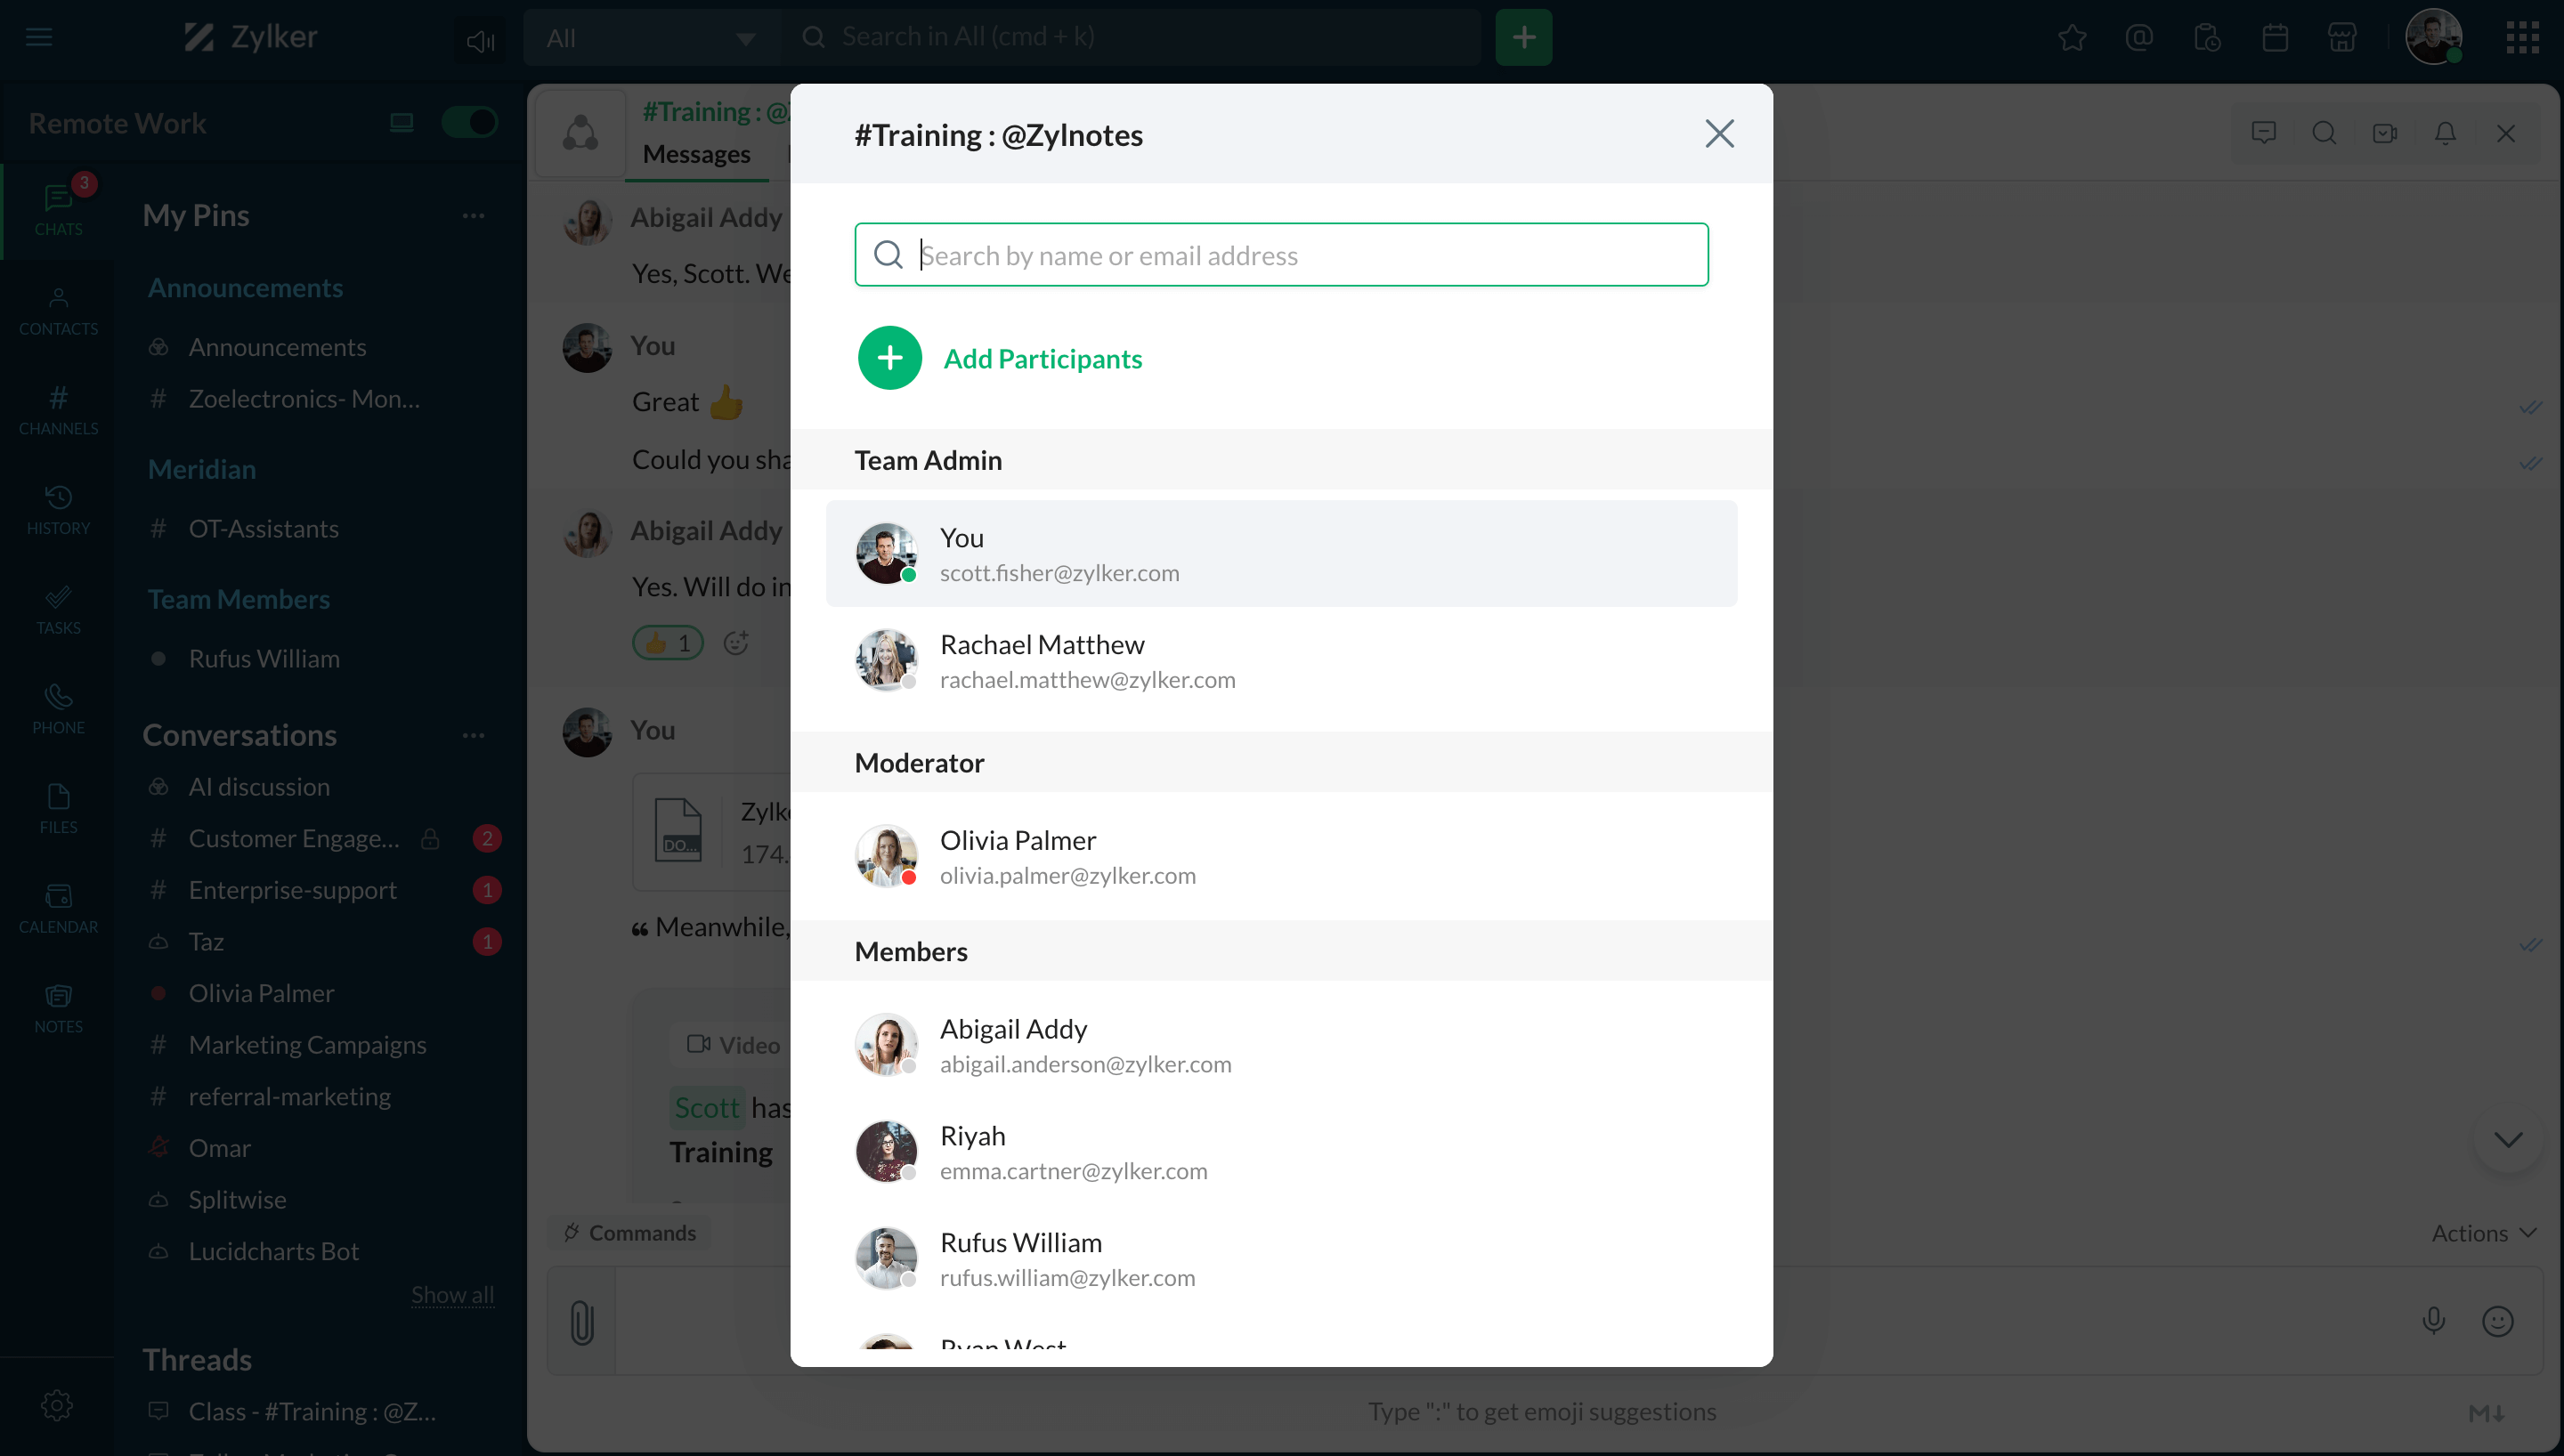
View channel participants and their roles by clicking on the number of participants under the channel name in your chat header.
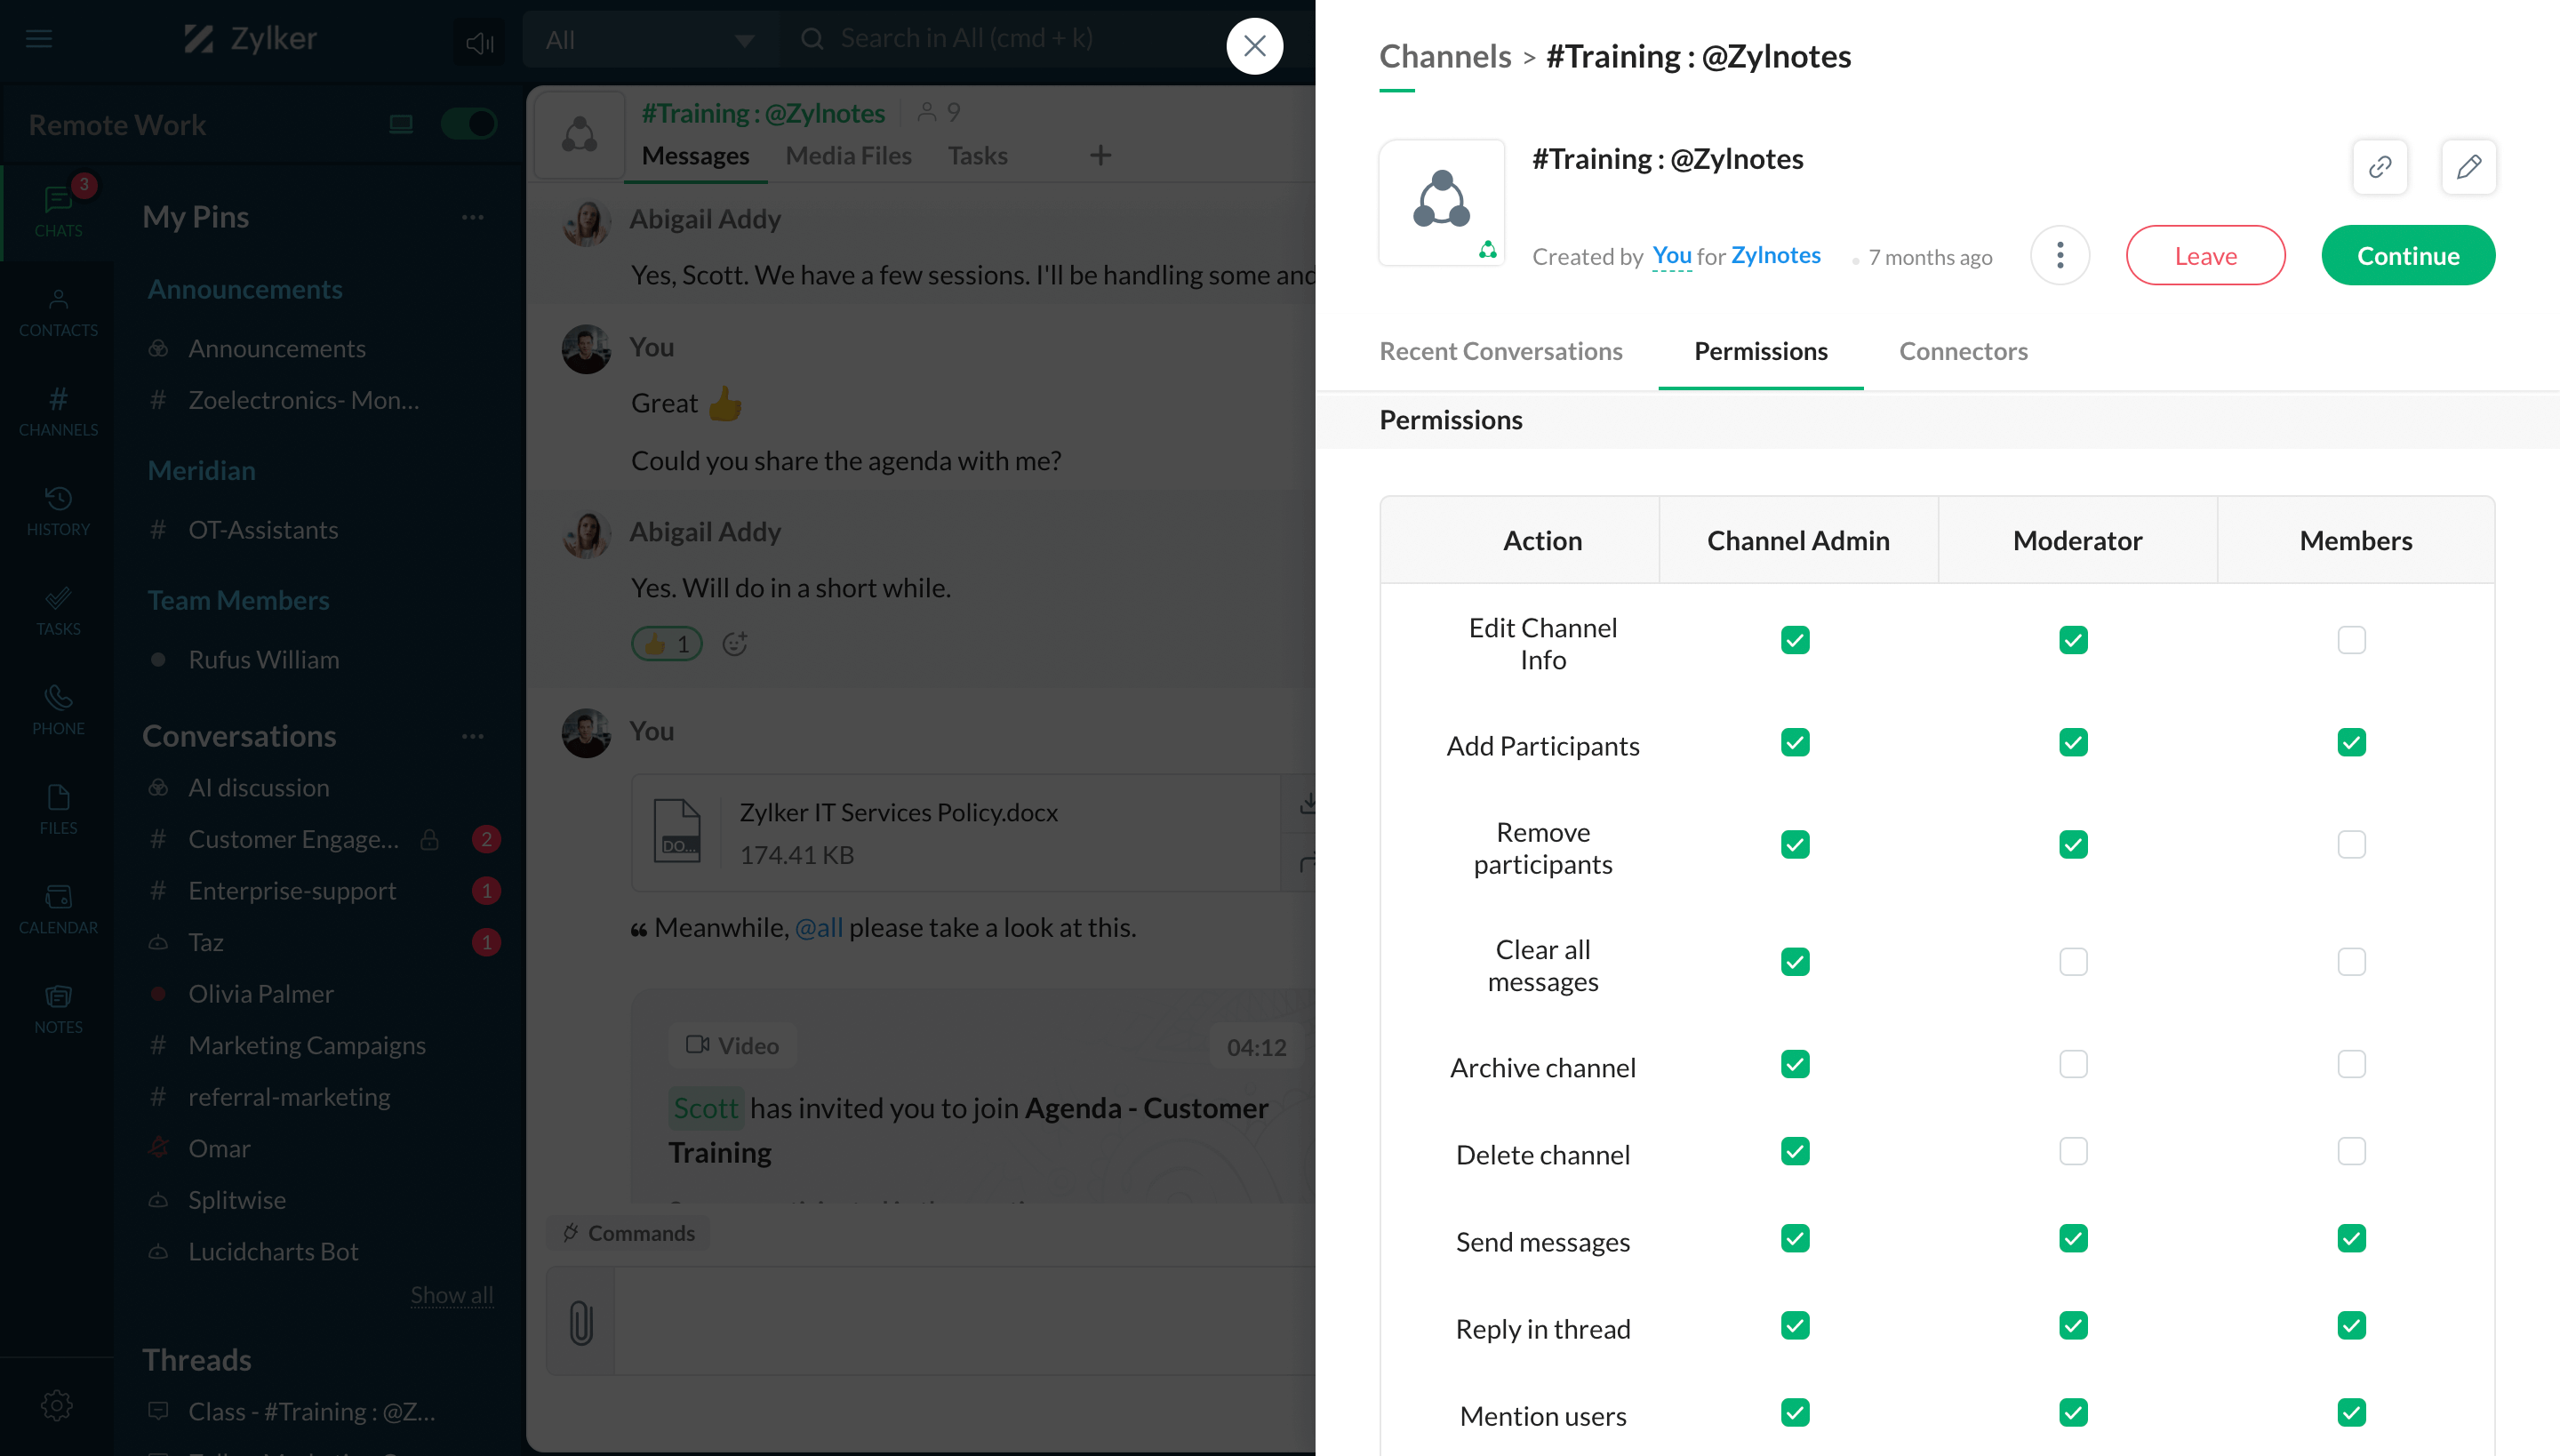
Channel permissions
You can view and moderate permissions based on participant roles from the channel's info section.
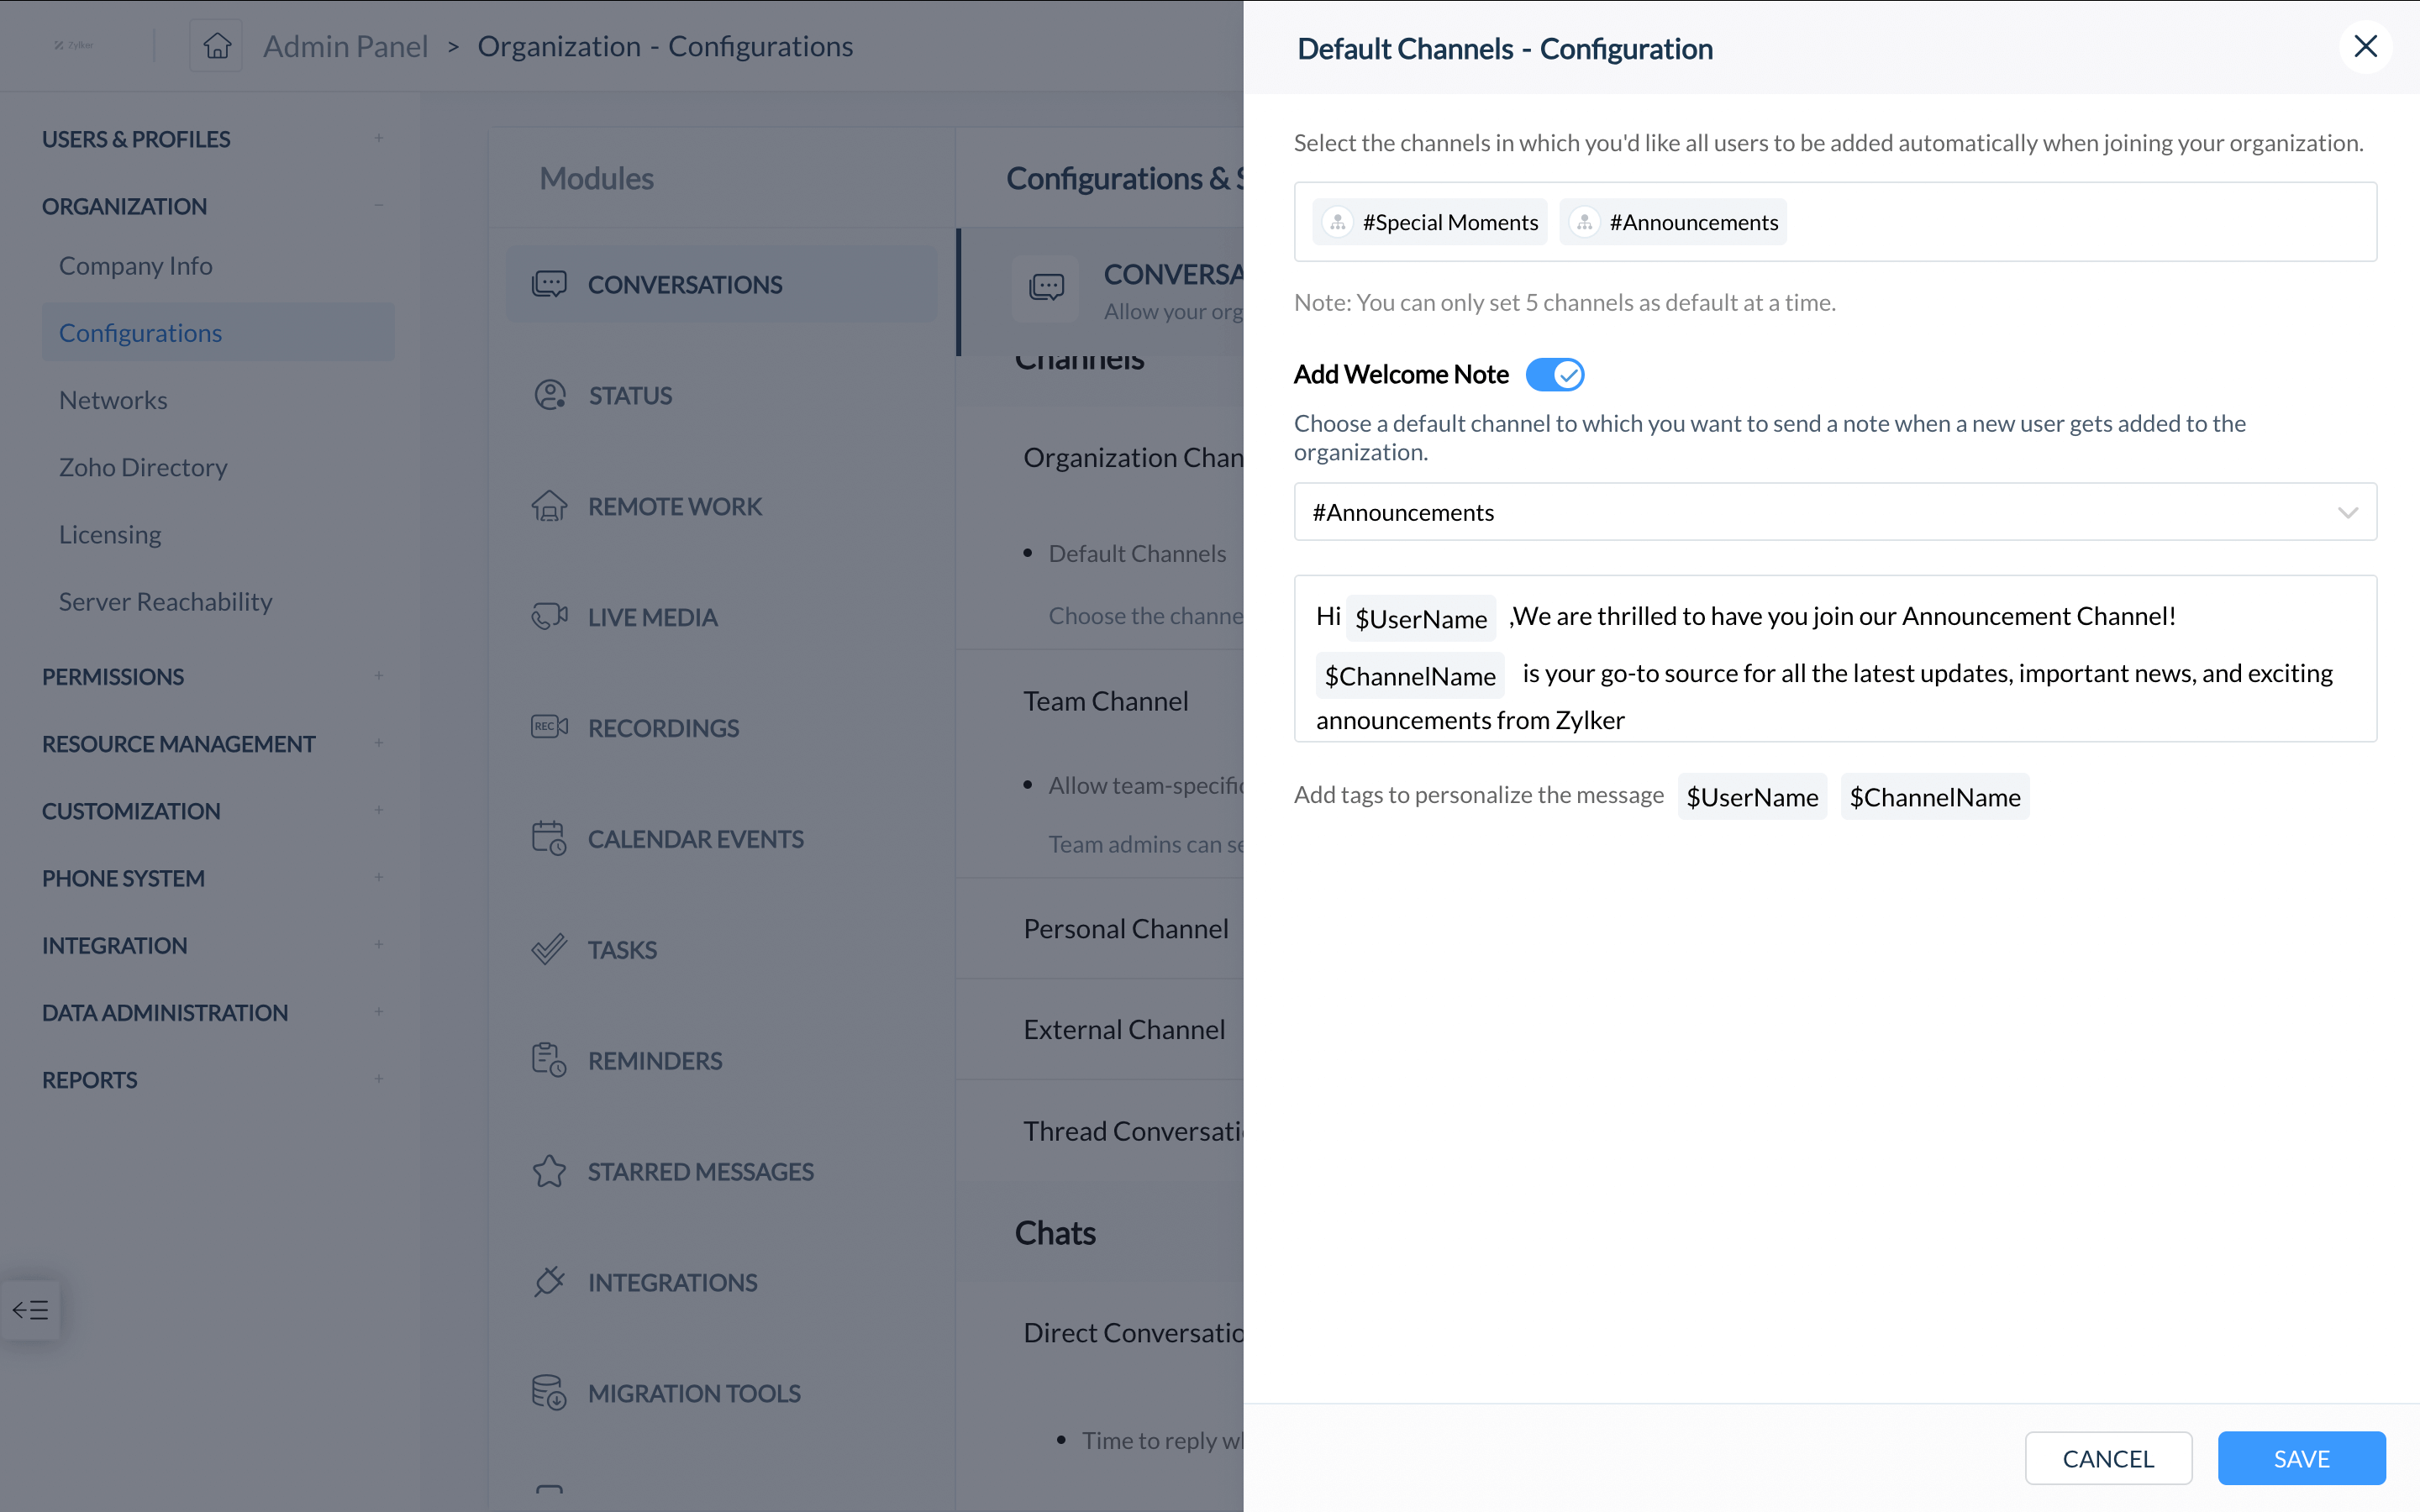
Default channels
Configure channels to automatically add new users whenever they join the organization. To configure a default channel, go to the admin panel and add it under Configurations.
- Create channel
- Start thread
- Channel participants
- Channel permissions
- Default channels


Meetings
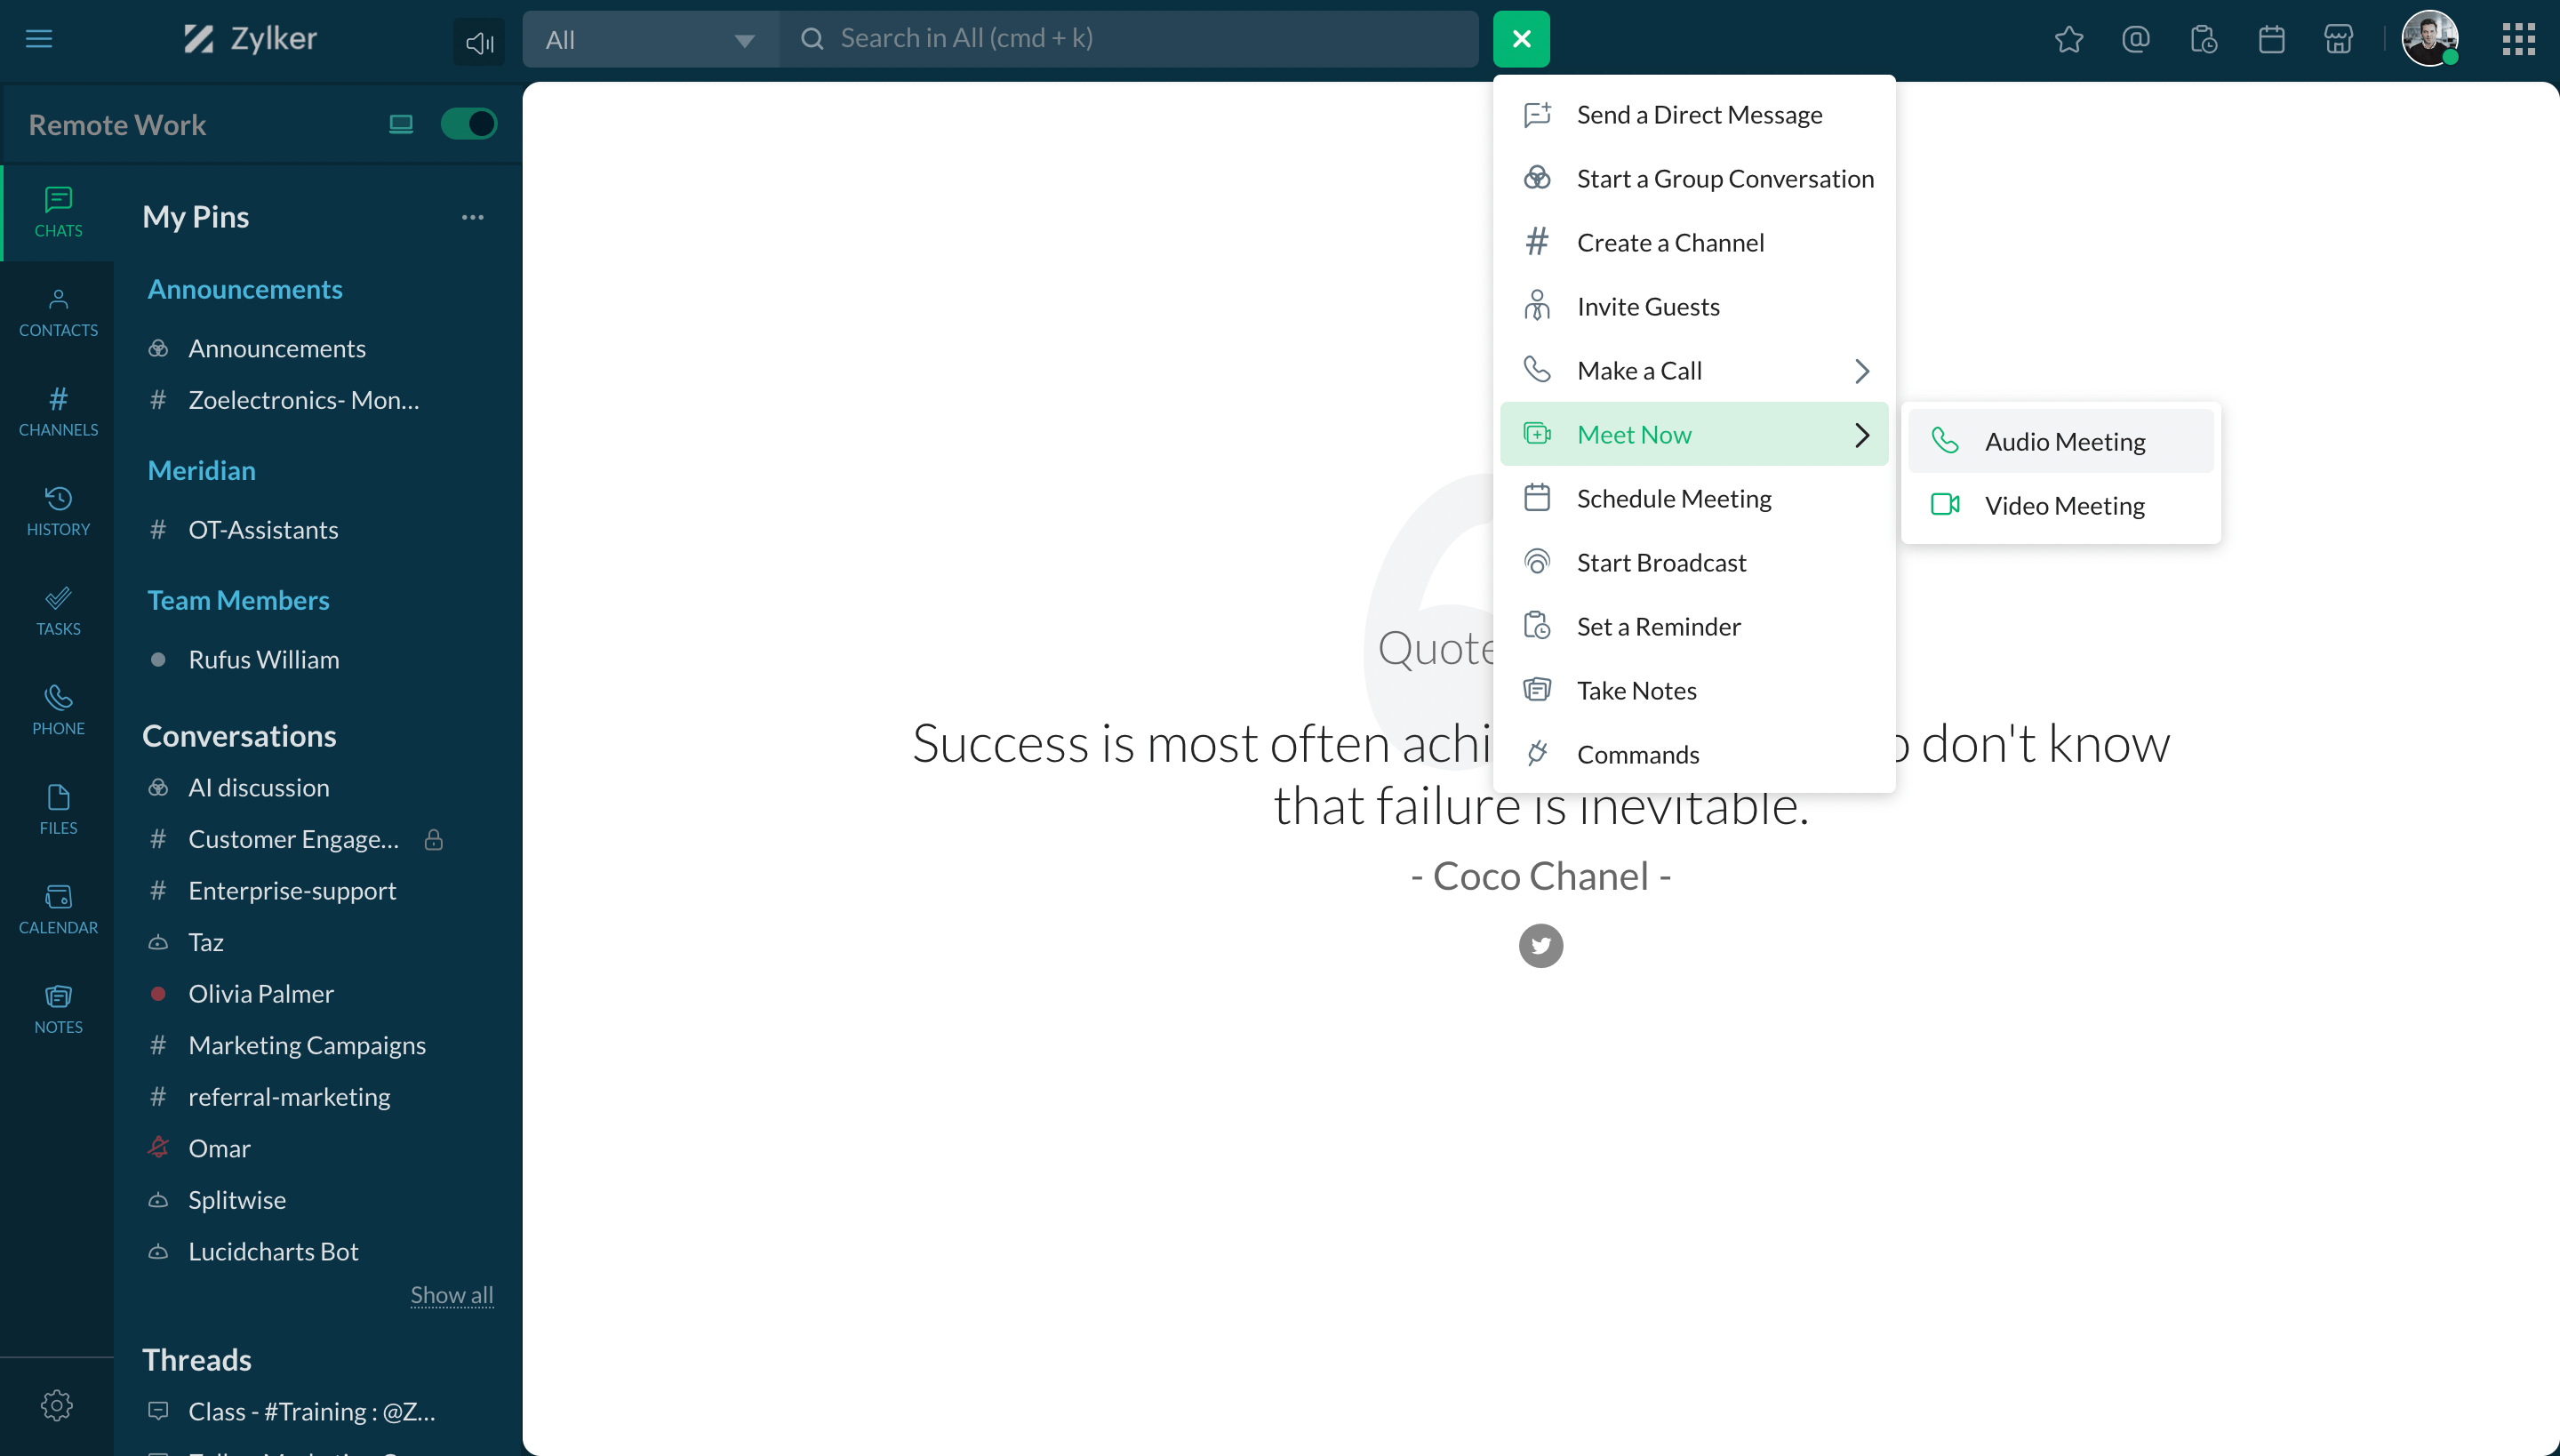
Start meeting
Organize instant meetings by clicking on Meet now from Quick actions. You can either start an audio meeting or a video meeting.
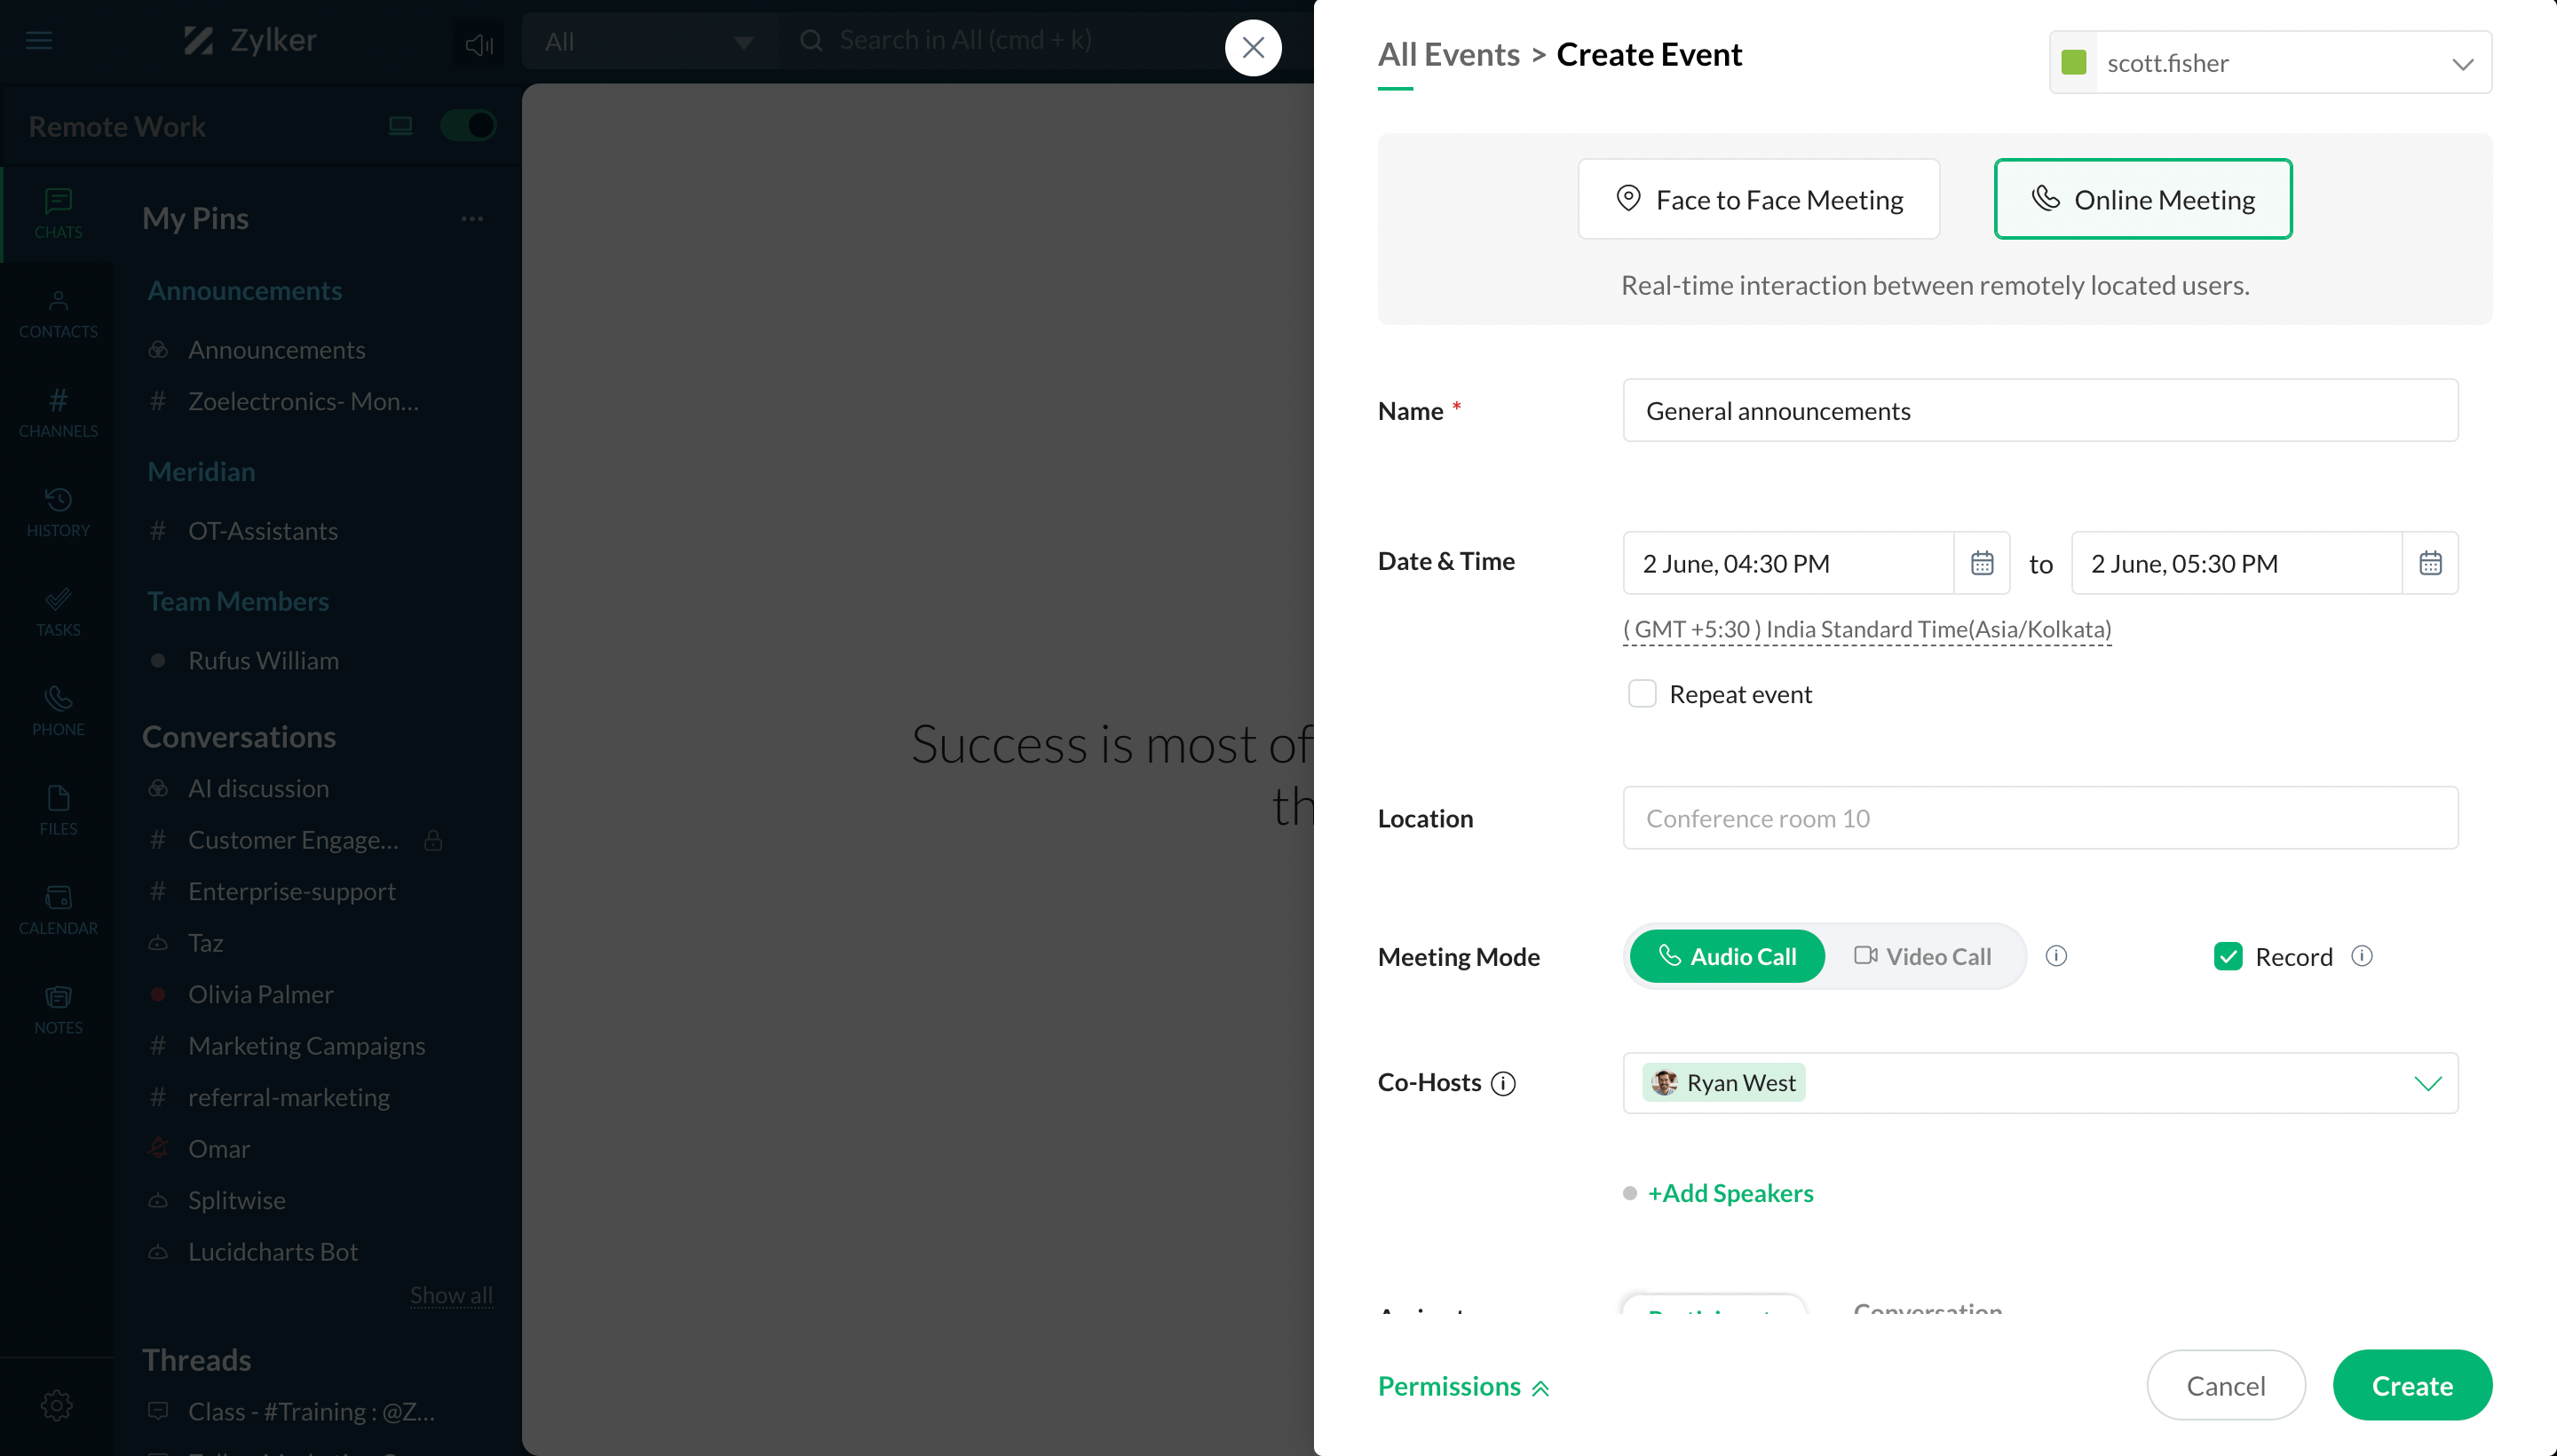
Schedule meeting
To schedule a meeting for later, select Schedule meeting from Quick actions. Fill in the required details and create the meeting.
Record meeting
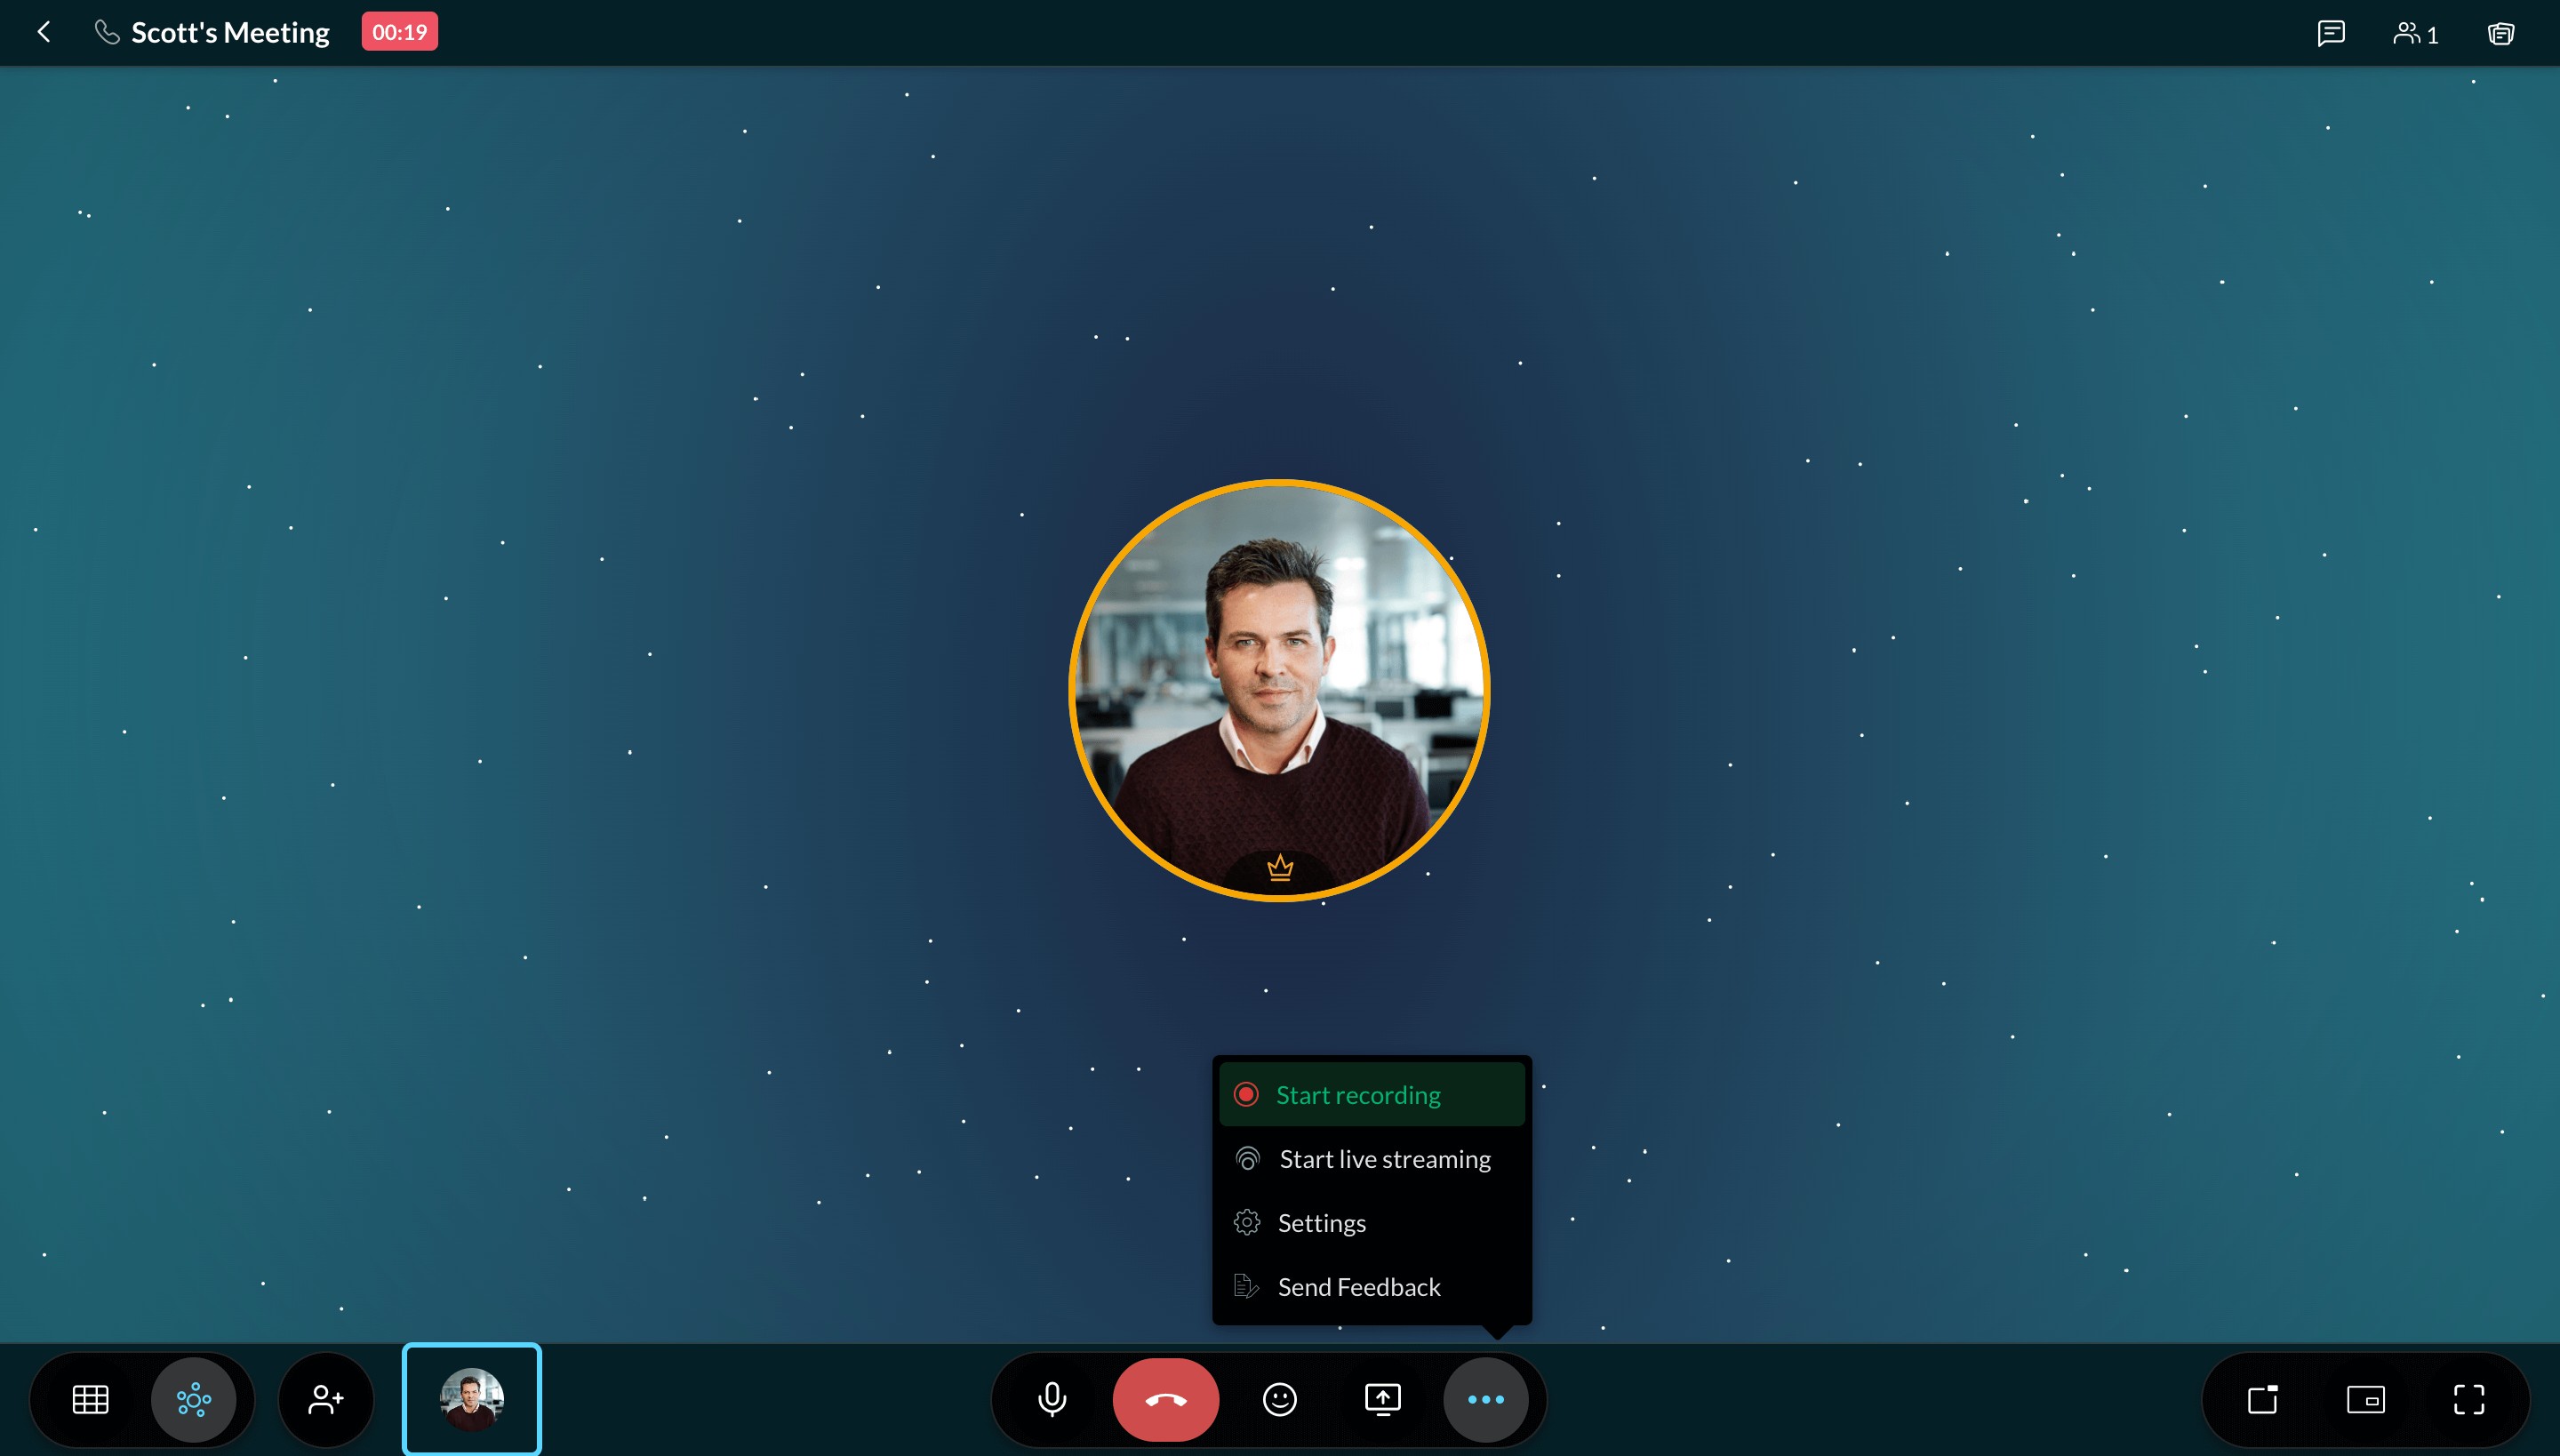
Meetings can be recorded and revisited later from the Files section. You can choose to record meetings before you begin or even after you start it.
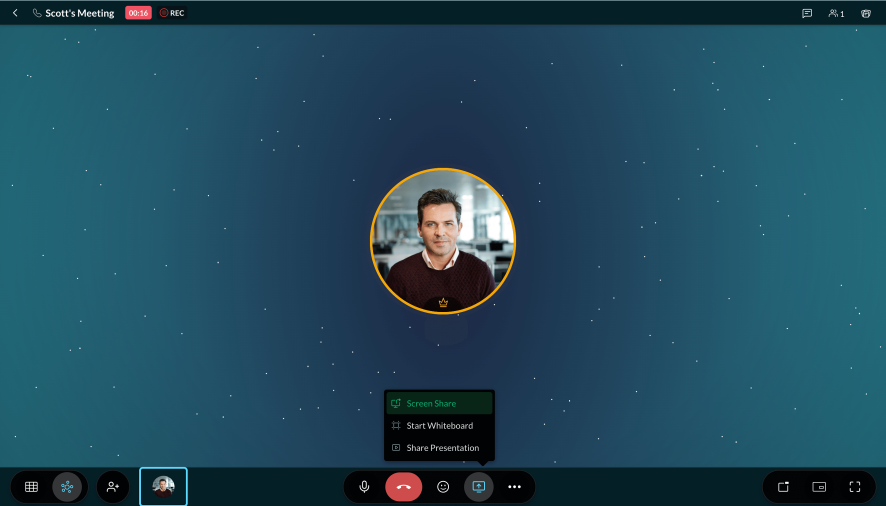
Share screen
Share your screen and ideas when you're on an audio or video call. To share your screen, click on the Screen Share option during the call.
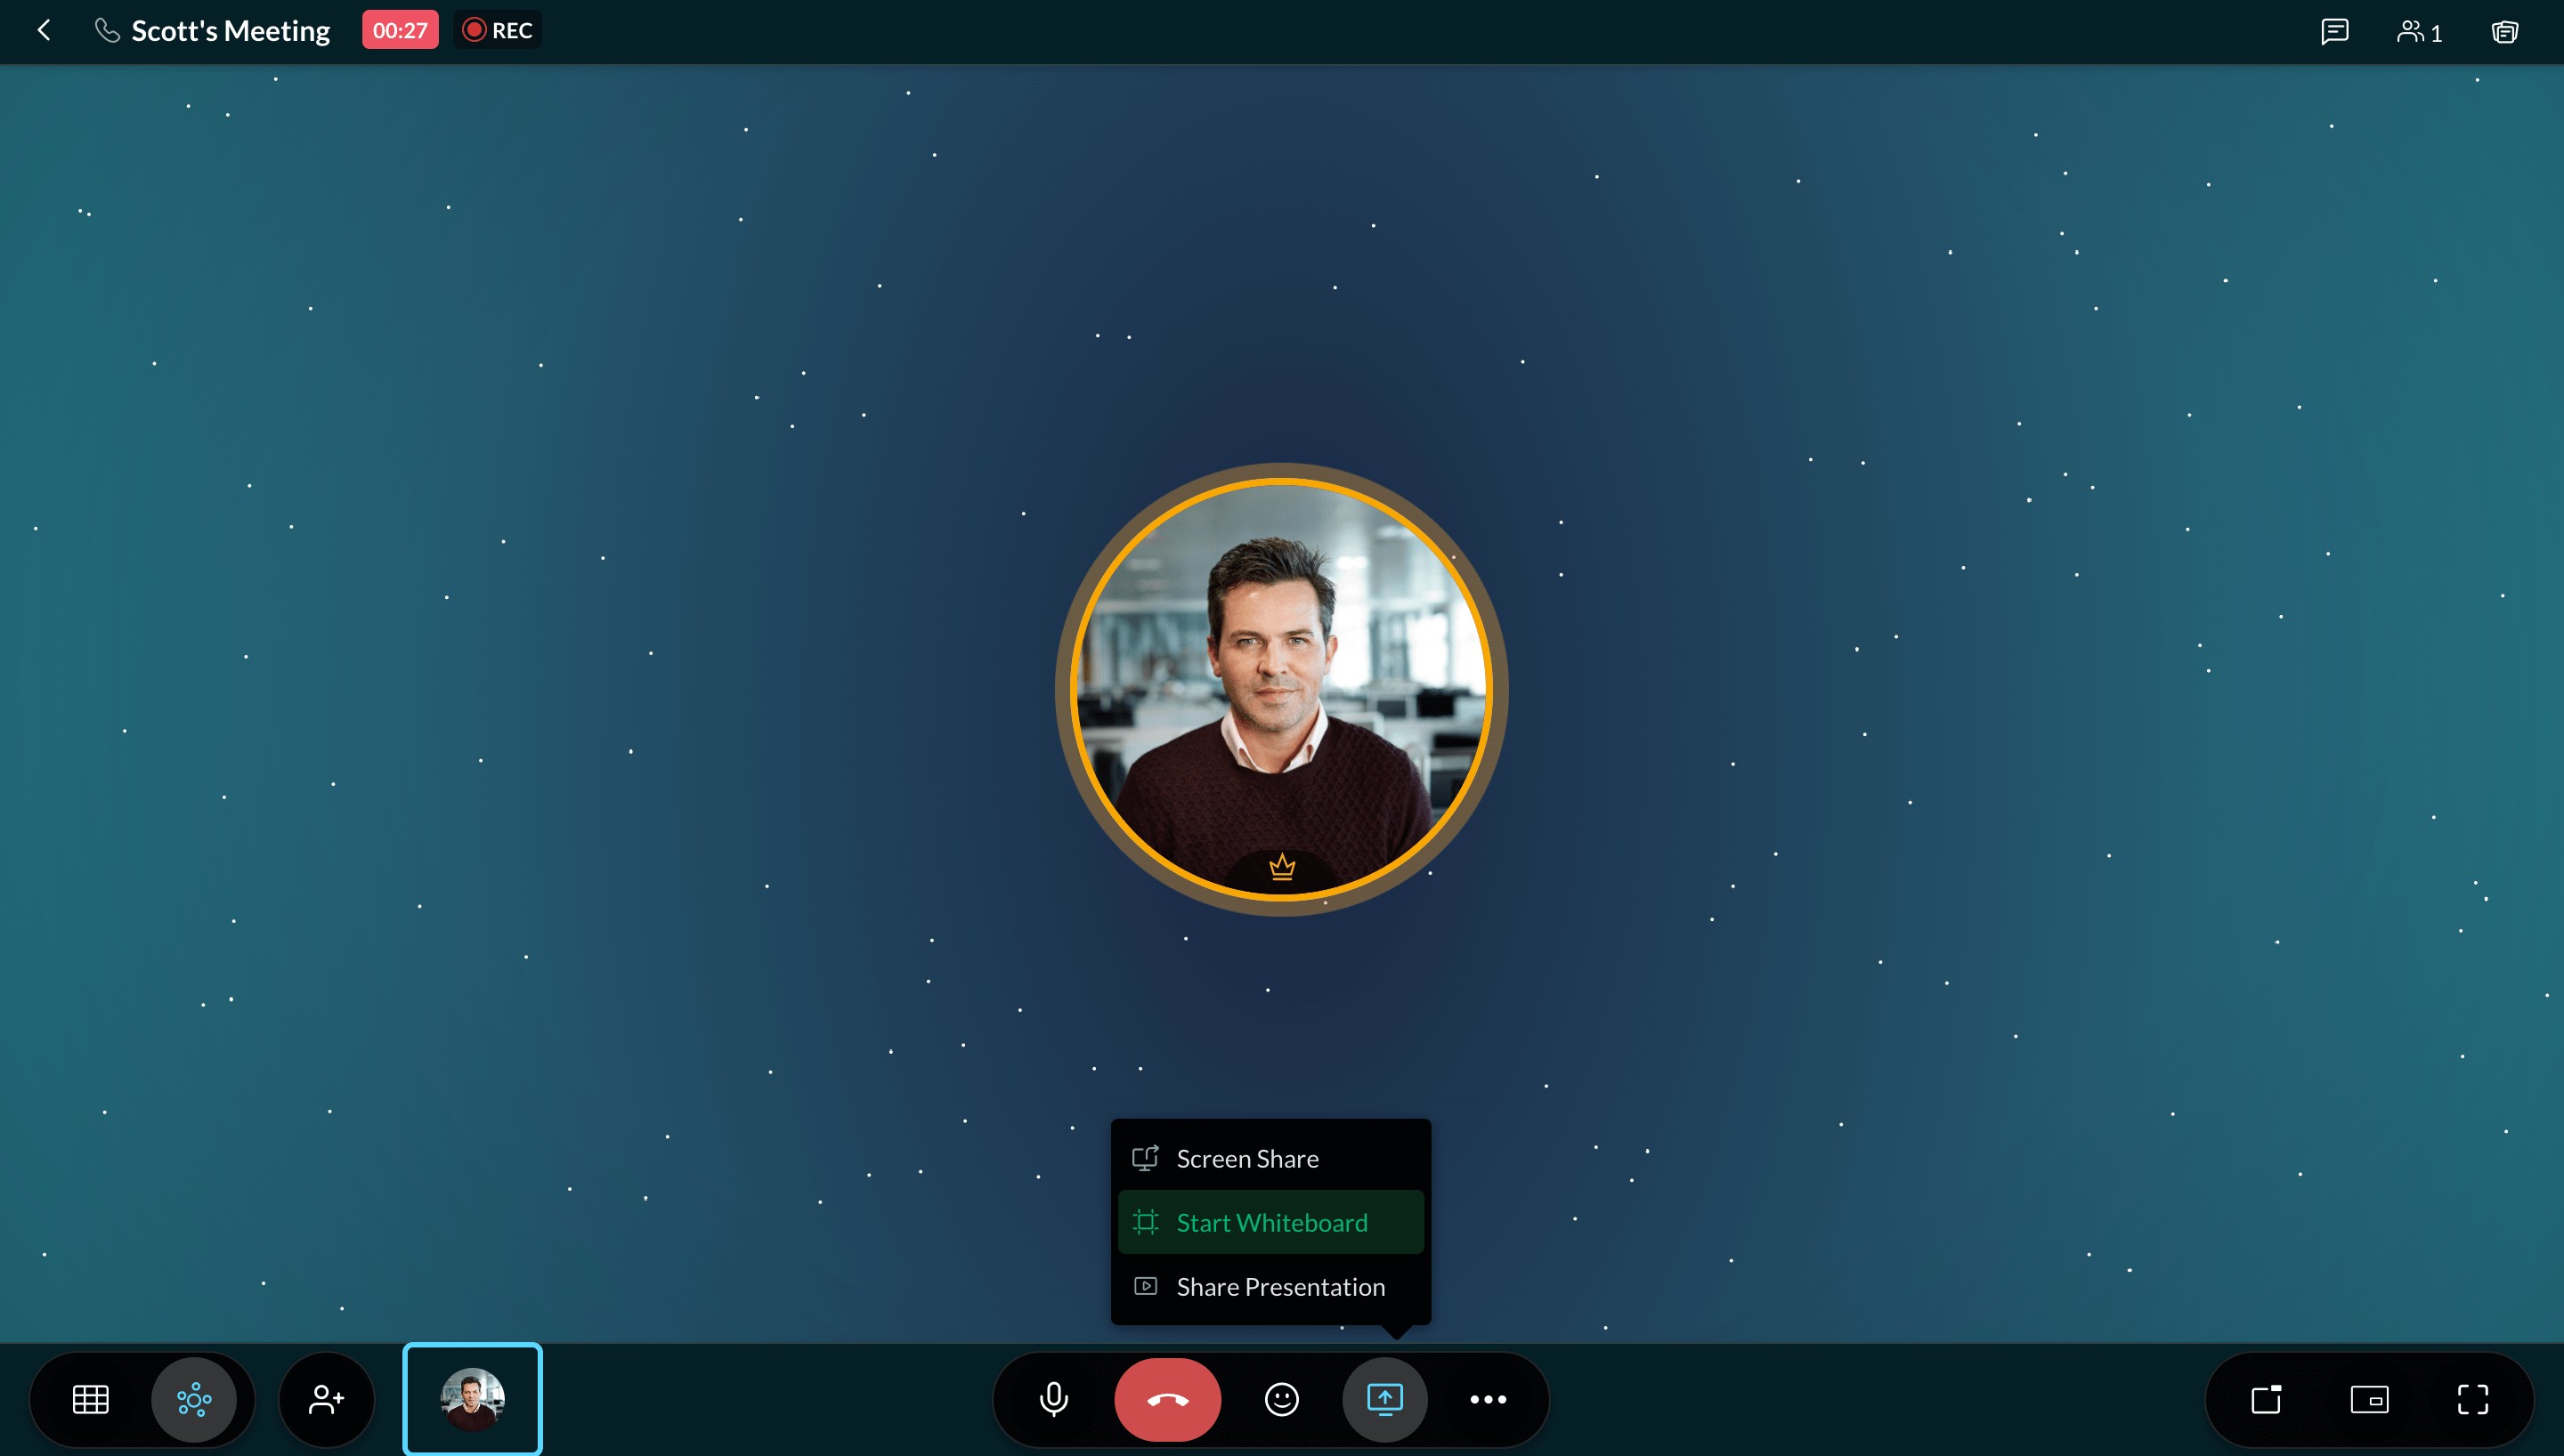
Open whiteboard
To start working on the whiteboard during a meeting or call, click on the share icon and then select Start Whiteboard.
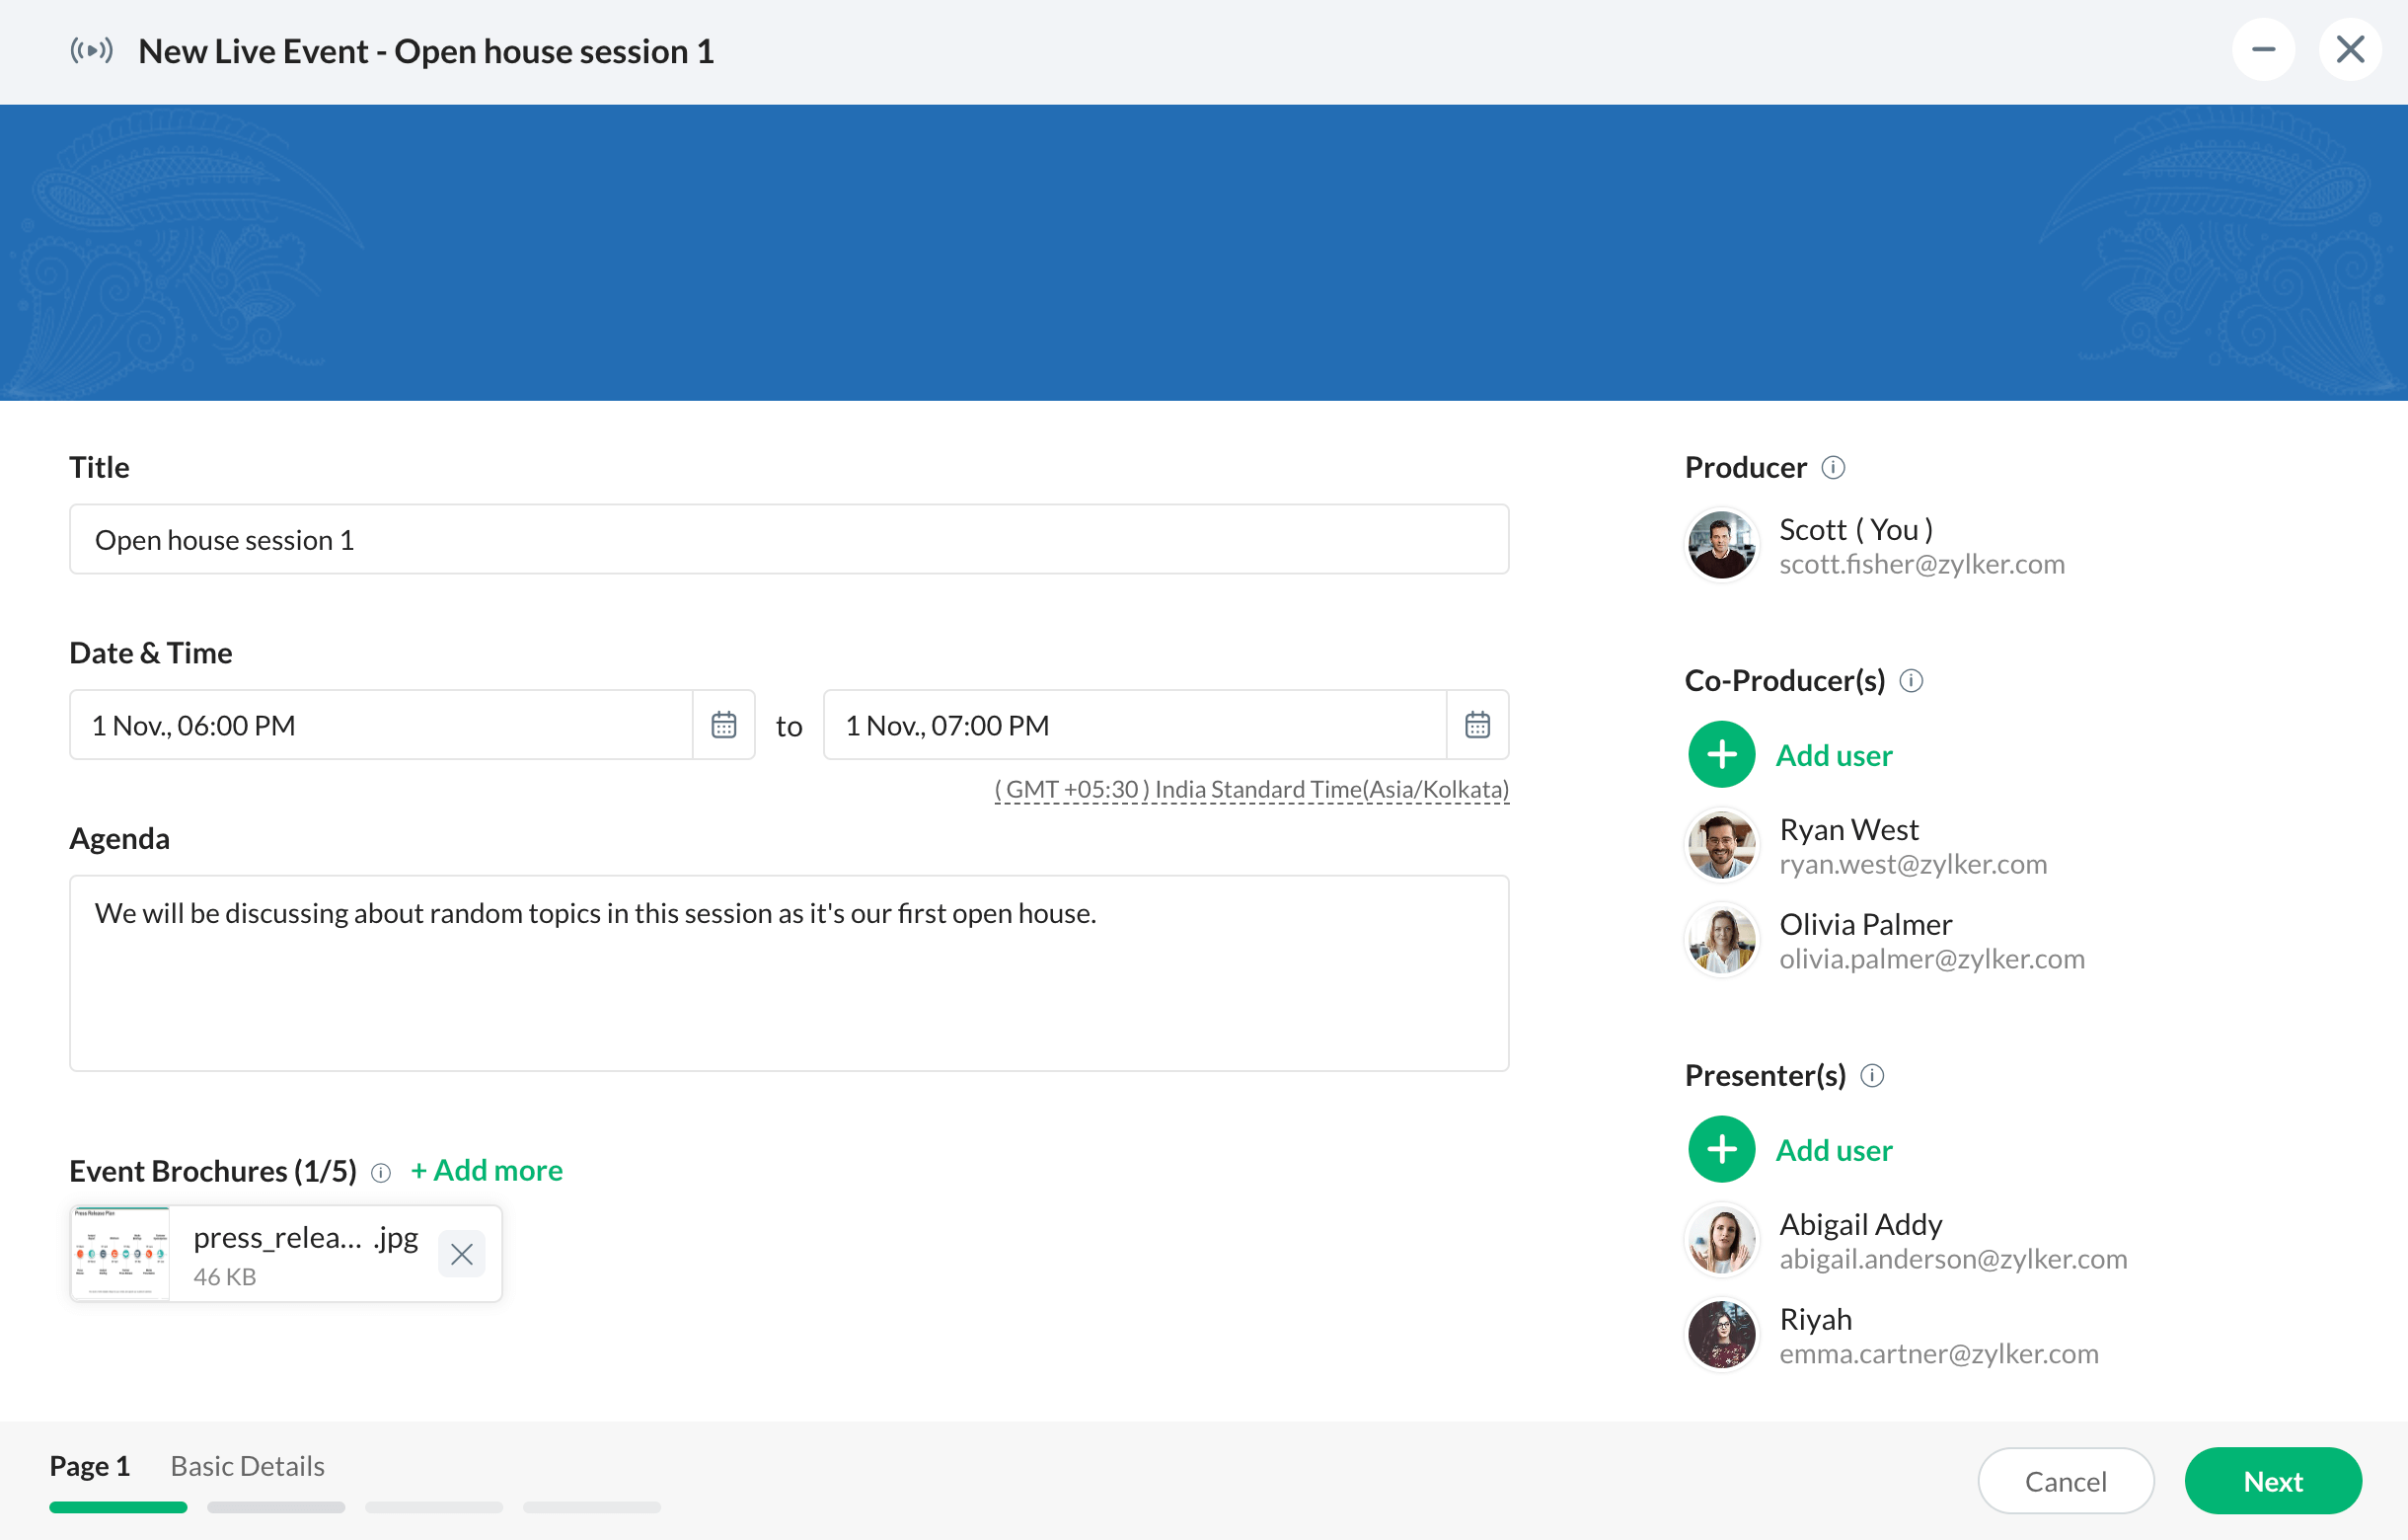
Host live events
Conduct large scale virtual events with filler media content for up to 10,000 members in your organization with live events.
Lock meeting
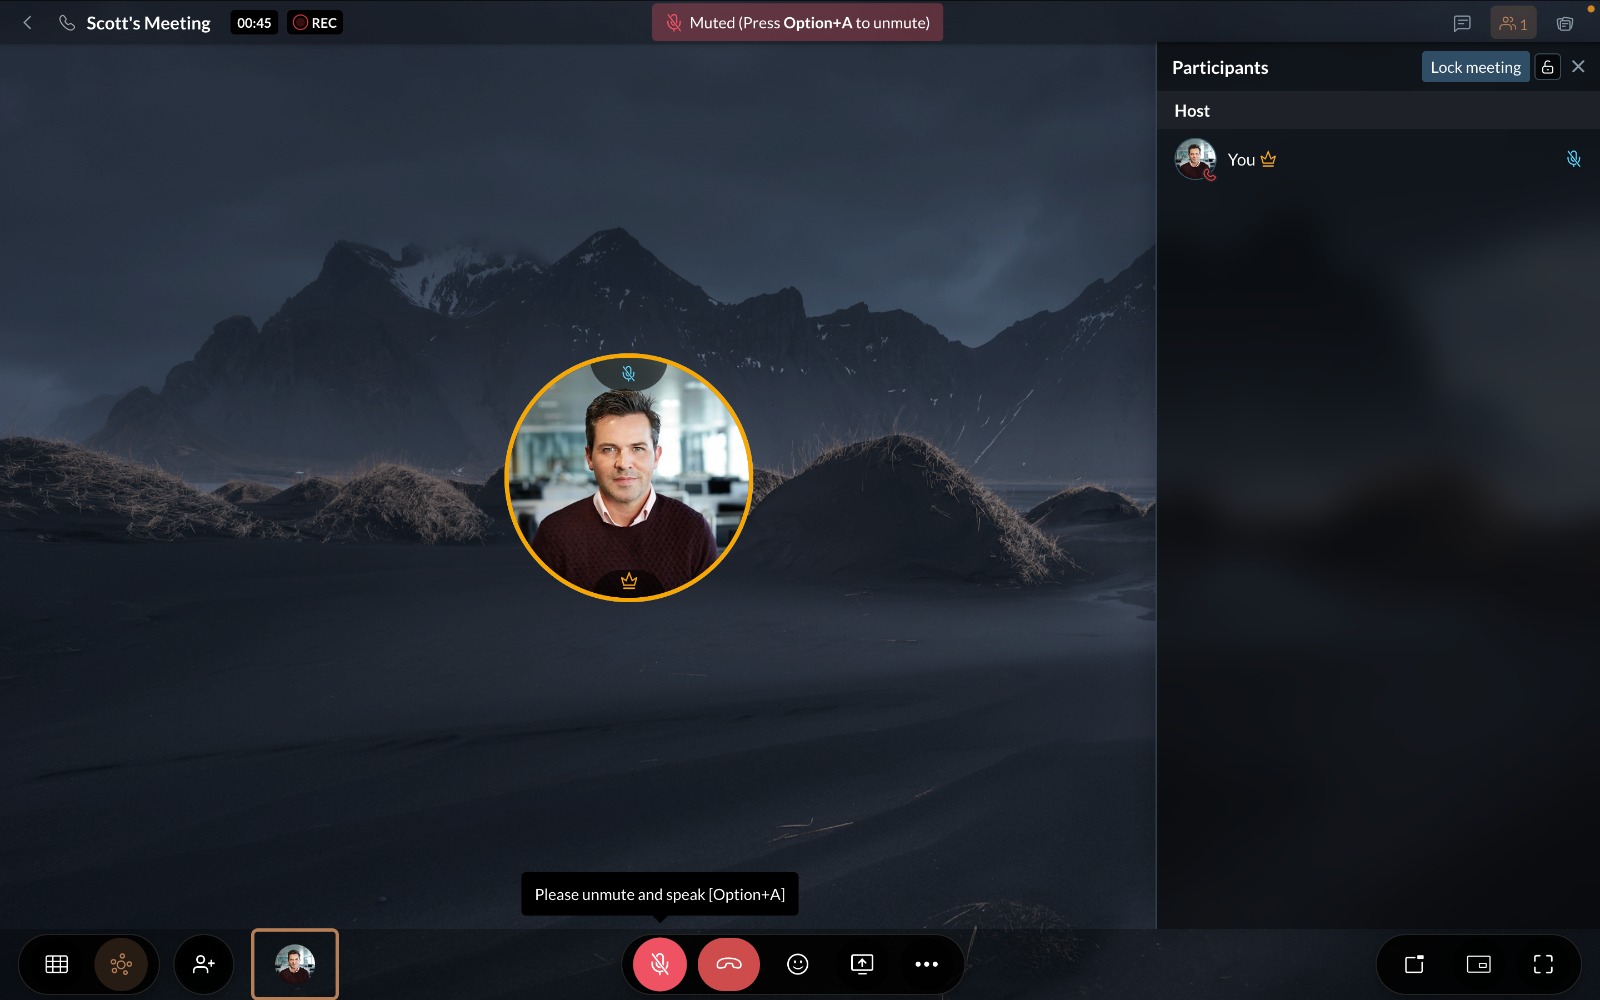
To prevent unintended visitors from joining your ongoing meeting, you can lock it. To lock a meeting, click on the Lock meeting option in the top right corner of your meeting screen.
- Start meeting
- Schedule meeting
- Record meeting
- Share screen
- Open whiteboard
- Host live events
- Lock meeting


Contacts
Send Contact Invite
To send a contact invite, navigate to the Contacts tab, and click the + icon next to Contacts in the navigation sidebar. Type their email address in the dialogue box, enter them a personalized message, and click Send Invites.
Contact List
All of your contacts will be listed under the Contacts section in your navigation sidebar.
- Send Contact Invite
- Contact List
Bots
Subscribe to bots
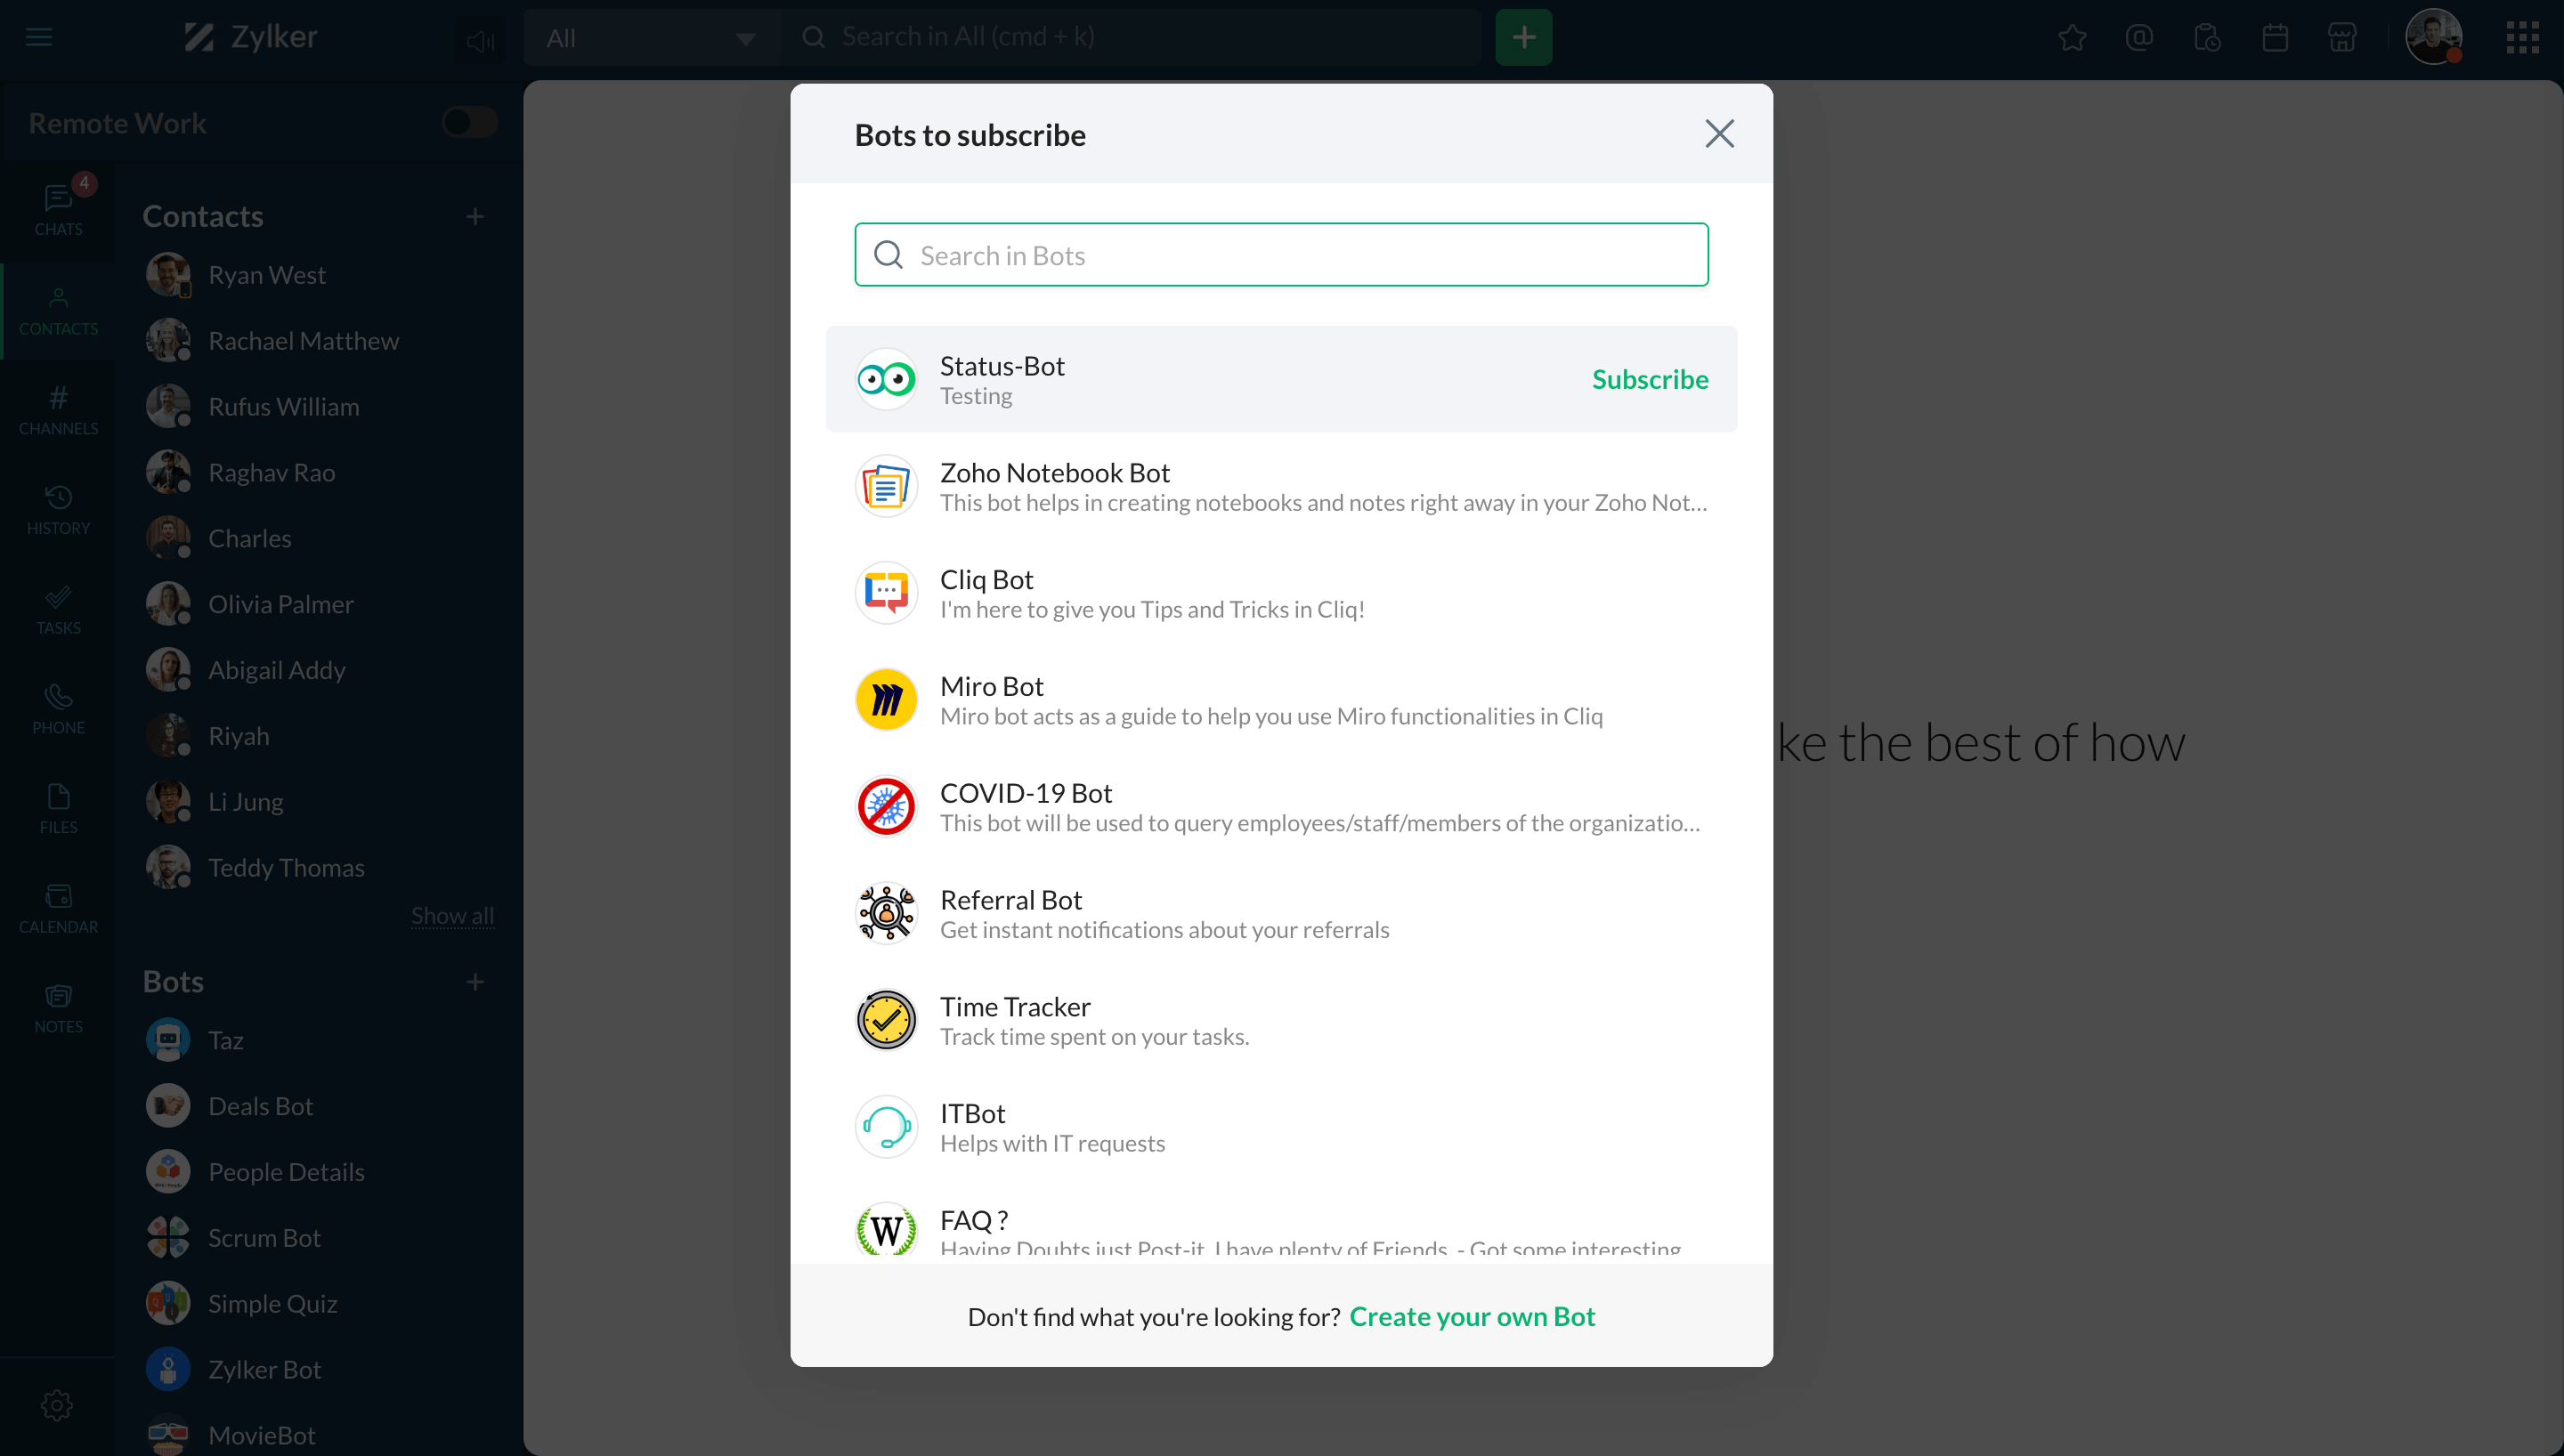
Bots in Cliq are conversational assistants that can be involved in a conversation, asked to perform a task, or send alerts. Subscribe to available bots by clicking on the + icon next to Bots in the navigation sidebar.
View all bots
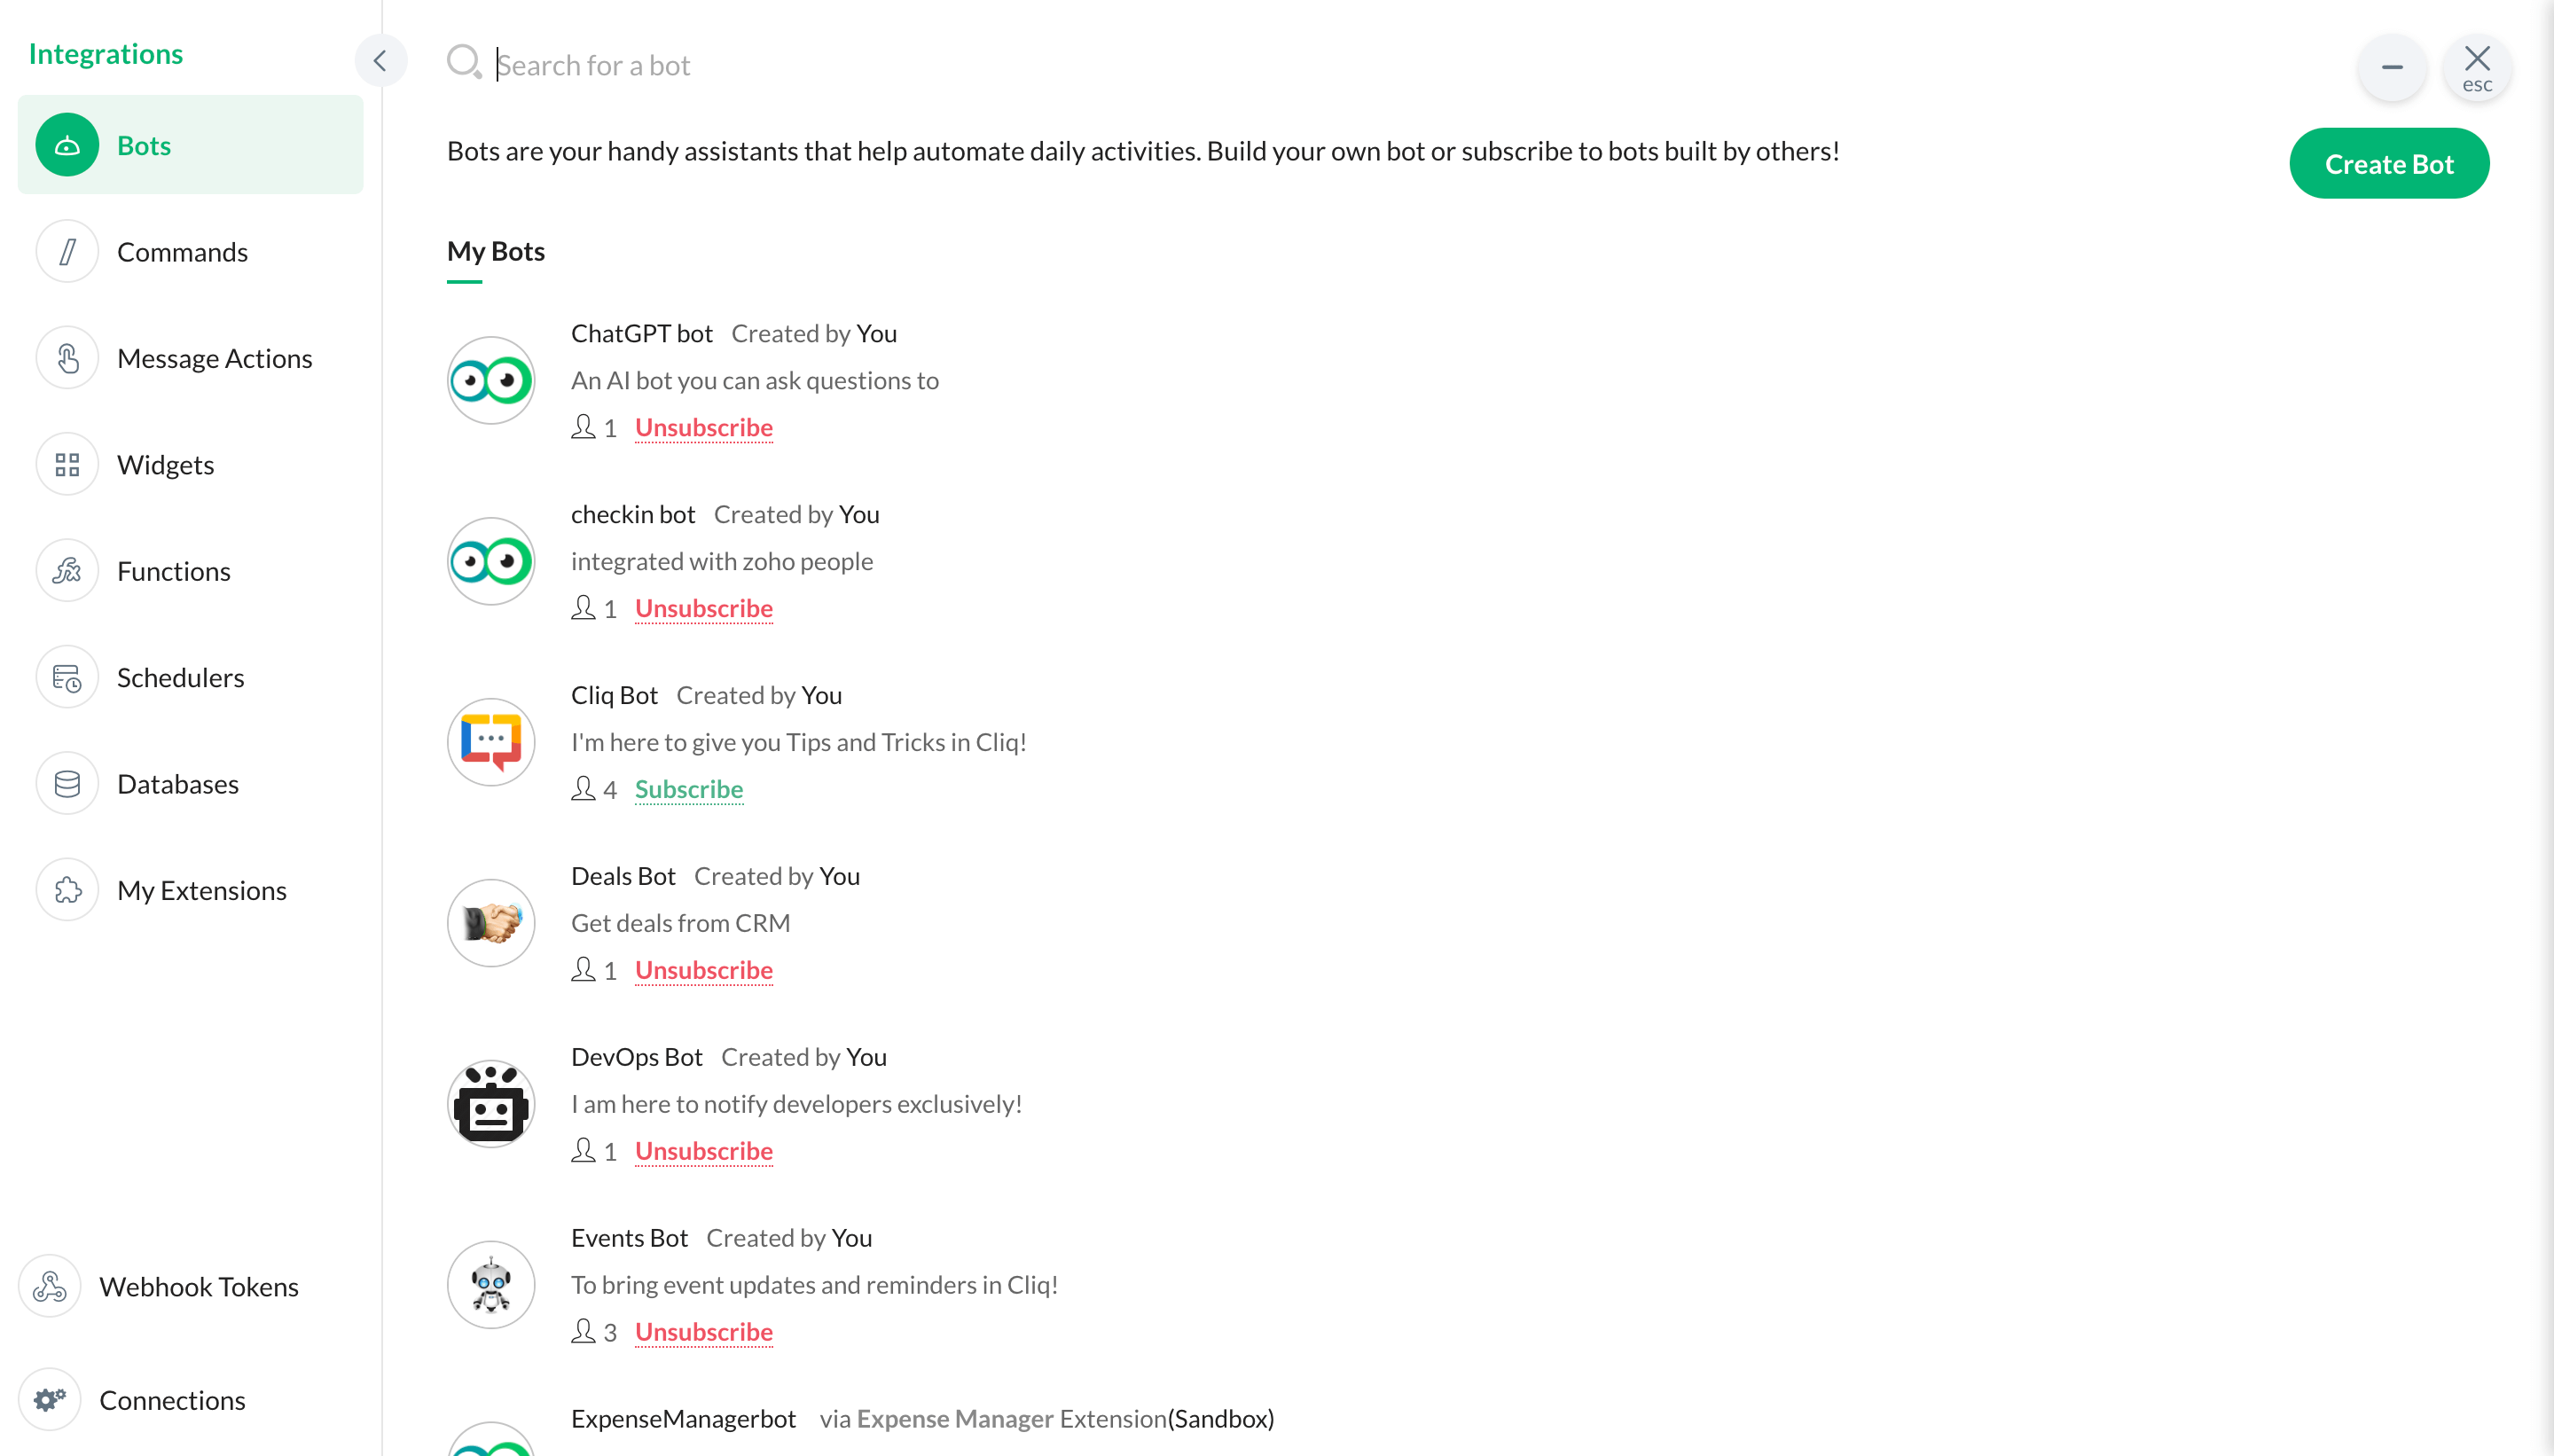
Click on your profile, then select Bots & Tools and choose Bots. From here you can view all the bots in your organization or create new ones.
Create bot
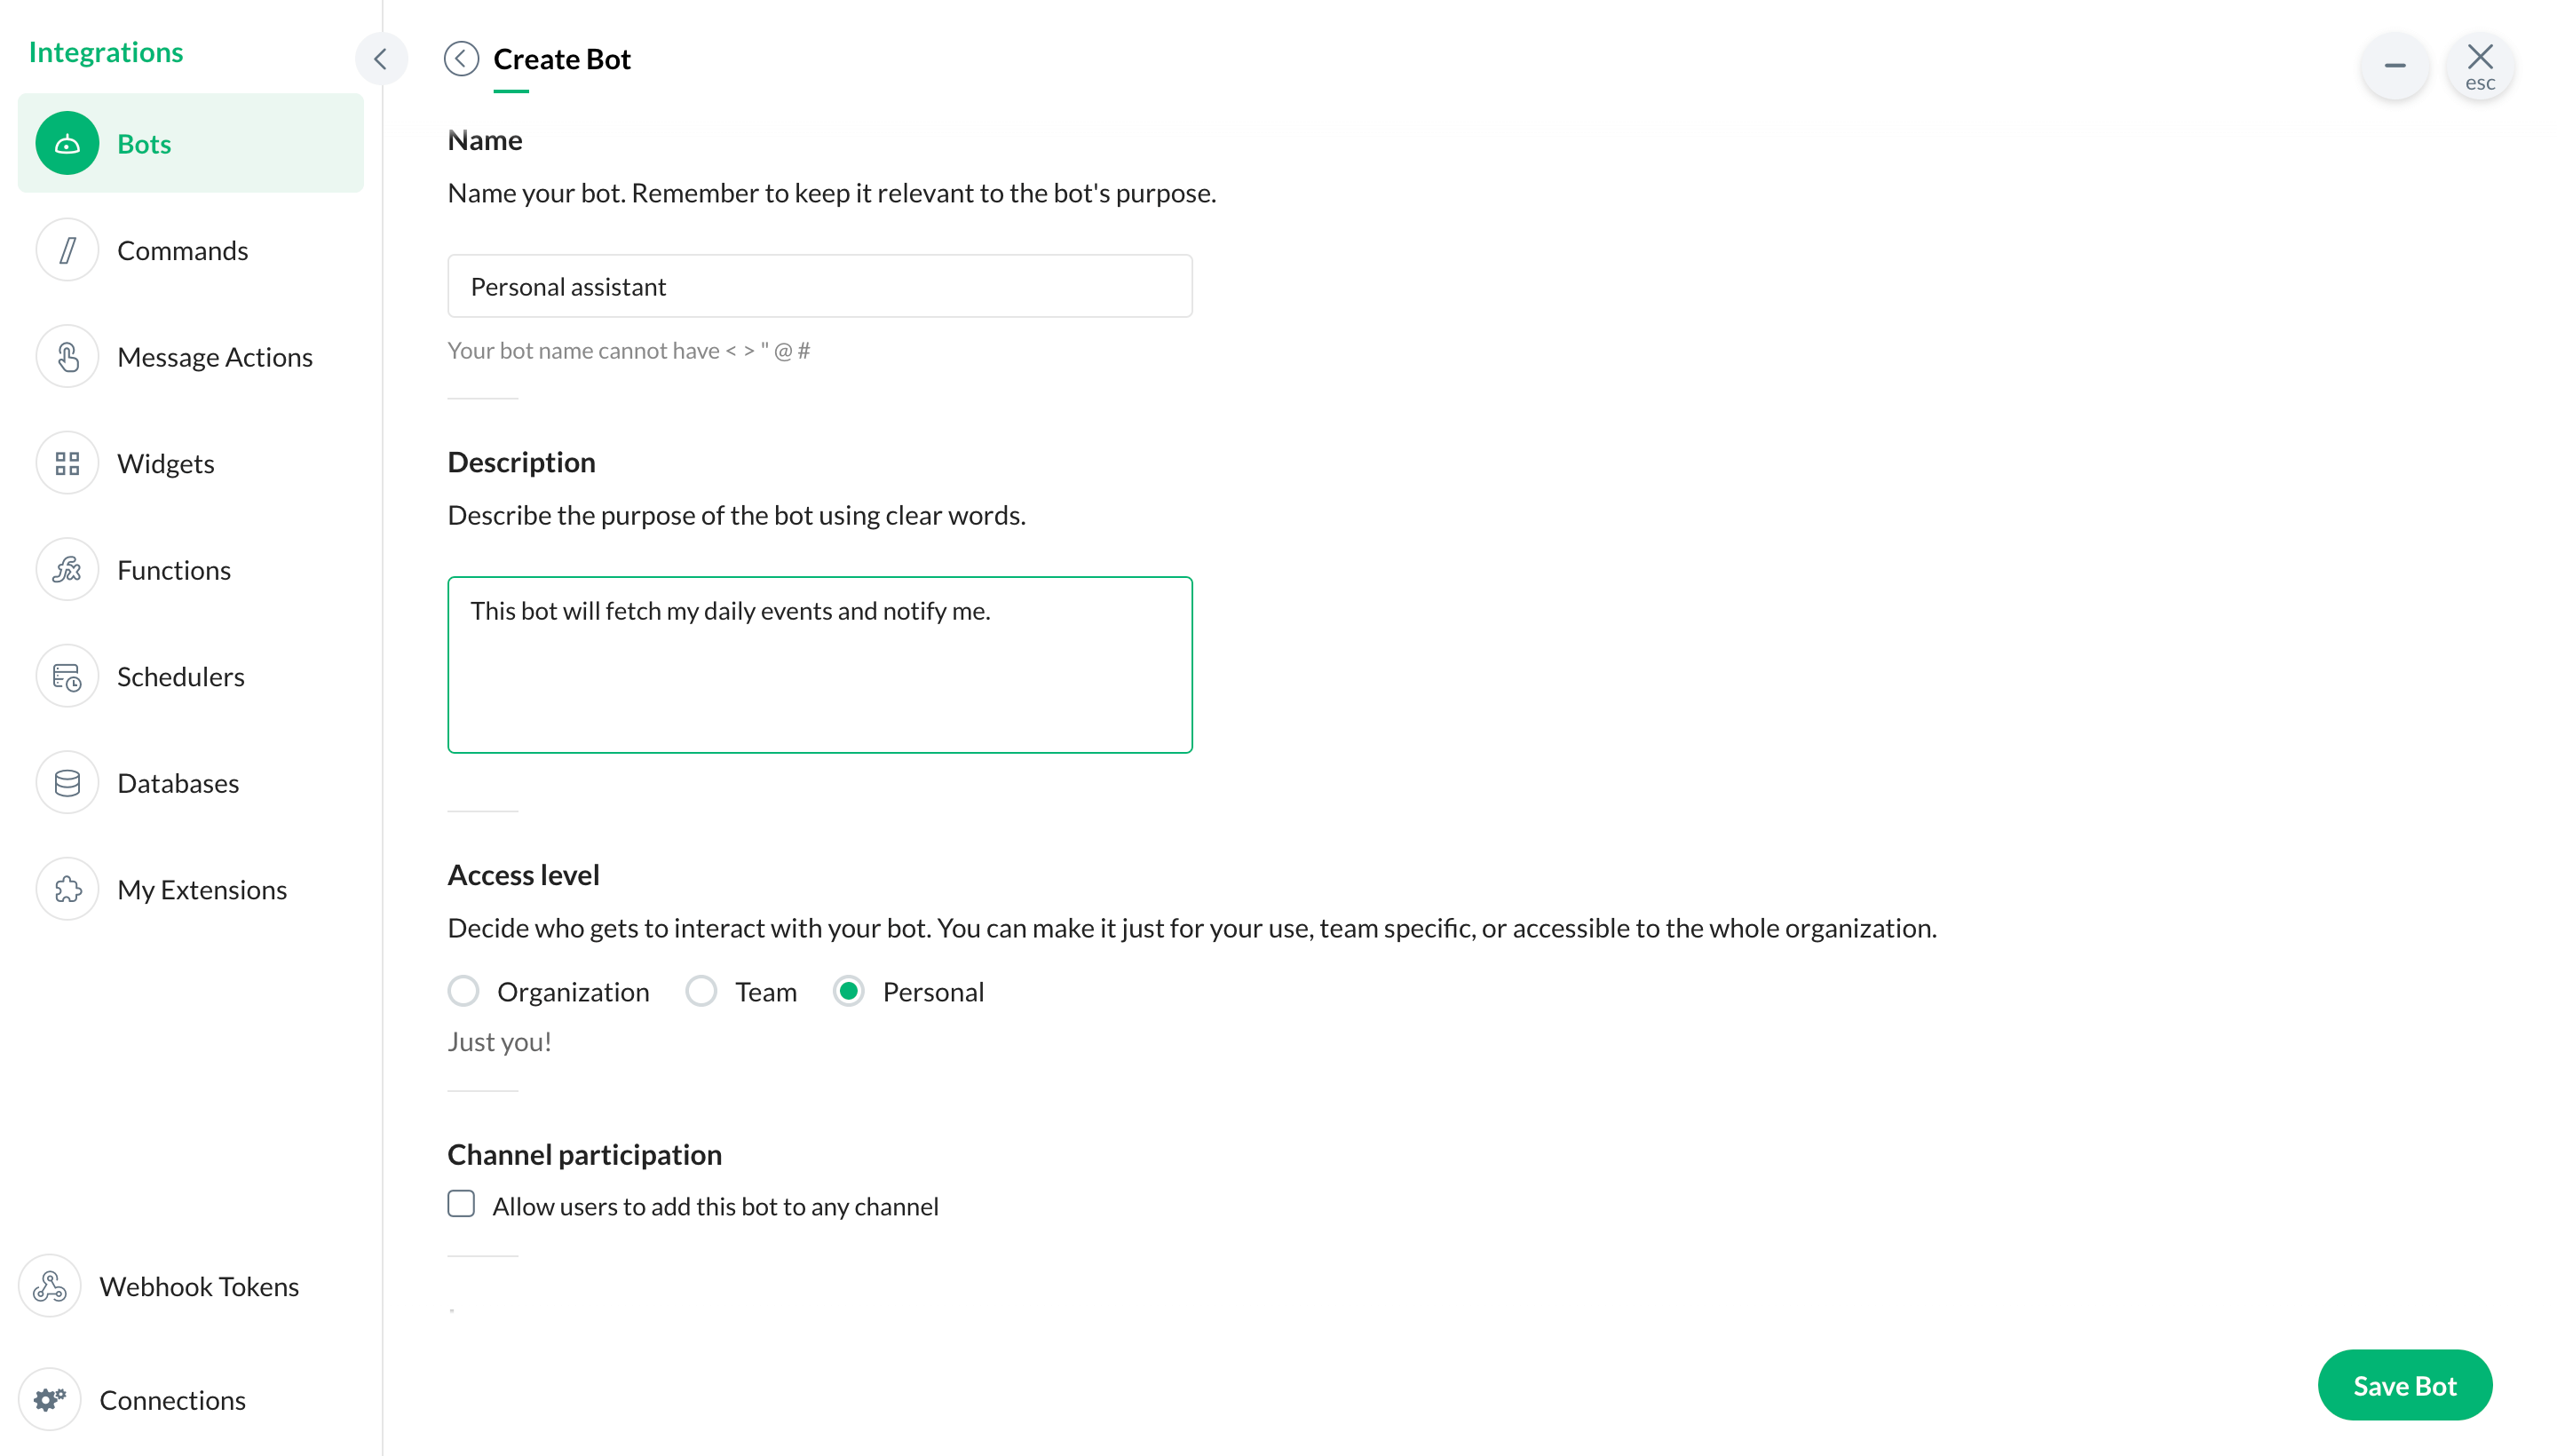
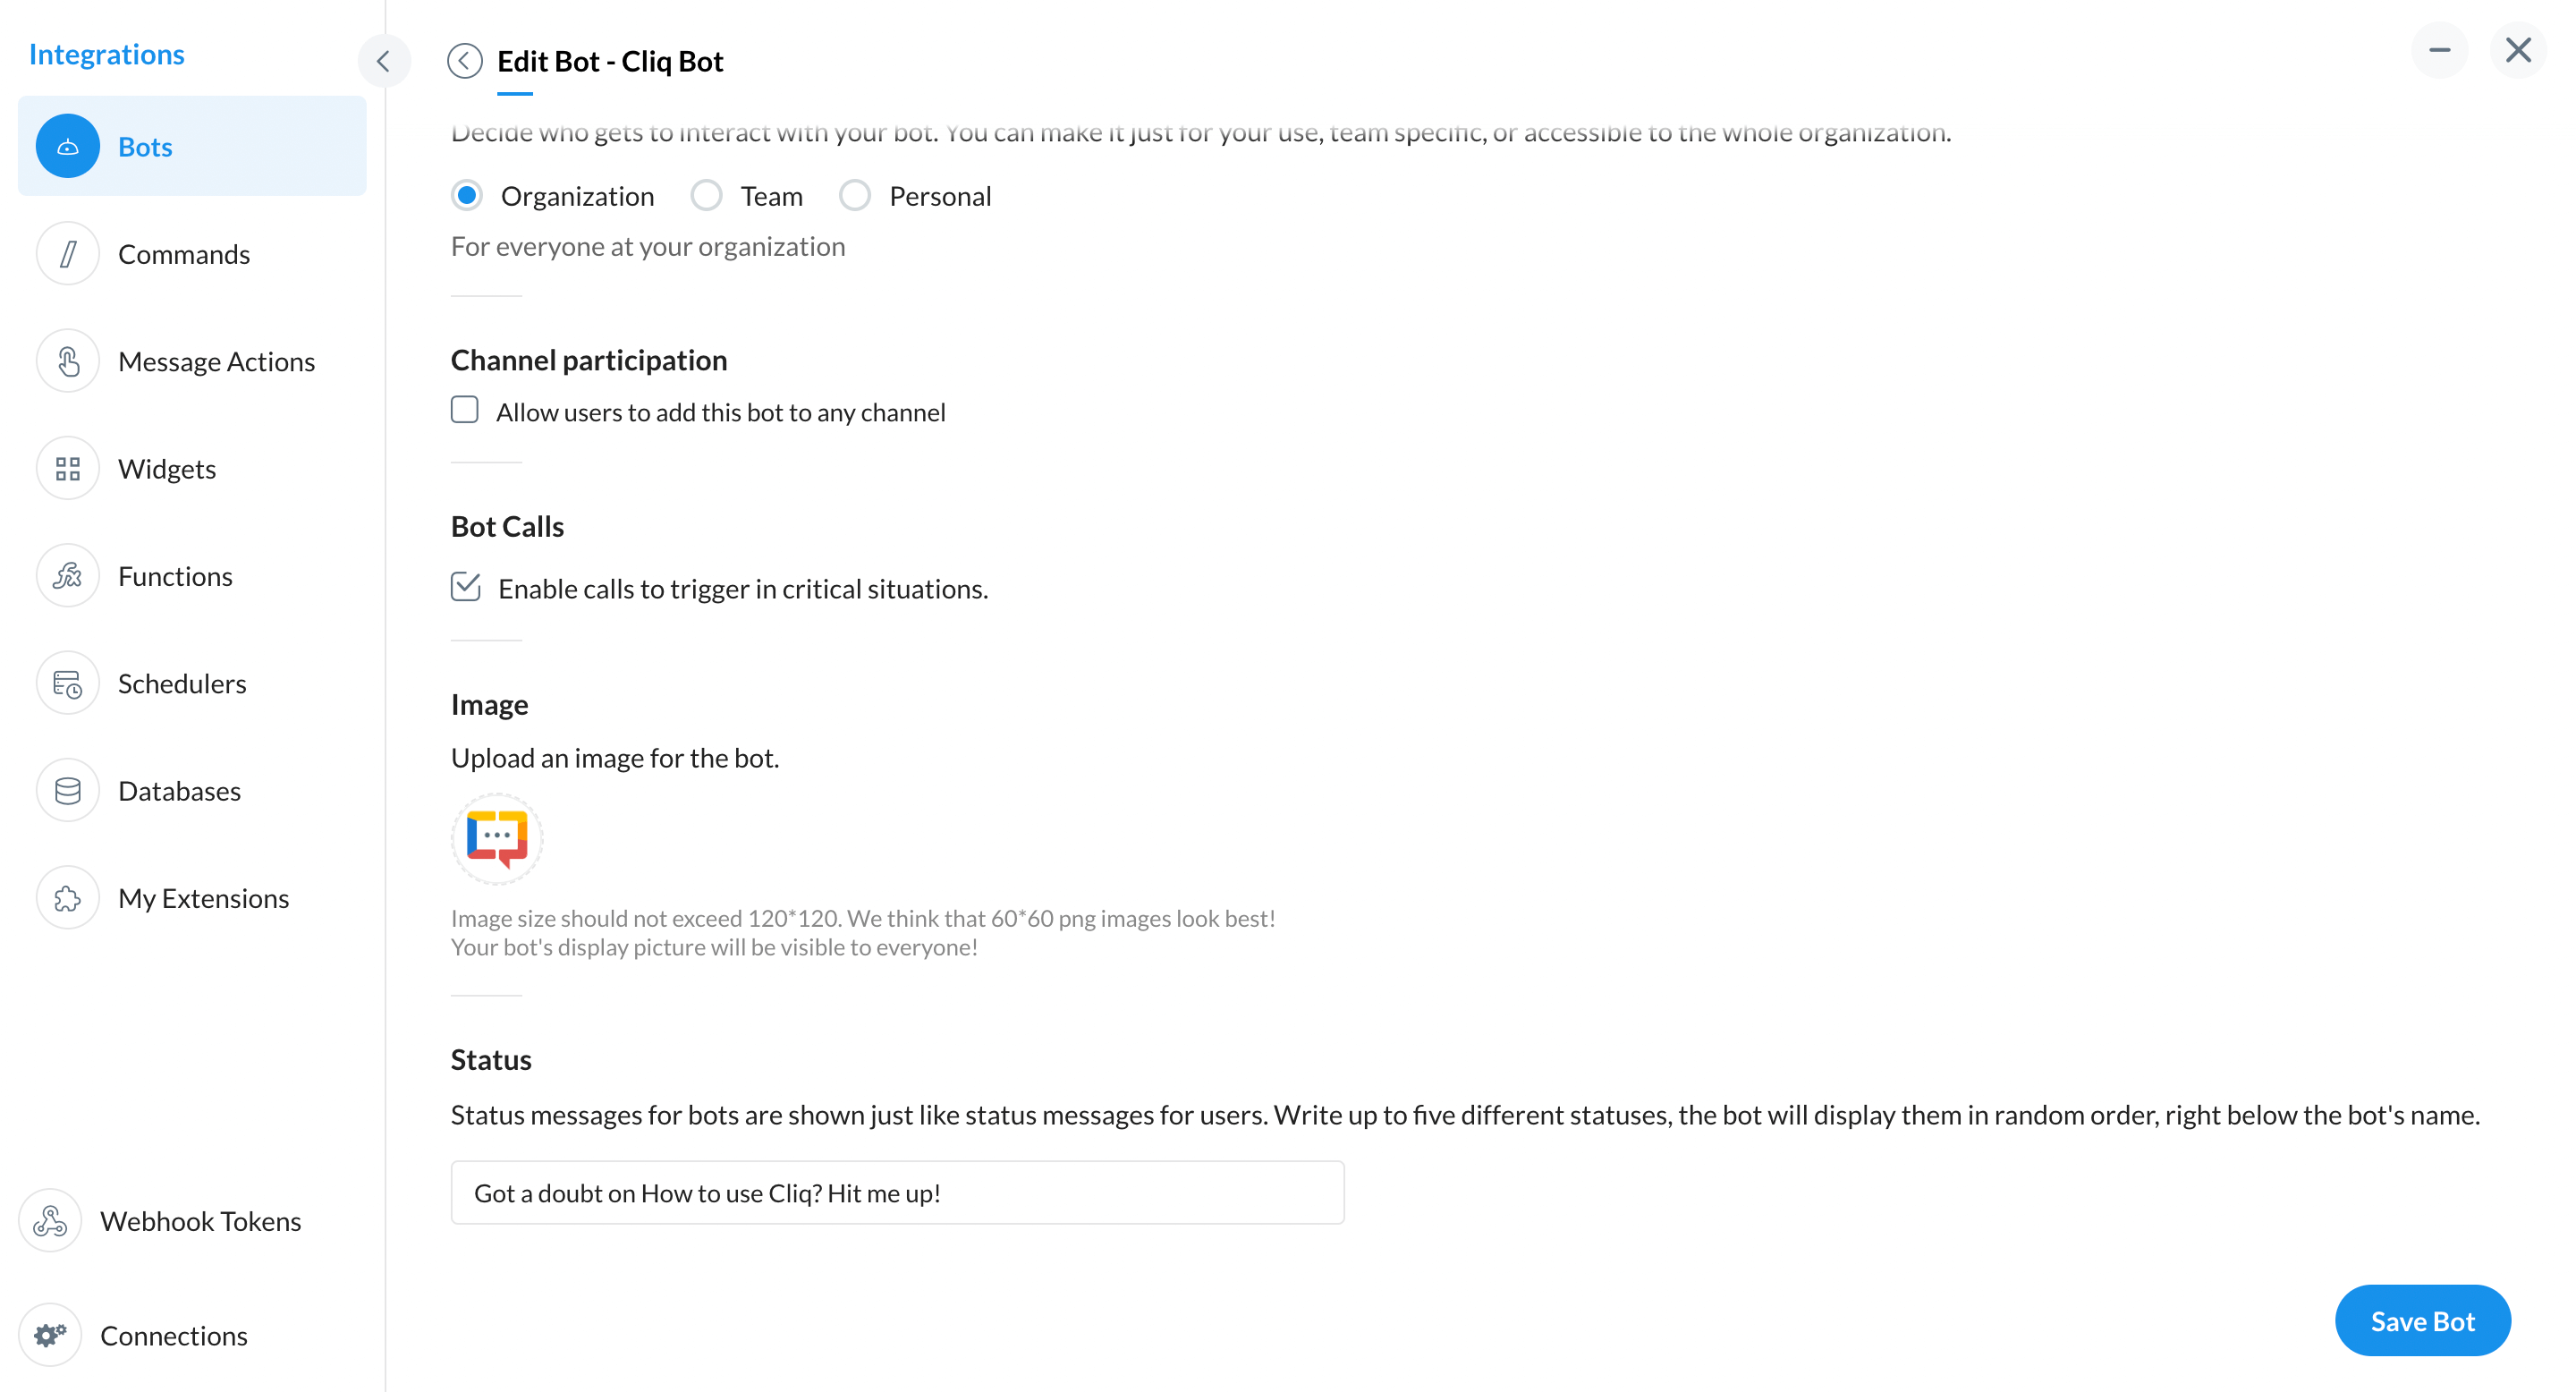
To create a bot, get started by adding the bot's name, description, access level, display image, and status.
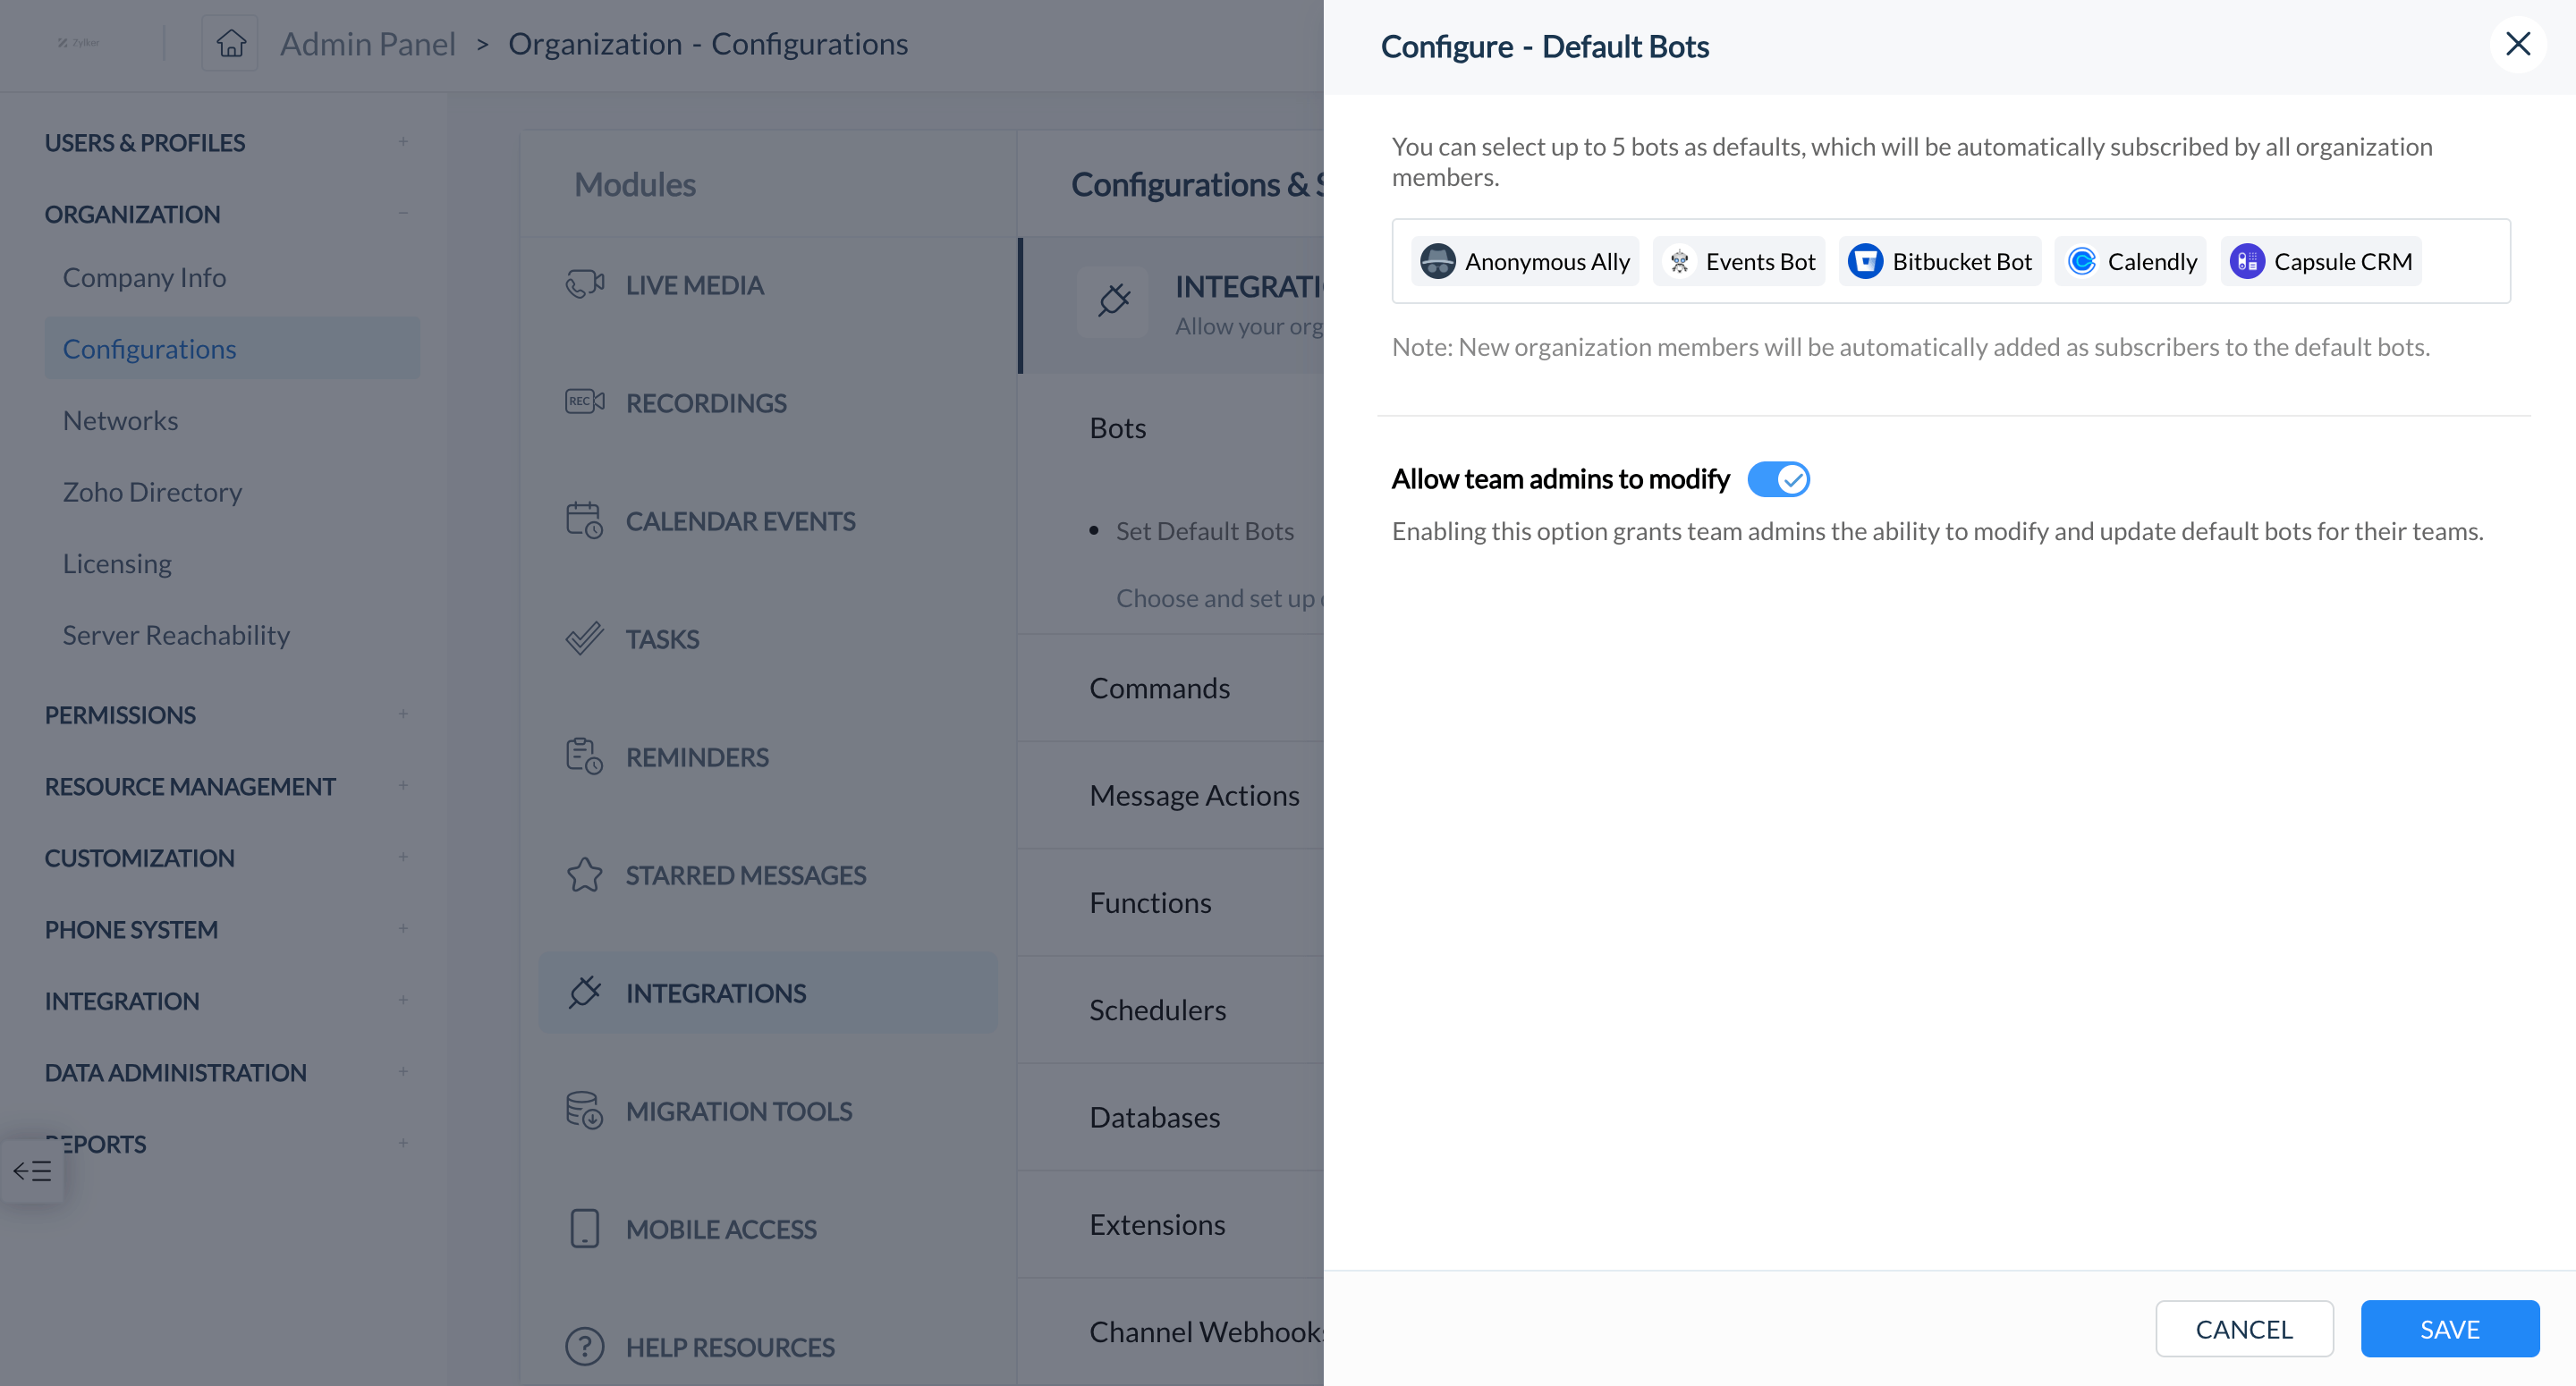
Default bots
Set up bots so new users are auto-subscribed to them. To add default bots, go to the admin panel, select Configurations, and click Integrations.
Bot voice alerts
Never lose important bot notifications. To turn on voice alerts, go to Bots & Tools and enable Bot Calls.
- Subscribe to bots
- View all bots
- Create bot
- Default bots
- Bot voice alerts


History
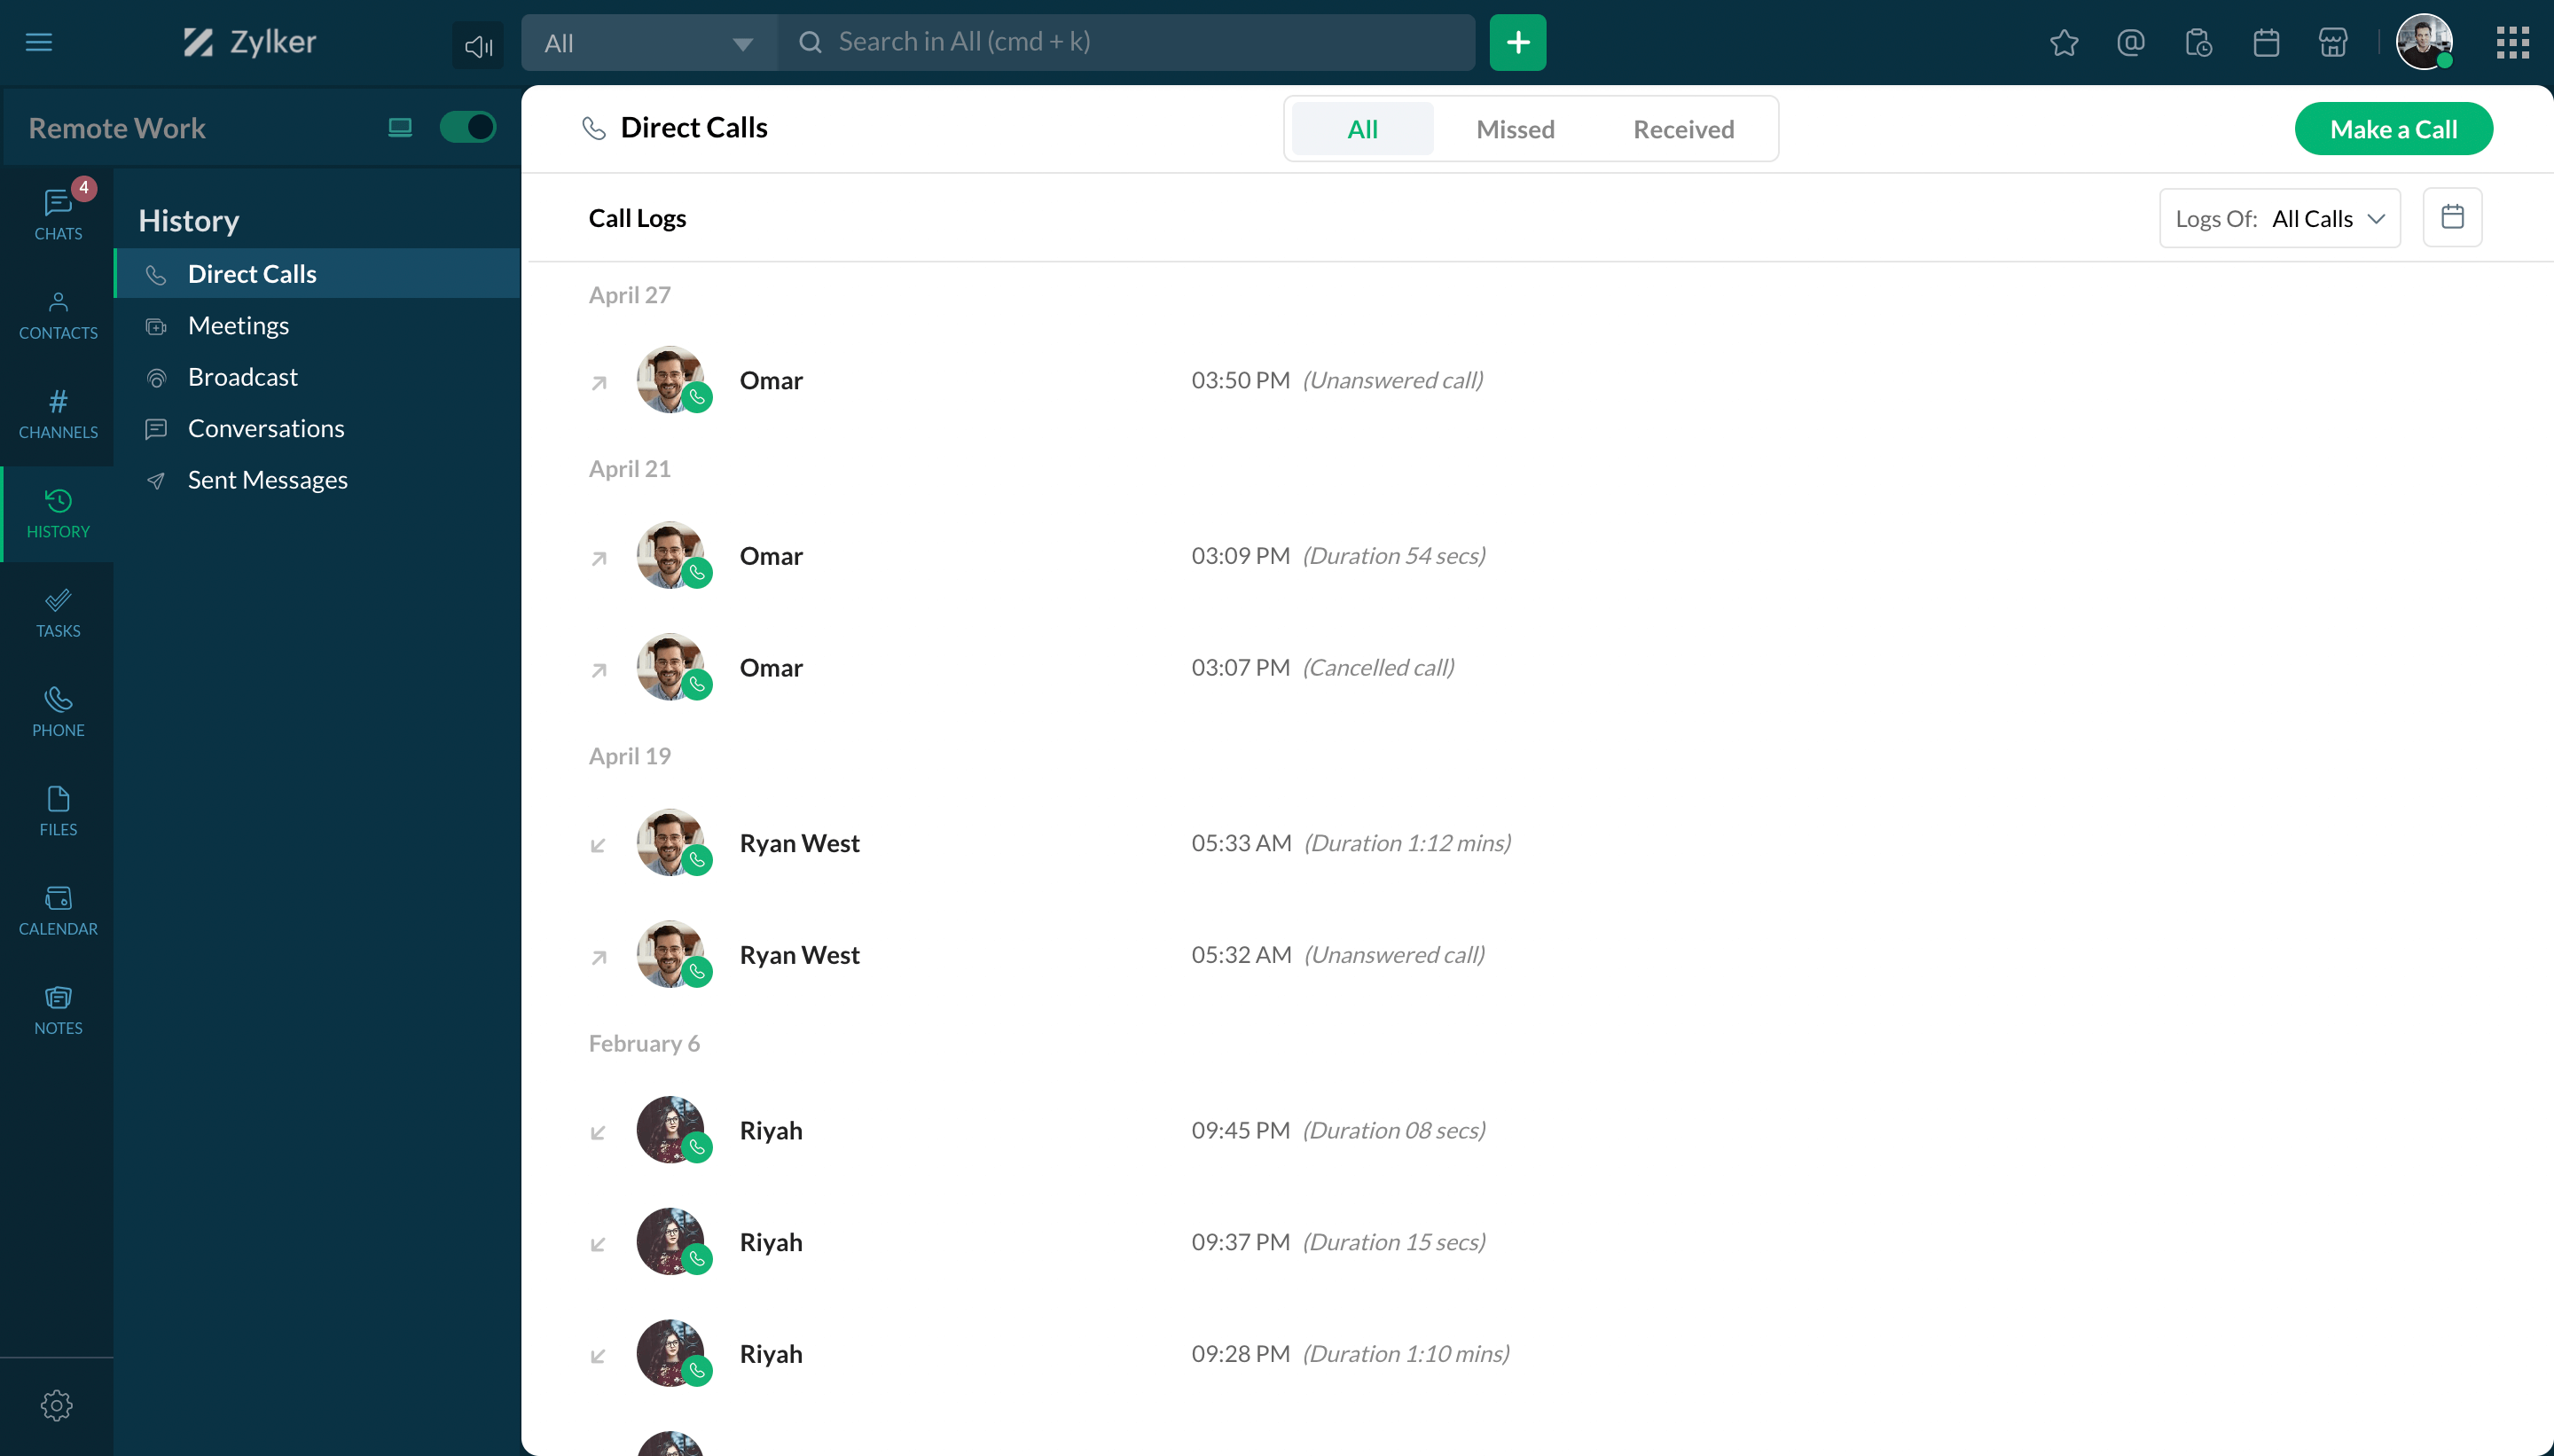
Check call logs
View history of direct calls, meetings, and broadcasts, and filter them based on dates or an individual.
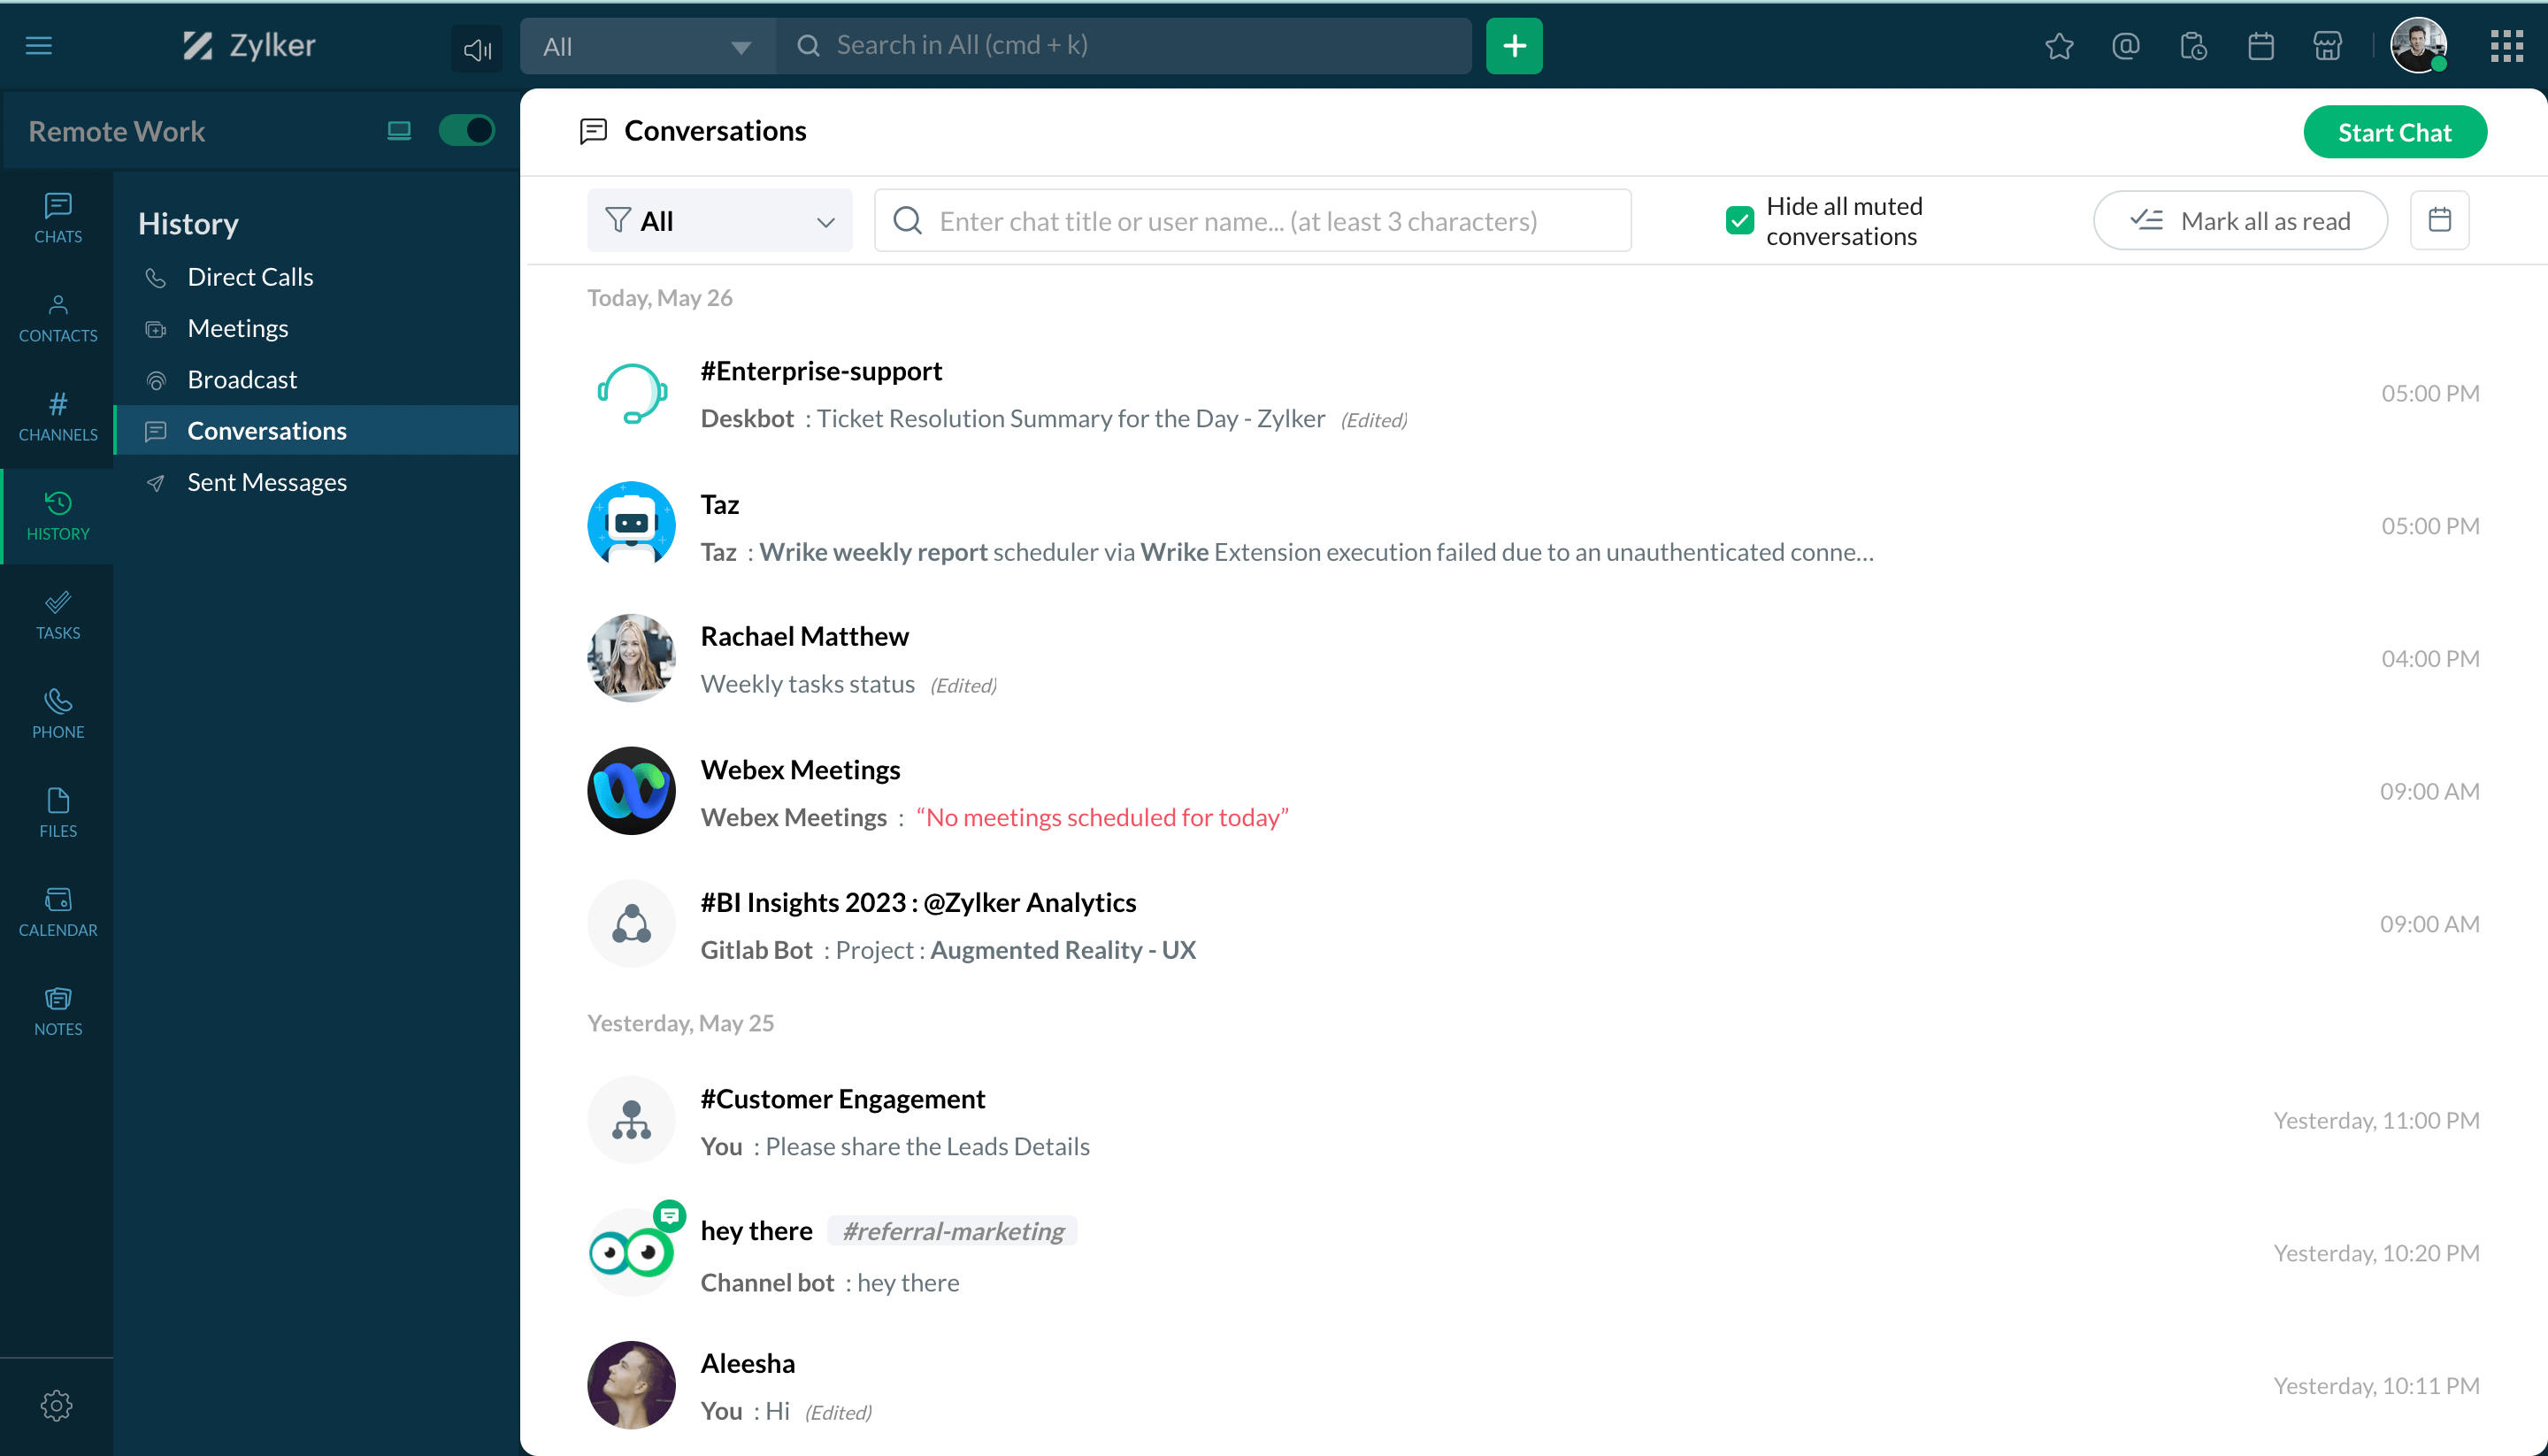
Conversation history
Check out the entire history of conversations in Cliq, and filter and locate them using the search bar.
- Check call logs
- Conversation history


Files
Files shared in chat
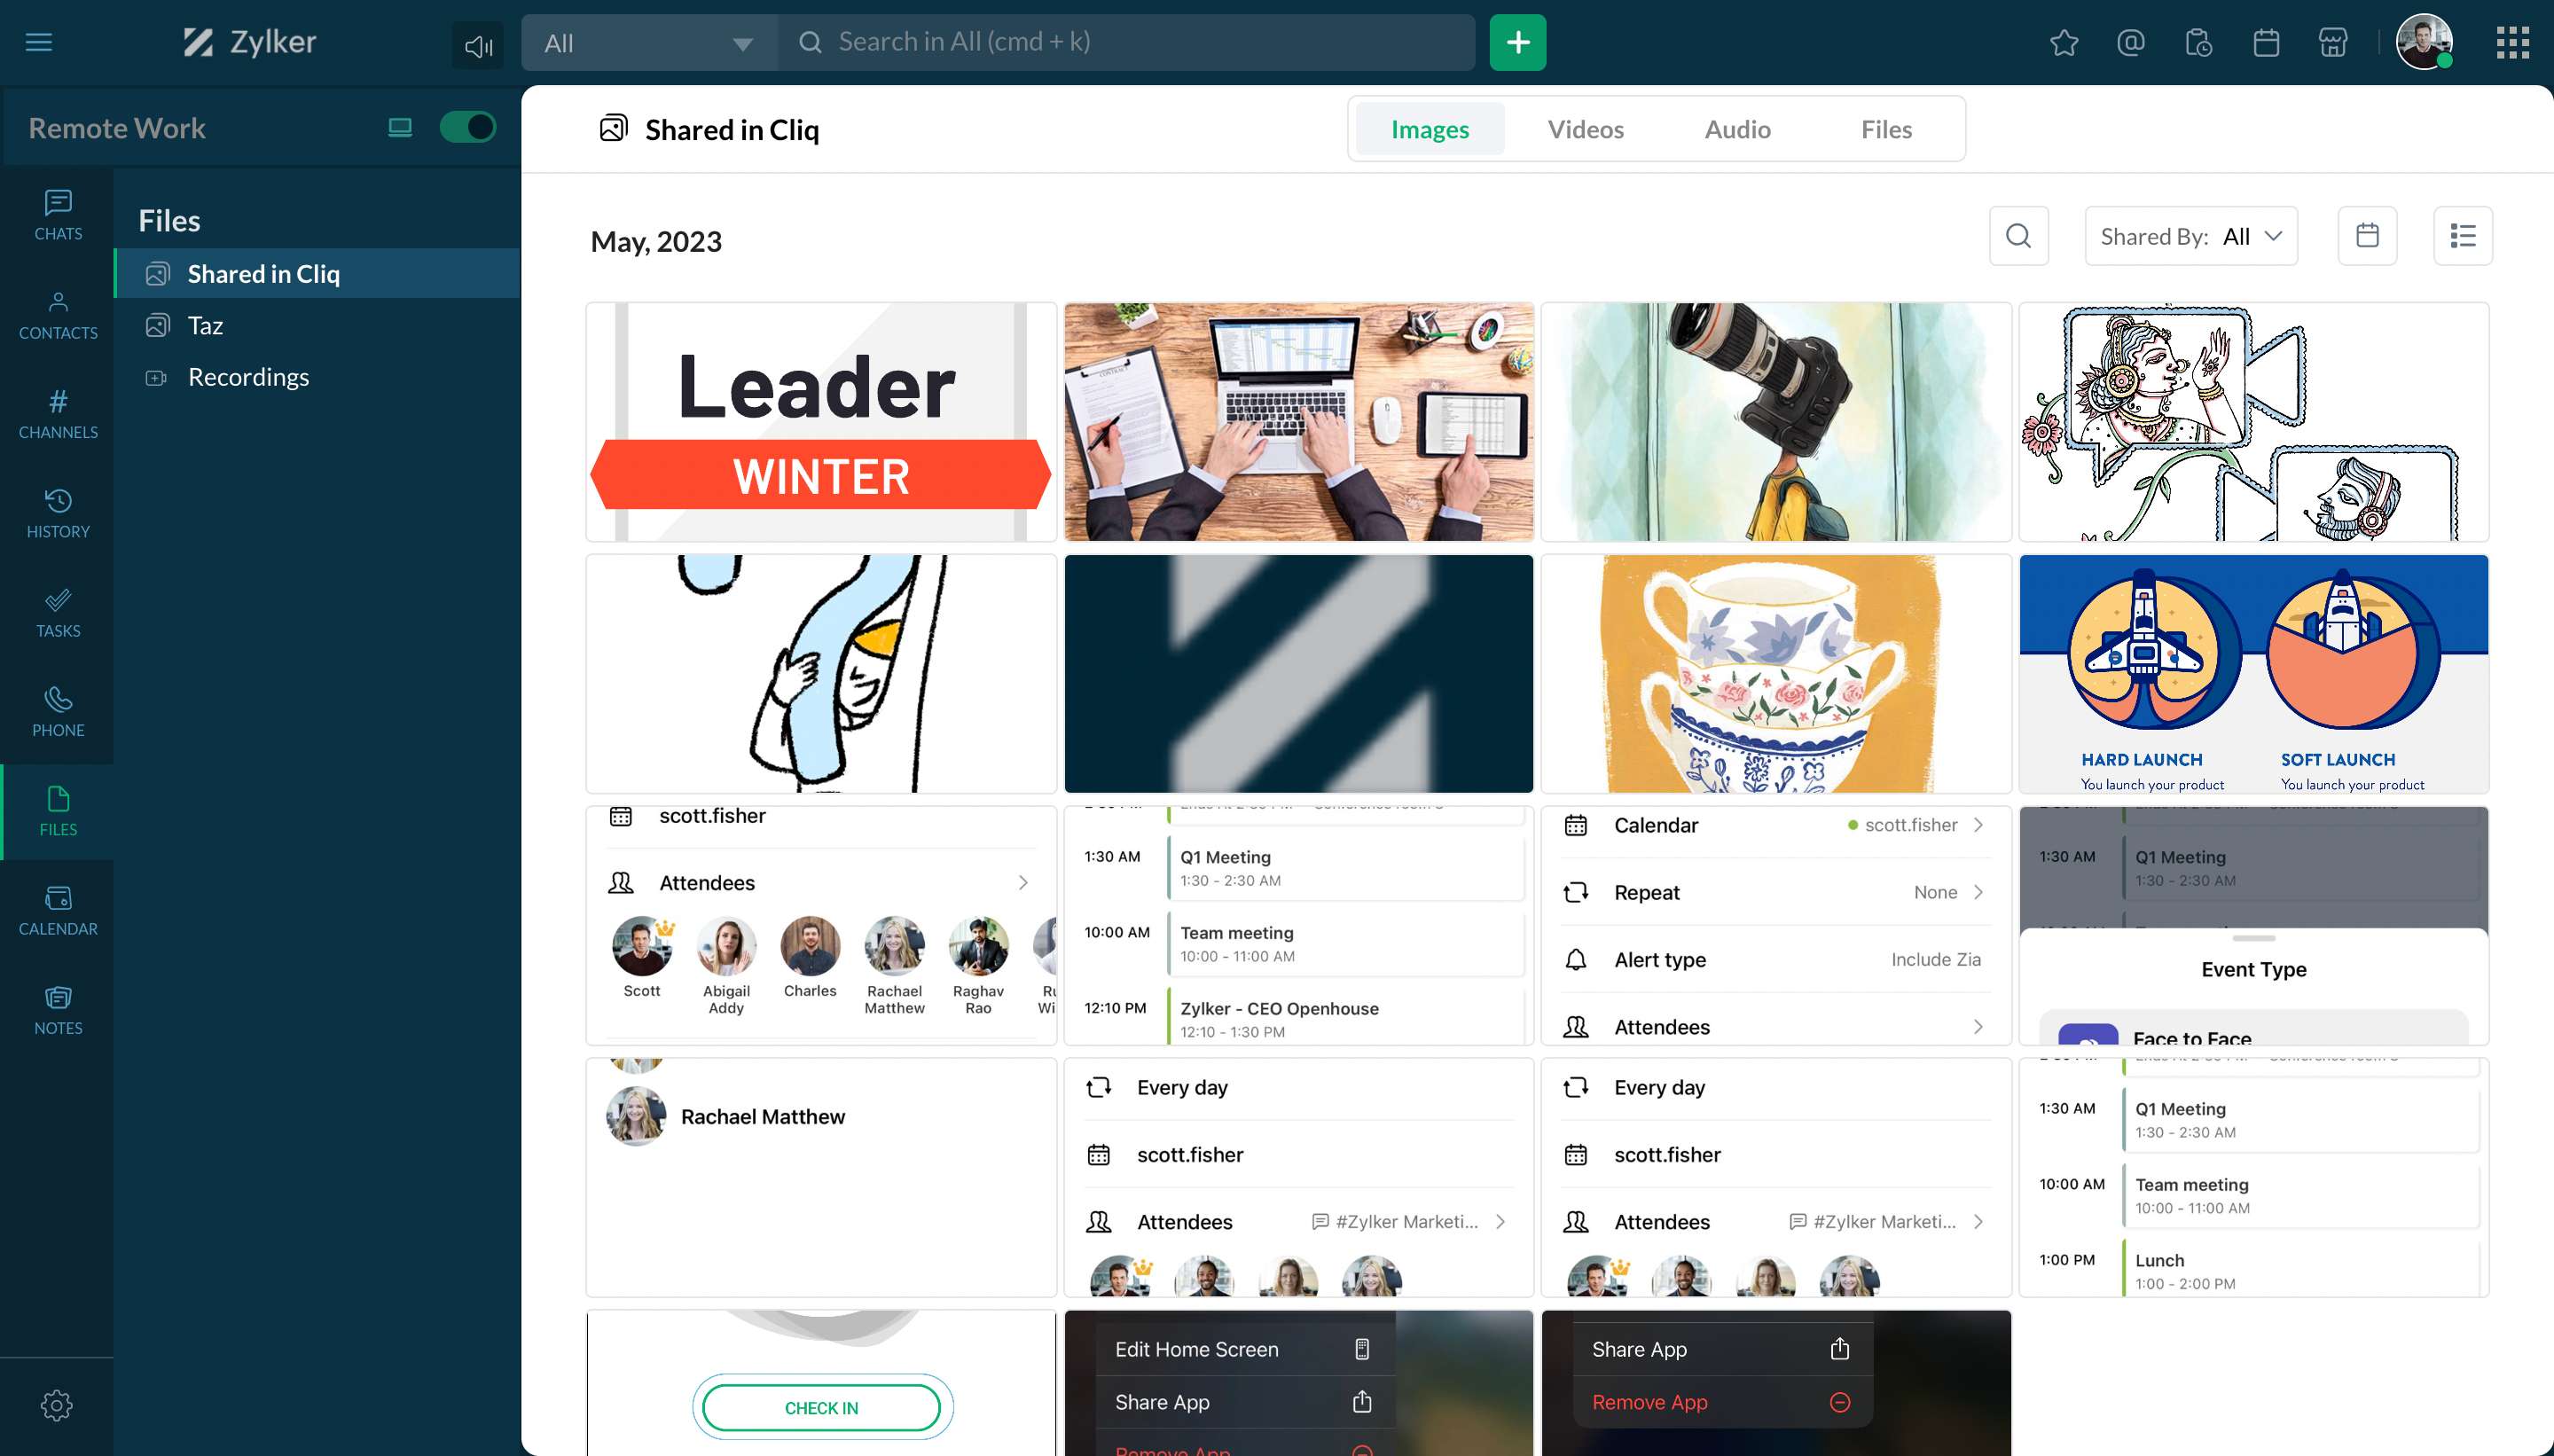
Locate all the files shared in chats by navigating to the Files tab and selecting Shared in Cliq. You can also filter files based on the type and file sharer.
Taz files
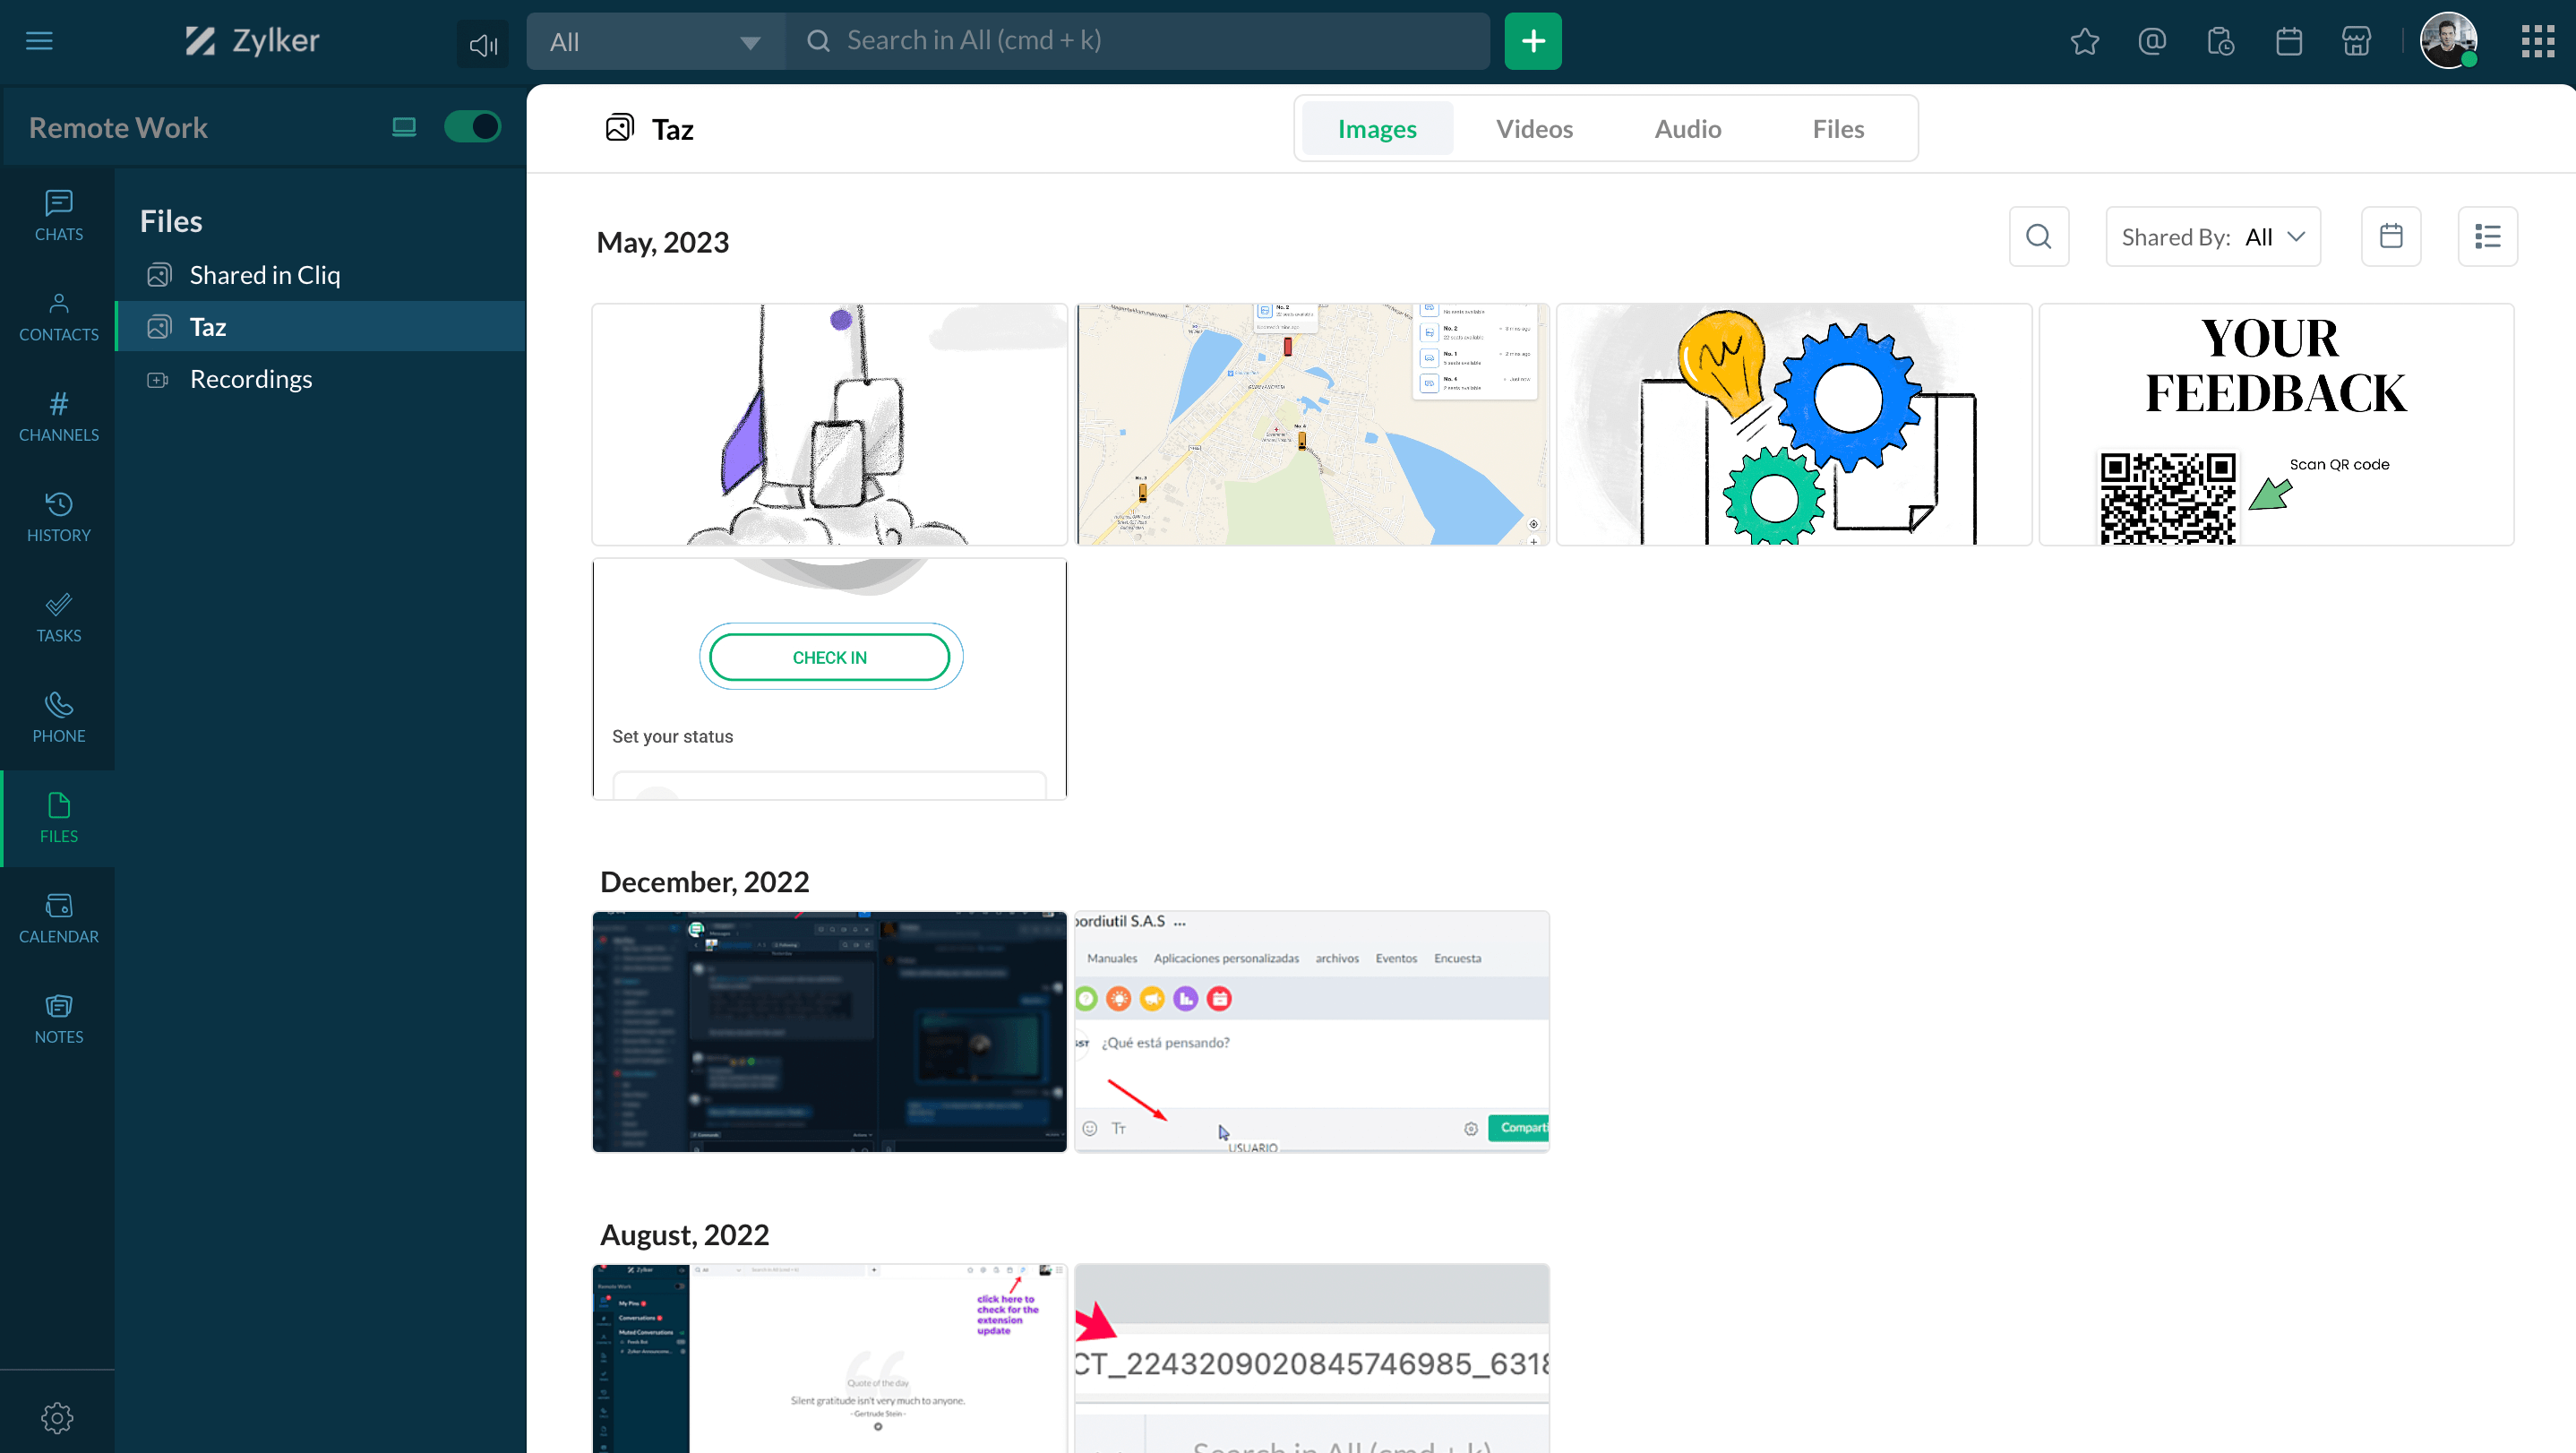
Find all the files that you shared with the Taz bot under Taz in the Files section.
View call recordings
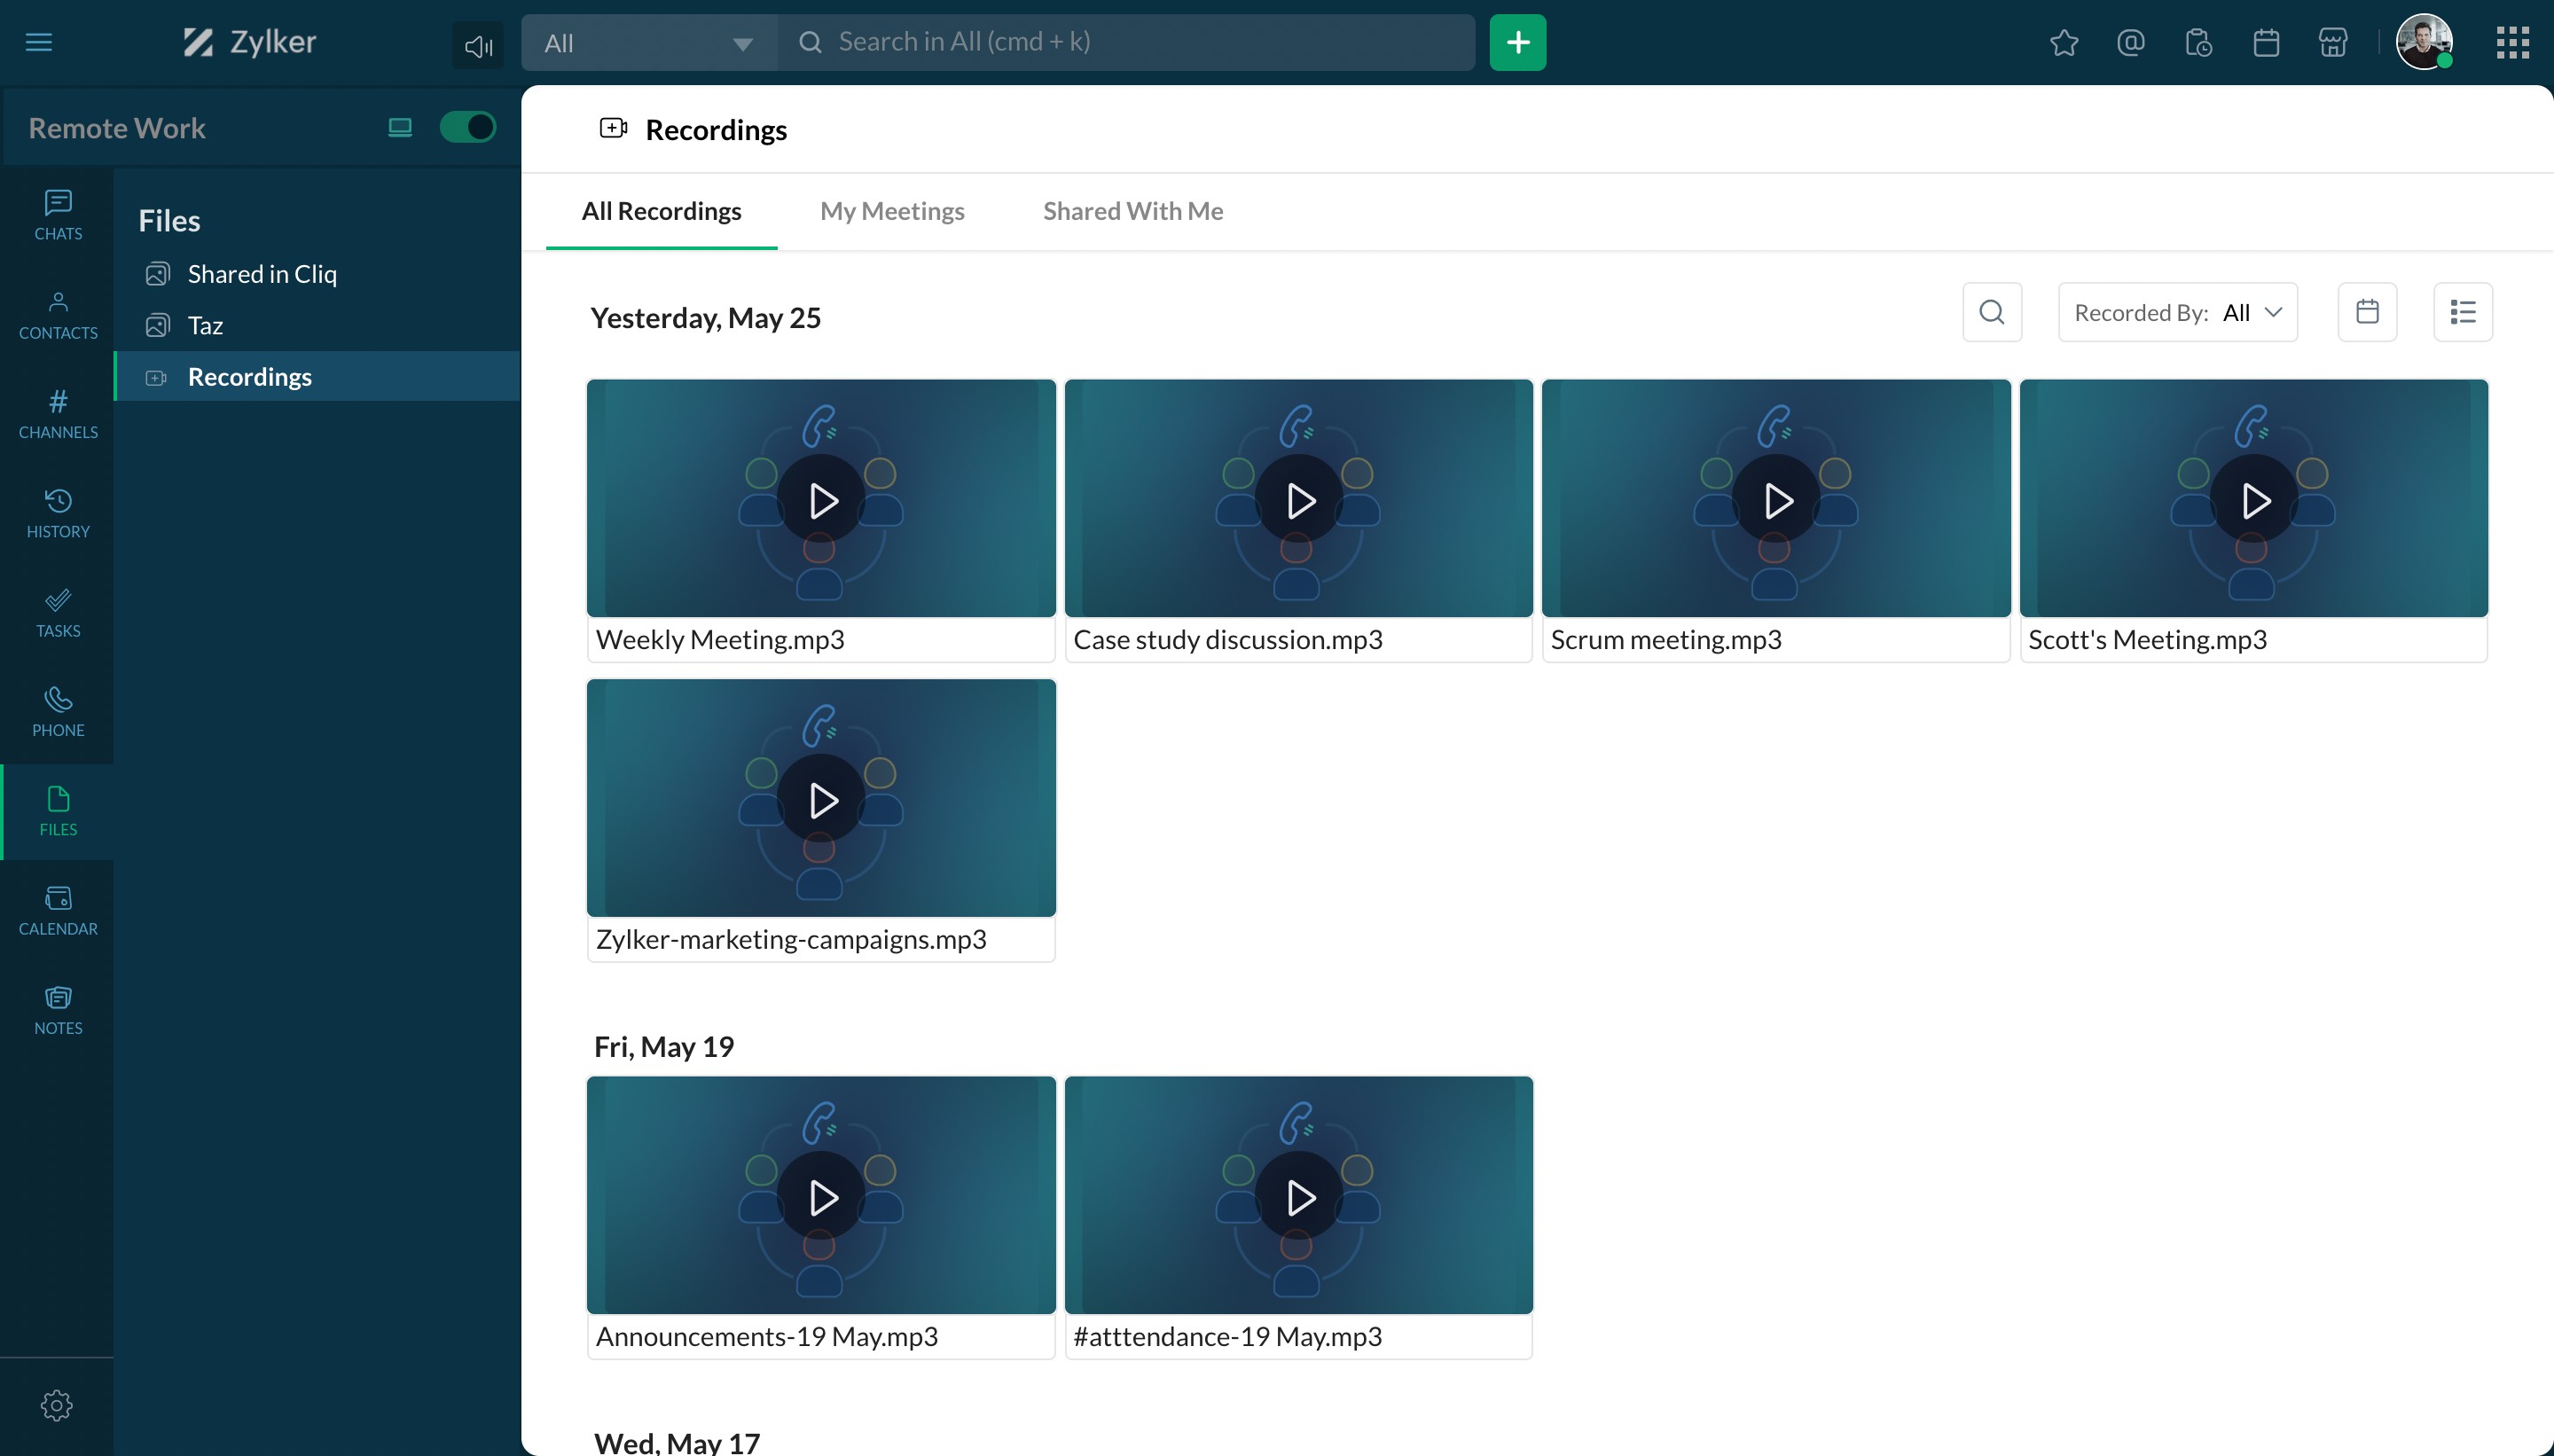
Get access to meeting recordings in Zoho Cliq and run through what was discussed under Recordings in the Files section.
Extract image text
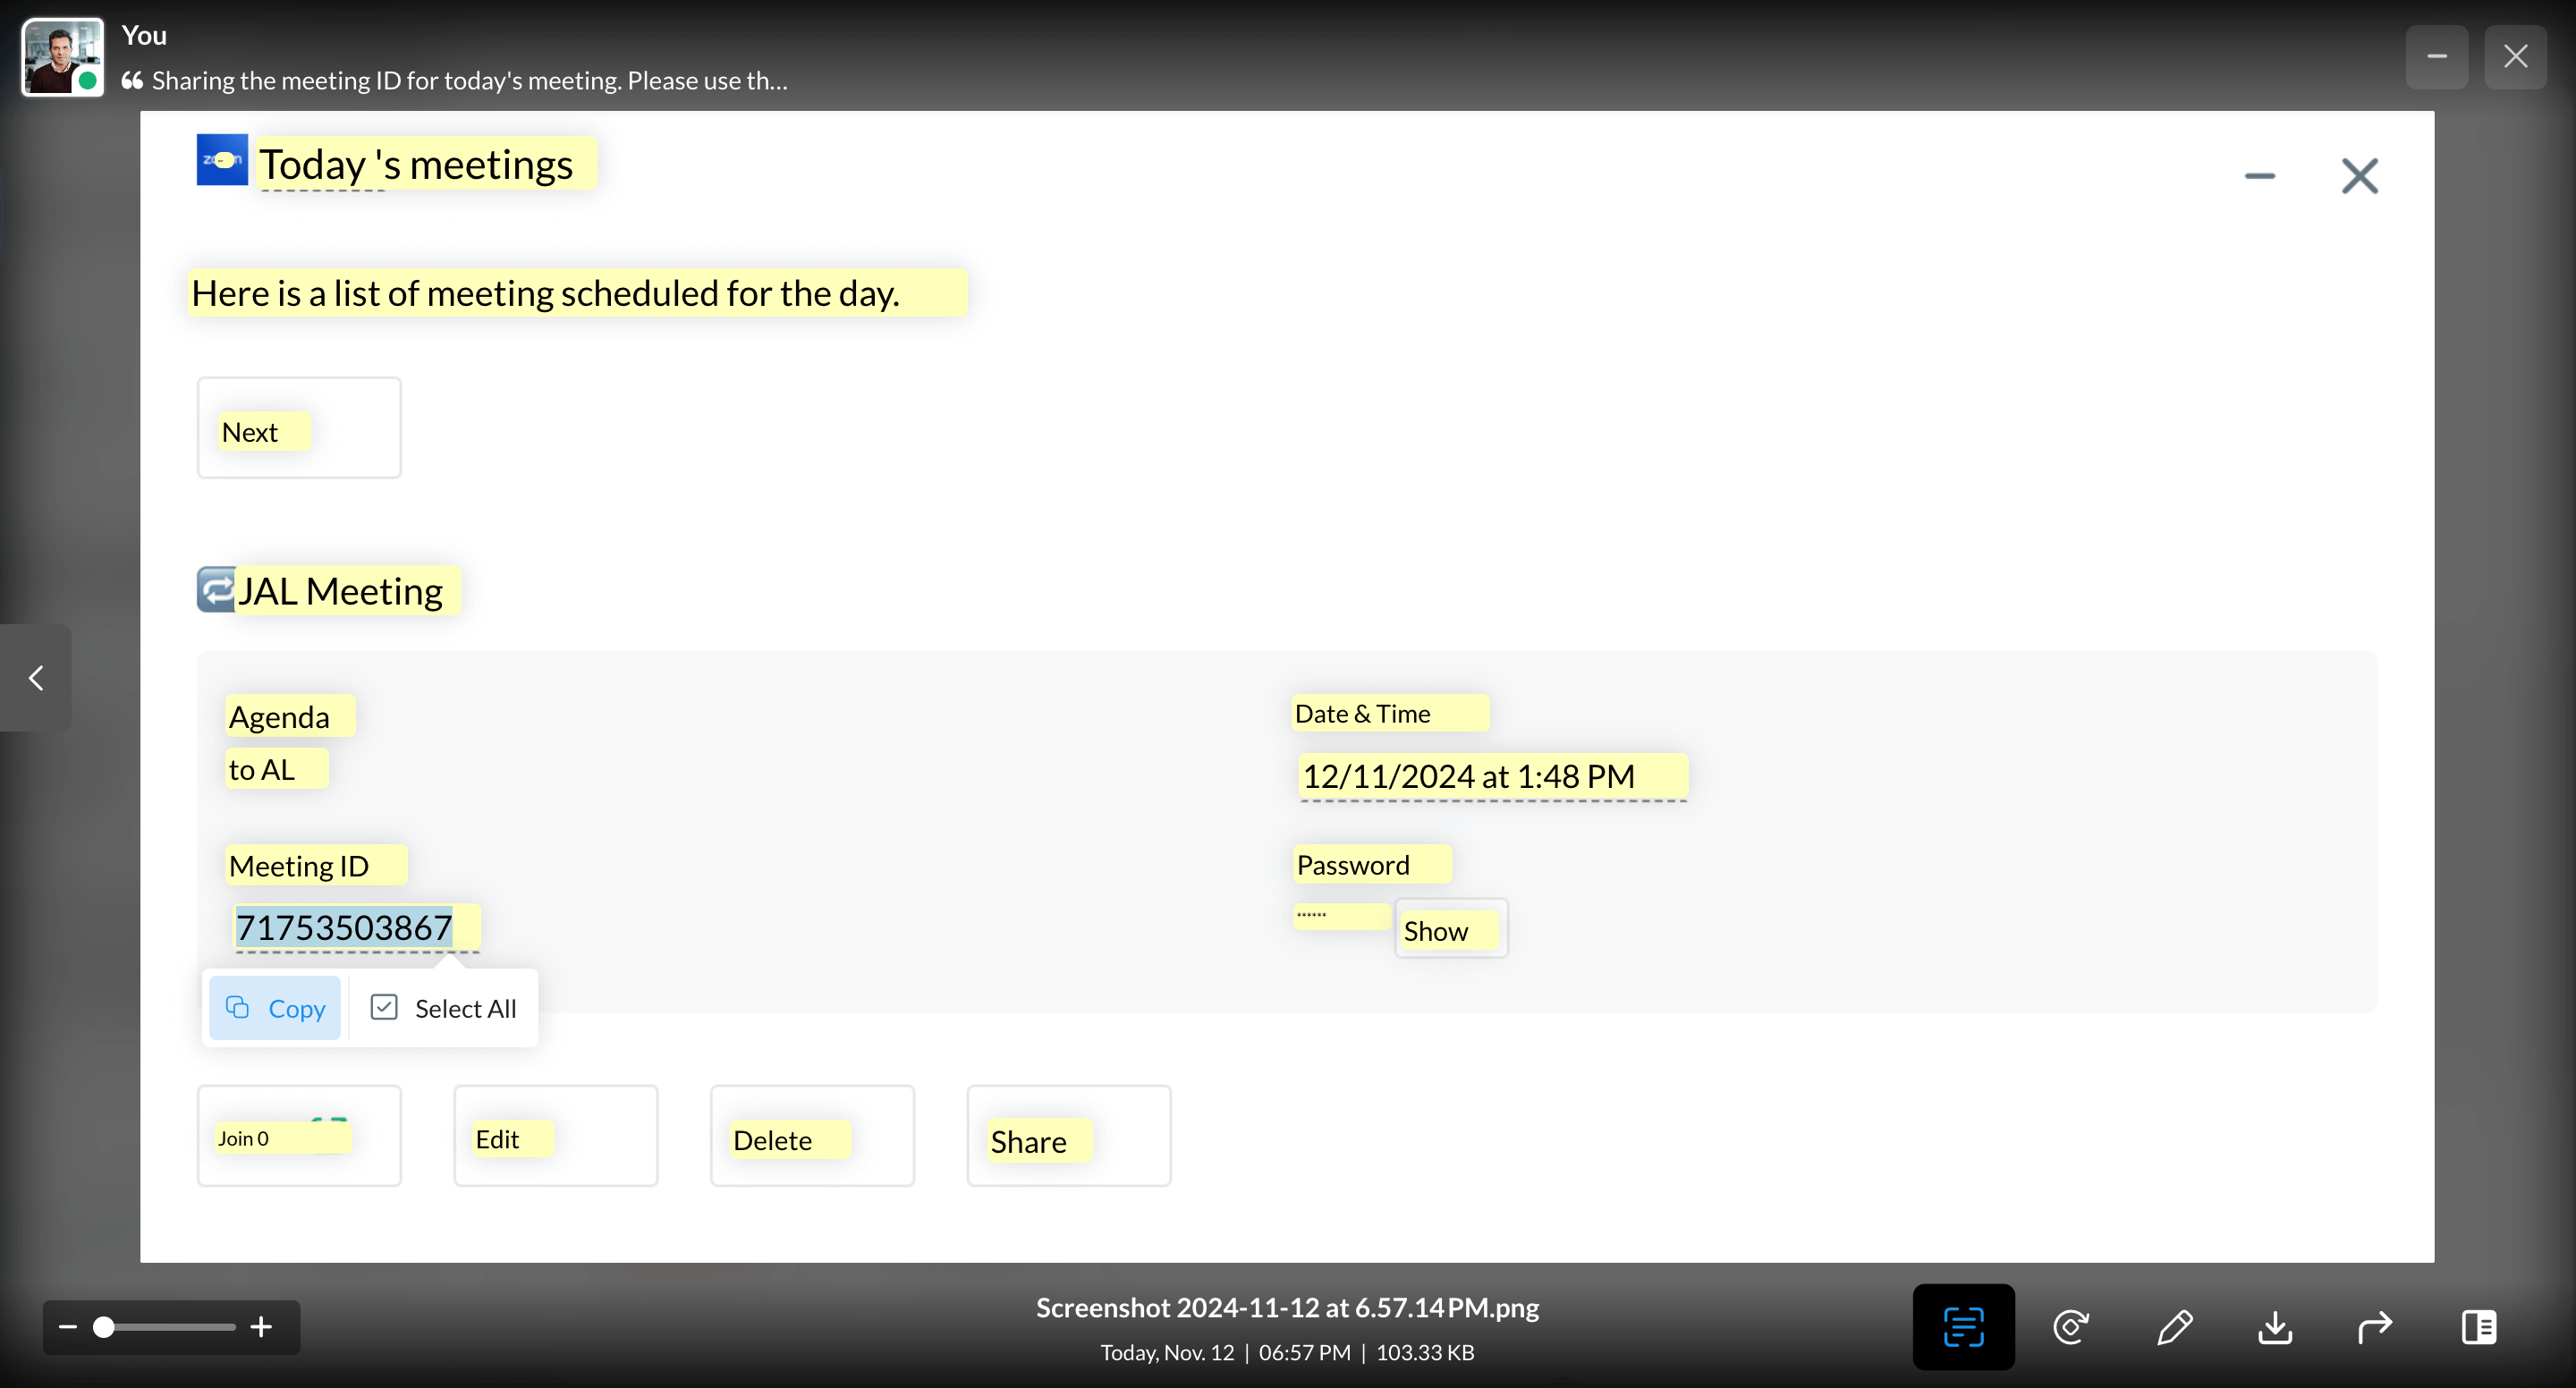
Allow users in your organization to extract text from images shared in Zoho Cliq. All they need to do is open the image and click Extract Text to copy.
- Files shared in chat
- Taz files
- View call recordings
- Extract image text


Tasks
View tasks
Manage tasks in Zoho Cliq by syncing the app with Zoho Projects. Navigate to Tasks from the navigation sidebar to view all tasks.
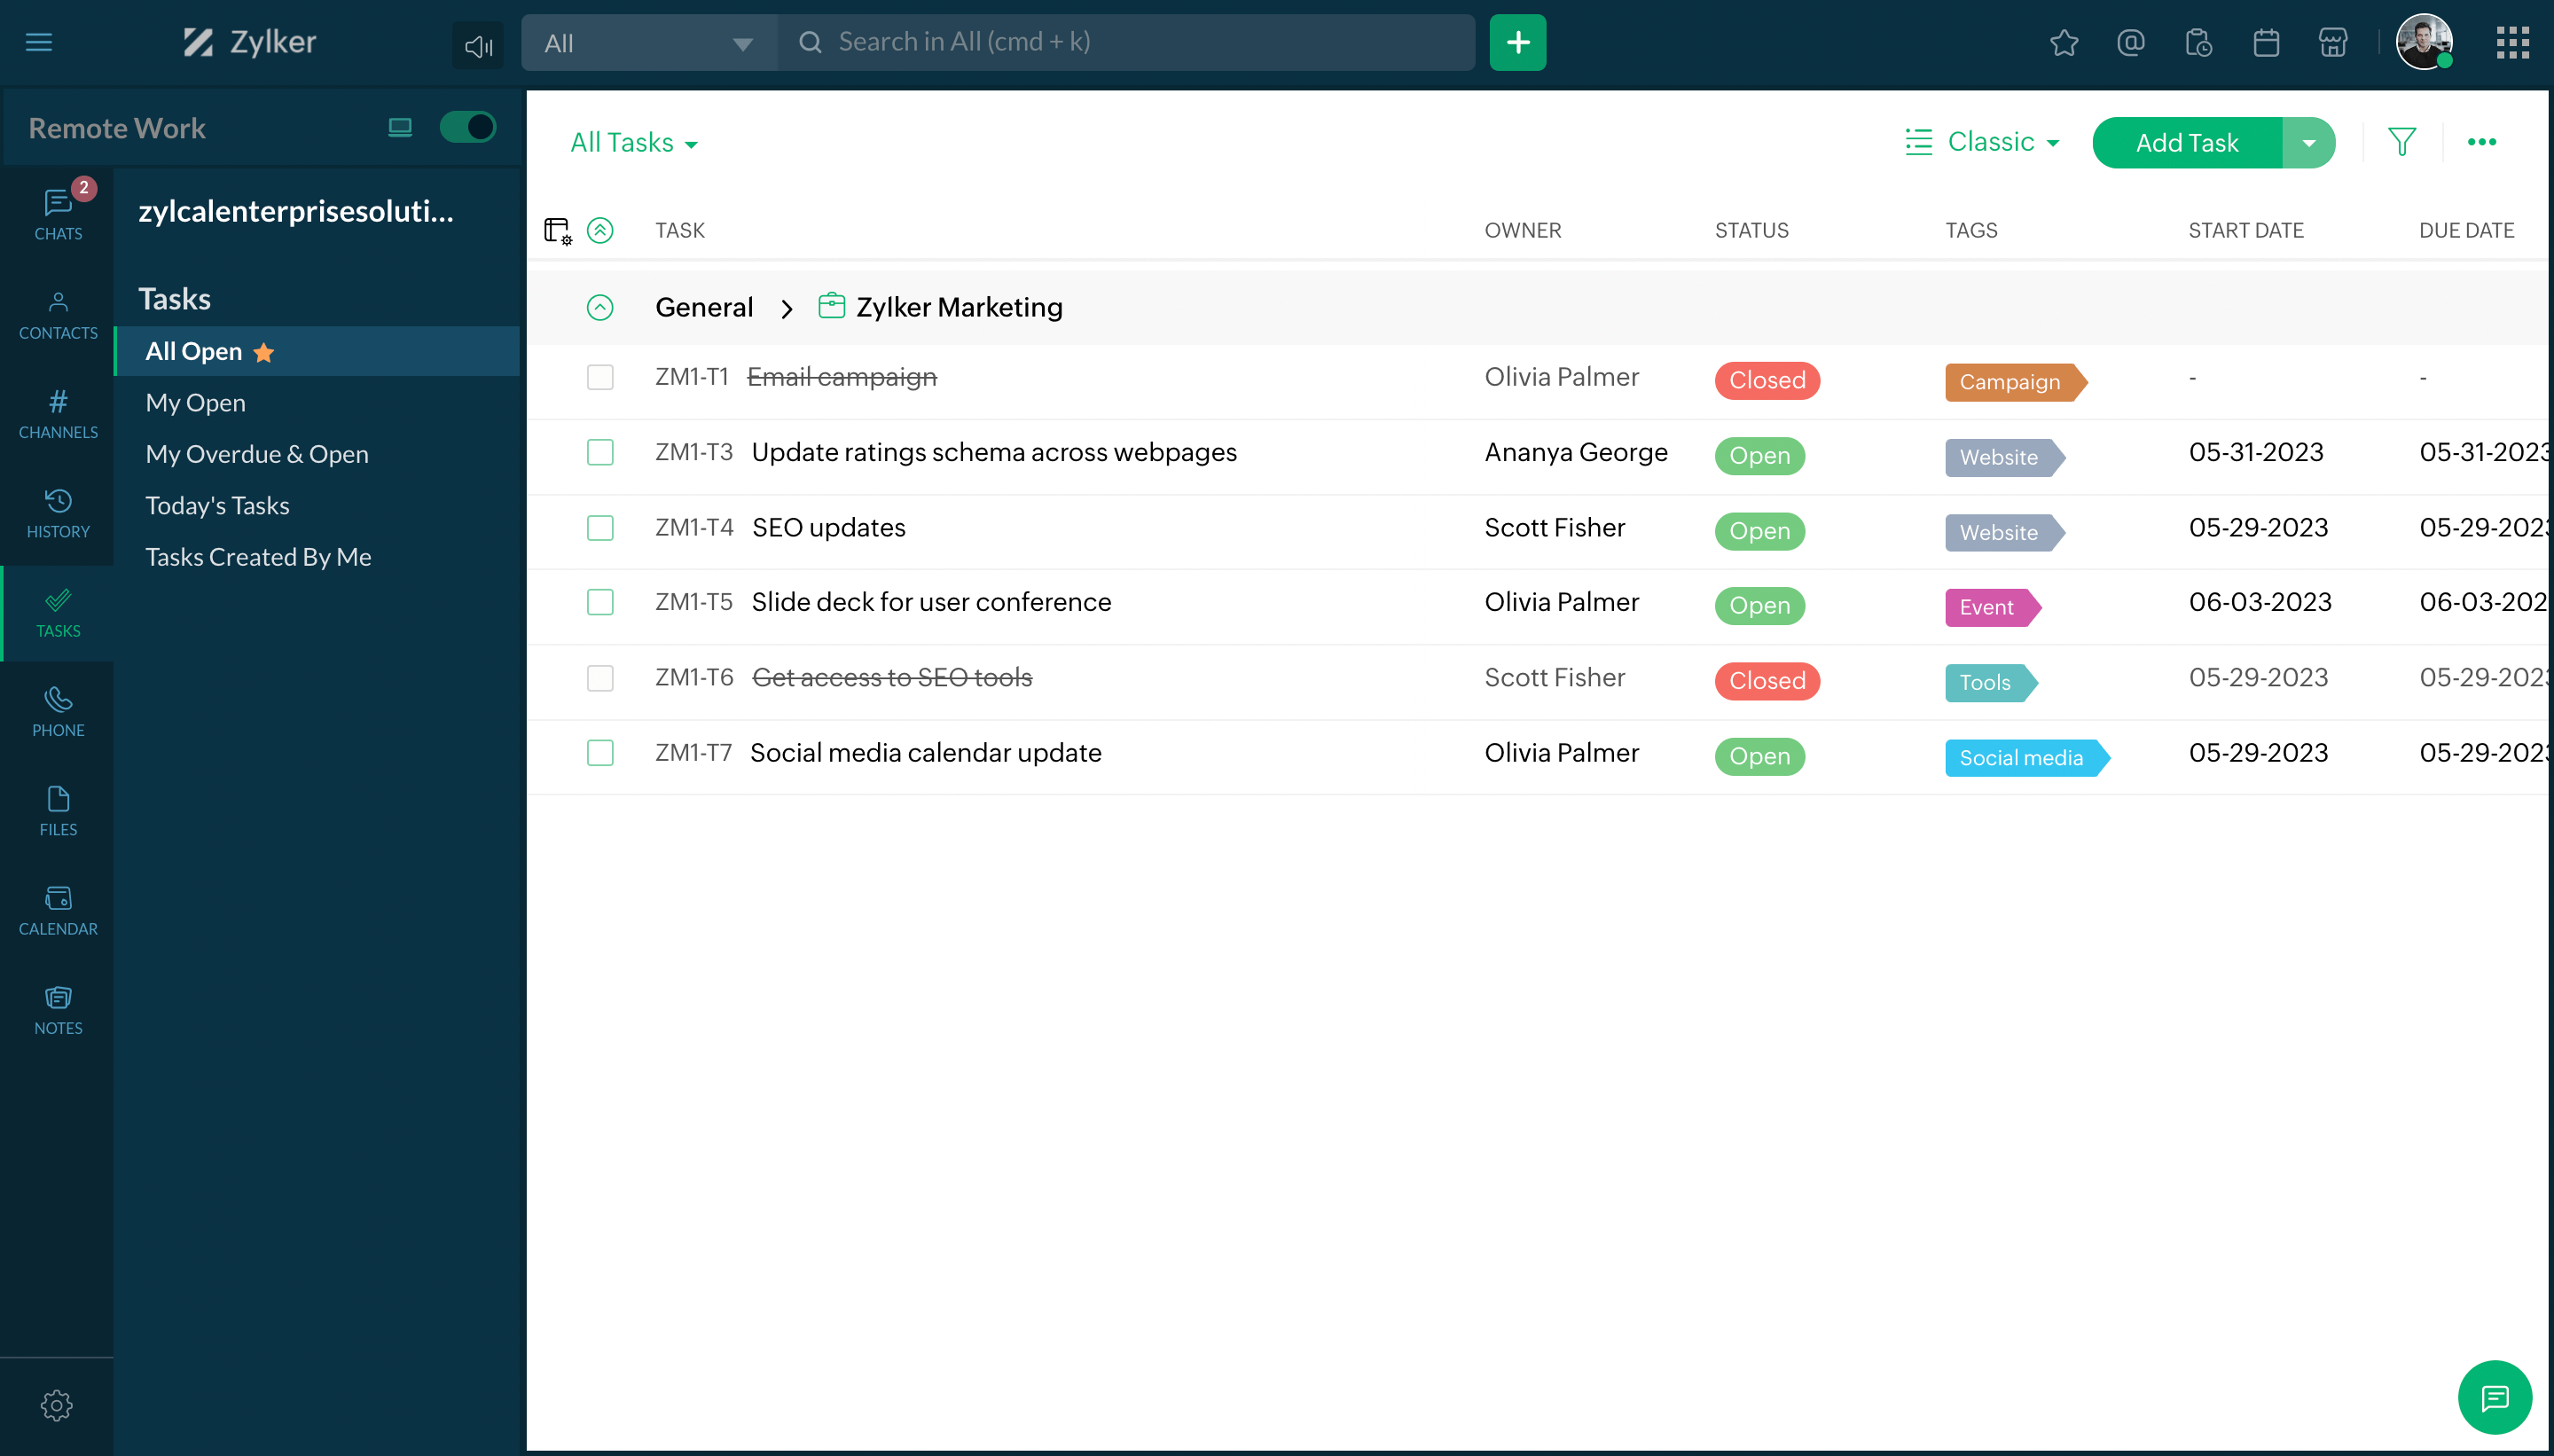
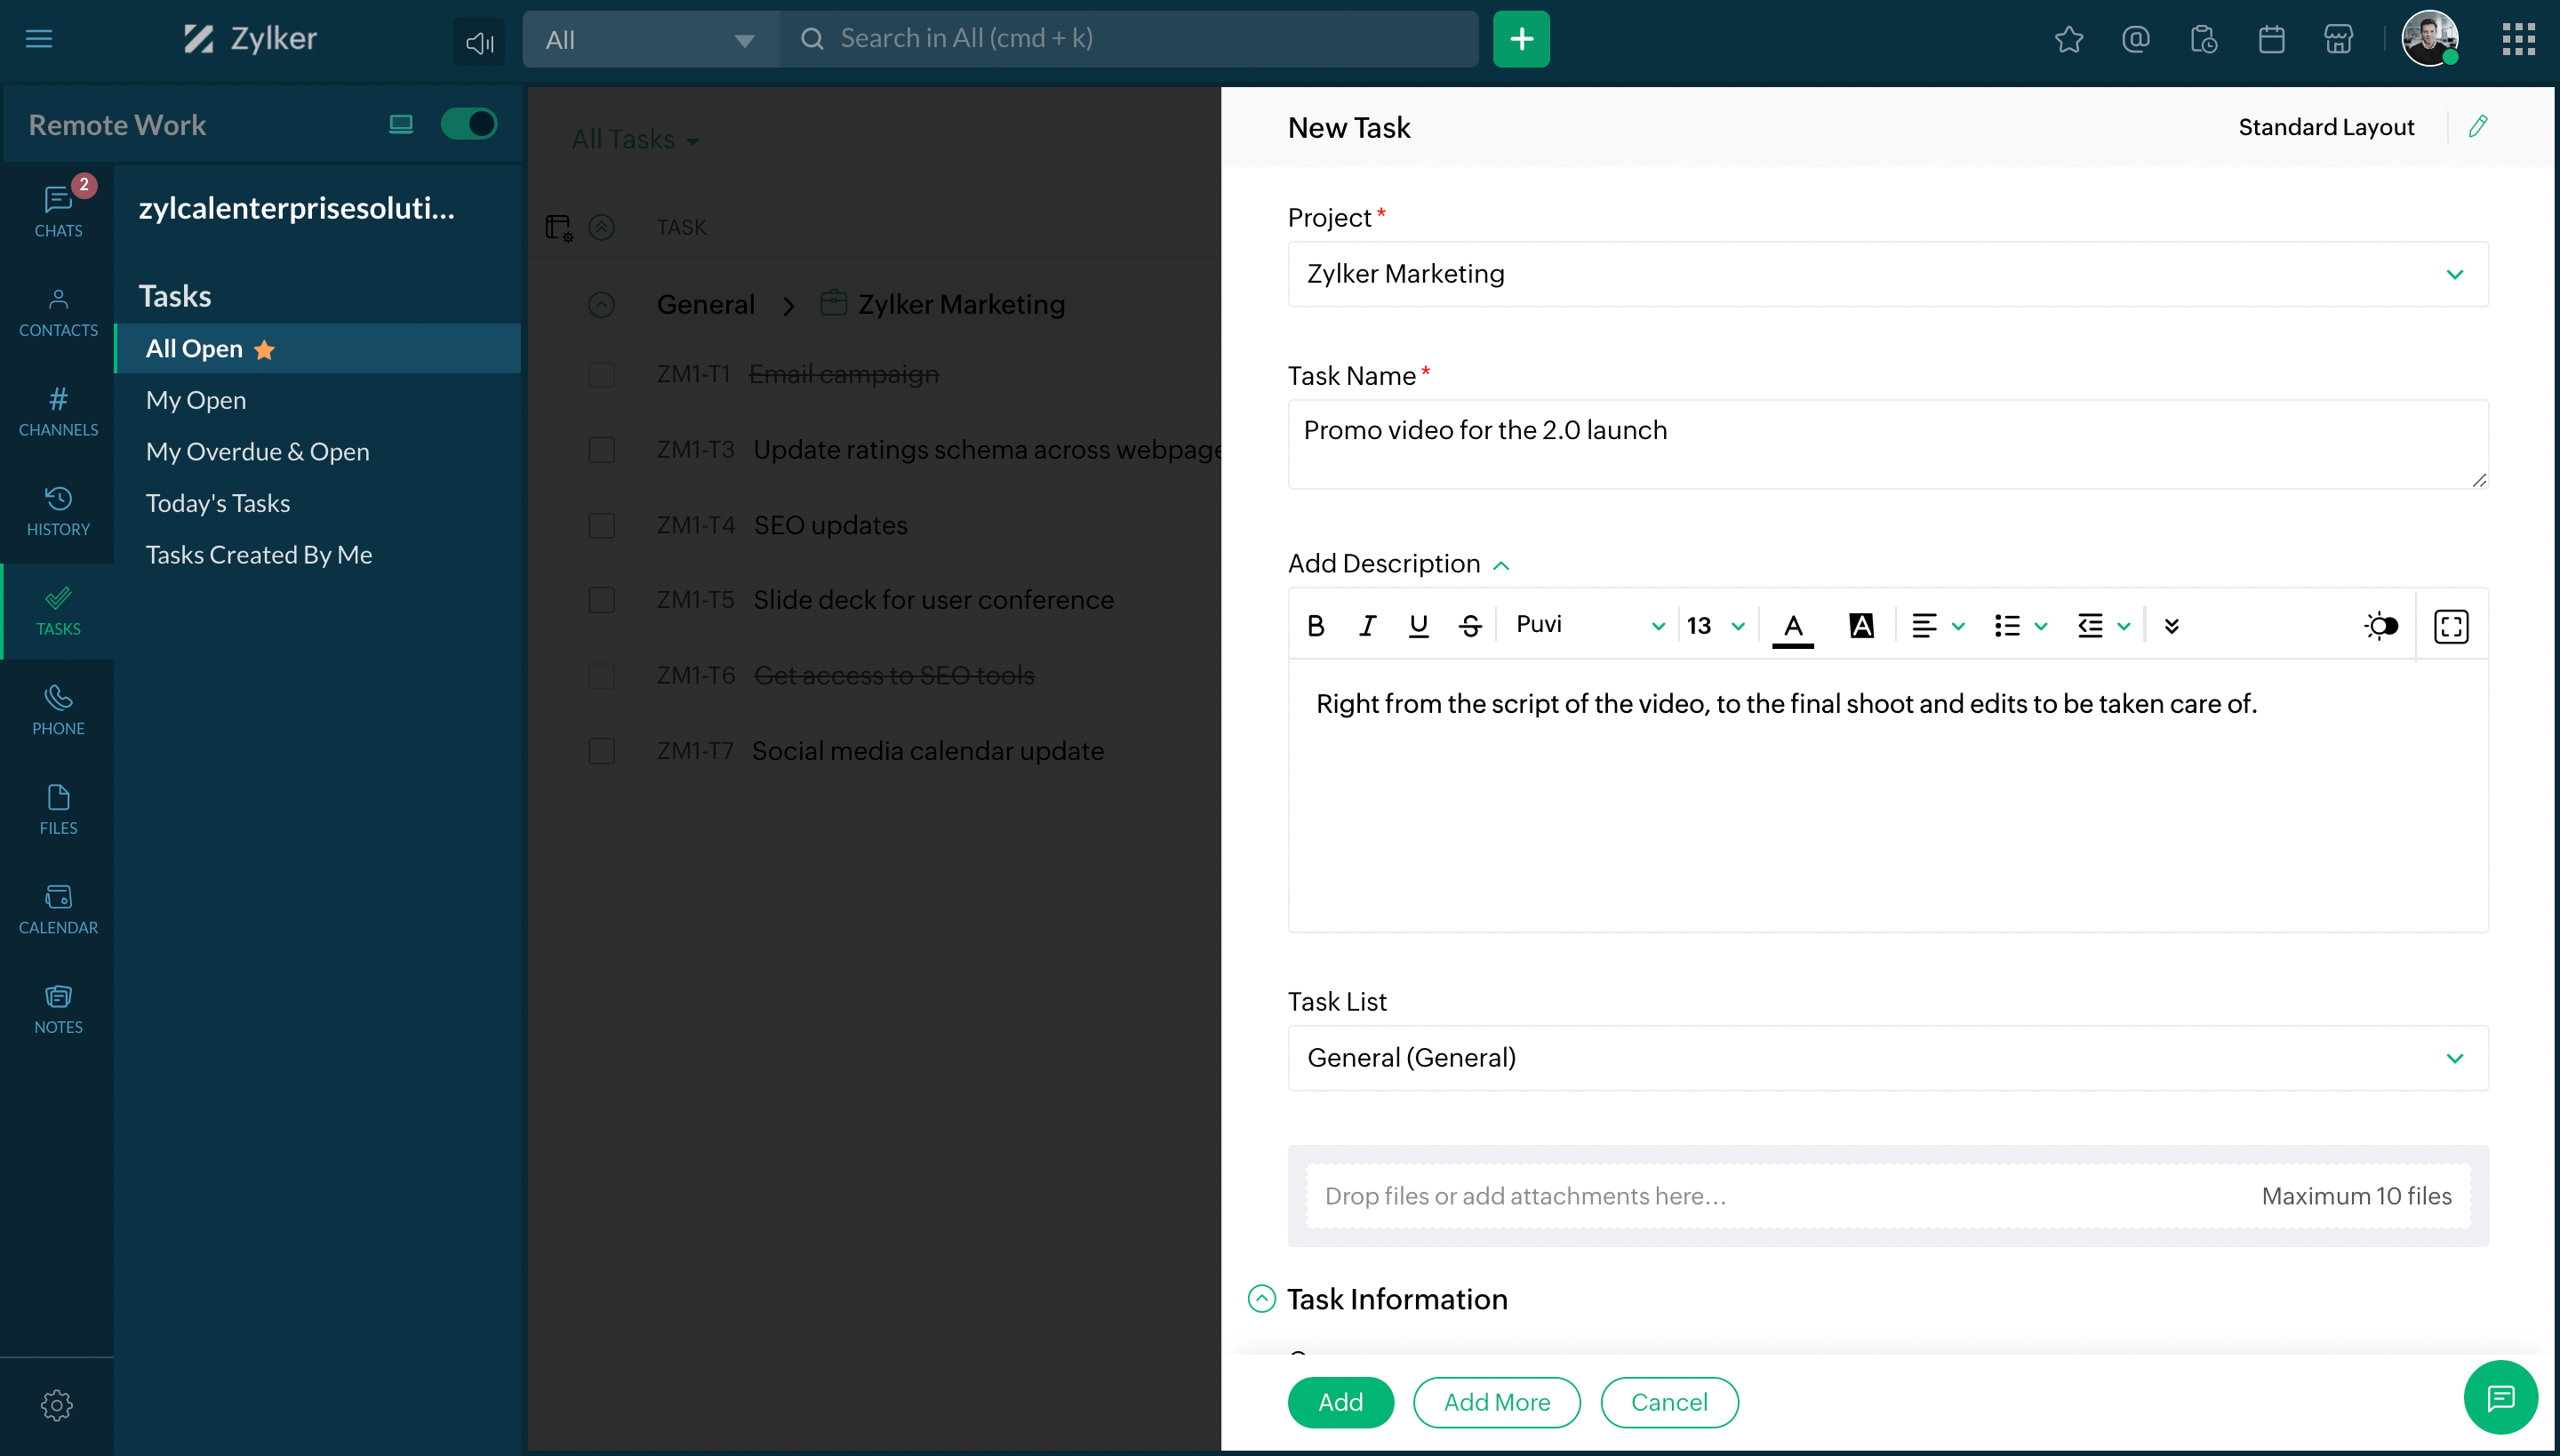
Add task
To create a new task from Zoho Cliq, click on Add Task and fill in the required details.
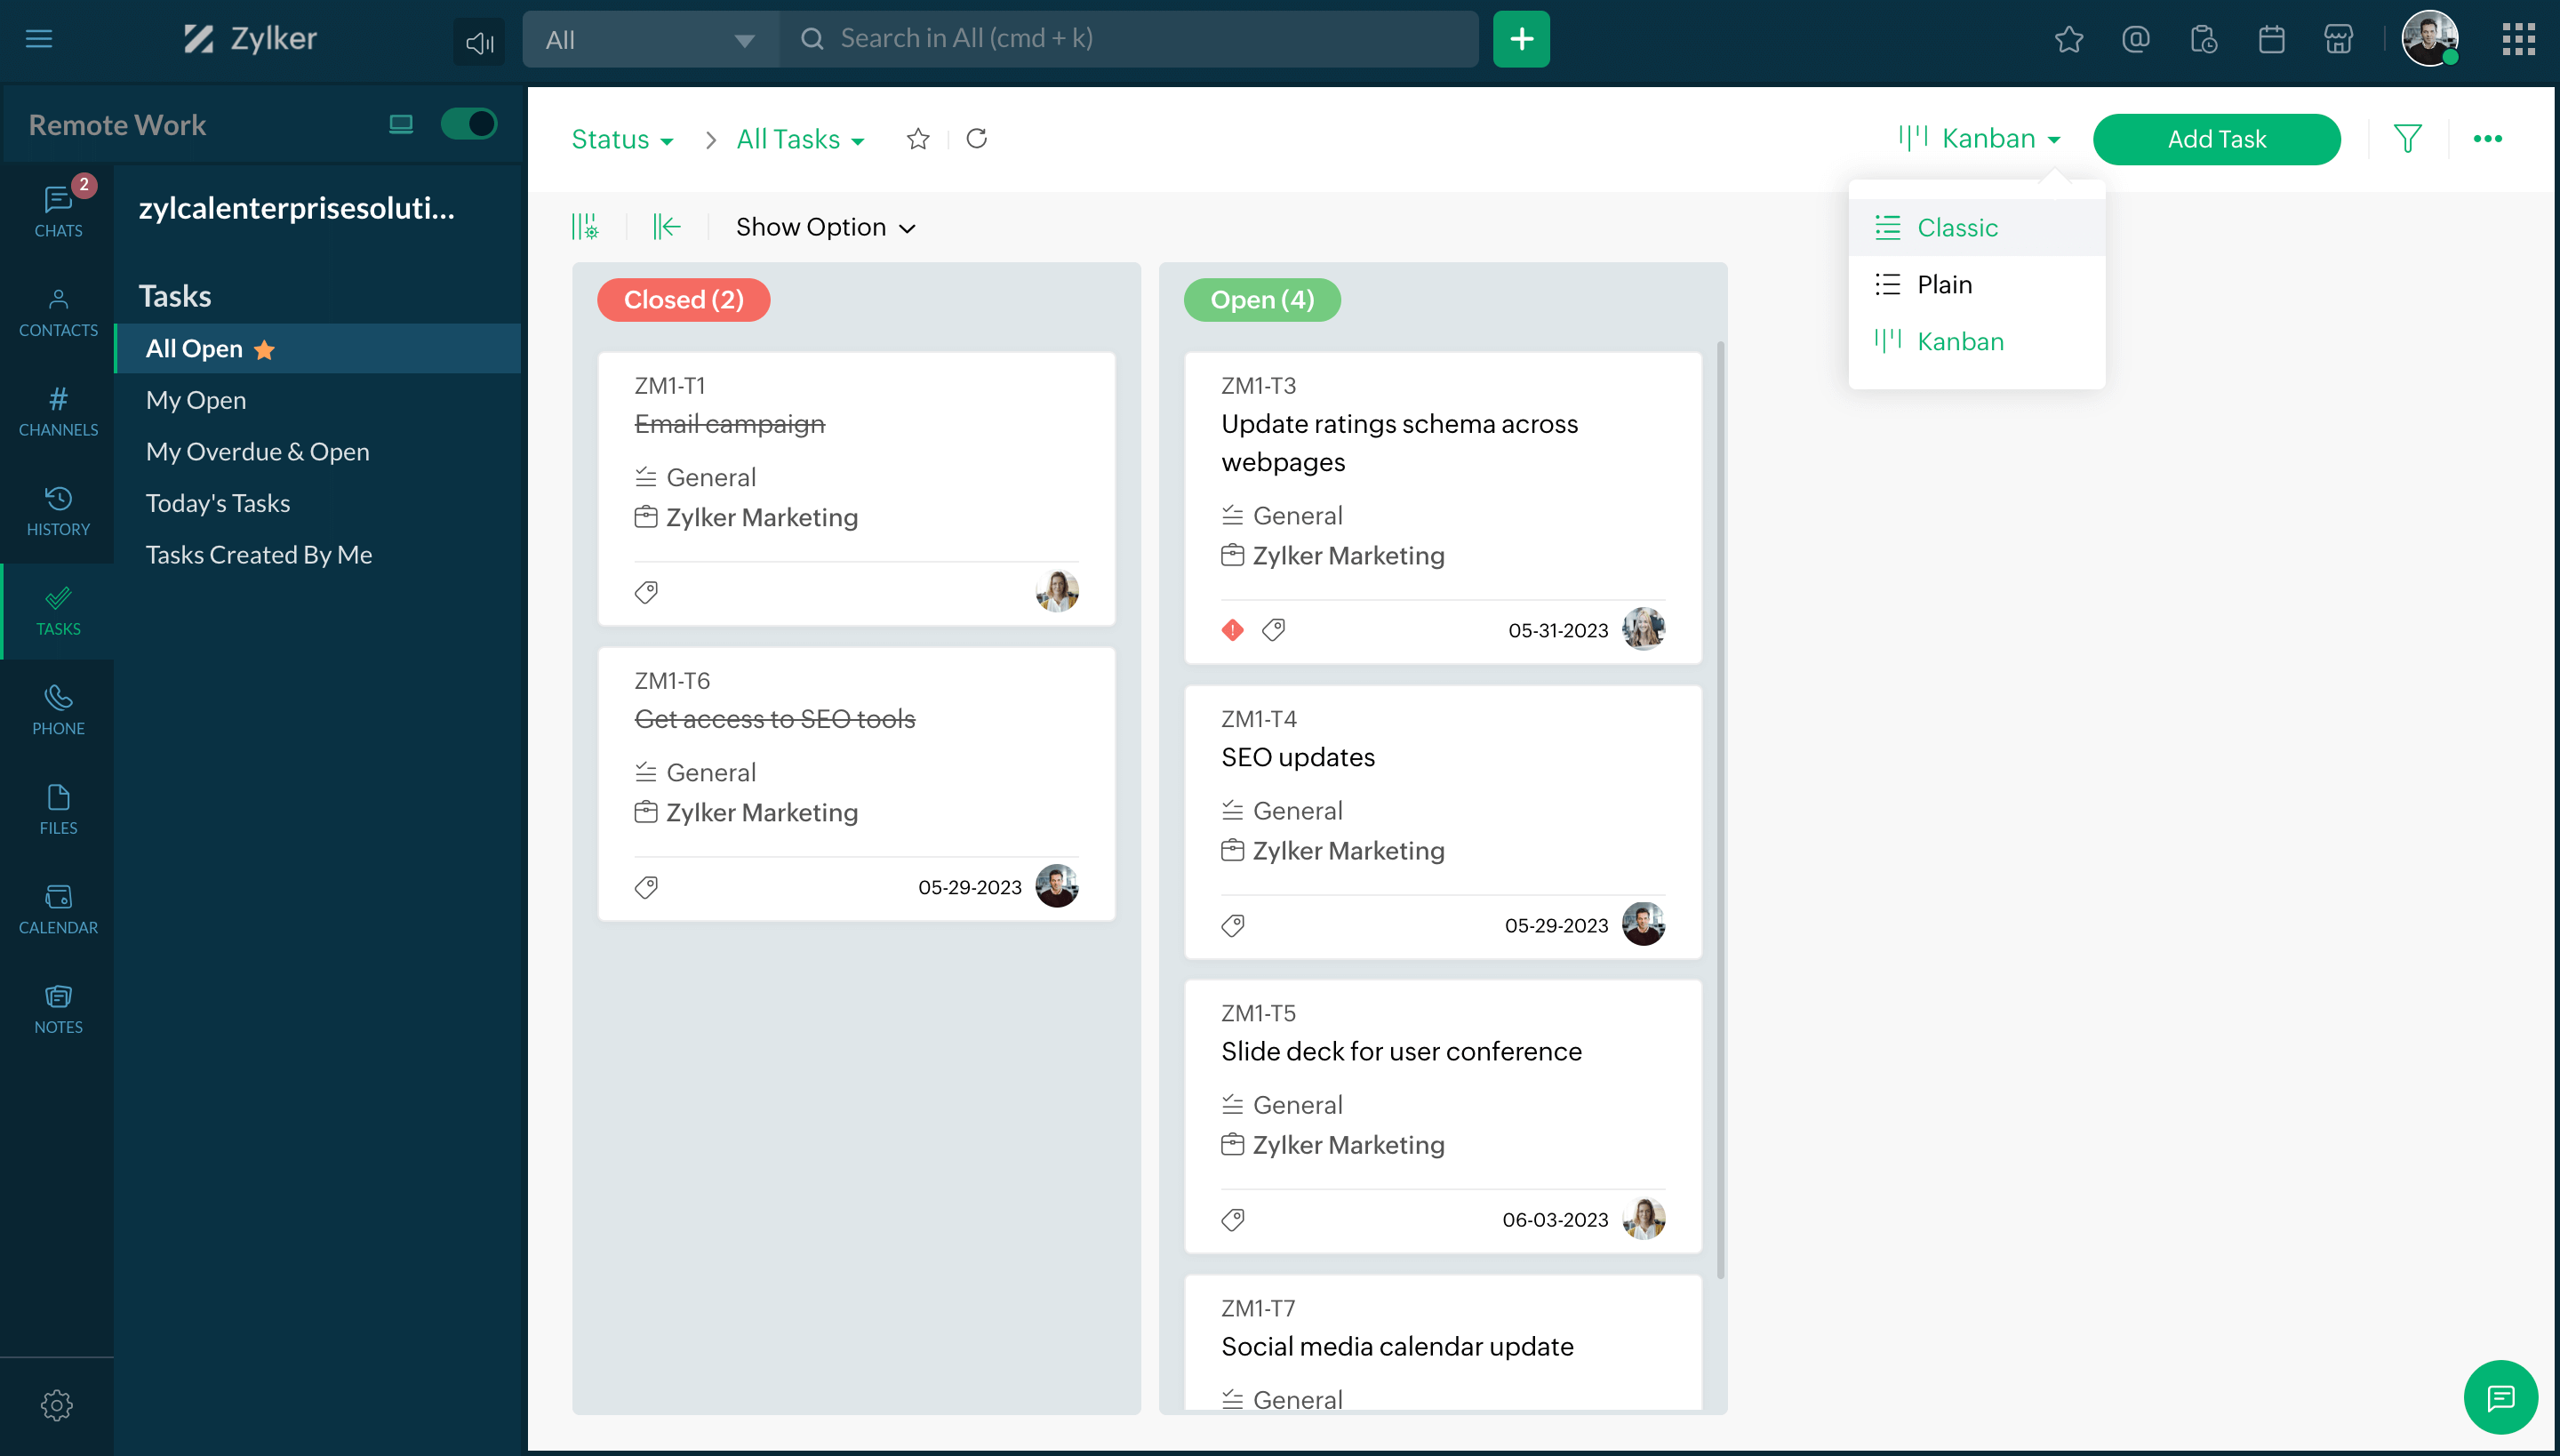
Change task view
Switch between classic, plain, and kanban views inside Cliq to view your tasks.
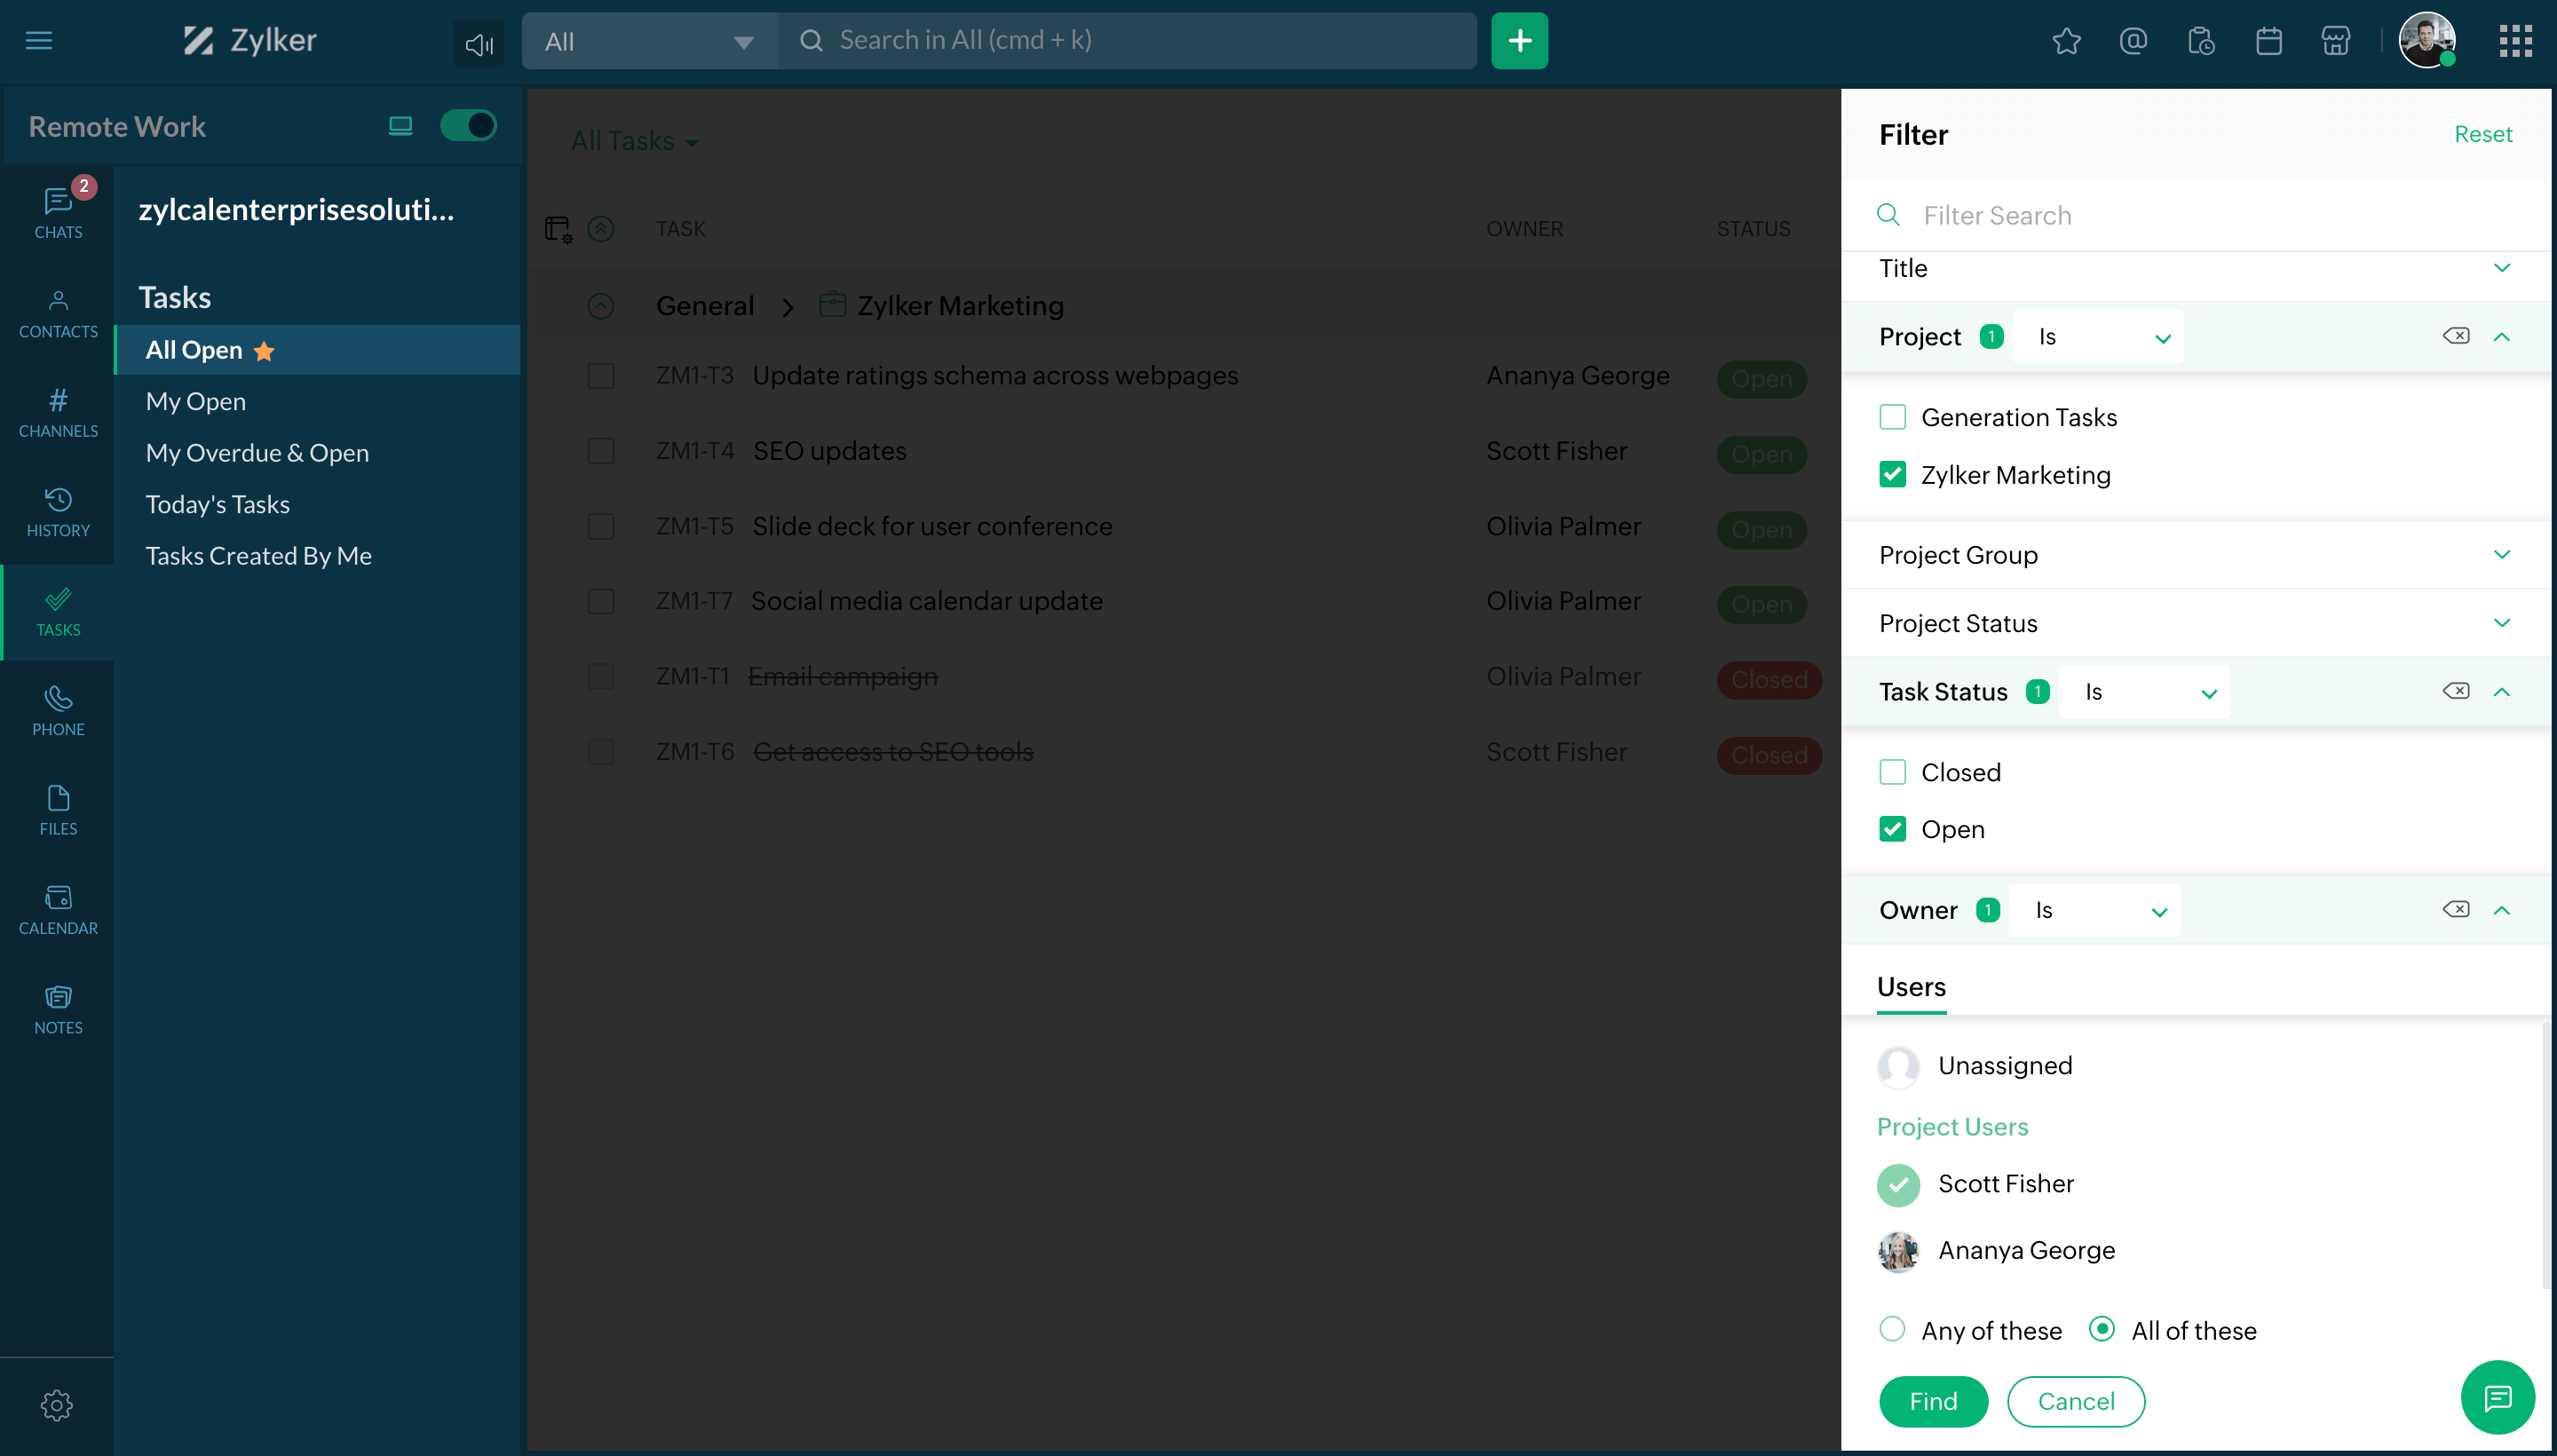
Filter tasks
Locate specific tasks based on your requirements with detailed filters like due date, project title, created time, and more.
Export tasks
Downloads tasks in XLSX or CSV format with all the necessary information.

- View tasks
- Add task
- Change task view
- Filter tasks
- Export tasks


Organization
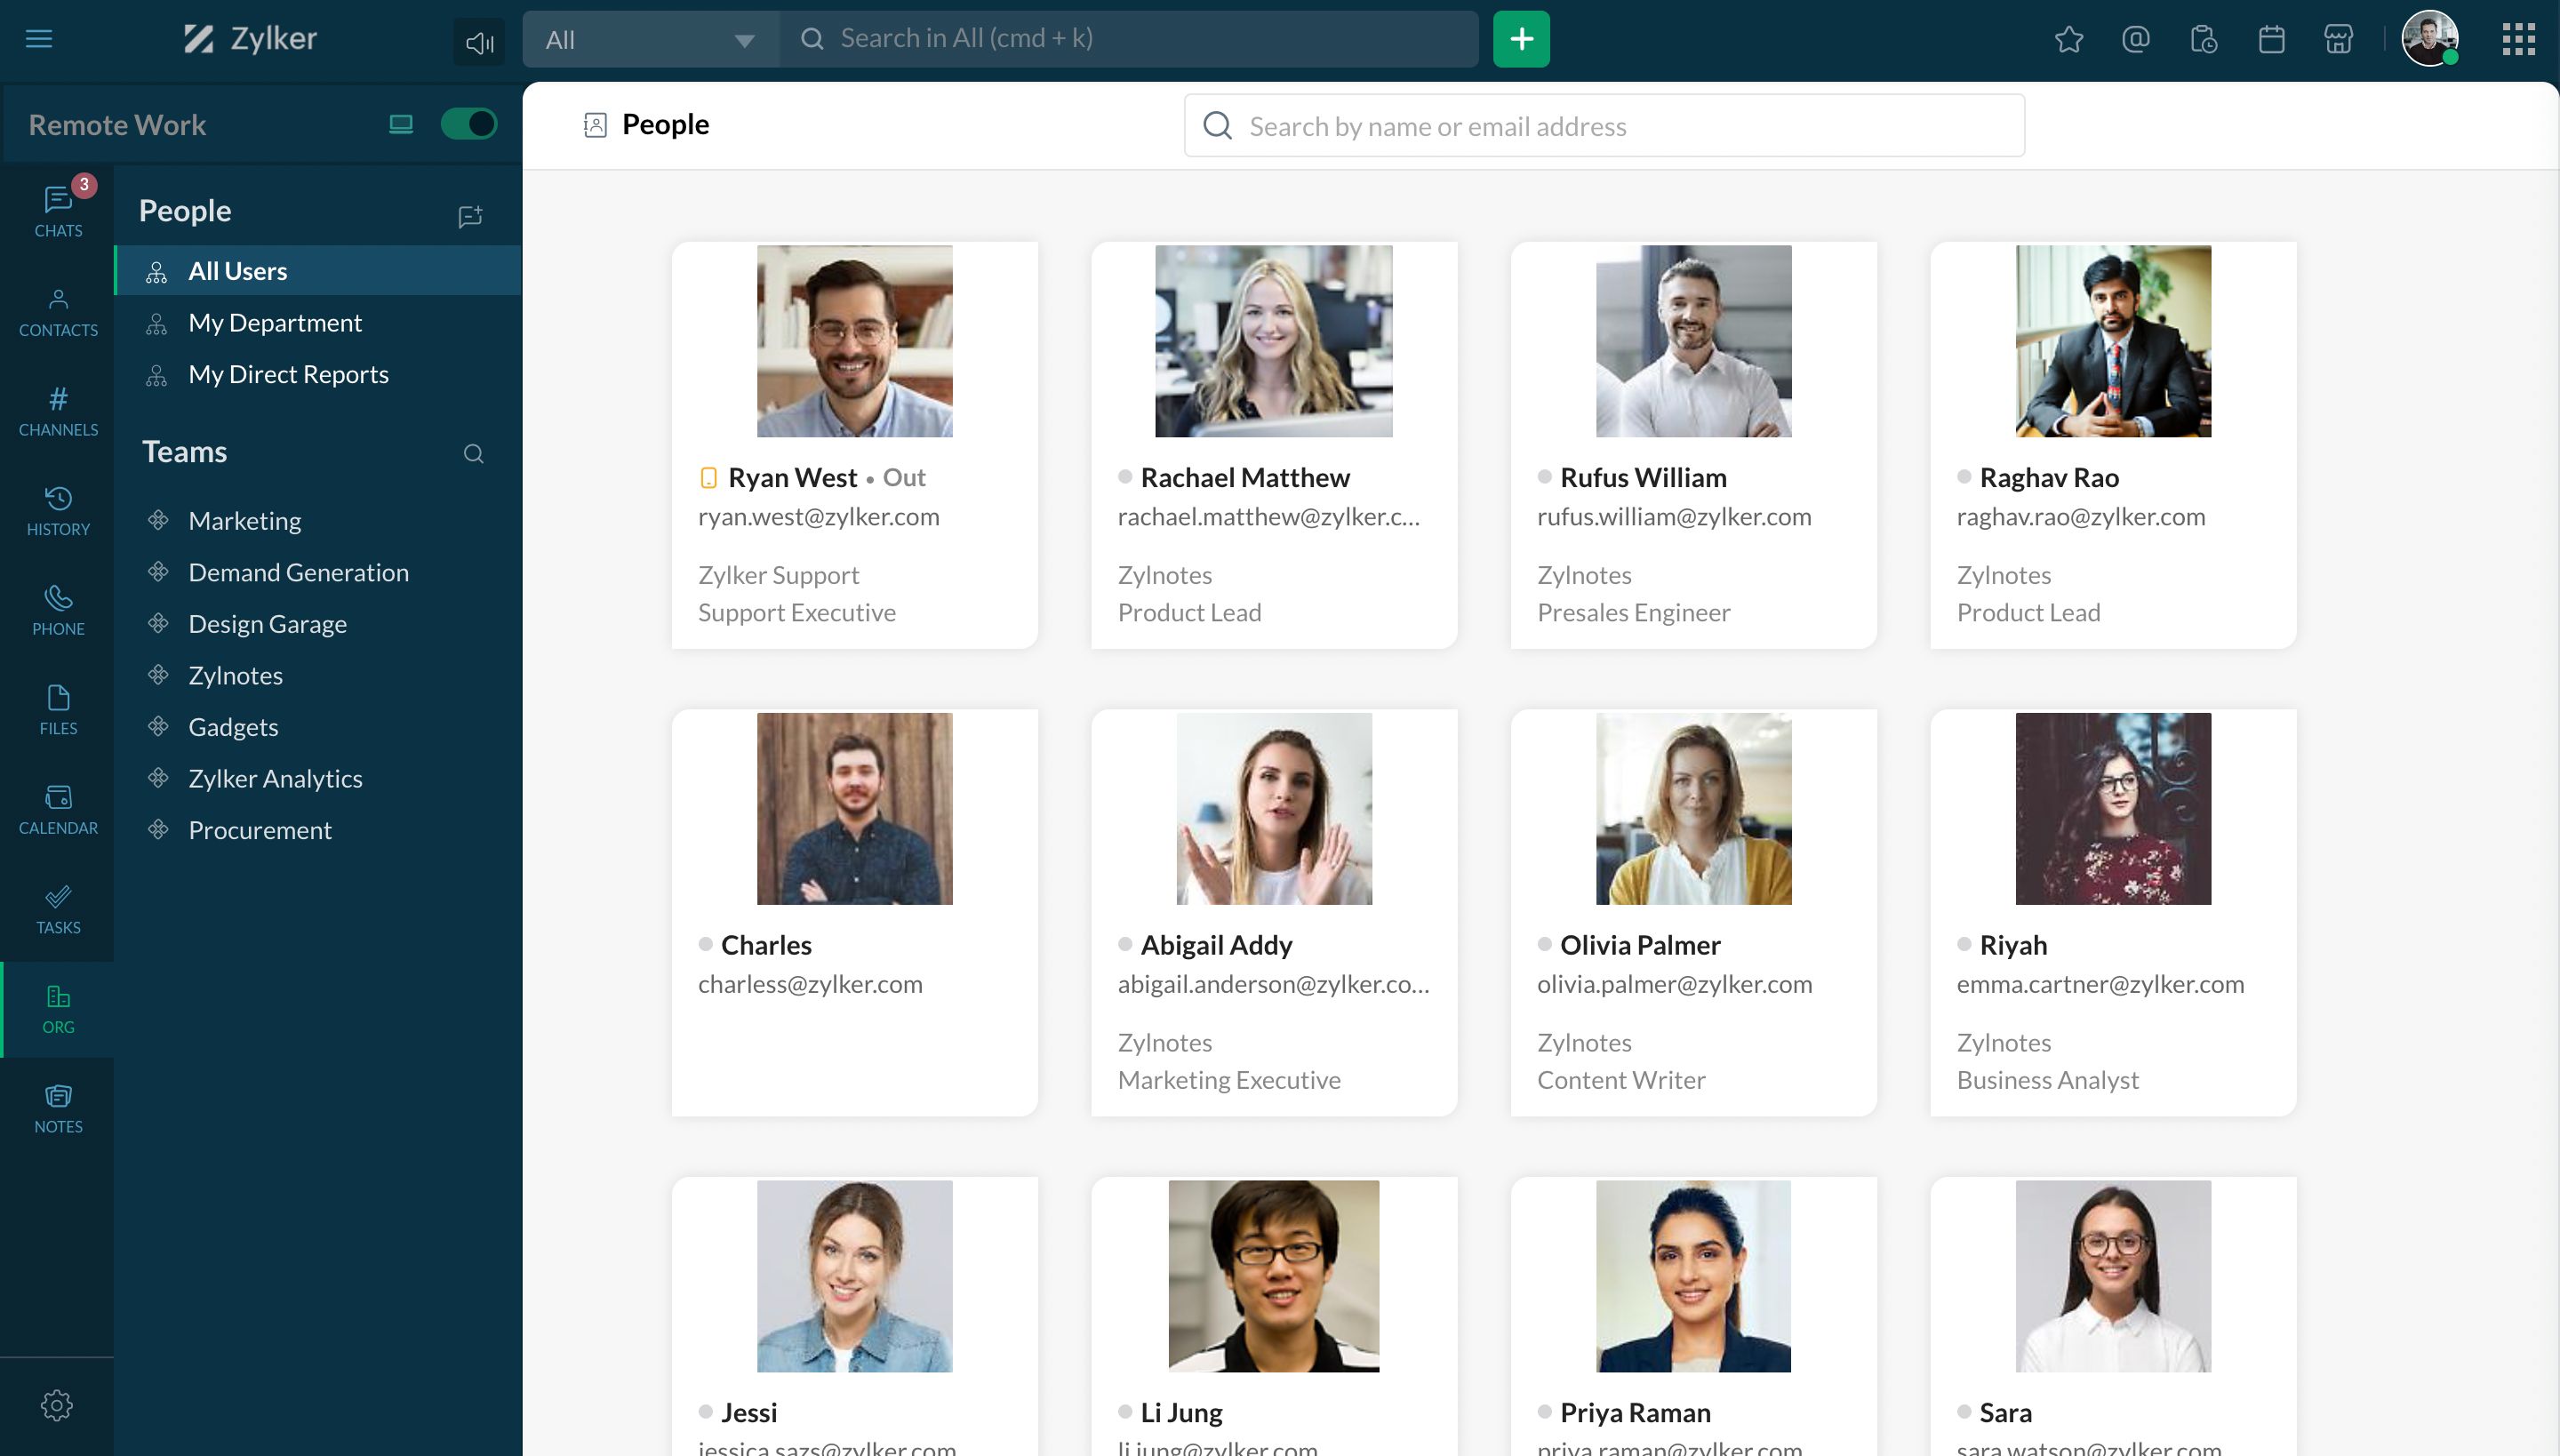
View people
Take a look at all the users in your organization by navigating to the Org section in your navigation sidebar.
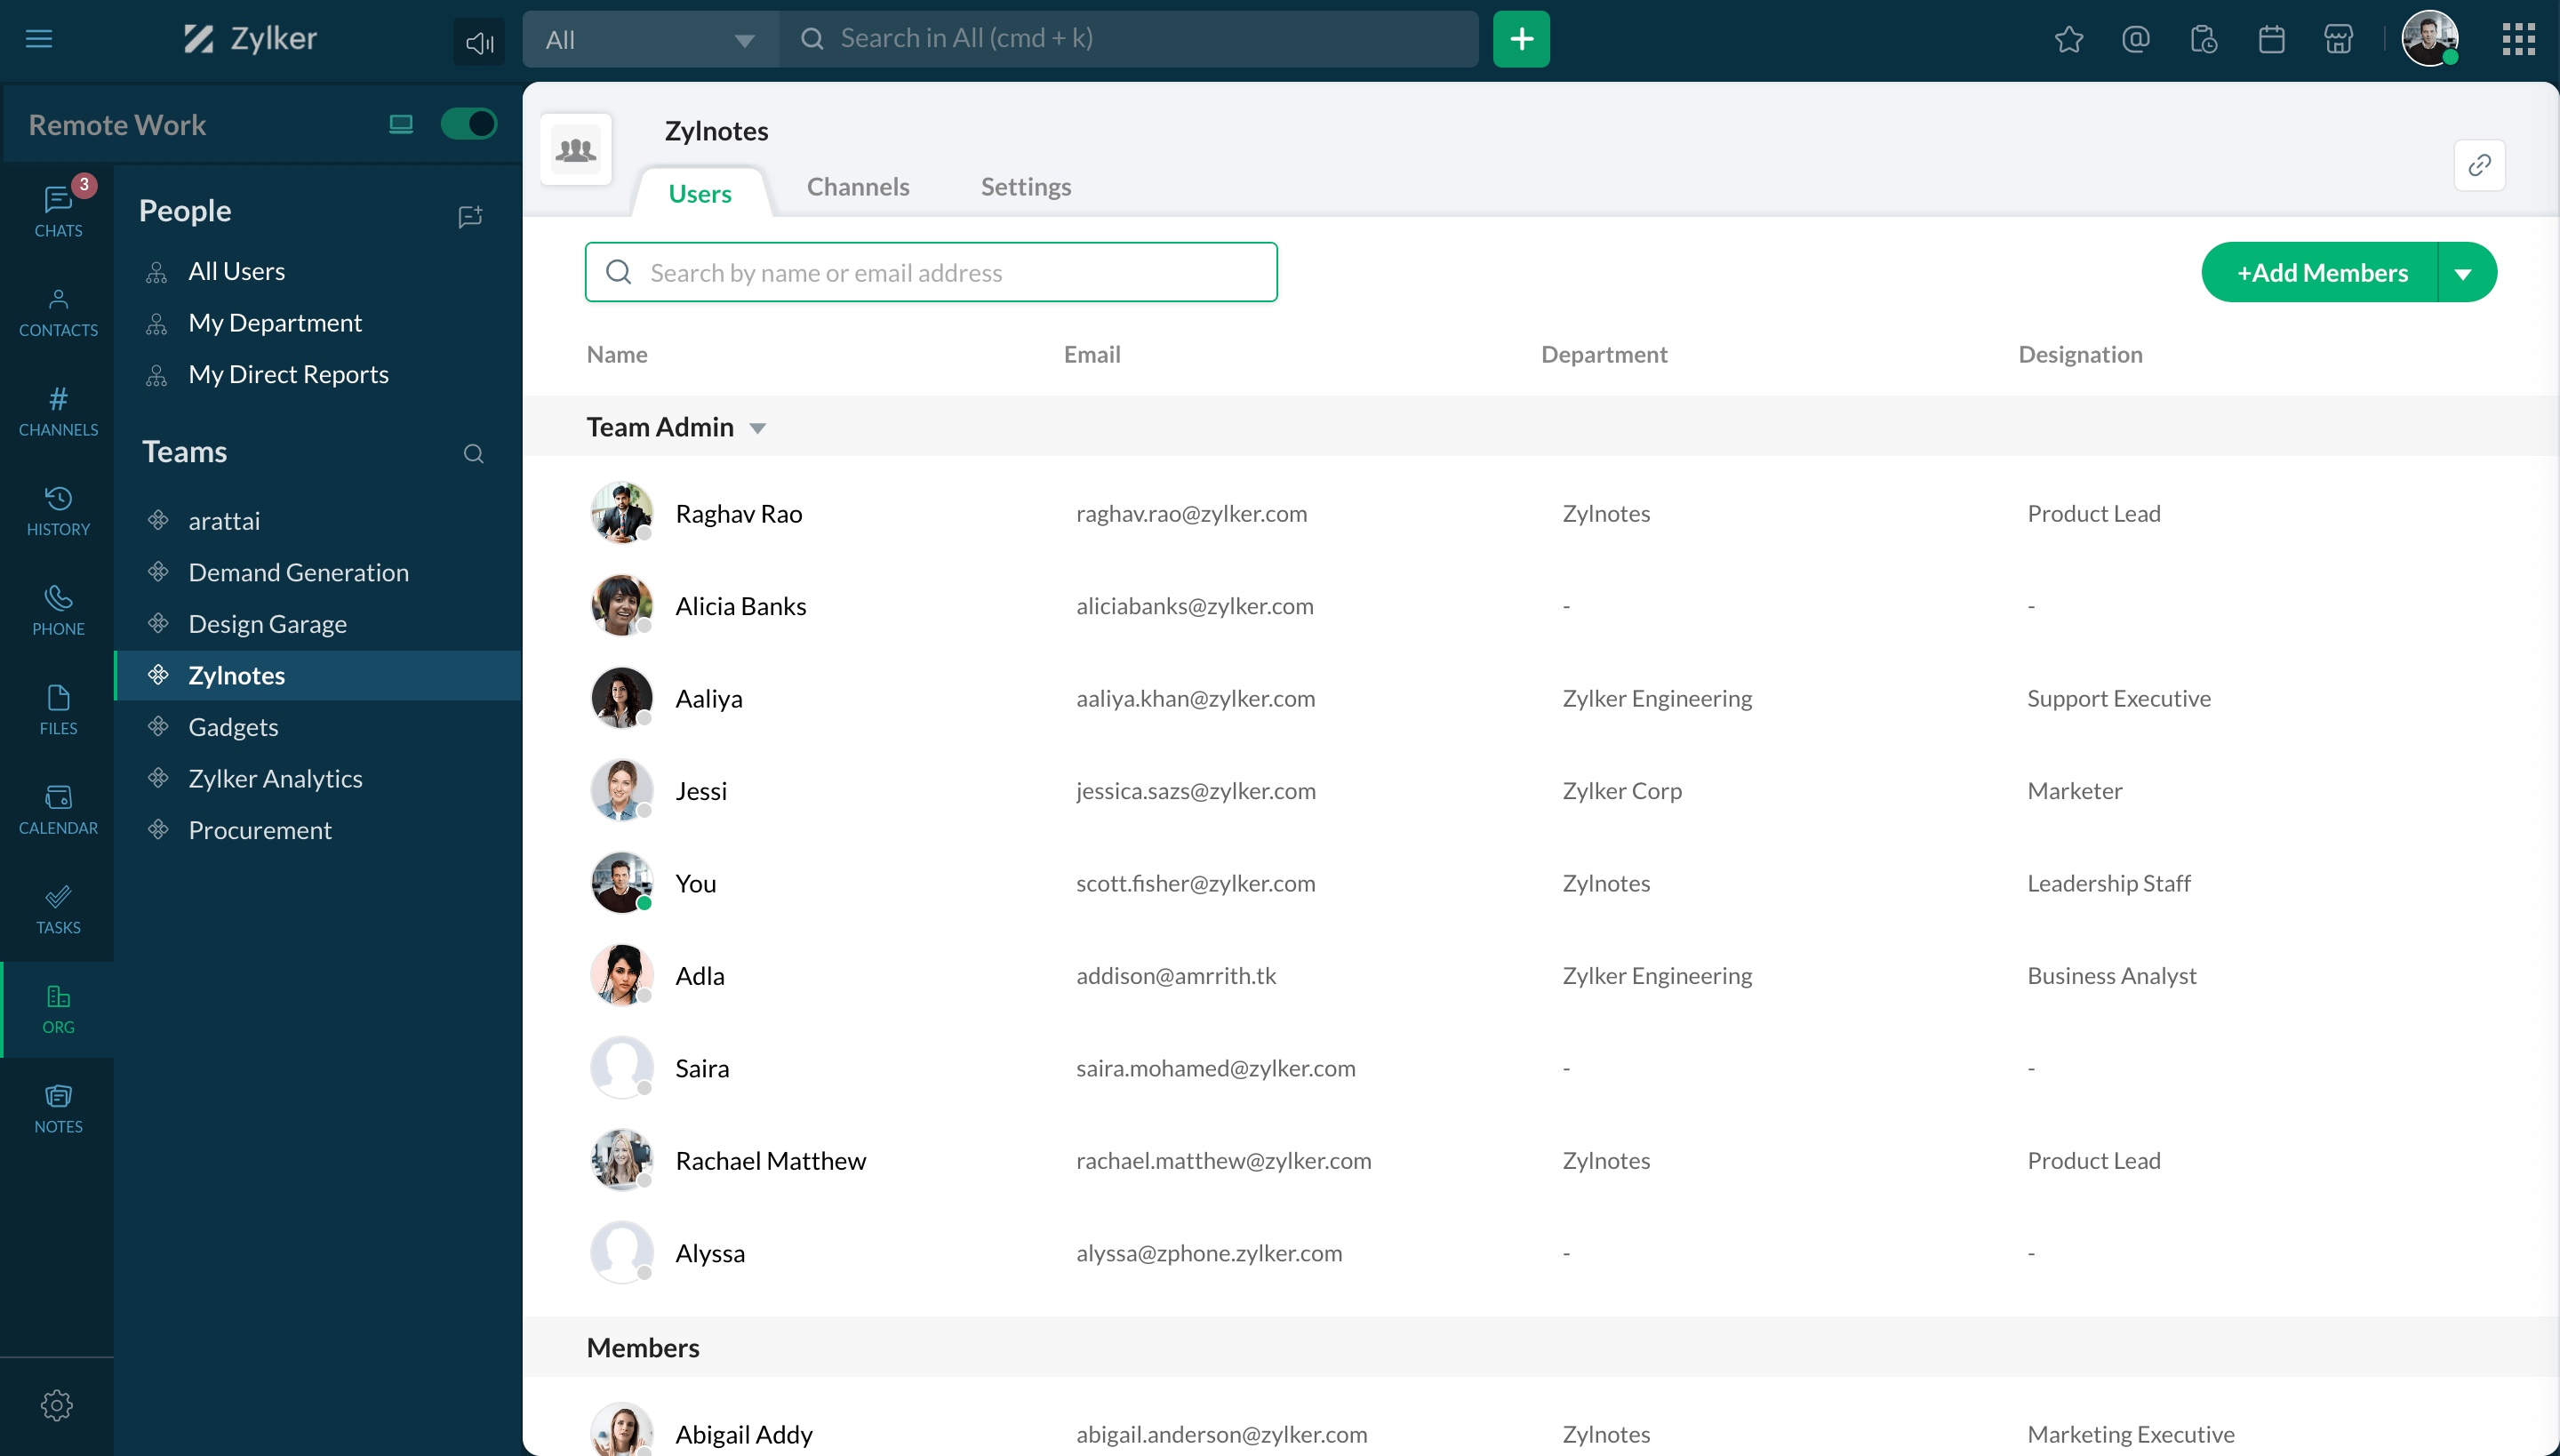
View teams
View the list of teams in your organization that you are a part of by clicking on the Teams section.
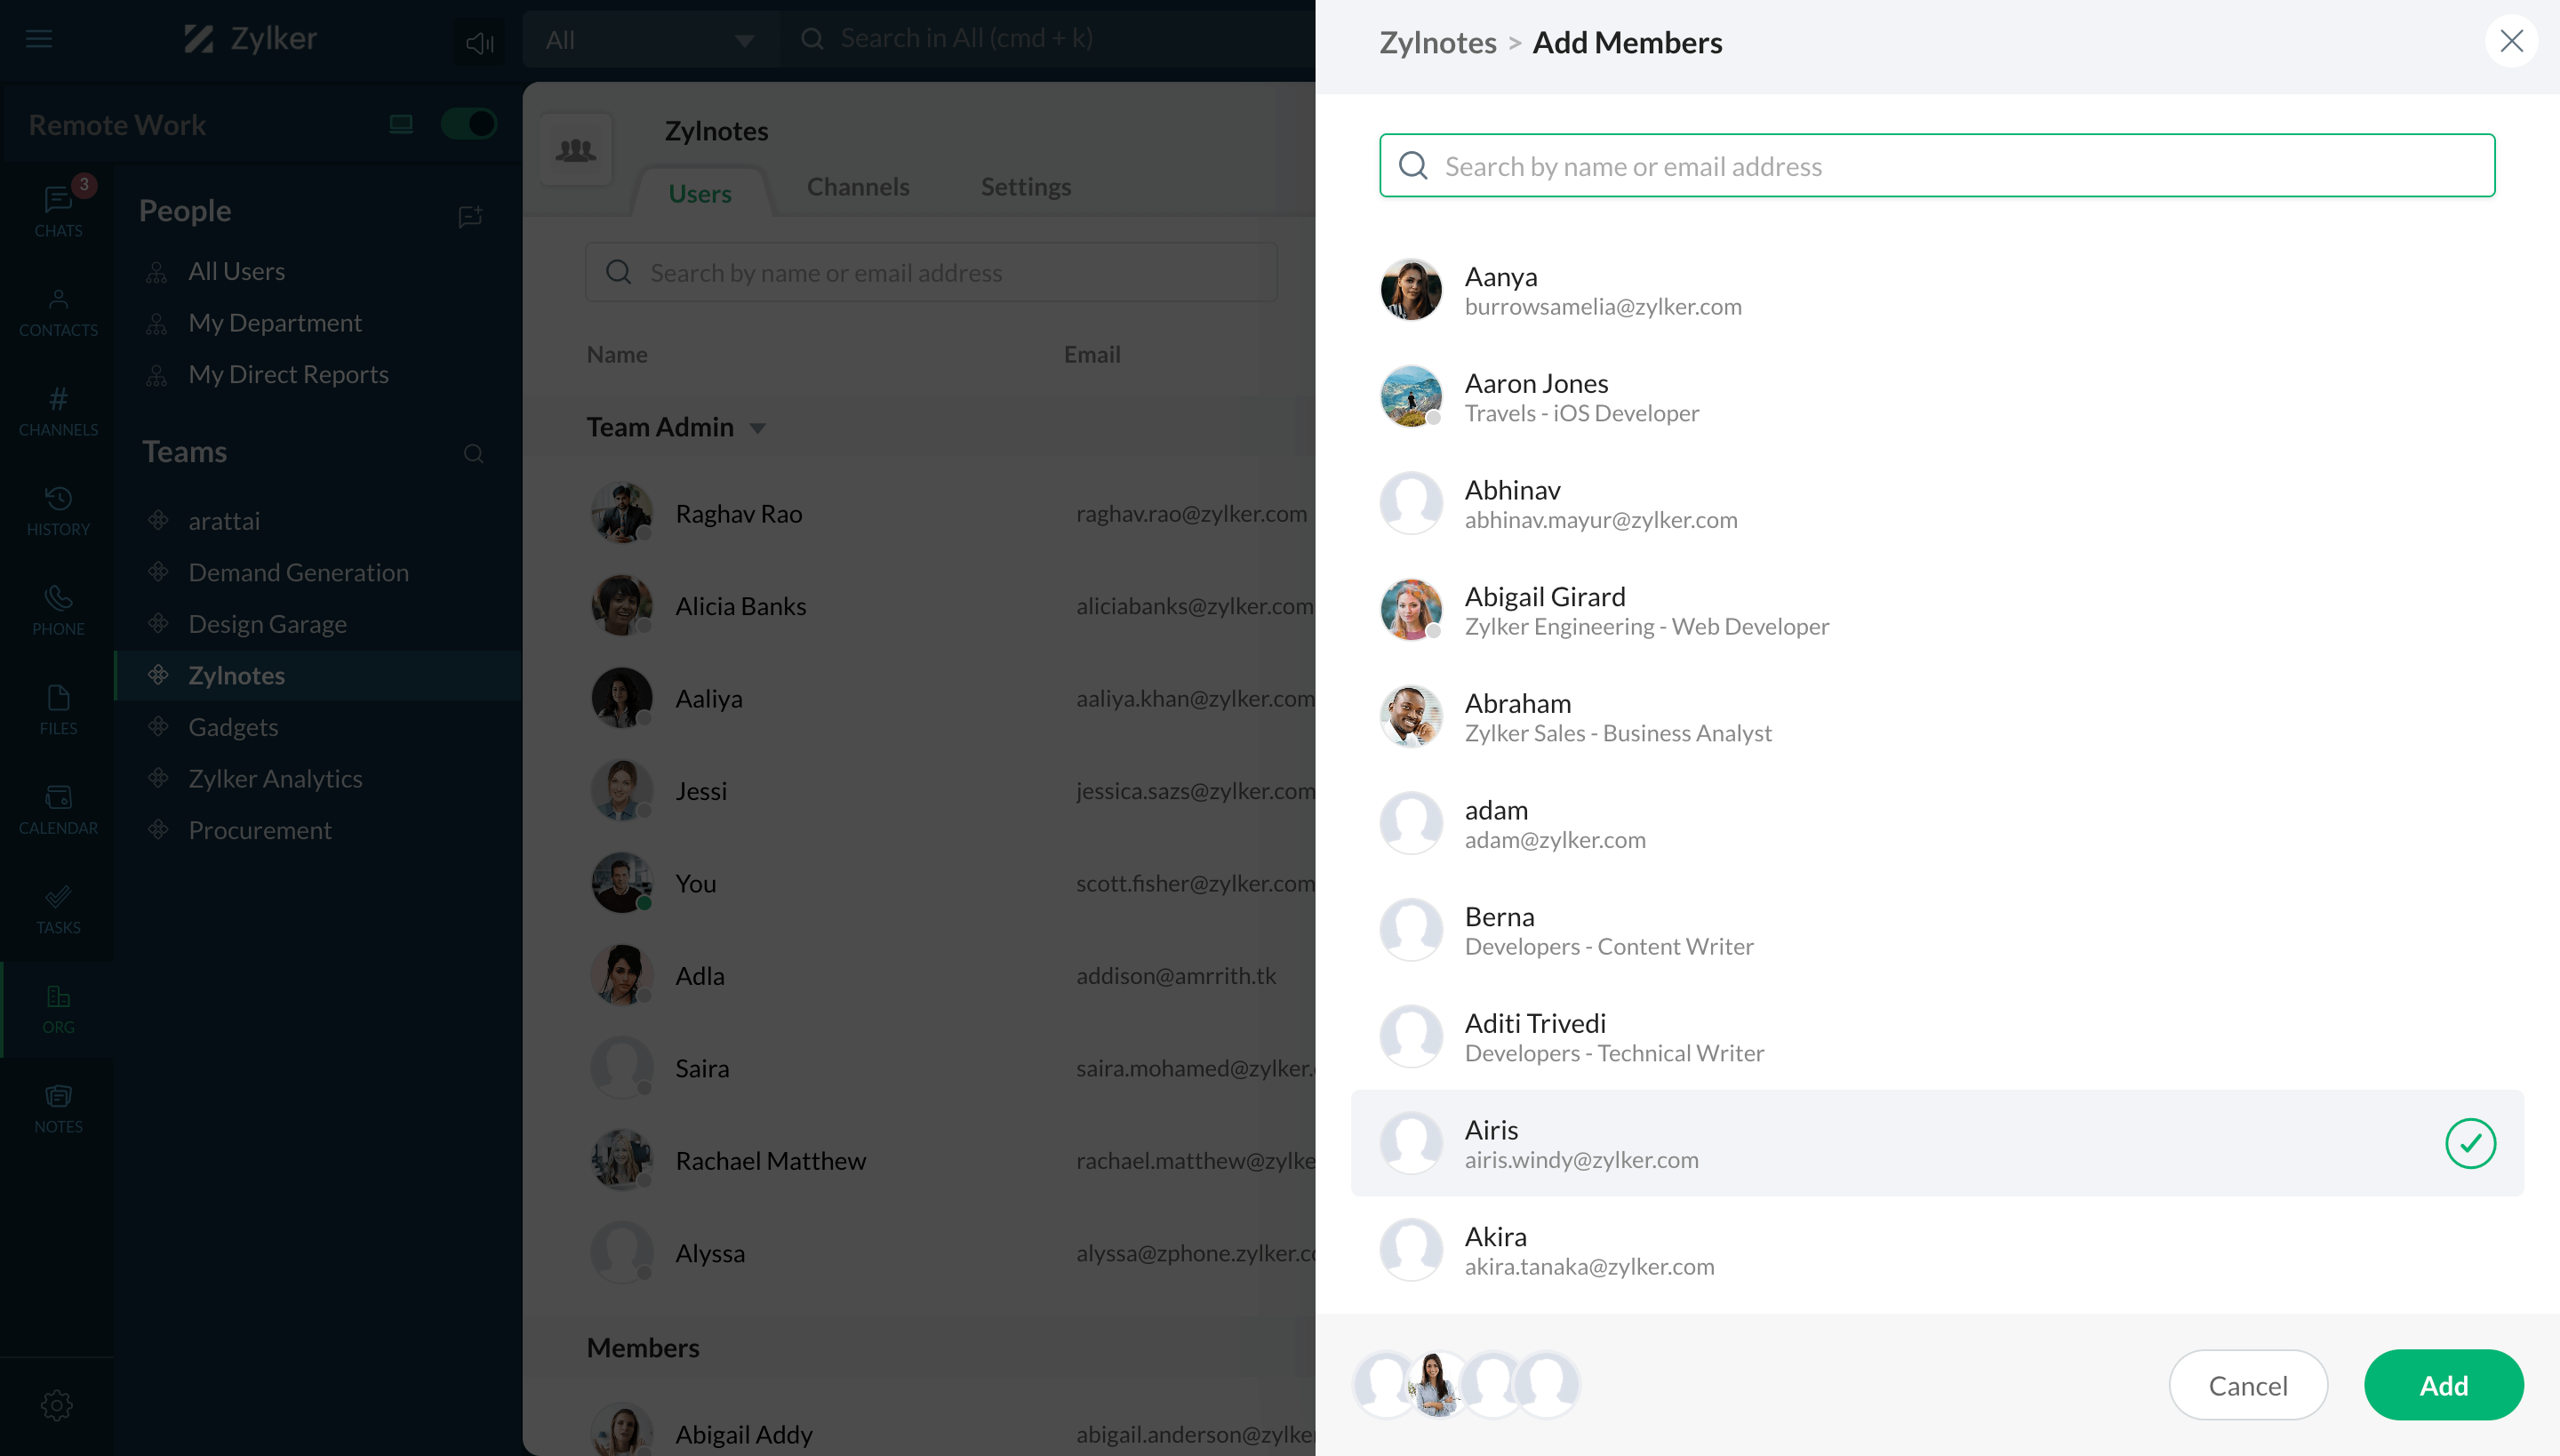
Add member to team
Add new members to the teams that you are an admin of by clicking on the Add Members button.
- View people
- View teams
- Add member to team


Calendar and events
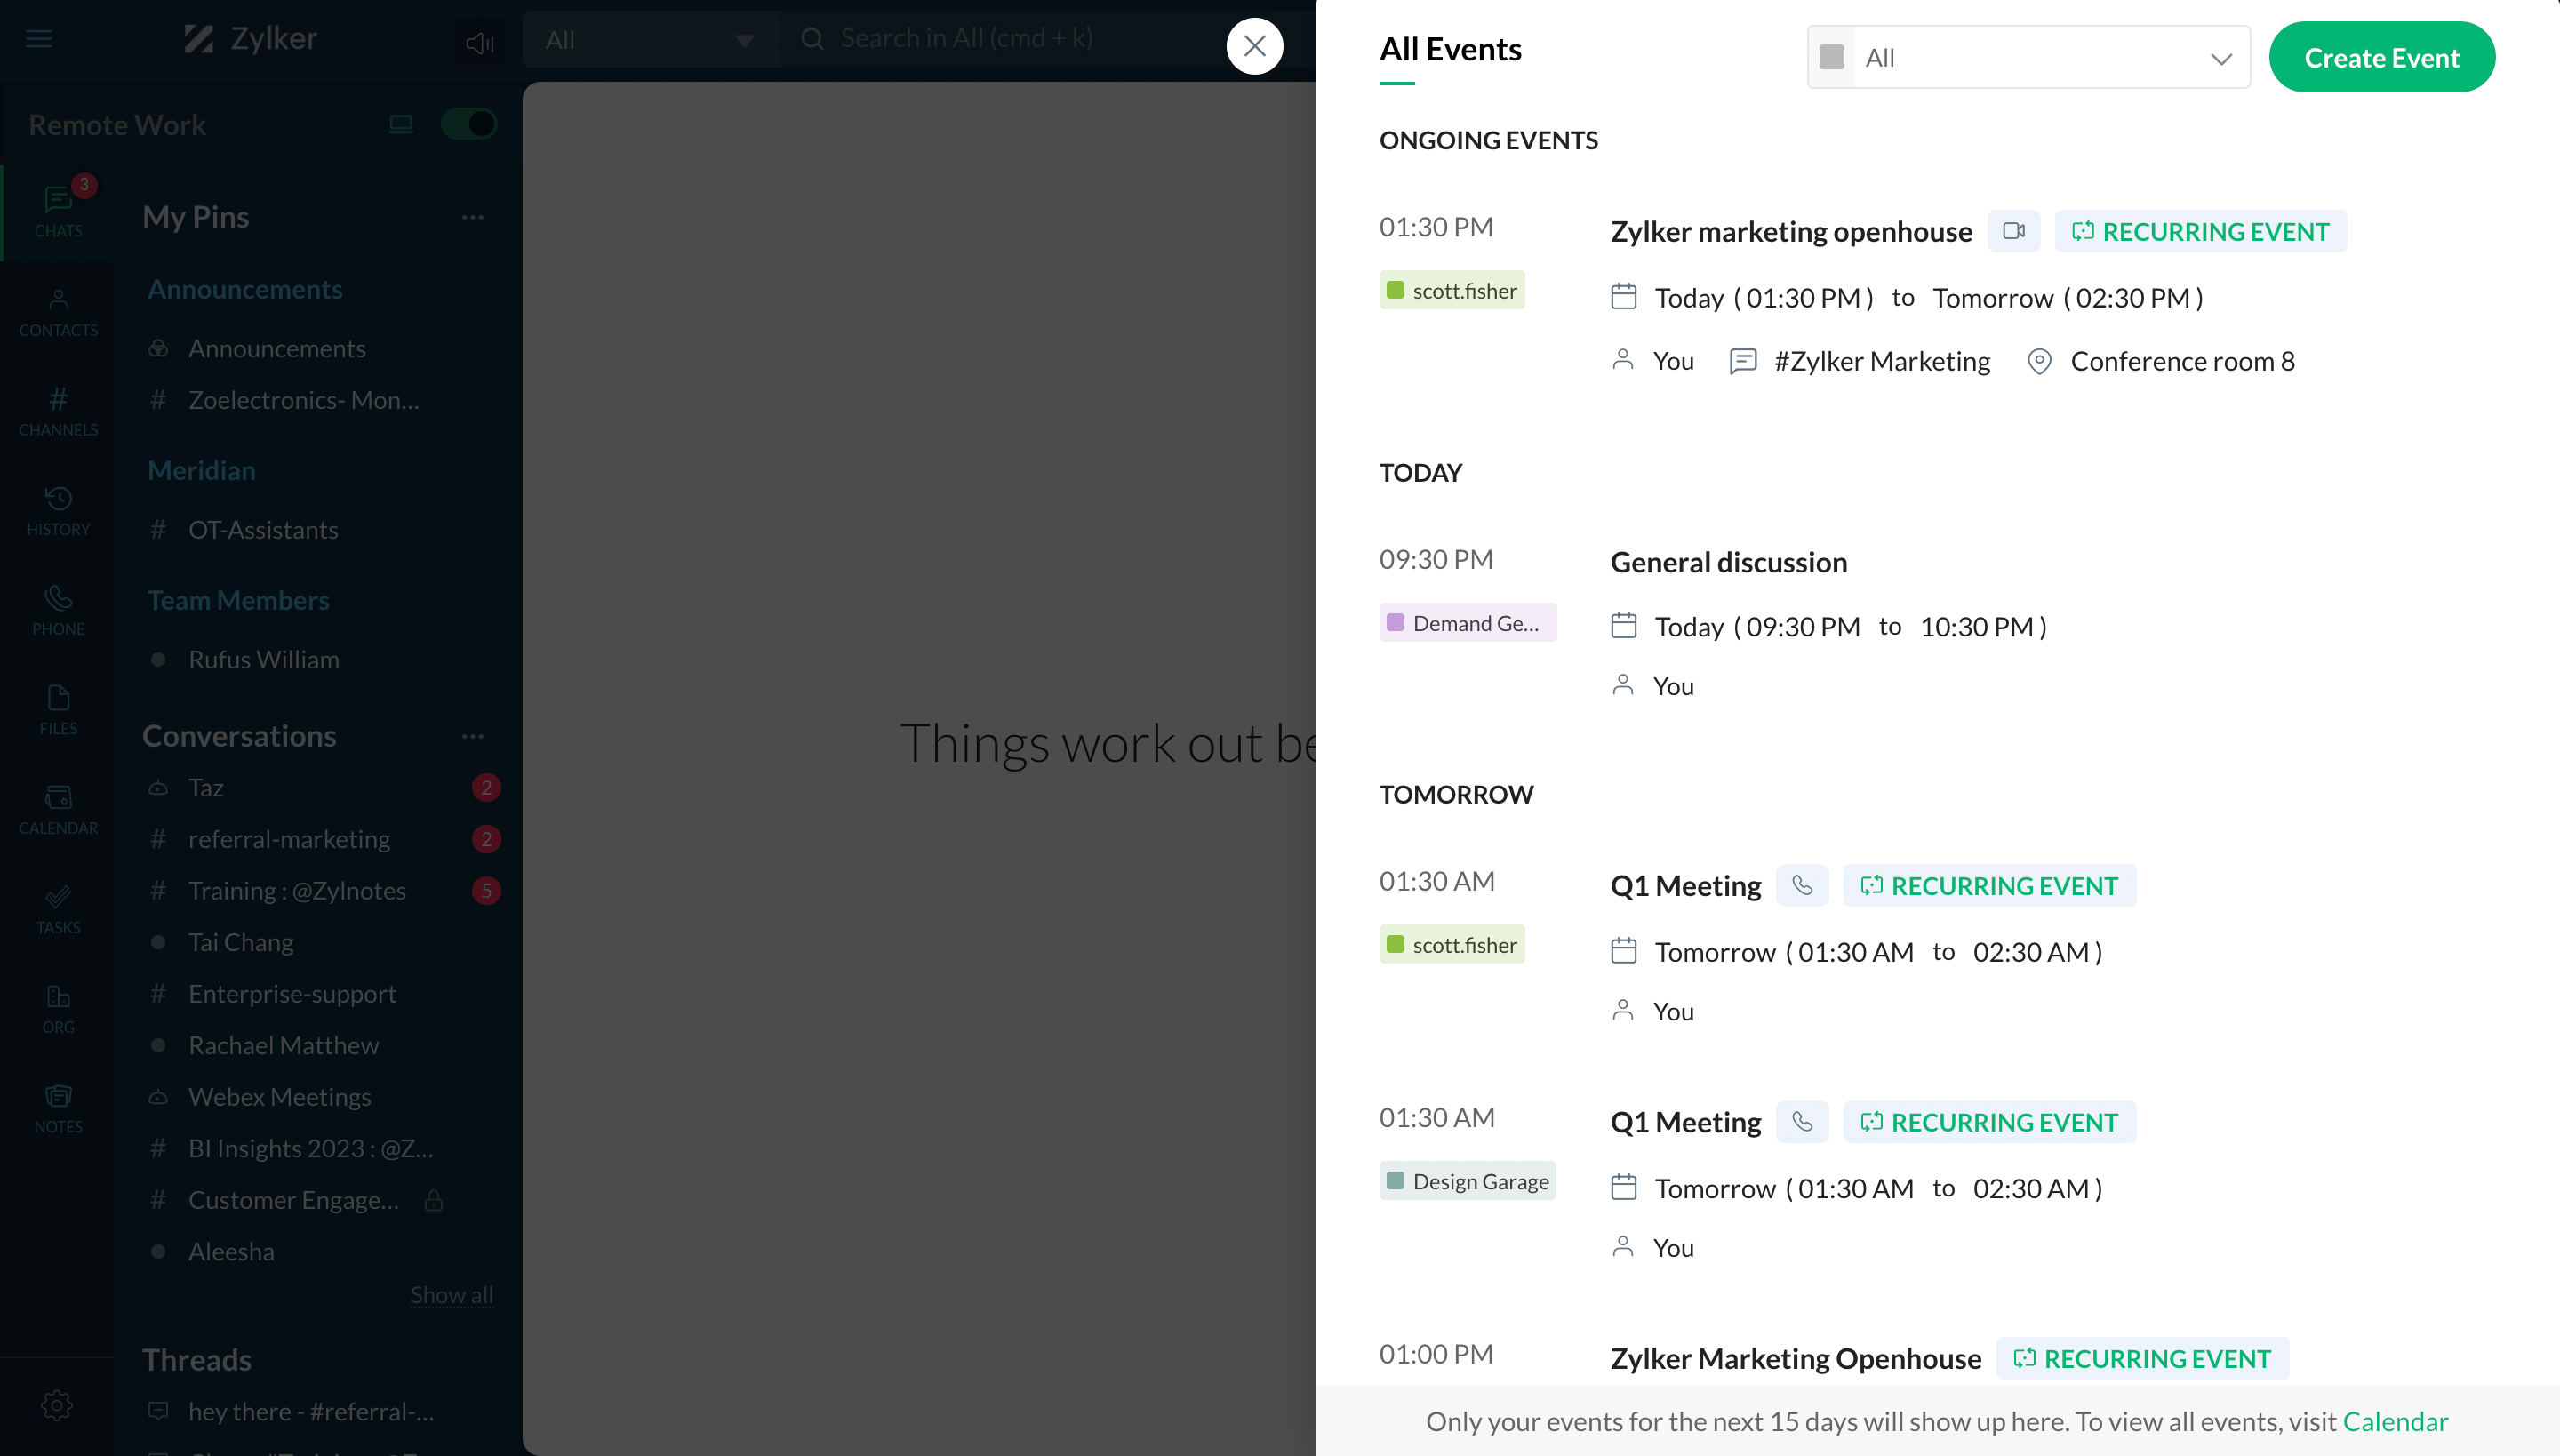
View all events
To view all your events, click on the Calendar Events icon in the top-right corner of your Cliq window.
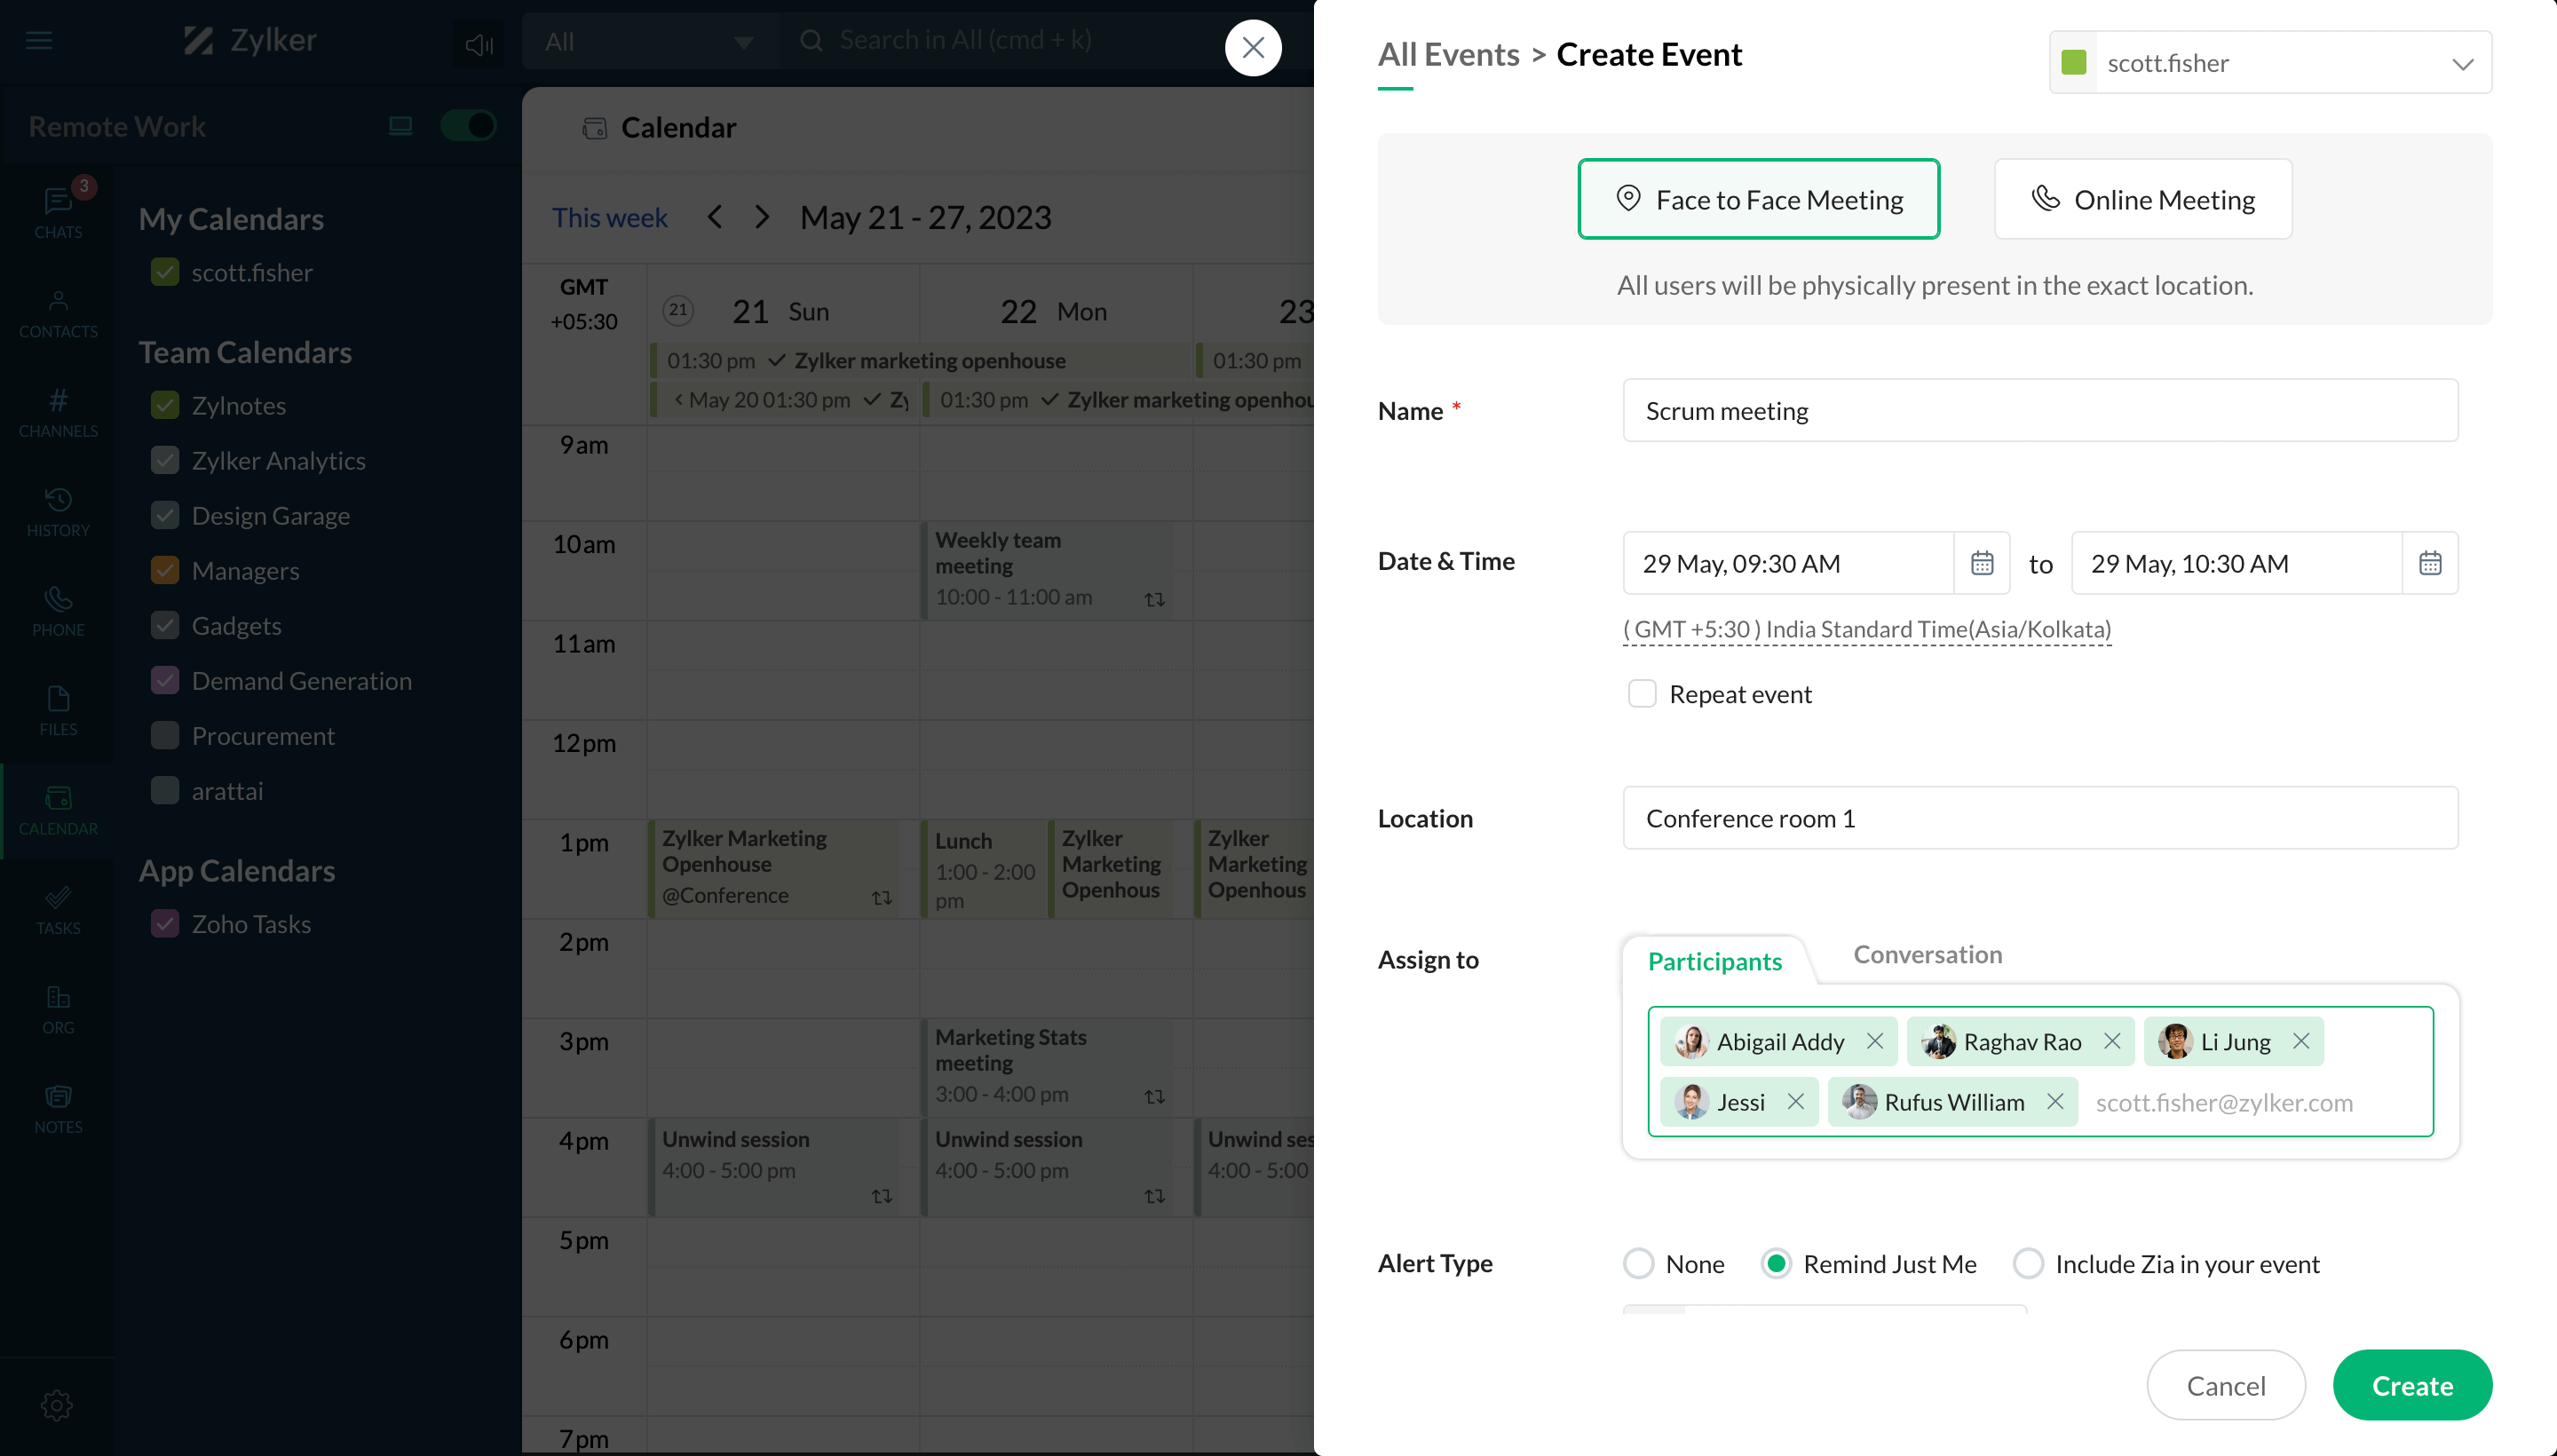
Create event
To create an event, click the Calendar Events icon in the top-right corner and select Create Event.
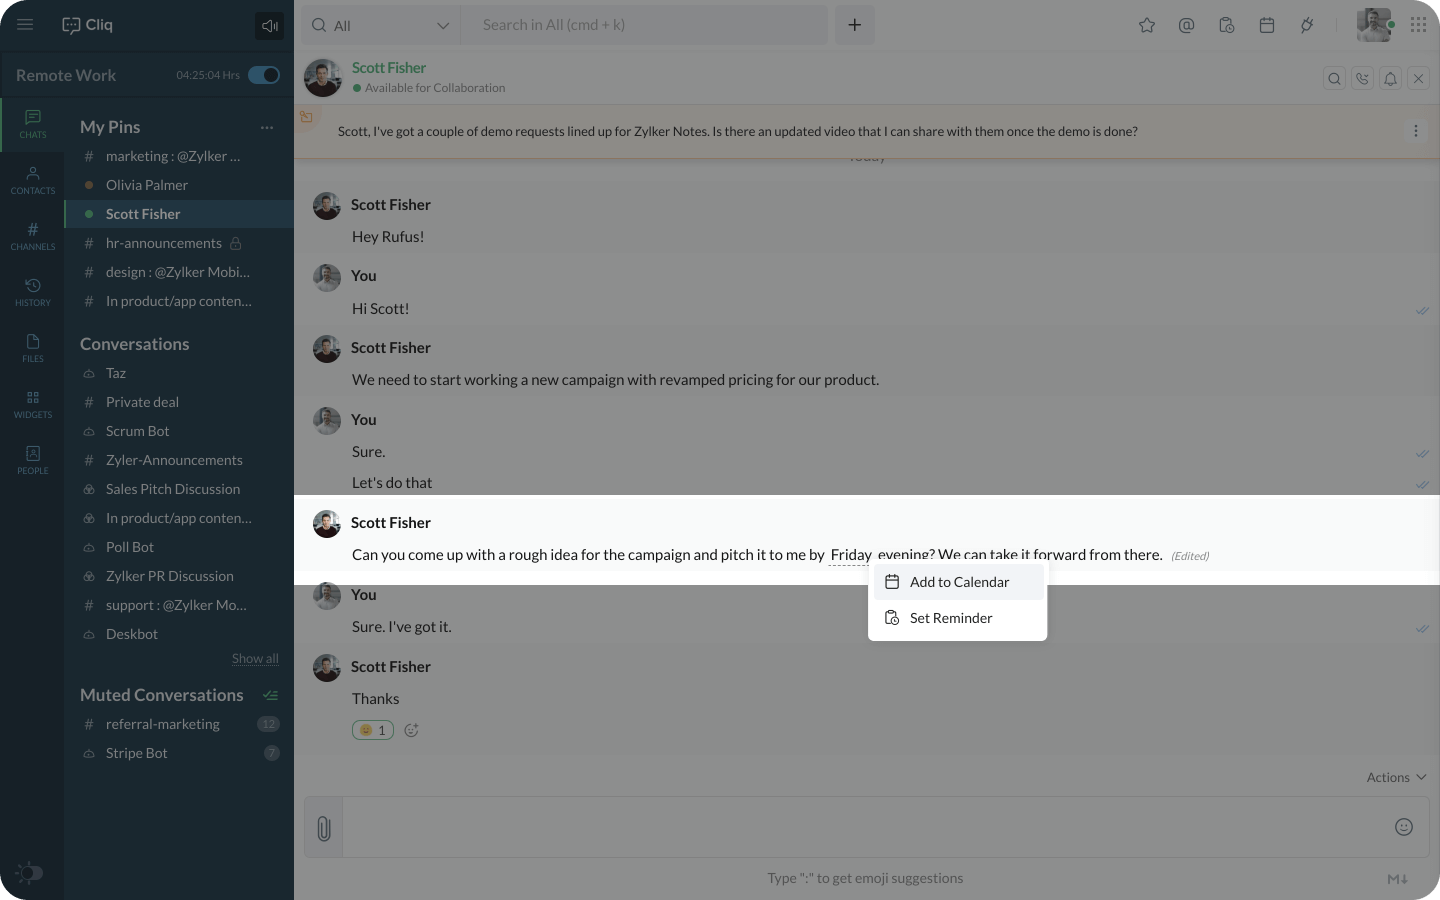
Smart suggestions
Cliq identifies the message context and provides you with reply suggestions. You can either create an event or add a reminder using smart suggestions.
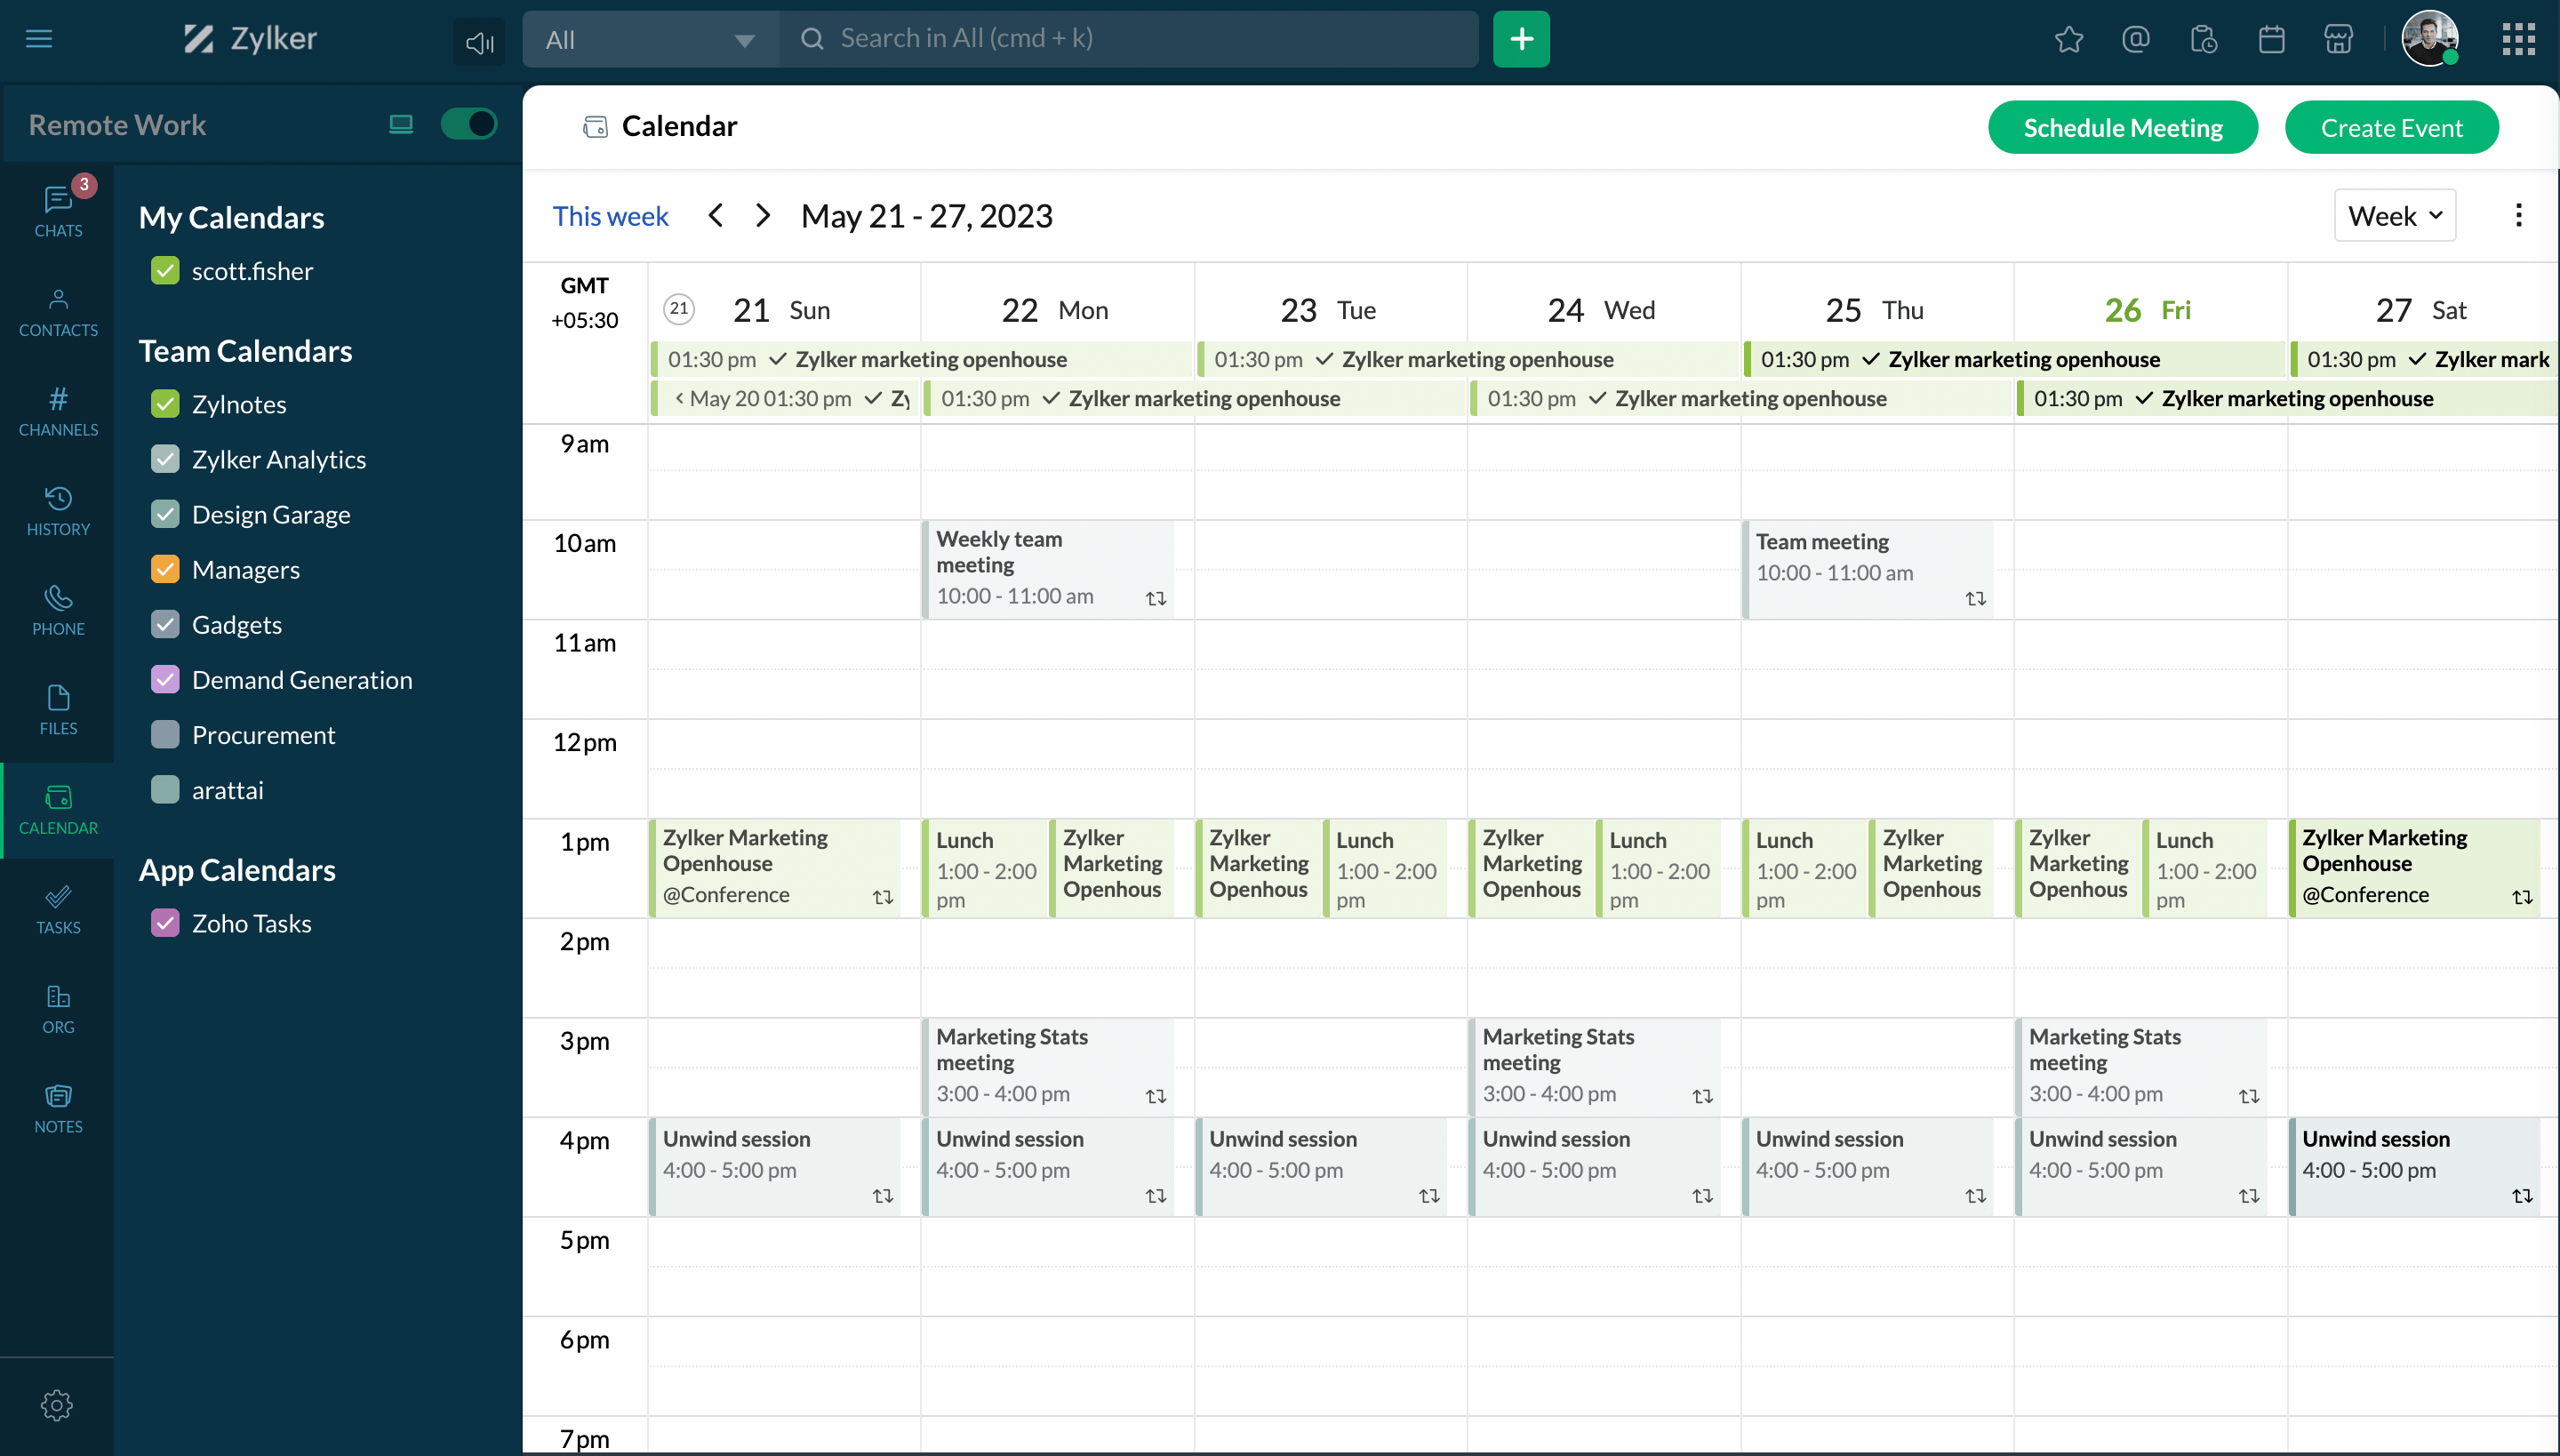
View all calendars
Navigate to the Calendar tab to view all calendars and events.
- View all events
- Create event
- Smart suggestions
- View all calendars


Notes
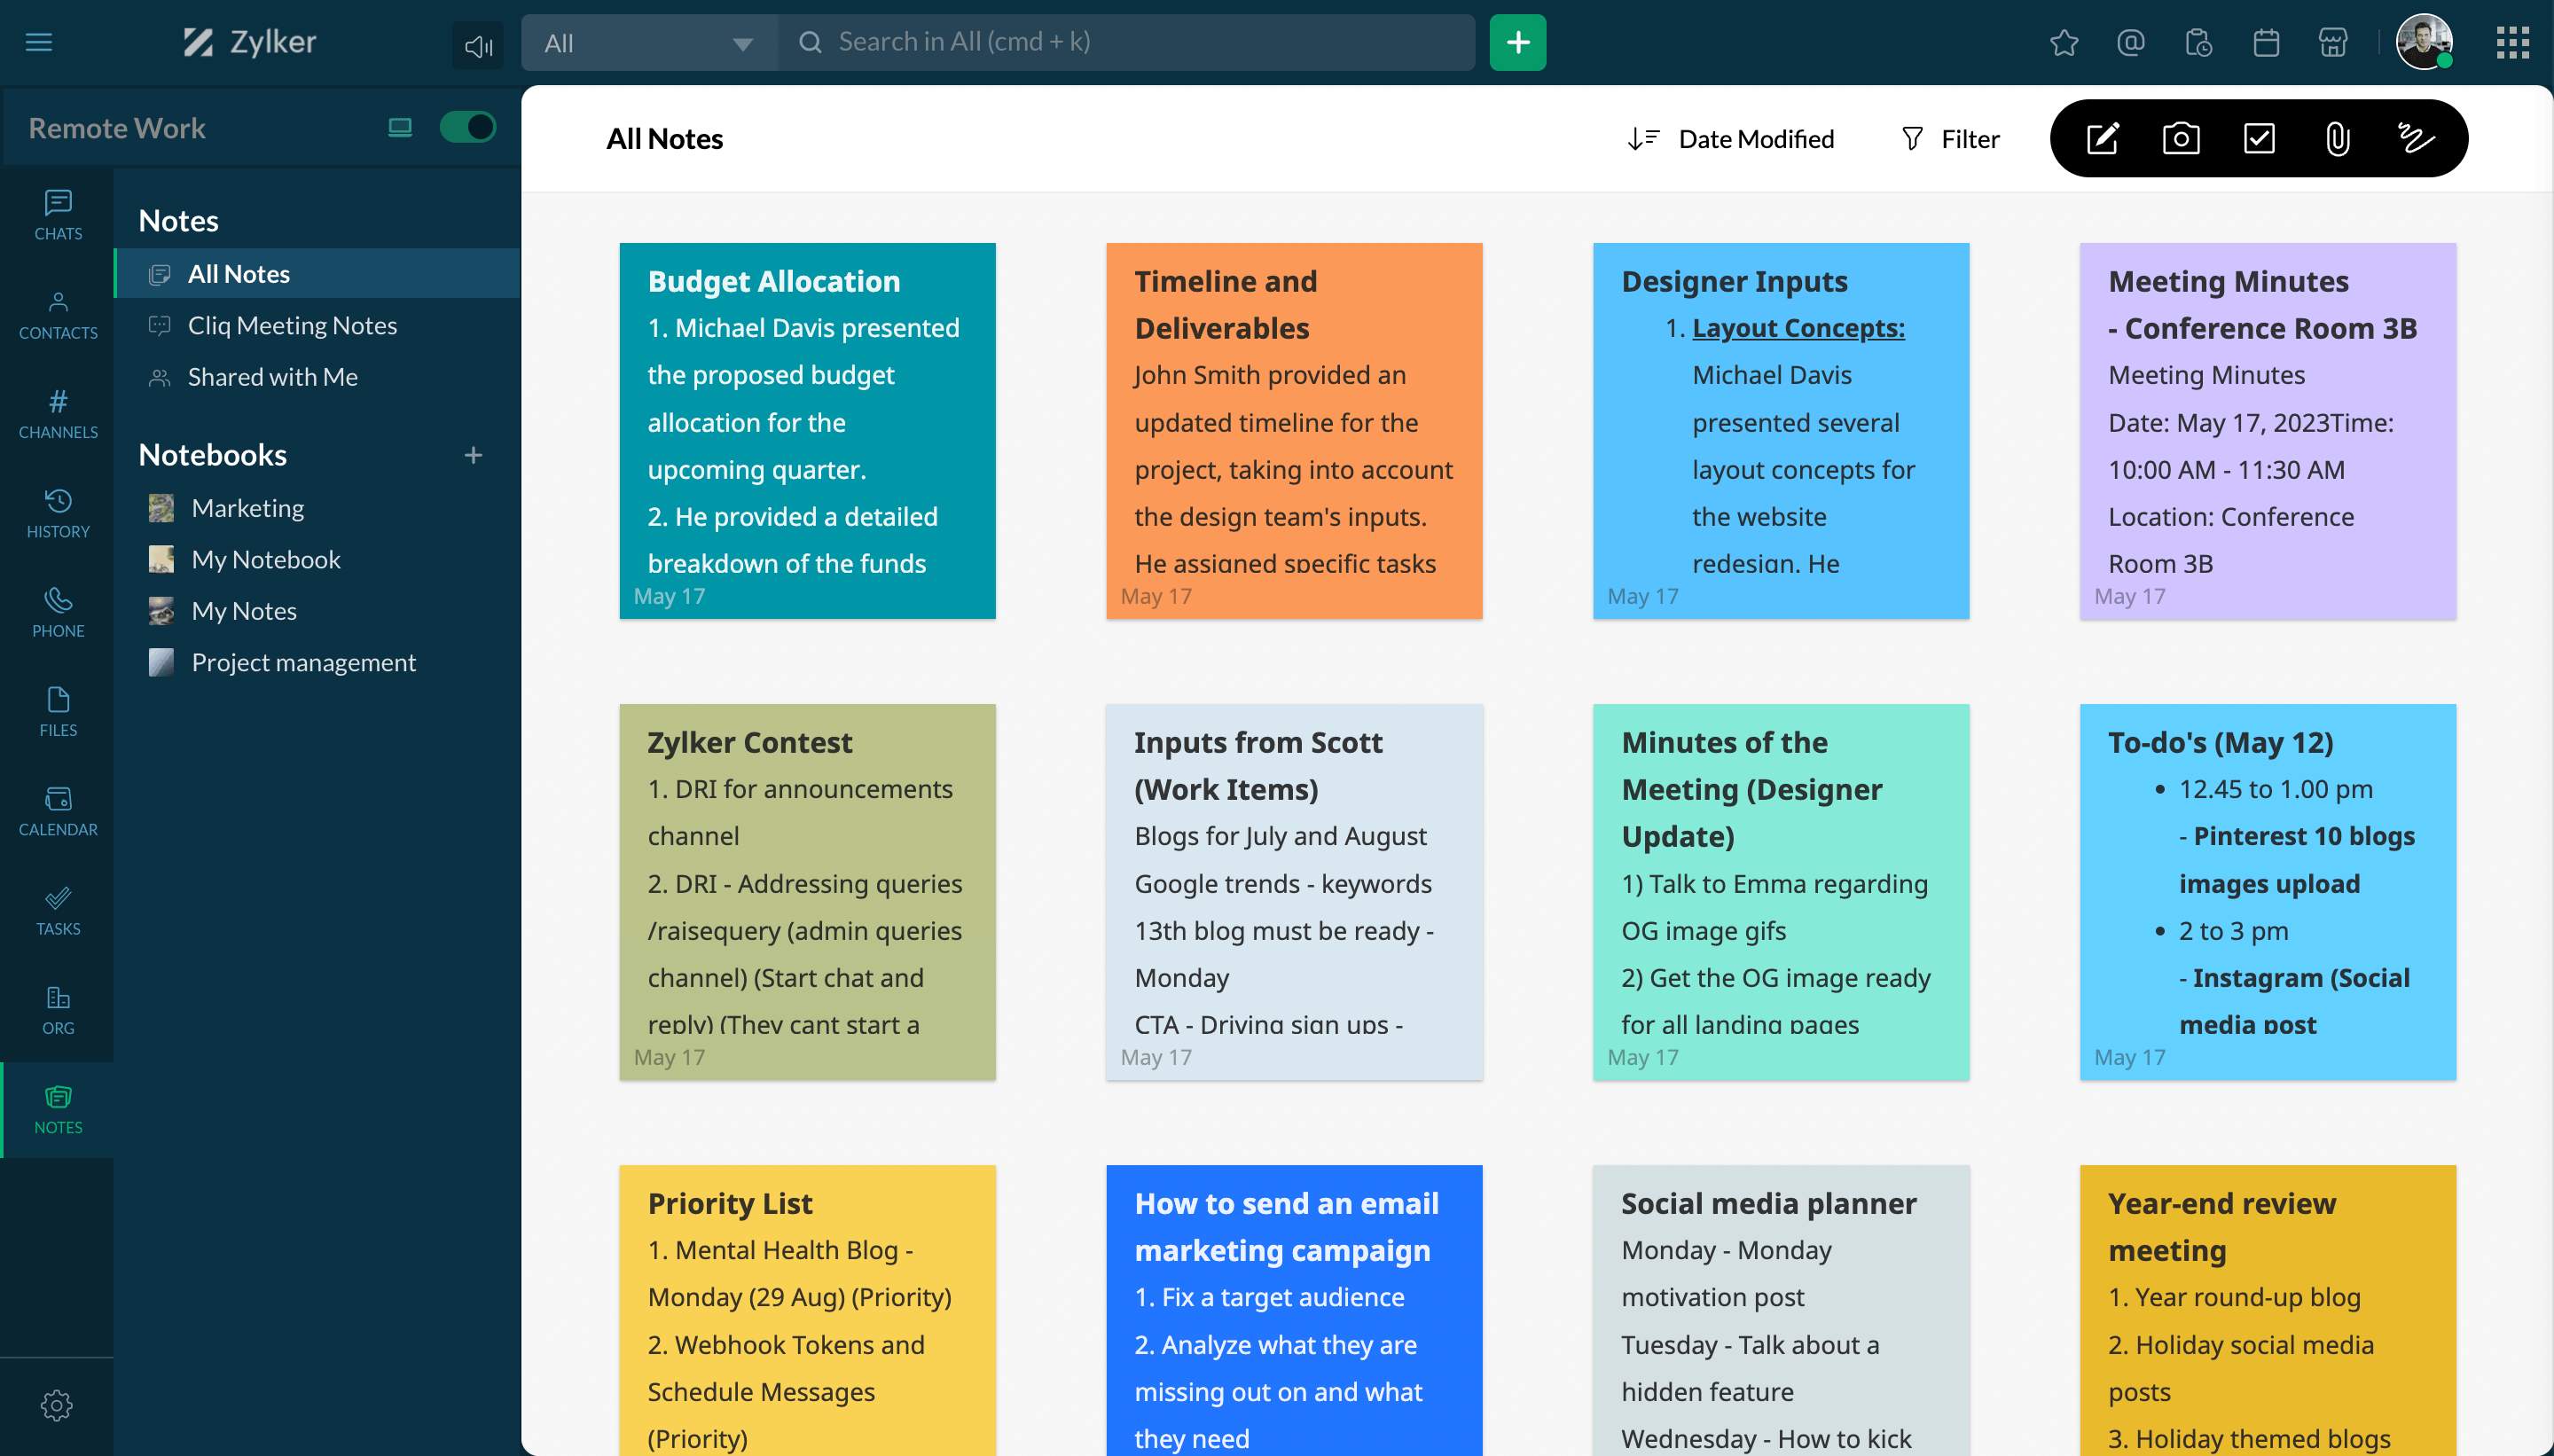
View all notes
Navigate to the Notes tab to view all your notes.
Create note
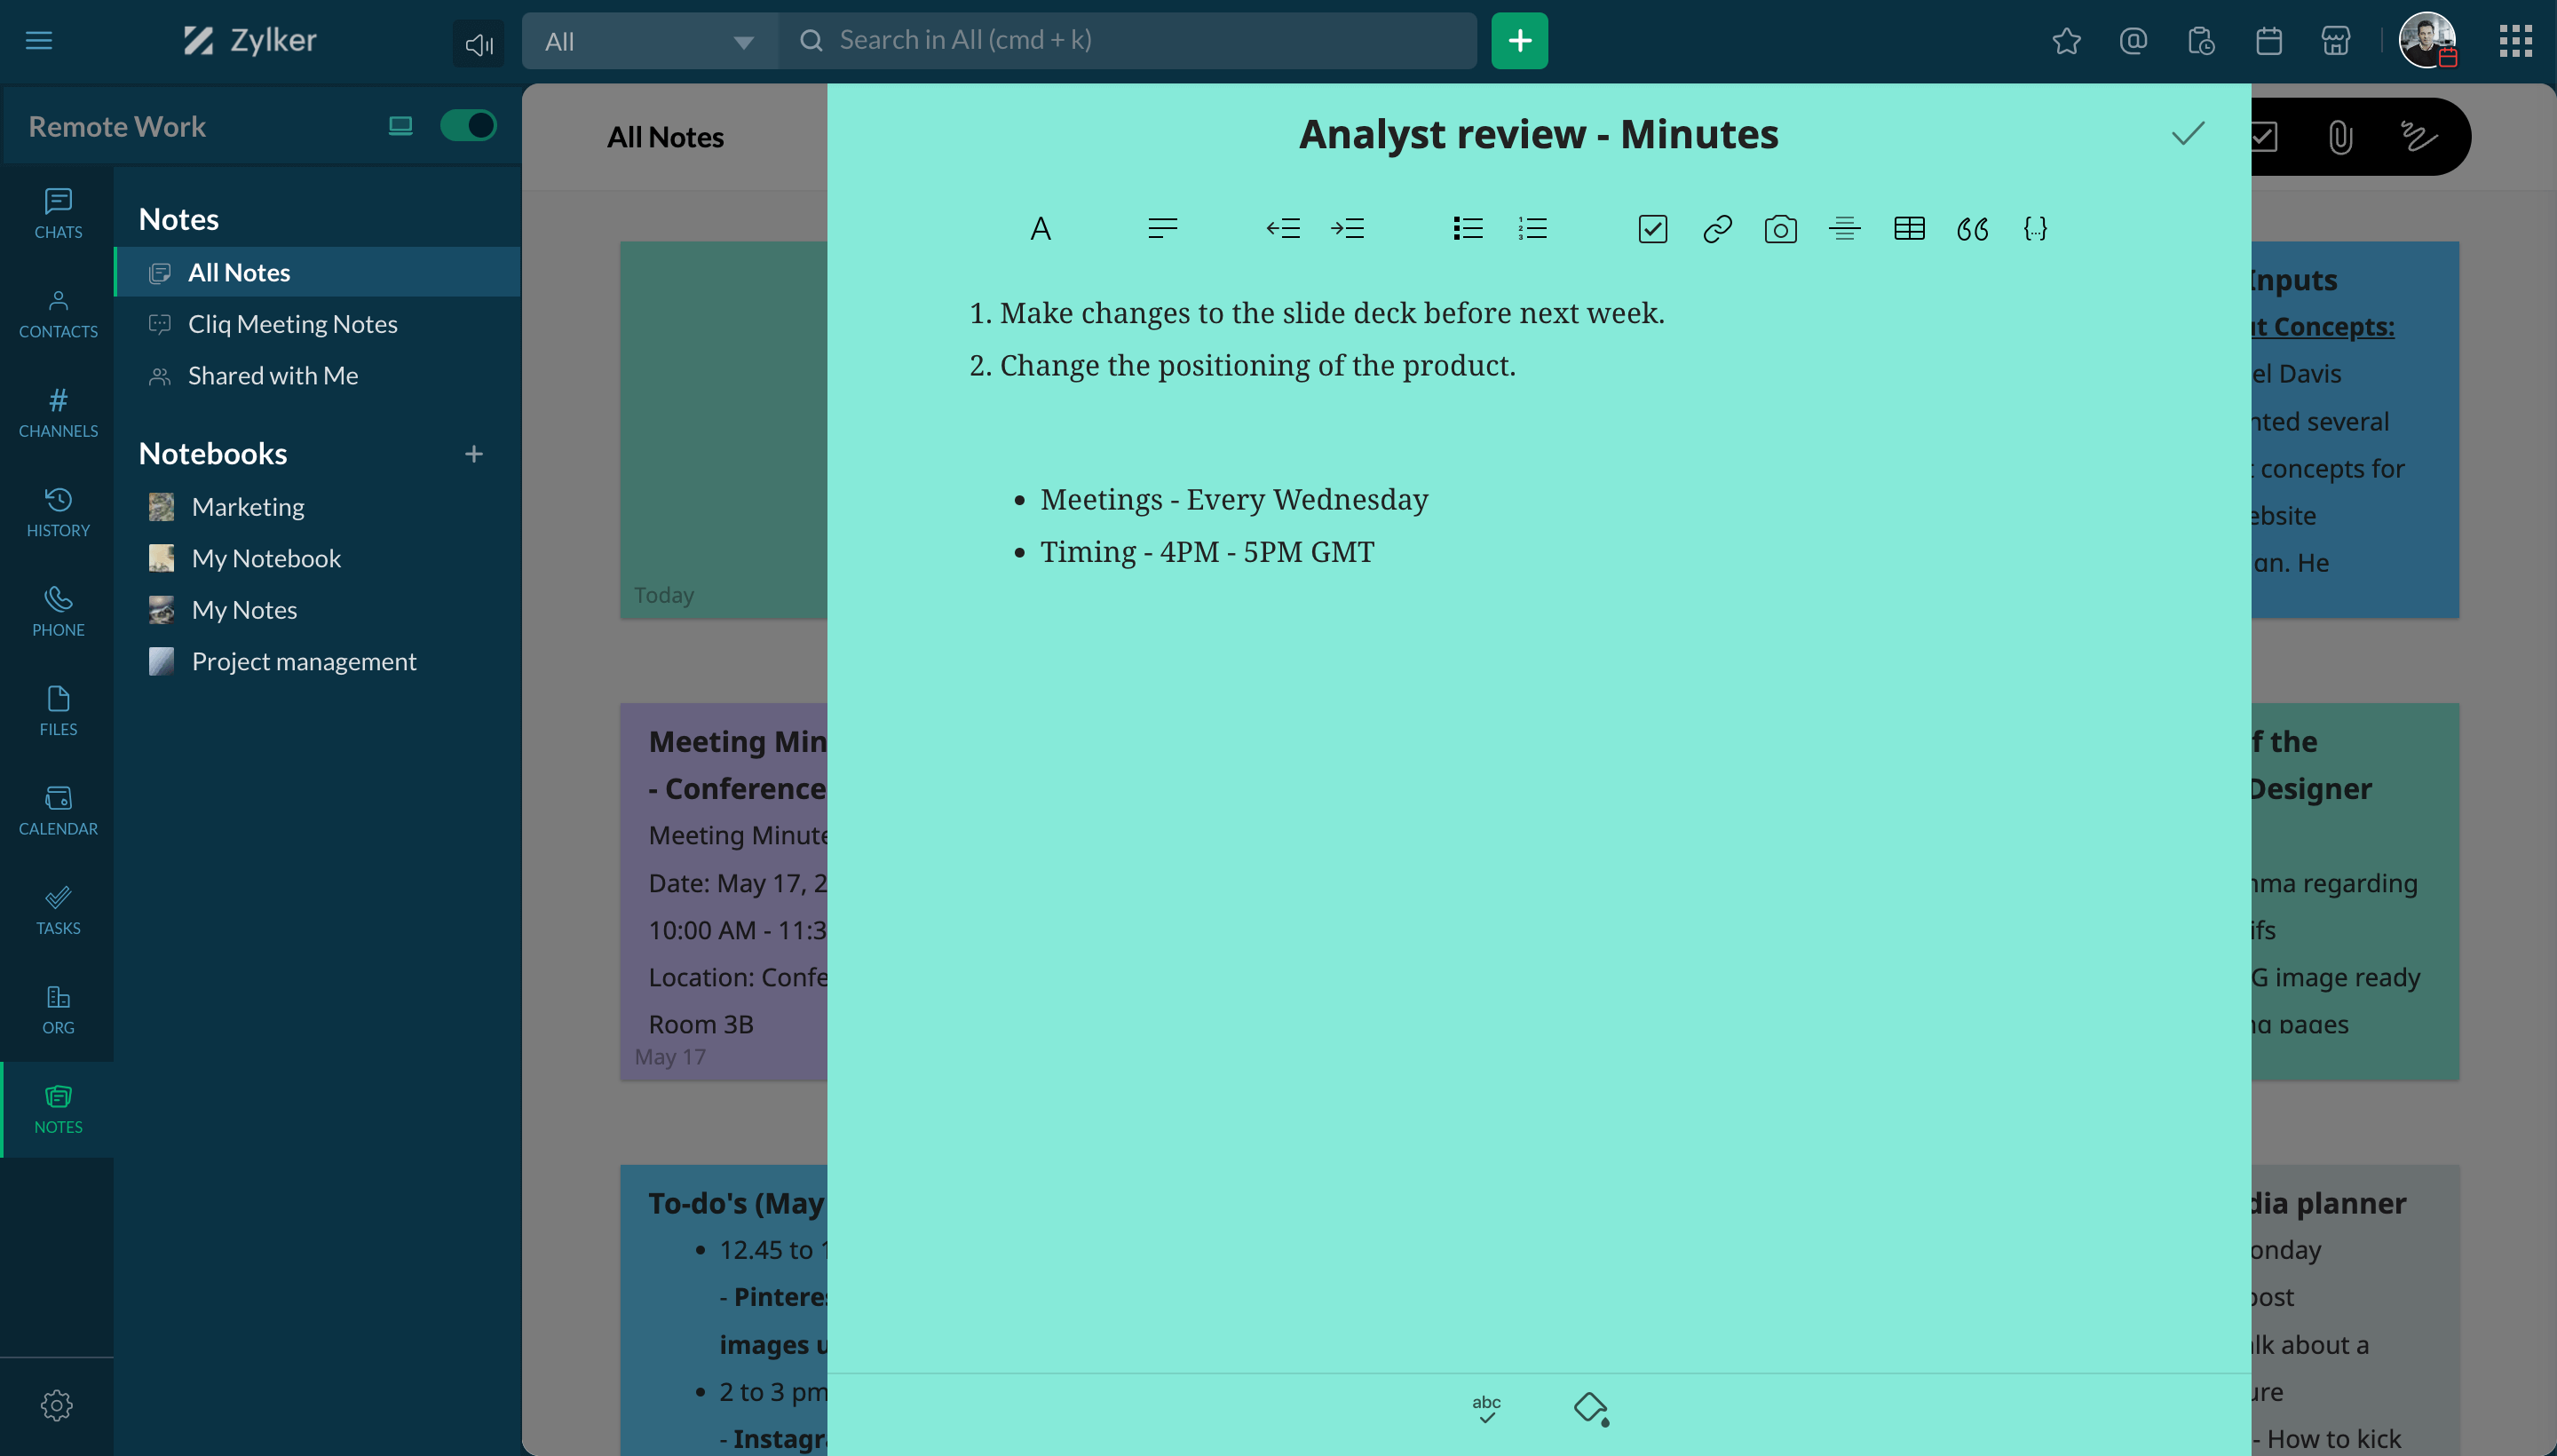
To create a new note, click on the Write icon and start typing.
Filter notes
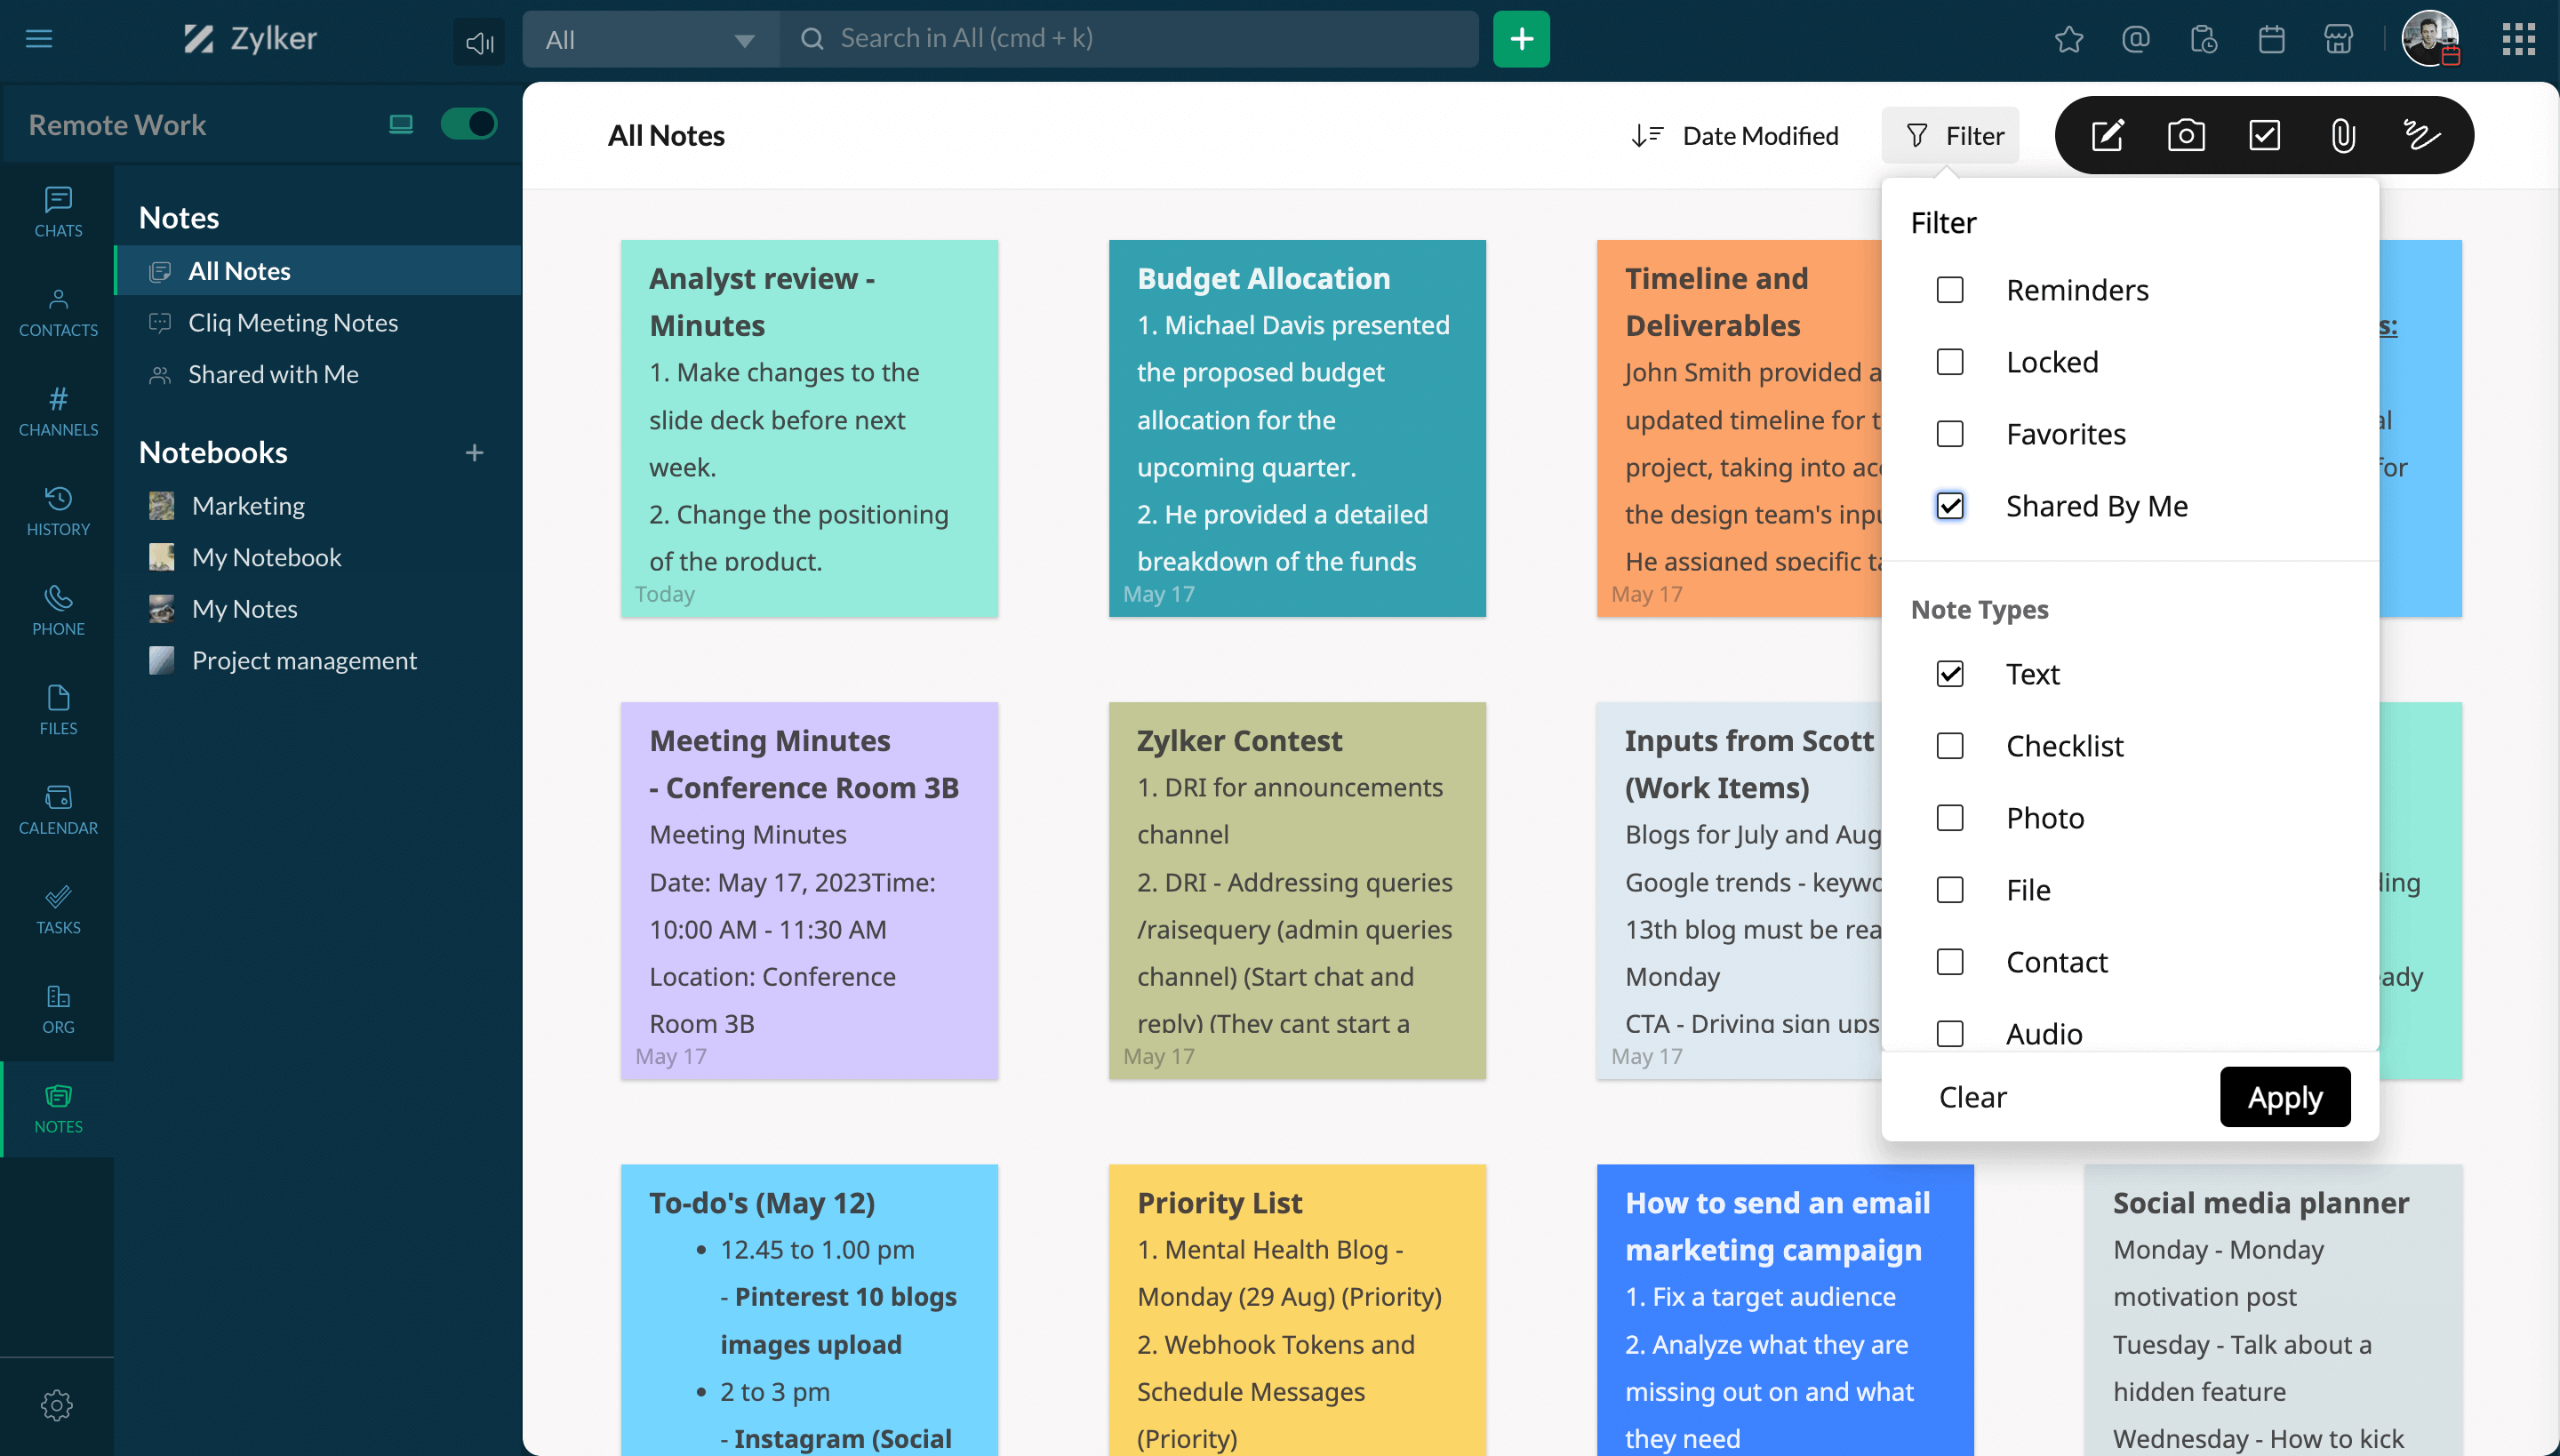
Locate specific notes based on what you are looking for with detailed filters like note type, favorites, locked, or notes shared by you.
Meeting notes
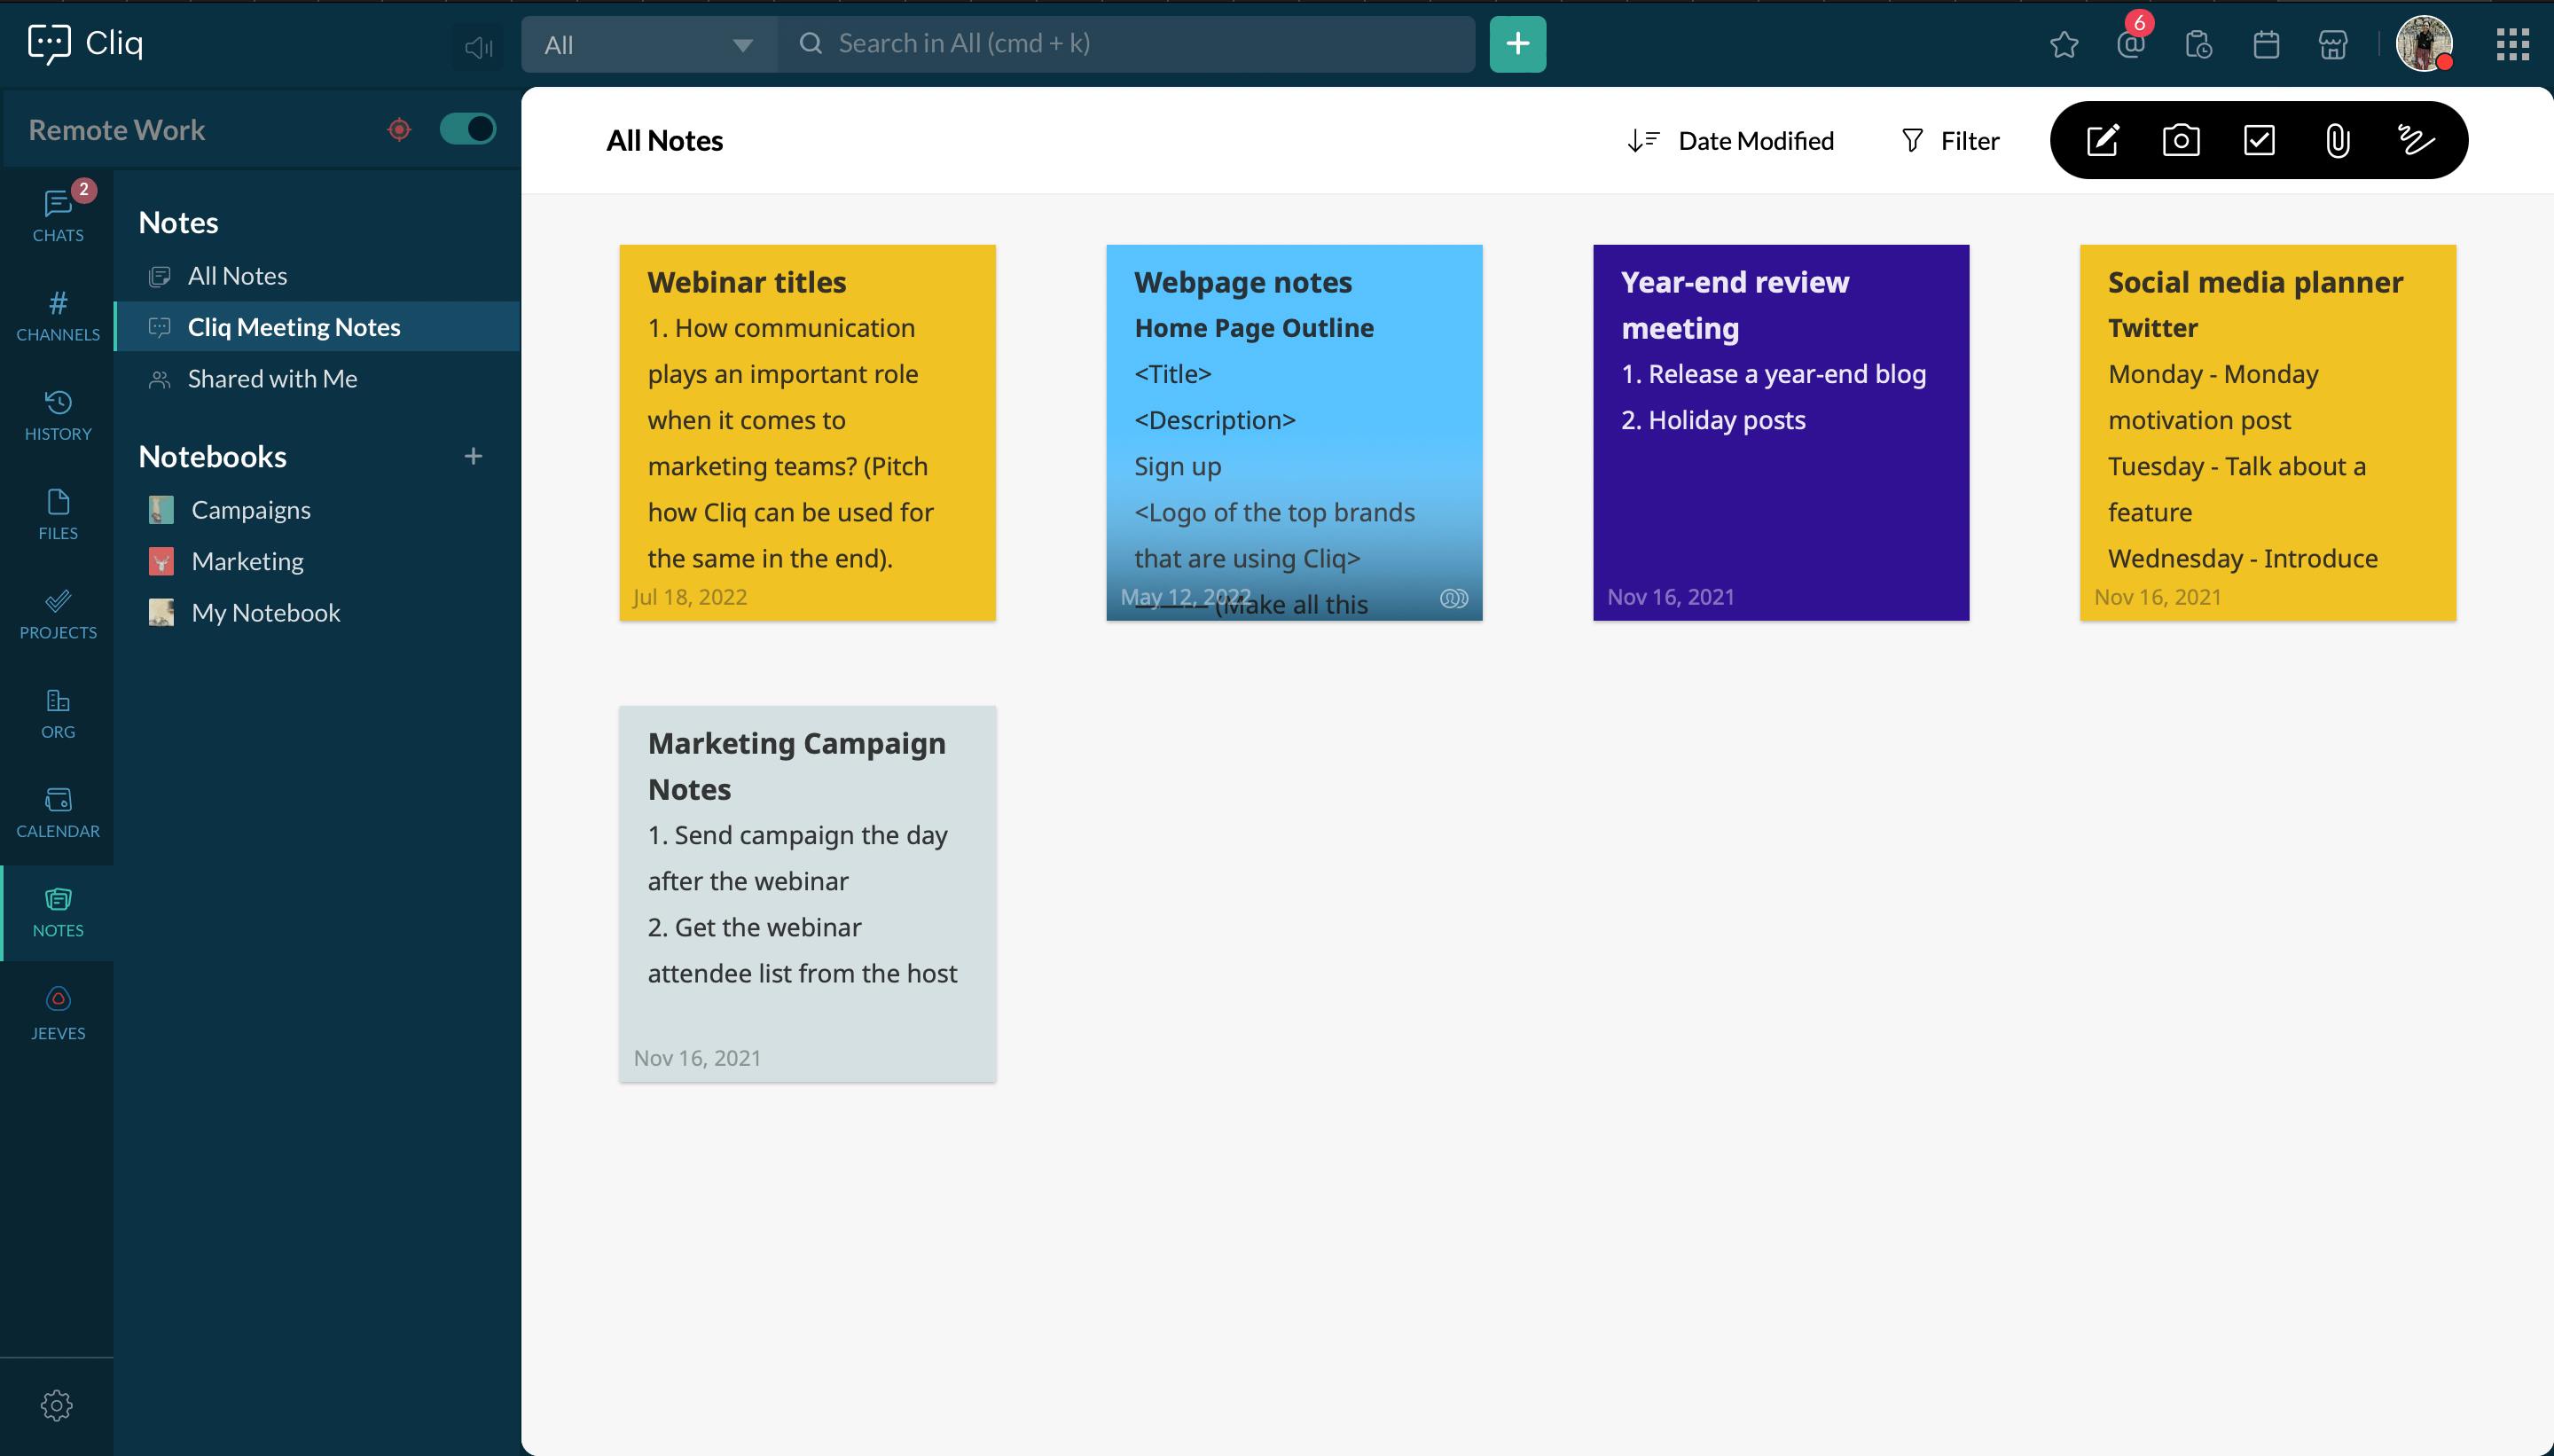
Get easy access to all the notes recorded during your meeting from the Cliq Meeting Notes tab.
Notebooks
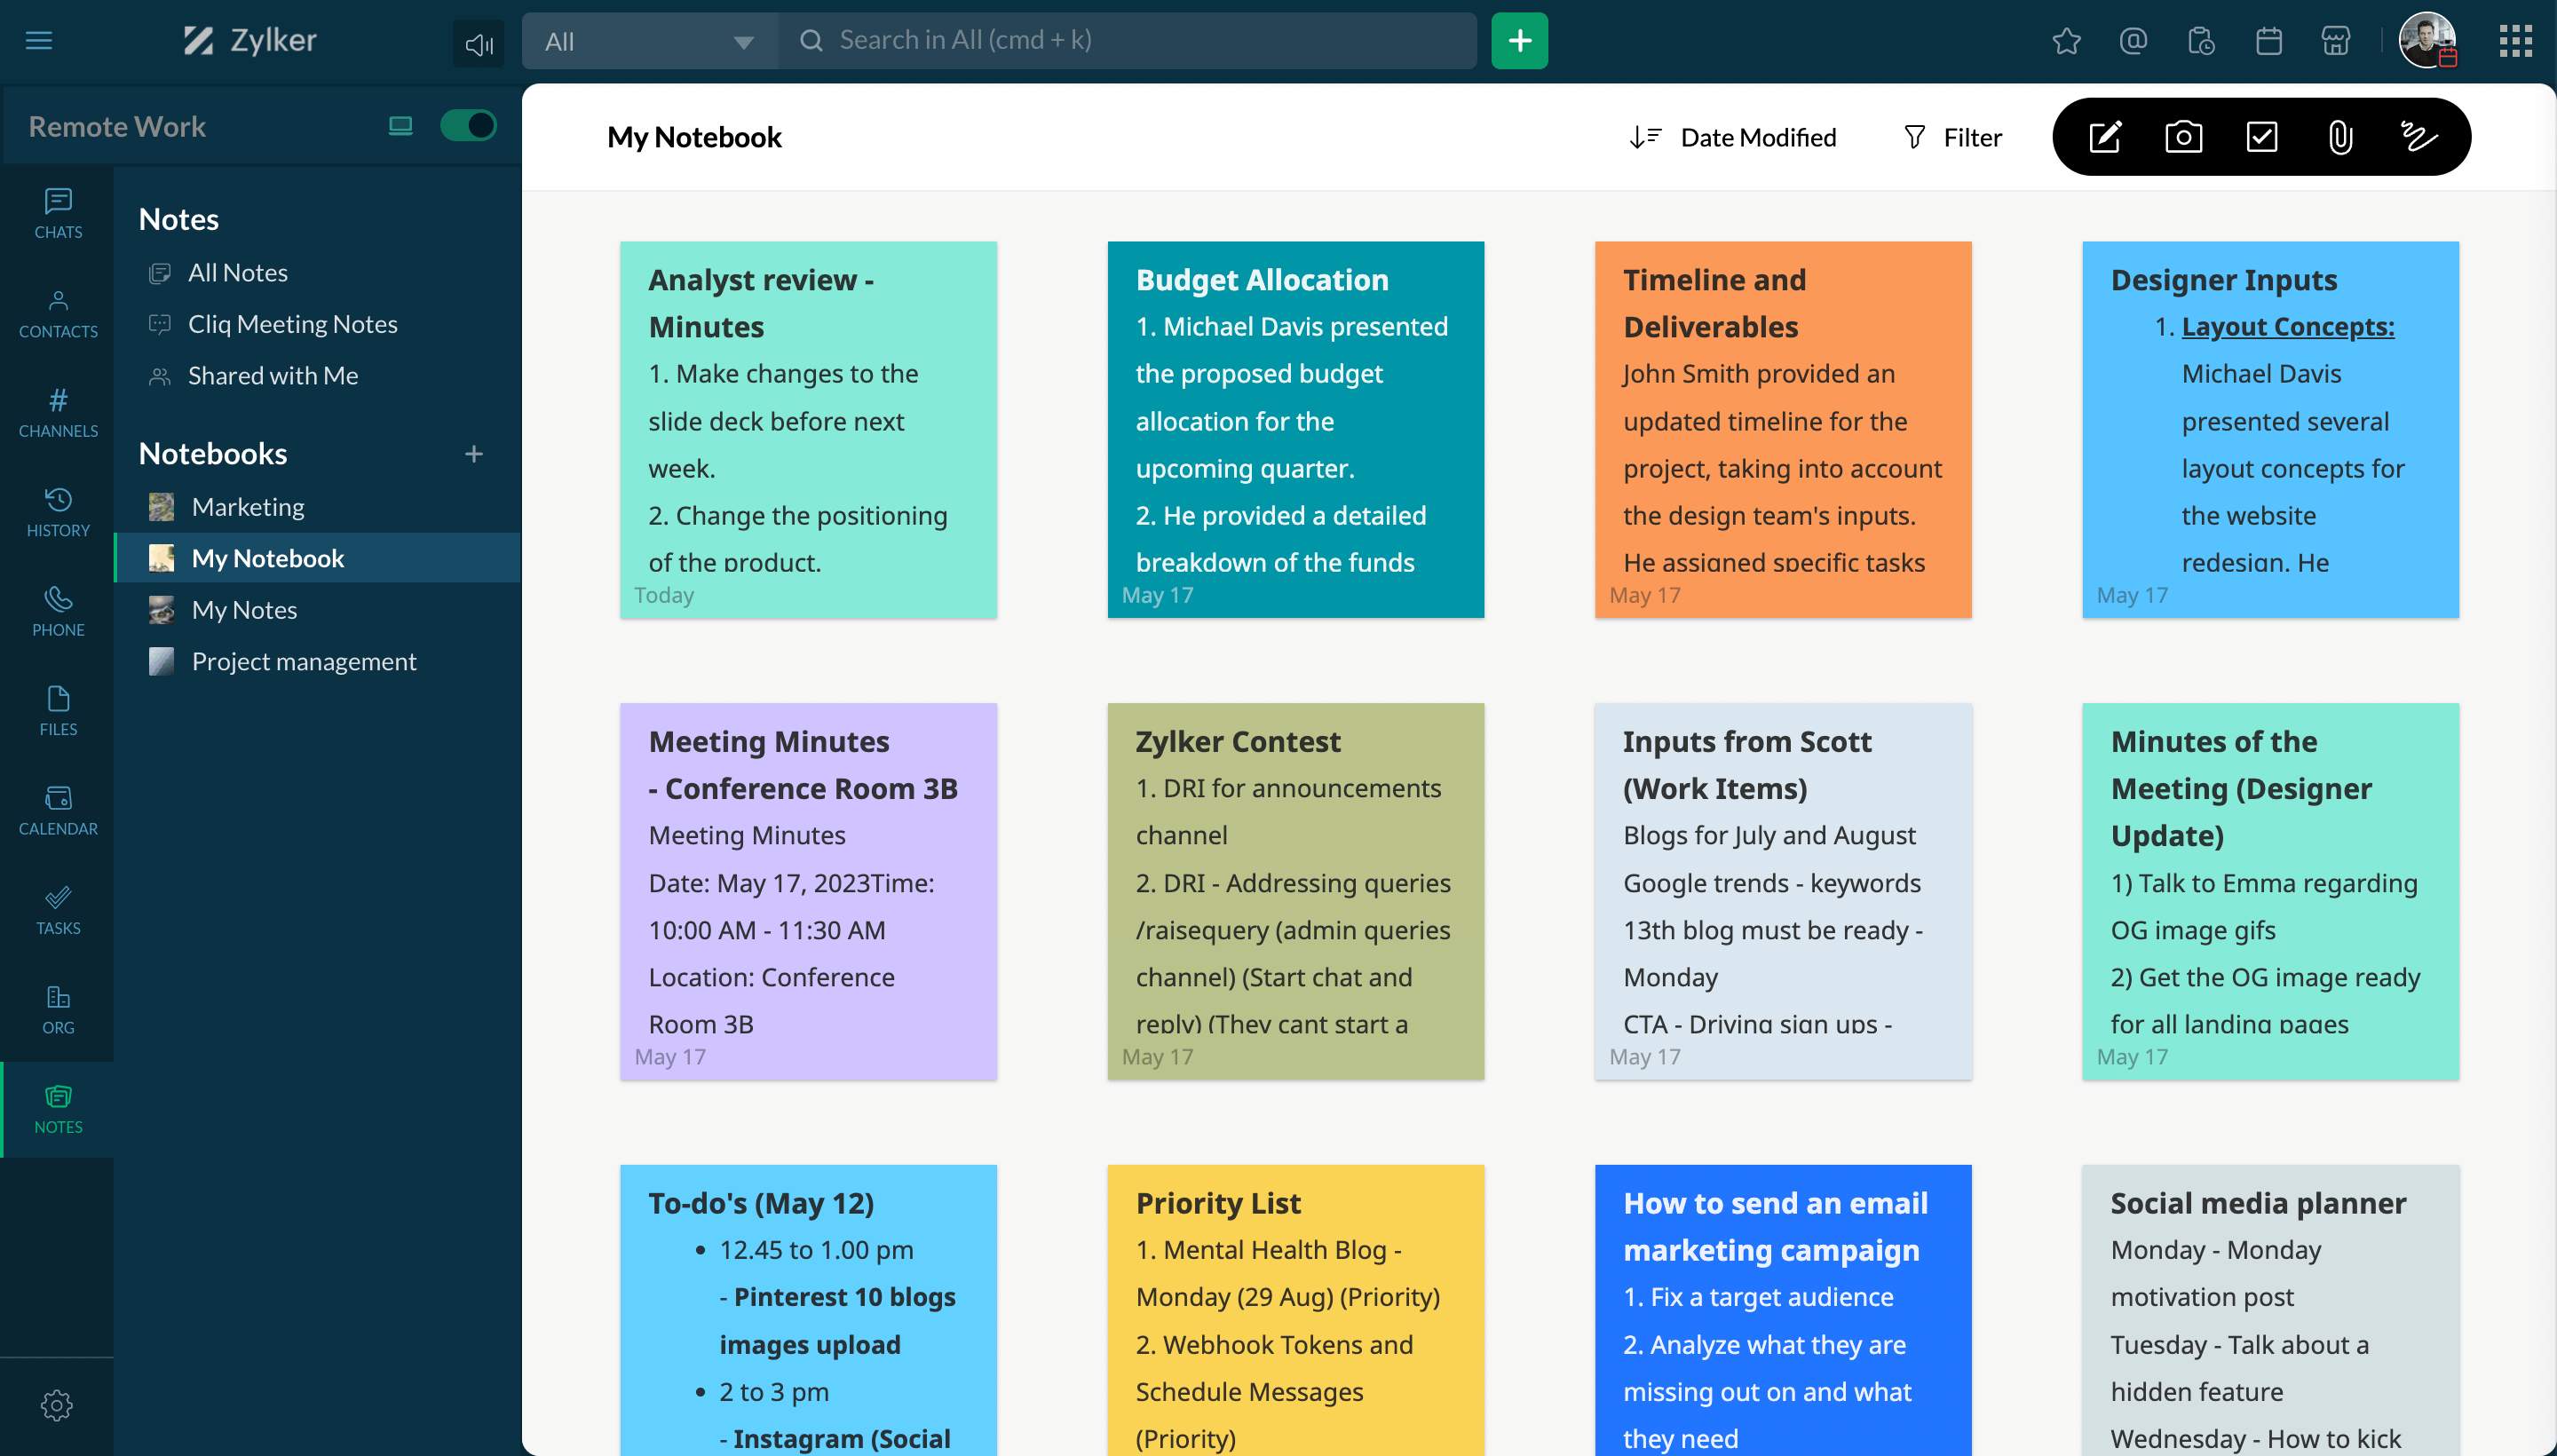
Create notebooks and view all the notebooks synced from Zoho Notebook.
- View all notes
- Create note
- Filter notes
- Meeting notes
- Notebooks


Reminders
Set reminder
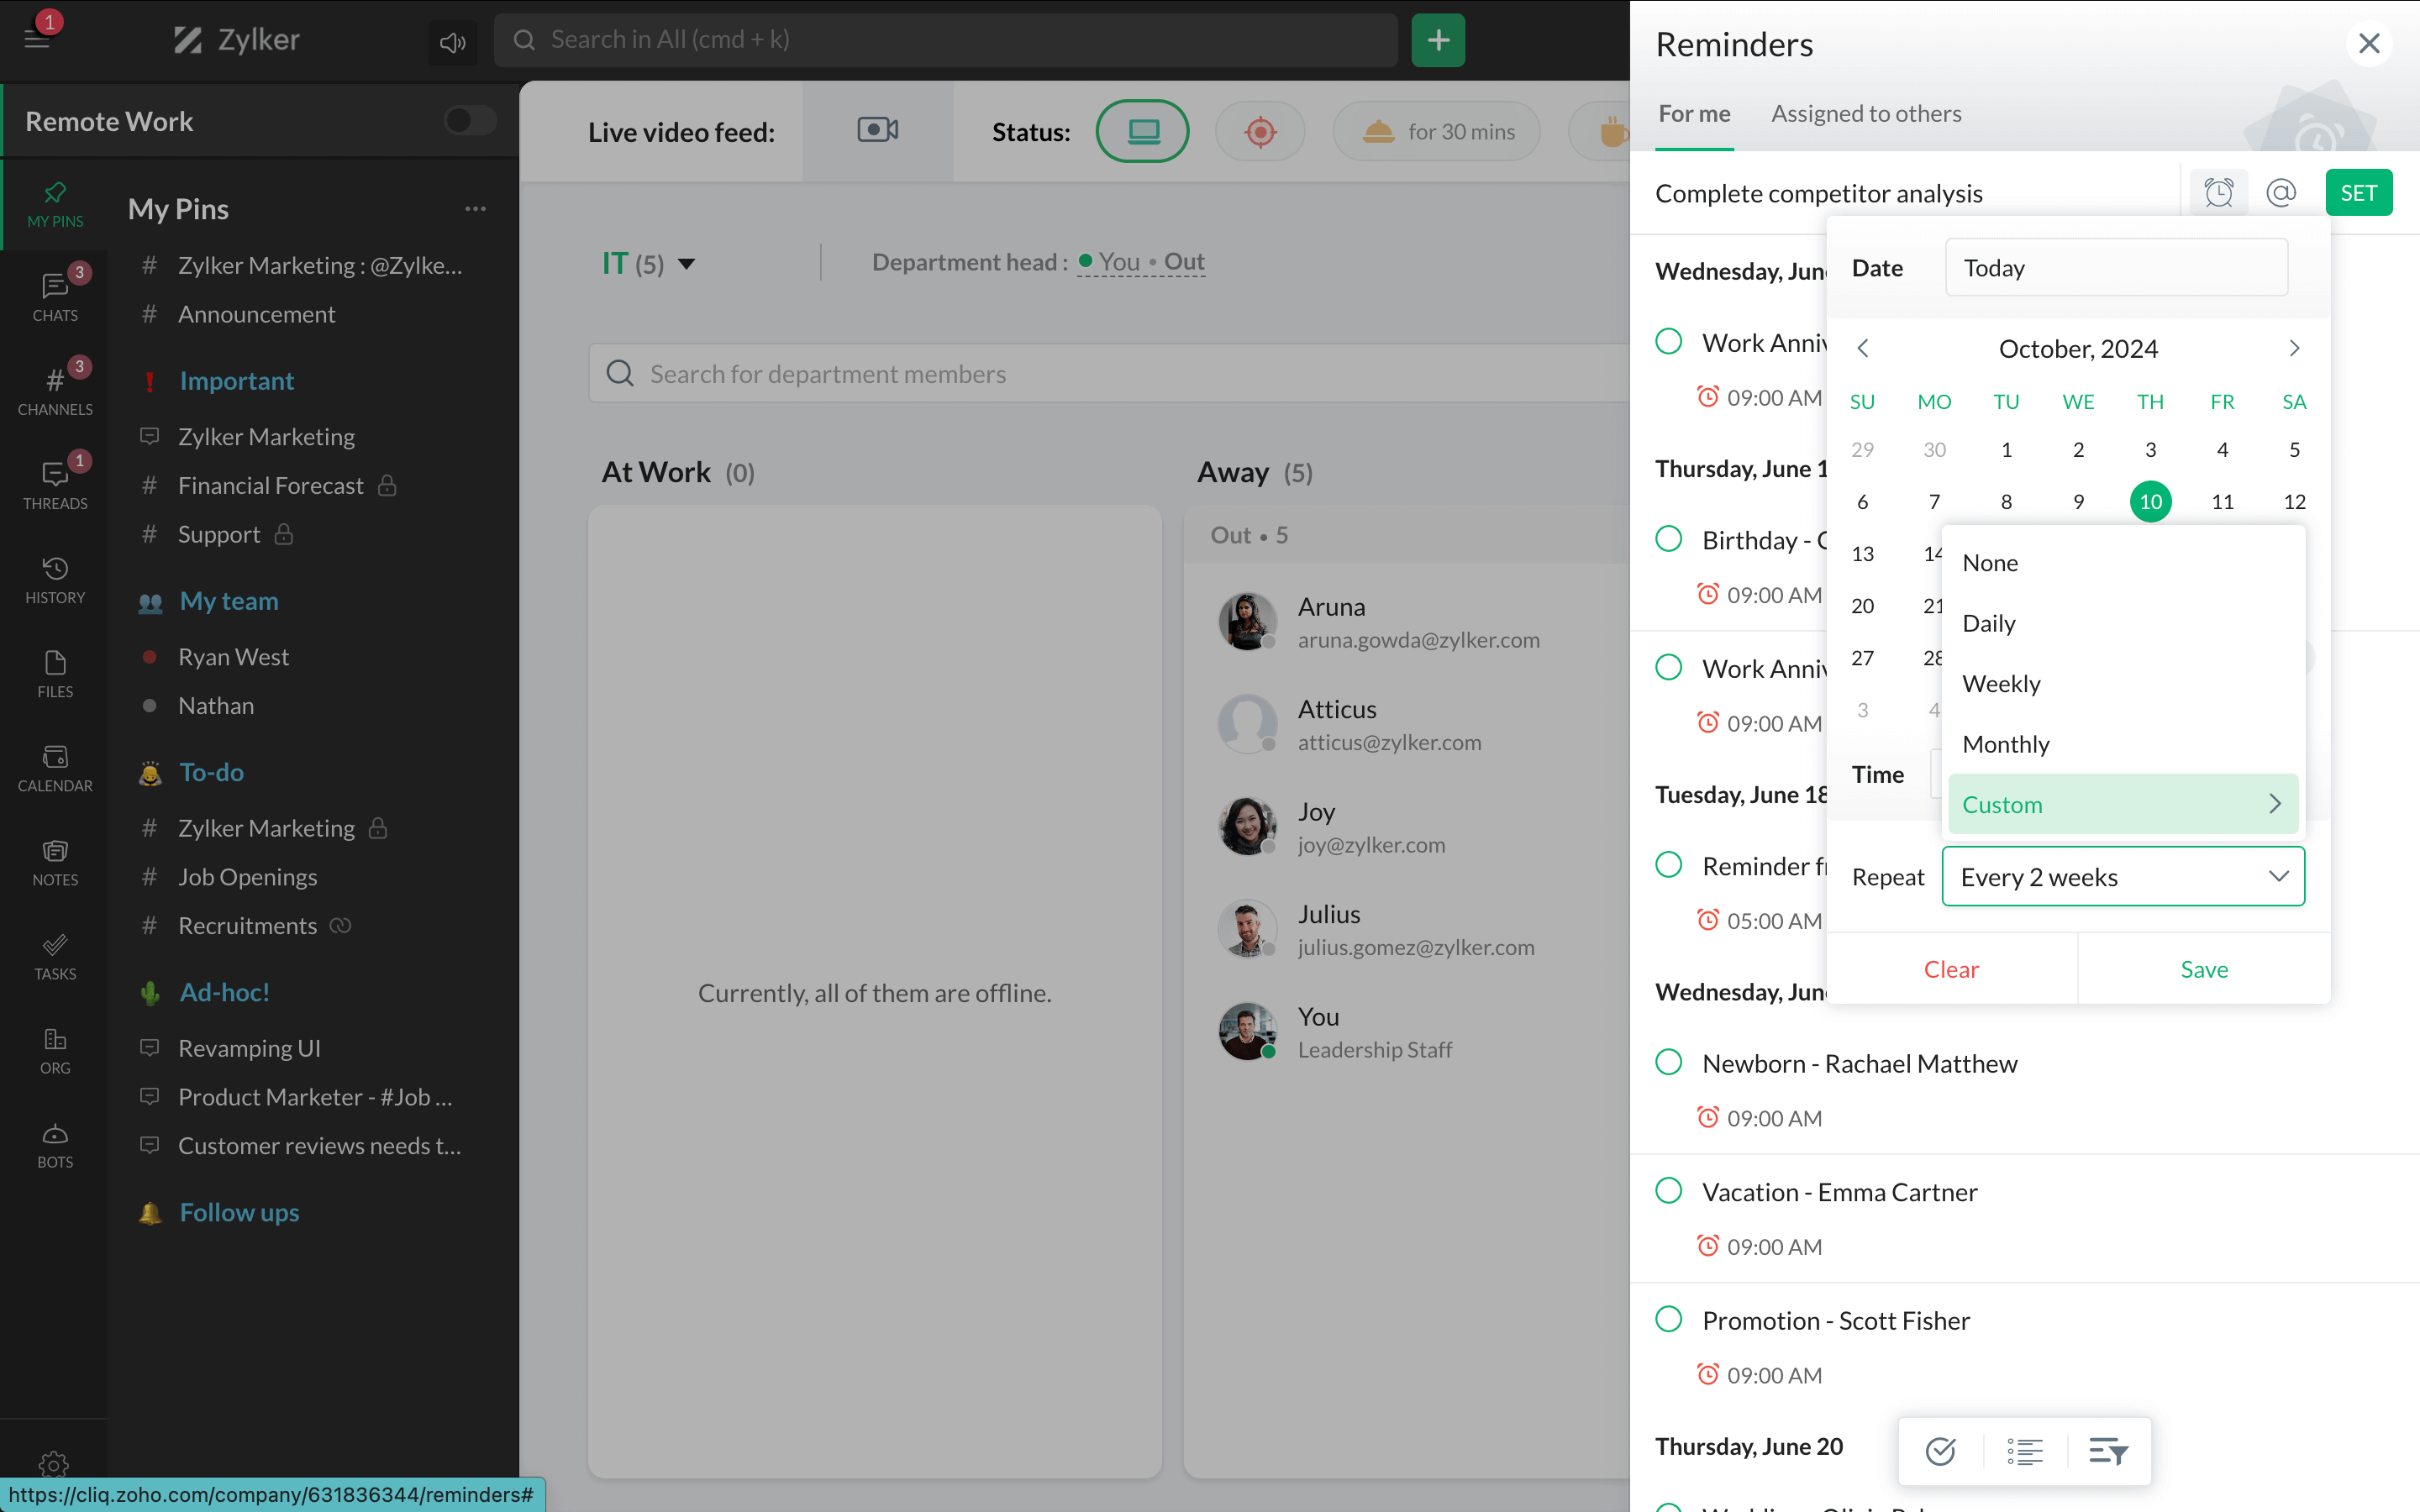
You can add a reminder for yourself, teammates, a group conversation, or a channel from the Reminders tab in the top-right corner of the Cliq window.
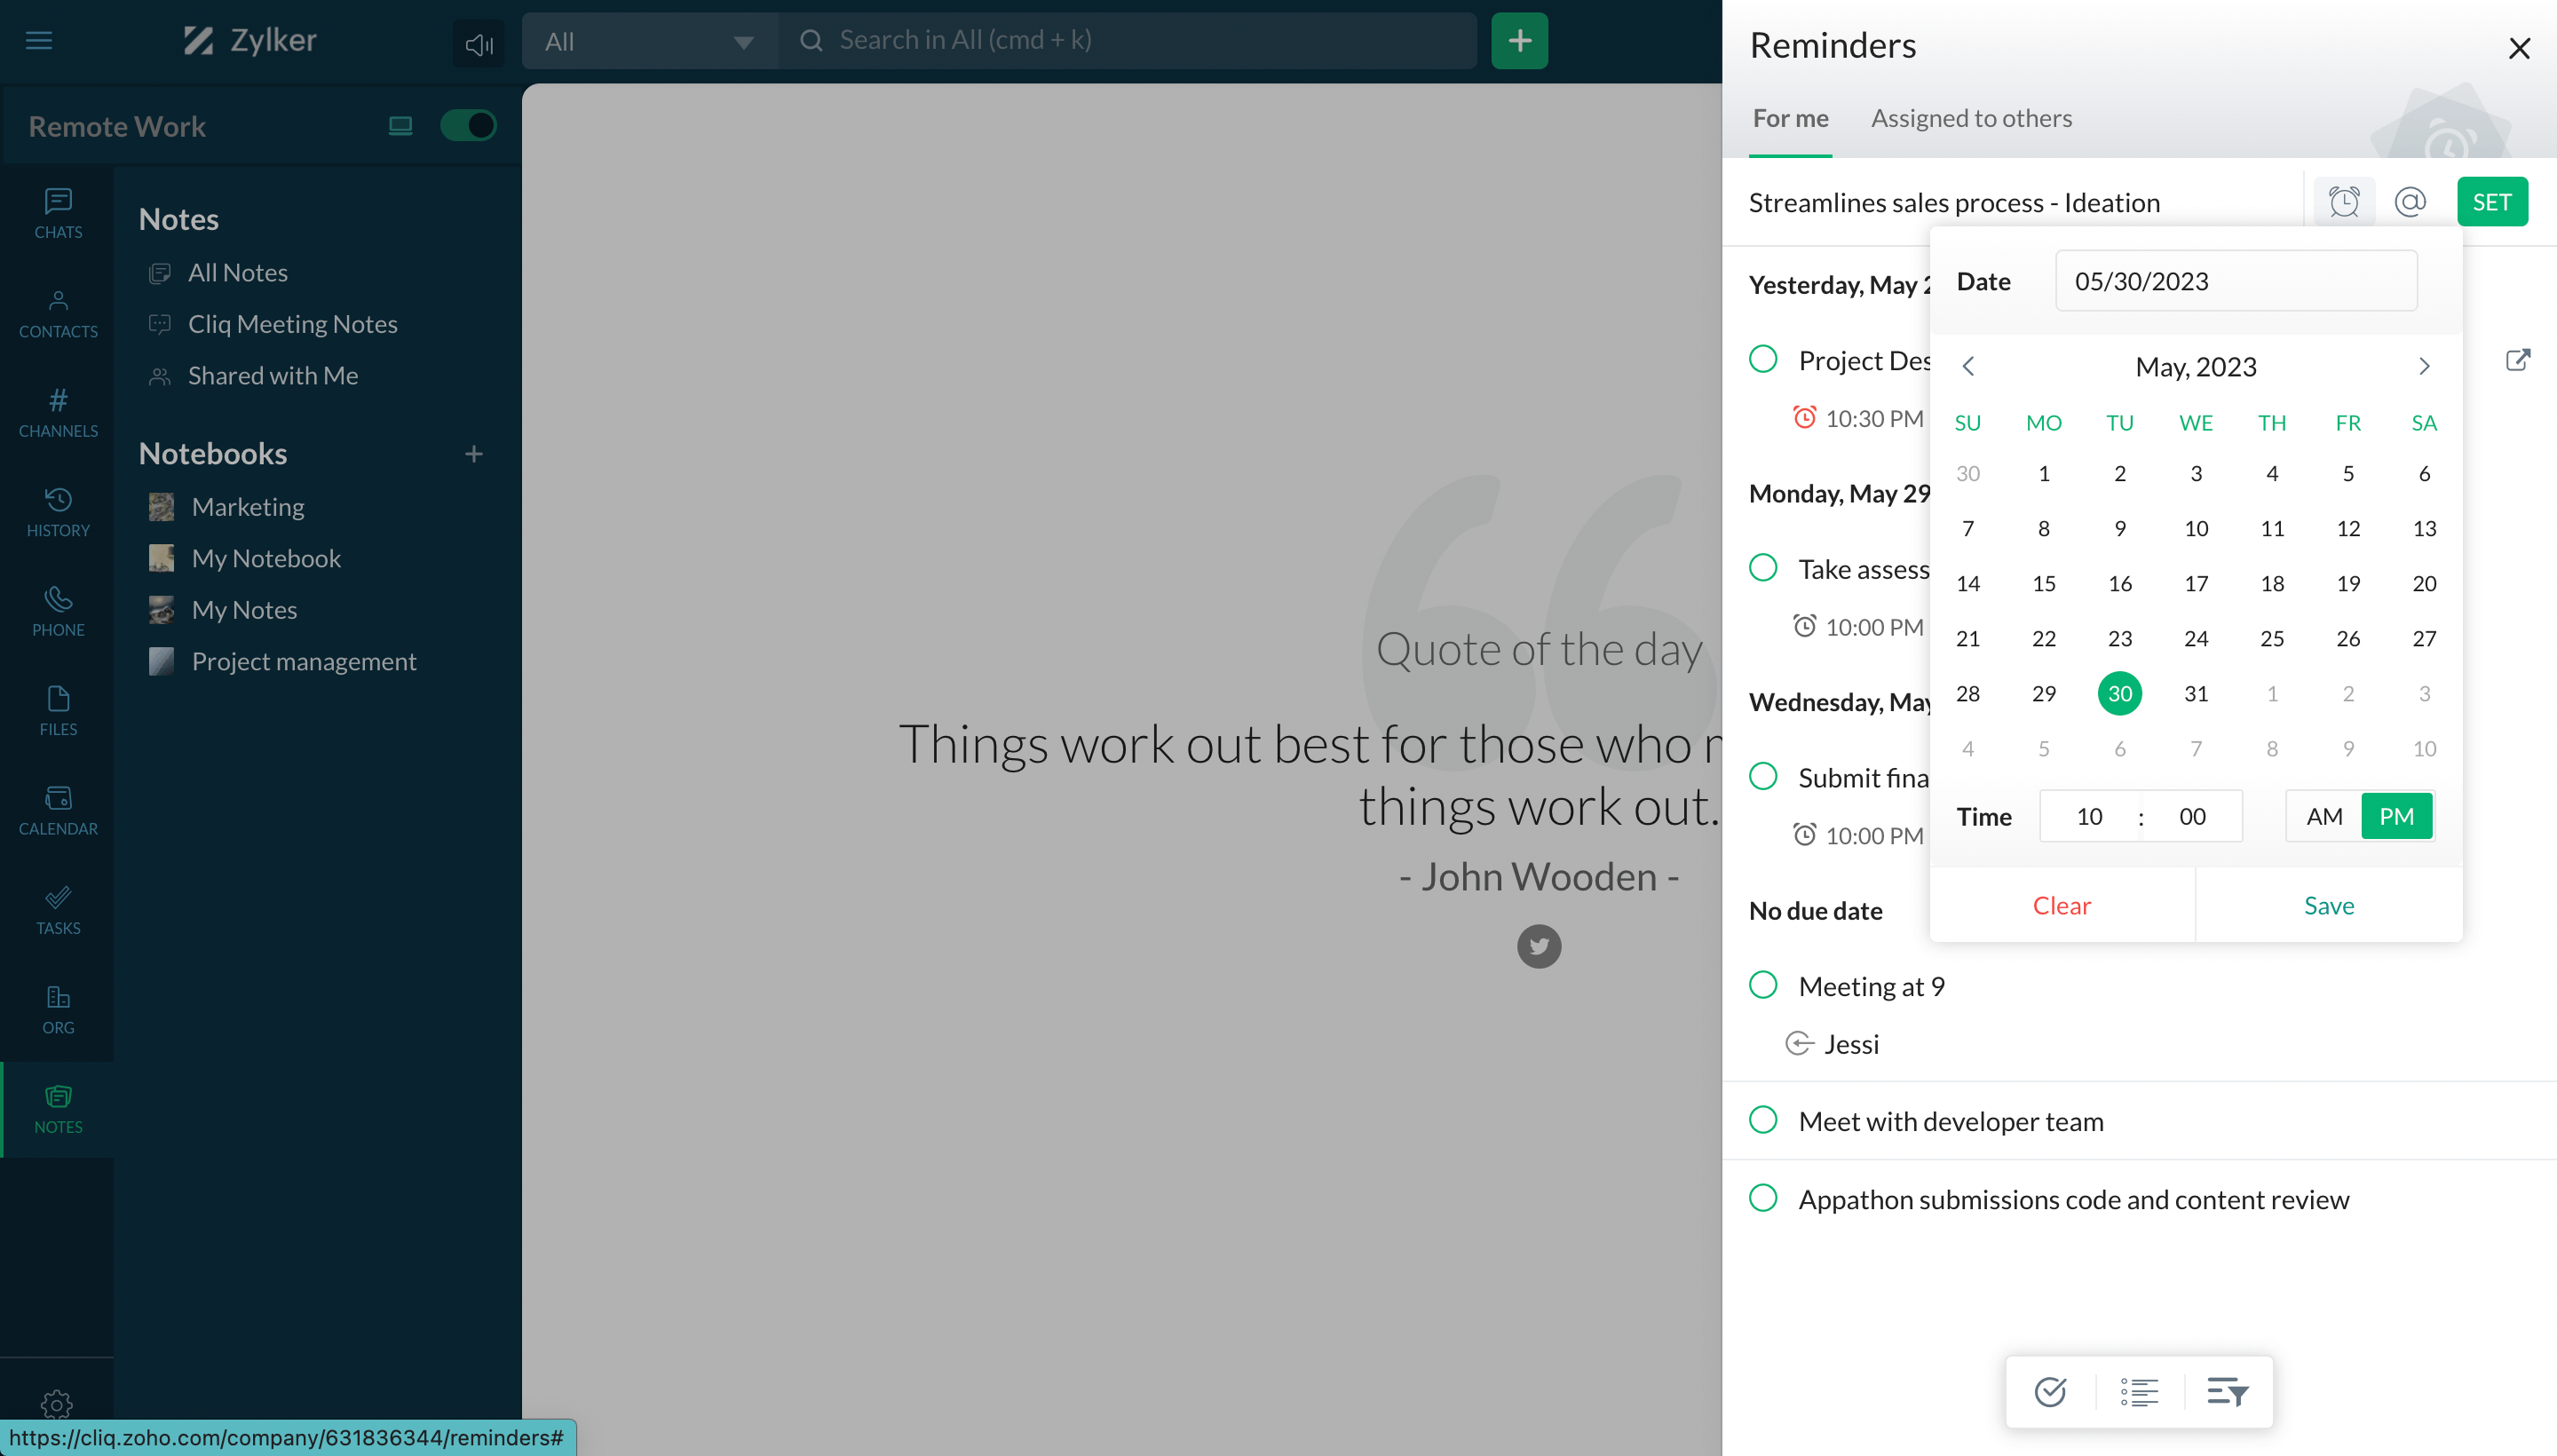
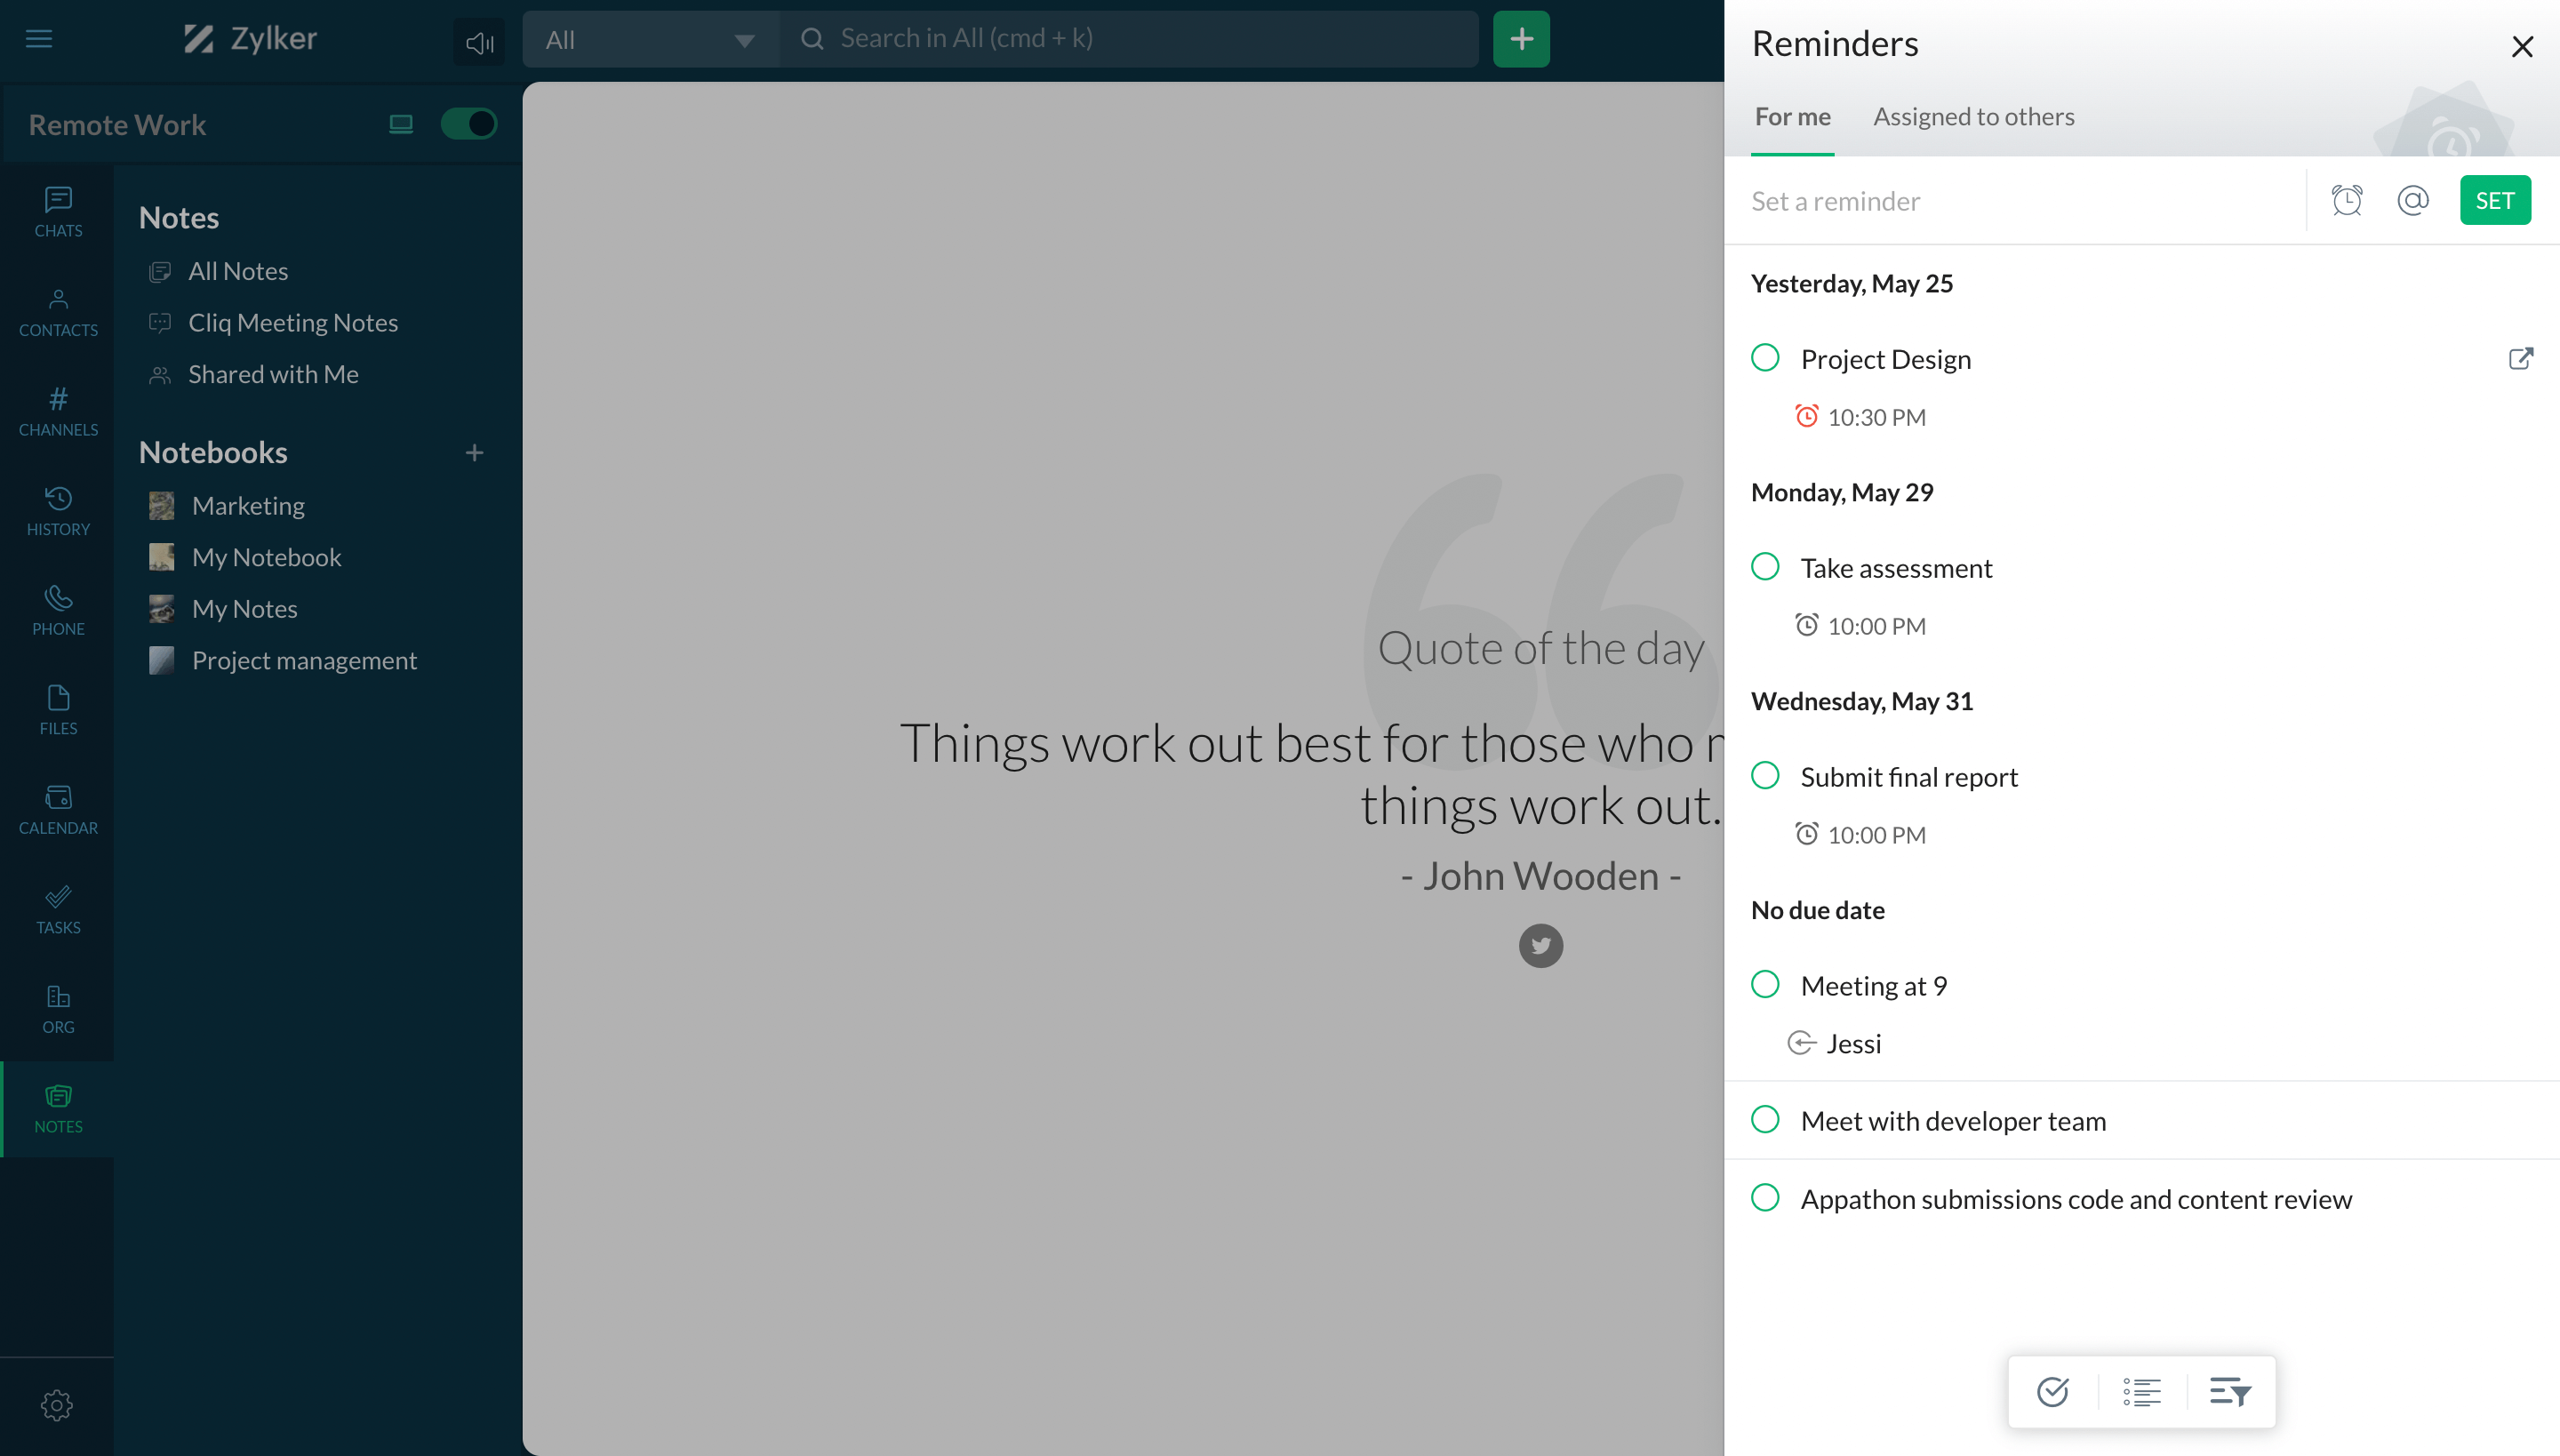
View reminders
View reminders assigned to you, by you, or by your teammates.
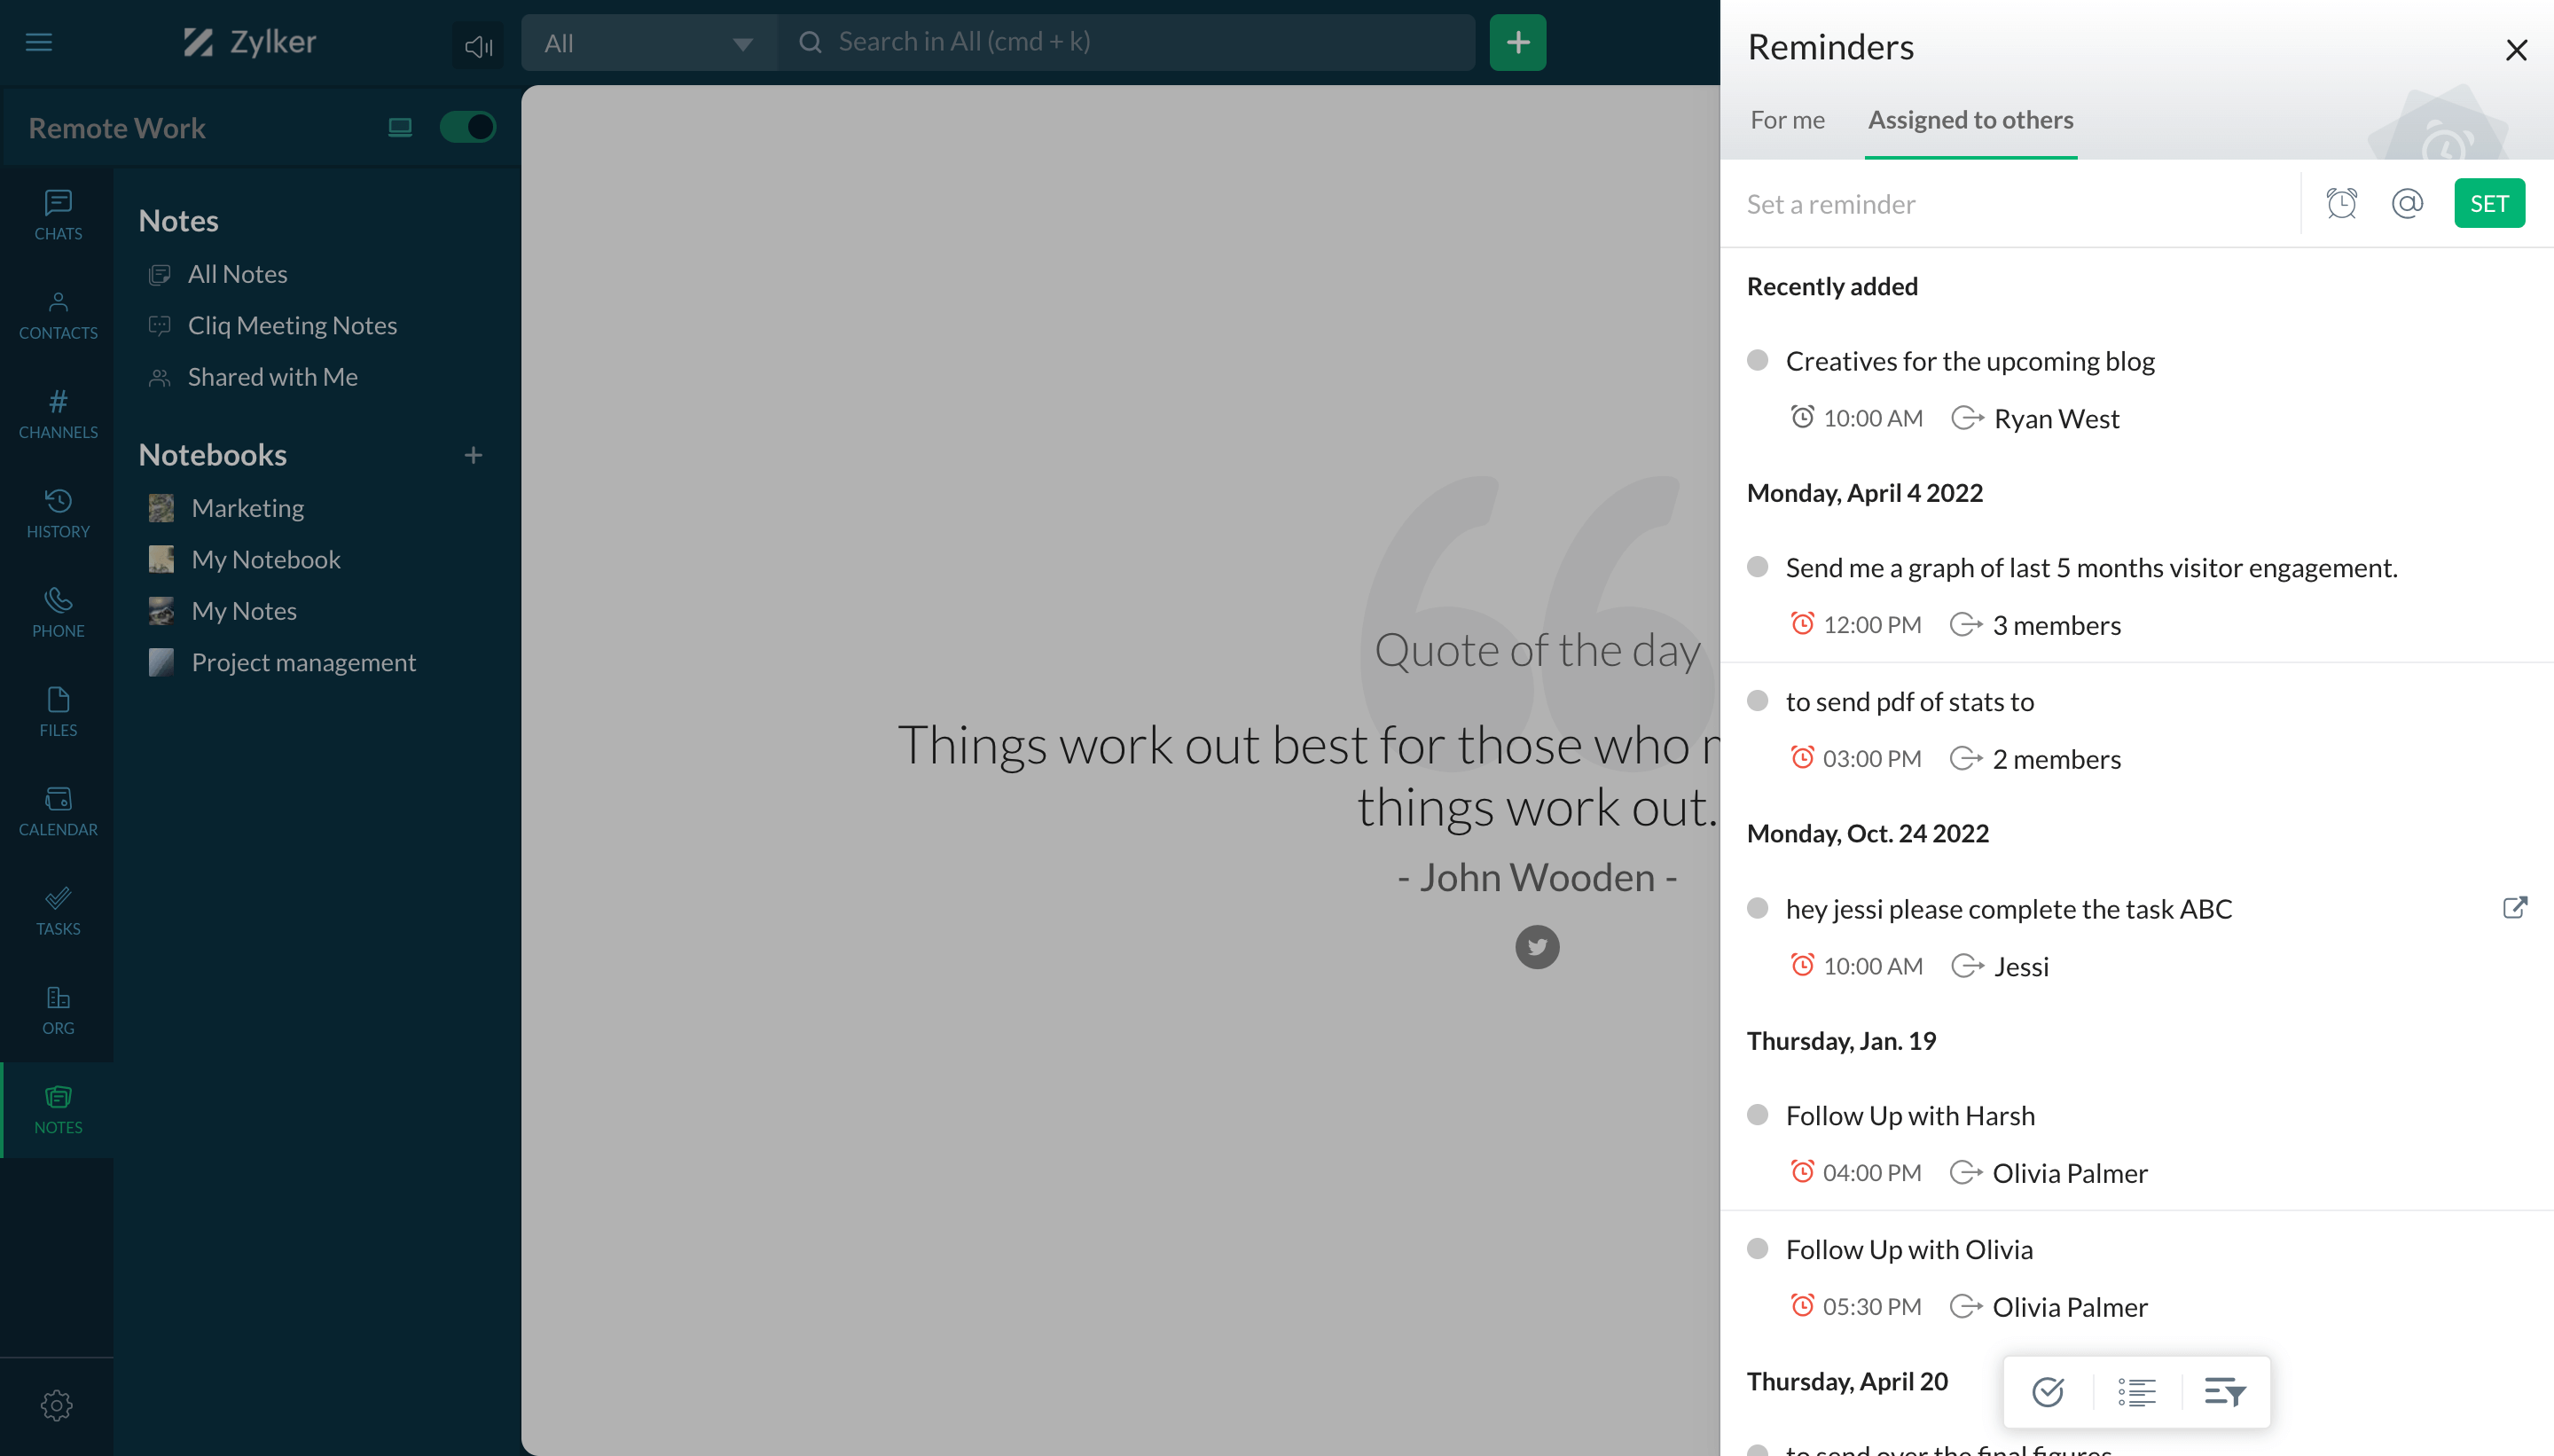
View reminders assigned to others
Reminders that you've assigned to teammates, group conversations, or channels will be listed here.
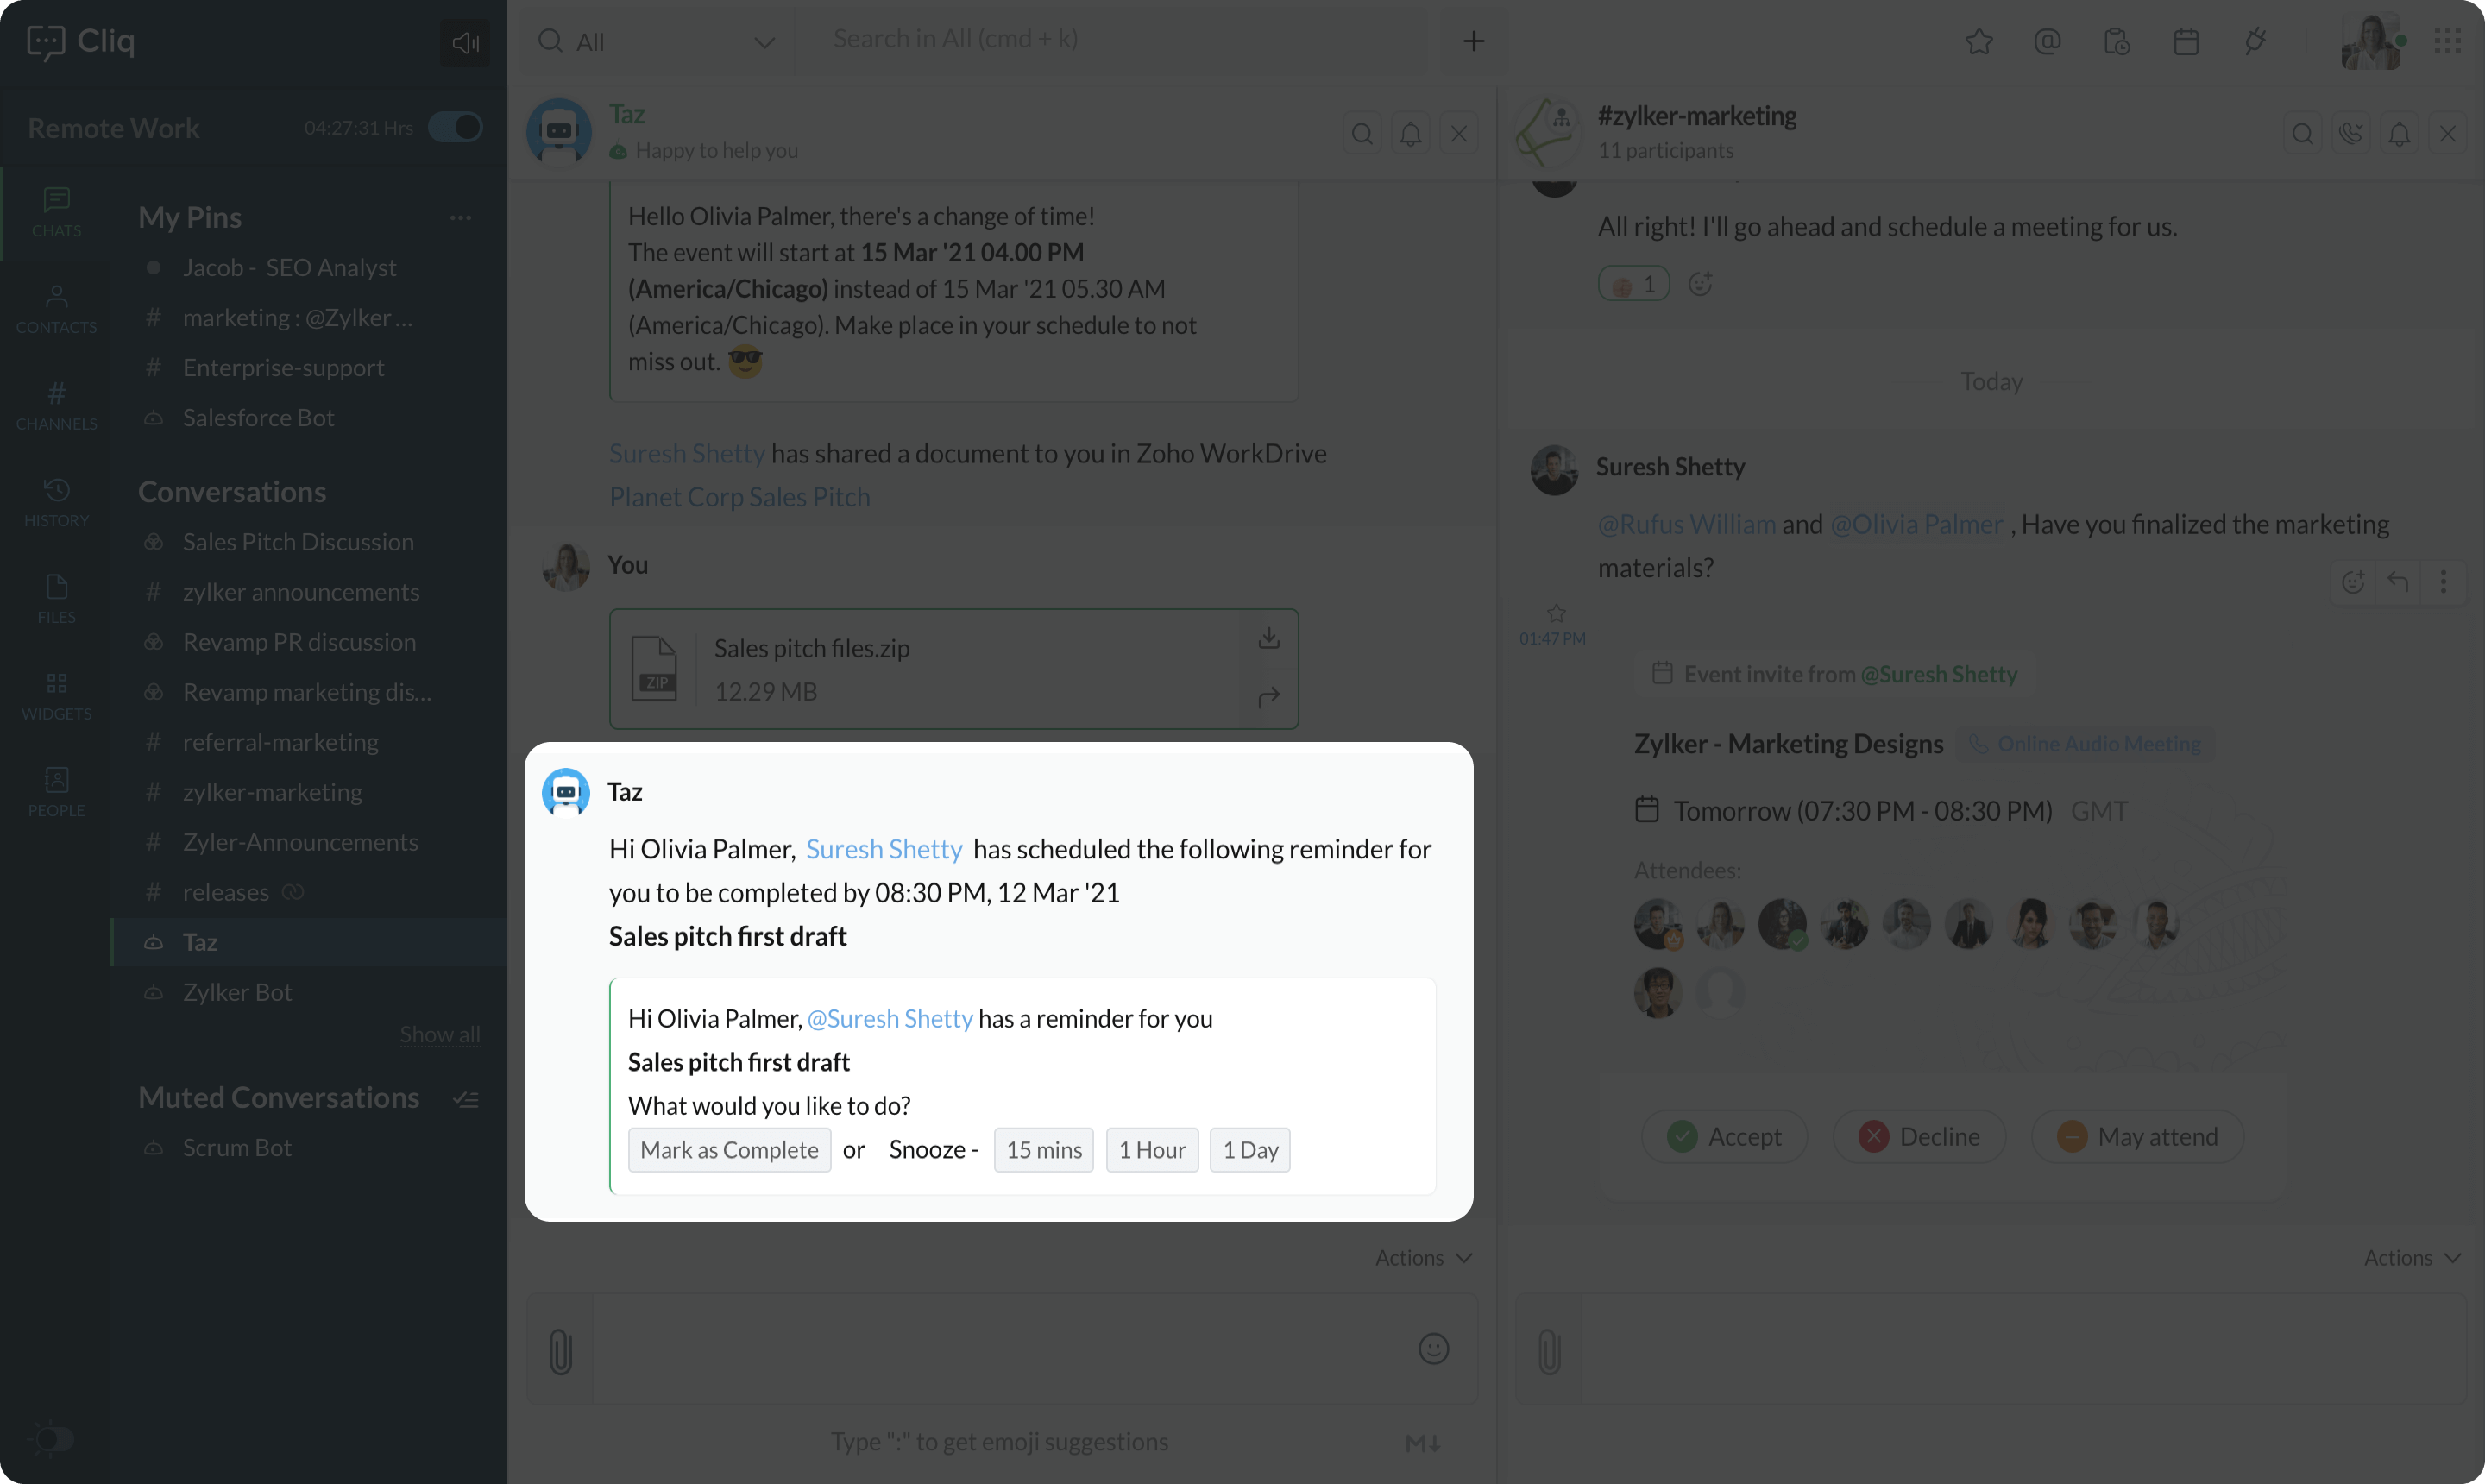
Reminder notifications
Taz notifies you of due dates. You can either mark the task as complete or snooze the reminder.
Recurring reminders
Always stay on top of your to-dos with recurring reminders. Simply select Schedule Recurrence under Reminders, mention the interval under Repeat, and save.
- Set reminder
- View reminders
- View reminders assigned to others
- Reminder notifications
- Recurring reminders


Extensions
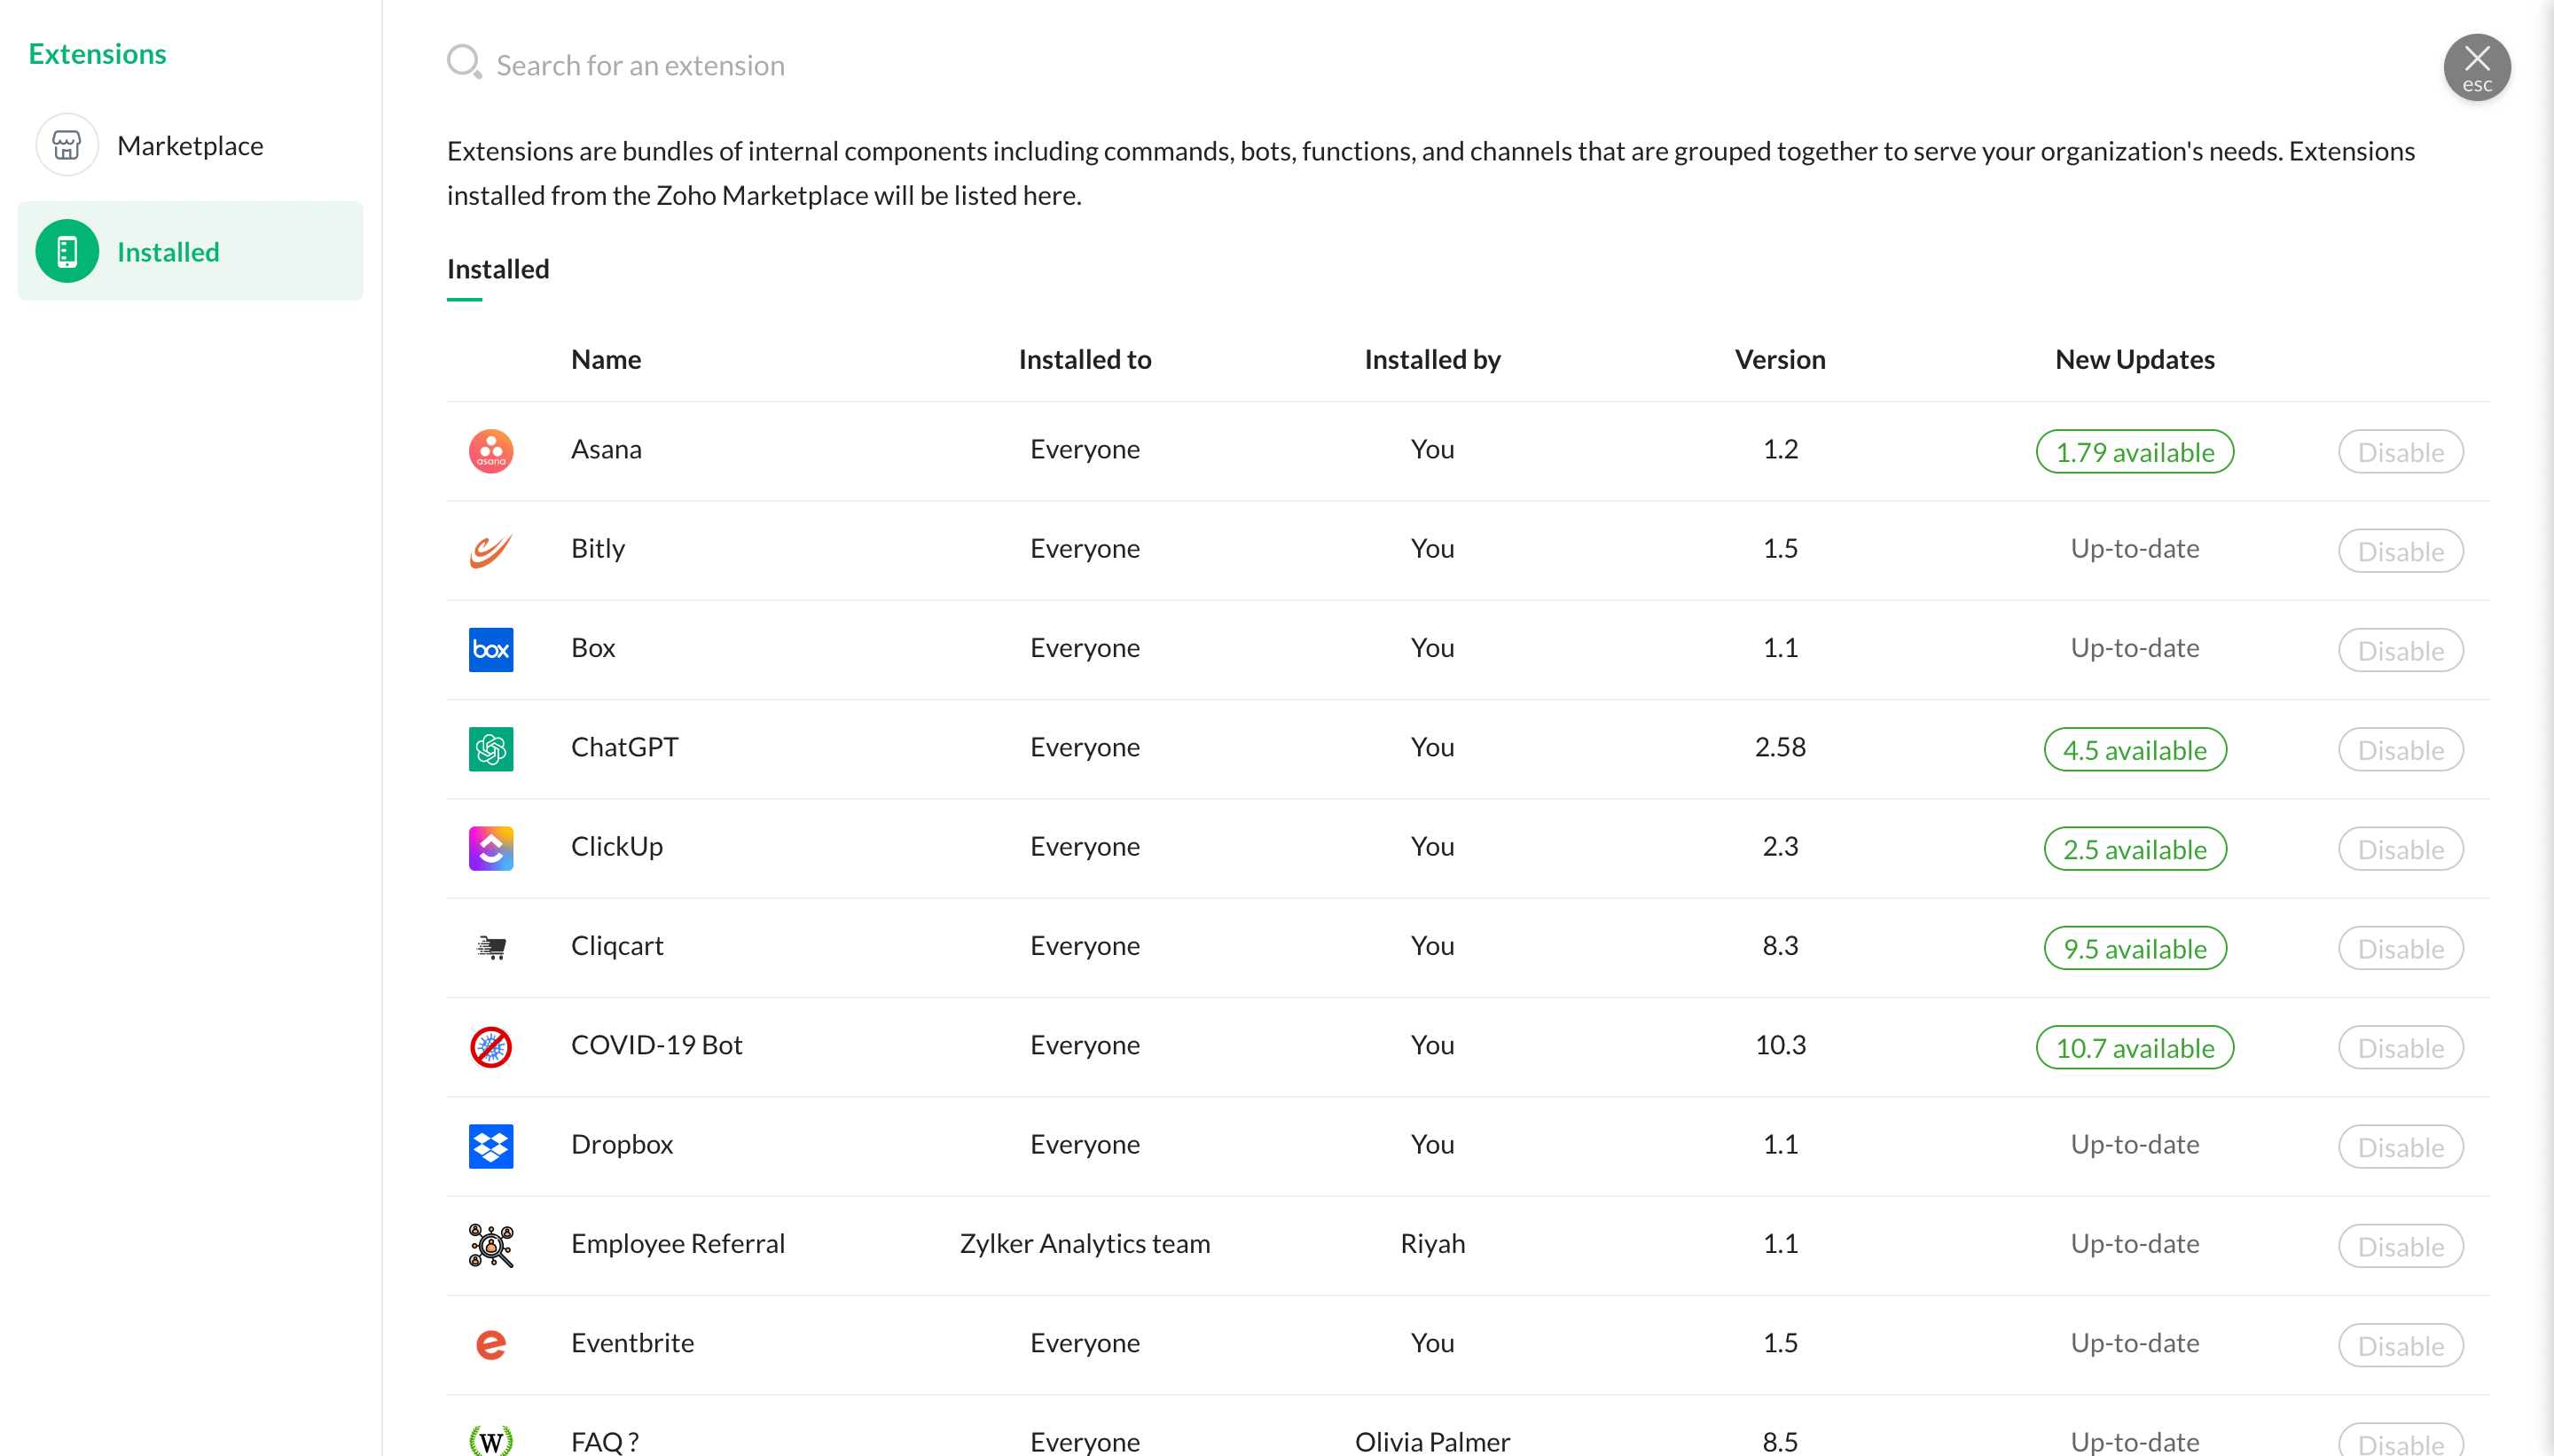
View all extensions
View all available and installed extensions by clicking on the Marketplace icon in the top-right corner. From the Installed section, you can update and disable installed extensions.
Create extension
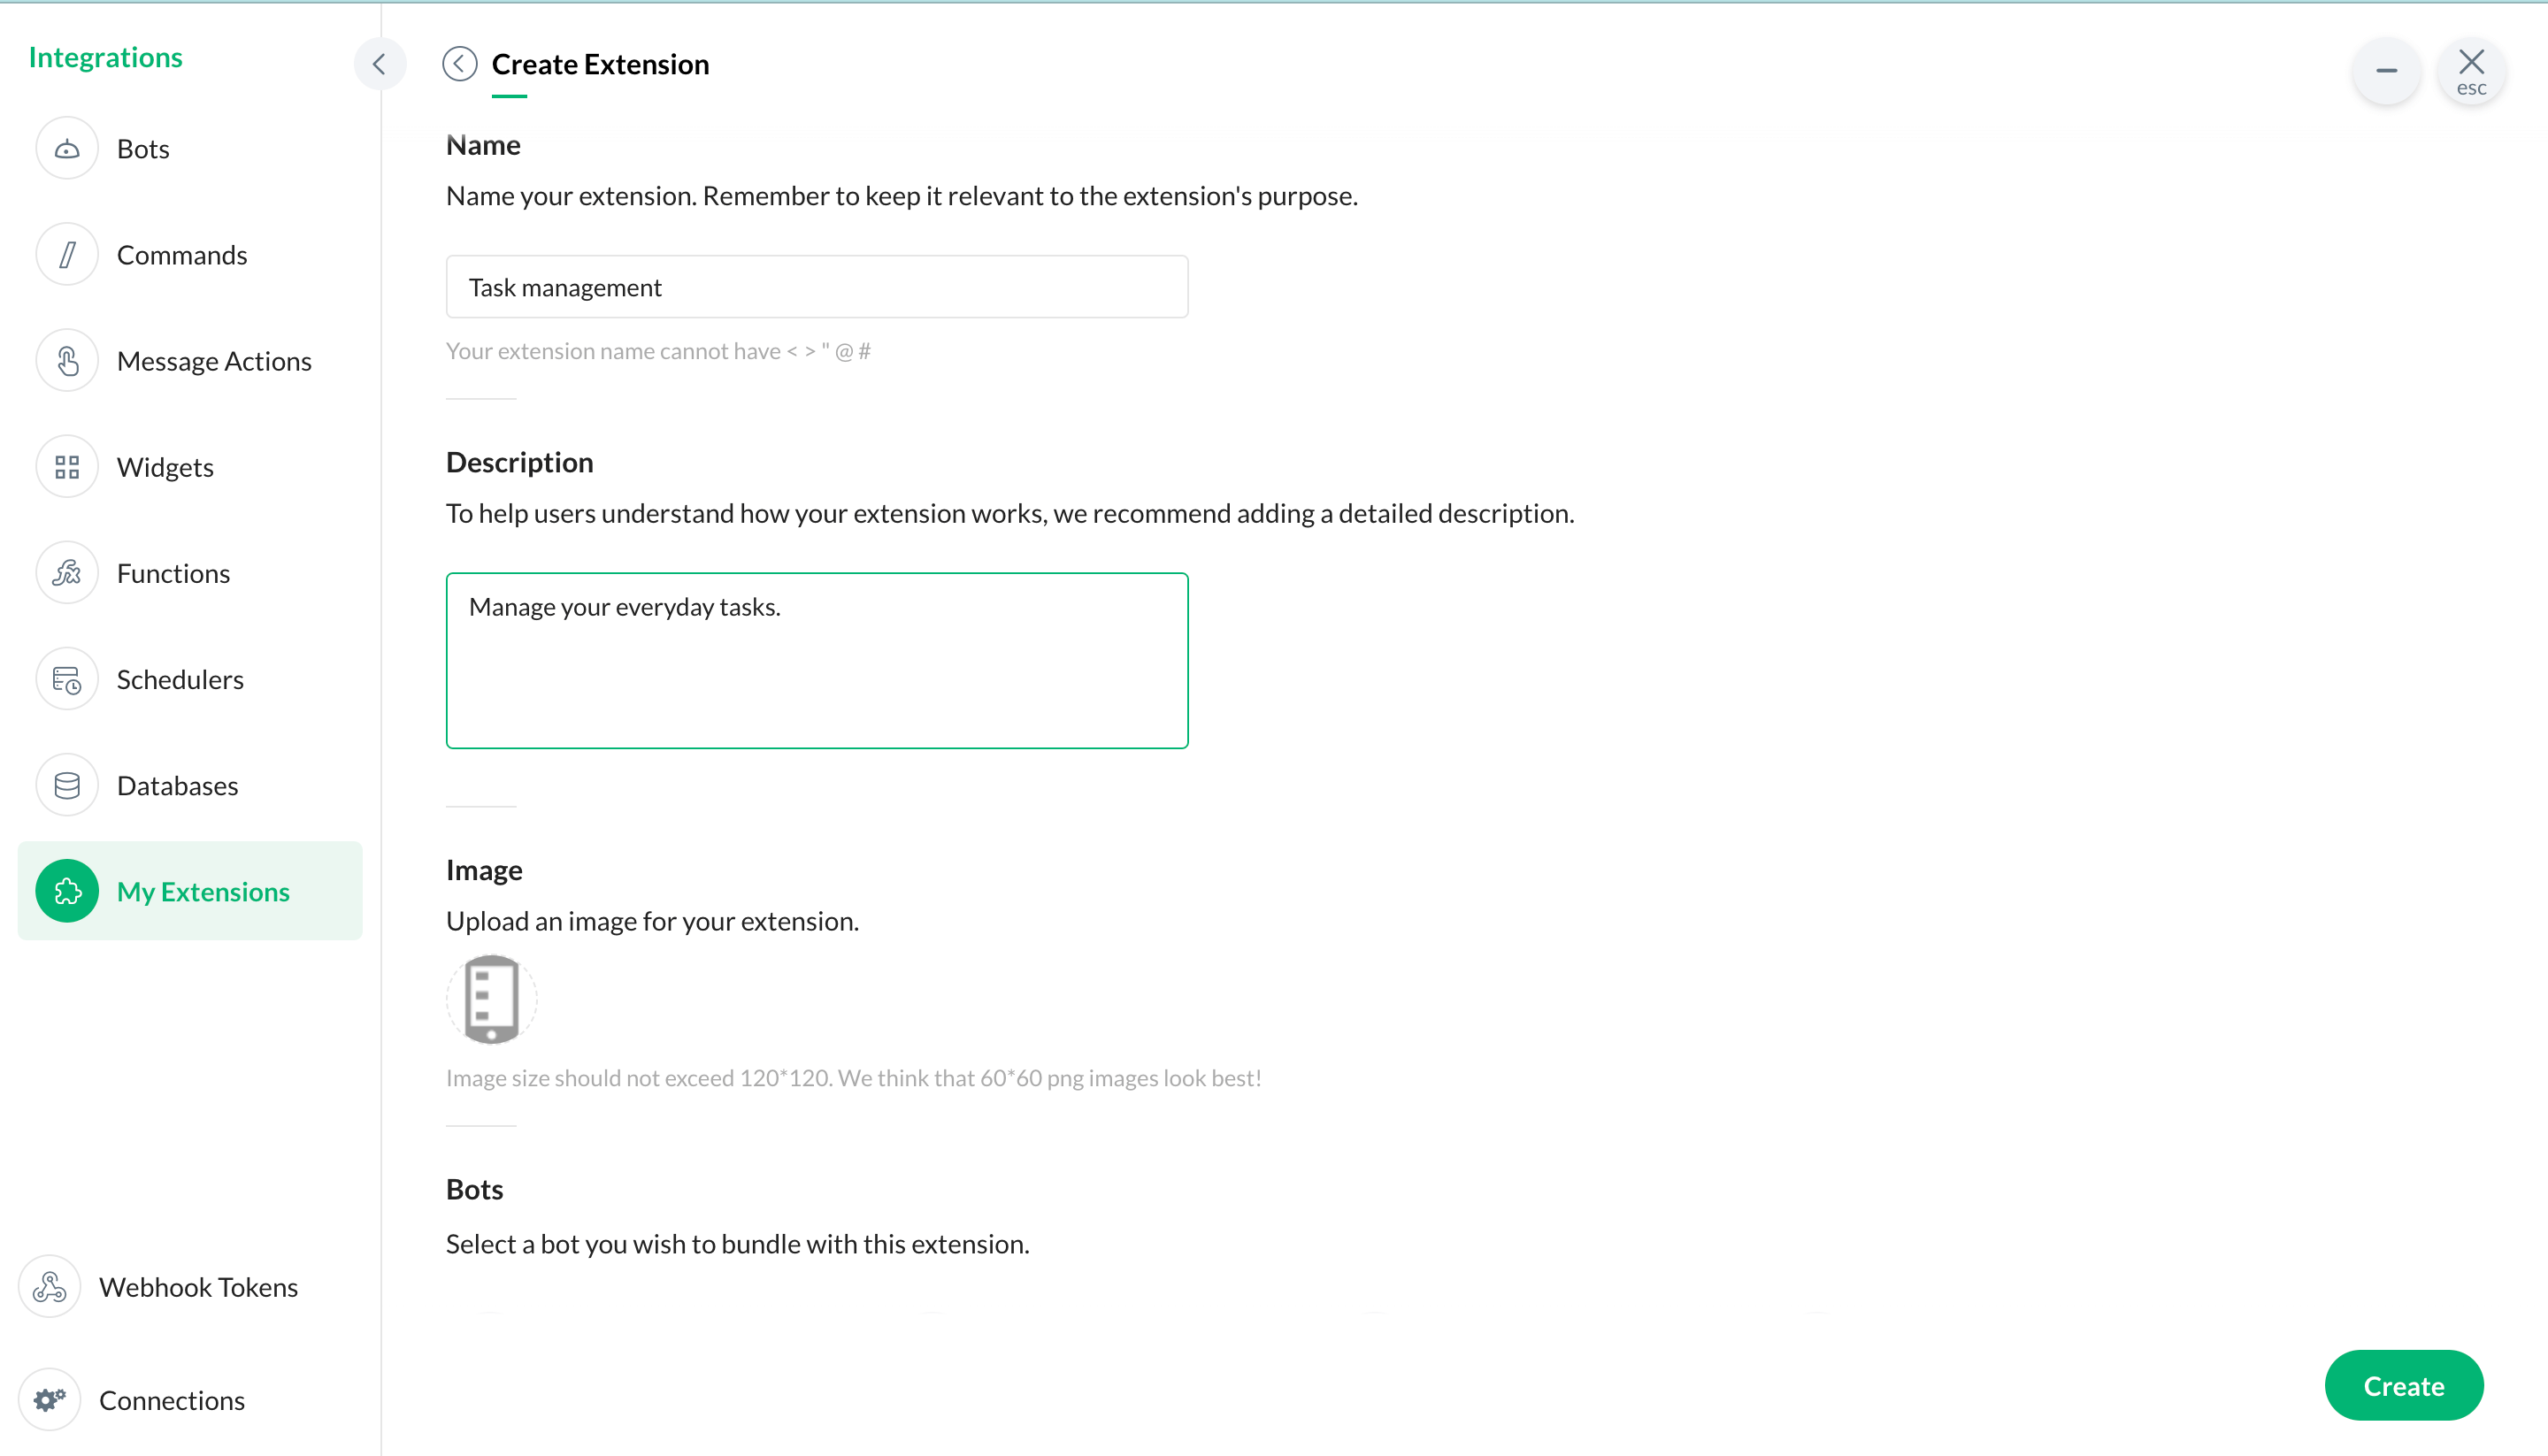
You can create your own extension and publish it in Zoho Marketplace. Select the My Extensions option under Bots & Tools to create your own extension and publish it.
- View all extensions
- Create extension


Admin panel
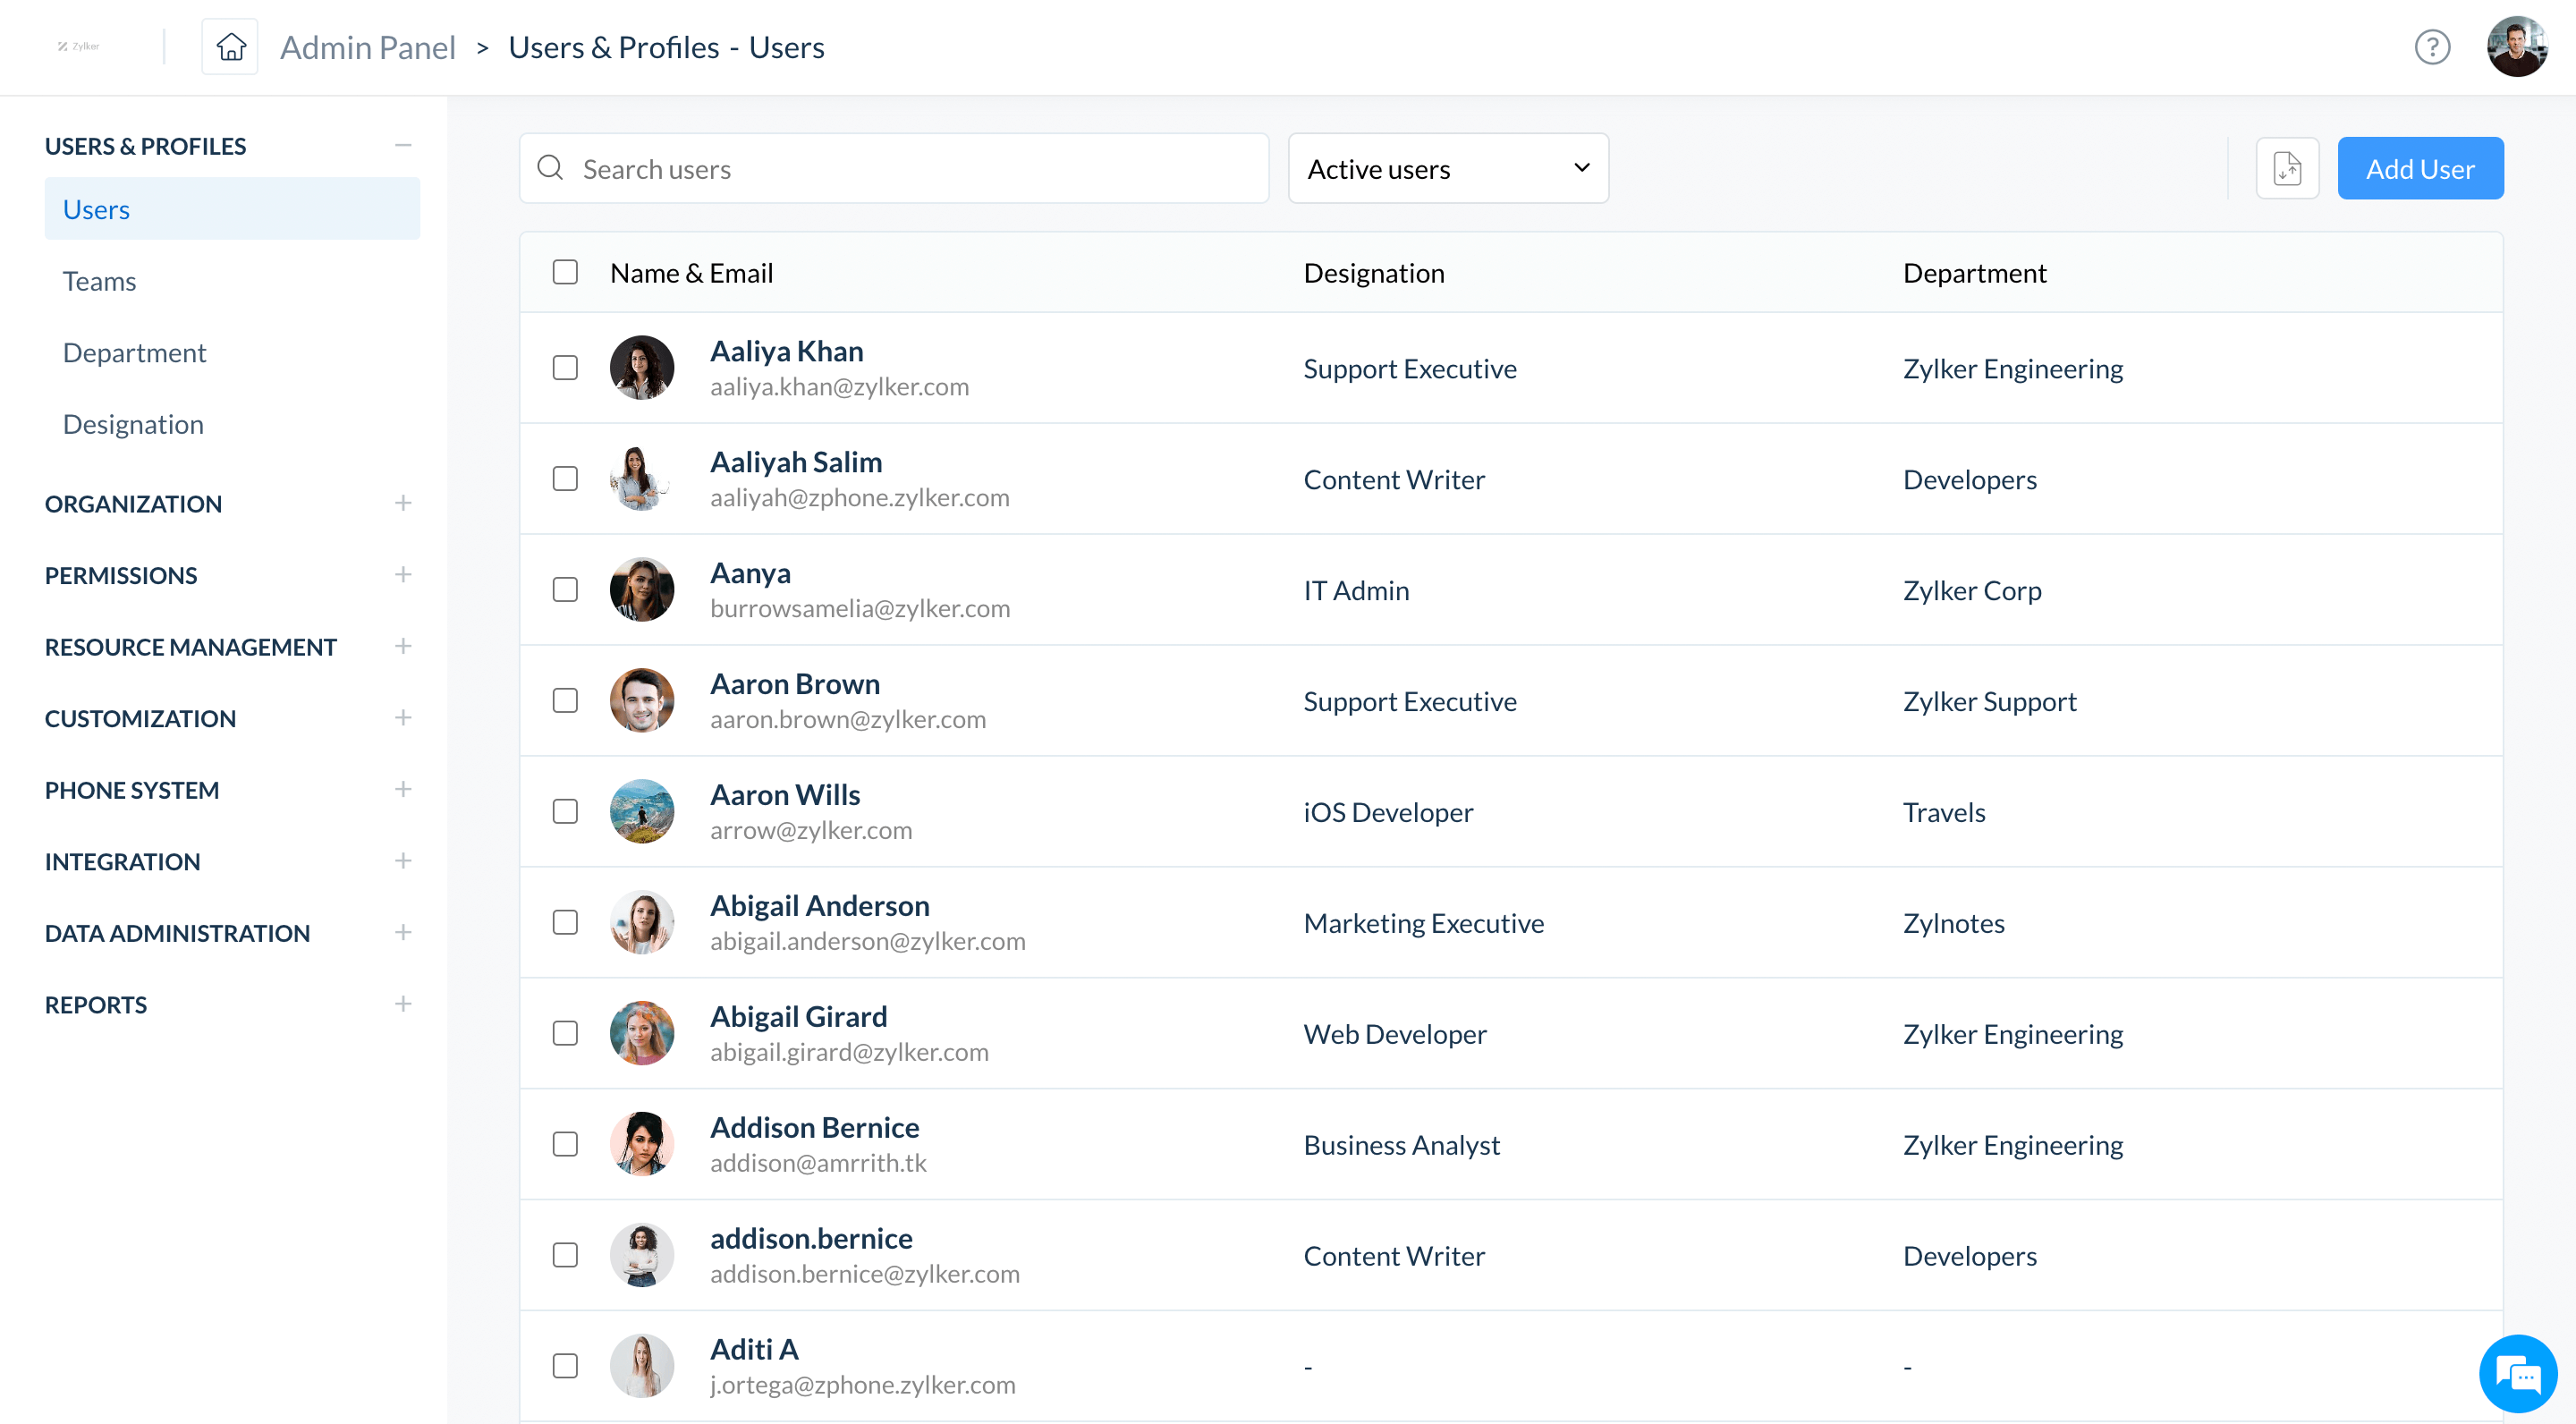
Add users
Manage all your user records—view, update and export existing user details, or import new records— from one central location.
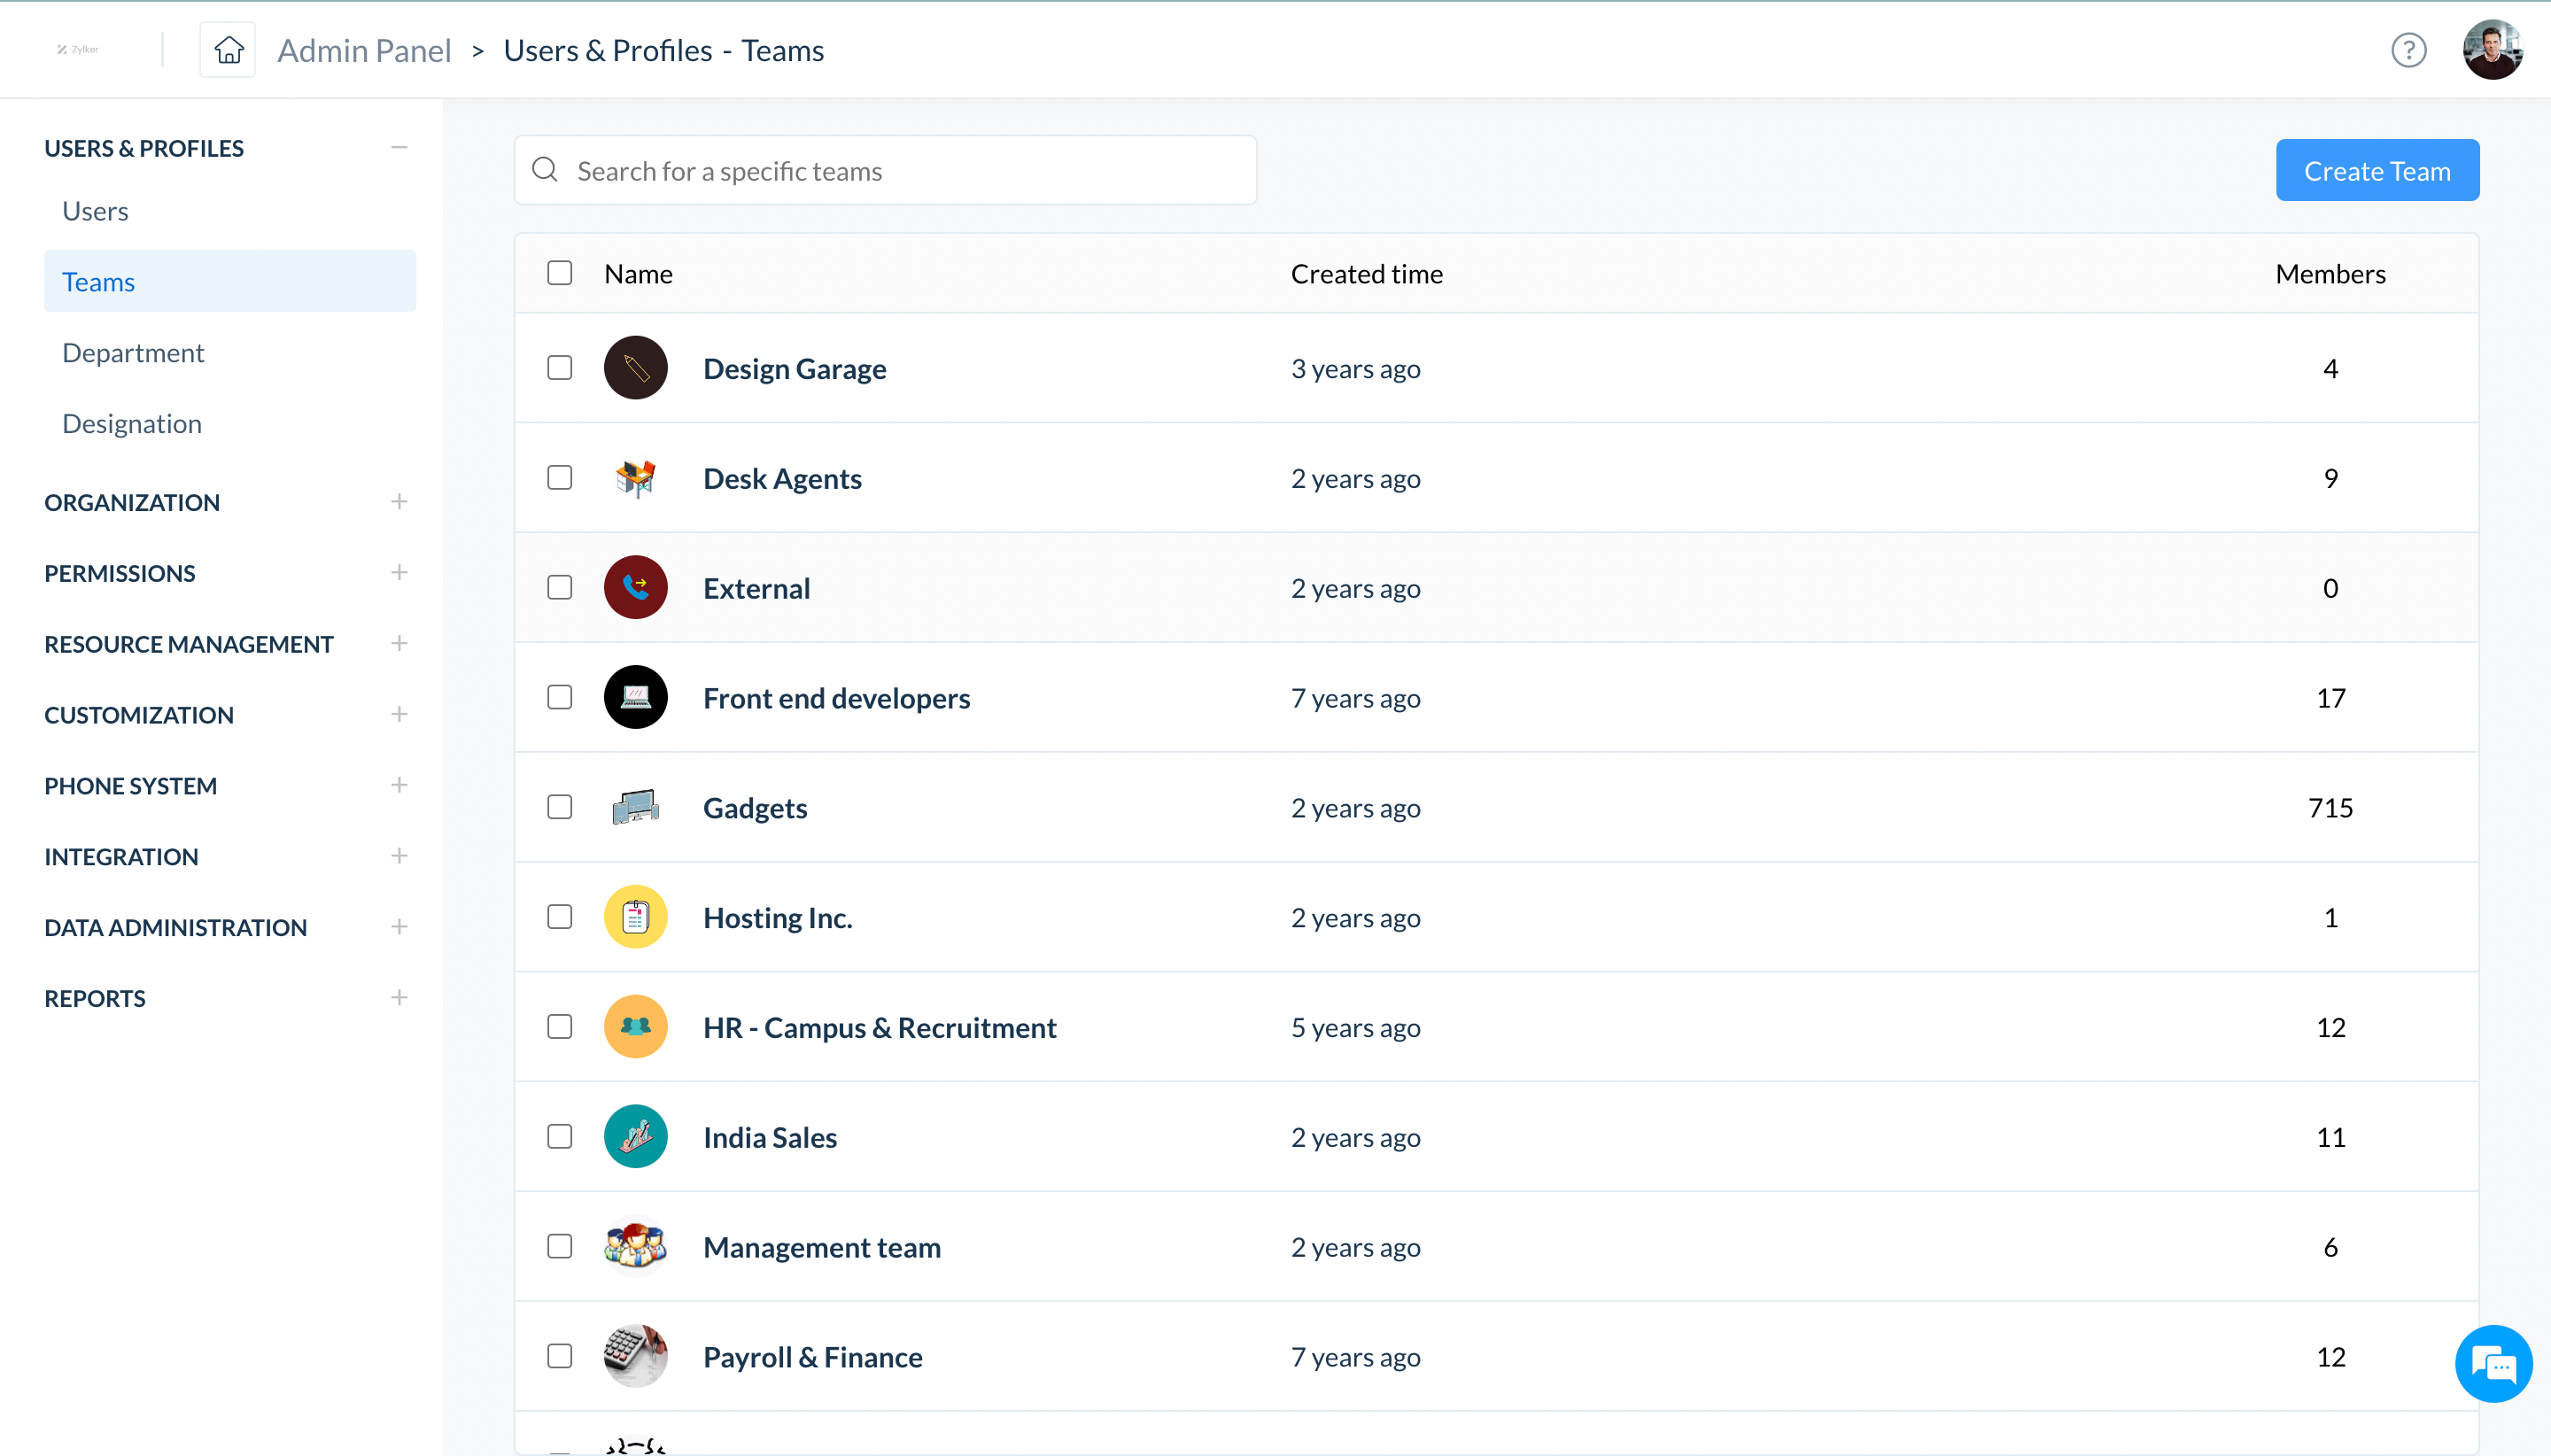
Create teams
Create teams and categorize them into departments in Cliq to reflect your organizational layout.
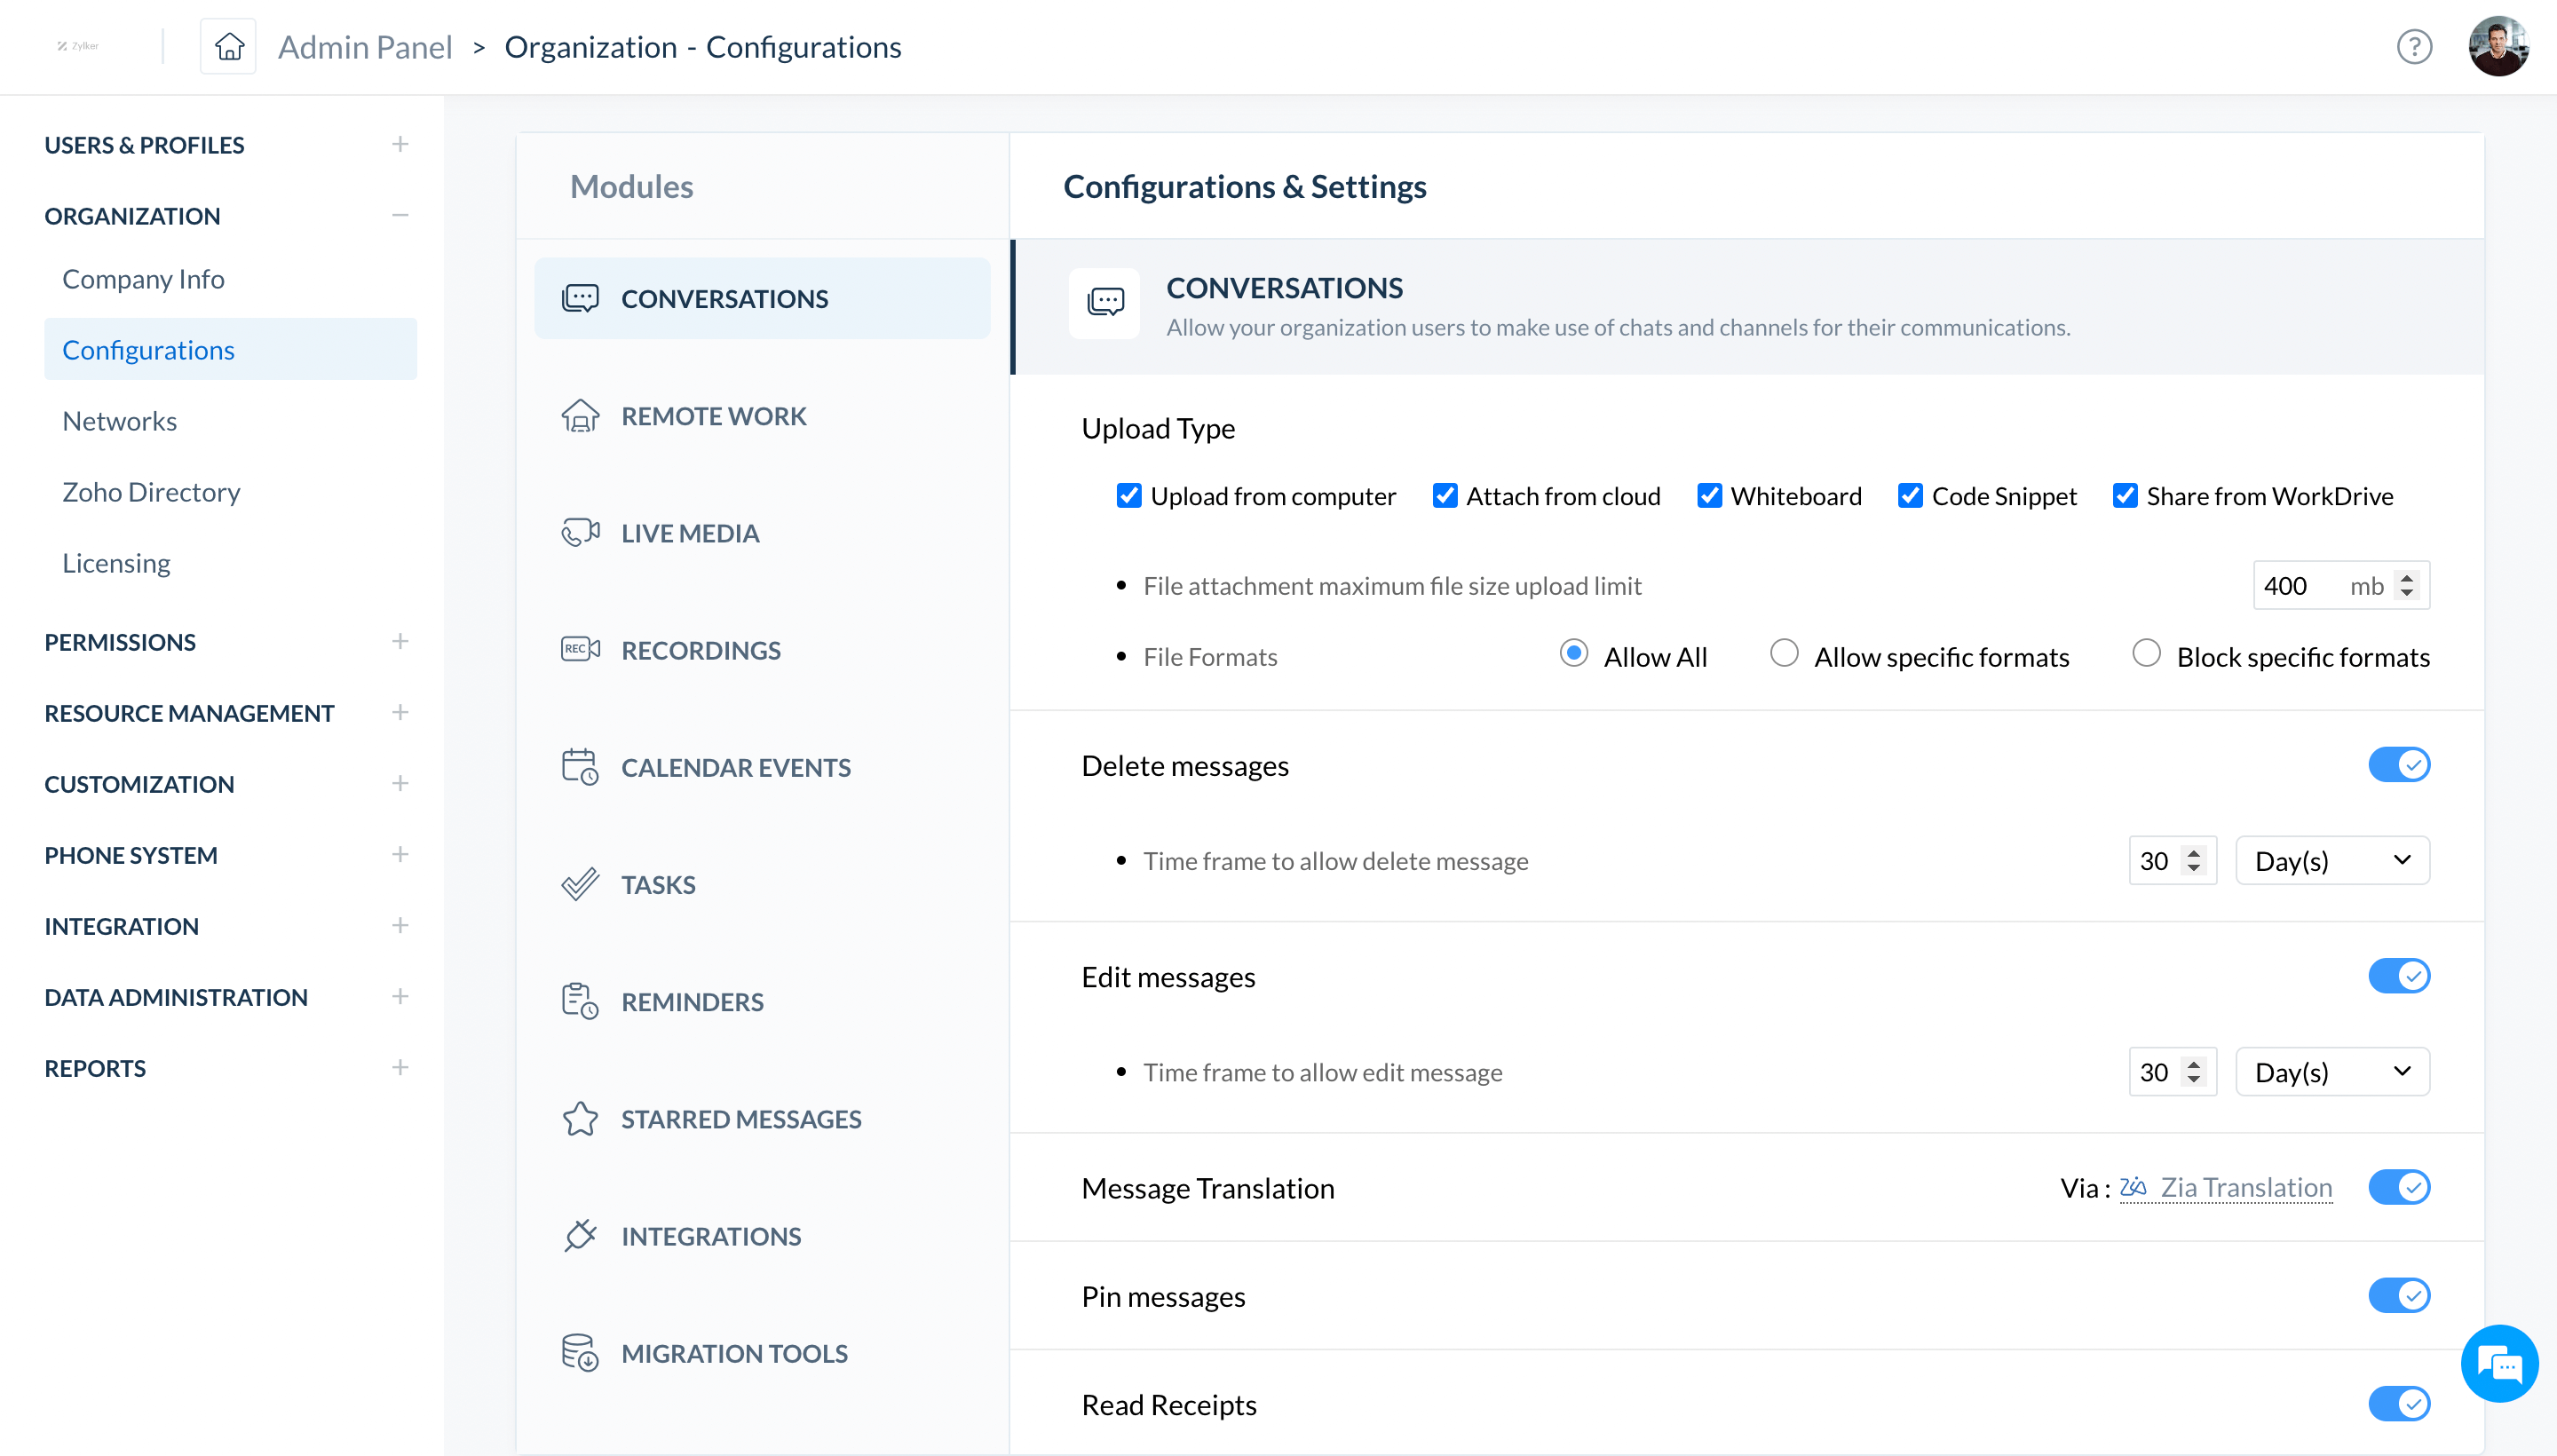
Manage modules
Choose from a list of available modules and tailor Cliq to suit your needs.
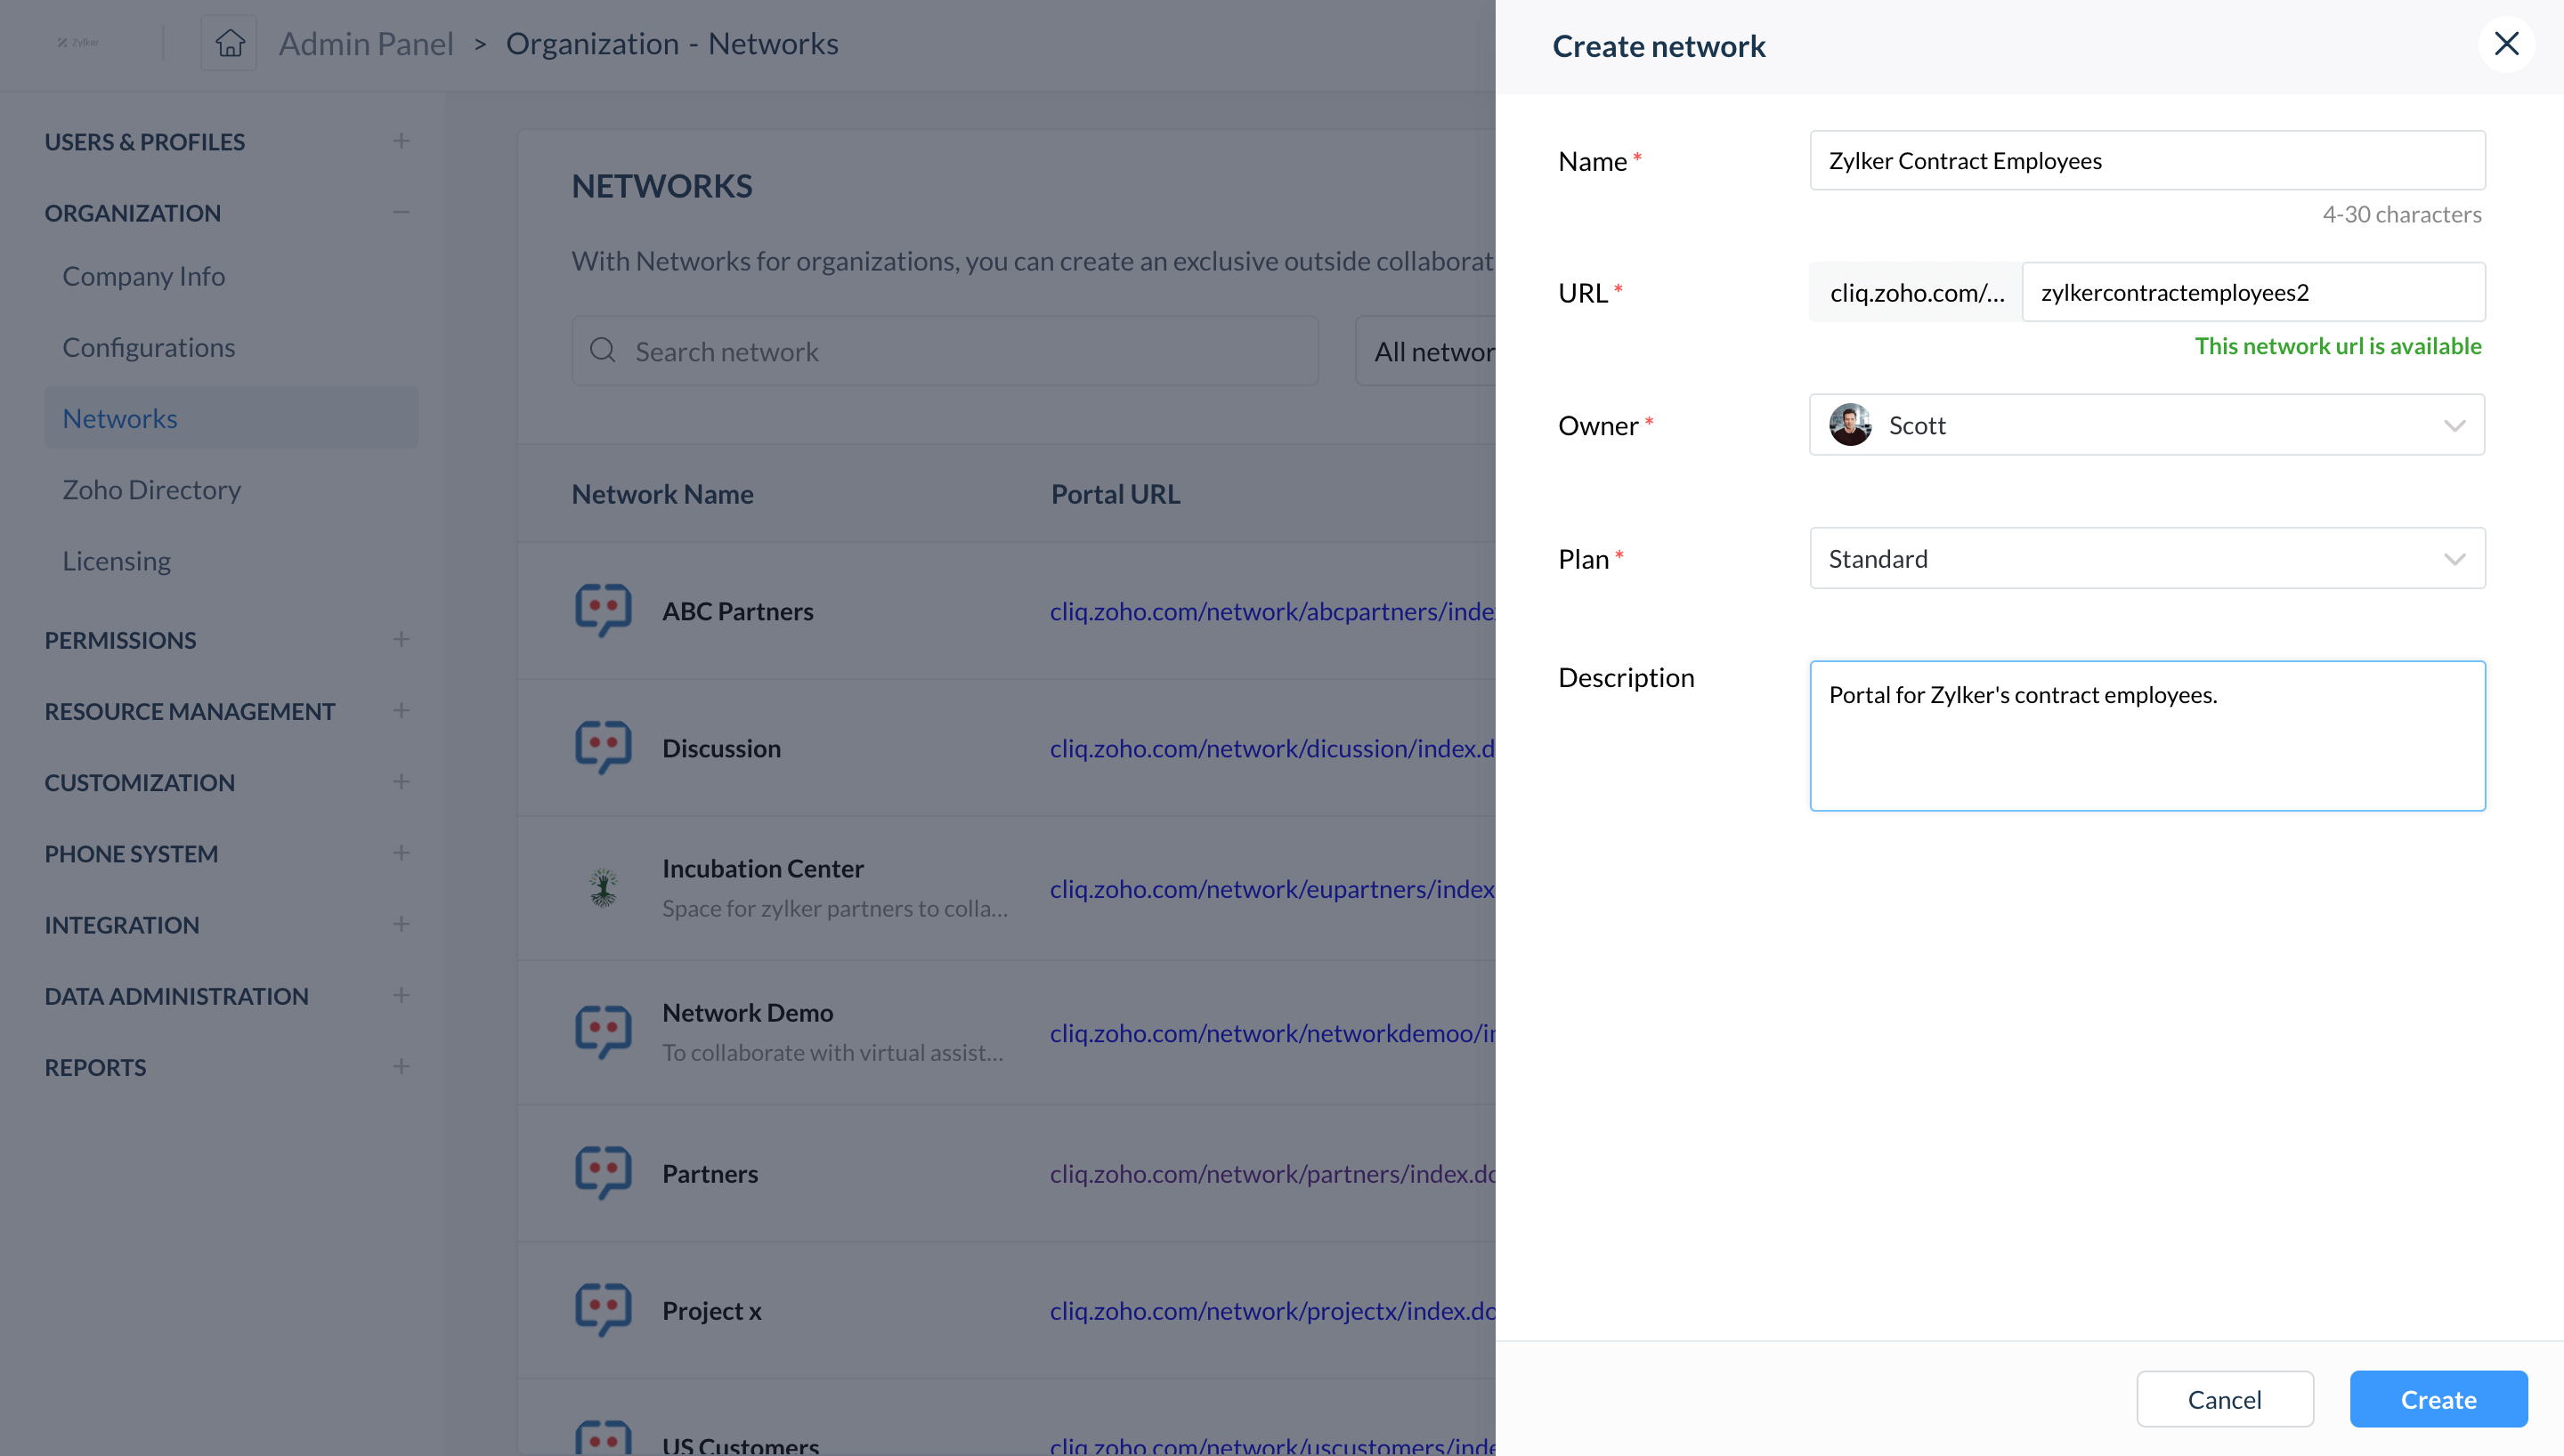
Create networks
Set up a dedicated space to collaborate with external stakeholders like vendors, contract employees, and the like.
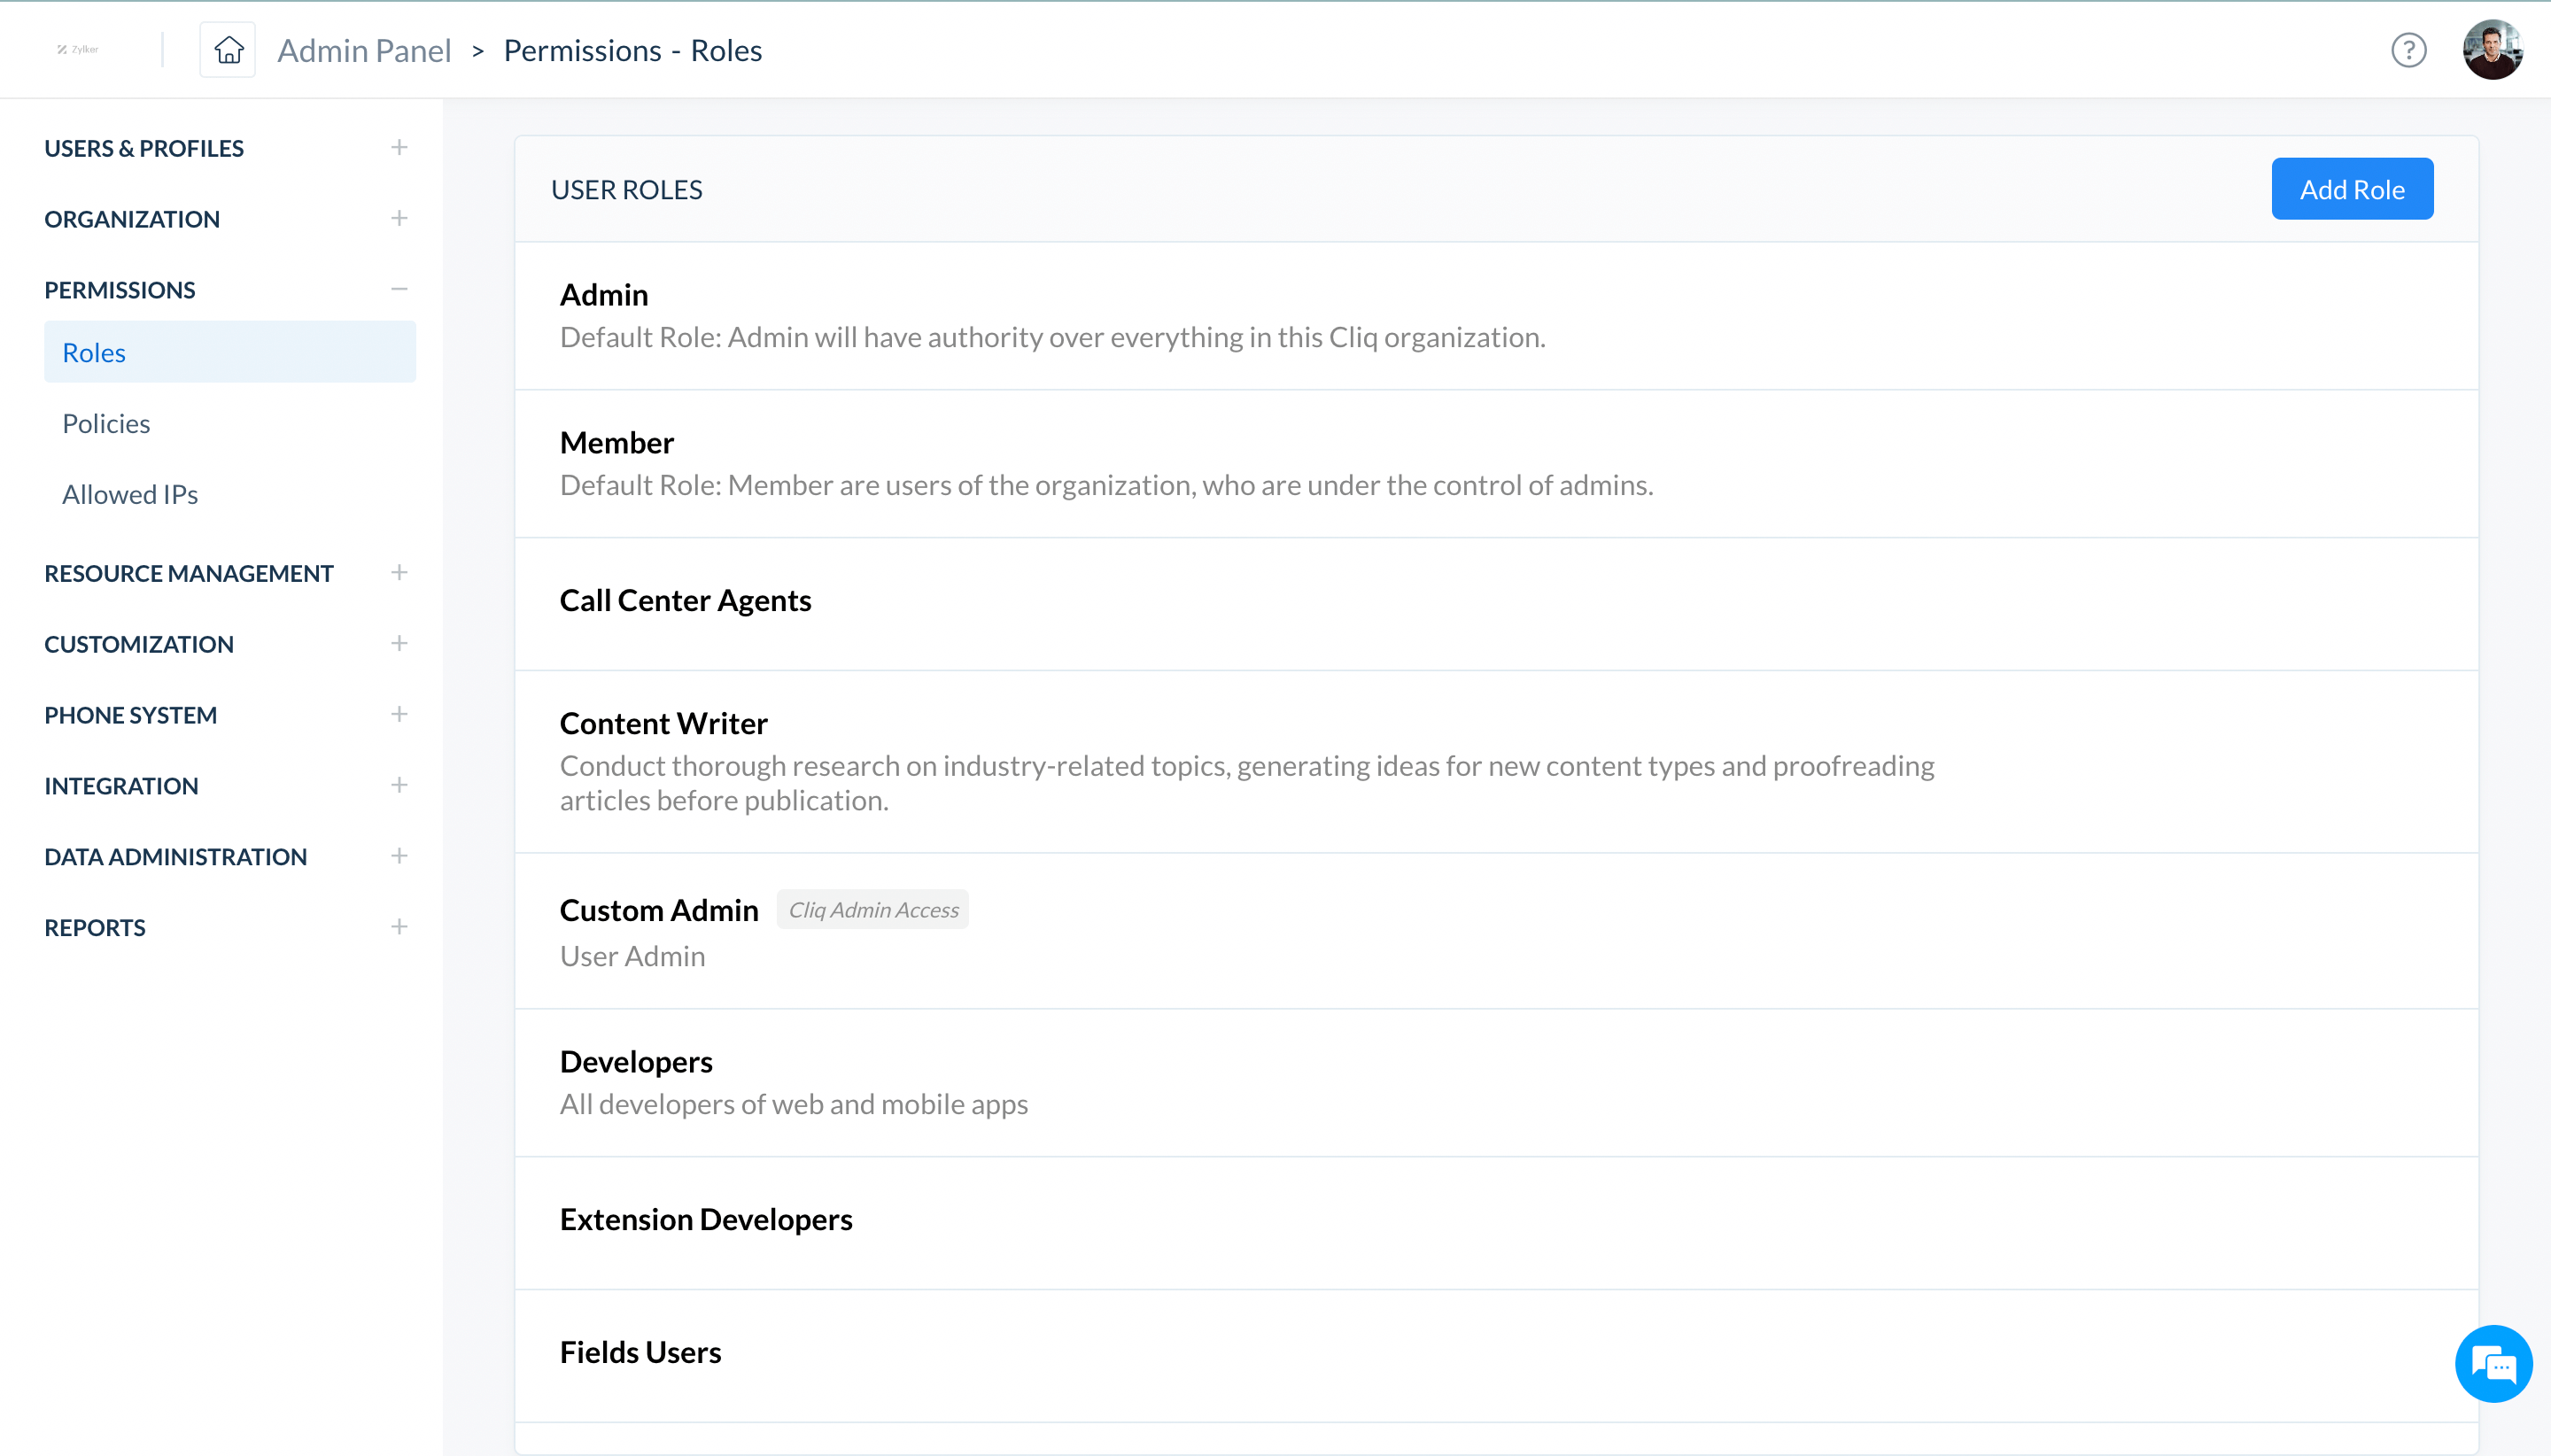
Define user roles
Configure roles for users based on your organizational hierarchy.
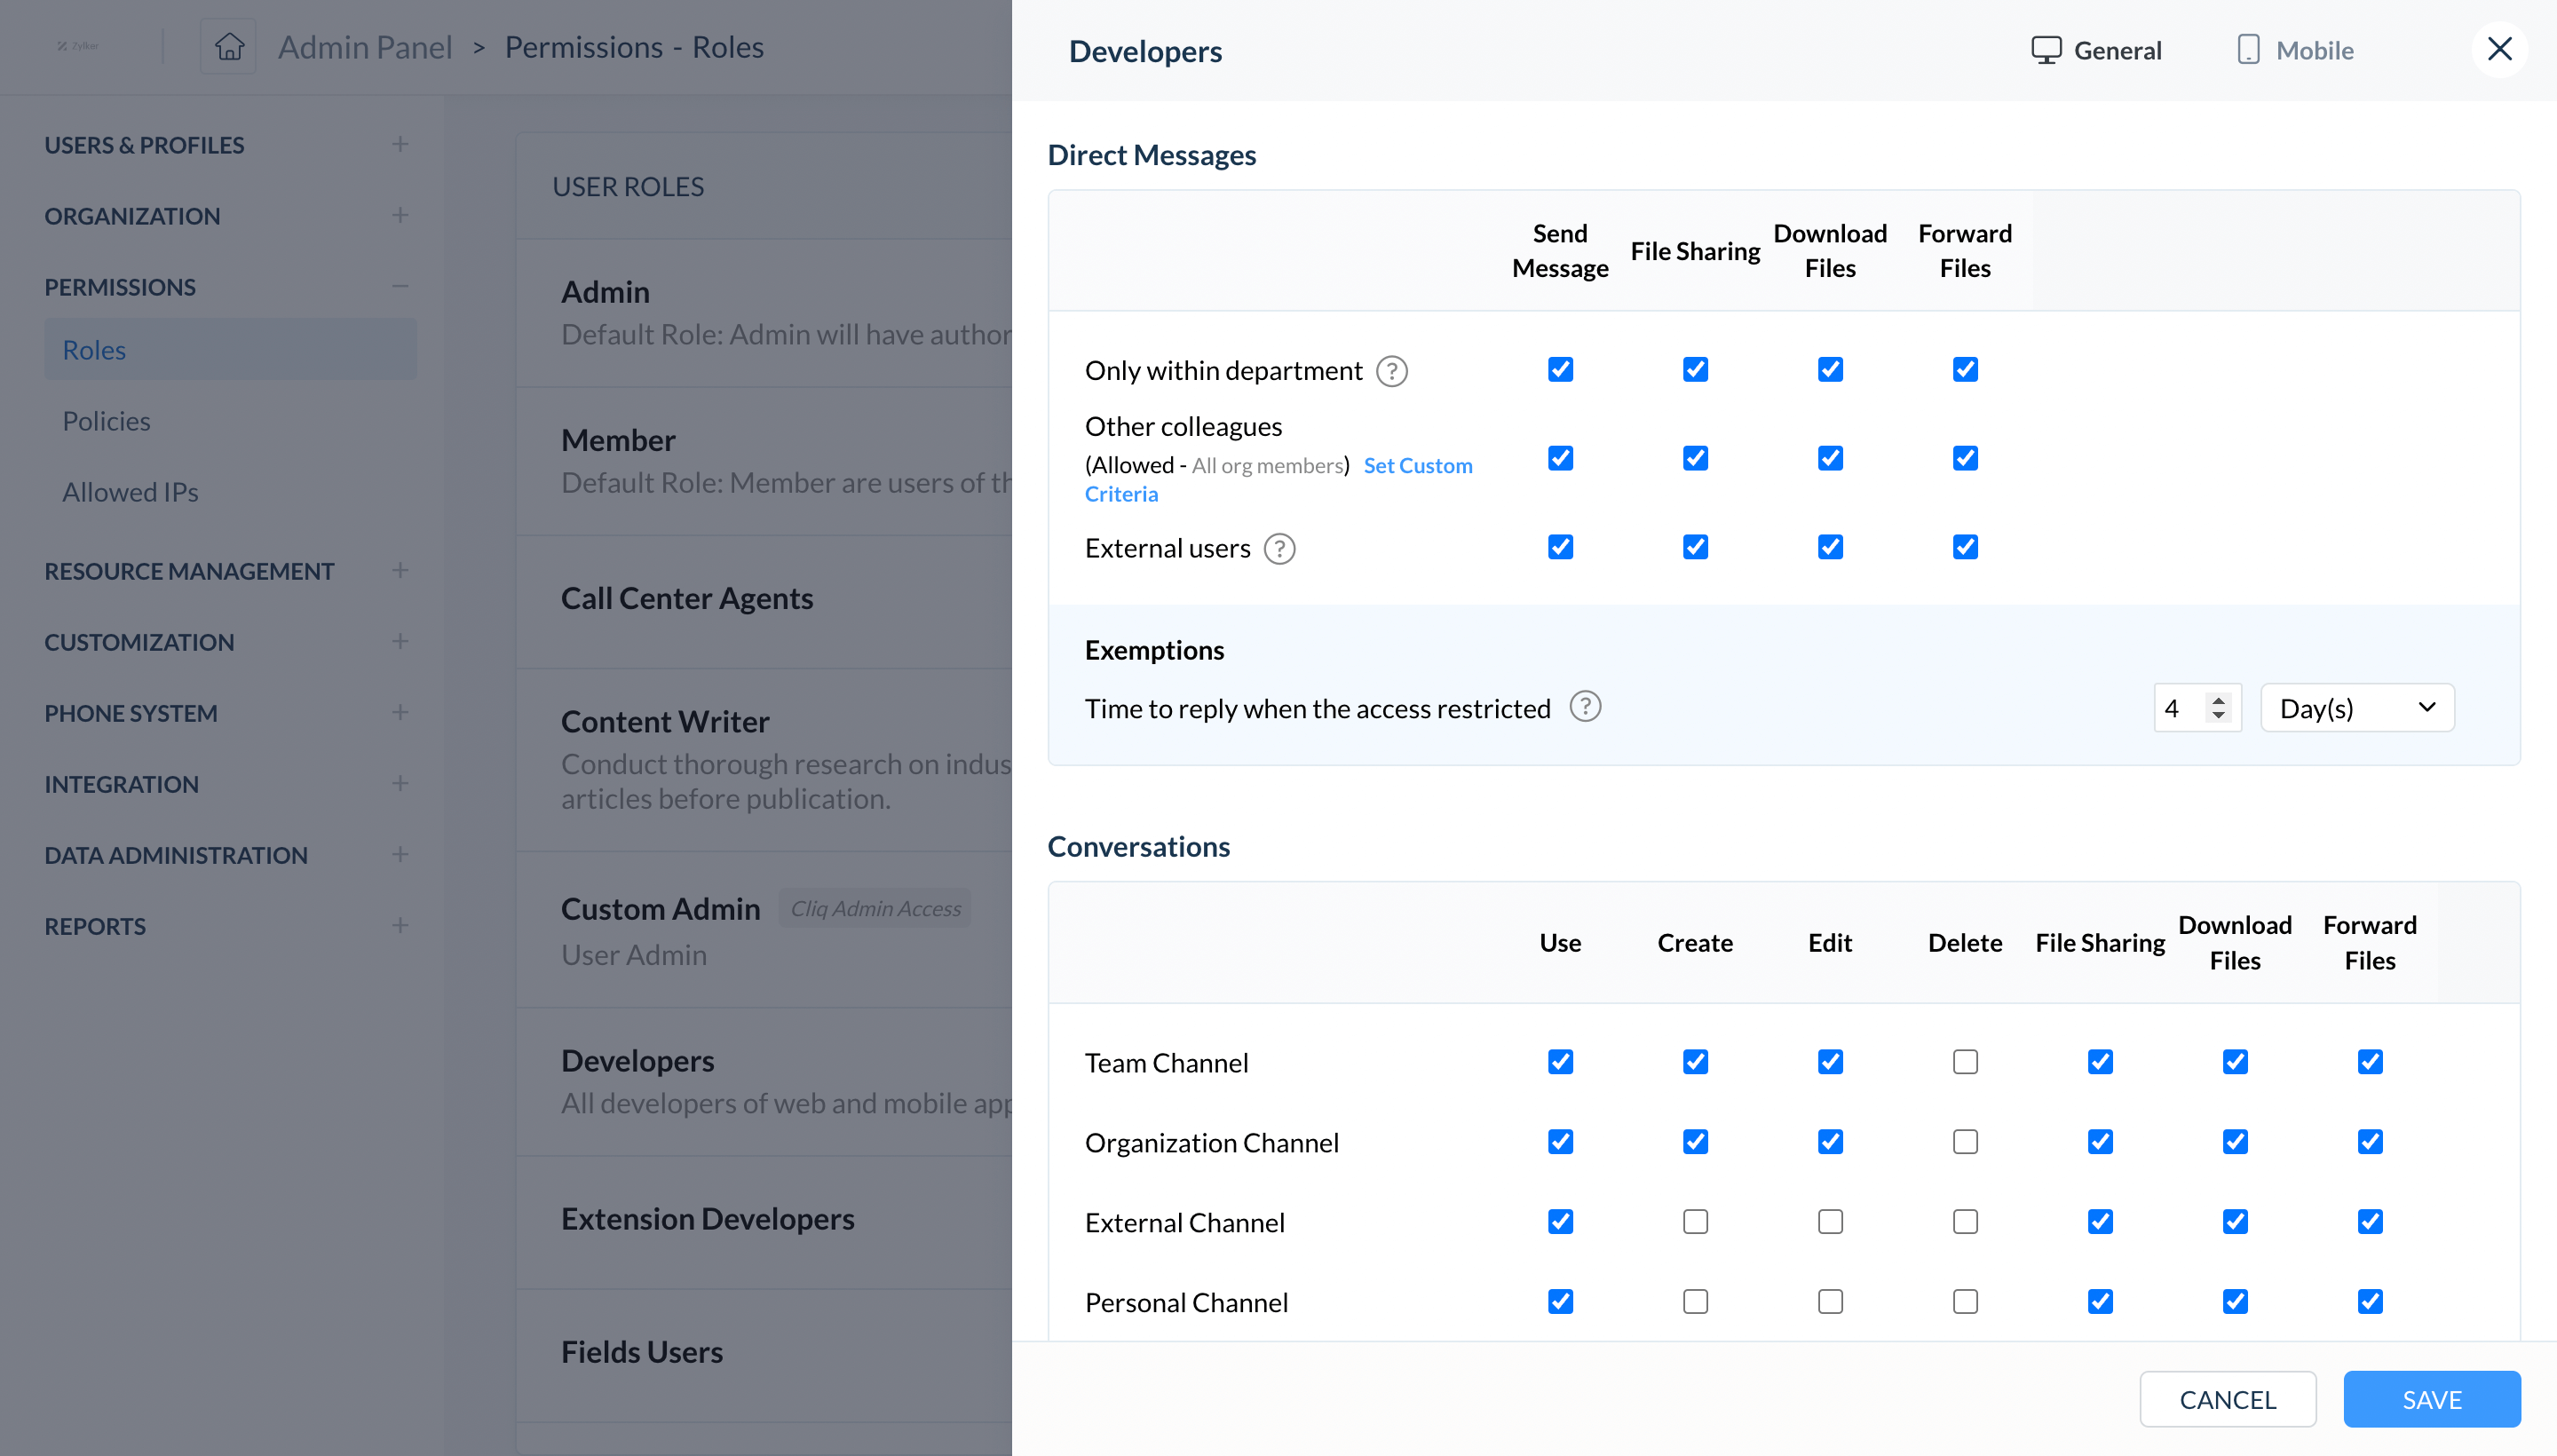
Permissions based on user roles
Set permissions for users based on their role. Selectively decide who gets to access and perform module actions.
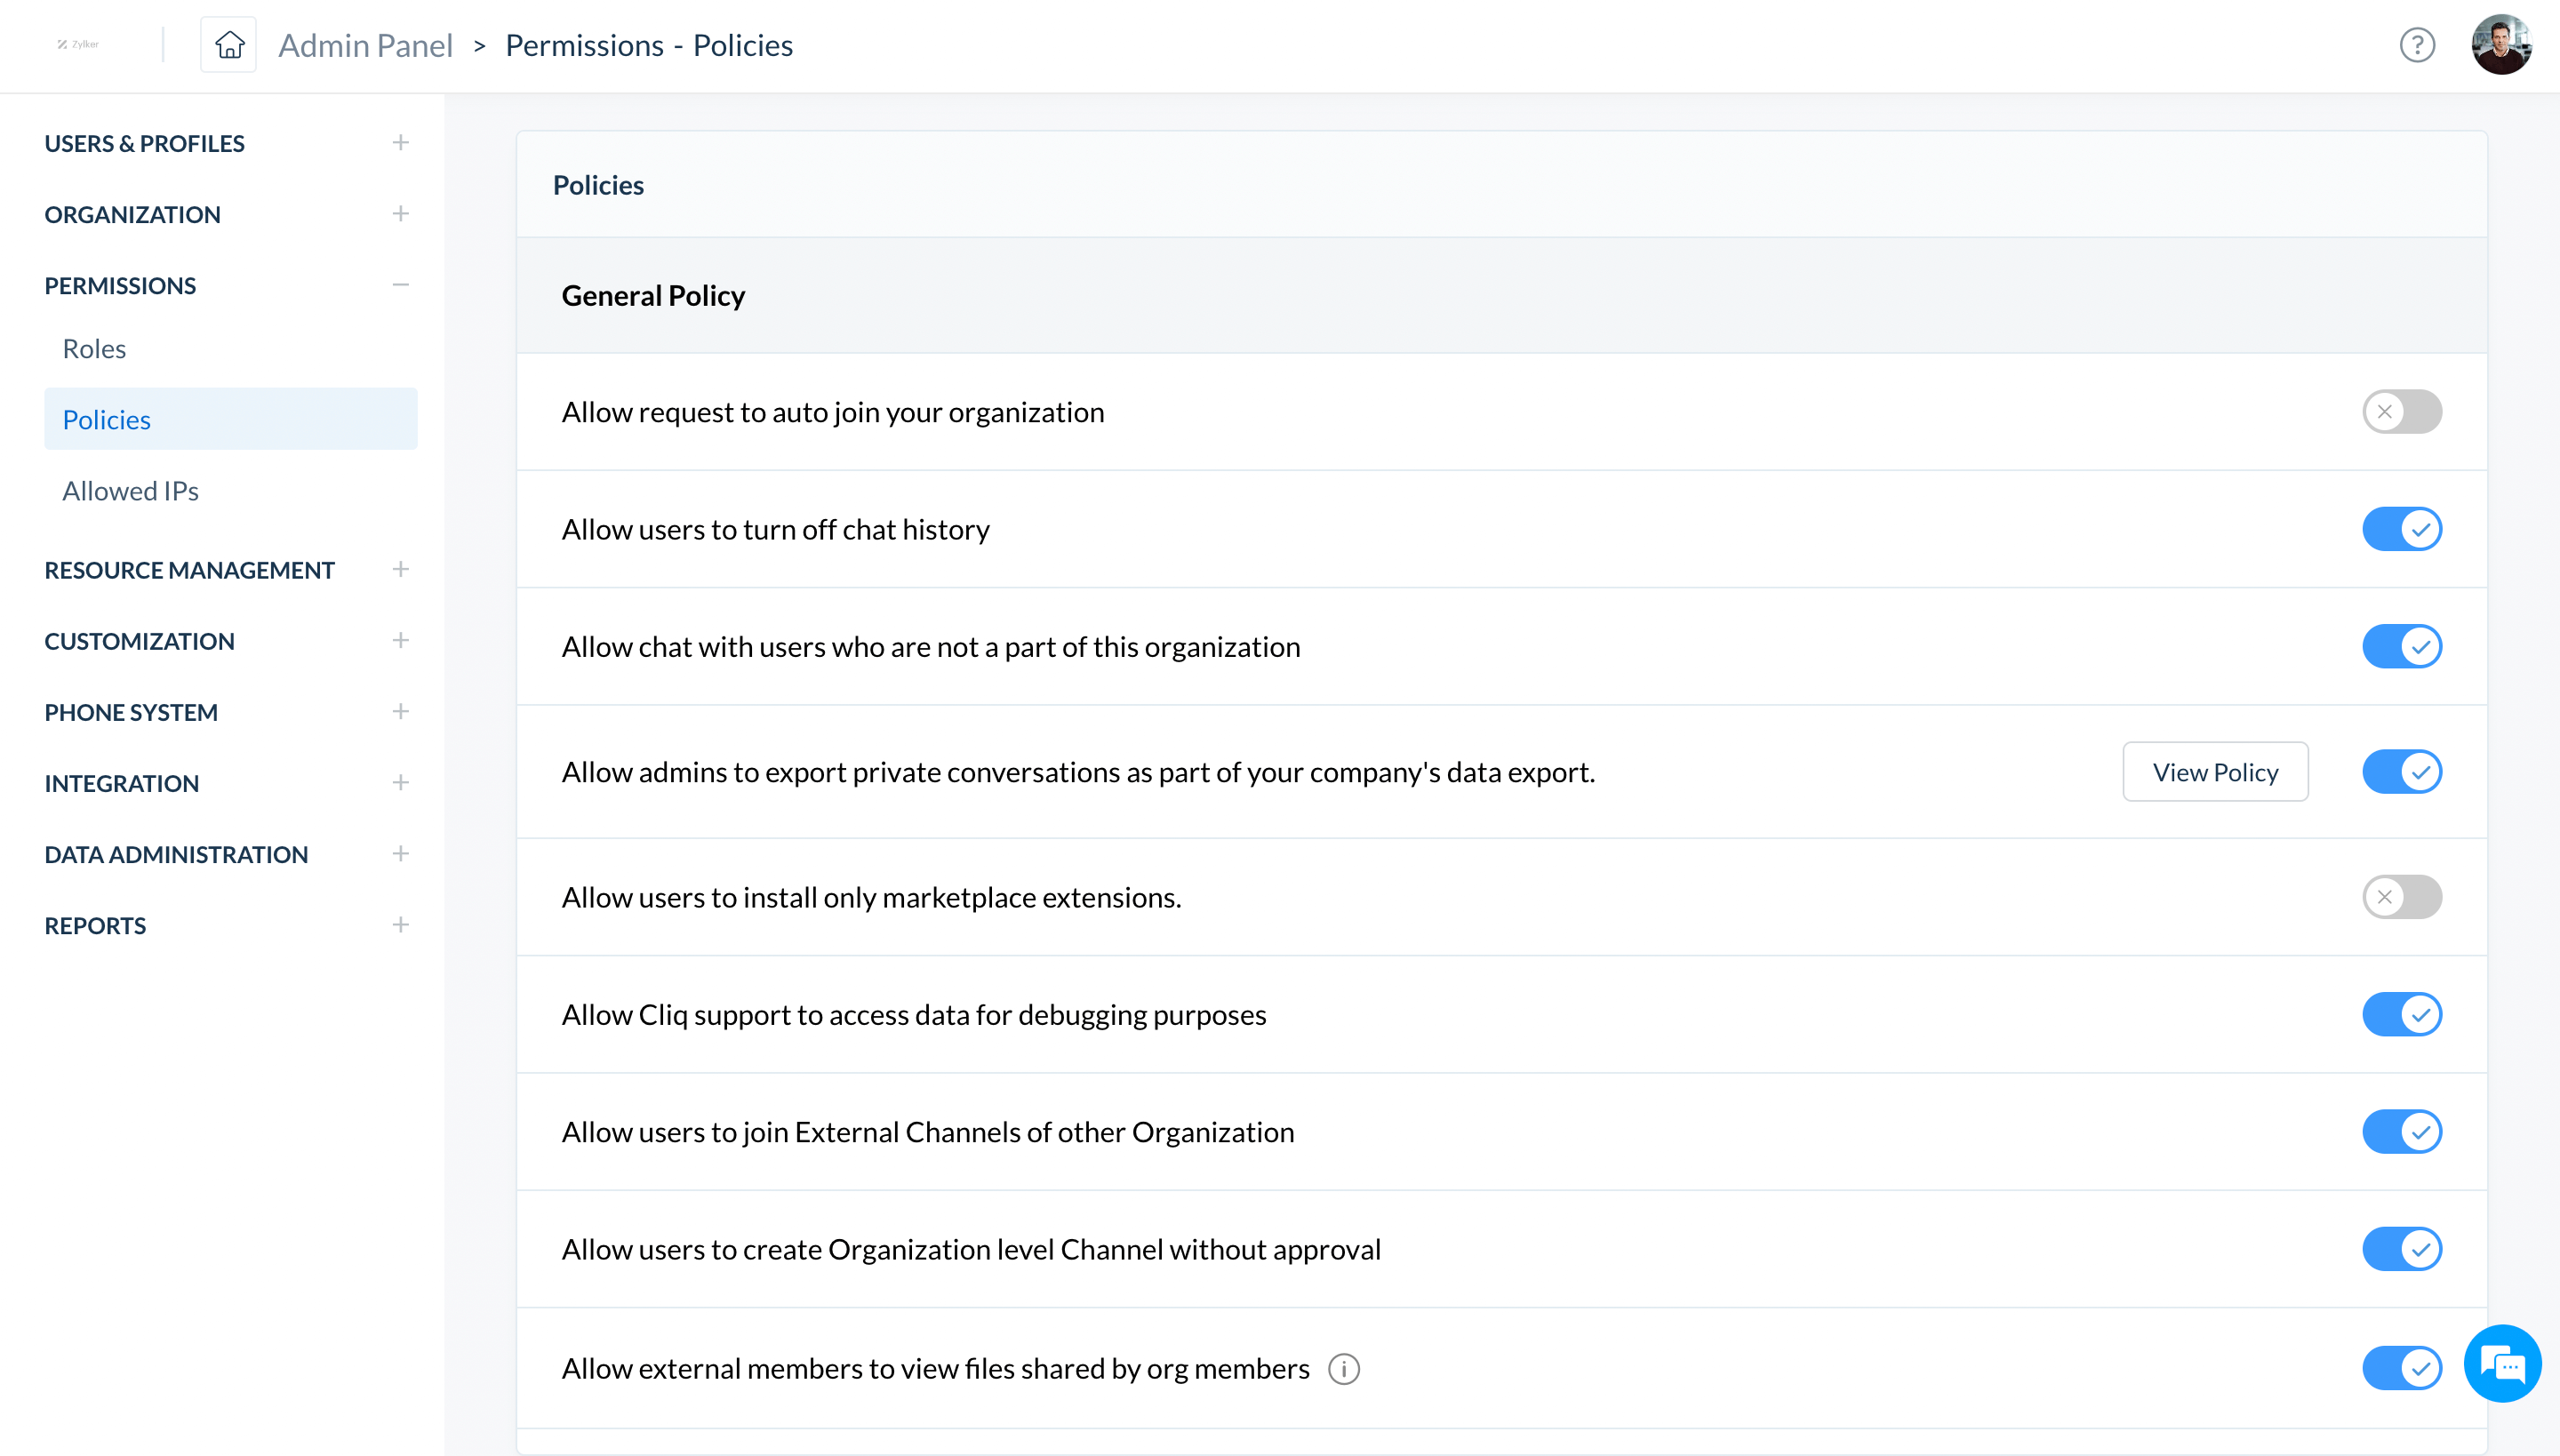
Manage policies
Set general policies and password policies to manage the information of your organization.
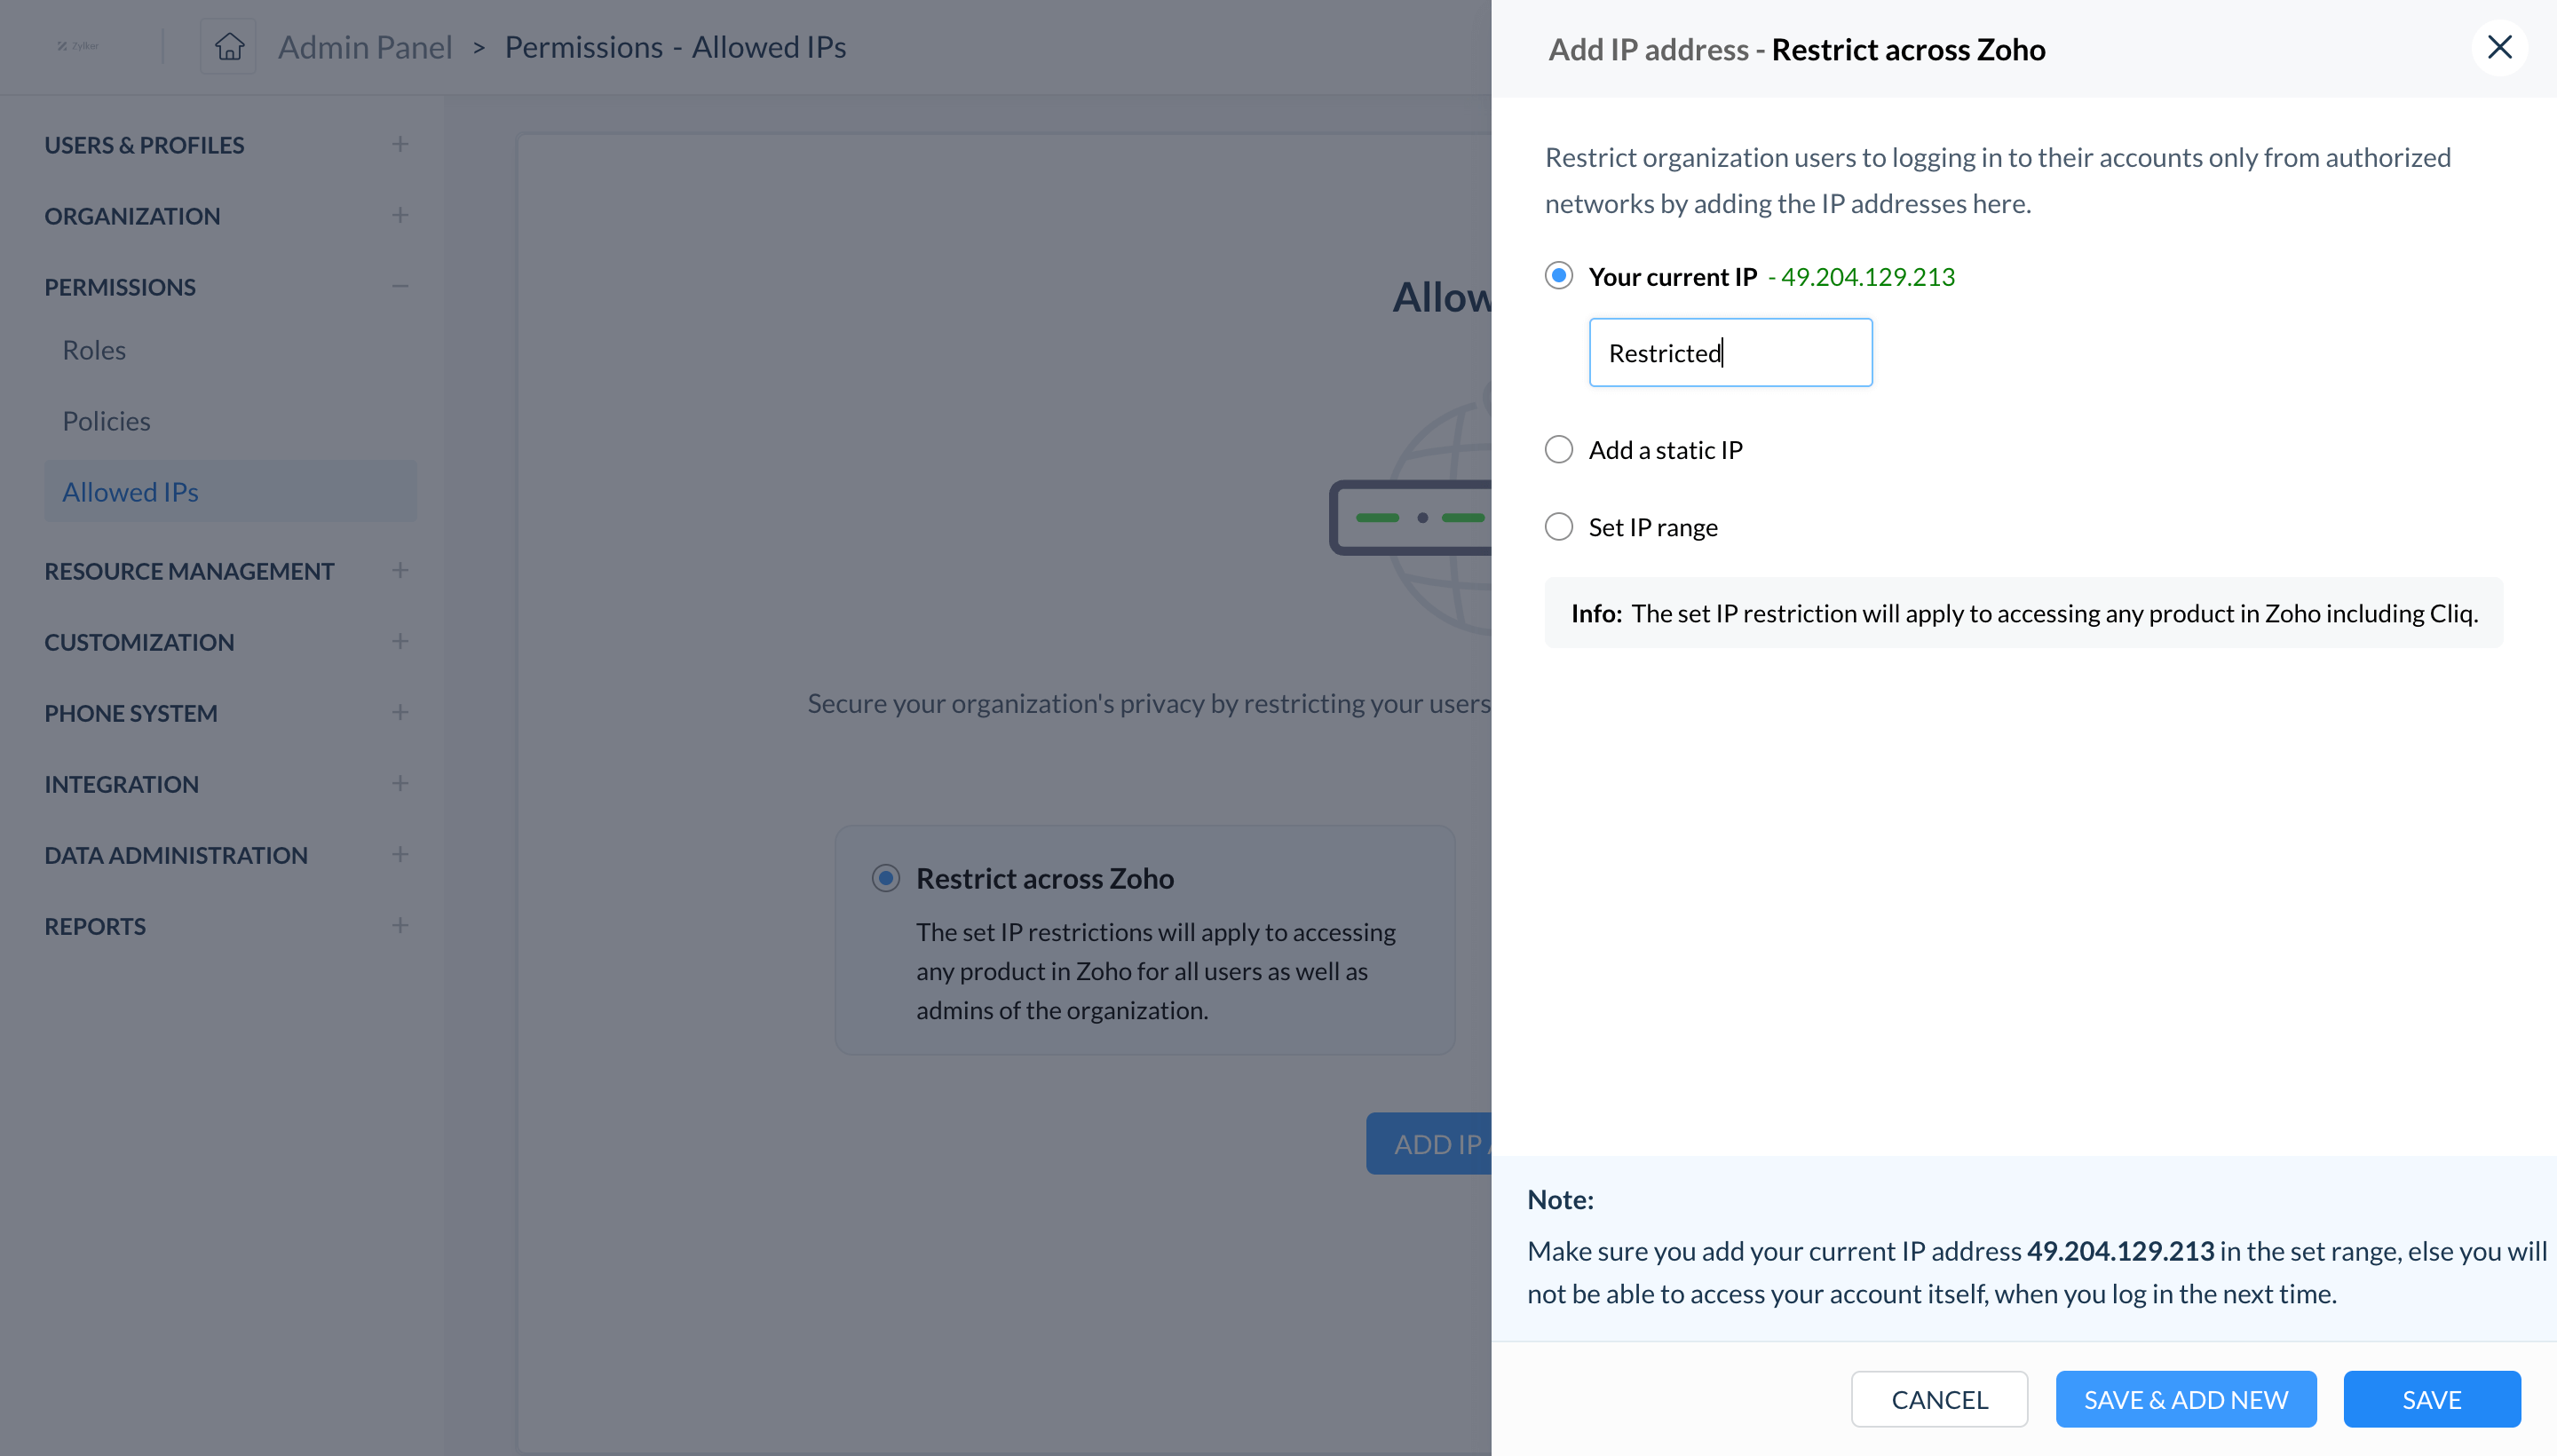
Restrict access to specific IPs
Allow employees to access Cliq only from specific IP addresses, and deny access for other IPs.
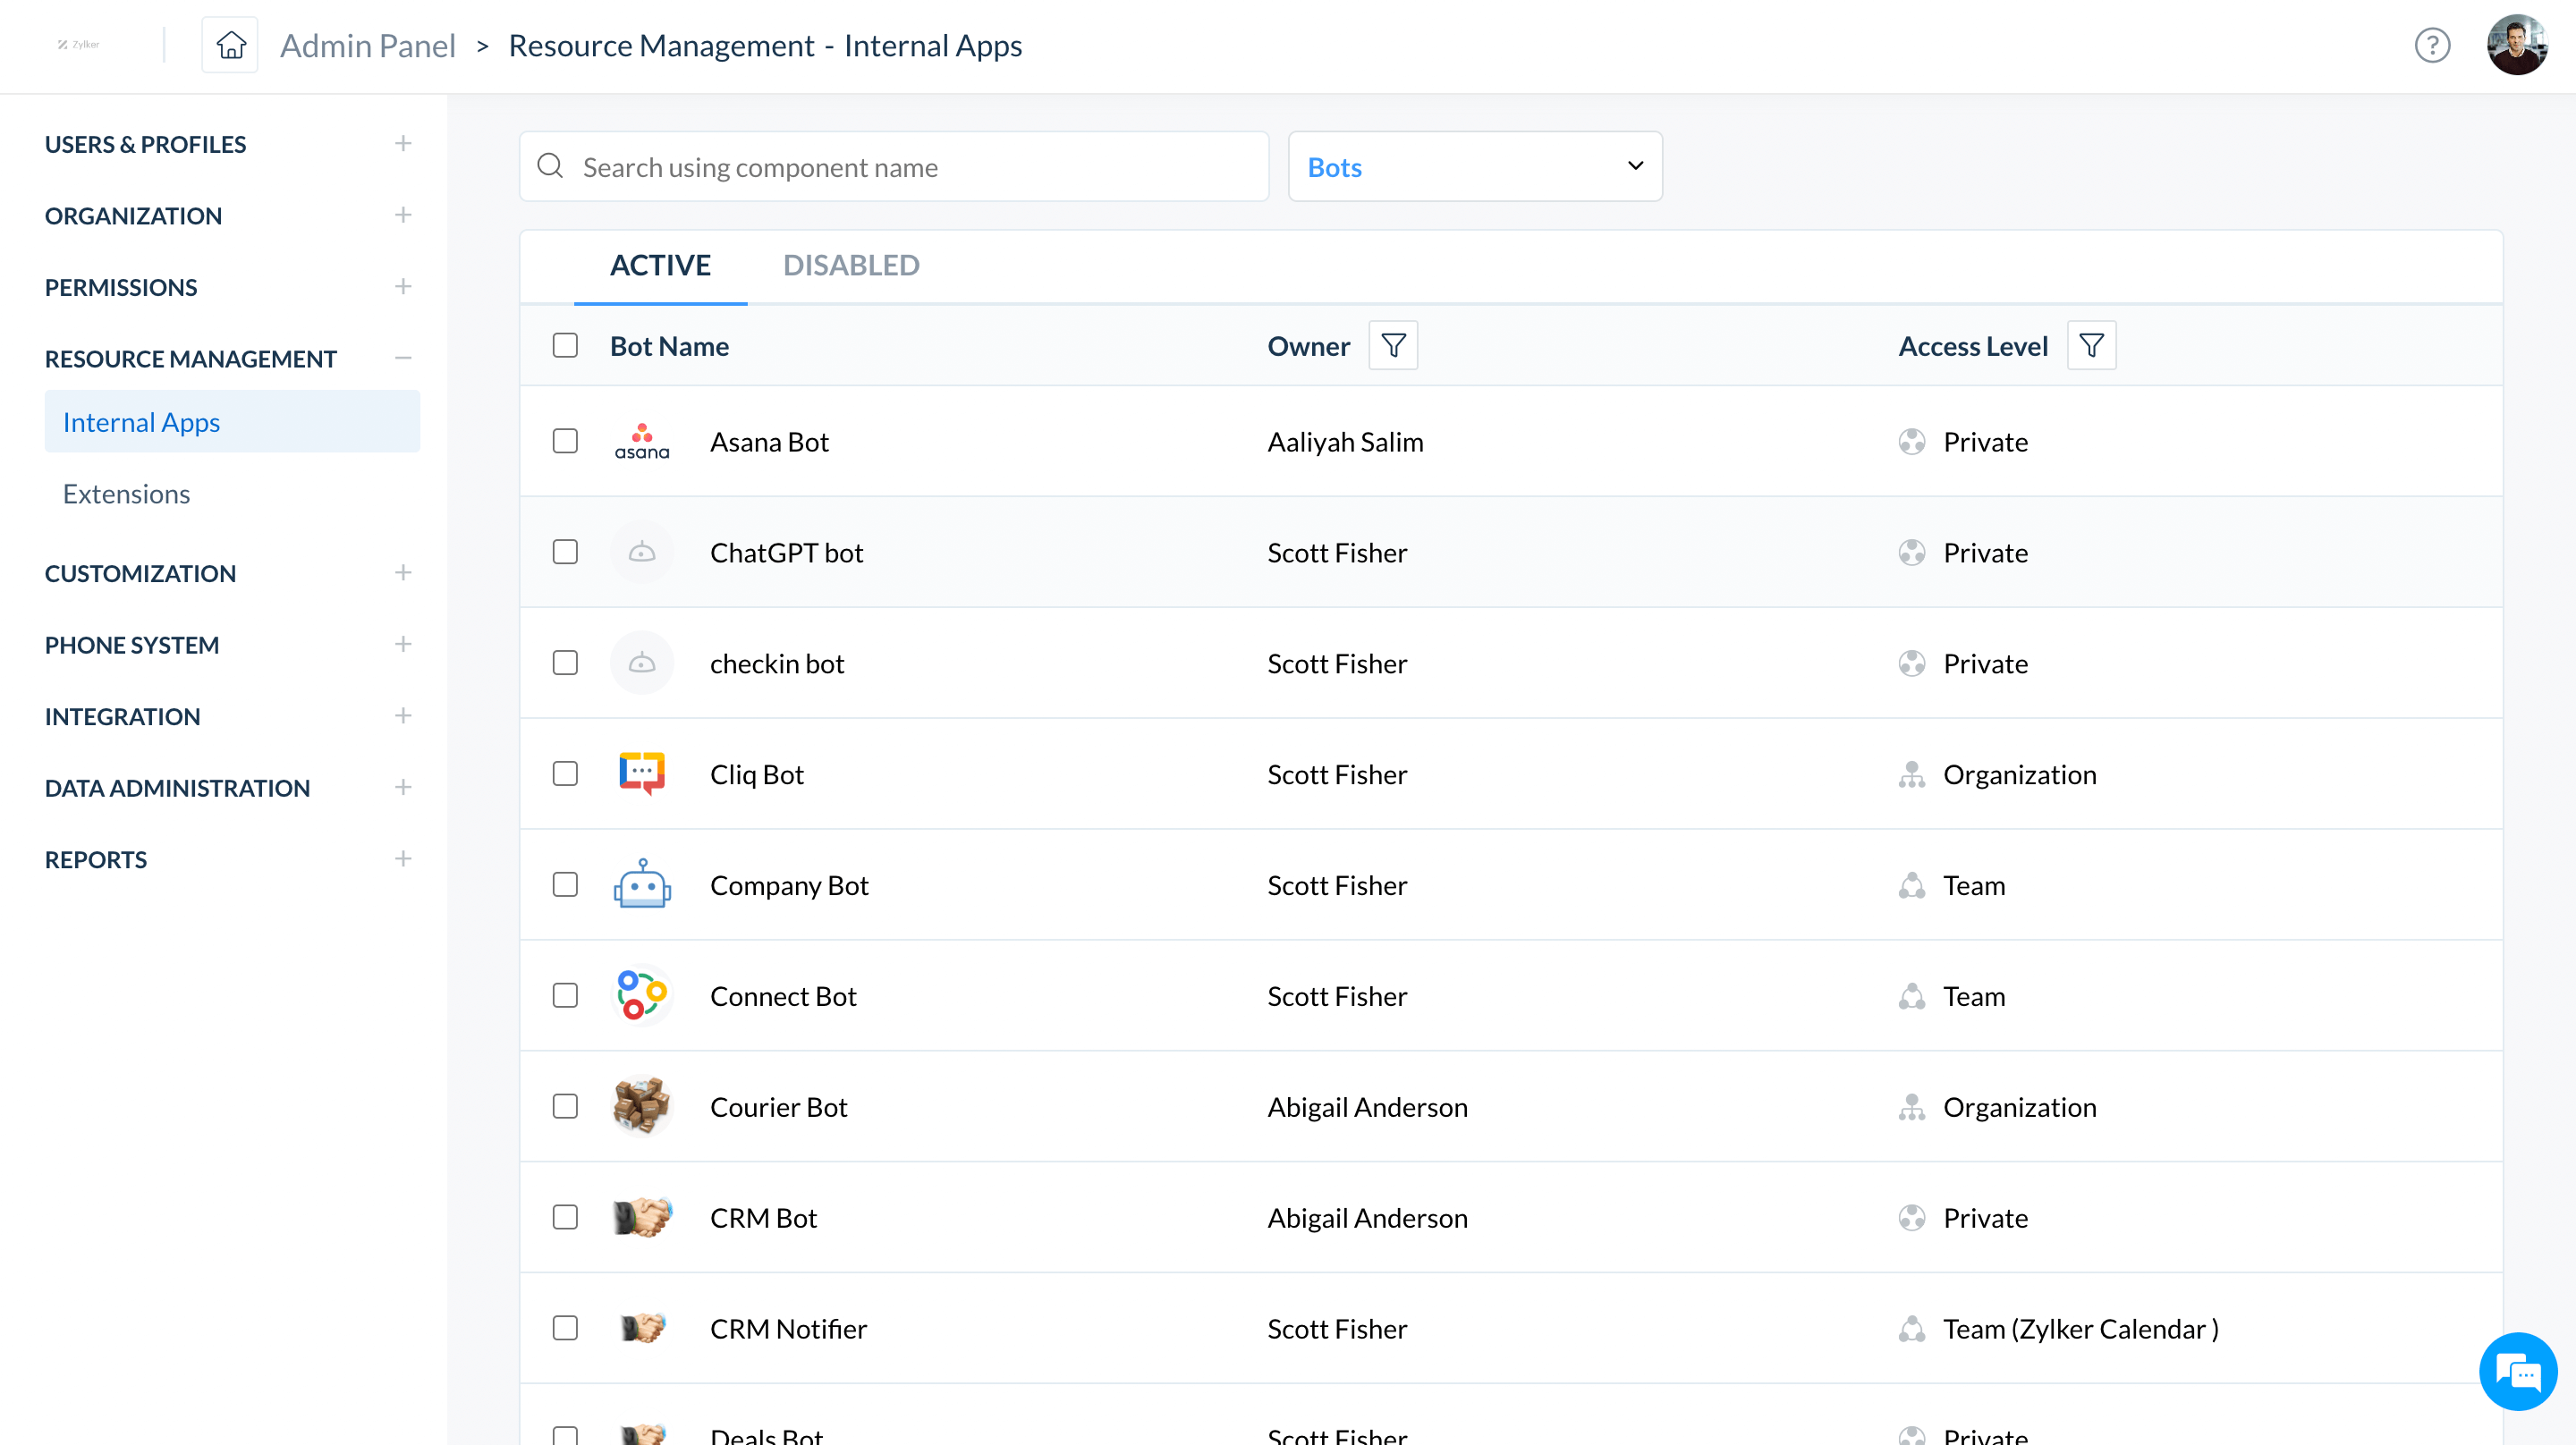
Manage internal apps
Take complete control of the custom apps and bots installed for your organization.
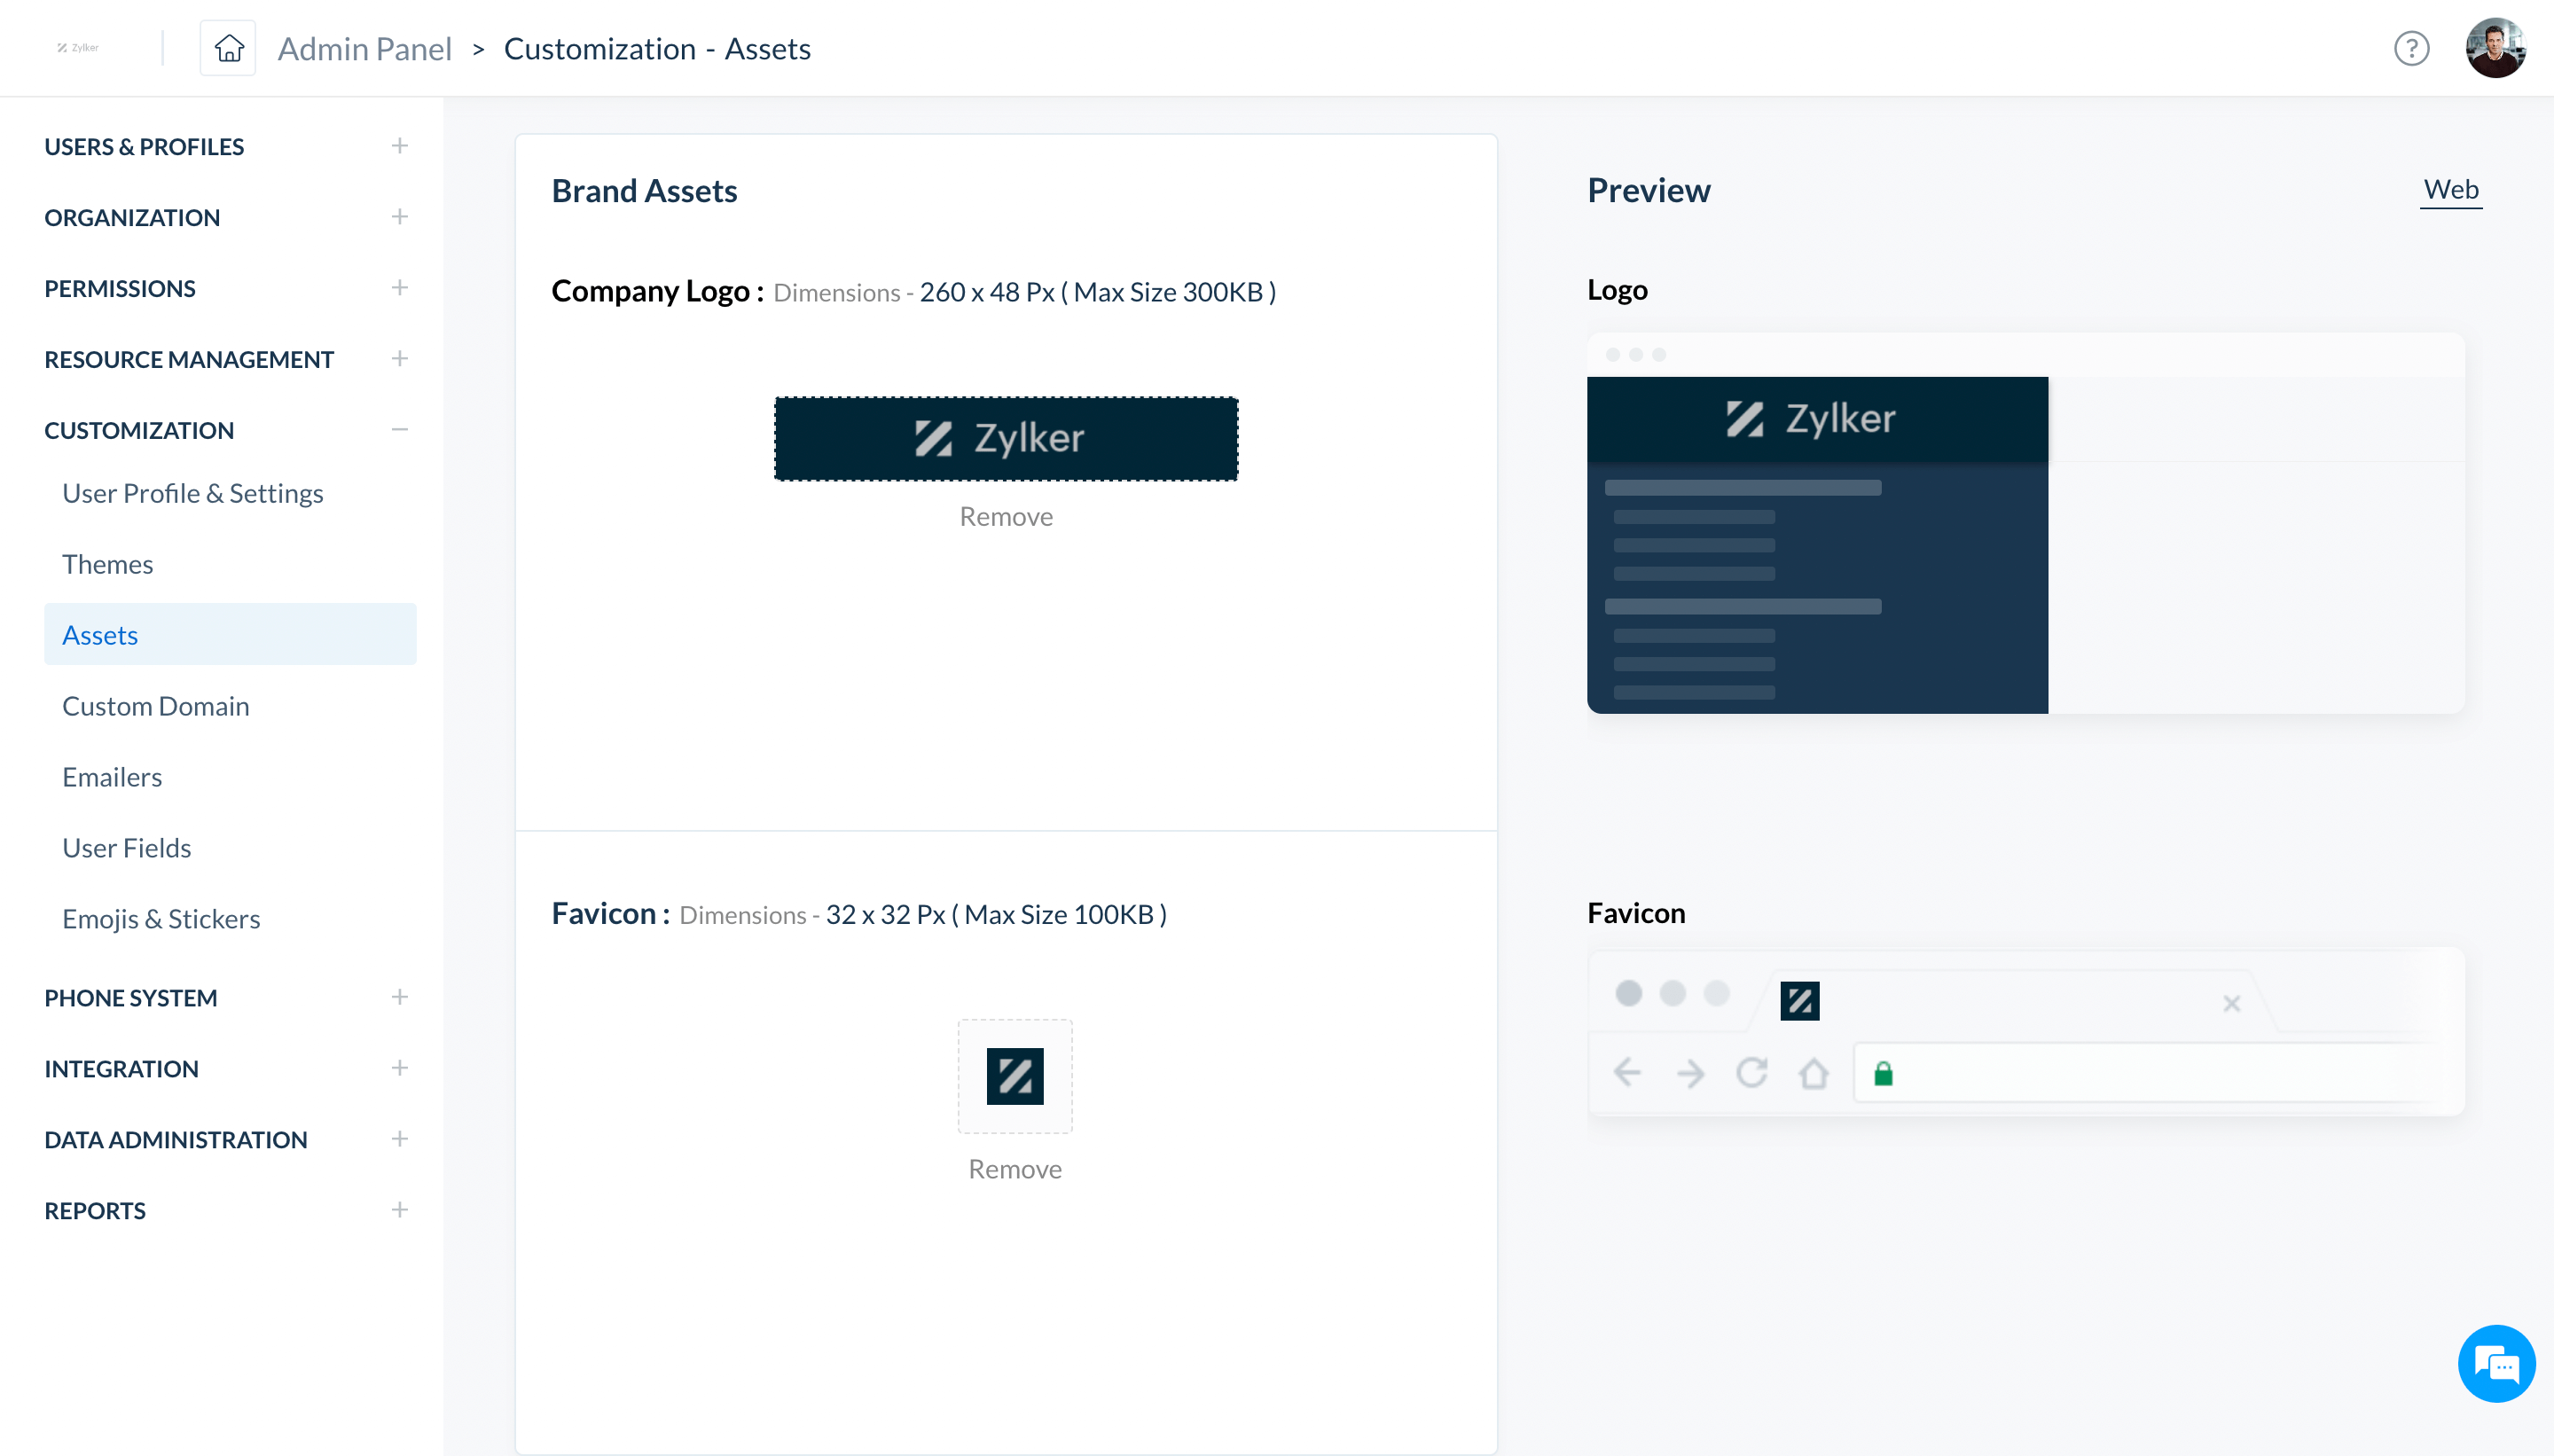
Set assets
Configure brand assets like the company logo and favicon to make Cliq your own.
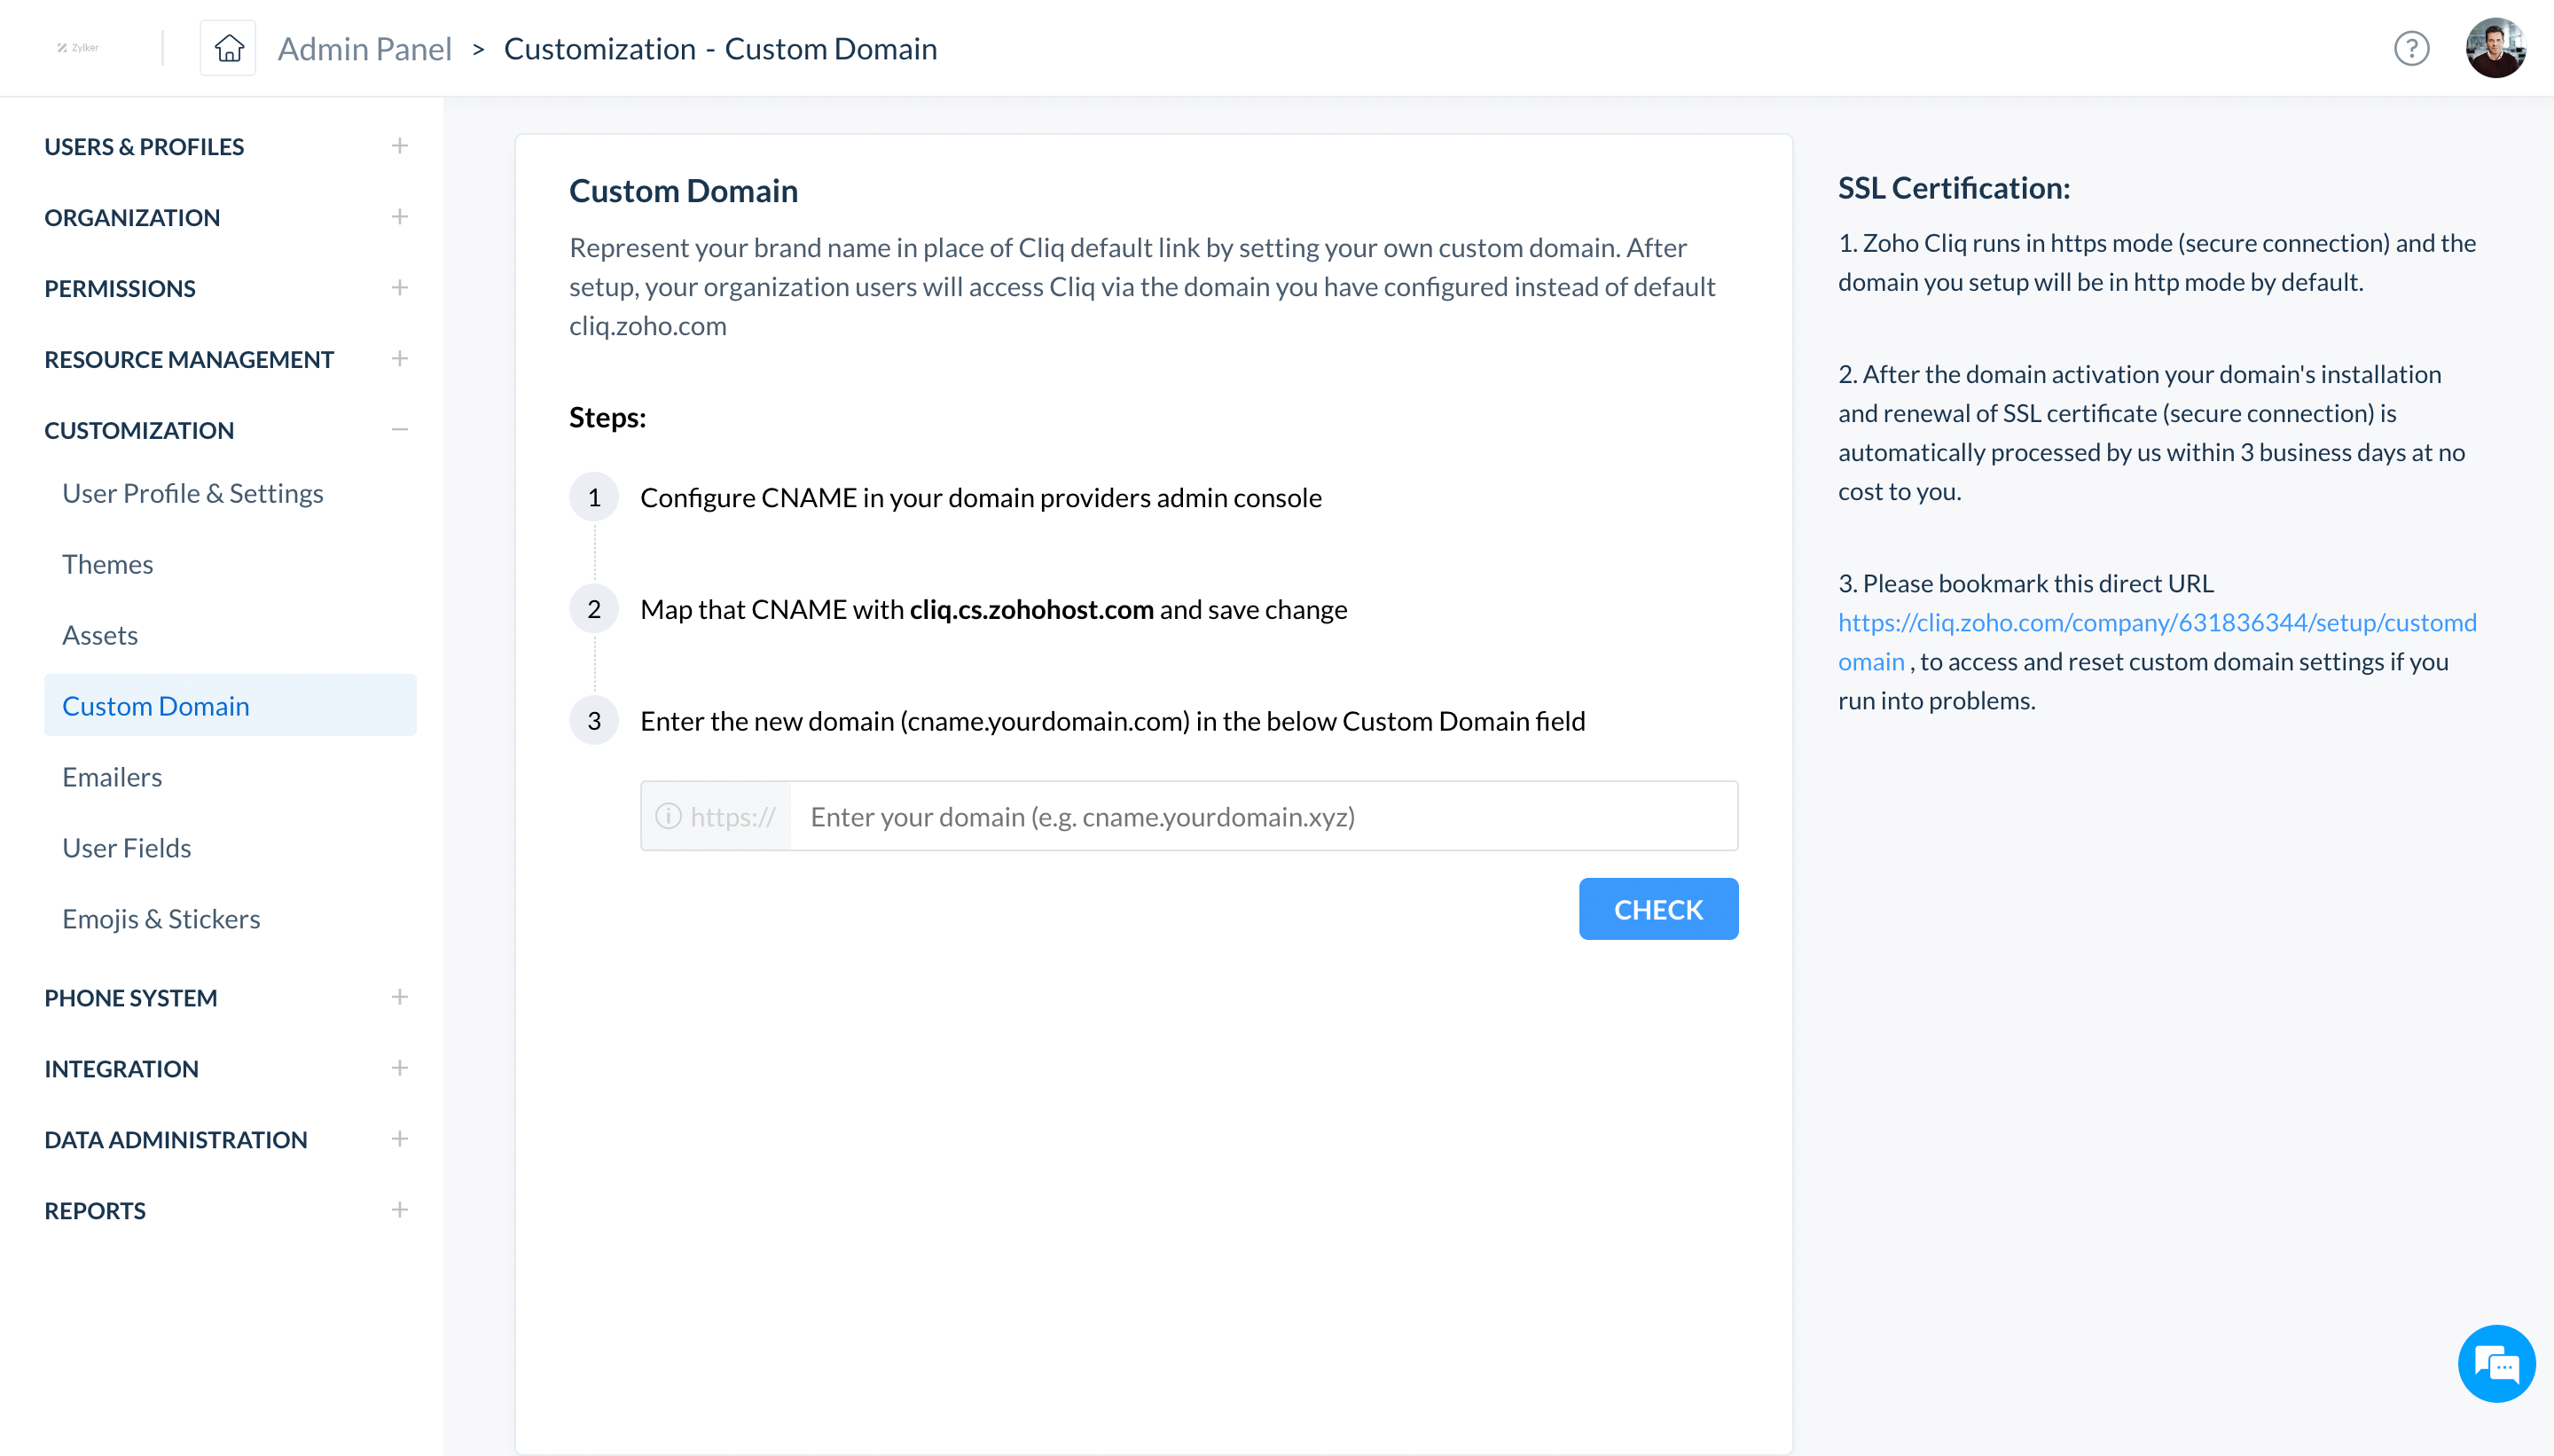
Create custom domain
Make Cliq accessible within your company by setting up a custom domain.
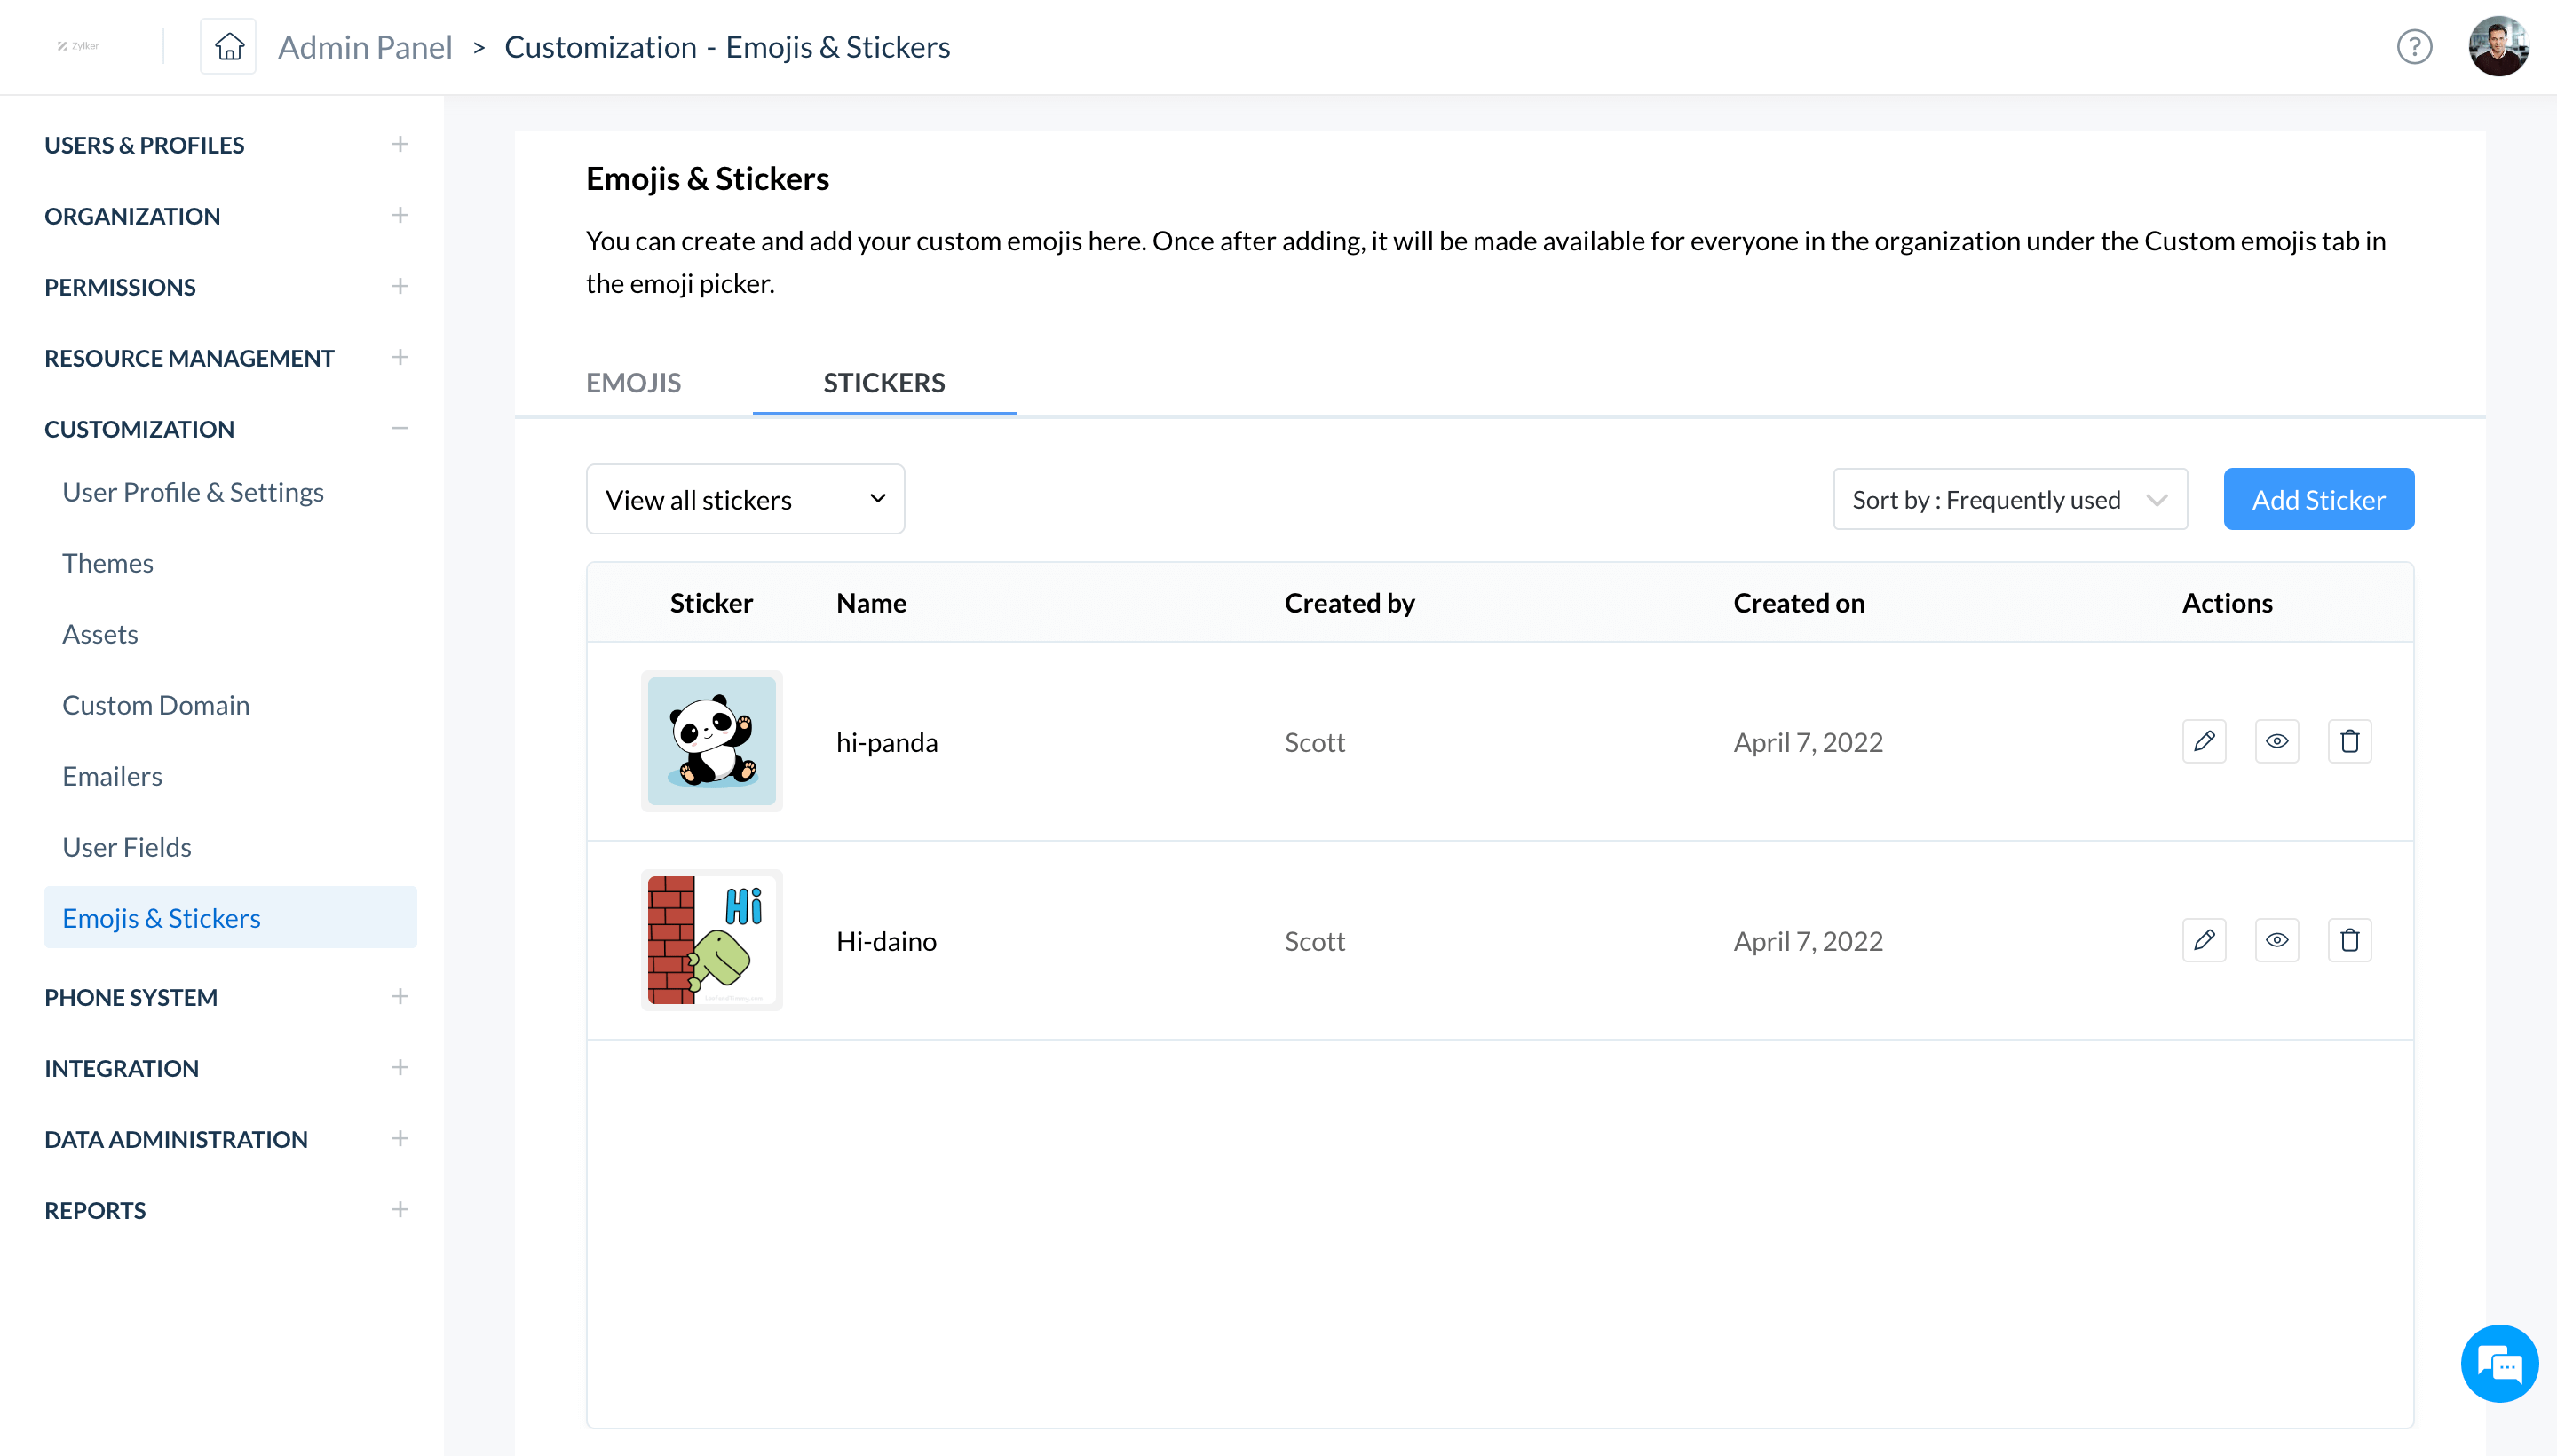
Add custom emojis and stickers
Create and add custom emojis and stickers that all the employees in your organization can use.
Export data
Download data of your organization's resources and data from Zoho Cliq to be used for auditing purposes.

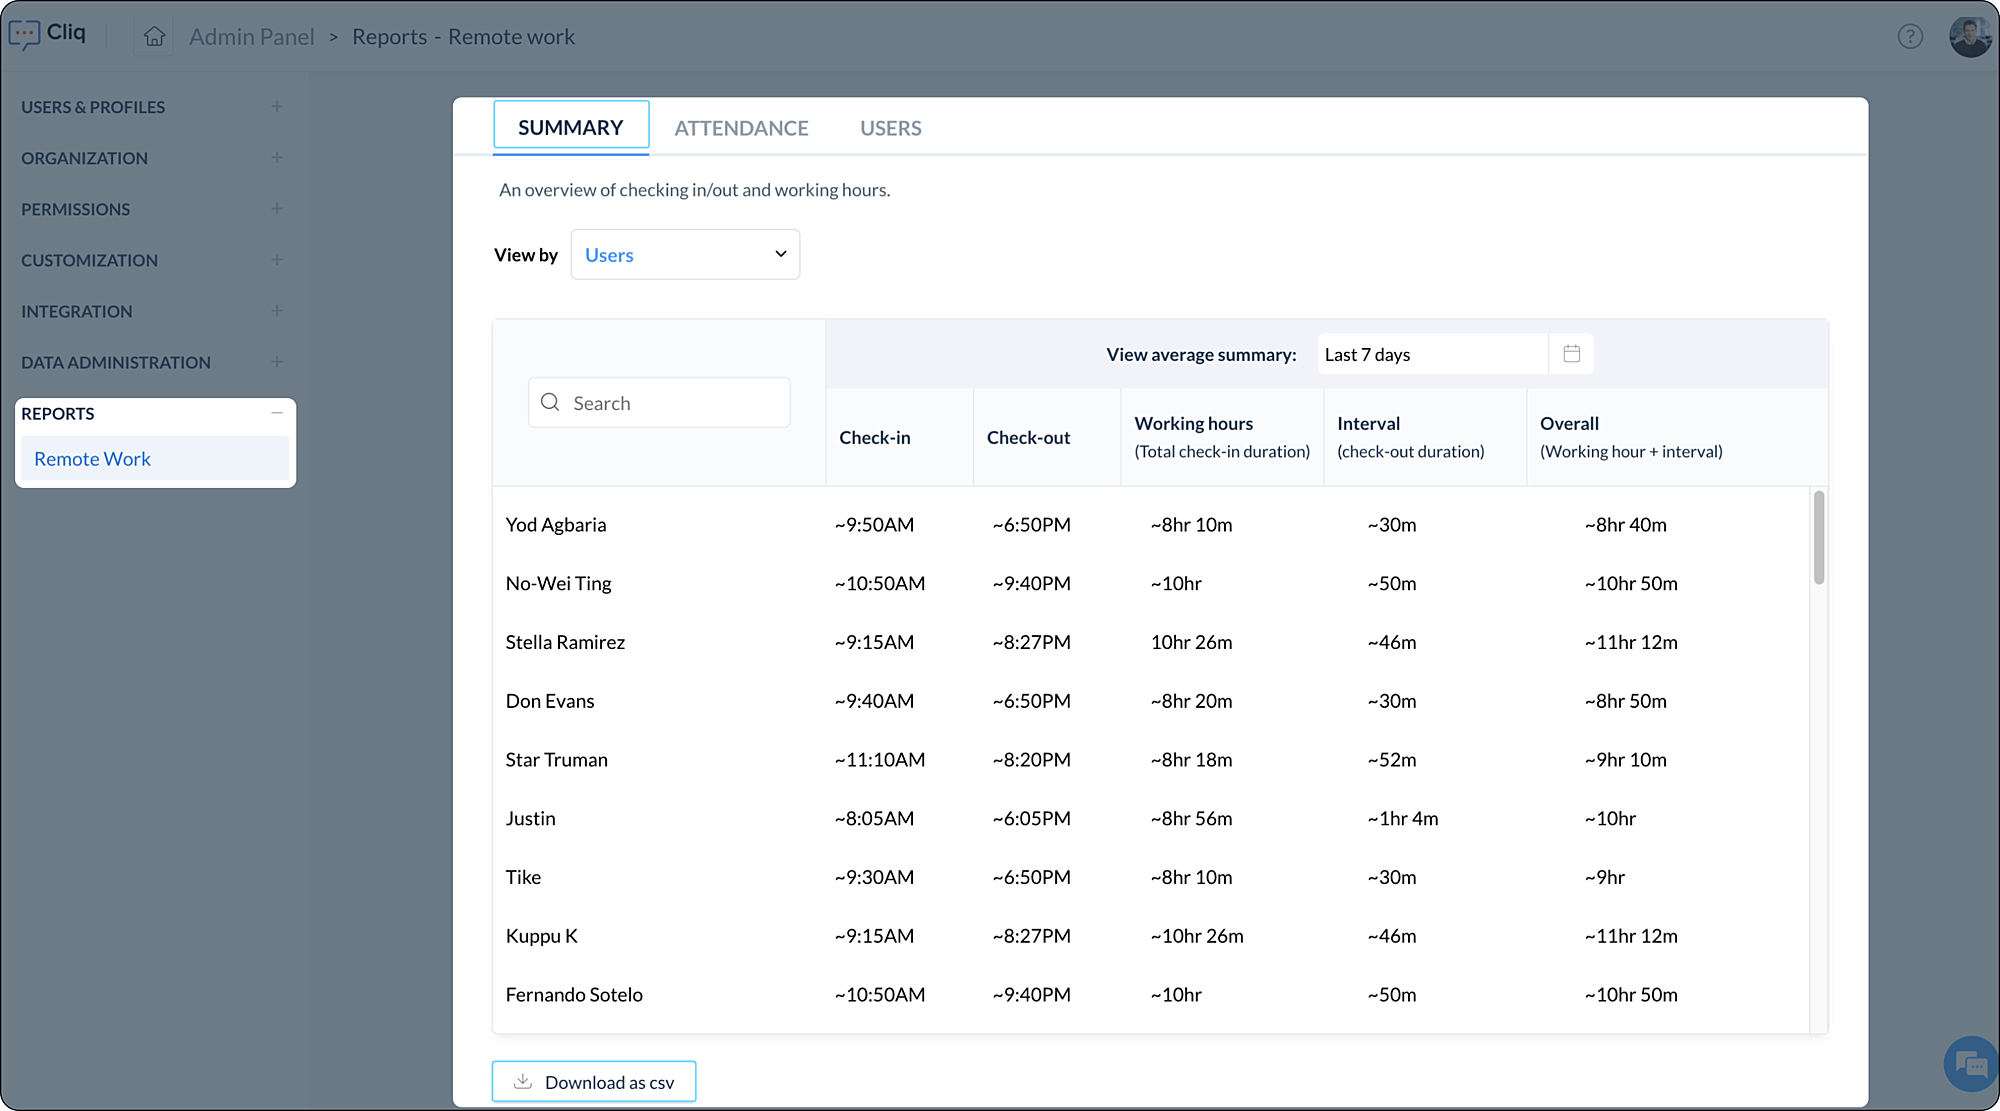
View remote work reports
Track the attendance of your reportees and manage them with the remote work Reports.
Meeting branding
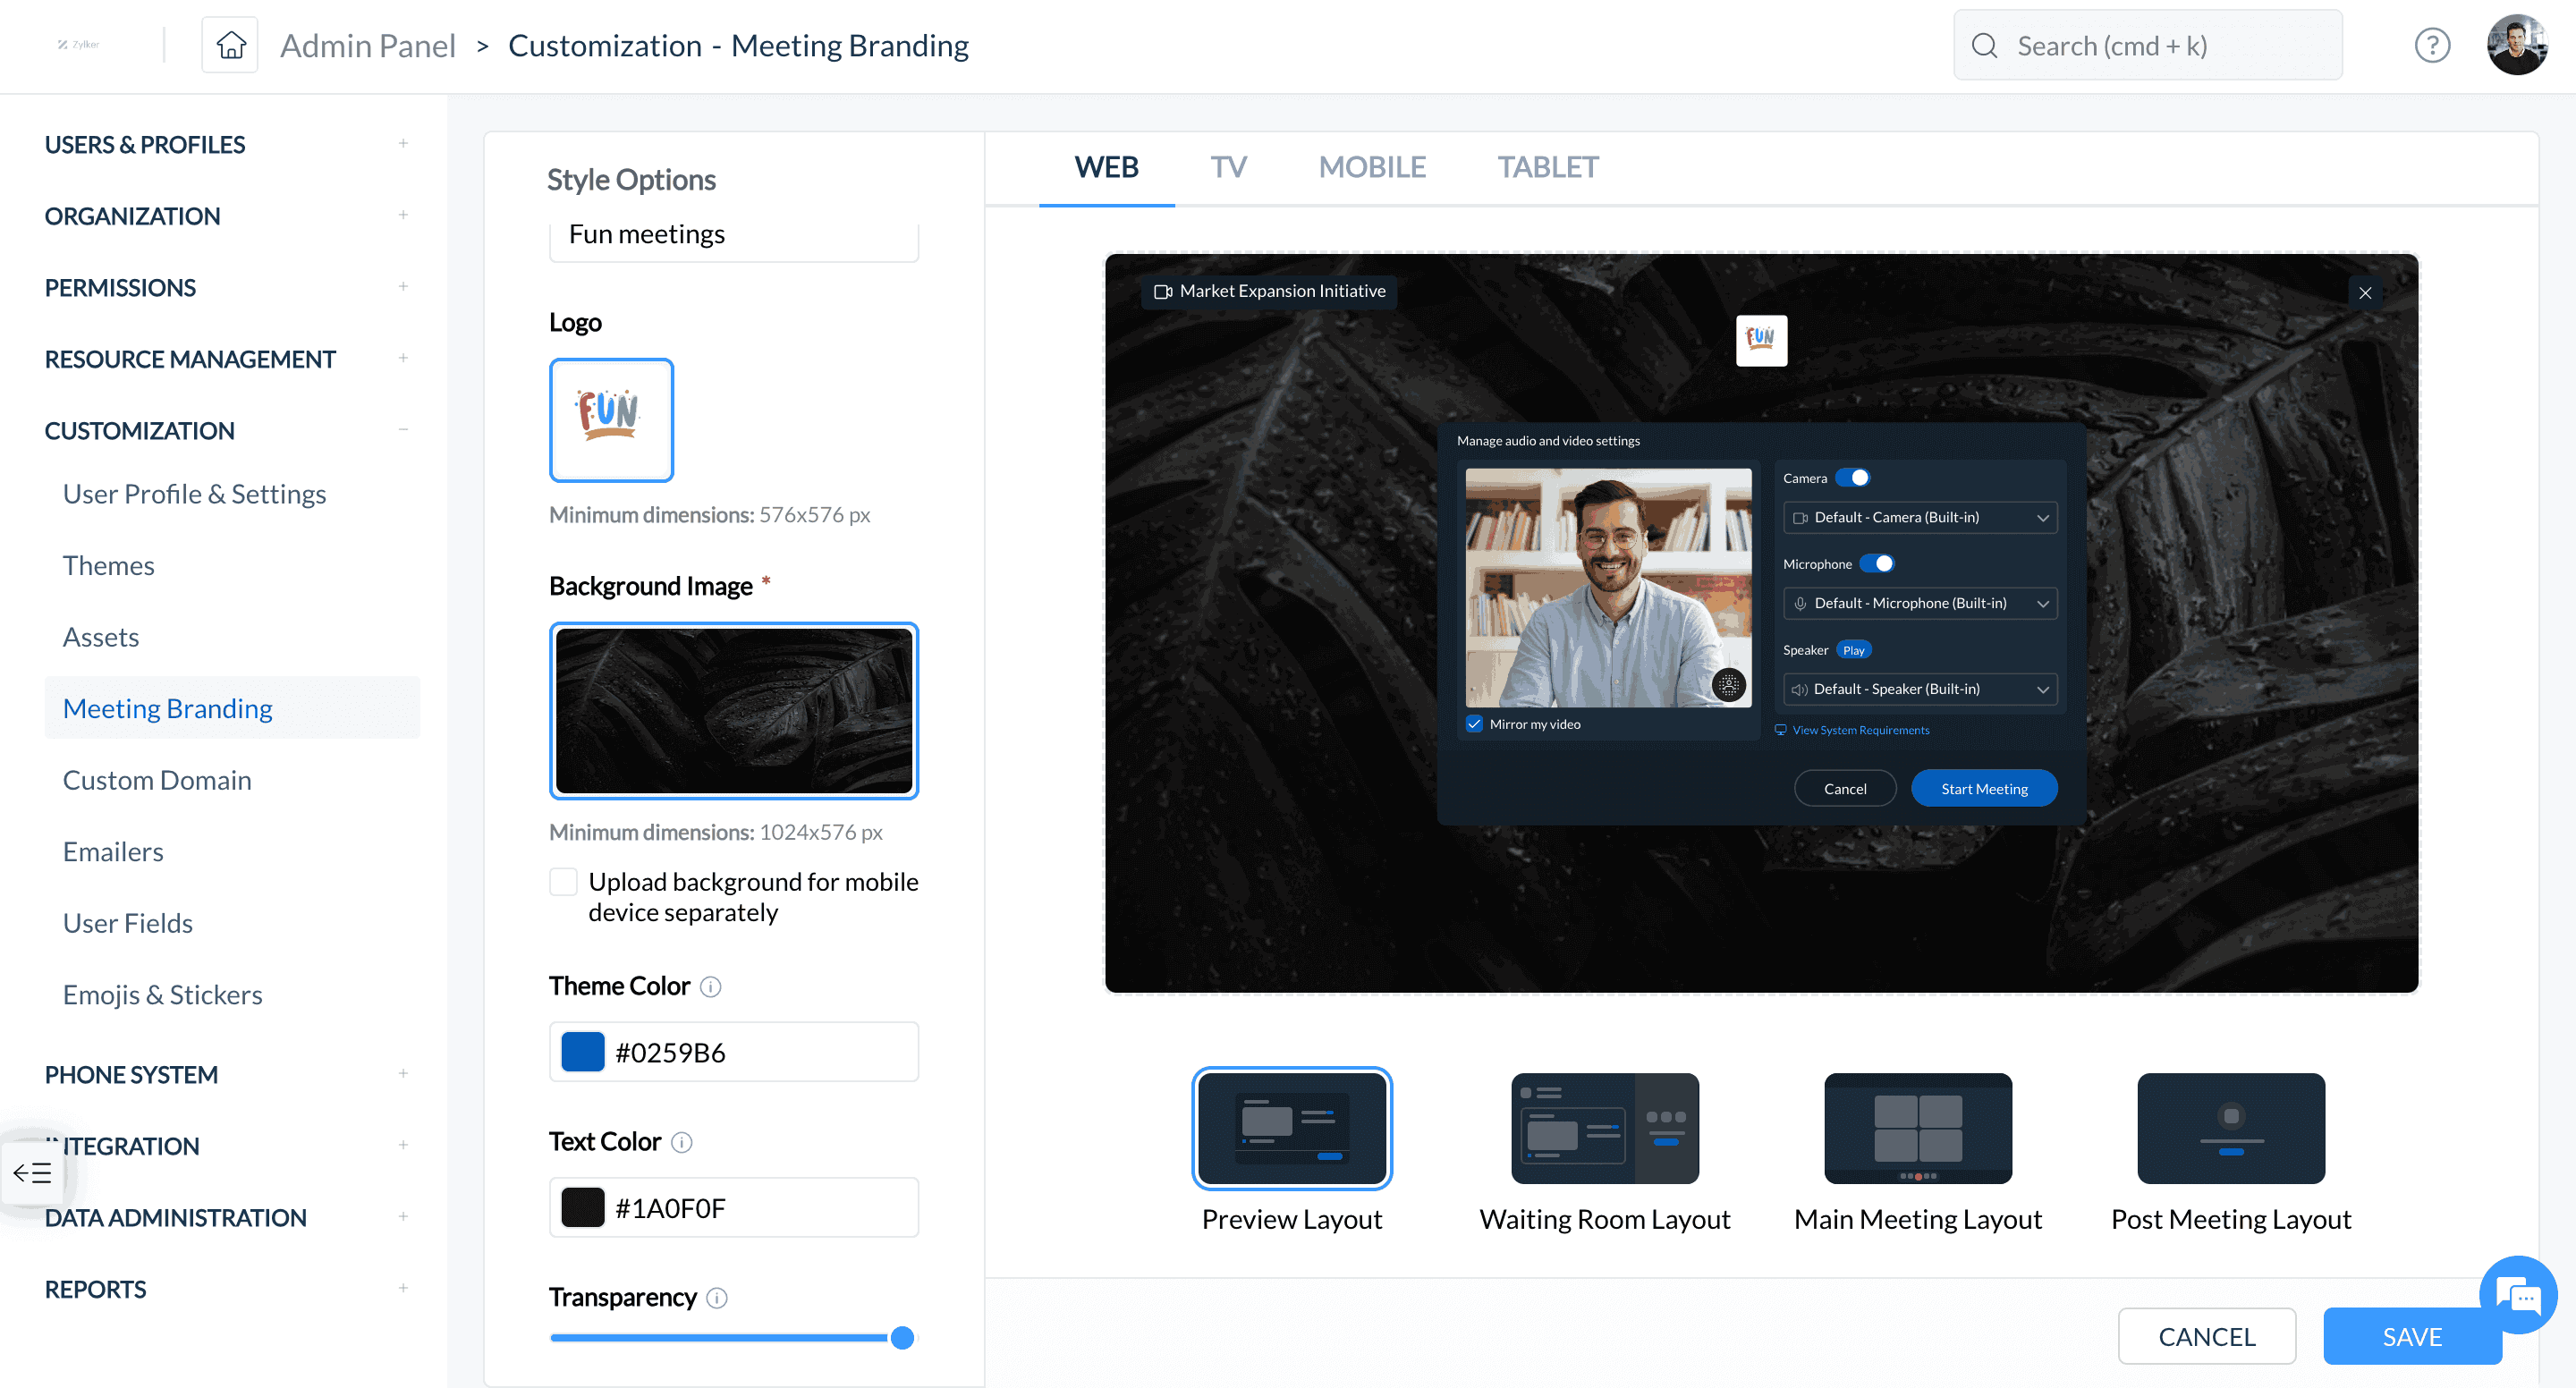
Reflect your brand identity in your Cliq meetings. To set up meeting themes for your organization, go to Customizations in the admin panel and choose Meeting Branding. Here, you can add a custom logo, background, text colors, and more.
File cleanup
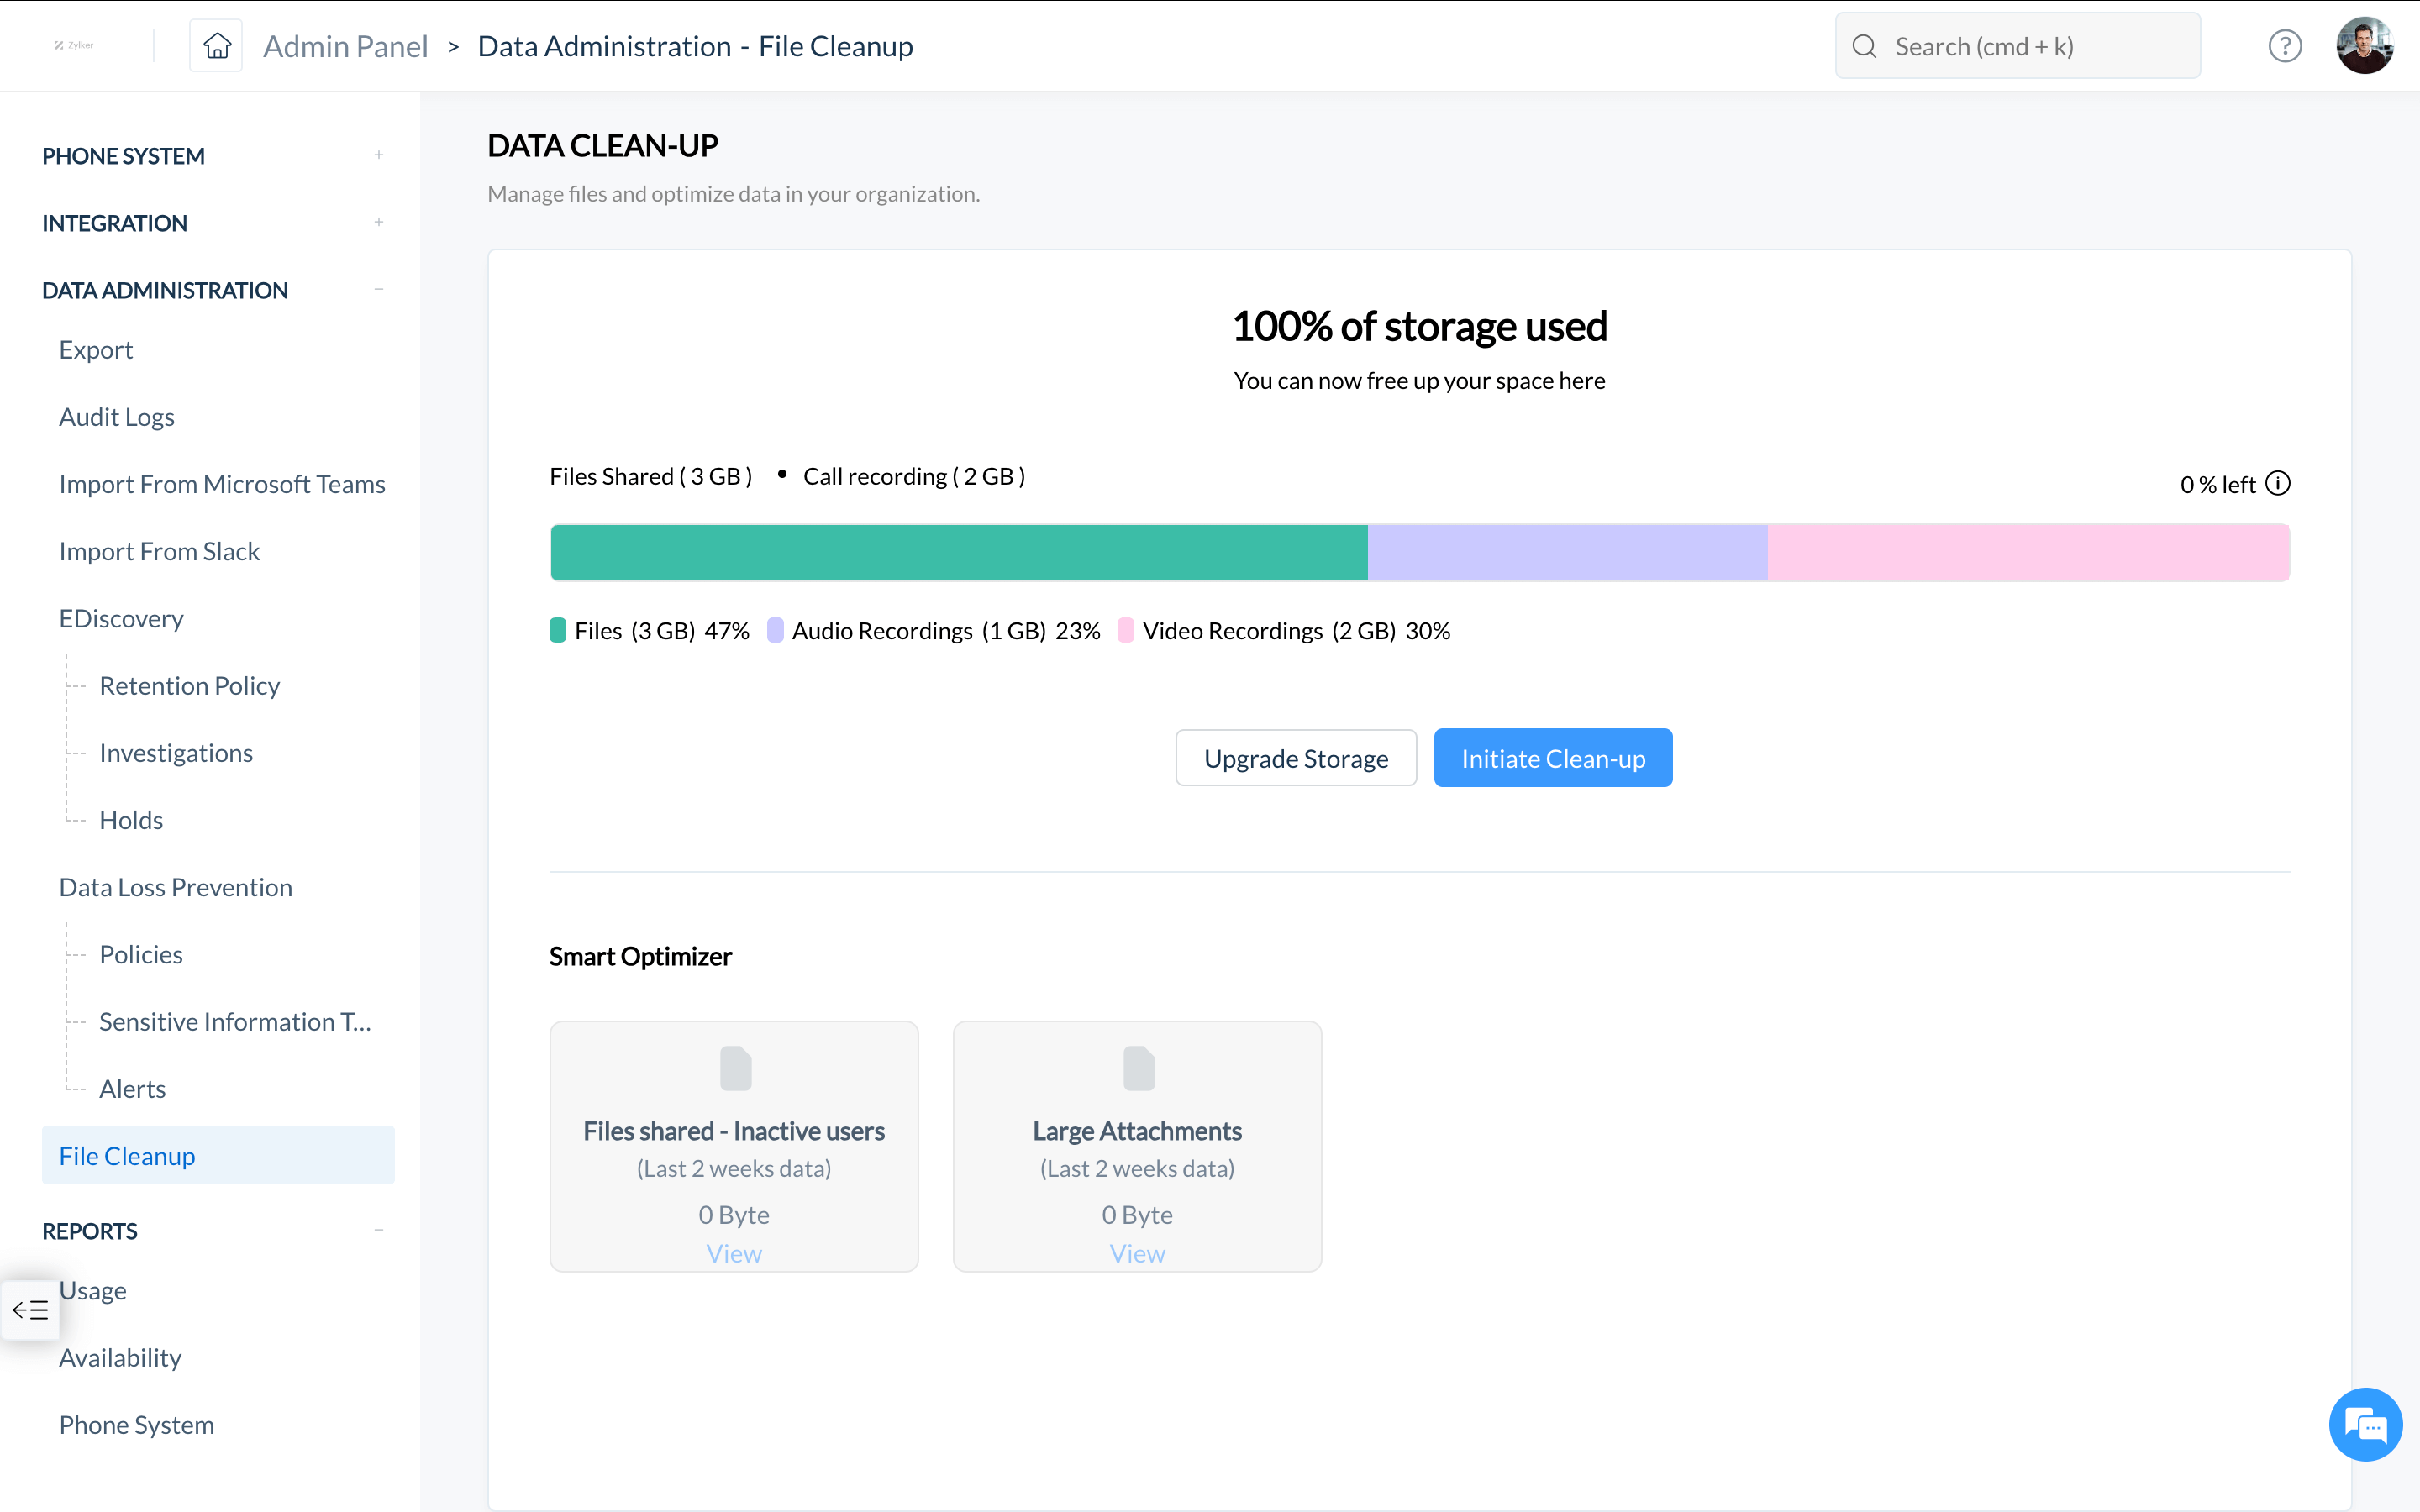
Optimize storage for your organization by removing unnecessary files. To clear storage, go to File Cleanup in the admin panel, and click Initiate Cleanup.
Data loss prevention
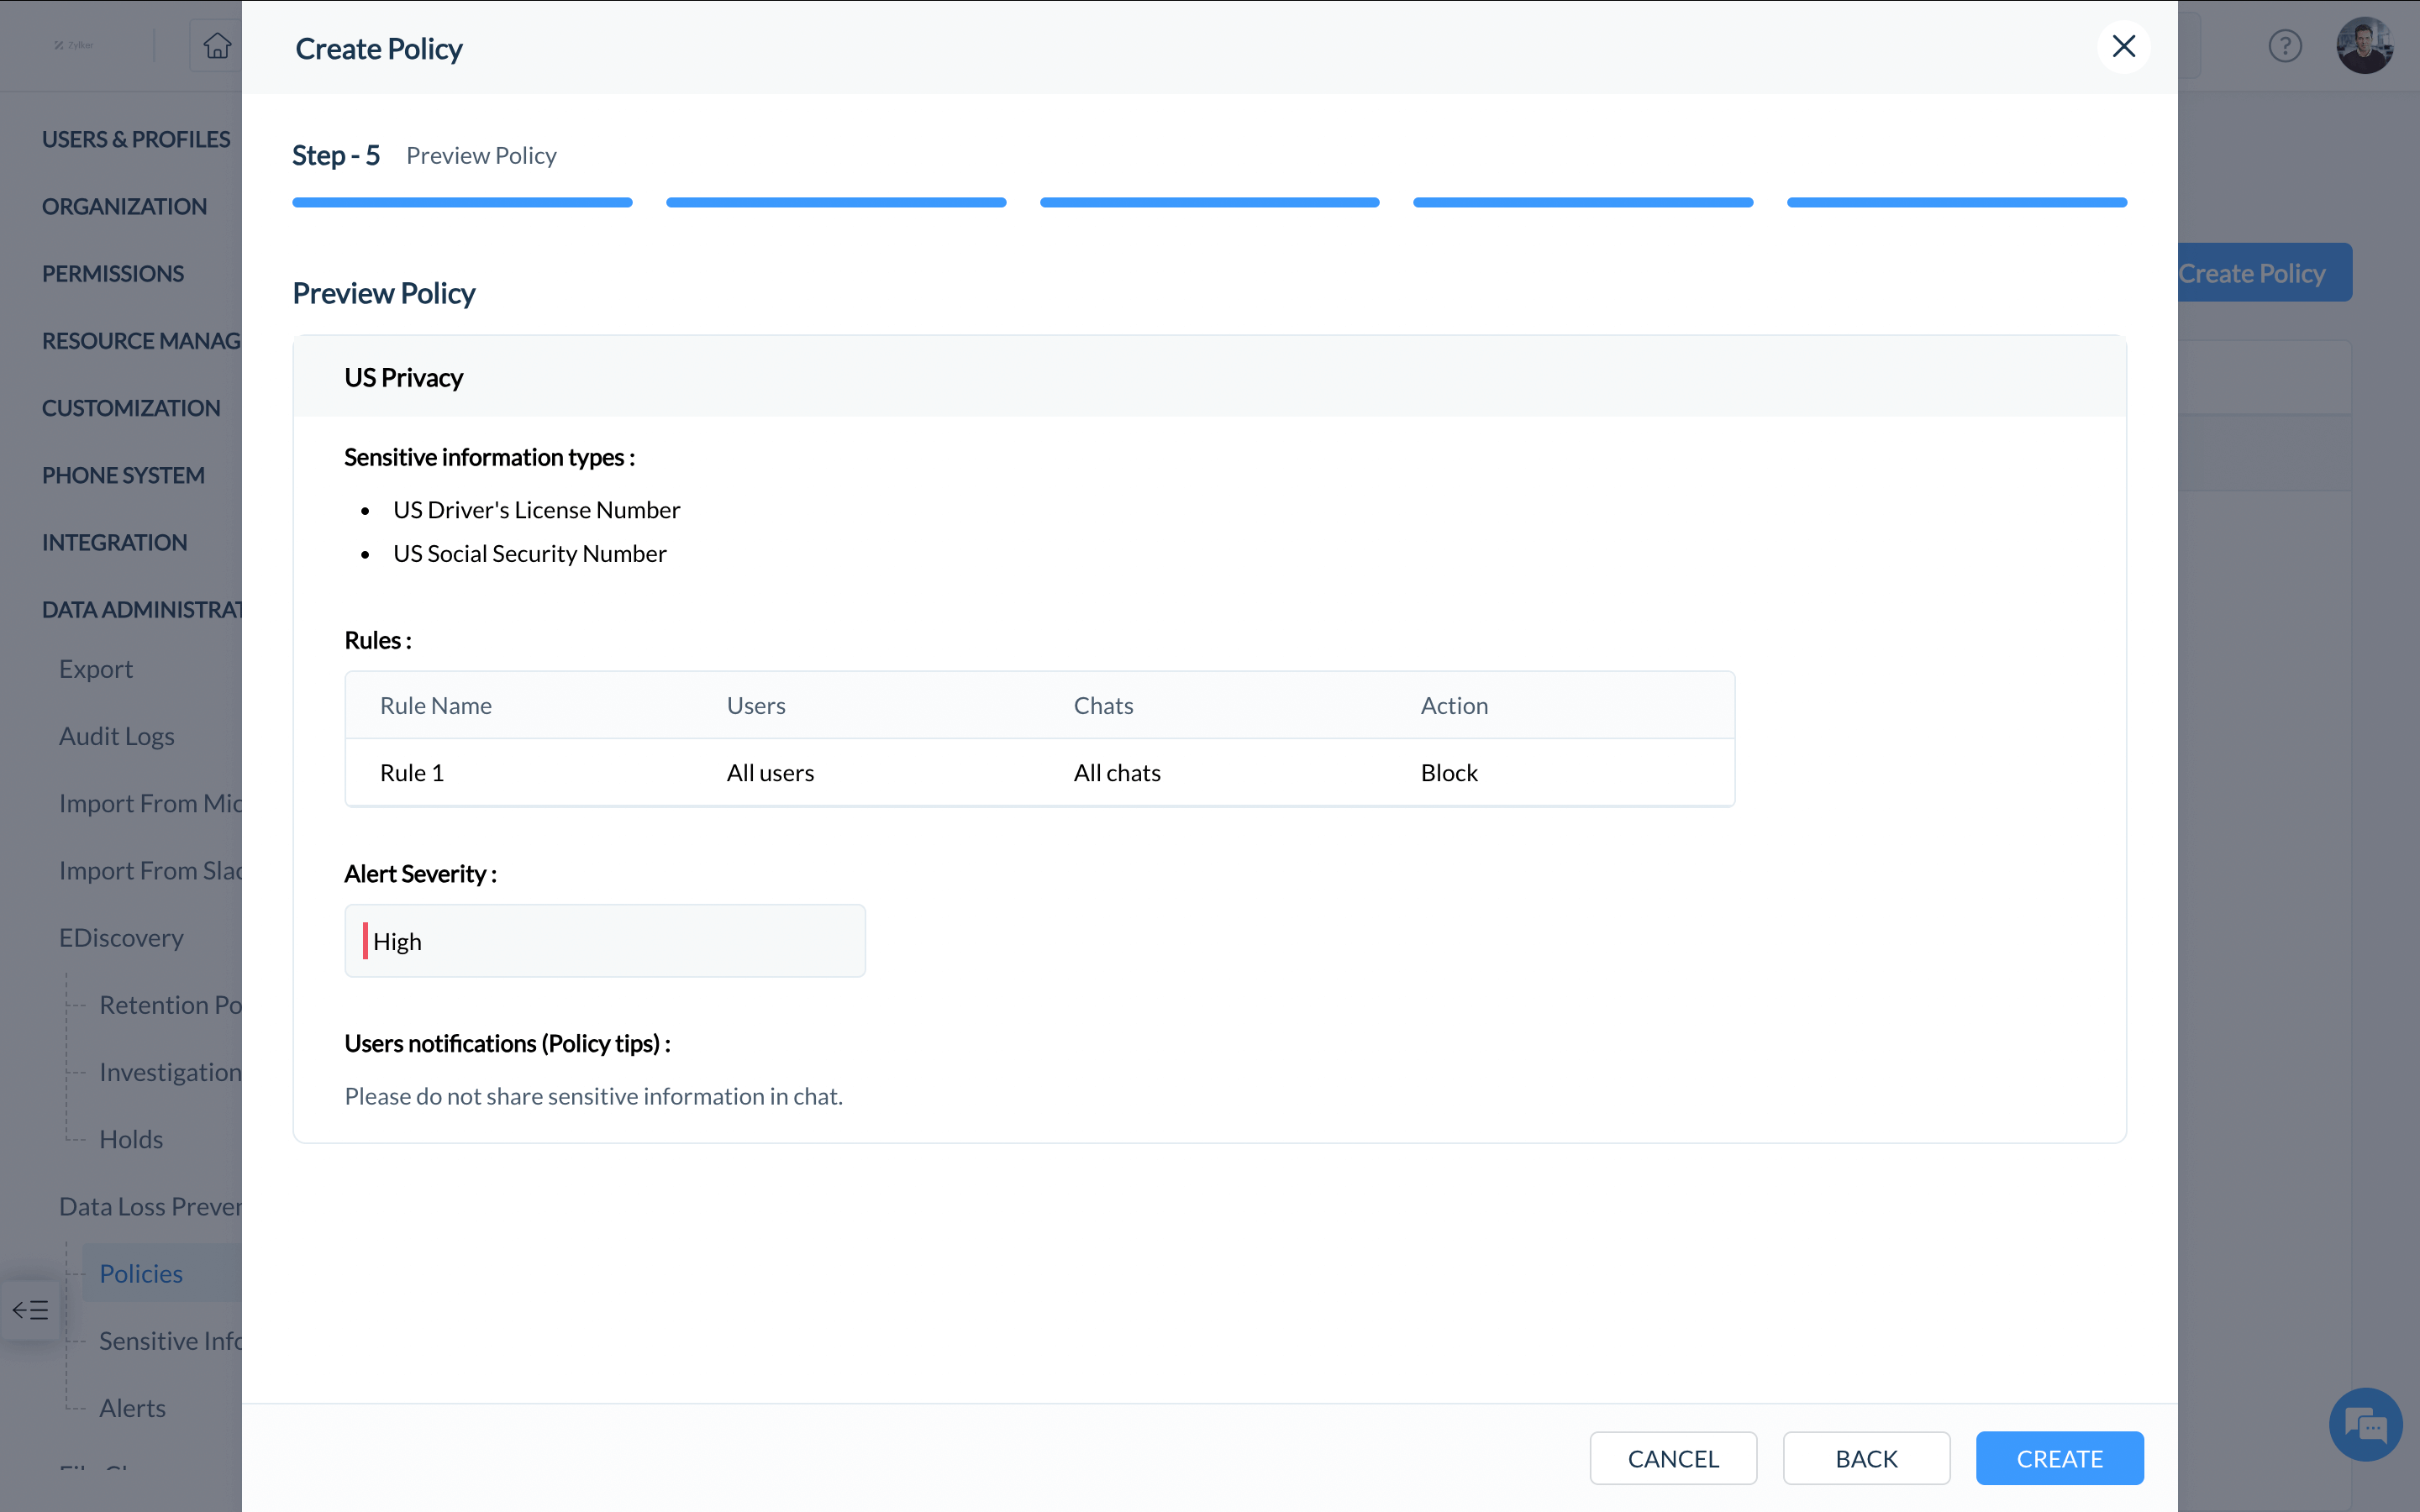
Take control of sensitive information shared in your organization by setting up data loss prevention policies. Go to Policies under Data Loss Prevention in the admin panel and select Create Policy. You can also define sensitive information types and track alerts.
- Add users
- Create teams
- Manage modules
- Create networks
- Define user roles
- Permissions based on user roles
- Manage policies
- Restrict access to specific IPs
- Manage internal apps
- Set assets
- Create custom domain
- Add custom emojis and stickers
- Export data
- View remote work reports
- Meeting branding
- File cleanup
- Data loss prevention


