Canvas for Zoho CRM
Implementation for Zylker Insurance
Zylker Insurance is a leading company with over 100+ insurance products
- Requirement
- Solution
- Instructions
Requirement
Zylker Insurance, a leading insurance company catering a wide range of customer insurance uses Zoho CRM to achieve their data collection and customer relationship goals. Starting with prospect generation, applications, policies, claims, invoices, reporting and referral management, the insurance CRM solution reduces data entry and makes its management effective for insurance agents.
Data dense customer and policy information
While data management is a breeze, accessing specific data isn't. For their CRM, which has multiple modules segregated like Prospects, Policy Holders, Policies, Claims, Commissions, etc, their agents find it hard to fetch specific data.
A few issues faced by teams while dealing with high data density are:
Delay in response time:
As the agent performs calls with customers and collaborates with them, they take a few to several minutes to search for specific crucial info, through the loads of unorganized data. For example, finding the exact amount claimed by the customer for their recent vehicle claim, will take a couple of clicks and scanning, while juggling through the modules.
Miss out critical information:
For any policies, the info related to premium amount, coverage and it's due date are crucial. In a module, with several related data, it is hard for the sales agents to pick out critical info while scanning through the entire page.
Lack of personalized interactions:
For customers to feel special, providing them a personalized experience is the way to go! For this, the agents need to know the exact crucial data sets. For example, contact info, an overview of the policies, loans and claims of a customer will be highly useful to start a more personalized interaction.
In spite of CRM having all the required info, not having the ability to view selected crucial info of a customer's profile at the glance remains to be a continuous challenge.

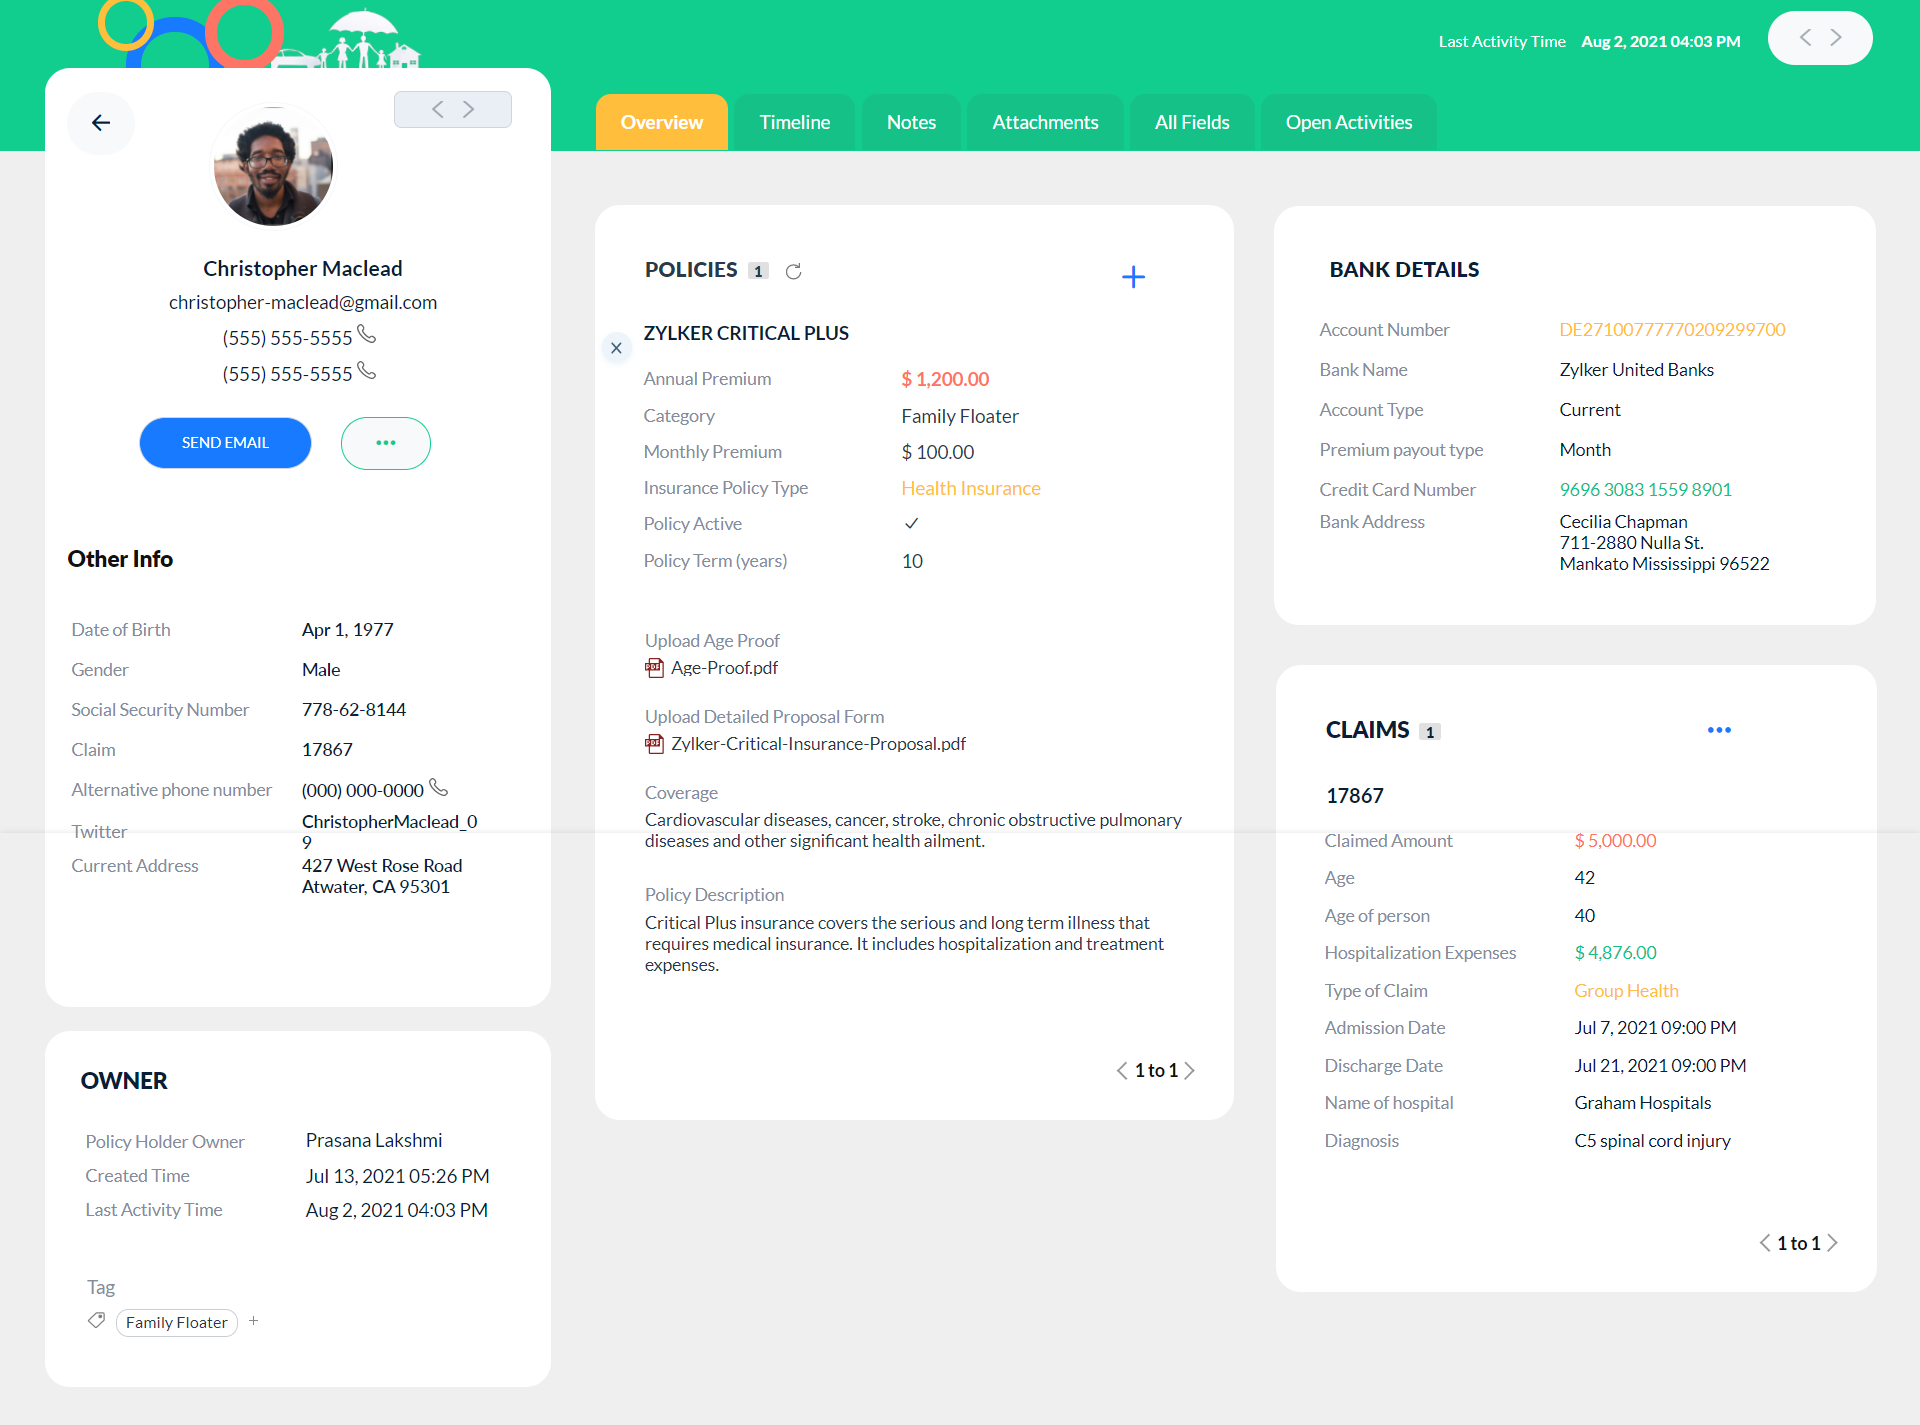
Canvas view for agent-friendly insurance data interface
A strategic way of breaking down the data visualization to smaller and manageable pieces by,
- Adding individual sections and listing out essential data under, Claims, Policies, Contact information, Bank Details, and Owner Info.
- Adding a green background for the page, with icons and images to improve visual impact
- Send Email, More, Back, Add, etc. buttons to navigate quickly and add data.
- Color coding for "Annual Premium" and "Insurance Policy Type" to understand a customer's priority.
Step-by-step instructions to achieve this Canvas look:
Configuring a Canvas template for the Policy Holder [Leads] modules.
Go to Set up > Canvas Builder.
Create a new template by choosing the module and layout.
To create the background:

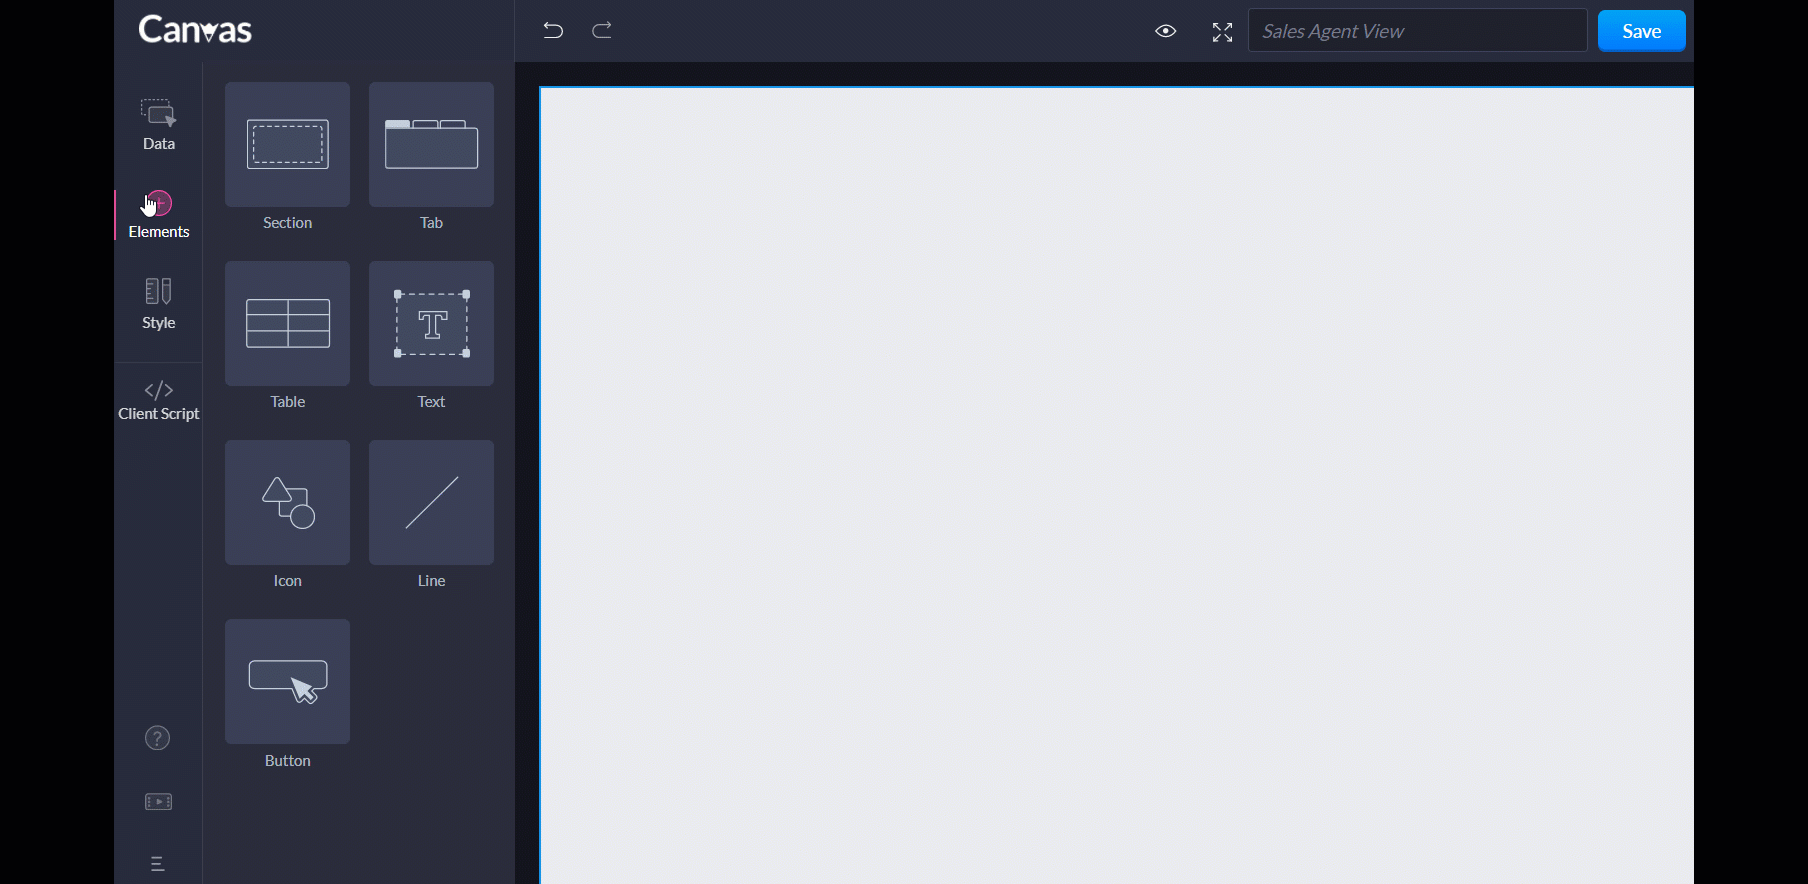
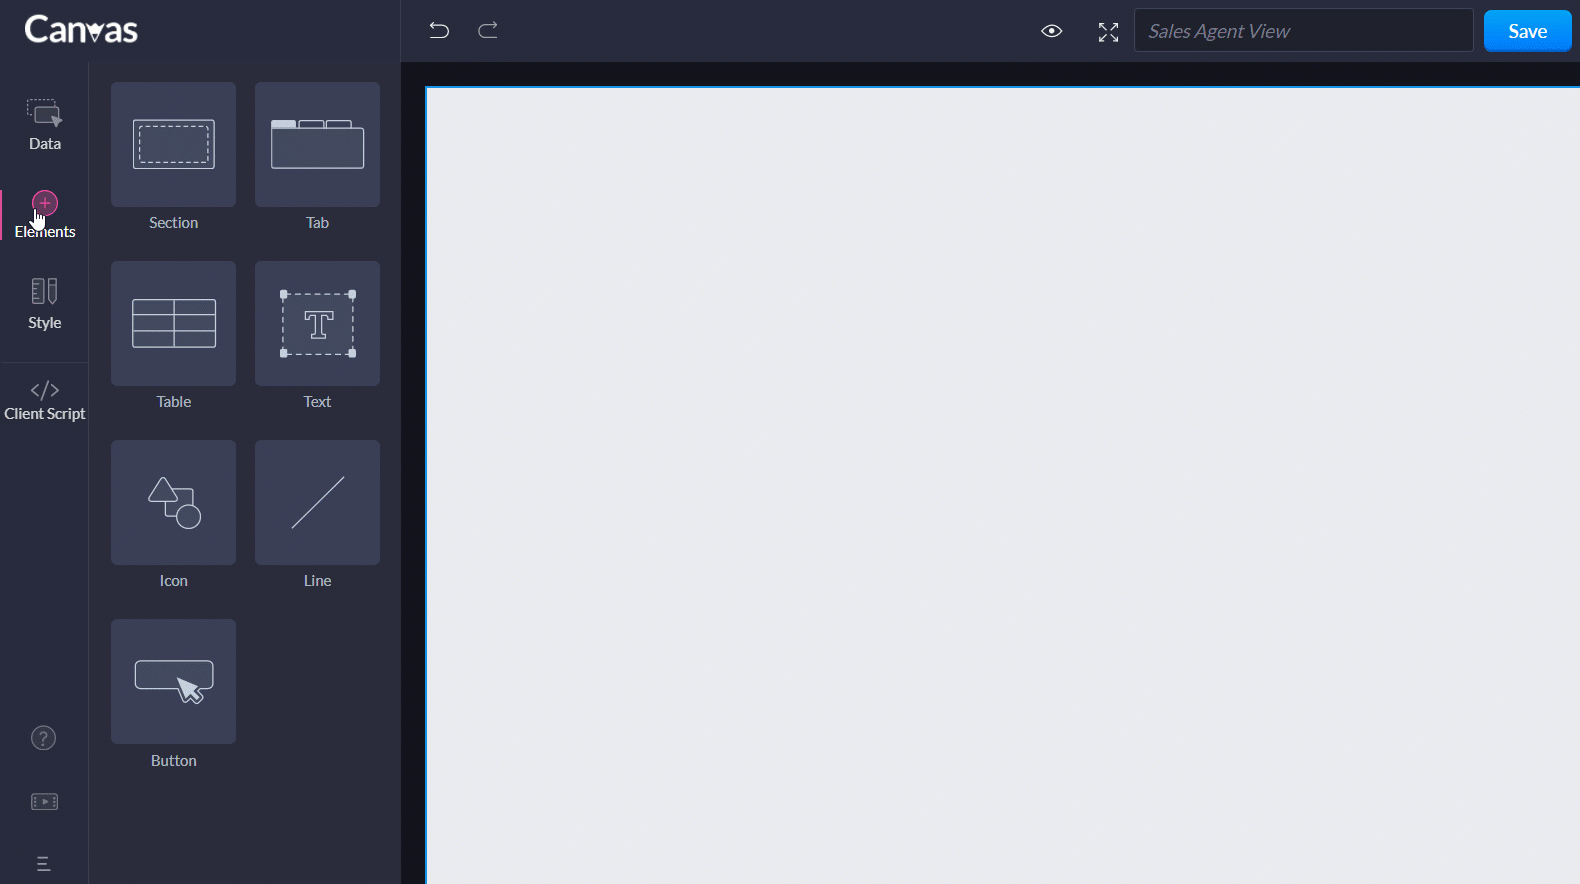
- Click Elements and drag and drop Section.
- Click the section, and in the styling properties that appear on left, add this #11CD8E as the color code.
- Check the image box, and add a url of the logo of your choice.
- Click Elements, and drag and drop Icon to add a few icons.
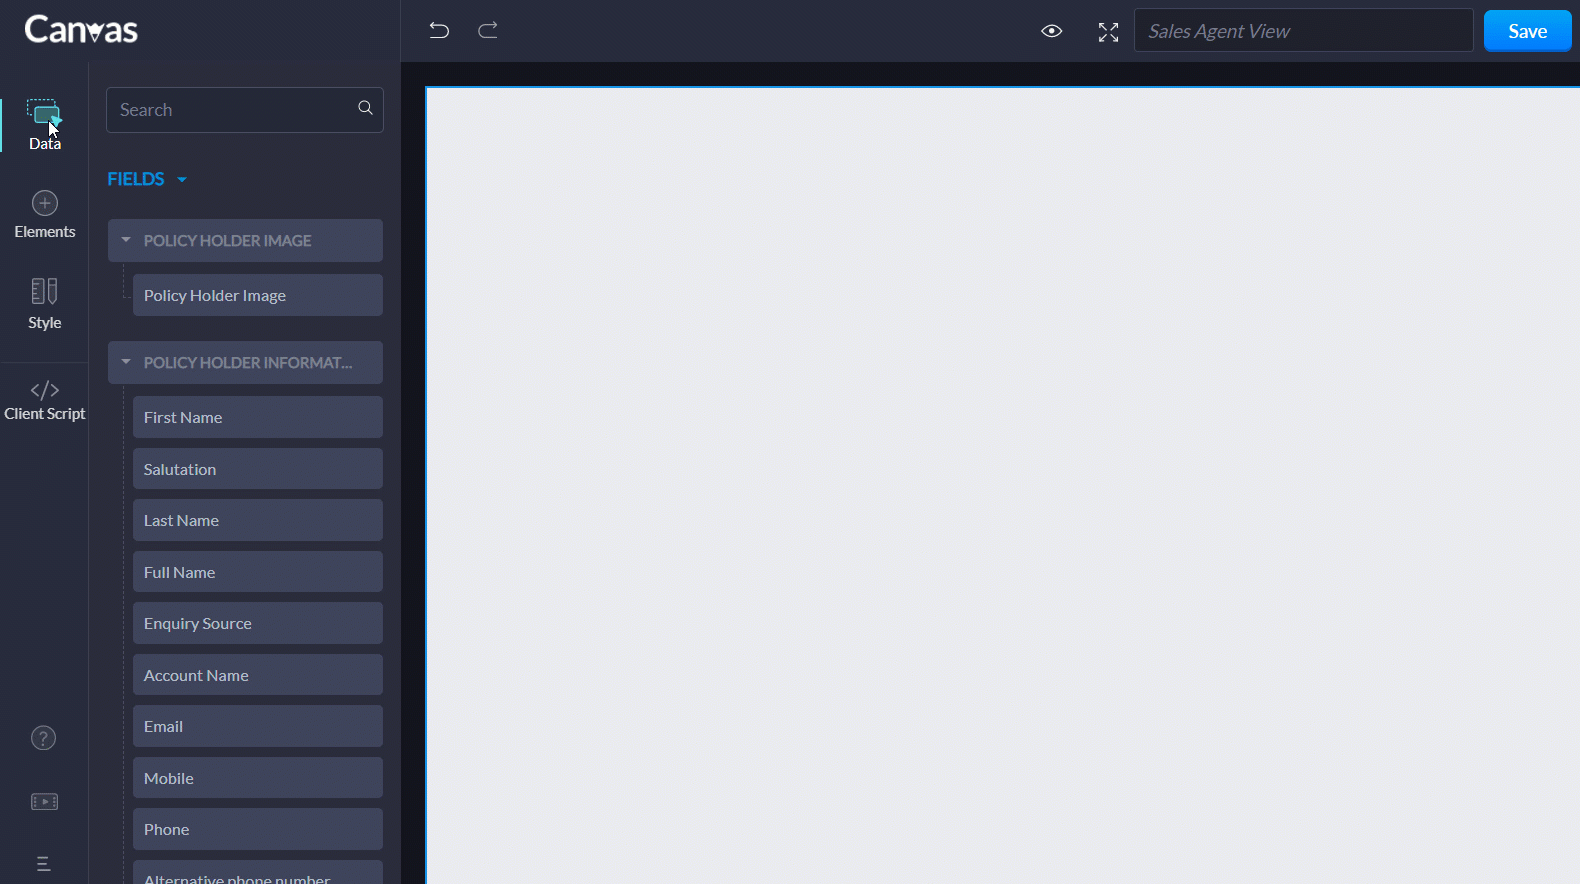
- Click Data and add Last Activity Time field and the Navigator button.
- From Elements, add a Text element and name it as Other info.
To create the contact info section:

- Click Elements and drag a new Section.
- Add the following from the data: Policy Holder Image, Full Name, Phone, Mobile, Date of birth, Gender, Social Security Number, Claim, Alternative Phone Number and Twitter Current Address.
- From Elements, add a Text element and name it as Other info.
- From Data, add the following buttons: Back, More, and Send Email.
To create the owner section:
- From Elements, drag and drop a section.
- Add a text element and name it as Owner.
- From Data, add the following fields: Policy Holder Owner, Created Time, Last Activity Time, and Tag.
To create the consolidated section containing the Overview, Timeline, Notes, Attachments, All Fields and Open Activities:

- From Elements, drag and drop the Tab element.
- In the left styling properties, name it as Overview.
- Click the "+" icon on the tab, and choose Timeline from the dropdown.
- Similarly, add Notes, Attachments, All Fields and Open Activities.
To create the Policies section:

- From Data, add the Policy under Related Lists.
- Tap the Policy section, go to Data and add the Policy Name field.
- Add a new section.
- Add Policy Name field. Include the following fields: Annual Premium Category Monthly Premium Insurance Policy Type Policy Active Policy Term (years).
- Drag and drop the following fields: Upload Age Proof, Upload Detailed Proposal Form, Coverage and Policy Description.
- Click Elements > Icon and add a "+" icon next to Policies.
To create Bank Details section:
- From Elements, drag and drop a section.
- Add a Text field enter Bank Details as the text. Add a table and include the following fields: Account Number, Bank Name, Account Type, Policy, Payout Type, Credit Card Number, and Bank Address.
To design the Claims section:
- From Elements, drag and drop a Section.
- Add a text element and name it as Claims.
- From Data, add the More button and place it on the top part of the section.
- Add Claim Name field and left align it.
- From Elements, add a Table.
- Add the following fields inside it: Claim Number, Claimed Amount, Age, Age of Person, Hospitalization Expense, Type of Claim, Admission Date, Discharge Date, Name of the hospital and Diagnosis.

You are all set now!
Follow these steps to recreate this Canvas look. You can further personalize this by adding fields and sections of your choice. For it, ensure that you have all fields added in prior to the layout you are designing for.