Ways to Share Calendars
In Zoho Calendar, calendars that are created under My Calendars can be entirely managed by the user who creates the calendar, without any restrictions. These calendars can also be shared among friends, colleagues and groups inside the organization by the owner. While sharing a personal calendar, you can either make the calendar public or you can share the calendar privately with your friend/ colleague/ closed group.
Note:
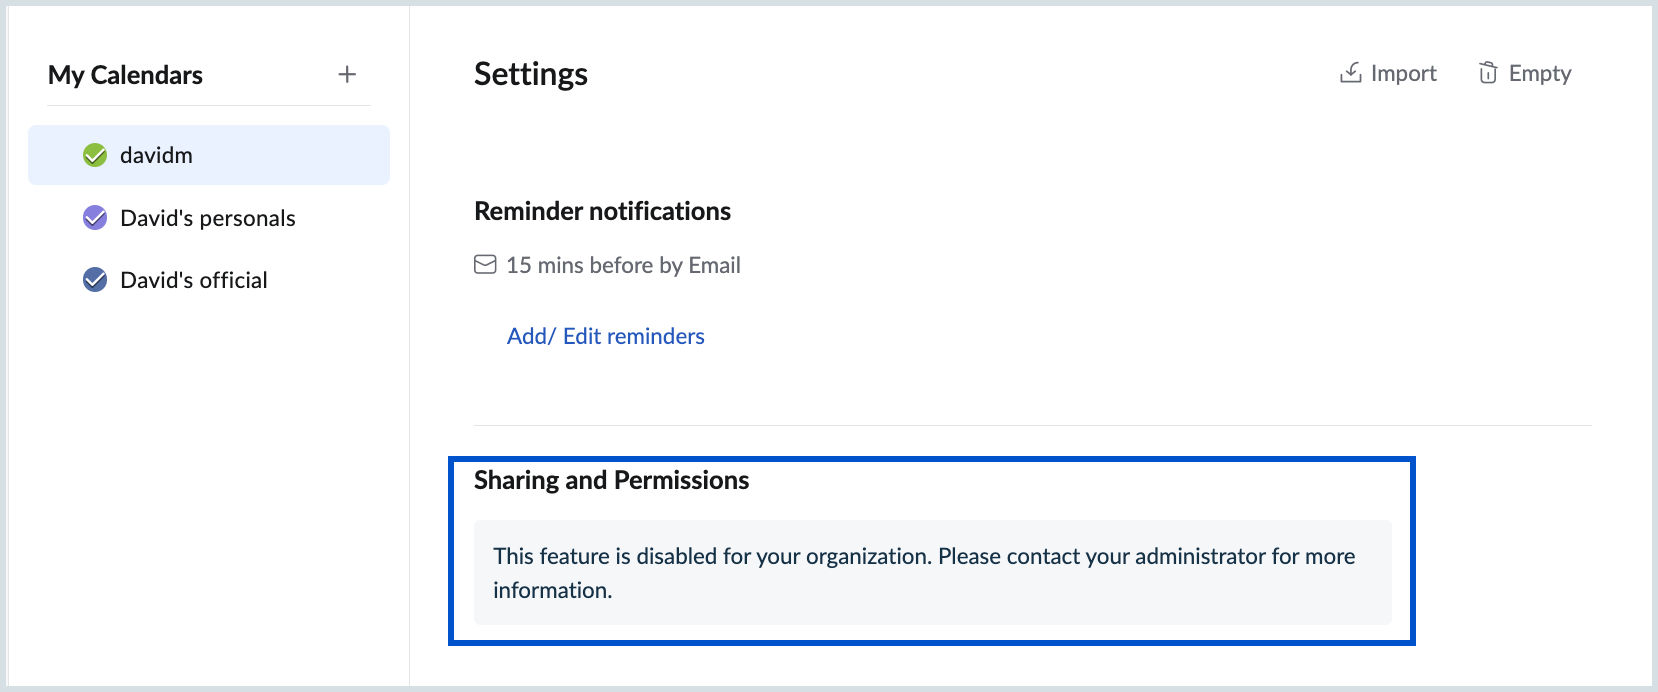
If the administrator of your organization has set permissions for Calendar Sharing, you will have the option to share calendars only with the permissions set by the admin, and you cannot modify those settings. For further clarification or to request adjustments to your sharing permissions, please contact your organization's administrator.
Public Sharing
You can allow others to access your calendar by making the calendar public. Public sharing helps when you need to share your calendar across a wider group. You can restrict others from accessing your calendar information to View only Free/Busy information or View event details. Others cannot make changes or edit events in a public calendar.
Steps to Make a Calendar Public
- Log in to Zoho Calendar.
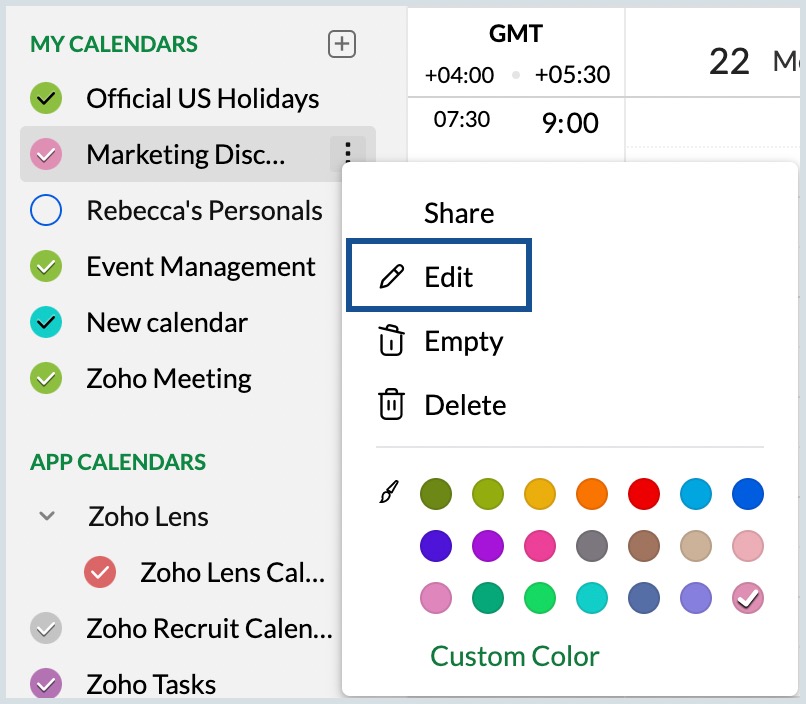
- Right-click the calendar under My Calendars from the left pane of the calendar window and click Edit (or) Go to Settings > Calendar > My Calendars and click on the calendar you want to share publicly.
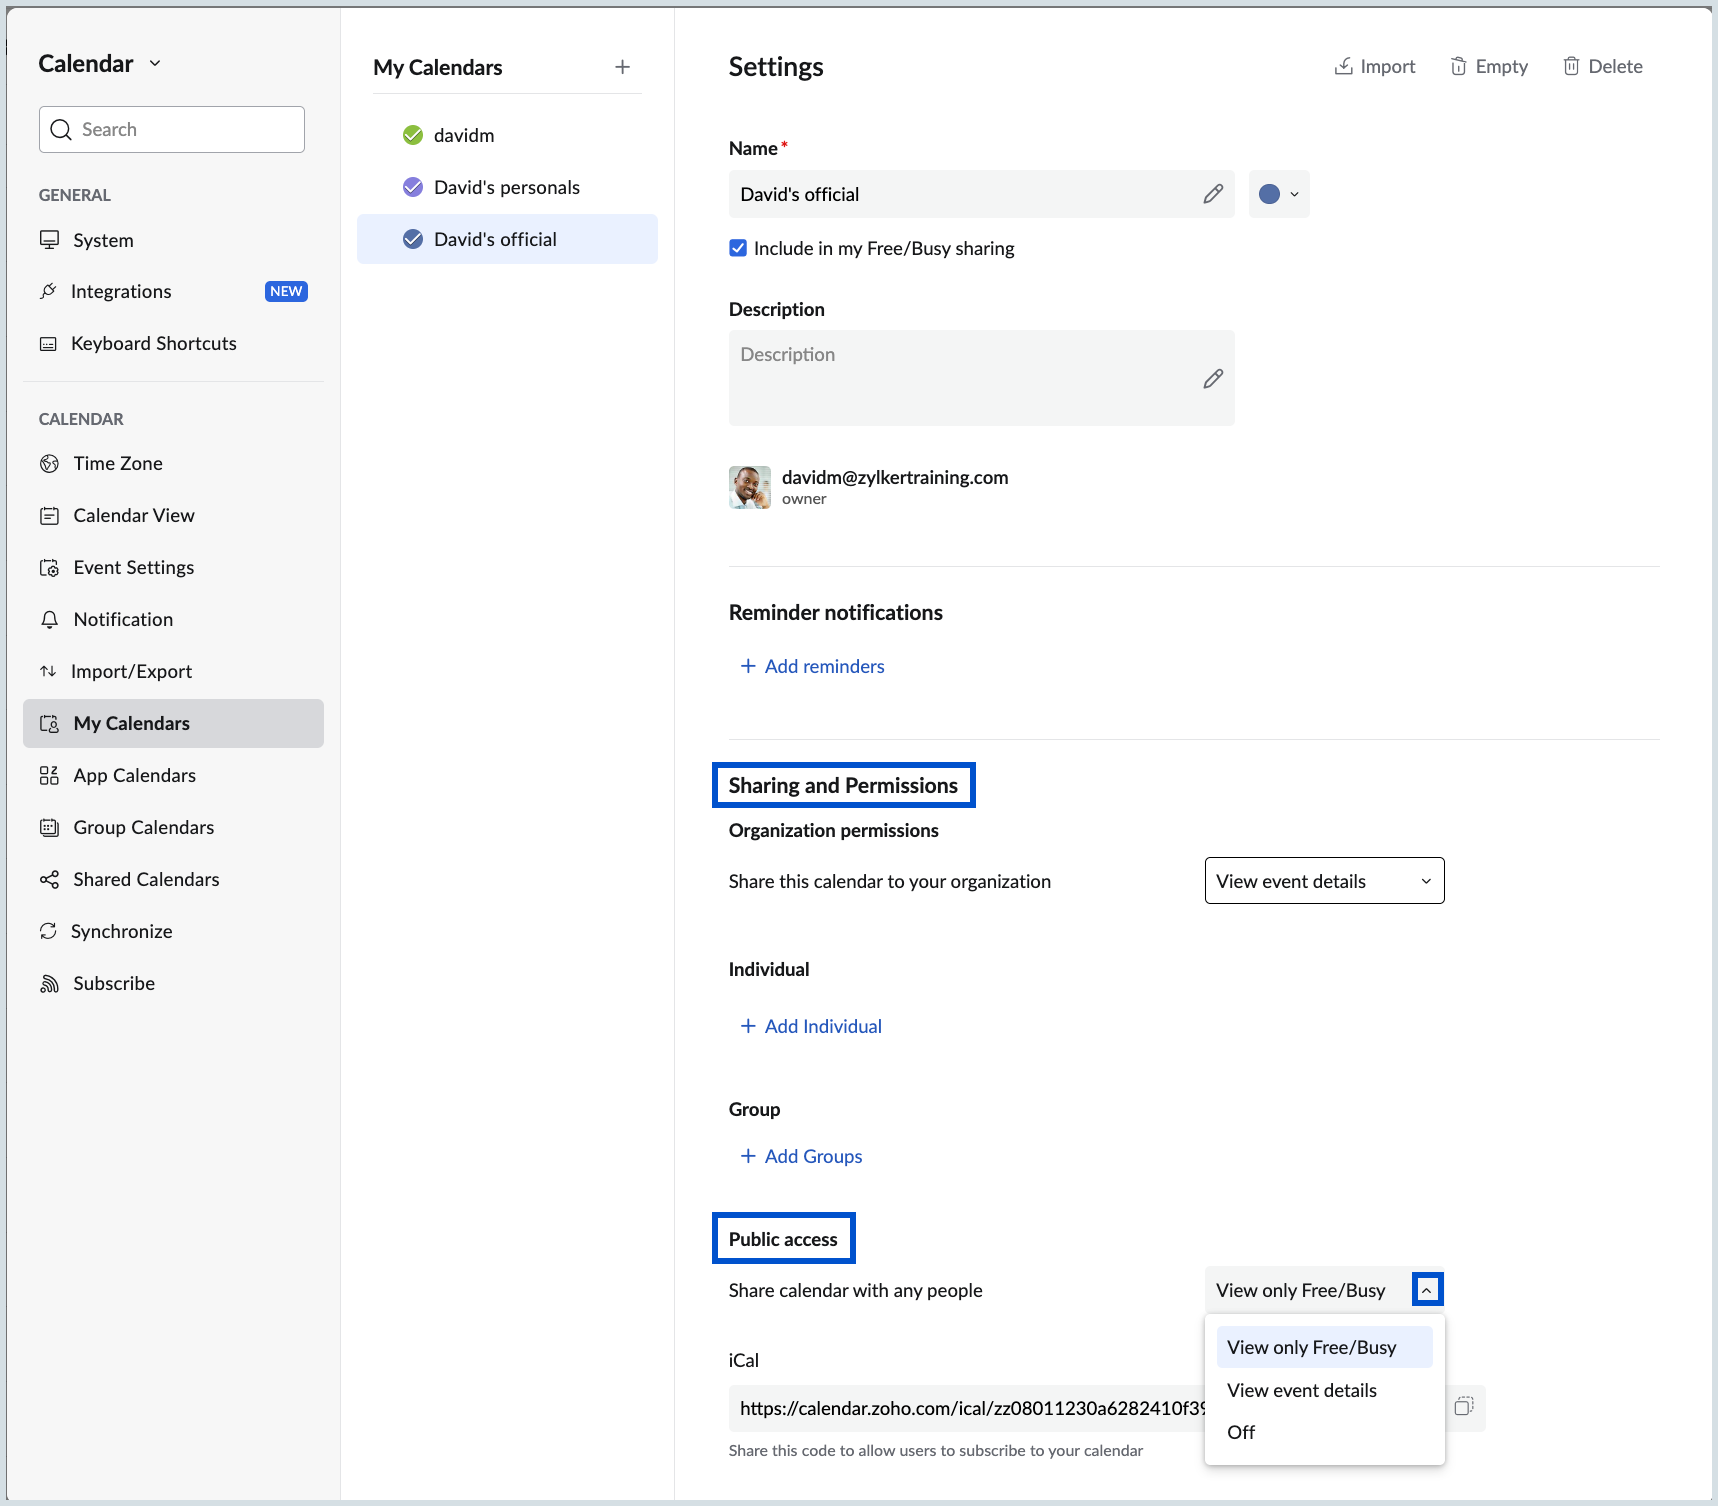
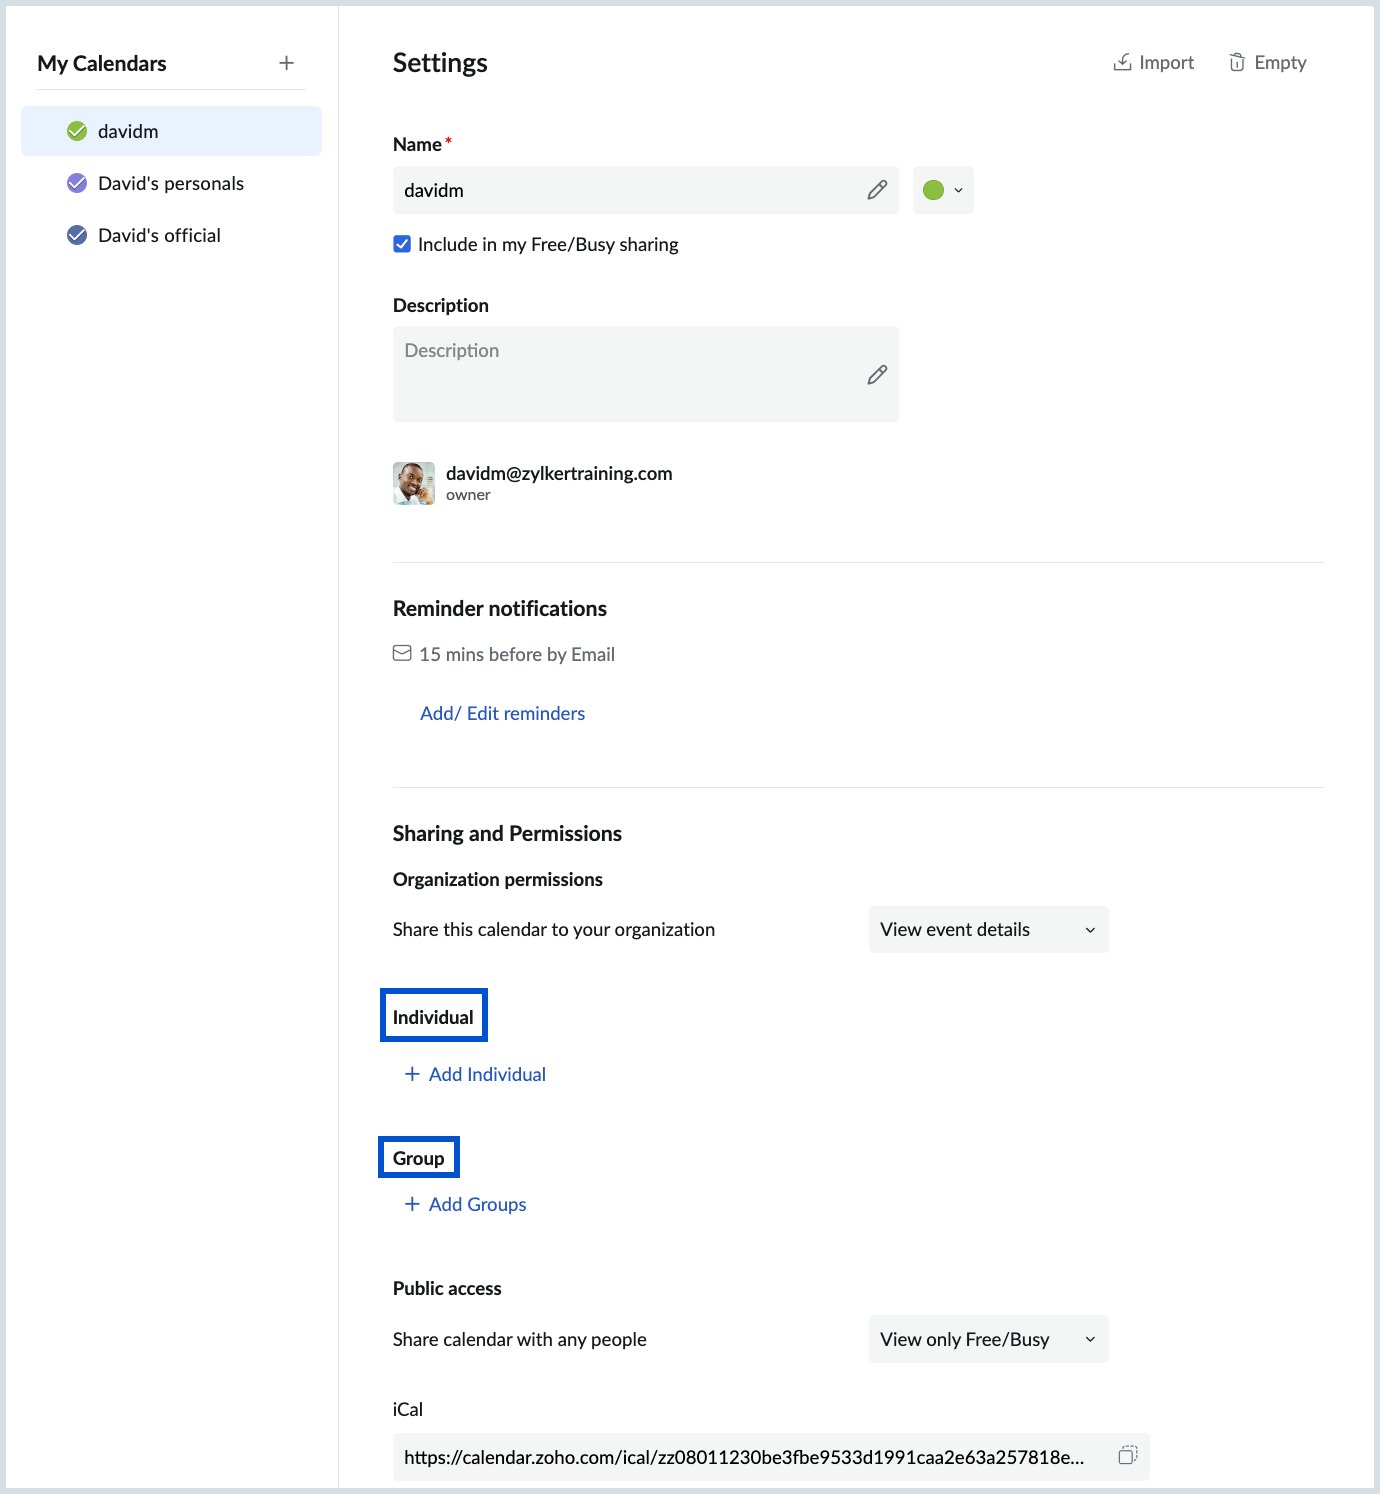
- Under Sharing and permissions > Public access, enable public access for the calendar by selecting either View only Free/Busy and View Event Details from the drop-down.
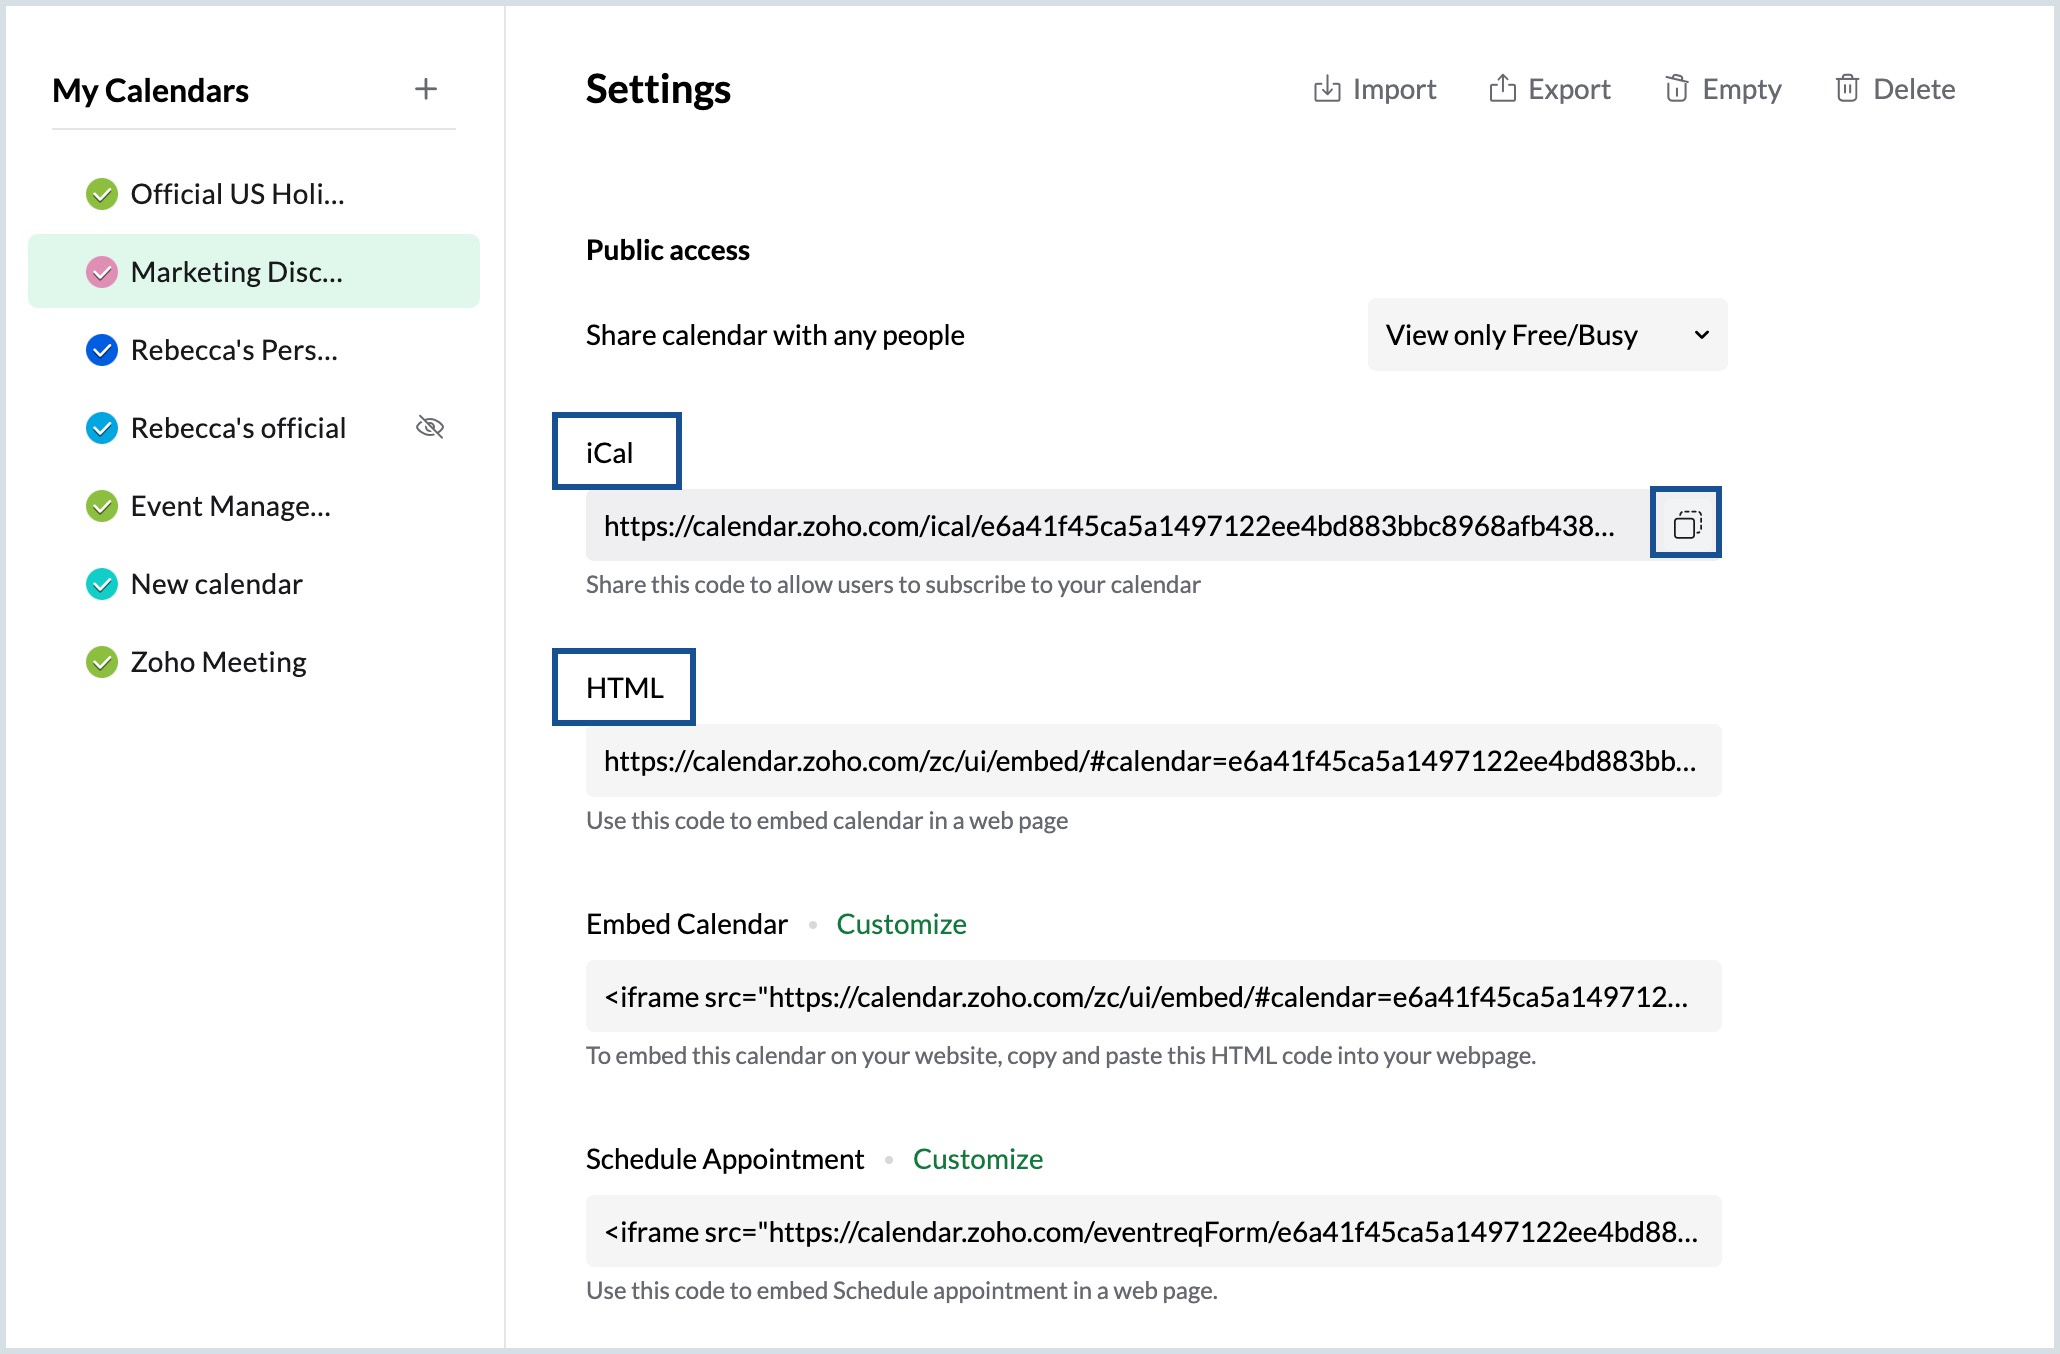
- Click on copy link near iCal or HTML to copy the respective iCal/HTML URL for this public calendar and use it to share the calendar.
- Enter the email address of the individuals or groups under the Mail to option in Public access and click Send to share the calendar link.
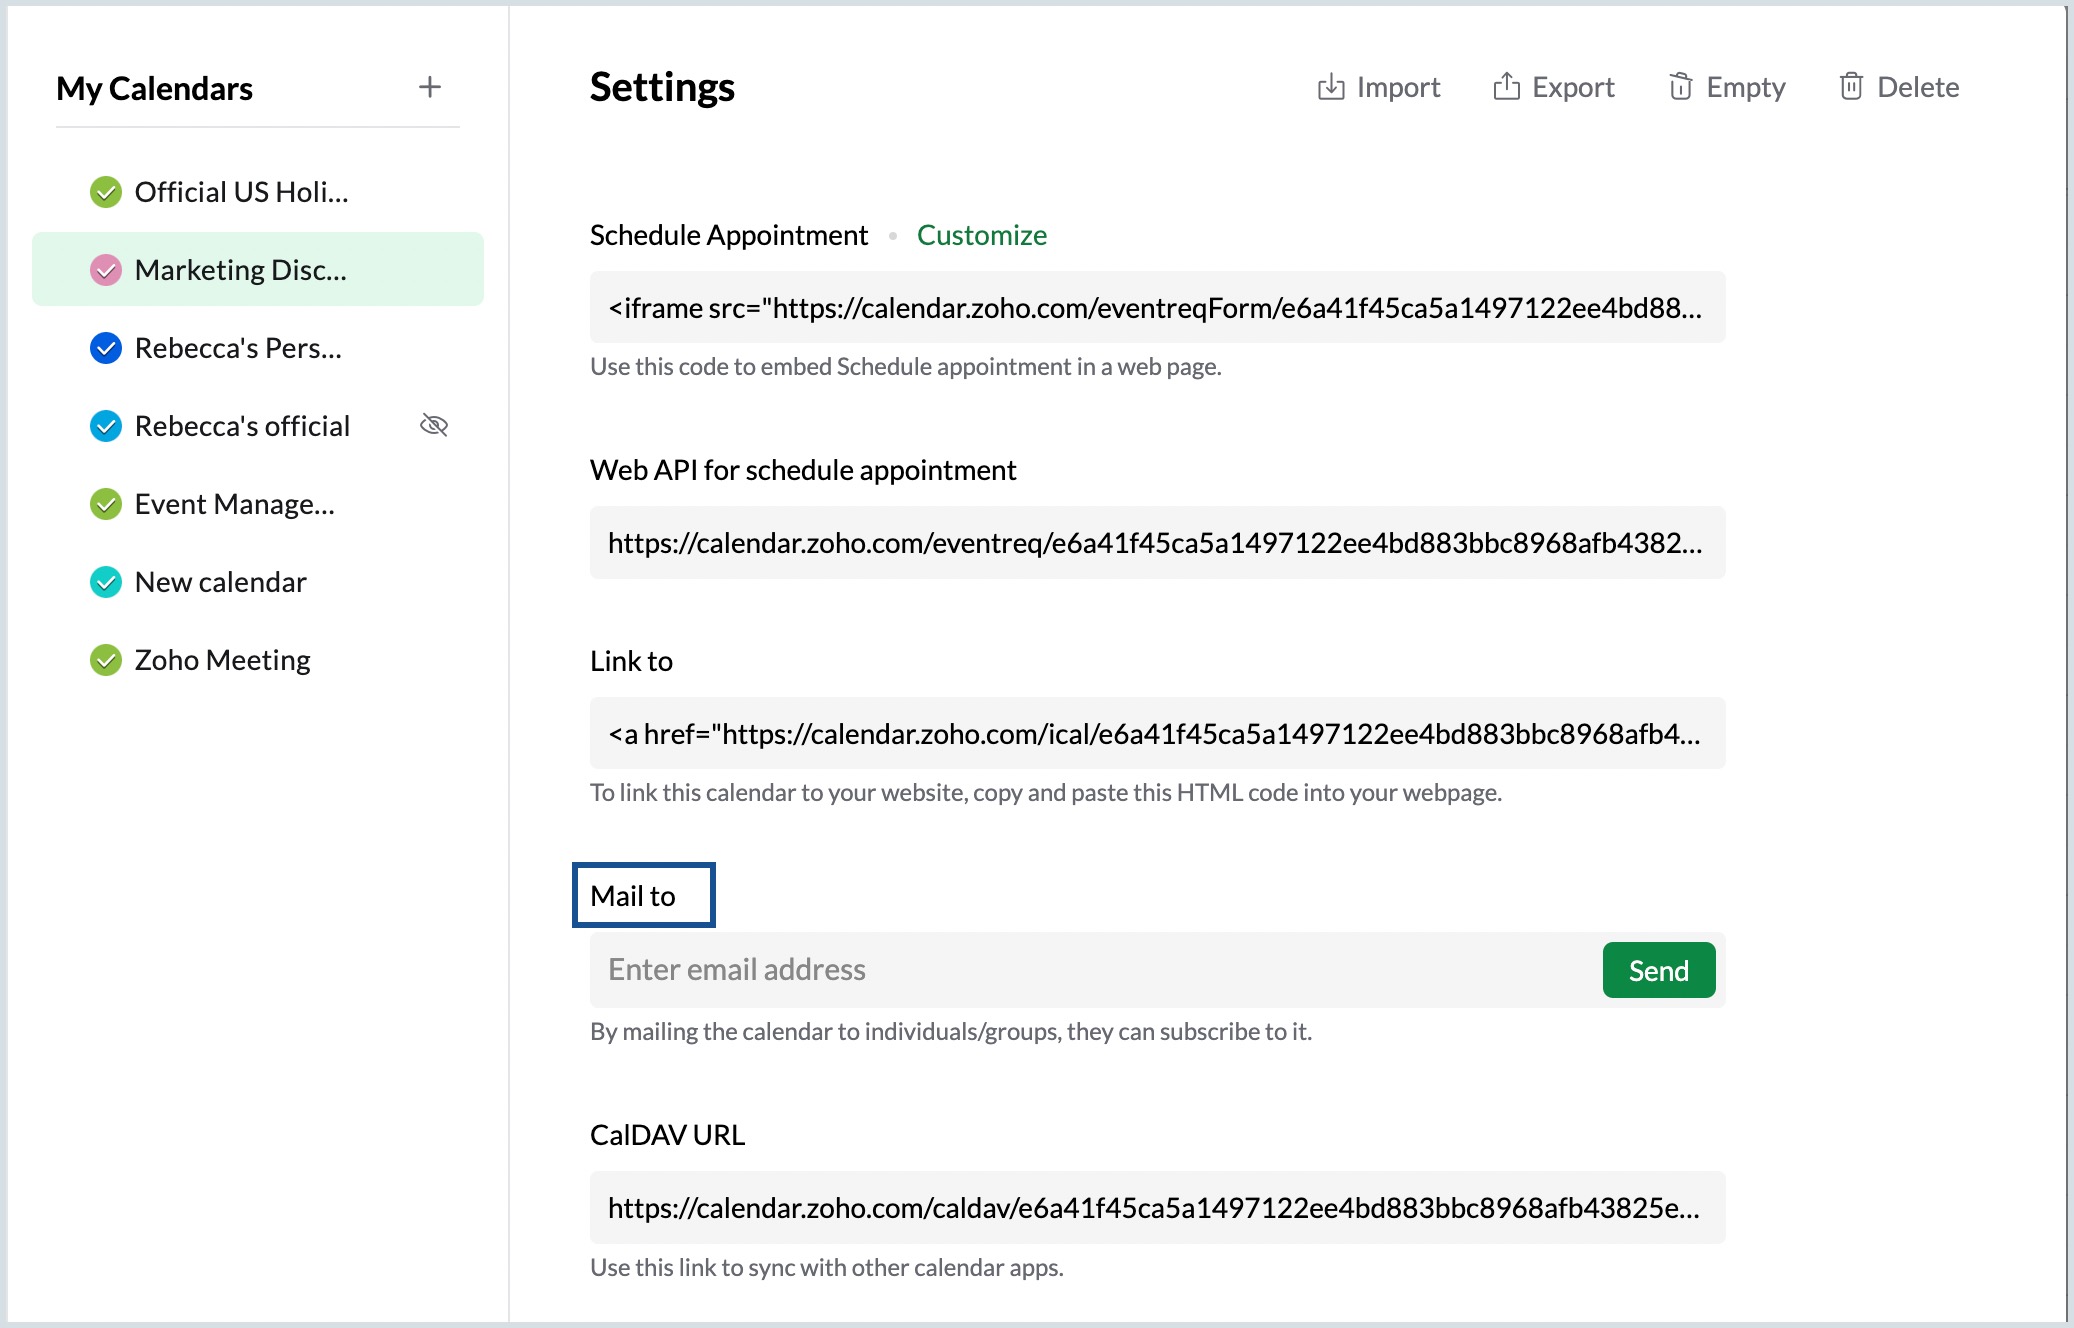
- Once you enter the email ID and send it, the calendar link will be emailed to the respective person/group and they can subscribe to the calendar by clicking on the link.
- Under the Link to option, copy the HTML code of the calendar and embed this calendar in your website.
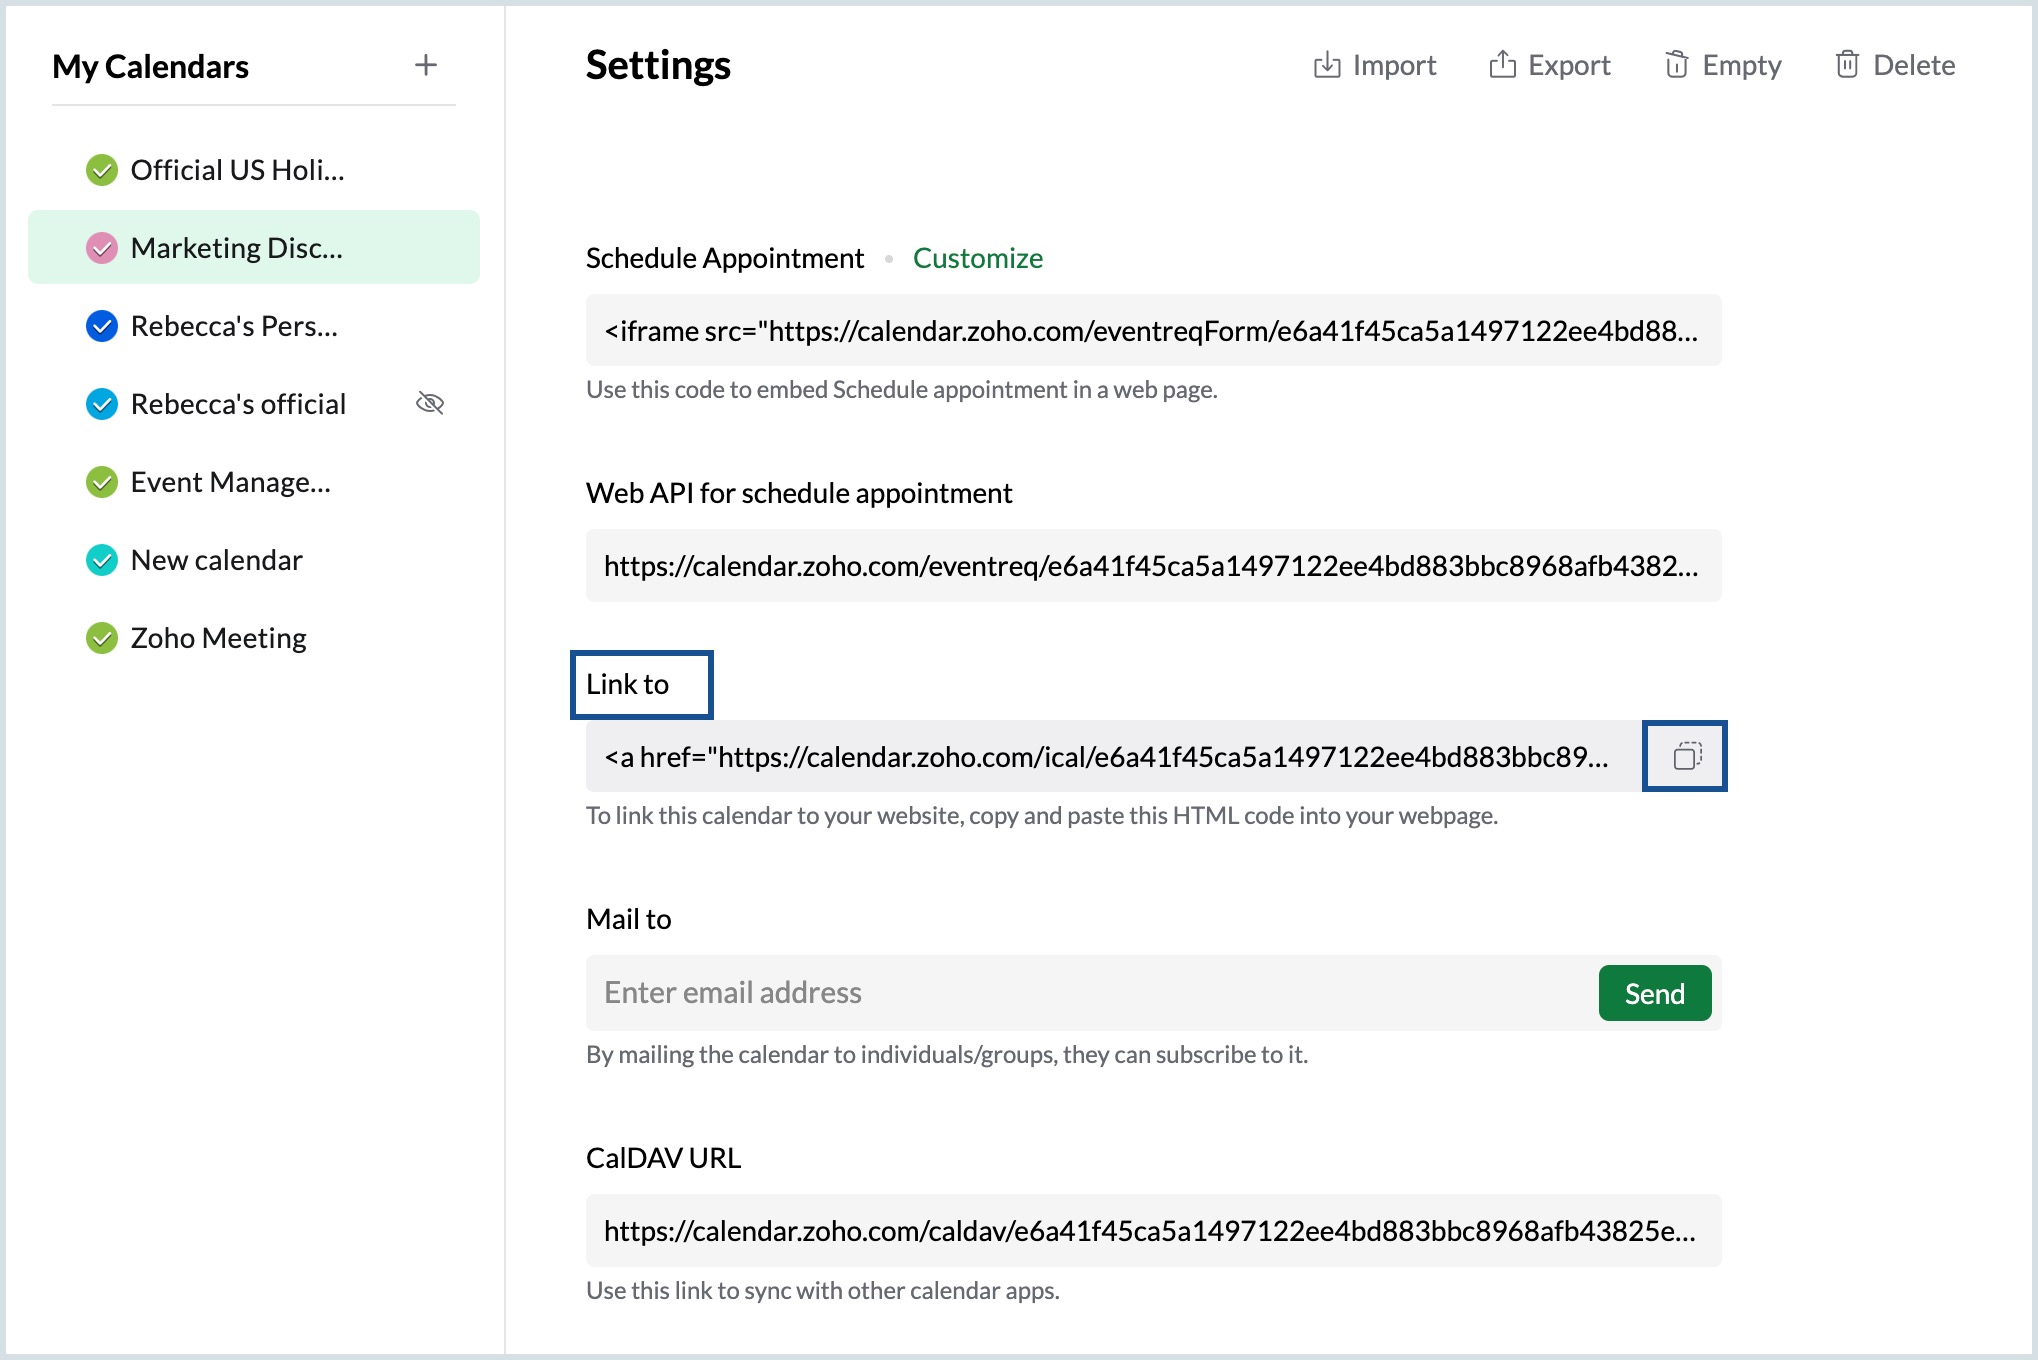
- Using the Embed calendar button, the user can subscribe to the calendar embedded in the website. The calendar will be embedded as a button on the website.
Note:
- The user can access the calendar URL sent via Mail To and linked via Link To only when the calendar is public. (i.e., The Enable public access check-box under the Public calendar options is checked.)
- In both public and private HTML URL sharing, you can choose the calendar view from Day/ Week/ Work/ Month view using the drop-down option available in the top right corner.
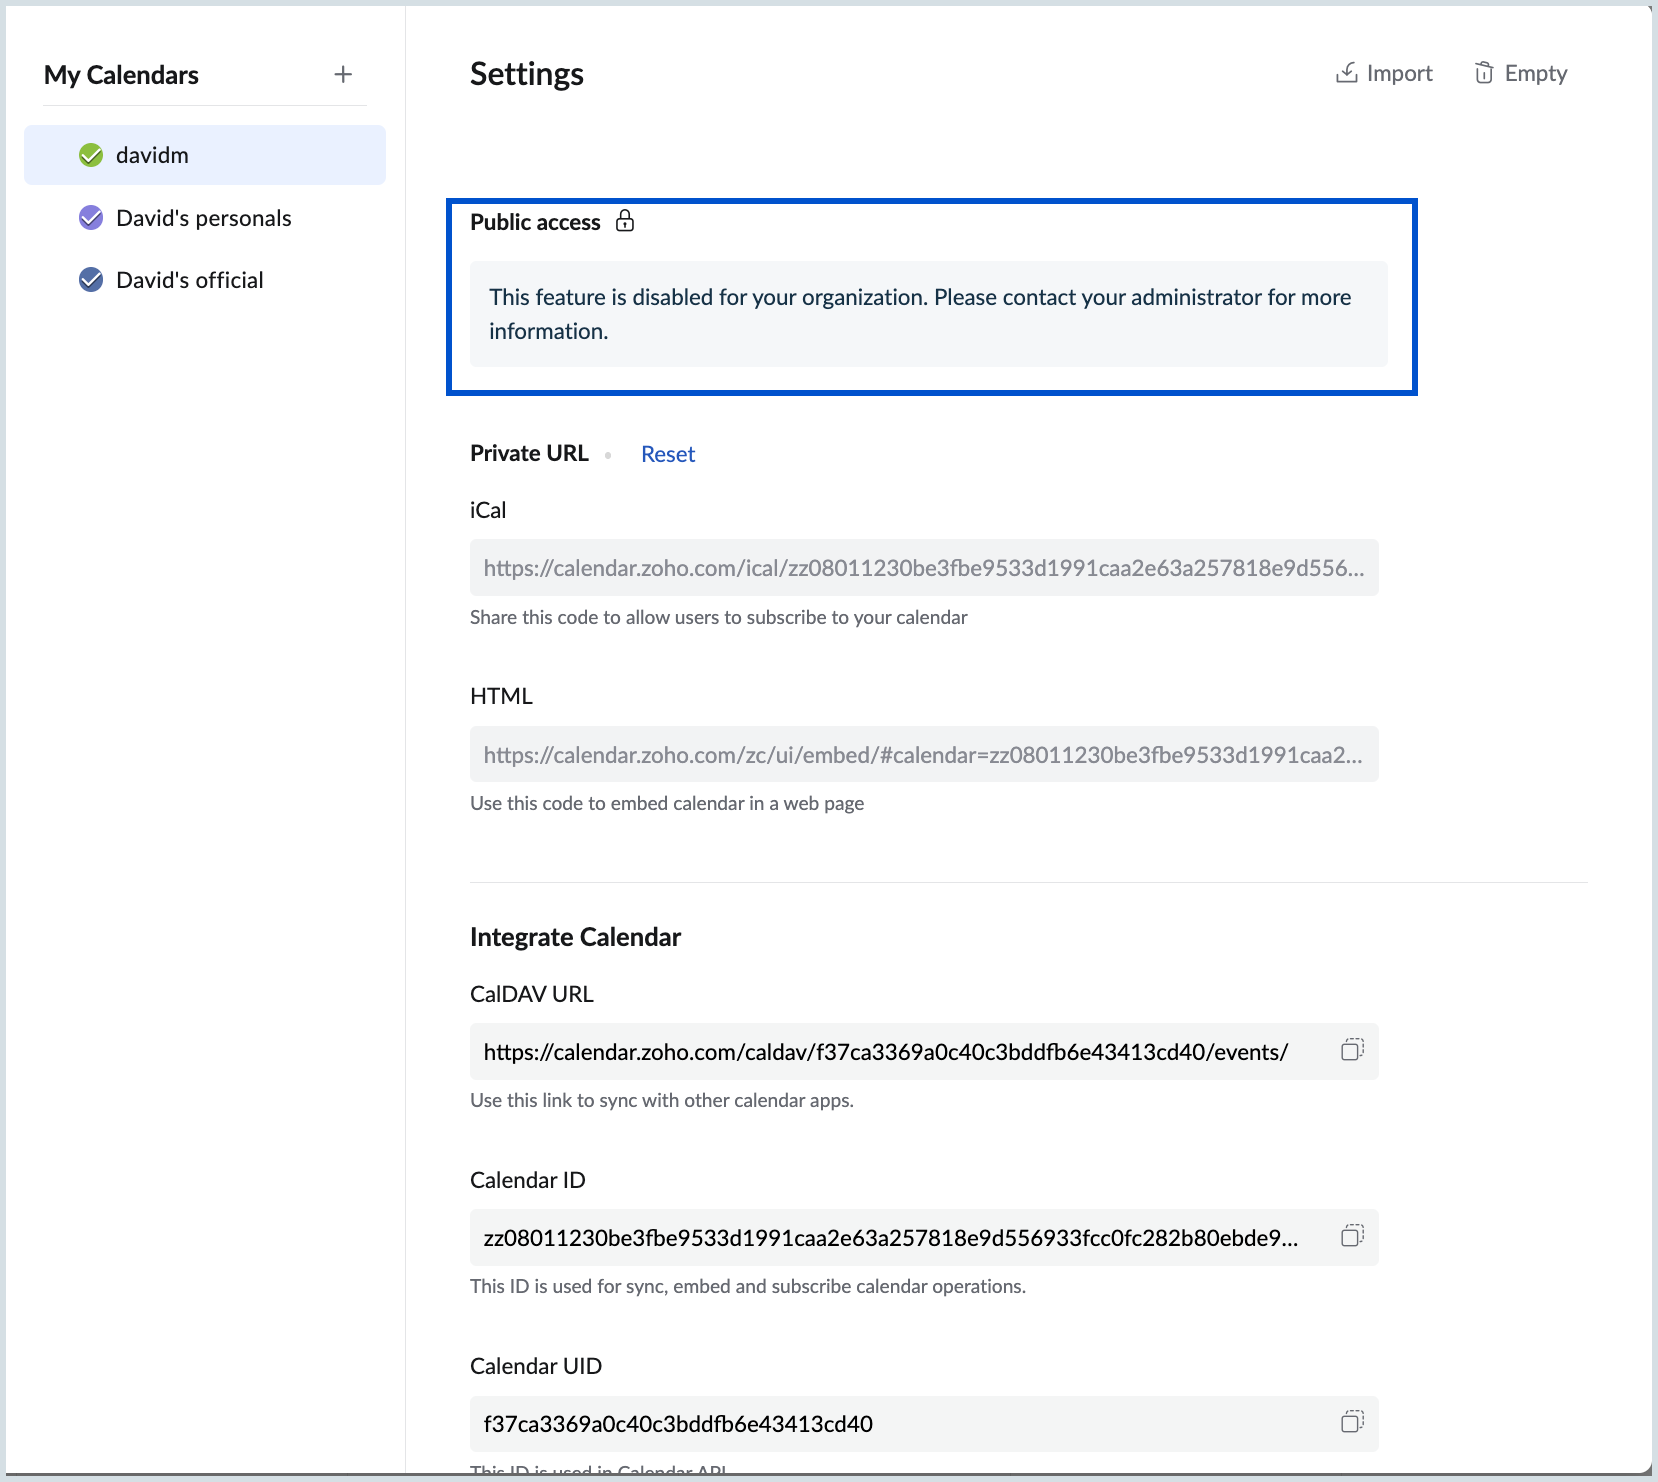
- Public access will be disabled if your administrator has restricted this feature for your organization. For any changes to your public sharing permissions, please contact your administrator.
Organization Sharing
You can share your calendar with all the members of your organization using the Share with org option. When you enable org sharing for a particular personal calendar, the shared personal calendar will be available for your org members. The members can subscribe to this calendar and it will be added to their list.
Steps to enable org sharing for your calendar
- Log in to Zoho Calendar.
- Right-click the calendar under My Calendars from the left pane of the calendar window and click Edit (or) Go to Settings > Calendar > My Calendars and click on the calendar you want to share with your organization.
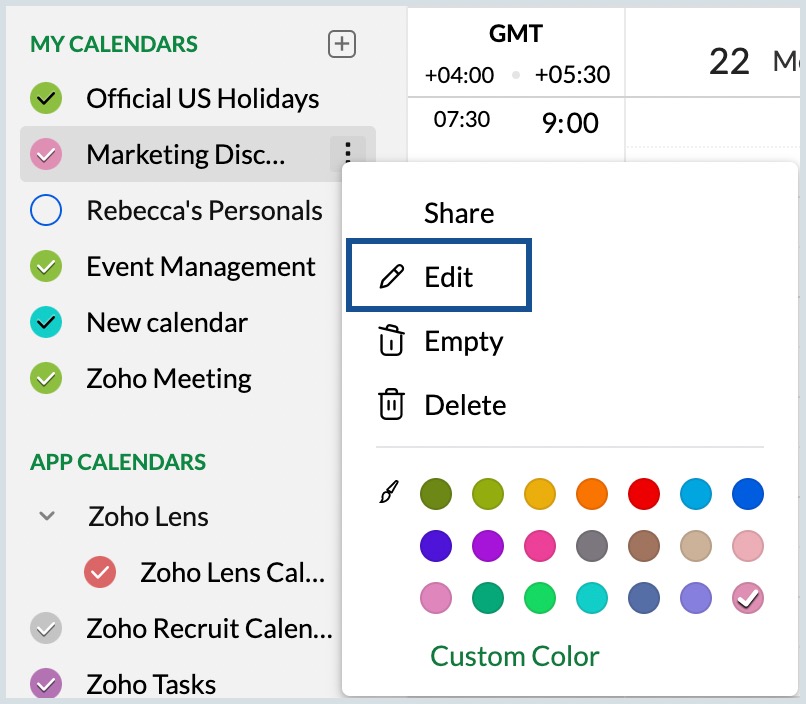
- Under Sharing and permissions > Organization permissions, Click on Share this calendar to your organization drop-down and Select permission for your org sharing between View only Free/Busy or View Event Details.
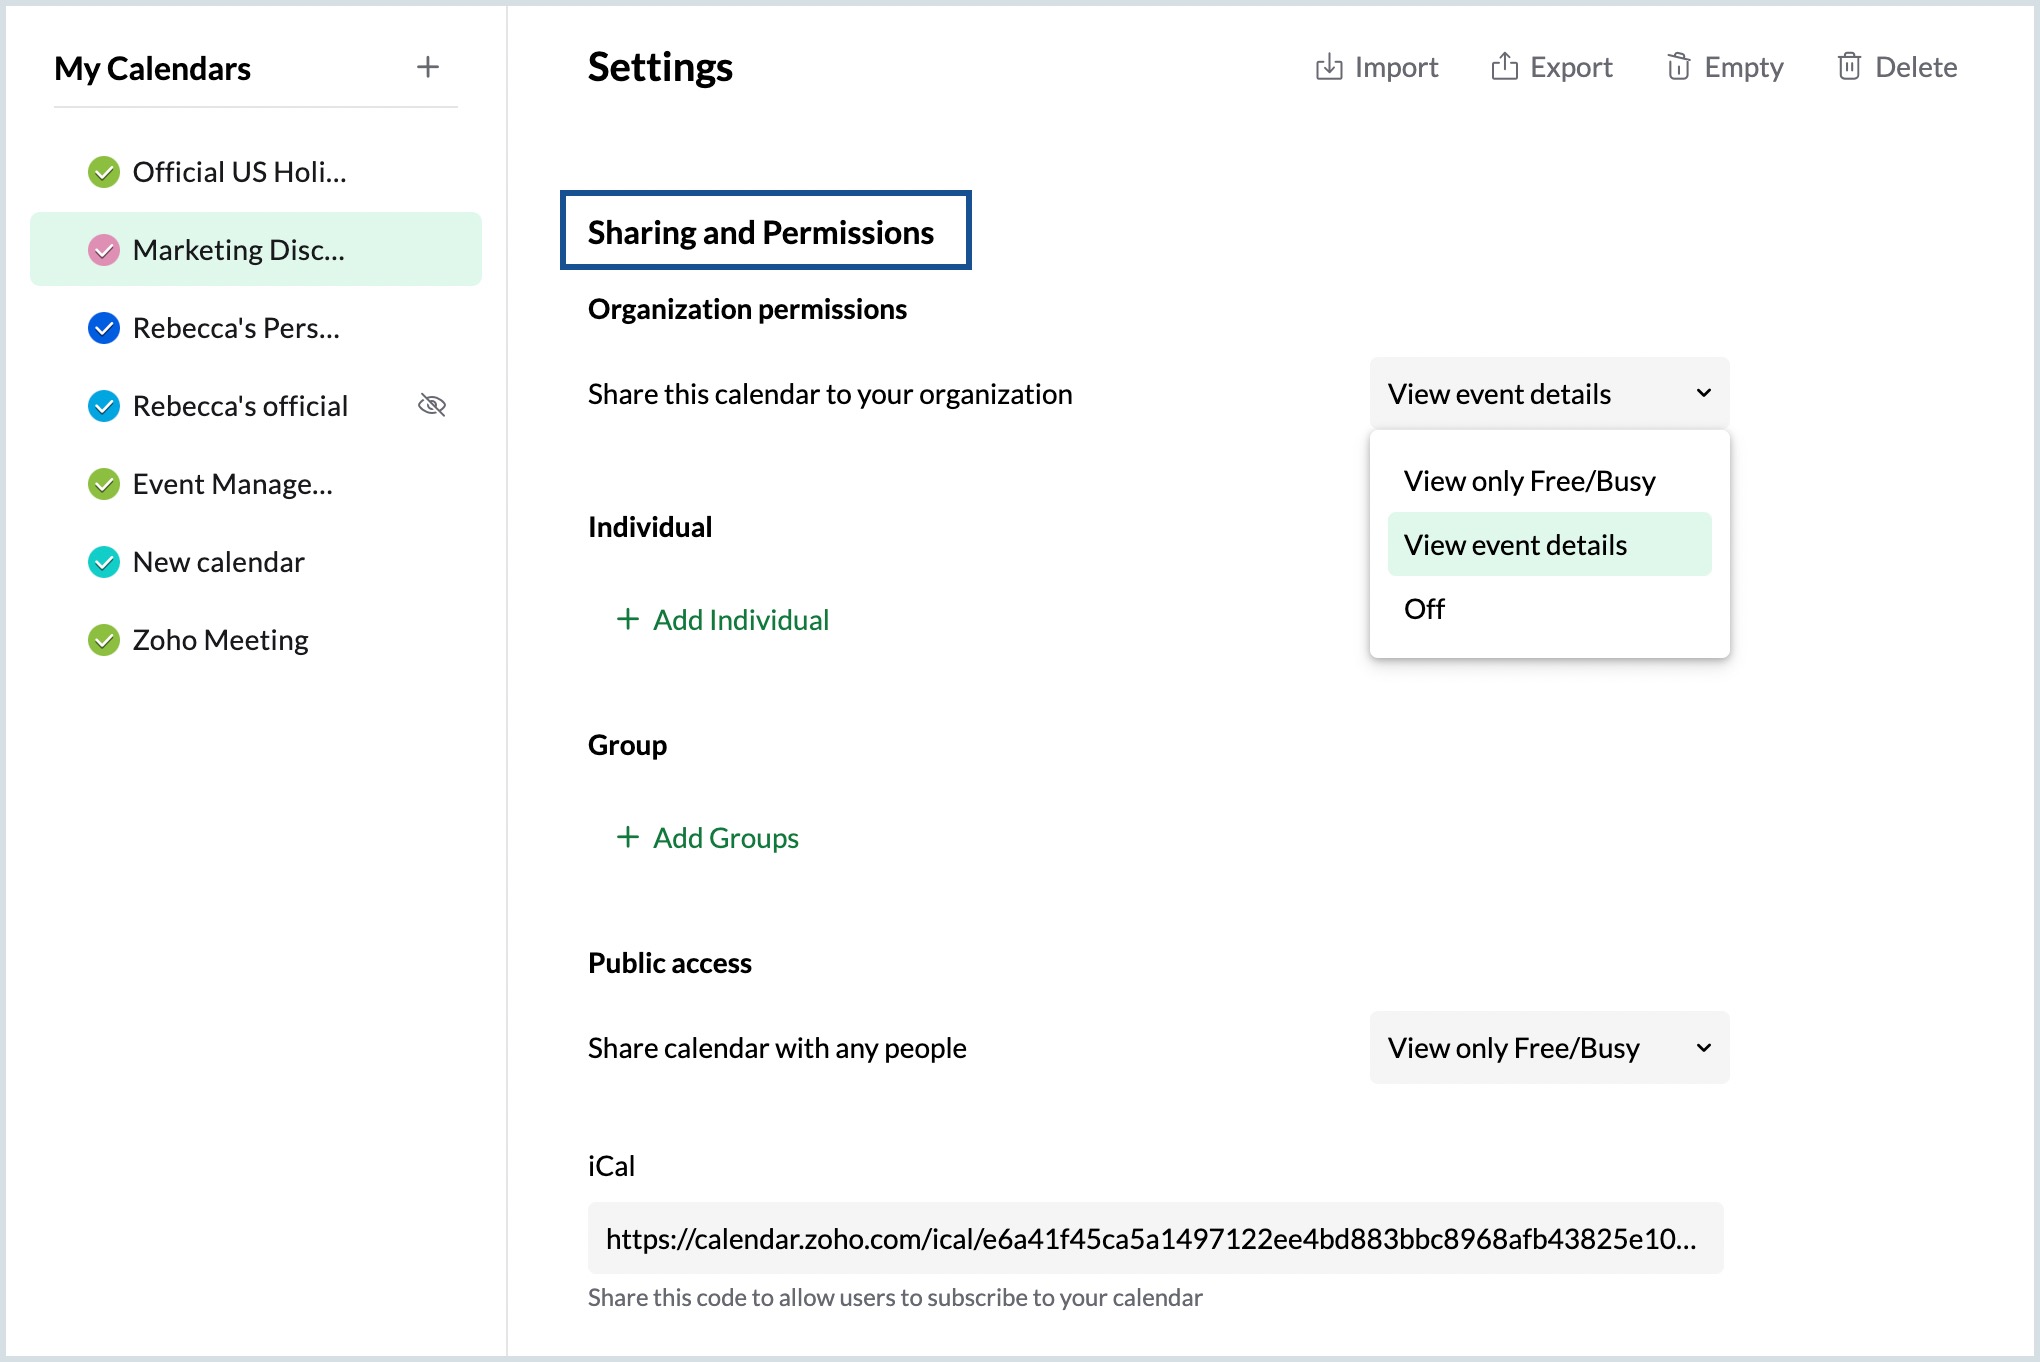
- Your org members will now be able to subscribe to this calendar.
Private Sharing
If you want to share your calendar only with specific people or groups, you can enable the private sharing feature in Zoho Calendar. Making your calendar public might not be ideal always as your schedule becomes exposed to everyone. In that case, you can limit the number of people accessing your calendar by sharing the private URL with specific people.
Steps to enable private sharing for your calendar using URL
- Log in to Zoho Calendar.
- Right-click the calendar under My Calendars from the left pane of the calendar window and click Edit (or) Go to Settings > Calendar > My Calendars and click on the calendar you want to share privately.
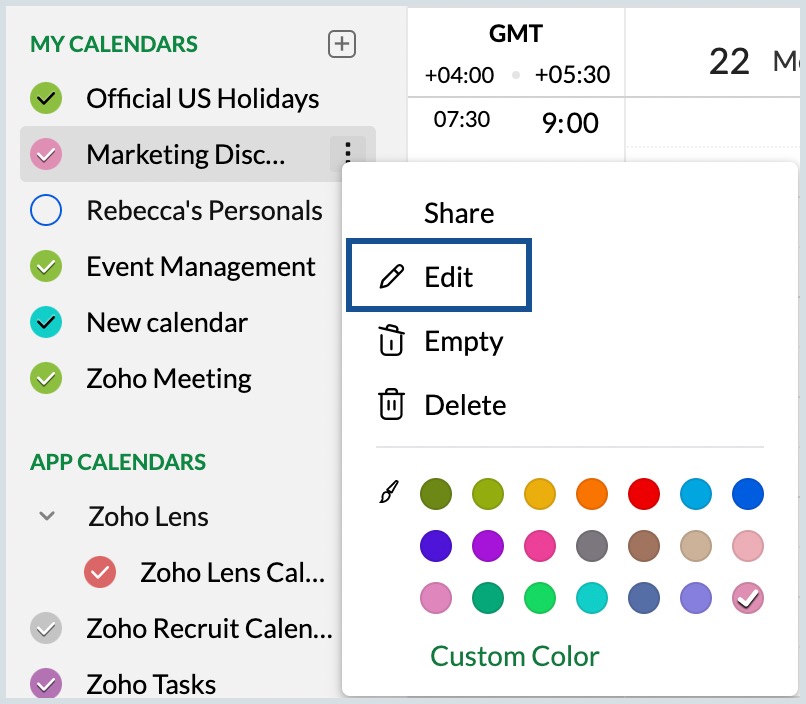
- To share your calendar privately, go to the Private URL section under Sharing and permissions.
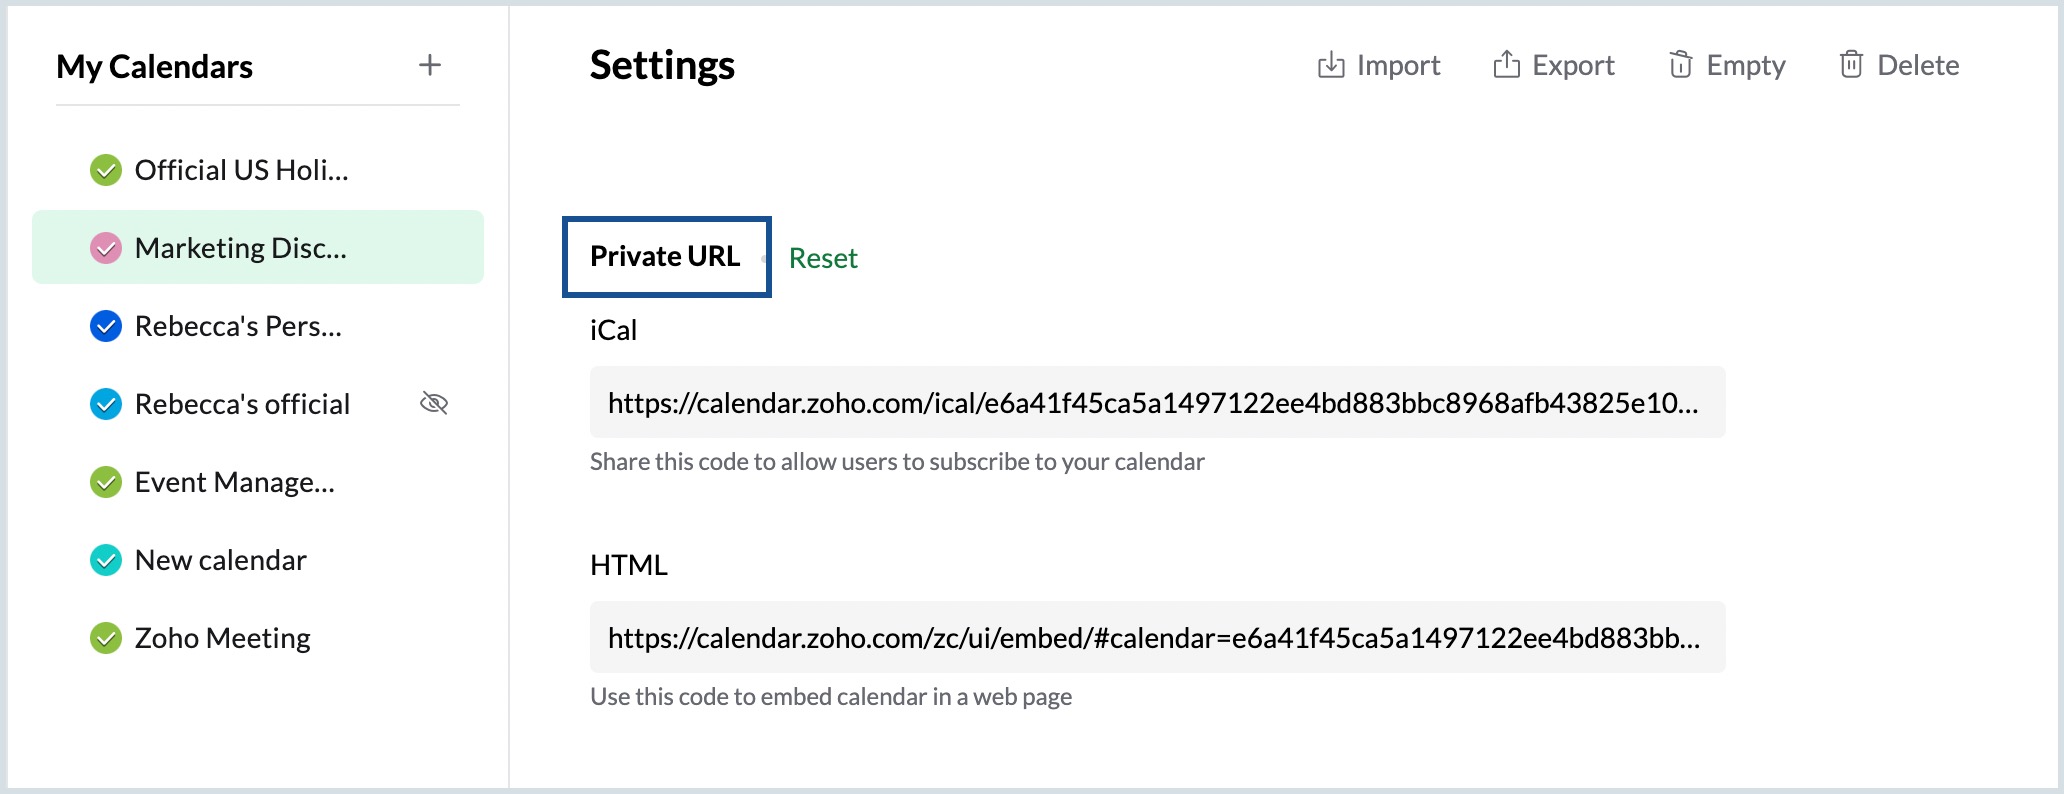
- Click on iCal to copy the private iCal URL for the calendar (or) click on HTML to copy the HTML code for the private calendar under the Private URL section of the Calendar.
Note:
If you have already shared the private URL of your calendar with someone and want them to stop accessing your calendar, you can use the Reset option next to Private URL to reset the URL of your private calendar.
Sharing with Individuals and Groups
Share your calendars privately with your colleague or any group having a Zoho account by just entering the name of your colleague or the name of the group. You can also choose from the following access permissions when sharing your calendar:
View Free/Busy
The person/group you have shared the calendar with can only view the free/busy status of your calendar.
View Event Details
The person/group you have shared the calendar with can view the event details of your calendar.
Edit Event Details
The person you have shared the calendar with can edit the event details in the specific calendar.
Delegate or Manage
The person you have shared the calendar with can manage and make changes to the calendar on your behalf. They can even share your calendar on your behalf.
Note:
- The Edit Event Details and Delegate (or) Manage permissions are not available when shared with groups.
- Only the owner of the calendar can change the time and date of events with Zoho Meeting in a shared calendar.
- The delegates can change the calendar's colour, but only the owner of the calendar can change the colour of individual events in that particular calendar.
Steps to share your calendar with individuals/groups
- Log in to Zoho Calendar.
- Right-click the calendar under My Calendars from the left pane of the calendar window and click Edit (or) Go to Settings > Calendar > My Calendars and click on the calendar you want to share.
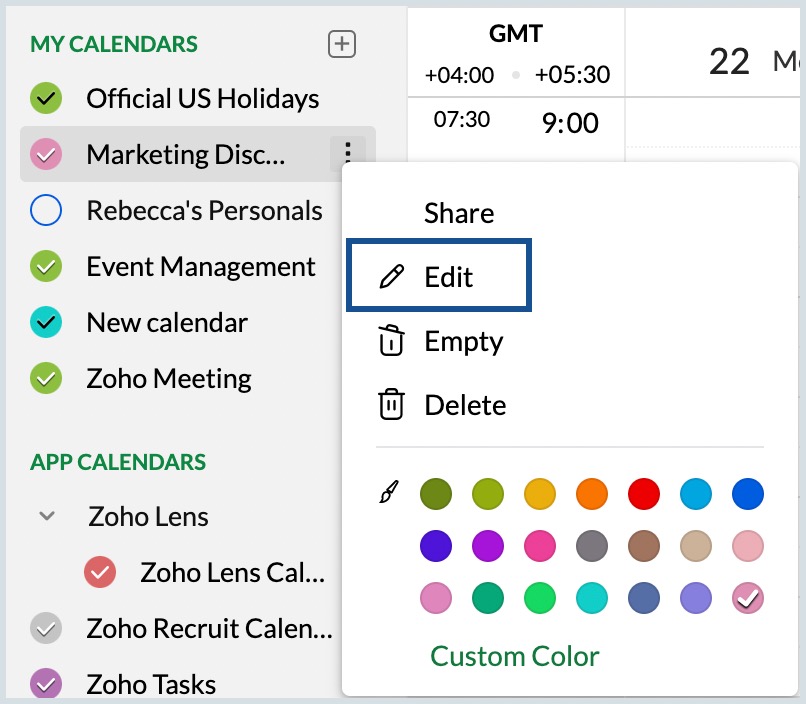
- Click on + Add Individual / + Add group under Sharing and permissions and enter the email address of the individual having a Zoho account or the group name respectively.
- Select the permission for the individual from View Free/Busy, View Event Details, Edit Event Details and Delegate (Manage calendar) in the drop-down.
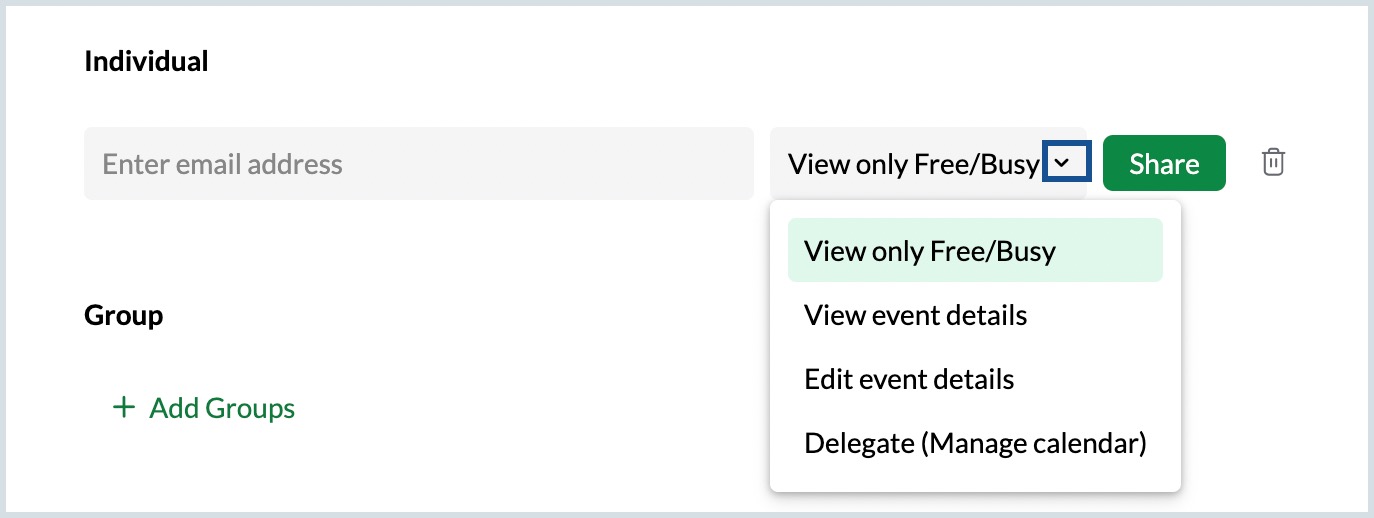
- For groups, select permission from View Free/Busy and View Event Details in the drop-down.

- Click Share to share your calendar.
The share calendars can be viewed by navigating to Settings > Calendars > Shared Calendars. You can view them in the calendar grid under the Shared Calendars section of the left menu.
Note:
- By default, when you share your calendar with a group, the group admin/moderator needs to approve the calendar to be added to the group. A mail will be directed to the admin/moderator asking for approval.
- You can share your calendar and assign permissions only if the user has a Zoho Account. If the user does not have a Zoho account, he/she won't be able to access the calendar.
- Sharing your calendar with individuals or groups will be disabled if your administrator has configured this feature to be restricted for your organization. For any changes to your organization level sharing permissions, please contact your administrator.
