Zoho Analytics App for Zoho Flow
Zoho Flow is an integration platform, which connects cloud applications to automate data transfer.
With Zoho Flow, you can integrate Zoho Analytics with 300+ apps without the need for any technical expertise. You can analyze the data imported from any of those 300+ apps in Zoho Analytics by creating insightful reports and dashboards over the same for informed decision making. Now let's get started.
Getting Started with Zoho Flow
To get started with Zoho Flow, you need to have a Zoho Flow account.
Please refer to Getting Started with Zoho Flow Documentation to know how to create a Zoho Flow account.
Common Terms
You must be familiar with certain terms used in Zoho Flow before you go ahead and create your flow.
Let us have a look at those terms.
- Flow: A workflow to connect various cloud apps. A flow contains a trigger and one or more actions.
- Connection: A connection is an app account that Zoho Flow has permission to exchange data with.
For example, you can connect with your Zoho Analytics account using your Zoho Flow account. - Trigger: A trigger is the event that executes the action(s).
For example, you can create a new row in Zoho Analytics each time a new lead is added in Insightly CRM. In this instance, the "New lead" acts as the trigger. - Action: An action is a task that the workflow executes based on the trigger. In our case the action will define how the data needs to be processed in Zoho Analytics.
For example, you can create a new row in Zoho Analytics each time a new lead is added in Insightly CRM. In this instance, the "Create row" acts as the action.
- You can refer to Zoho Flow Help Documentation to know more about how Zoho Flow works.
- As of now, you can use Zoho Analytics only as an action in Zoho Flow.
Setting up workflow for Zoho Analytics
Using Zoho Flow, you can create actions to add a row or update an existing row in your Zoho Analytics table.
Follow the below steps to set up a flow:
- Create flow: You need to initially set up the BUILDER area to create a flow.
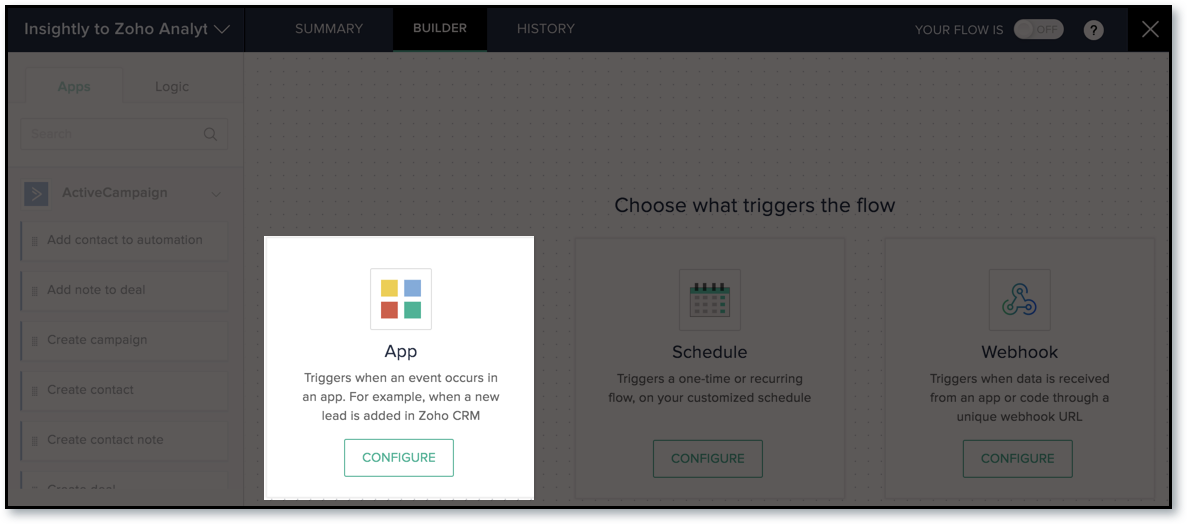
- Configure trigger: Choose a trigger type to trigger your Zoho Analytics actions. You can have an App trigger, a Schedule trigger, or a Webhook trigger.
We have taken the example of an App based trigger. An App based trigger triggers when there is a data update in an app. In this document, we've created a flow to generate a trigger each time a lead is created/updated in Insightly CRM.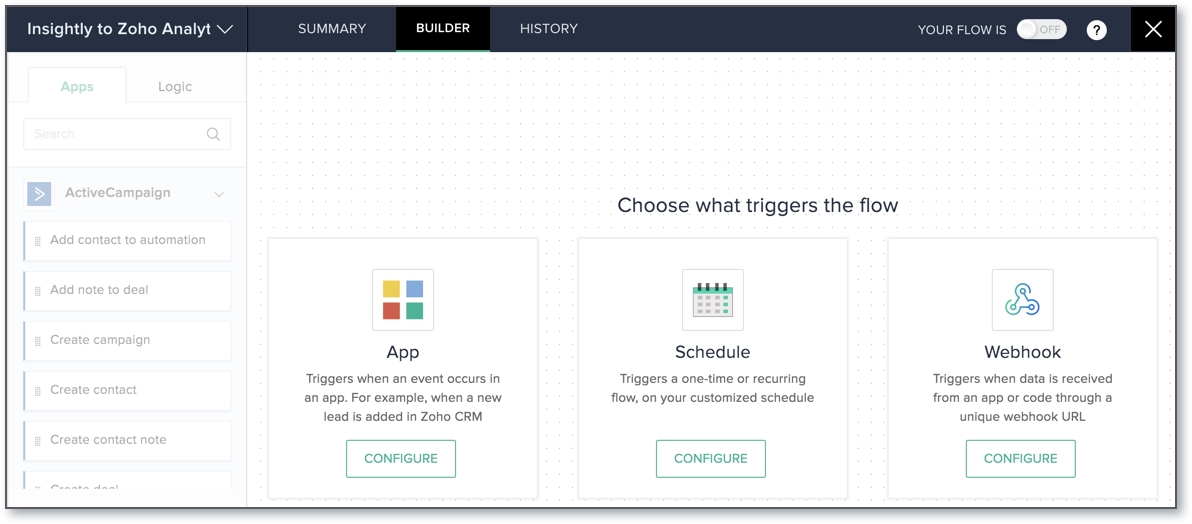
- Add Action: Add Zoho Analytics actions to complete your flow. Zoho Analytics supports the following actions:
- Create Row: This action is used to create a new row in Zoho Analytics each time a trigger is generated.
To create a row, you need to set the trigger app to generate a trigger each time data is added in your trigger app.
In our example, a trigger will be generated each time a new lead is created in Insightly CRM. Upon this trigger, Zoho Flow will fetch the corresponding data and add it as a row in the Zoho Analytics workspace.
- Update Row: This action is used to update an existing row, based on a criteria, each time a trigger is generated. To update a row, you need to set the trigger app to generate a trigger each time data is updated in your trigger app.
In our example, a trigger will be generated each time a lead is updated in Insightly CRM. Upon this trigger, Zoho Flow will fetch the updated data from Insightly CRM and replace the existing data in Zoho Analytics with this updated data.
- Fetch Row: This action is used to retrieve data from Zoho Analytics. This action cannot be used as a standalone action. It is always followed by a series of other actions.
Using this action you can verify whether a record already exists in Zoho Analytics table before adding it to avoid duplication.
In our example, a trigger will be generated each time a contact is added in Insightly CRM. Upon this trigger, the fetch row action will check for duplication and add the new data as a row in the Zoho Analytics workspace.
- Create Row: This action is used to create a new row in Zoho Analytics each time a trigger is generated.
- Save and Execute: Save your flow to apply the changes made. Generally, your flow will be auto saved by default.

Now, let us see these four steps involved in creating a flow in detail.
Step 1: Create Flow
You can either create a flow from Scratch or from a list of existing flows (template) available in the Gallery.
To create a flow:
- In the My Flows section, click CREATE FLOW button or the + button on the left.
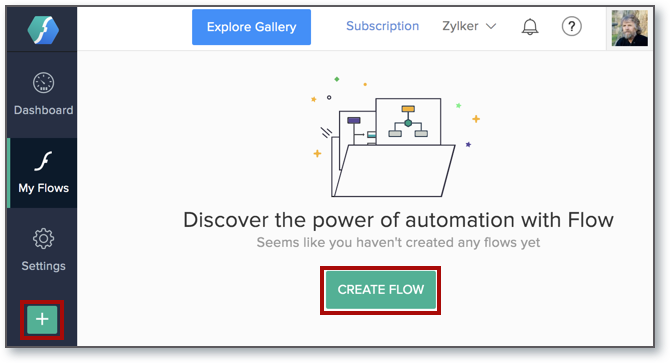 Note: You can also click the Explore Gallery button to create a flow from the list of already available templates.
 - In the Create flow page that opens, specify a Flow Name and a Description (optional).
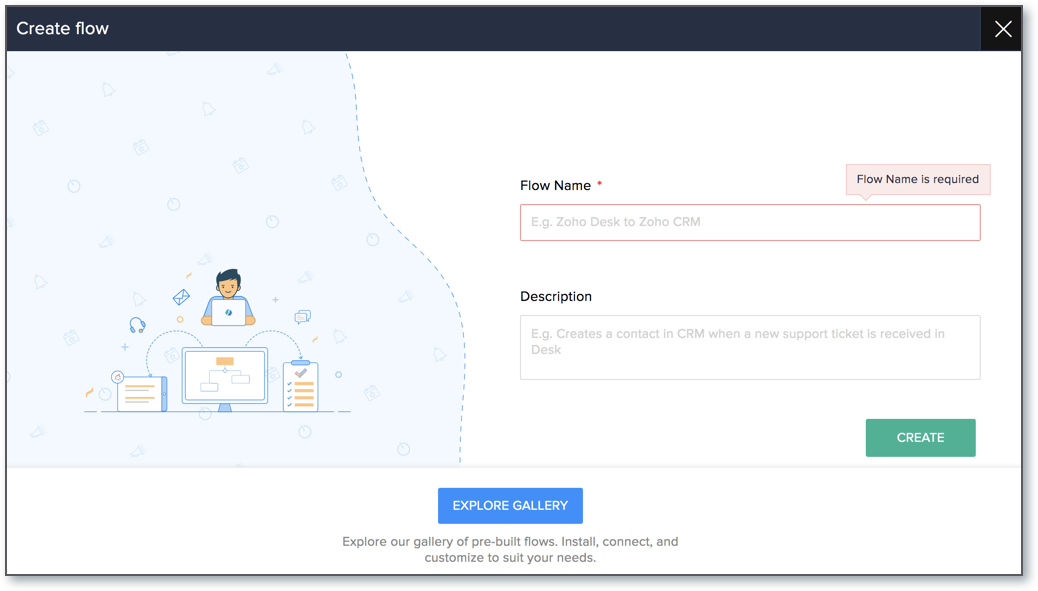
- Click CREATE.
- You will be navigated to the BUILDER page. Now, you can configure trigger and add actions to your flow.


Step 2: Configure App Trigger
To configure an App based trigger:
- On the BUILDER page, click CONFIGURE in the App trigger box.
- Choose a Trigger app (in this case Insightly CRM) in the App Trigger wizard.
- Choose a trigger case for the app based on your requirement e.g., New Lead, Update Lead, and New Contact.
- Provide all the necessary authentication details for the app (Insightly CRM) you are connecting with.
- Once you have provided all the necessary details, click DONE.


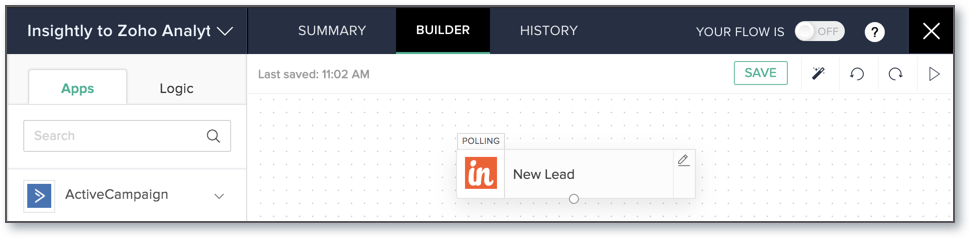
Once configured, your App trigger will appear in the BUILDER area. You can change the trigger by clicking the edit icon. You can't delete them unless you delete the entire flow.
Step 3: Add Action
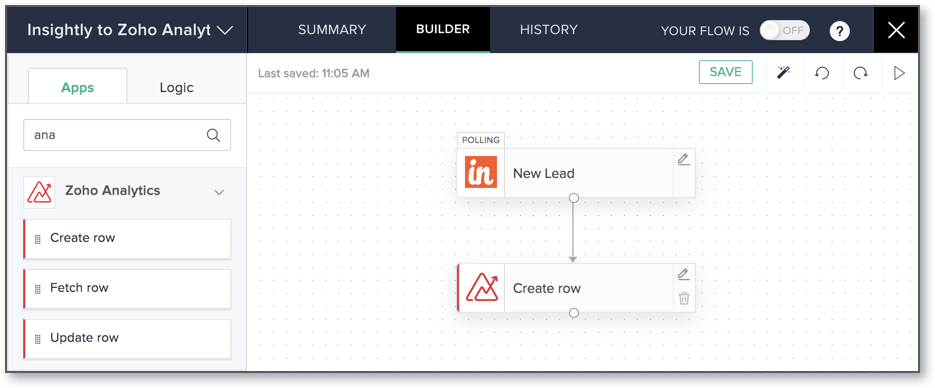
After configuring your trigger (in this case Insightly CRM trigger), set Zoho Analytics as an action for your flow. You will find the Zoho Analytics based-actions (Create row, Update row, and Fetch row) to the left of your BUILDER under the Apps sections.

Create Row
To create a row in Zoho Analytics,
- Drag the Create row option from the Zoho Analytics drop down menu available in the Apps section and drop it below the created "New Lead" trigger.
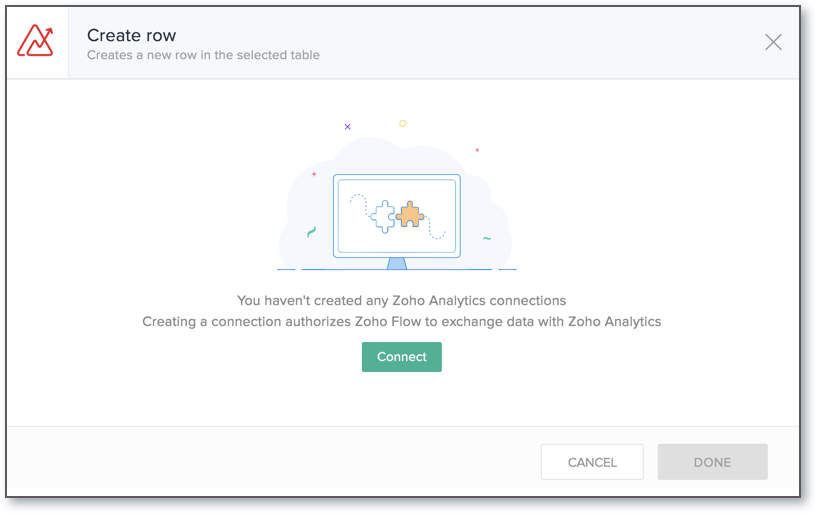
- You need to create a connection to grant permission, by clicking the Connect button, to allow adding data into Zoho Analytics.
- The New Connection page will open. Provide the following details to grant access:
- Provide a name for your connection in the Connection Name field.
- Provide the Authtoken value in the Authtoken field. If you already have a token, you can provide the same. Else, you can generate a new token by clicking the Generate Authtoken link. To know more about Authtoken, click here.
- Mention the email address linked with your Zoho Analytics account in the Owner Email Address field. Please note that only Account Admin and Workspace Admin can import data using Zoho Flow. To know more about the user roles, click here.
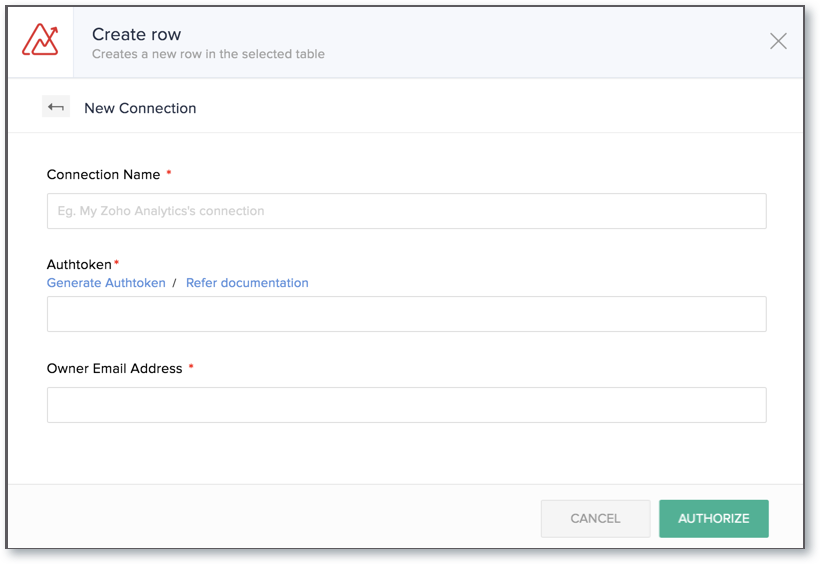
- Click AUTHORIZE. A connection will be created. You can use this connection for various flows in your organization.
- Once a connection is created, the App Trigger wizard will open. You will notice the action name being auto populated in the Variable Name field. You can edit the name if needed. Ensure the name provided matches the required criteria.
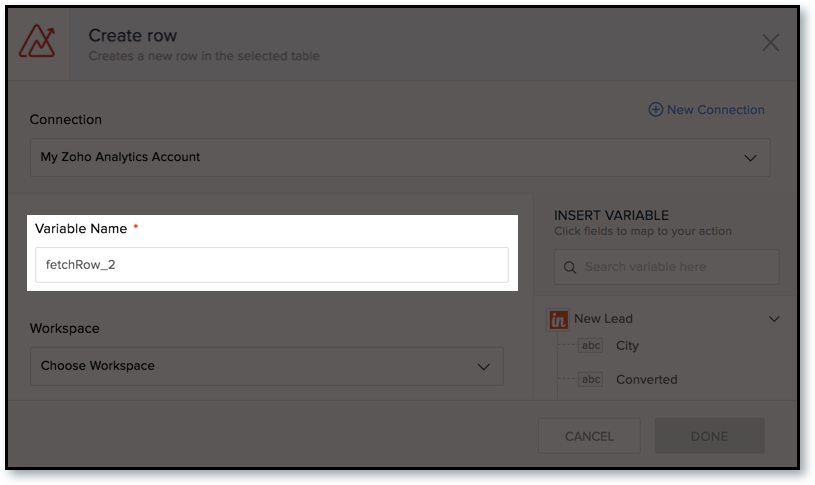
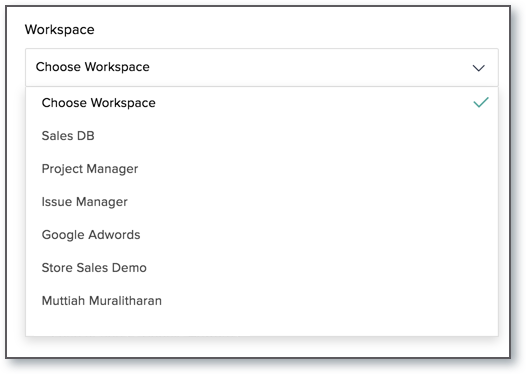
- All the workspaces in your Zoho Analytics account, for which you have Workspace Admin privilege, will be listed in the Workspace drop down menu. Select the workspace into which you want to add data.
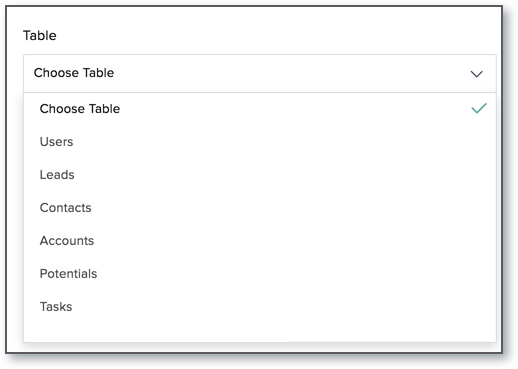
- The tables associated with the selected workspace will be listed in the Table drop down menu. Select the required table into which you want to add data.
 Note:
Note:- It is mandatory to have the workspace and table created in your Zoho Analytics account to import data using Zoho Flow. You cannot create a workspace or table from Zoho Flow.
- You need to be an Account Admin or a Workspace Admin in Zoho Analytics to import data using Zoho Flow.
- Only the data added after setting up the flow, will be imported into Zoho Analytics.
- The columns available in the selected table will be listed. Map the corresponding columns from Zoho Analytics to the corresponding columns in Insightly CRM listed on the right. Learn how to map data from here.
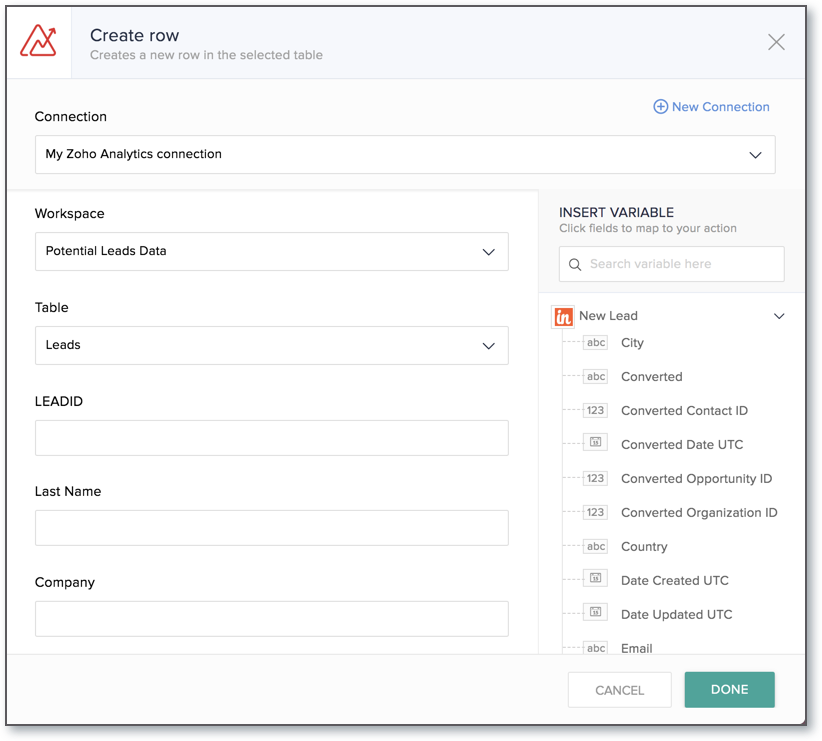
- Click DONE.


You have successfully configured the flow to add data from Insightly CRM to Zoho Analytics. You can verify the same on the BUILDER area. This flow will get executed after you switch ON the flow.
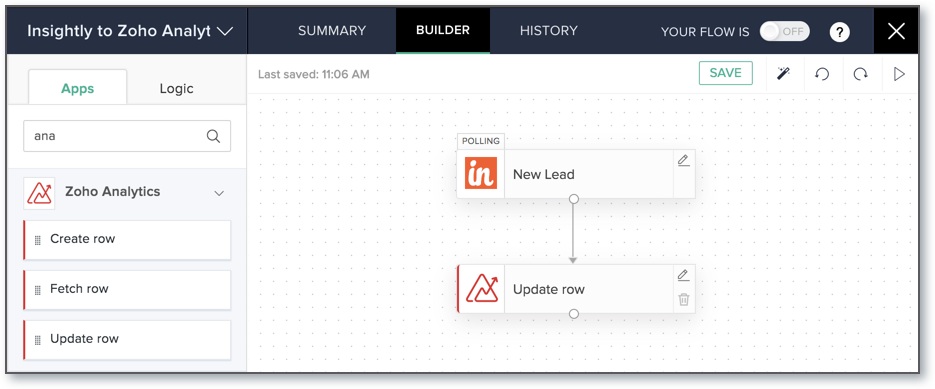
Update Row
To update a row in Zoho Analytics,
- Drag the Update row option from the Zoho Analytics drop down menu available in the Apps section and drop it below the created "Update Lead" trigger.
- The rest of the steps are similar to Create row.
- After you provide all the necessary details, you need to enter the criteria to specify which row(s) in the Zoho Analytics table needs to be updated in the Update when field. Rows matching with the criteria will be updated with the received data.
In this example, we are specifying Lead ID (an unique value) column from Trigger app (Insightly CRM) to match with the Lead ID column in Leads table in Zoho Analytics table and identify the matching row to update.

- Click DONE.


You have successfully configured the flow to update data in Zoho Analytics. You can verify the same on the BUILDER area. This flow will get executed after you switch ON the flow.
Fetch Row
To retrieve a row from Zoho Analytics,
- Drag the Fetch row option from the Zoho Analytics drop down menu available in the Apps section and drop it below the created flow.
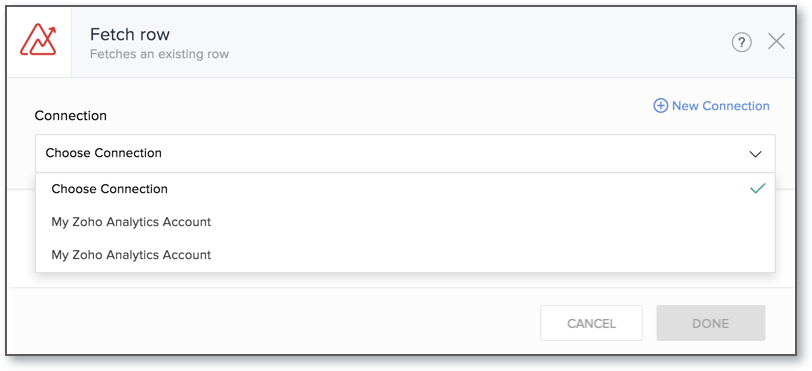
- You need to specify a connection, in the Connection drop down menu, to authenticate Zoho Flow to retrieve data from Zoho Analytics.
- You will notice the action name being auto populated in the Variable Name field. You can edit the name if needed. Ensure the name provided matches the required criteria.
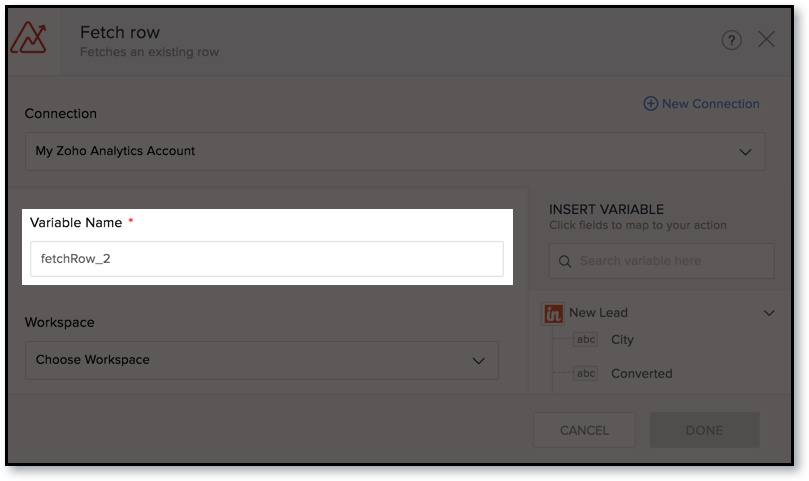
- All the workspaces in your Zoho Analytics account and for which you have Workspace Admin privilege will be listed in the Workspace drop down menu. Select the workspace in which you want to verify and add the data.
- The tables associated with your selected workspace will be listed in the Table drop down menu. Select the required table in which you want to verify and add the data.
- In the Criteria field, provide a filter criteria.
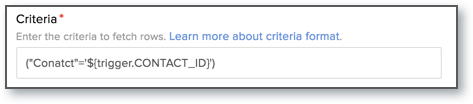
- Click DONE. Fetch row action will be created.
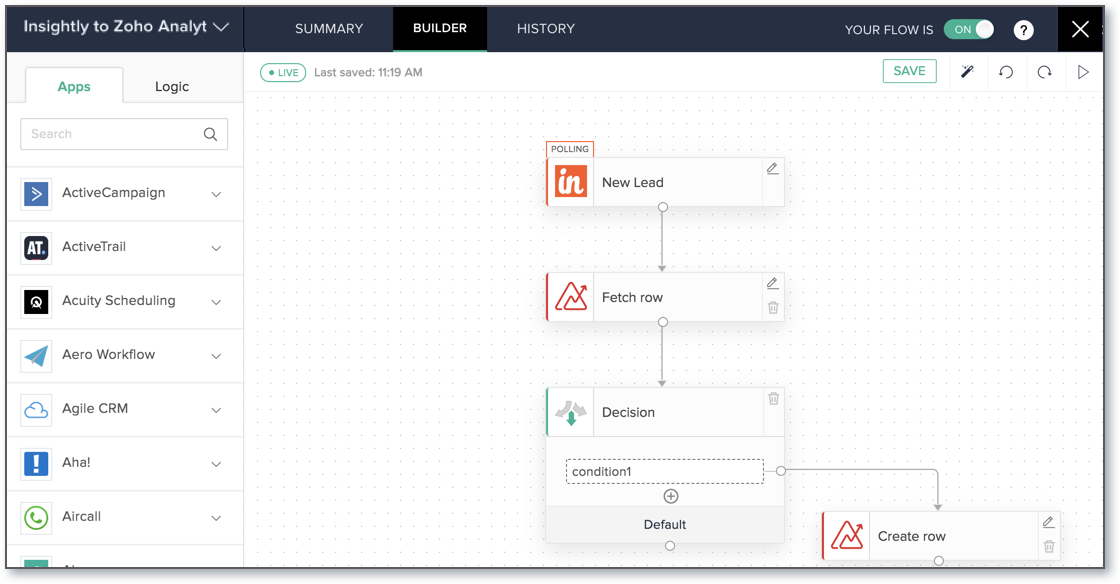
- Now, you need to provide a condition in the Decision box to verify whether the data (Contact record) received from Insightly CRM already exists in Zoho Analytics table, if so we want to ignore the record to avoid duplicates.
- Drag the Decision box from the Logic section and drop it below the created Fetch row action in the BUILDER area. In this instance, we want to verify whether the data (Contact record) received from Insightly CRM already exists in Zoho Analytics table and create a row if the received data is not available. To do so, the condition would be Contact ID is not null.
- Provide the required condition in the Decision box.
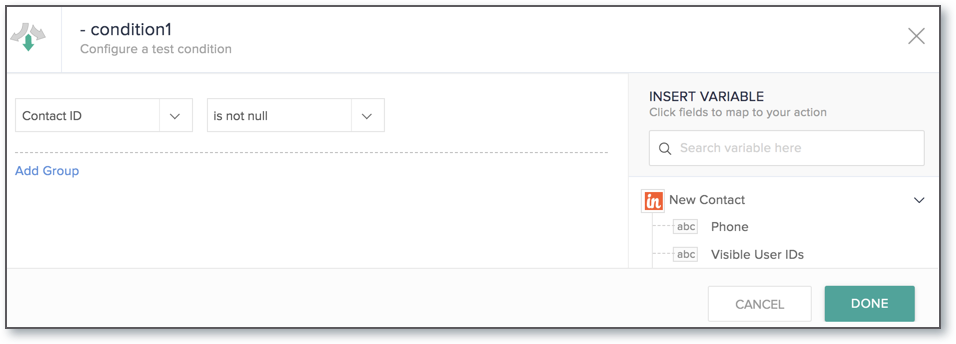
- Click DONE.
- Next, you need to add action to create a row in Zoho Analytics. Refer to Create row section to know how to create a row in Zoho Analytics.


You have successfully configured the flow. This will add a row if the received data does not exist in Zoho Analytics table. You can verify the same on the BUILDER area. This flow will get executed after you switch ON the flow.
Step 4: Save and Execute
Your flow will be auto saved by default. You can also manually save the flow by clicking the SAVE button in the top right corner.
Switch ON the YOUR FLOW IS toggle button. You need to turn on the flow to let it work with actual data.

- You won't be able to save your flow if your flow has no actions, or if an action or trigger is not configured completely.
- Your flow will be saved as a draft, until you switch on the flow.
- You can also test and debug your flow using the Test and Debug icon. This is an optional step to check if the flow is working correctly. Learn how to test and debug.