Manage Datasources - Business Applications
The Data Source tab allows you to monitor and manage all data sources within the workspace. It helps track data synchronization, notifies you of sync issues, enables you to edit data source settings, and provides audit details for better monitoring and control.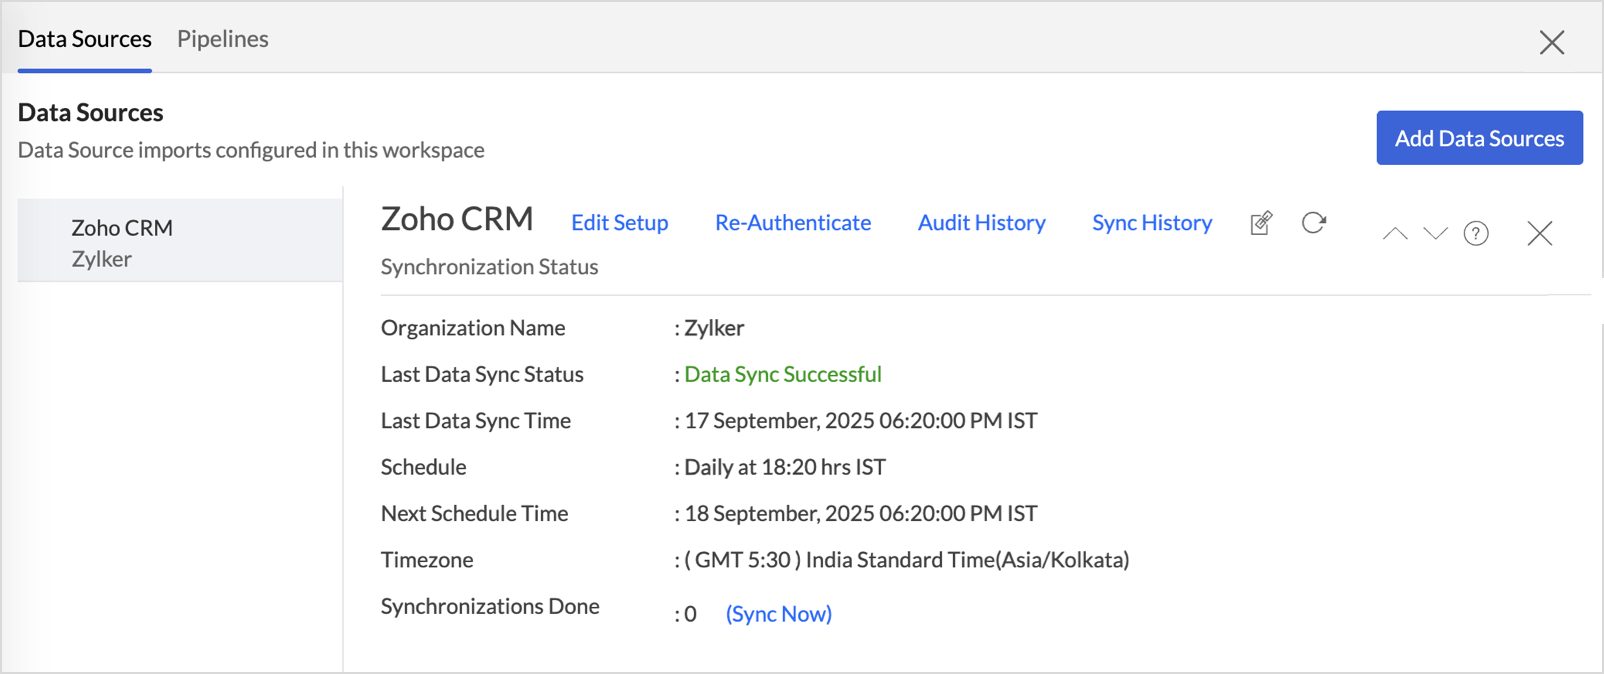
On this Page
- Accessing the Data Source Tab
- Data Source Permalink
- Edit Setup
- Reauthenticate
- Sync History
- Audit History
- Remove Data Source
- Transfer to Another Admin
- Transfer via Account Ownership Change
- Take Ownership When the Previous Admin Has Left the Organization
- Request a Manual Connector Transfer
Accessing the Data Source tab
- Access the workspace for which you need to manage the settings.
- Click Data Sources on the side navigation panel.
- All the data sources connected with the current workspace will listed.
Data Source Permalink
The Data Source Permalink helps you easily access the data source tab. The Organization Admin and Account Admin can make changes in the data sources Page.Other users can know the synchronization details like whether the last data sync was successful or not, when the last data sync happened, when the next sync is scheduled to happen, etc.
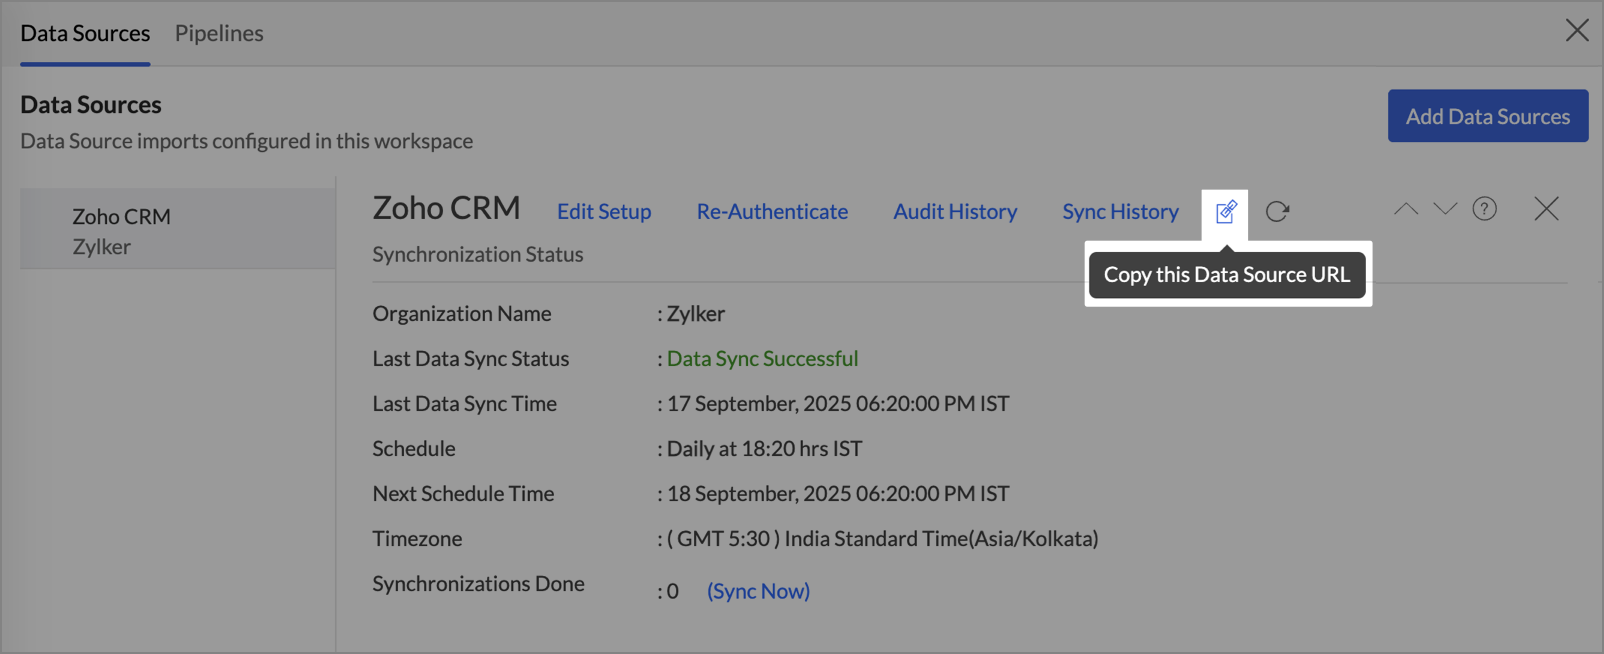
This link can also be pasted in dashboards so that everyone accessing the dashboard can know about the sync status.
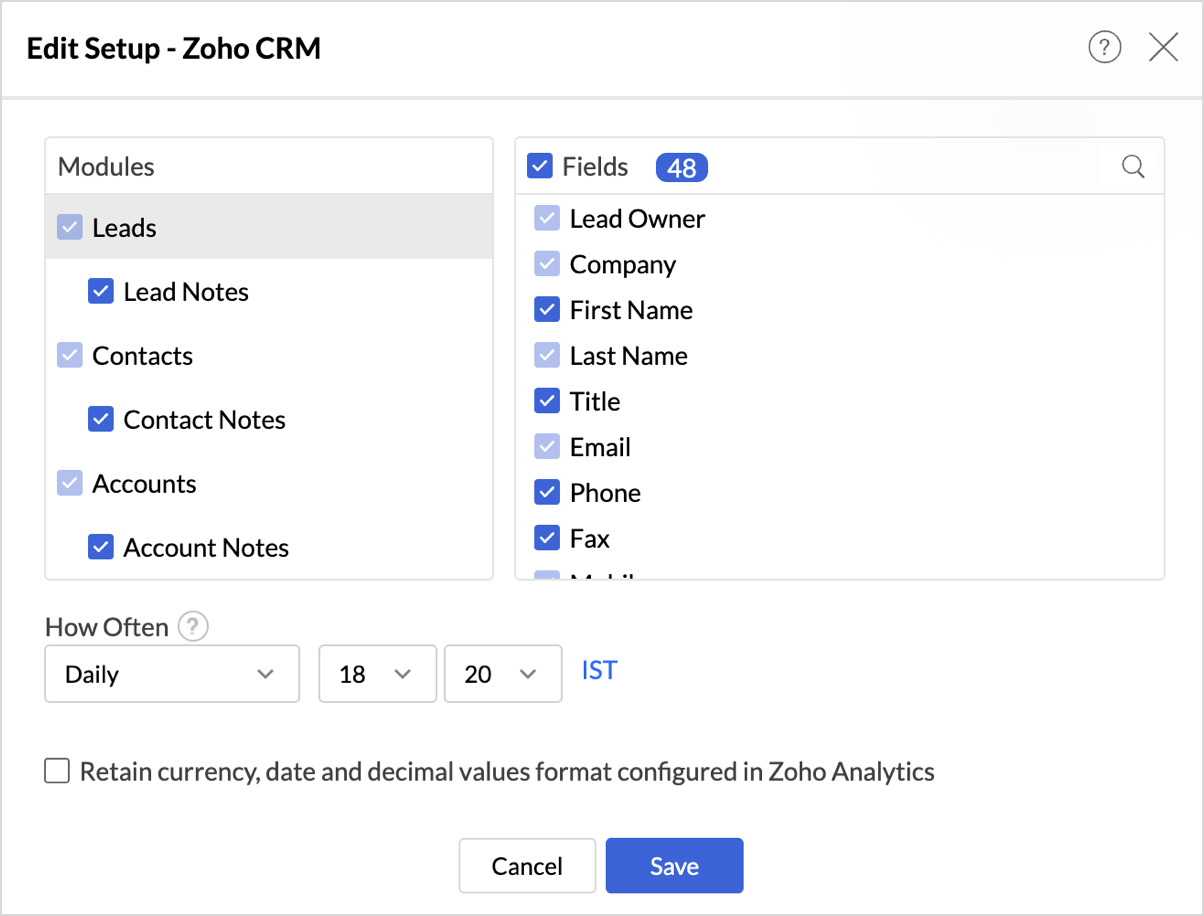
Edit Setup
The Edit Setup tab allows you to add or delete modules or fields, change the schedule interval, and modify other settings specific to the business application.
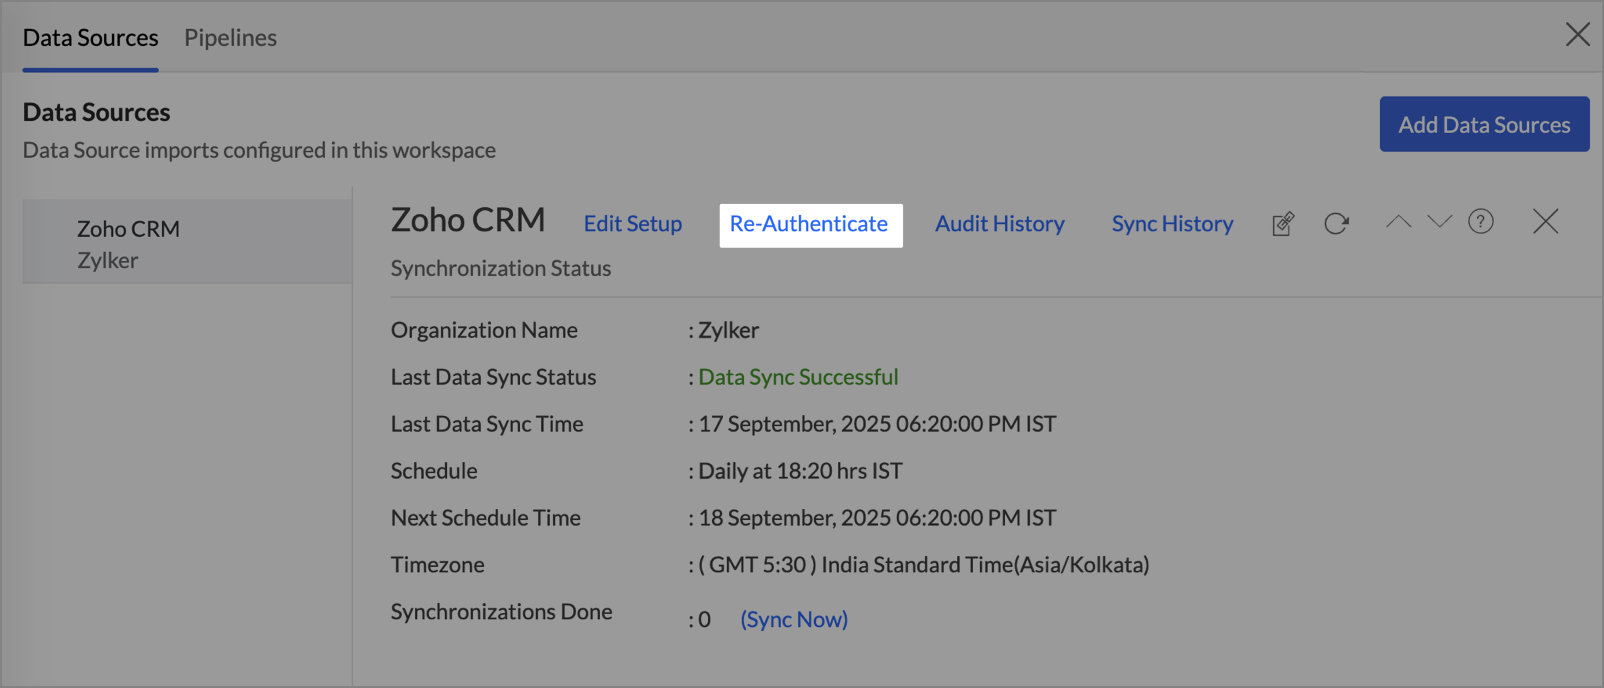
Re-authenticate
Re-authentication is useful for restoring and maintaining secure access between Zoho Analytics and the connected data source. It is required when authentication credentials expire, passwords or API keys are changed, access permissions are updated, or additional security measures such as multi-factor authentication are enabled. In this case, the data sync will be paused, and the administrators must re-authenticate to resume the data sync.
Sync History
The Sync History tab provides details about the data sync for the last 45 days. A successful data sync is marked in green, and a sync failure is marked in red.
To view the sync history,
- Click Data Sources > Sync History.
- A calendar with the Sync History of the last 45 days will open. The date when the data sync has happened will be highlighted. Hover to view the number of times the data had been synced on a specific date.
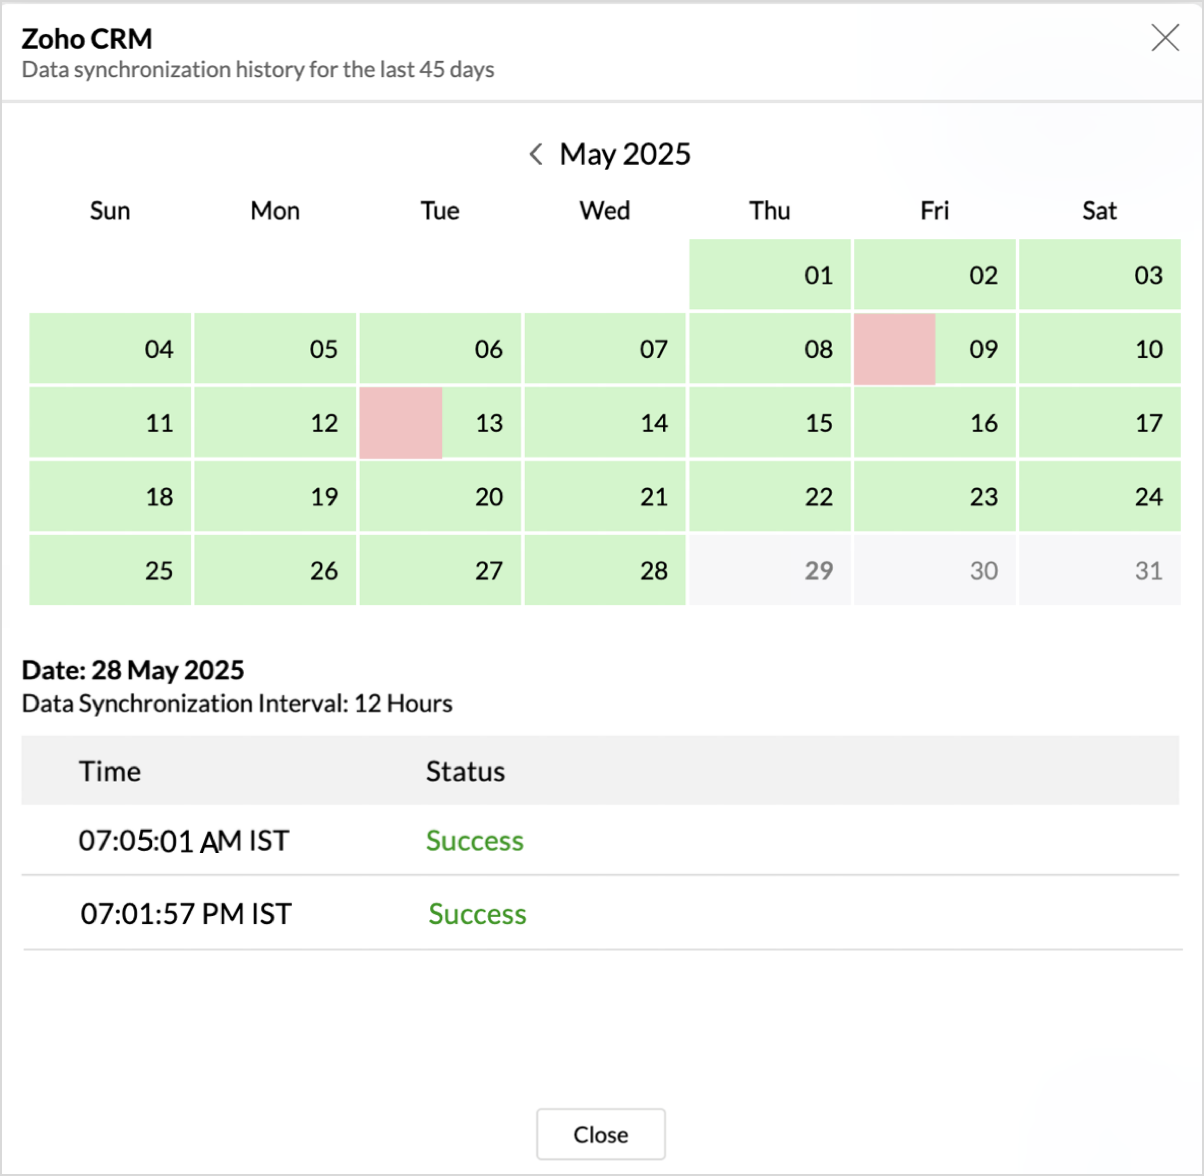
- Click the date to view more details.
- Time - Displays the time when the data is synced.
- Status - Shows whether the sync was a success or a failure.In case of failure, the reason will be displayed. Refer to resolving sync failures article to learn how to resolve the issue and avoid further failure.
Audit History
Zoho Analytics logs all the user activities and system events within the workspace. The following actions are logged in Zoho Analytics.
- User Action: Create, Modules Added, Modules Removed, Fields Added, Fields Removed, Schedule Change and Entities Modified, Delete, Take Ownership, Re-authenticate, Sync Now, Retry.
- System Action: Plan upgrade or downgrade.
Remove Data Source
Zoho Analytics allows you to remove the integration if needed. Removing the integration will suspend further data synchronization. The data tables and the reports will be available.
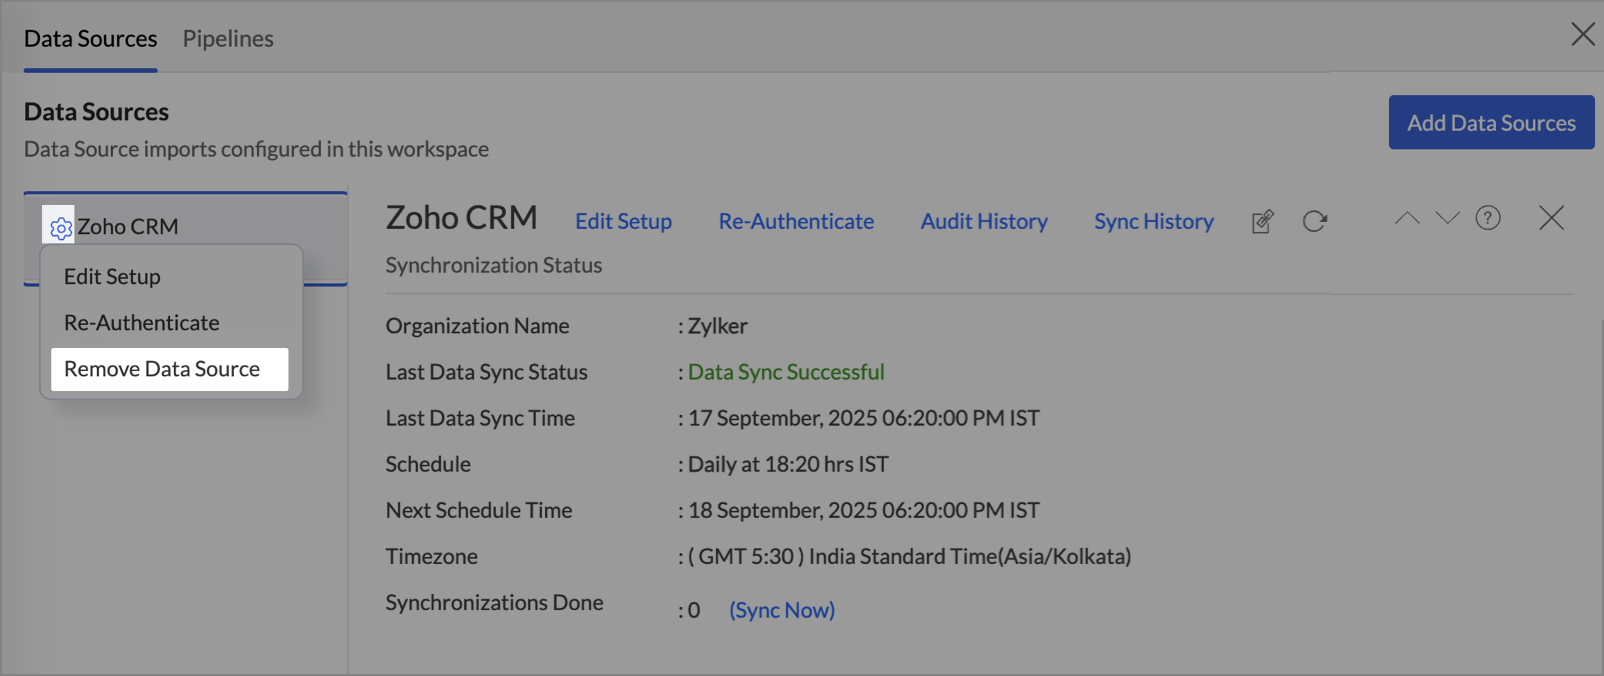
Click the Settings icon in the Data Sources tab, and select Remove Data Source from the drop-down menu.
Transferring Connector to Another Admin
Zoho Analytics allows you to transfer ownership of a Business Application Connector to another administrator in your organization when needed. This ensures that the connector remains functional and manageable when there are changes in account ownership or user roles, such as when an administrator steps down, leaves the organization, or hands over responsibilities to another admin.
A connector can be transferred in the following ways:
- Transfer via Account Ownership Change
- Take Ownership When the Previous Admin Has Left the Organization
- Request a Manual Connector Transfer
- Considerations Before Transferring a Connector
Transfer via Account Ownership Change
If you are the Account Administrator, you can transfer ownership of your Zoho Analytics account, including all configured connectors, to another Organization Administrator in your organization. When account ownership is transferred, ownership of all connectors configured under that account is transferred along with it.
For detailed steps on transferring account ownership, see Transferring Account Ownership to Another Admin.
Take Ownership When the Previous Admin Has Left the Organization
If the administrator who configured the connector has left the organization, another administrator in the organization must manually take ownership of the connector to continue managing and maintaining the connection.
Note: The Take Ownership option appears in the Data Sources page only after the previous owner is removed from the organization. The new owner must have Organization Administrator or above privileges.
Before you take ownership
Remove the previous connector owner from your organization:
- Go to Organization Settings > General > Manage Users.
- Locate the user who configured the connector and click the Delete icon.
For detailed steps on removing a user, see Delete a User.
Take ownership of the connector
Once the previous owner has been removed, follow these steps:
- Open the Advanced Analytics workspace of the connector.
- Click Data Sources to open the connector's settings page.
- Click Take Ownership.
- For Zoho applications, ownership is transferred immediately.
- For third-party applications, you will be prompted to log in to the source application before the transfer is completed.
Note: Ensure that you have the required permissions in the source application to manage the connector before proceeding.
Request a Manual Connector Transfer
If the current administrator is still part of the organization but wants to transfer the connector to another Organization Administrator without changing account ownership, write to our support team for assistance.
To request a manual connector transfer:
- Send an email to support@zohoanalytics.com.
- Include the following details in your request:
- Your organization name
- The name of the connector to be transferred
- The email address of the current connector owner
- The email address of the new connector owner
- Our support team will verify your request and coordinate the transfer.