Login instructions for Zoho Mail
Zoho Mail provides the best-in-class email experience for personal and organization usage, with its robust features, customization options, security, and privacy.
Log in to Zoho Mail
Zoho provides a single-sign-on and hence once you log into any Zoho application, you can directly access the other applications in the same browser using different tabs. Both organization users and Zoho personal users can log in to Zoho Mail using this link.
In case you've forgotten your password, or if an authentication error shows up, follow the instructions in the password reset section.
Organization user login - First-time login
The Organization Administrators create users from the Control Panel using the Add User option.
The administrator furnishes the first-time password for the user while creating the account from the Control Panel. The users who log in for the first time need to use the login email address and the password information provided by the administrators and log in from this link. After login, the users can change their Password from the Accounts section.
Personal user login
Personal users would've chosen the email address and the password while creating the email account for themselves. Personal users can also use their phone numbers provided during sign up for logging in to their accounts. They can log in to Zoho Mail using the credentials that they entered.
Control Panel Login
An organization Administrator or Super Administrator can log in and access the Control Panel from mailadmin.zoho.com. They can enter their Zoho account credentials and access the Control Panel. Alternatively, if they are already logged in to their Zoho Mail account, they can click the Control Panel link from their profile.
Sign up for Zoho Mail - Domain-based Business Account
Zoho Mail provides the email service for business accounts to get custom domain-based email addresses for all the users in the organization. To sign up for a custom domain-based email address like me@mydomain.com or info@mydomain.com, choose any of the plans from the Zoho Mail Pricing page and click Sign Up under the plan.
If you want to Sign up and need a domain-based custom account, you need to have the required permissions to access the DNS Manager of the domain. The entire Email Hosting Process for the domain is explained on the email hosting set up help page.
Sign up for Zoho Mail - Personal Account
While Zoho Mail is specifically designed for business purposes and for users who need a custom email address with their own domains. But we also understand that there may be users who want to either use it without their domain or use it for personal purposes. For the latter who do not want to create a domain-based account in Zoho Mail, the email address will be of the format username@zohomail.com. You can sign up from the home page using the following steps:
Choose Personal email, from the signup section. 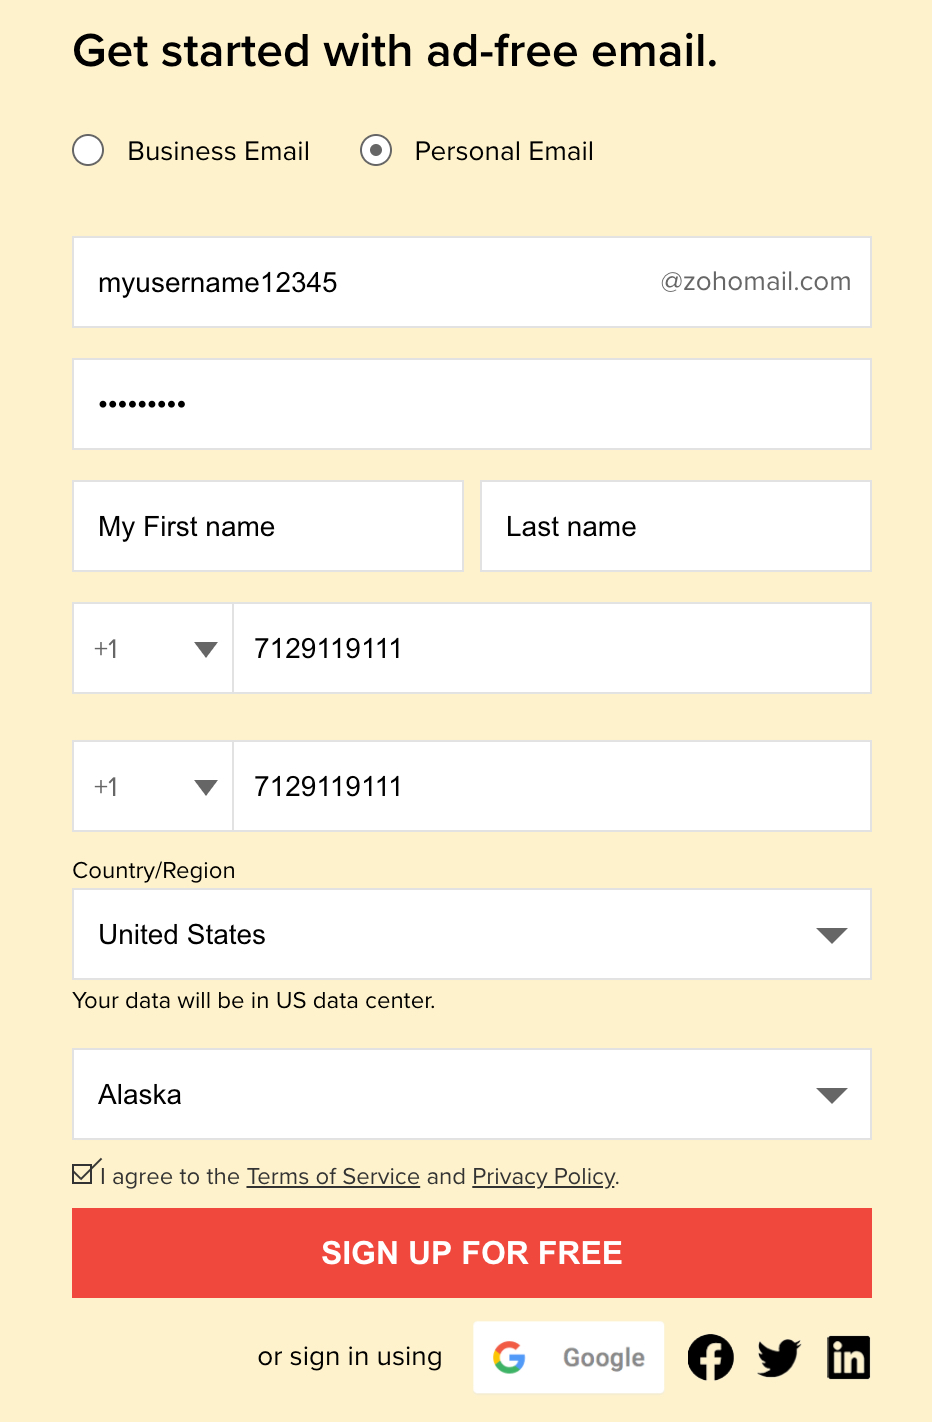
- You need to choose a unique user name to create the account.
- Provide your mobile number - This will be used for verification.
- Make sure that the mobile phone is accessible and active to receive messages, during the signup process.
Once you provide the required details such as username, password, and mobile number. Once done, a confirmation code will be sent to your mobile to verify the ownership of your mobile number. On successful verification, you will be redirected to your Zoho Mail account. You will be able to send emails only from a verified account.
Sign Up - Required Information
While signing up for a Zoho Mail account, you are required to provide us with below mentioned certain personal information. This information is required in order to make your account secure.
Name
You will be asked to enter your First Name and Last Name while signing up. This name is by default displayed to everyone you interact with, using your Zoho Mail account.
Email Address
The email address you provide will be the email address used to sign in to your Zoho Mail account. This is also the email address that will be displayed in your outgoing emails by default.
- Your email address has to be more than 6 characters and less than 30 characters.
- The email address can include only letters, numbers, underscore (_), and dots (.)
Password
The password you provide will be required each time you sign in to your Zoho Mail account. The password has to include a minimum of 8 characters. In order to keep your account safe, choose a Strong Password.
Mobile Number
Providing and linking your mobile number with your Zoho Mail account helps us keep your account secure. You will be asked to enter your mobile number and then re-enter it in order to eliminate any mistakes.
- This registered mobile number can be used to enable Two Factor Authentication, thus adding an extra layer of security to your account or as your recovery phone number in case you forget your password.
You cannot use the same number as a recovery phone number and to enable SMS-based TFA. This is restricted in order to prevent you from getting locked out of your account if you miss the number.
Federated Sign In
In Zoho, you can signup using your Google/ Yahoo/ Facebook account, and create an account, to use the Zoho Services via Federated Sign In. When you want to set up and use a personal account in Zoho Mail, you need to choose a Zoho username to get an account username@zohomail.com.
You will not need a separate password for Zoho and can use the Federated Sign-in, as long as you use only webmail.
However, if you want to access via POP/ IMAP or Active Sync, or to use Email Forwarding, you need to generate and use the password specific to Zoho.
Follow the below instructions to set up Federated Sign In and generate your Zoho account password through accounts.zoho.com.
- On the login page, click the Forgot Password link.
- Enter the Registered Email or Mobile details, type in the captcha, and click Request.
- Select your choice for the mode of password reset, i.e., if you want a reset link emailed, or a verification code sent to your mobile number.
- On clicking the reset link, or entering the verification code, you will be redirected.
- Enter a password and click Change.
- You can now sign in with this password.
Change Primary Email Address:
The Primary Email Address is the email account that is linked to your Zoho email account. For @zohomail.com users, the Primary email address will be used for verification and Password reset purposes only.
Steps to change the Primary Email Address:
- Login to Zoho Mail
- Click on your Avatar, and choose My Account.
- You will be redirected to the Zoho Accounts page. On the left pane, navigate to Profile and select Email Address.
- All the email addresses associated with your account will be listed under the Email Address section.
- You can set an email address as primary by hovering over the email address on the list and clicking Set as Primary address.

- You can also add a new email address that you own and make it your primary address.
- Click Add Email Address and provide the new email address you want to link to your Zoho Account.
- Once done, click Add. You will receive a notification to the provided address for verification. After successful verification, your email address will be linked to your Zoho Account.
- Follow step 5 to set the newly added email address as your primary address.

Note:
You can also change your display name for outgoing emails.
Change Password
The users can change their password from the My Account section in the Zoho Mail Suite.
Steps to change the current password:
- Login to Zoho Mail
- Click on your Avatar, and then select My Account
- You will be taken to the Zoho Accounts page. Navigate to Security in the left pane.
- Under Security, navigate to Password and click Change Password.

- Provide the old password for validation and enter the new password twice. Once done, click Change Password

Forgot Password
In case you have forgotten your account password, you can reset it by following the below instructions.
- On the login page, click the Forgot Password link.
- Enter the Registered Email Address or Mobile Number, and click Next.
- Type in the captcha and click Next.

- If you recall your previous password, enter your last password, then select Verify Password and adhere to the on-screen instructions to reset your password.
- Else, select Continue to reset your password.

- Click Send OTP to send a verification code to your registered email address, or select View all options to choose the password reset method of your choice, i.e., if you want a reset link emailed or a verification code sent to your mobile number.

- On clicking the reset link, or entering the verification code, you will be redirected to the Create New Password page.
- Enter a new password and click Change Password.
- You can now Sign in by entering your new password.


Note:
In case you're an organization account holder, you can't change your password directly. You'll have to request a reset, and your password has to be reset by your organization Administrator.
Troubleshooting Sign Up
Wrong mobile number during Sign Up
If you have entered the wrong mobile number while signing up, you won't receive the verification code. So, you'll not be able to complete the registration process. To complete your sign-up using the correct mobile number, follow the steps below:
- Log in to mailadmin.zoho.com using the incorrect mobile number as the Username and the Password that you used during the Sign Up process.
- On the verification page, click the Click Here hyperlink.
- Choose the country code, enter your mobile number and click the Update my mobile link.
- Once done, click the Resend Code link to get the verification code by SMS.
- Enter the verification code and click Verify my mobile button to Activate your account.
Now, log in to Zoho Mail again using the updated phone number and complete the Domain Verification process by following the on-screen instructions.
Invalid Email Address error
Sometimes, if you enter your email address to sign in to your account, you might get an invalid email address error. This might occur if you haven't verified your mobile number. In such cases, use your mobile number to sign in. This will direct you to the verification page, where you can verify your mobile number. Following this, your account will be validated and the email address can be used for signing in.
The email address belongs to a different deployment region
You will receive the "Email address belongs to a different deployment region" error if you provide a domain/ email address that already exists in any other Zoho data center other than the one where you are trying to Sign up. The deployment/ region is the data center (US/ EU/ IN/ CN/ AU/ JP) in which the data has been hosted. You have the following options to rectify this error:
- You can use a different email address/ domain to Sign up.
- You can delete the domain from the existing deployment region and Sign up using the email address/ domain in a new deployment/ region.
- You can also choose to continue using the domain email from the existing deployment region.
Note:
If you aren't aware of the data center in which the domain/ email address exists, you can reach out to our support team at support@zohoaccounts.com for further assistance.
Related Pages
Email Hosting Setup | Multiple From Addresses | Password Reset | Zoho Mail Pricing | Manage Mail Settings