Zoho Invoice - Zoho Analytics Integration
Zoho Analytics is a business intelligence and reporting software that lets you create visually appealing and insightful reports. Though the Reports module in Zoho Invoice contains a multitude of reports, each business has different needs and it might require them to generate custom reports. Which is exactly why Zoho Invoice integrates with Zoho Analytics.
The Zoho Invoice - Zoho Analytics integration allows you to create highly customizable reports and dashboards to visualize and track key metrics from your Zoho Invoice data. With the integration, you can create custom reports or choose from Zoho Analytics’ 75+ financial reports.
Benefits of the Integration
By integrating with Zoho Analytics you can:
- Get access to a full-featured business intelligence (BI) and reporting tool that can slice & dice your Zoho Invoice data to create any report/dashboard you require.
- Create your own reports and dashboards based on your Zoho Invoice data or from any other data sources and popular business applications.
- Share reports and dashboards with your colleagues.
- Schedule and email your reports whenever you want.
- Export your reports as PDF, HTML, Excel, CSV, and image files.
- Embed your reports in websites, blogs, etc.
Note: When you set up the integration, Zoho Analytics will provide you with a free 15-day trial. However, once the trial ends, you will no longer be able to use Zoho Analytics and will have to upgrade to one of their plans that suit your needs.
IN THIS PAGE…
Set up the Integration
Prerequisite: You must be an admin to set up this integration.
Note: When you integrate your Zoho Invoice organization with Zoho Analytics, your email id, customers, invoices, estimates, and expenses will be shared with Zoho Analytics.
To set up the integration:
- Log in to your Zoho Invoice account.
- Go to Settings > Integrations > Zoho Apps.
- Click Connect next to Zoho Analytics.

- Read about the integration on the next screen, and then click Configure.

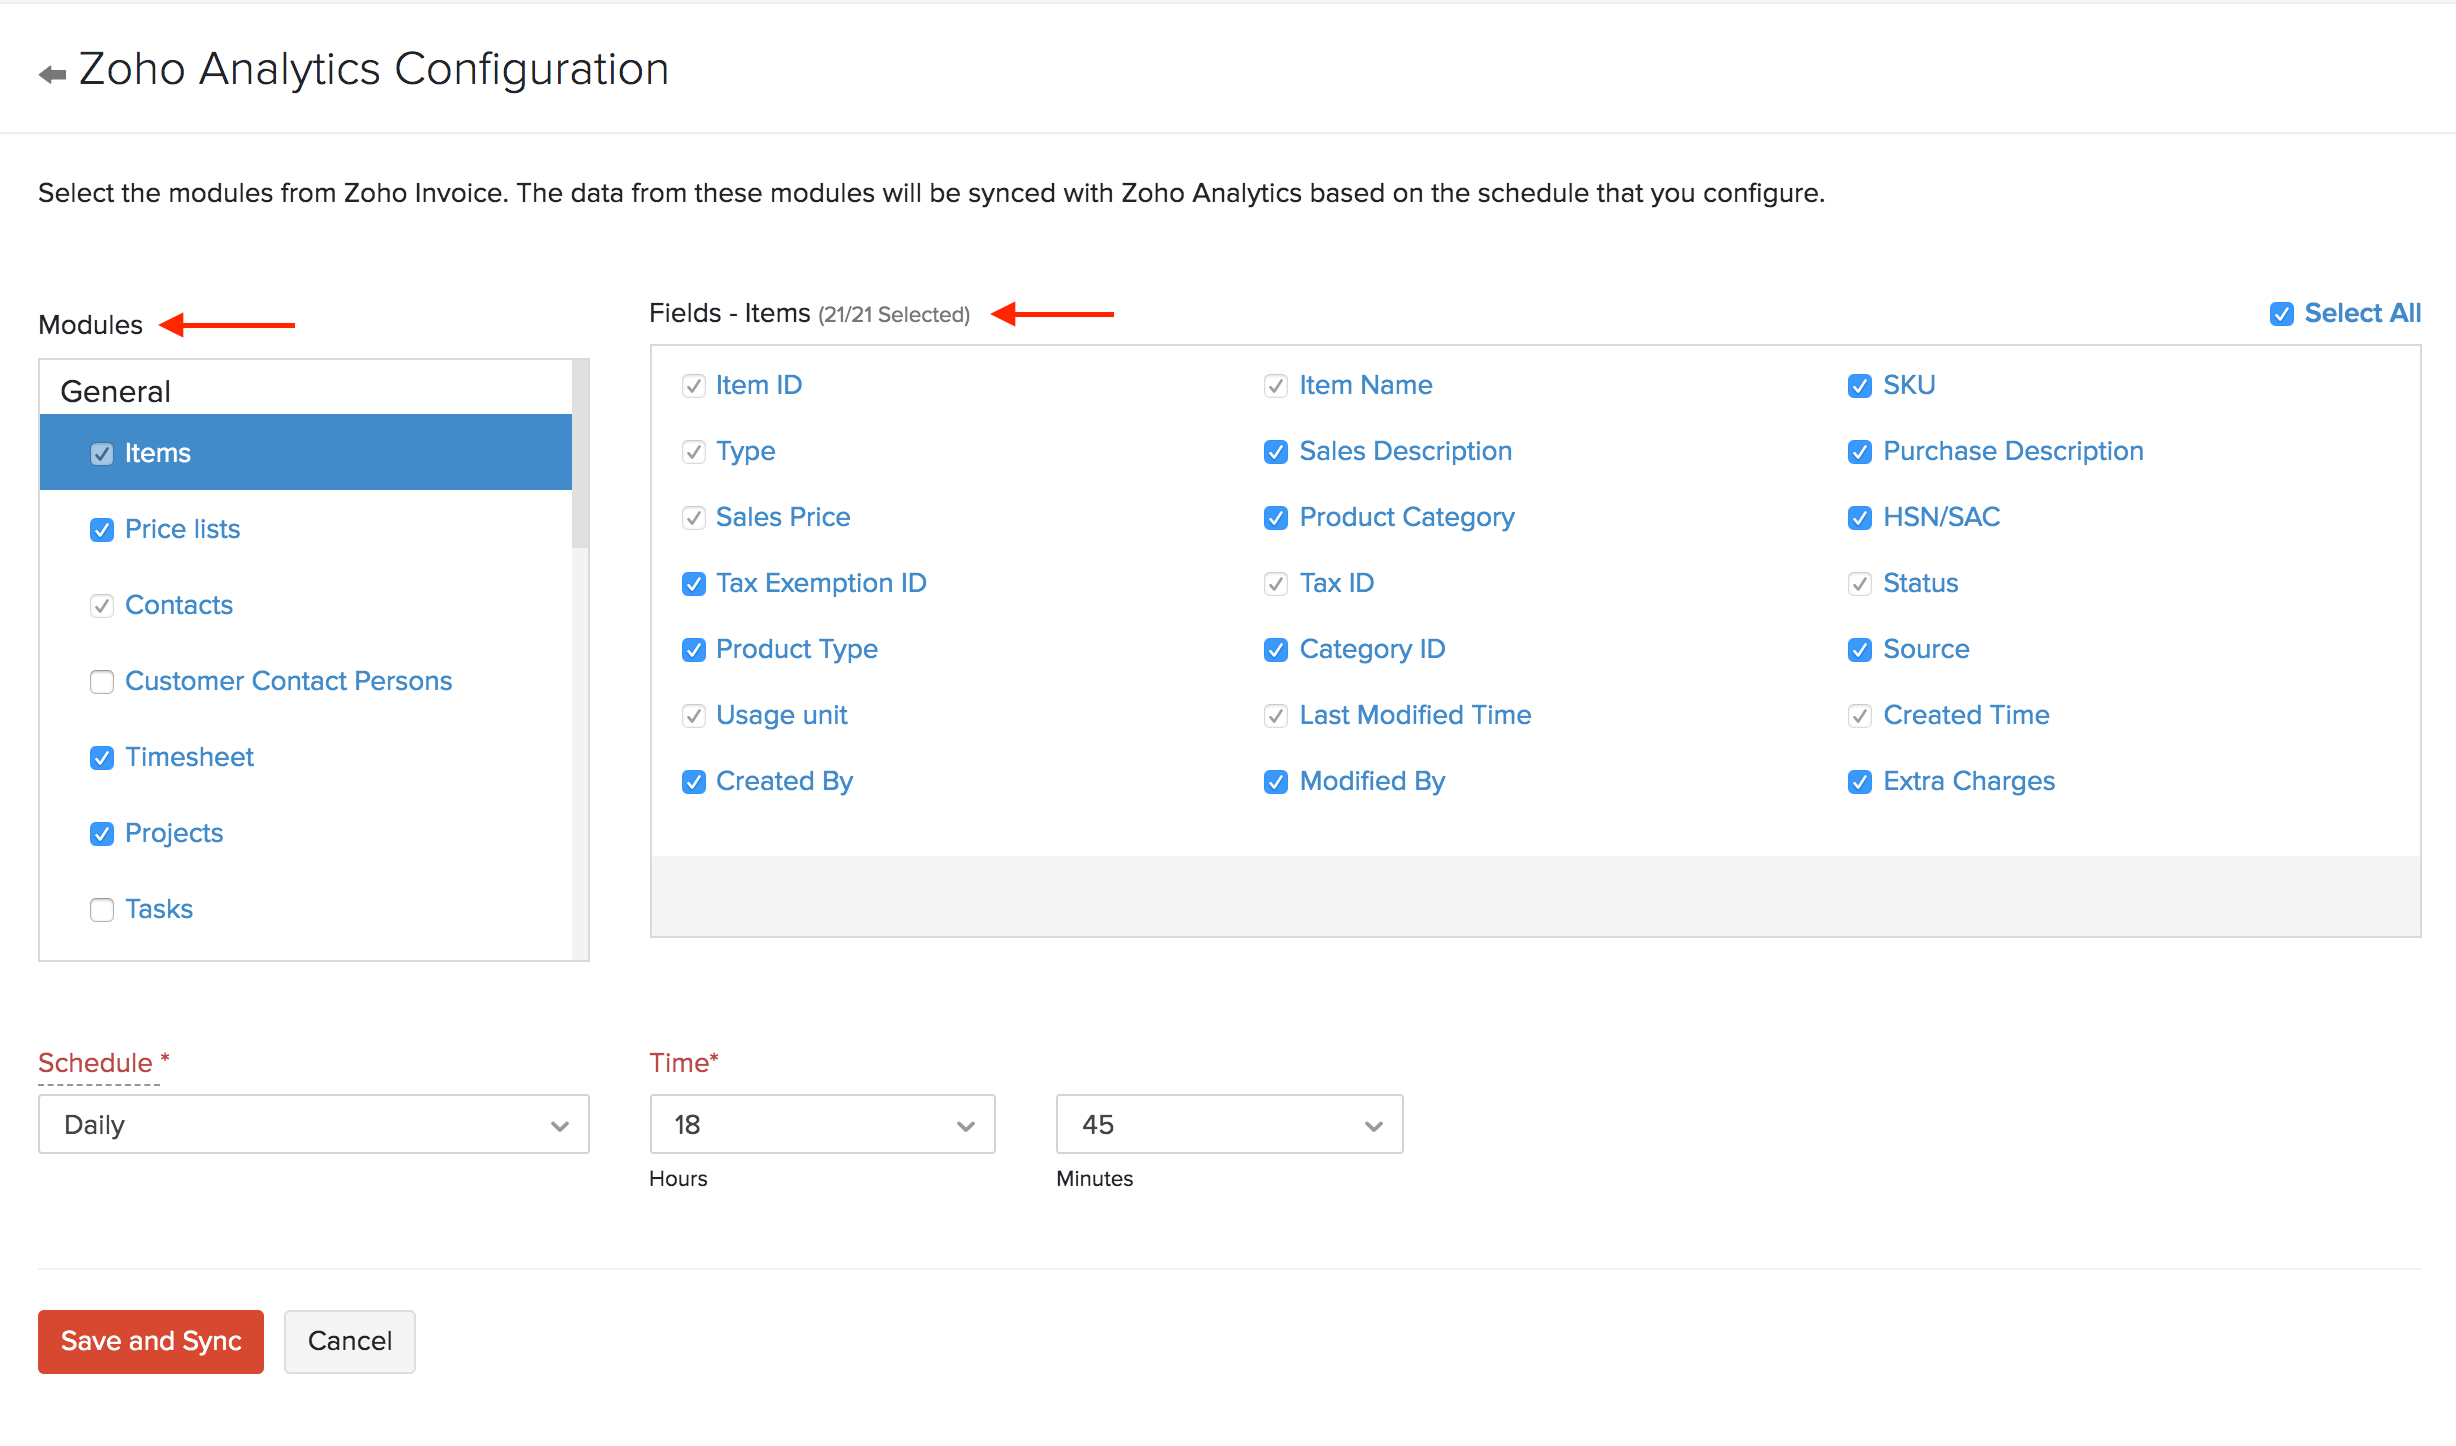
Your data from Zoho Invoice will be made available in Zoho Analytics via a one-way sync. You can choose the modules whose data you wish to sync with Zoho Analytics, and also configure how often this data should be synced with Zoho Analytics.
- Select the Modules and their respective Fields that need to be synced.

- Configure a Schedule to sync data with Zoho Analytics.

- Click Save and Sync.
Pro Tip: You can reconfigure the schedule and the modules that get synced even after integrating, by going to Settings > Integrations > Zoho Apps > Zoho Analytics > Show Details and then clicking Edit Settings.
Now, your integration has been setup and your data will start getting synced with Zoho Analytics. The initial sync may take a while to complete, however, you can continue to use Zoho Invoice and you’ll be notified by email as soon as your data has been synced.
Access the Workspace in Zoho Analytics
When you set up the integration, a workspace will be created in Zoho Analytics. This workspace is where you can create reports and dashboards with data from Zoho Invoice. To access Zoho Analytics:
- Go to the Reports module and click Try Advanced Reporting.

(or)
- Go to Settings > Integrations > Zoho Apps > Zoho Analytics.
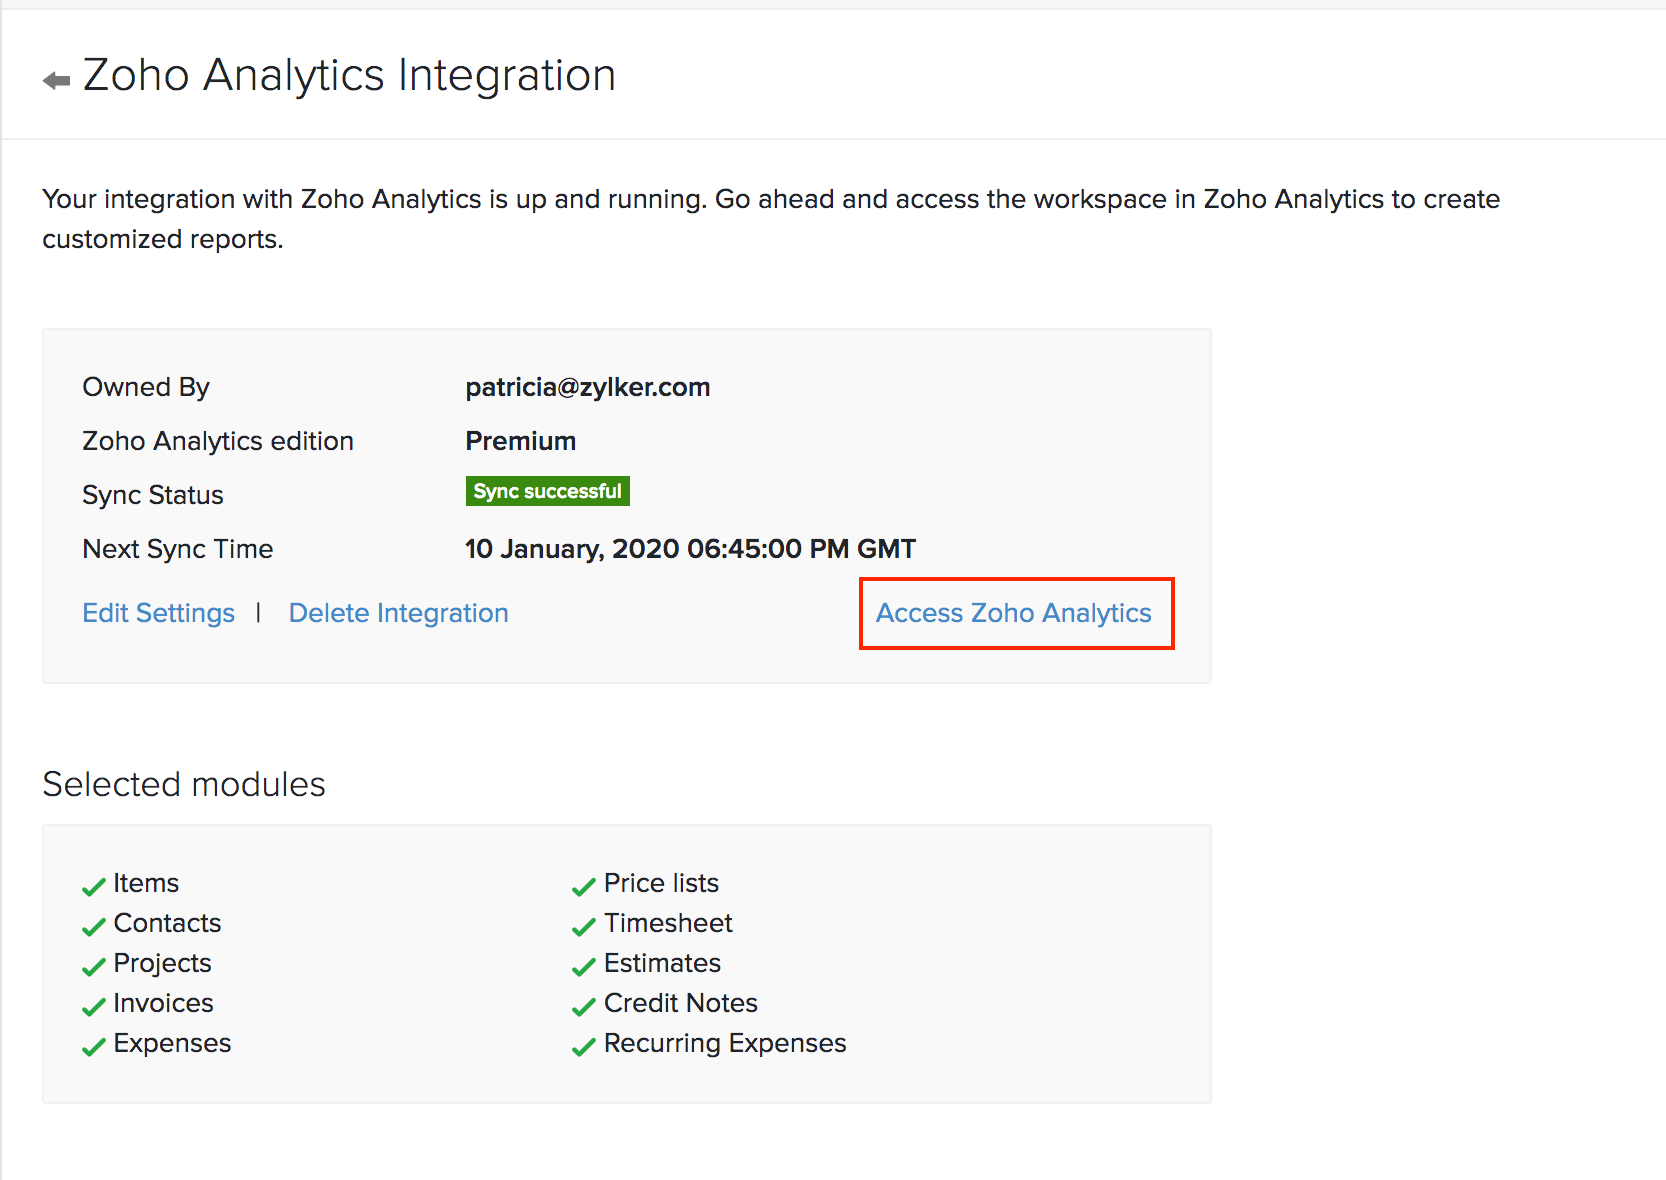
- Click the Show Details button in the integrations page.
- Click Access Zoho Analytics.

You can also go directly to Zoho Analytics and view Zoho Invoice’s Analytics. Apart from accessing pre-defined reports, you can also create custom reports and view them in different formats such as Charts, Pivot Tables, Summaries, Widgets, Dashboards, etc,.
Also, make sure to read Zoho Analytics' integration specific help resources, which goes into detail about using the integration from their side.
Add Users to the Workspace
It’s important to note that only the admin who set up the integration will be able to access this workspace. If other users (including other admins), want to access this workspace, the admin who set up this integration must add them as users in the workspace. To do this:
- Go to Settings > Integrations > Zoho Apps > Zoho Analytics.
- Click the Show Details button in the integrations page.
- Click Access Zoho Analytics.
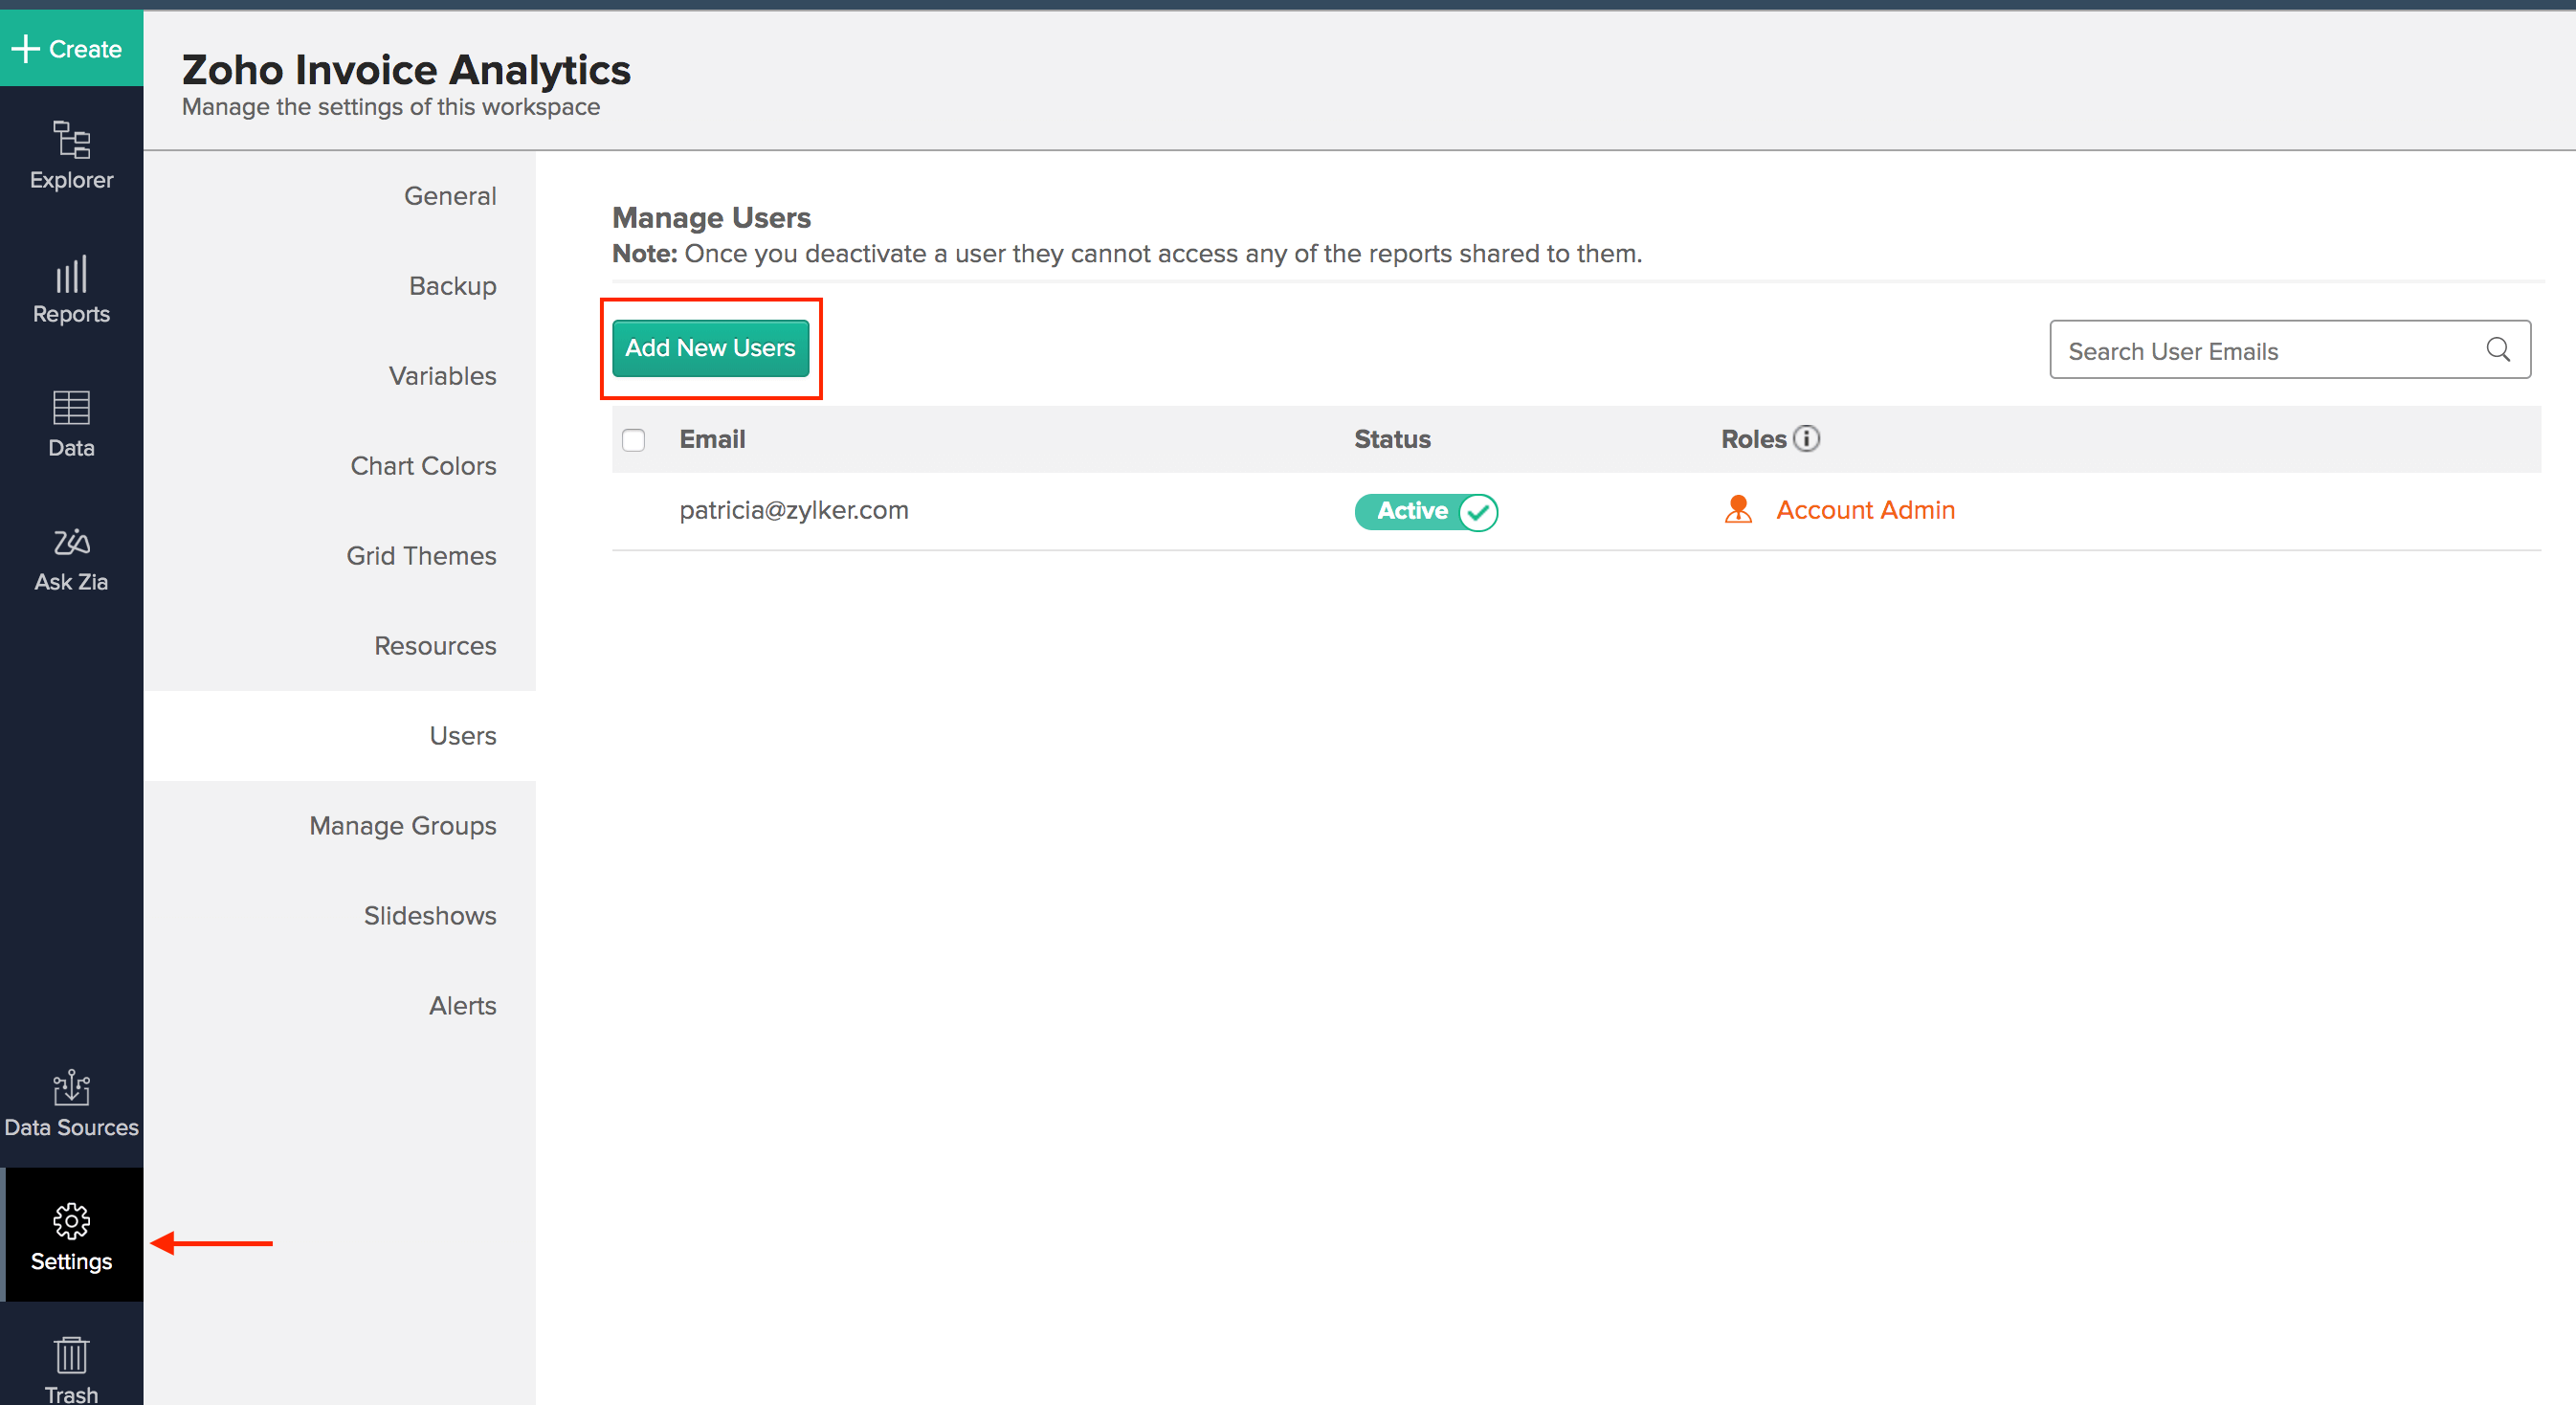
- Go to the workplace’s Settings from the left side bar of Zoho Analytics.
- Navigate to the Users tab and click Add New Users.

- Enter the email address of the user and click Add.
Now, the users that you’ve added will be able to access the workspace in Zoho Analytics. You can learn more about user roles in Zoho Analytics by checking out their help resources.
Delete the Integration
If you’d like to stop using the integration completely, you can delete it. Here’s how:
-
Go to Settings > Integrations > Zoho Apps > Zoho Analytics.
-
Click the Show Details button in the integrations page.
-
Click Delete Integration.

-
Confirm your action by clicking Delete in the pop-up that follows.
Now, the integration will be deleted and your data from Zoho Invoice will no longer be available in Zoho Analytics, including any data that was synced to Zoho Analytics before deleting the integration.

 Thank you for your feedback!