Zoho Flow
Zoho flow is an integration platform that allows you to connect applications together and create a workflow between them. You can create a flow between the applications you want to connect and automate the process. A flow structure will have a trigger and action(s). The trigger can be any activity that occurs in an application. In response to this trigger, a corresponding action will occur in another application. Using this flow model, different applications can be integrated to perform different actions. Similarly, Zoho flow can also be used to connect ZeptoMail with various other applications.
- Trigger - New Activity
Triggers are the activities that occur in an application. In ZeptoMail, it can be the recipient activity like open, click, and bounce on an email you send. You can choose the activity you wish to include in the trigger. - Action - Desired outcome
The resulting action to be performed for the particular trigger.
Configuring ZeptoMail trigger In Zoho Flow :
If you have a ZeptoMail account, you can easily login to Zoho flow and create a workflow for your account.
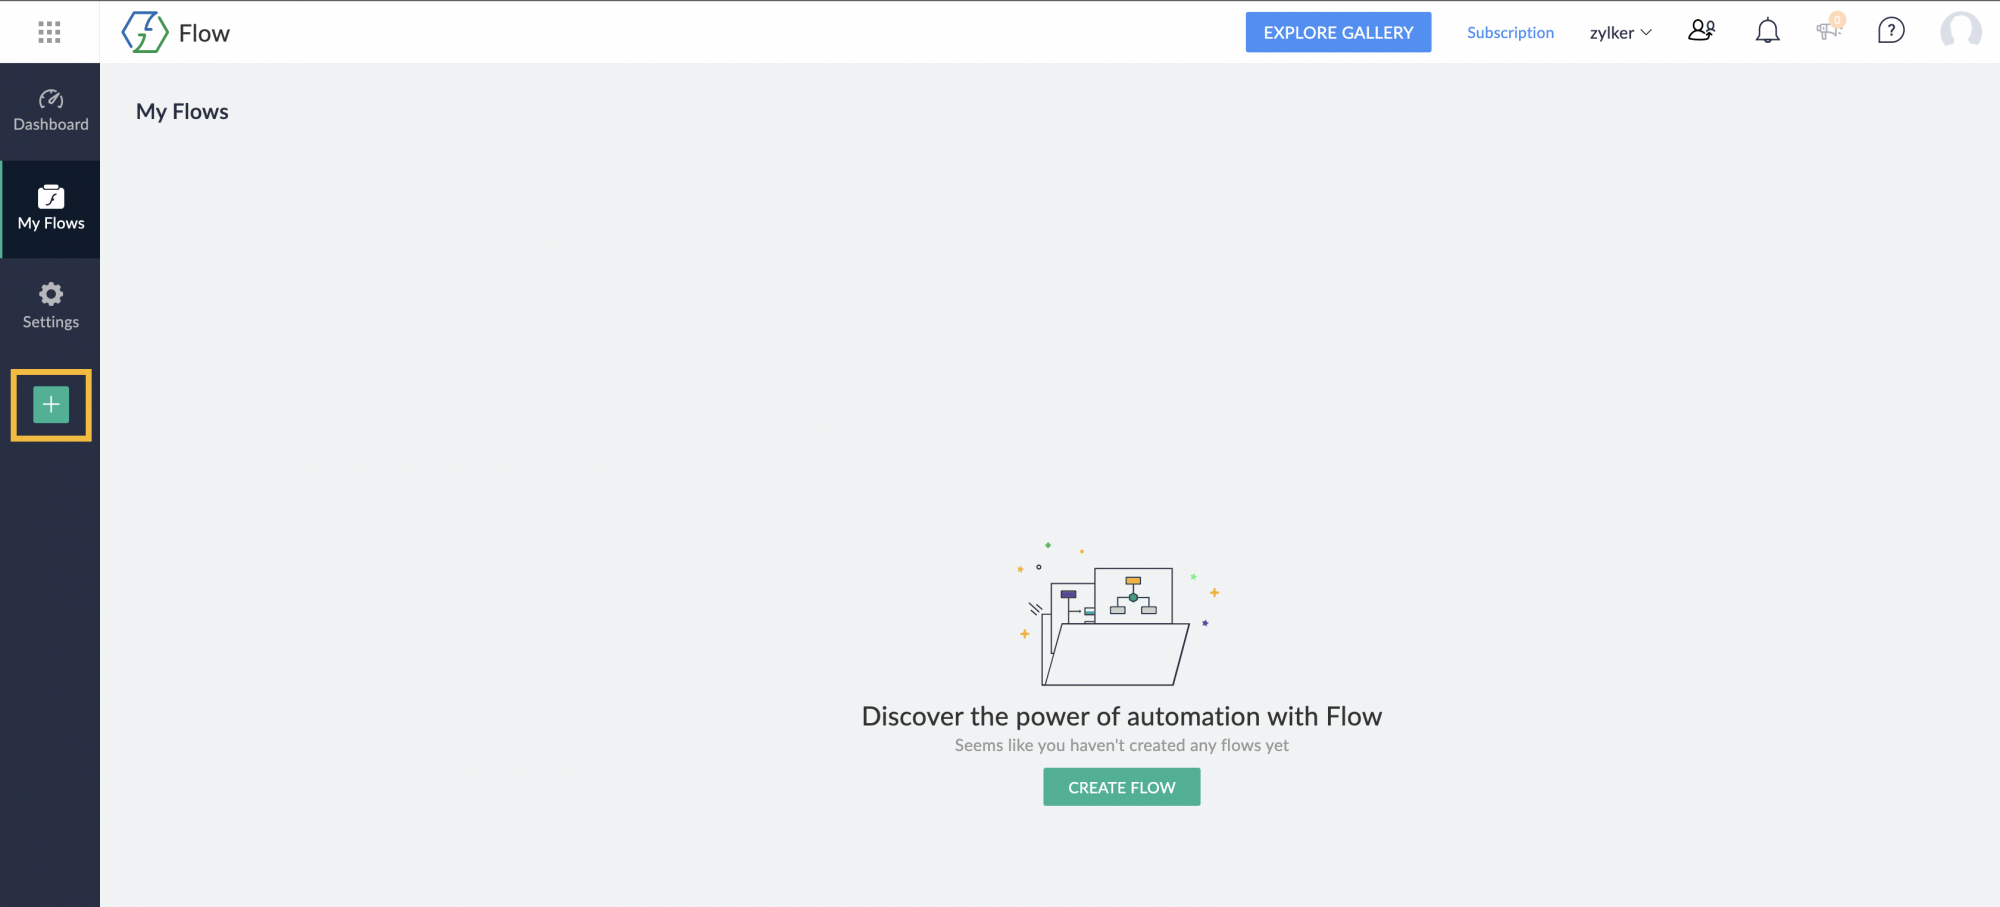
- Login to Zoho Flow webpage.
- To create a new flow, click the Create flow button from the left panel.
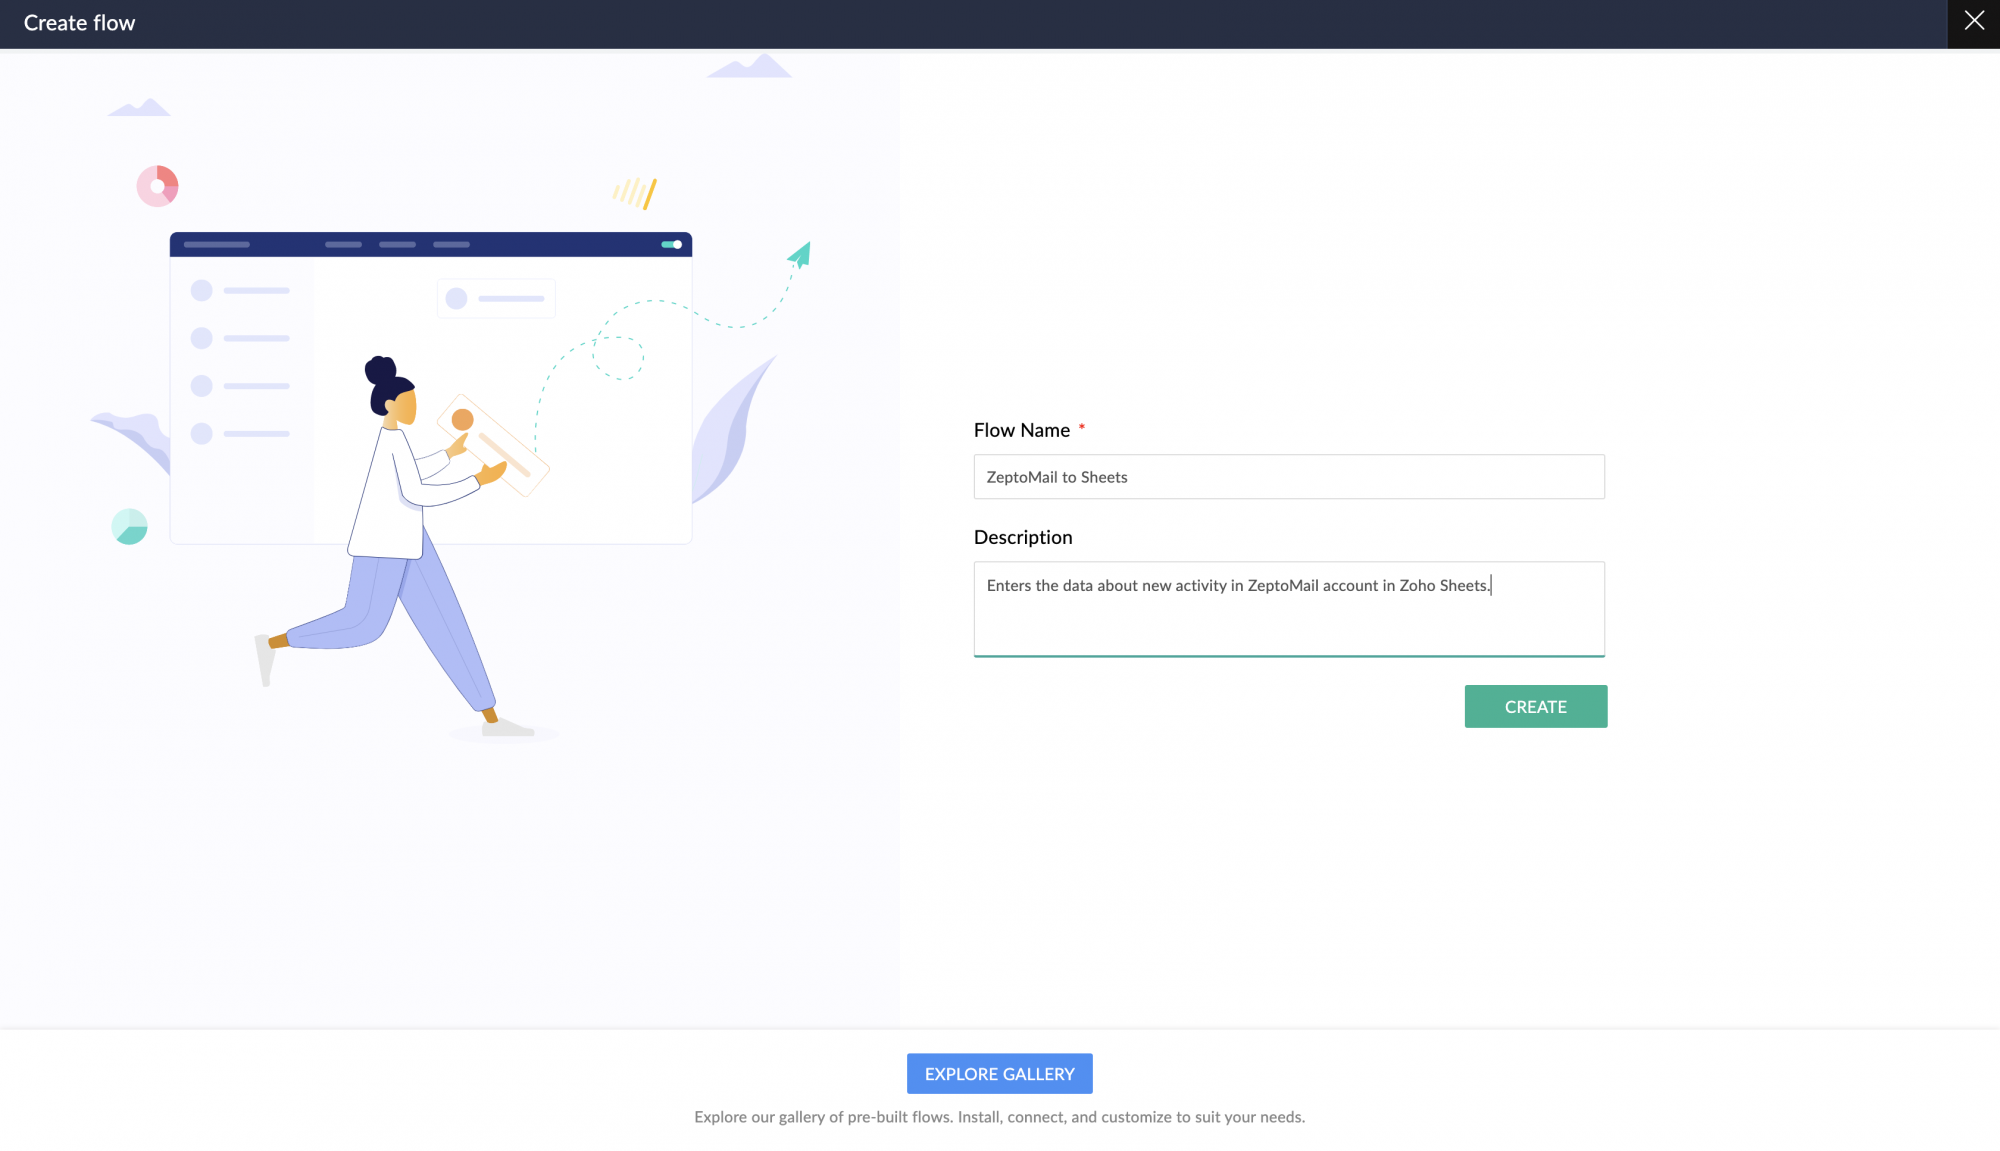
- Enter a Flow name describing workflow between the applications you wish to connect and give a short description explaining it. Say you would like to connect ZeptoMail with Sheets. Write an appropriate description explaining the process. Click next.
- If you are creating a new flow, a pop up with the steps explaining the flow process appears. Once you go though all the steps, you can start creating your flow.
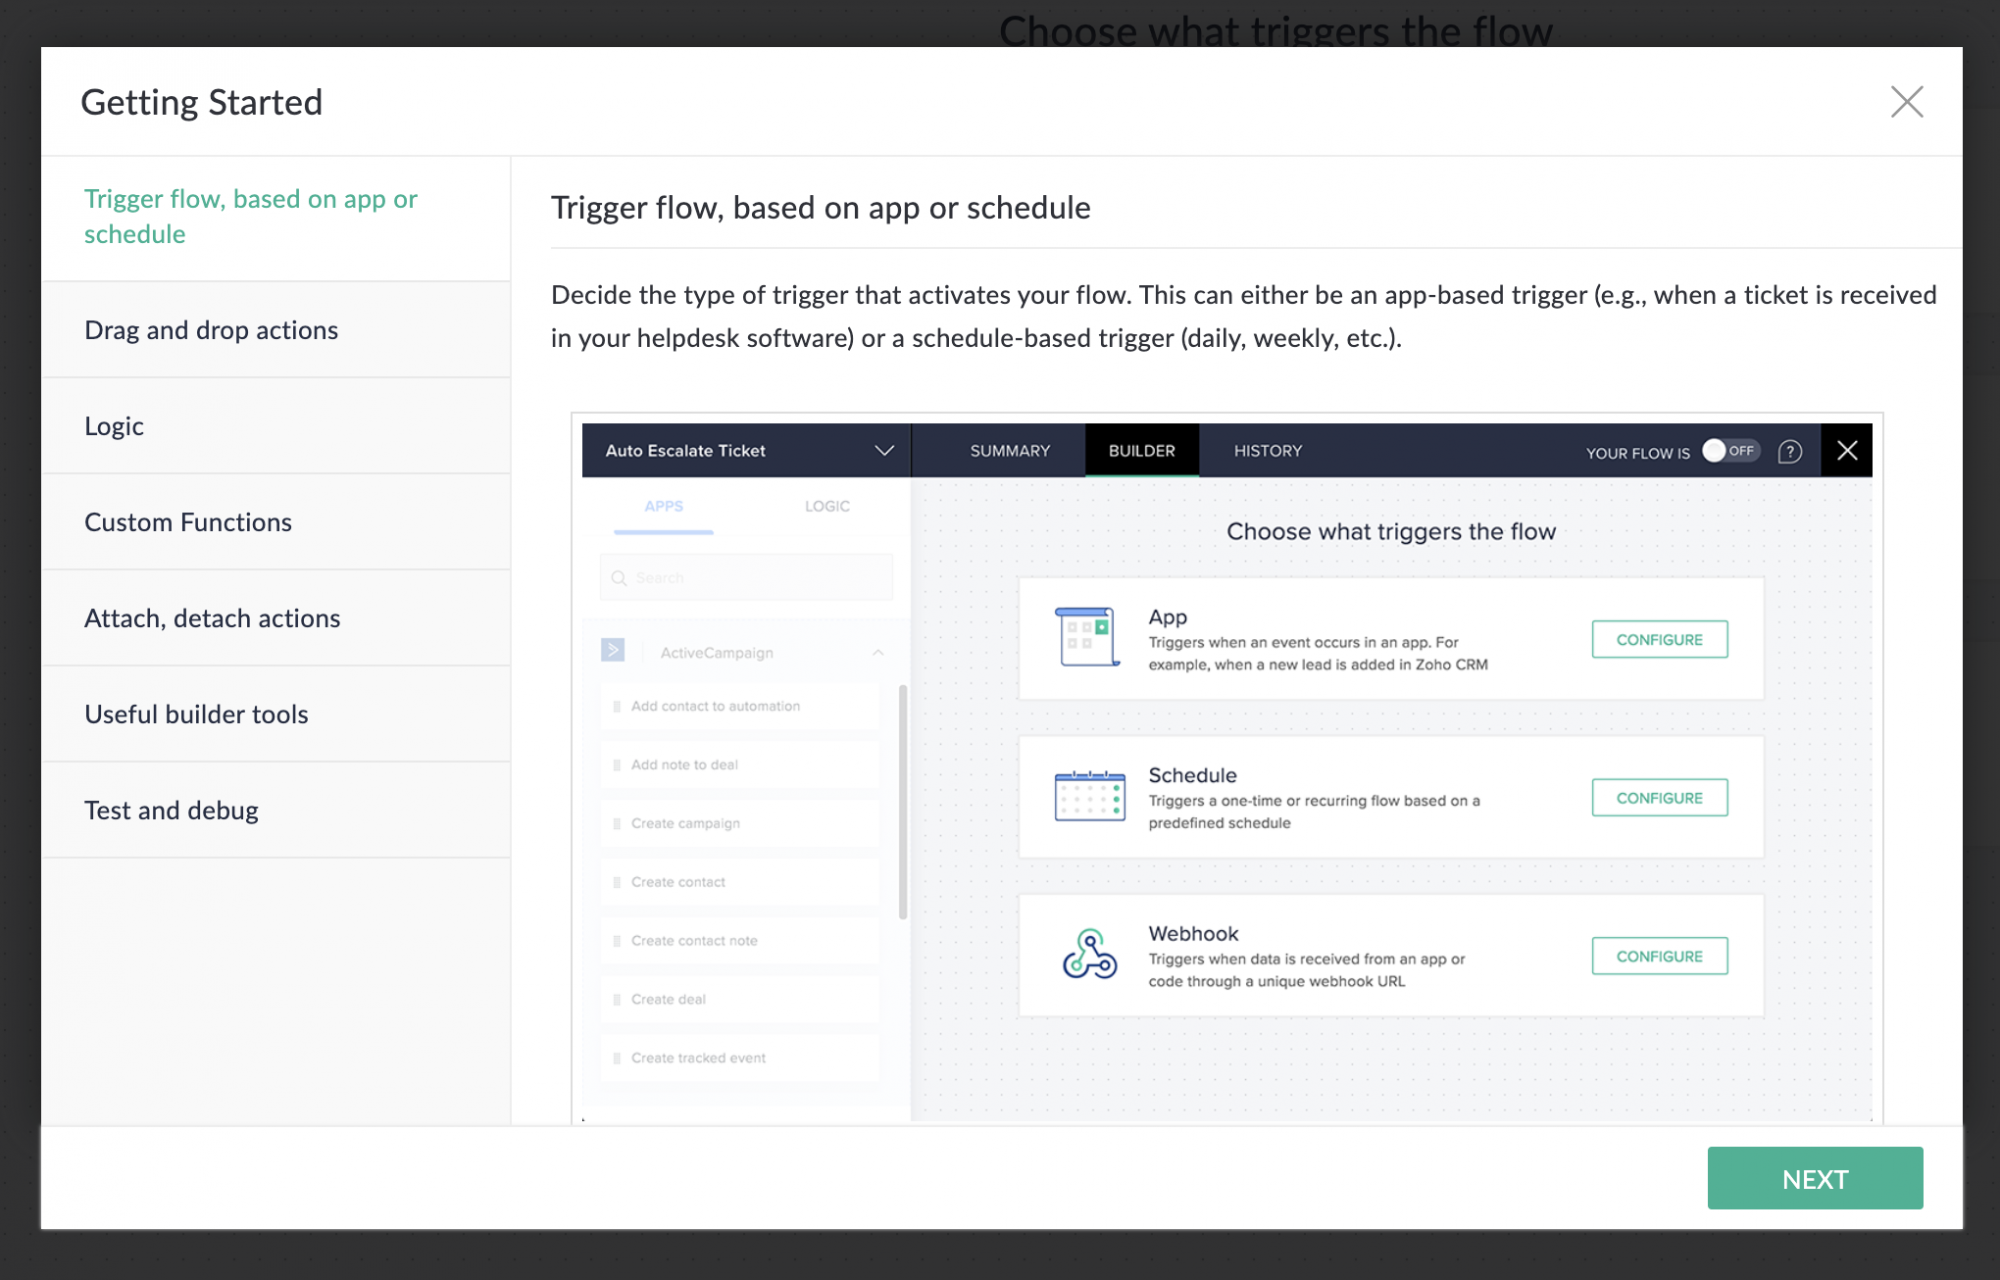
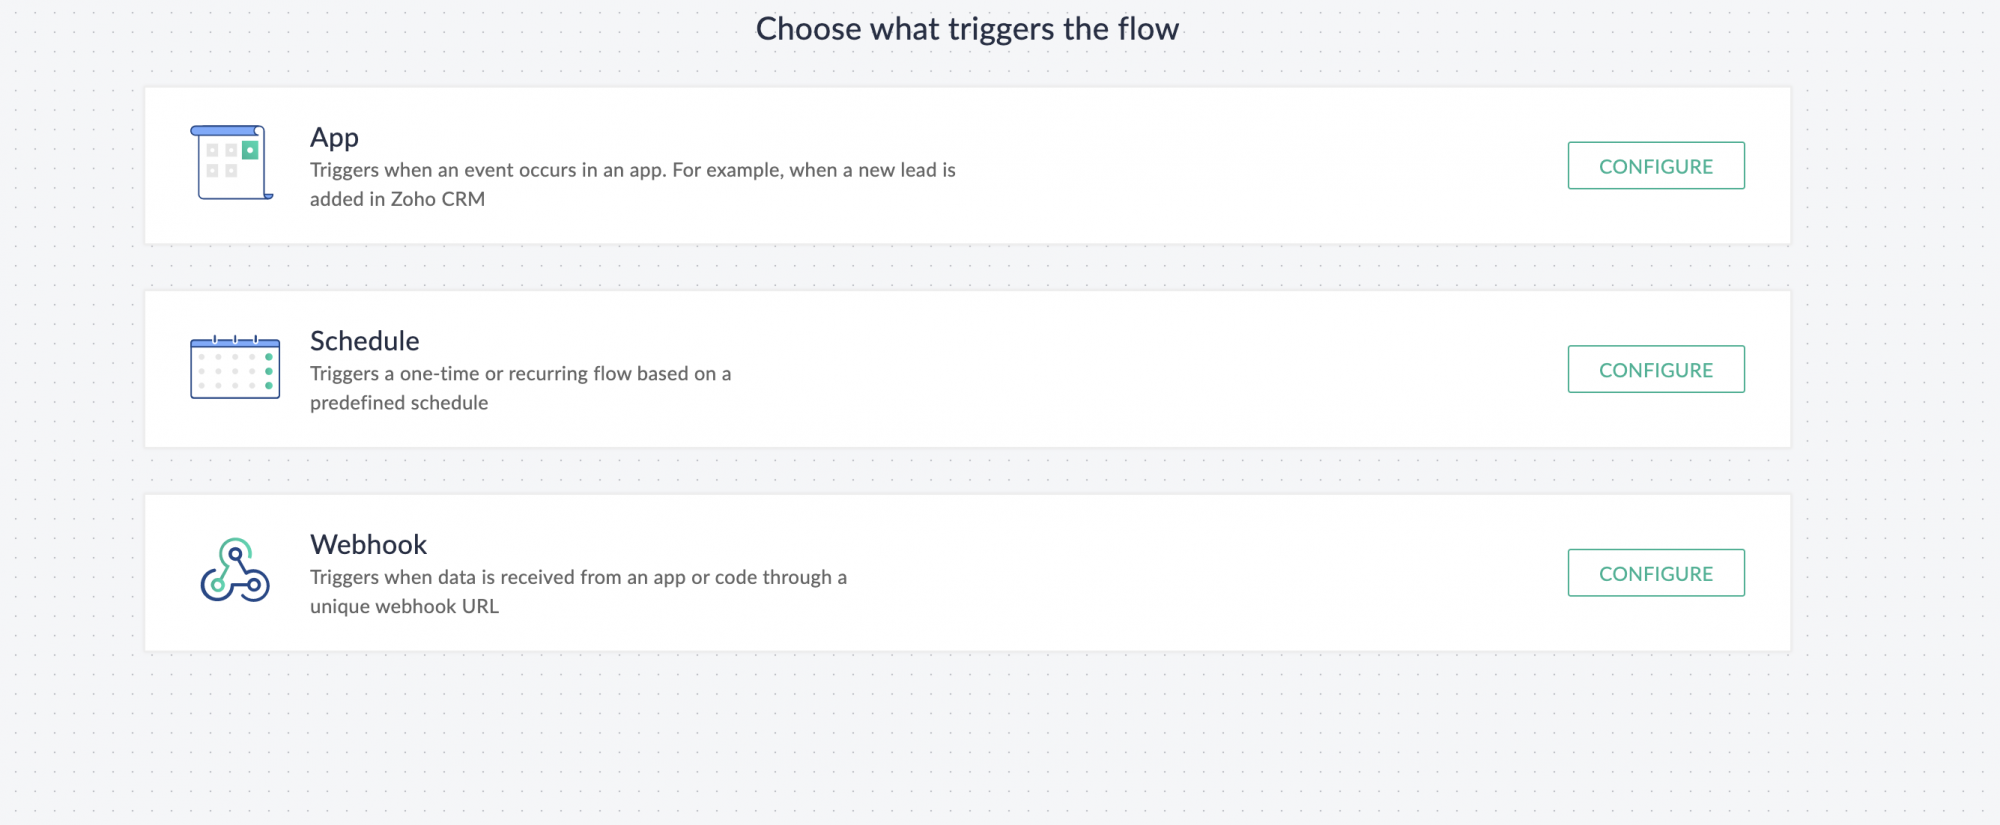
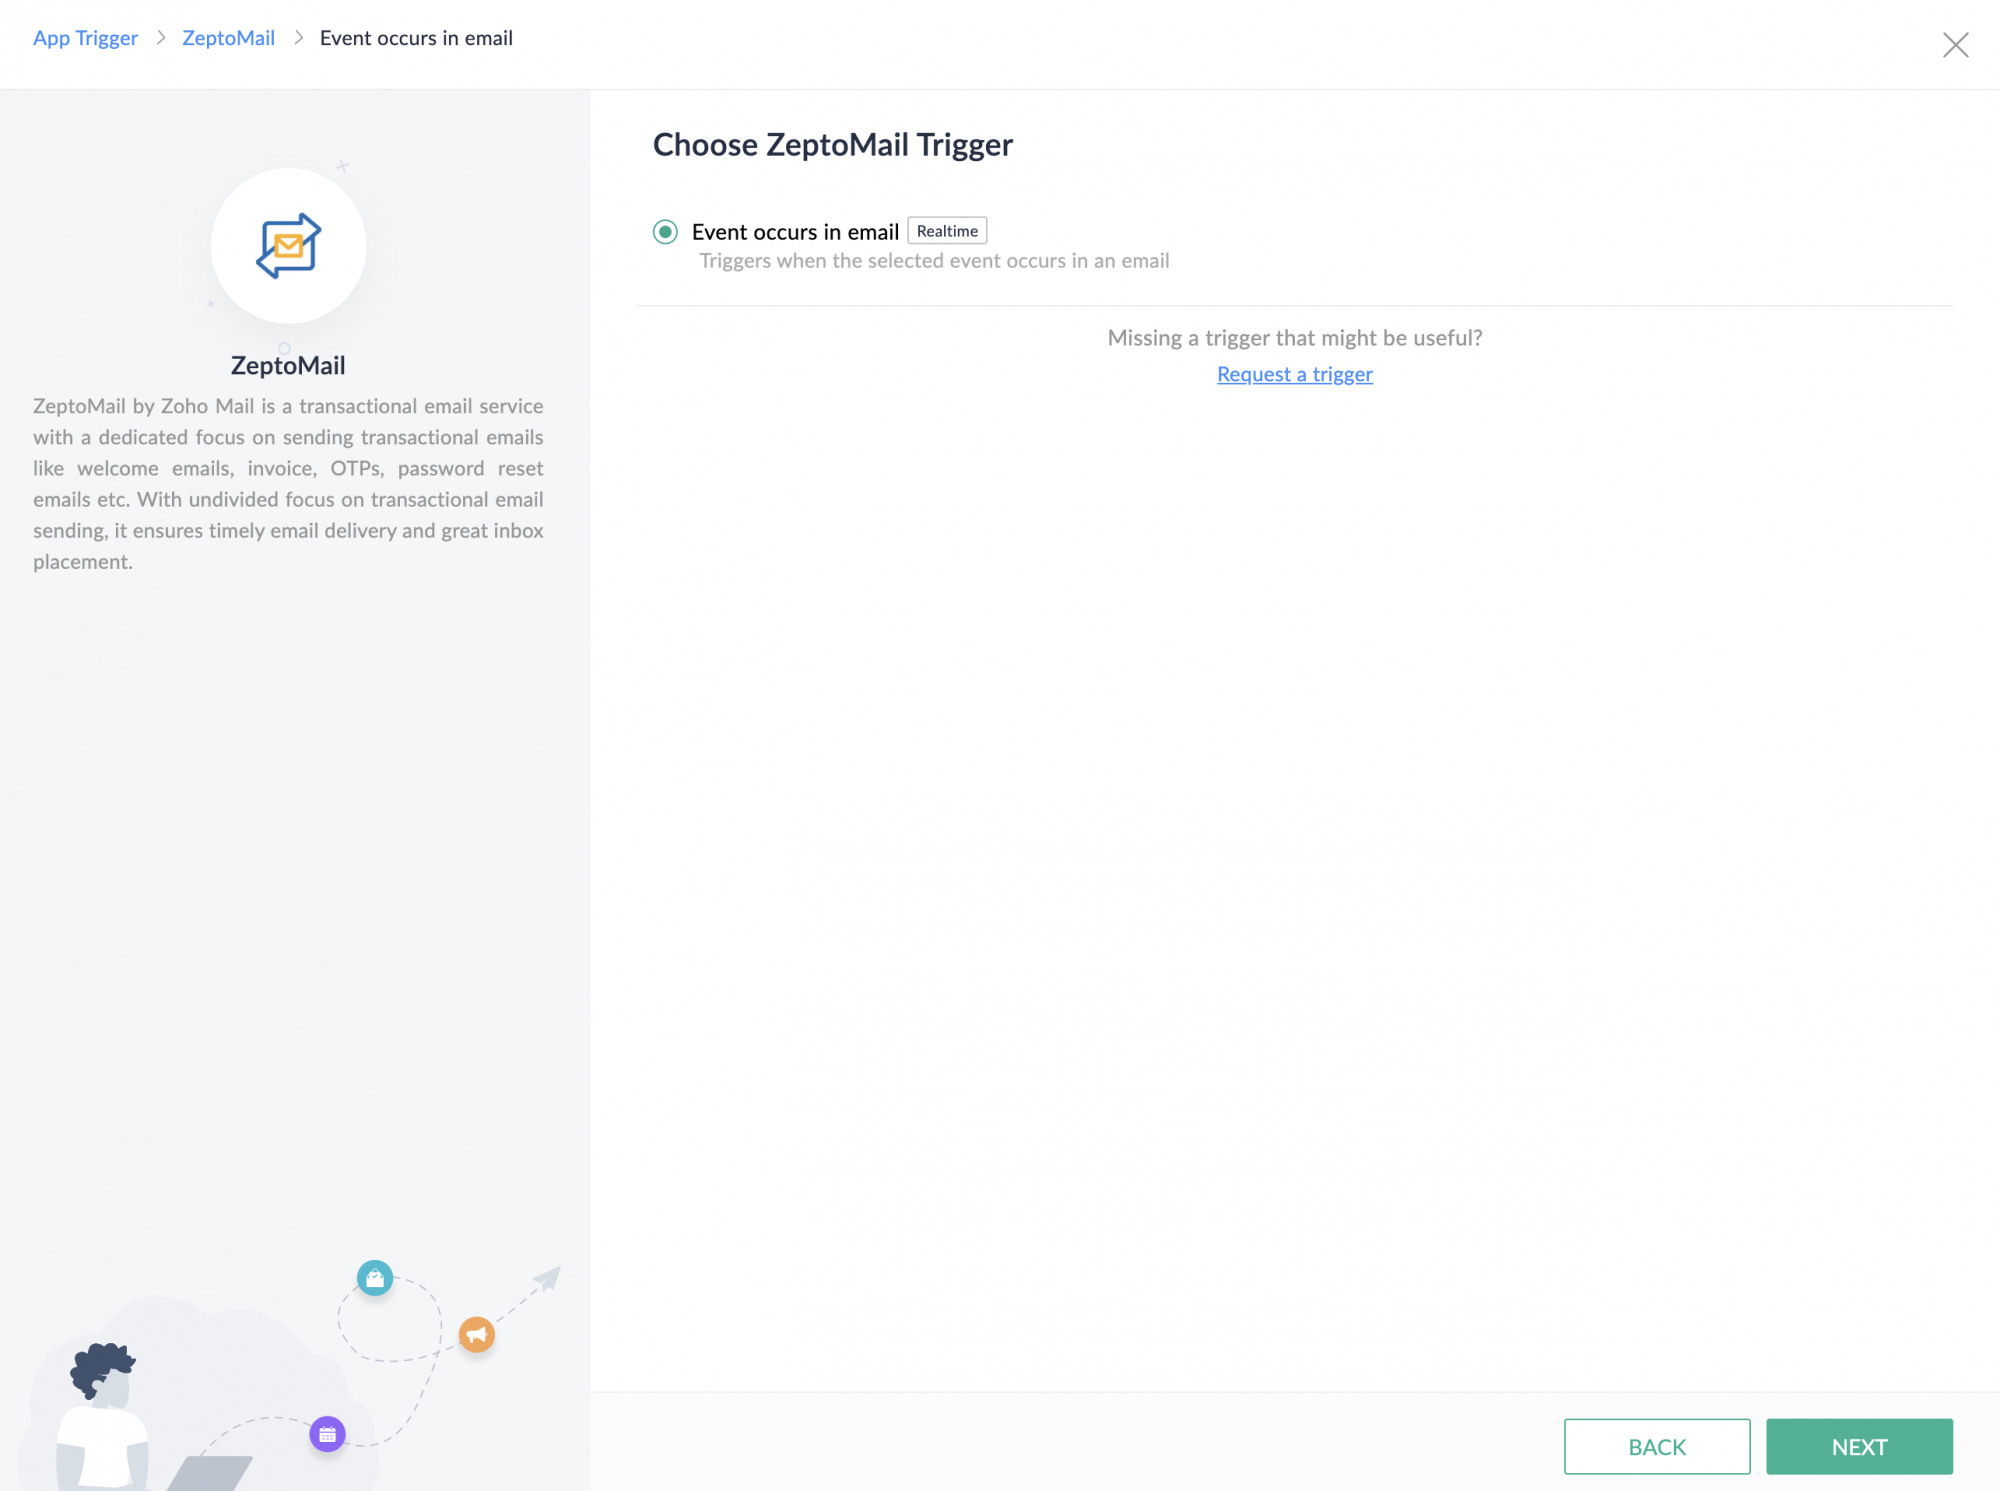
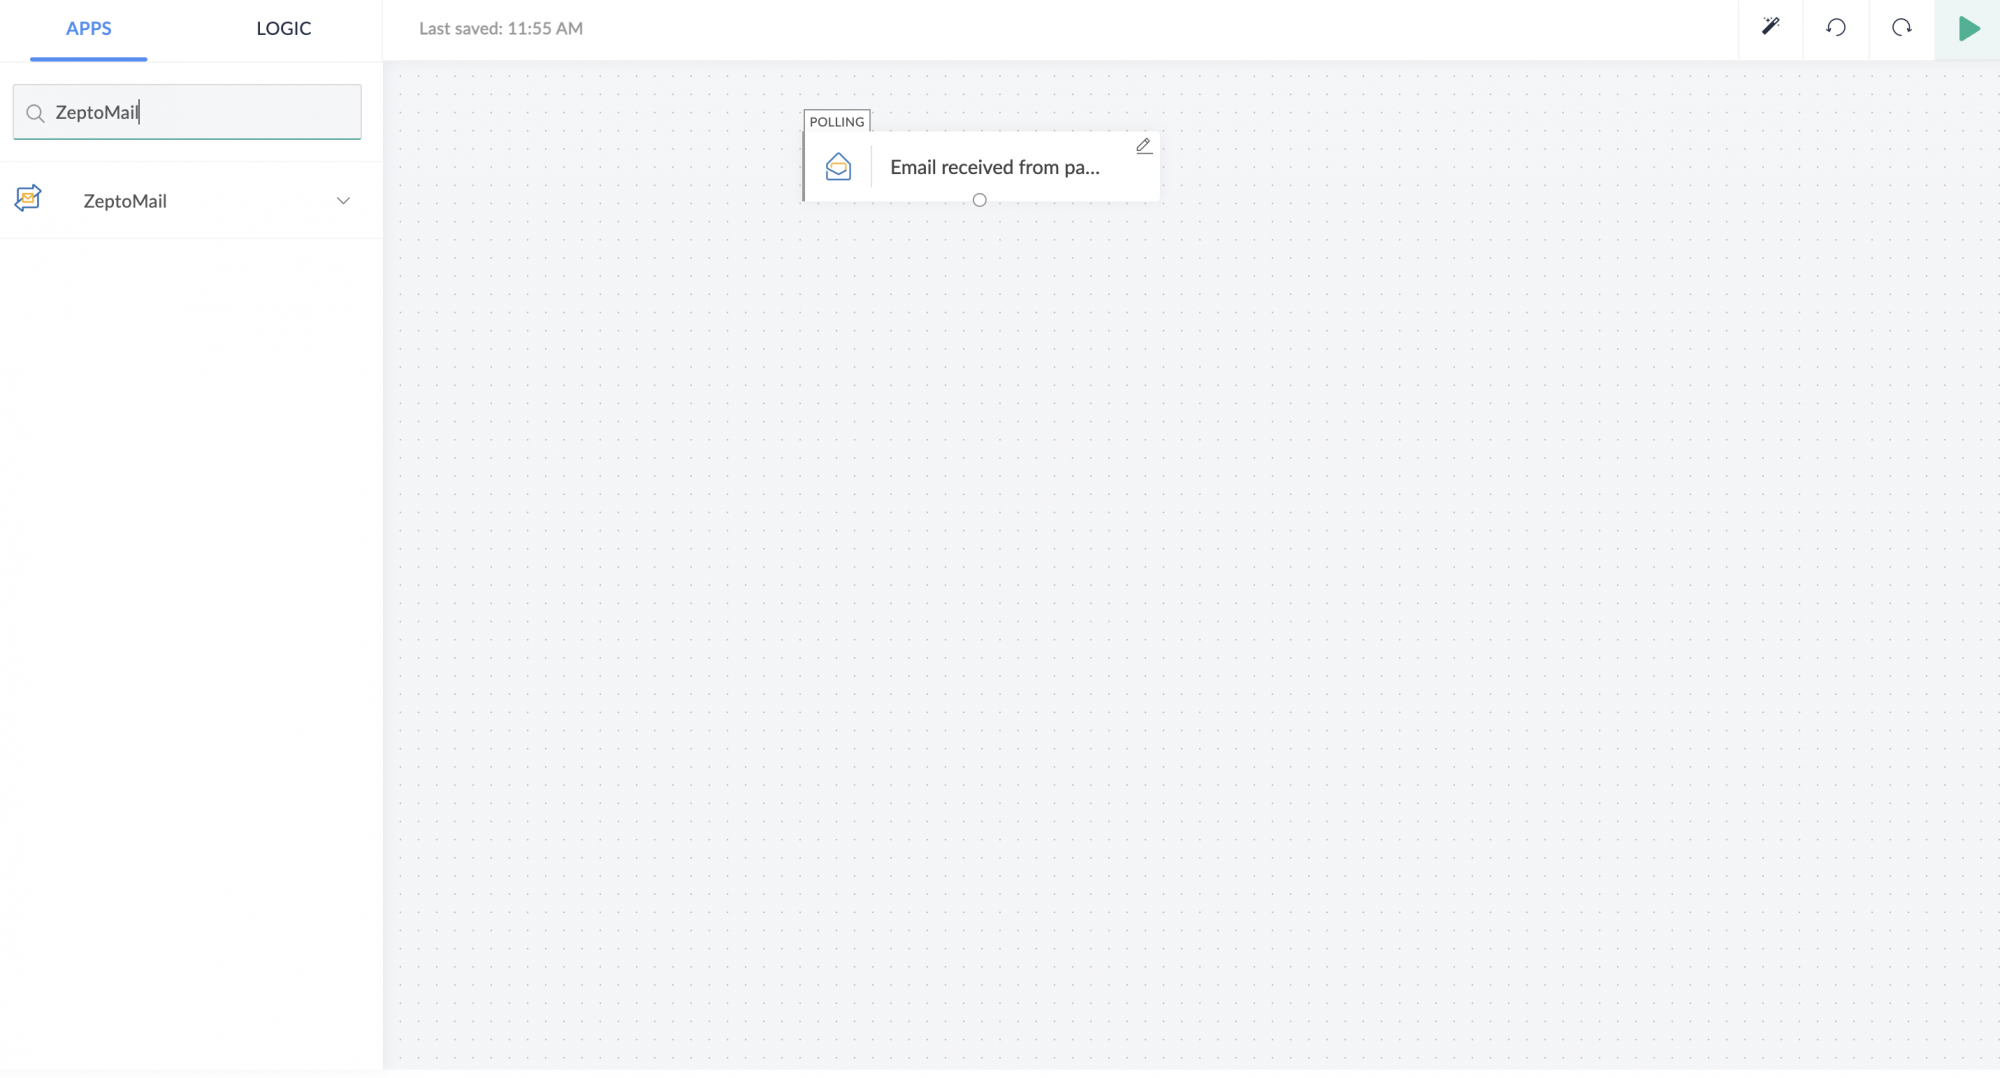
- Select the trigger for your flow. For ZeptoMail click on App as the trigger. Click configure.
- In the search bar, search for ZeptoMail and click Next.
- A page with ZeptoMail's trigger(s) will be displayed. Choose the appropriate one and click Next.
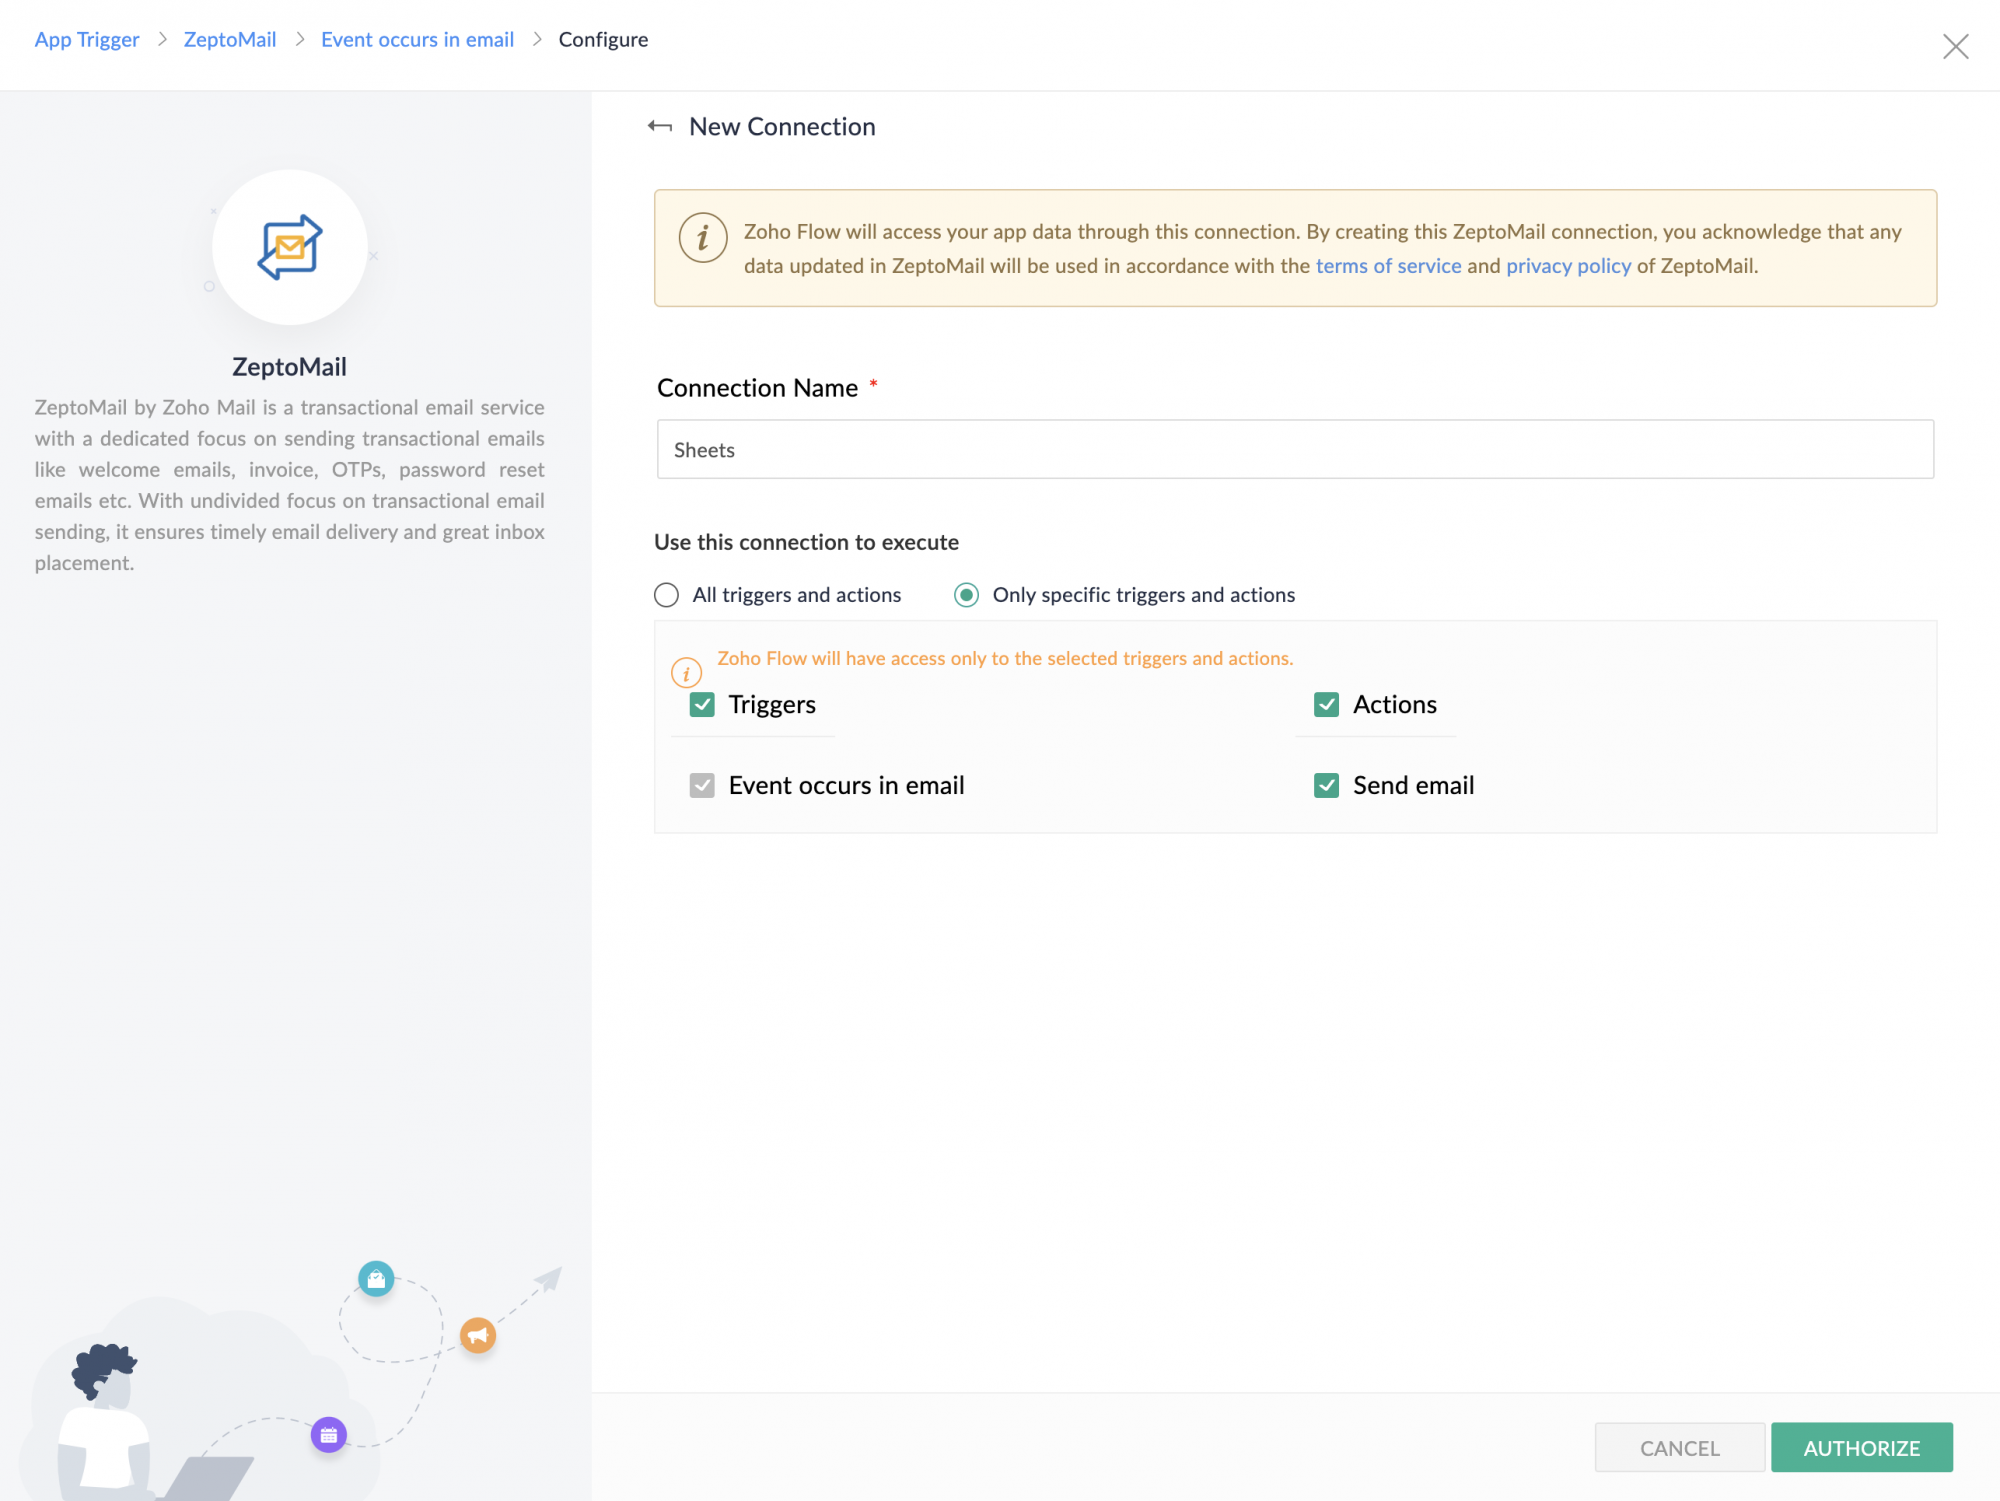
- By clicking connect in the next step, you approve Zoho flow to exchange data with ZeptoMail.

- In the next step, enter the connection name. You can either authorize this connection to access all the triggers and actions or select specific triggers and actions.
- The triggers include : Occurance of an email event such as a bounce, click or open.
- The actions include : An email being sent.
- Click Authorise.
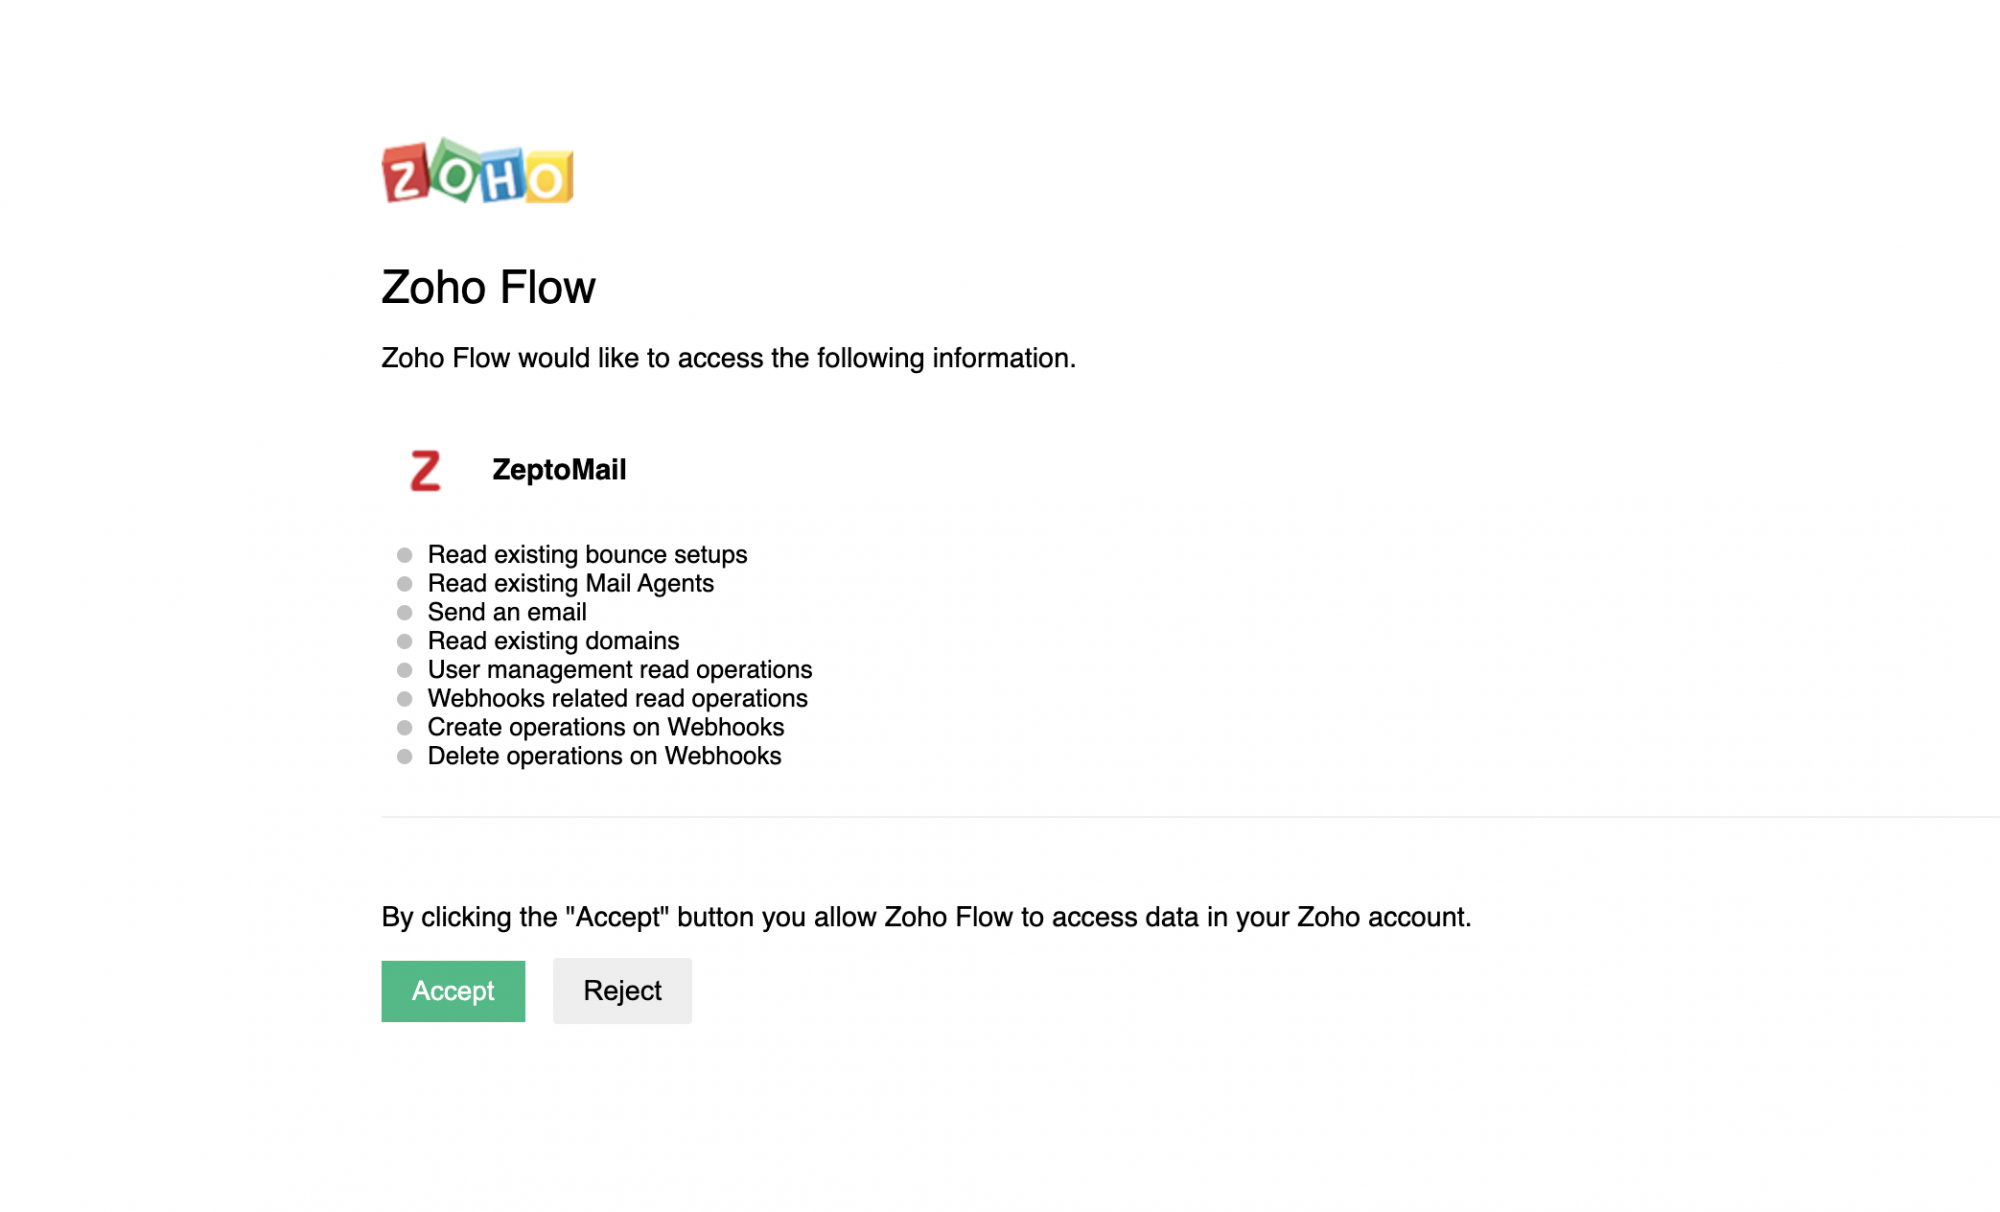
- Click Accept in the next step to allow Zoho flow to access your data.
- Next, enter the variable name. Once you enter a connection's name, a default variable name will be auto-filled. You can change this variable name. Points to be noted while re-naming a variable are:
- Variable names must always start with an alphabet. A Variable name can contain alphanumeric characters and underscore.
- Special characters such as space, hyphen, etc. are not accepted. Enter unique variable names to avoid name clashes.
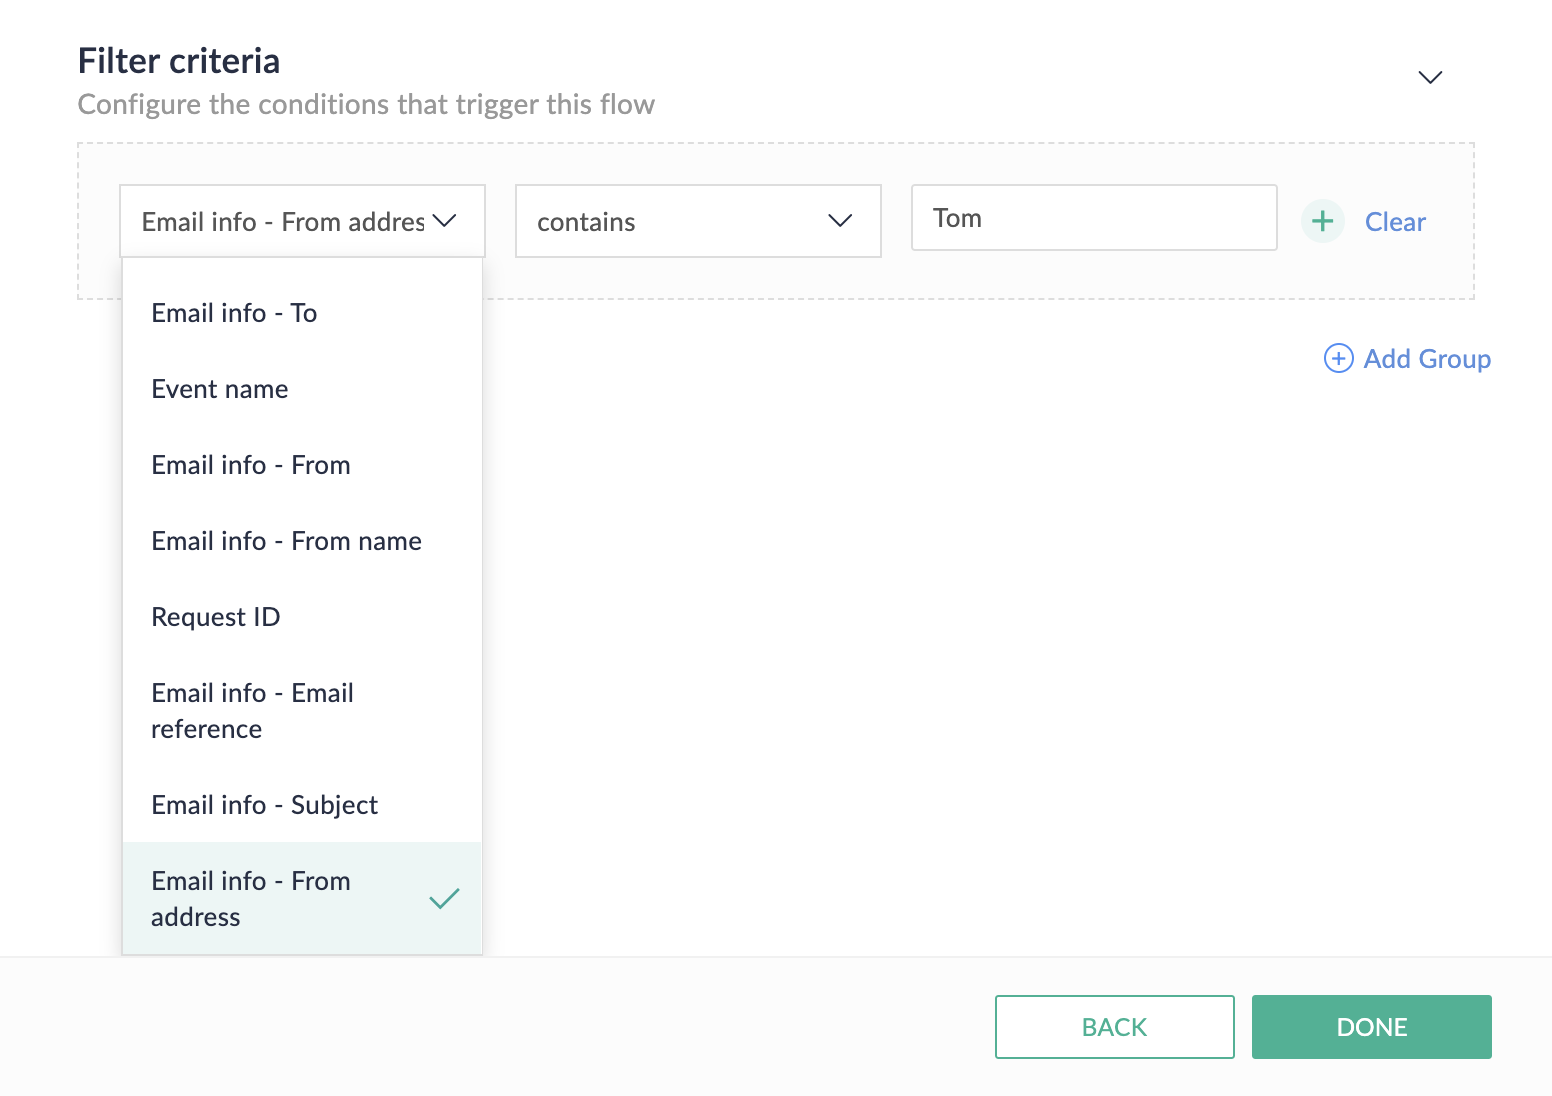
- Choose the Agent and the email event that you wish to use as the trigger, from the drop-down.
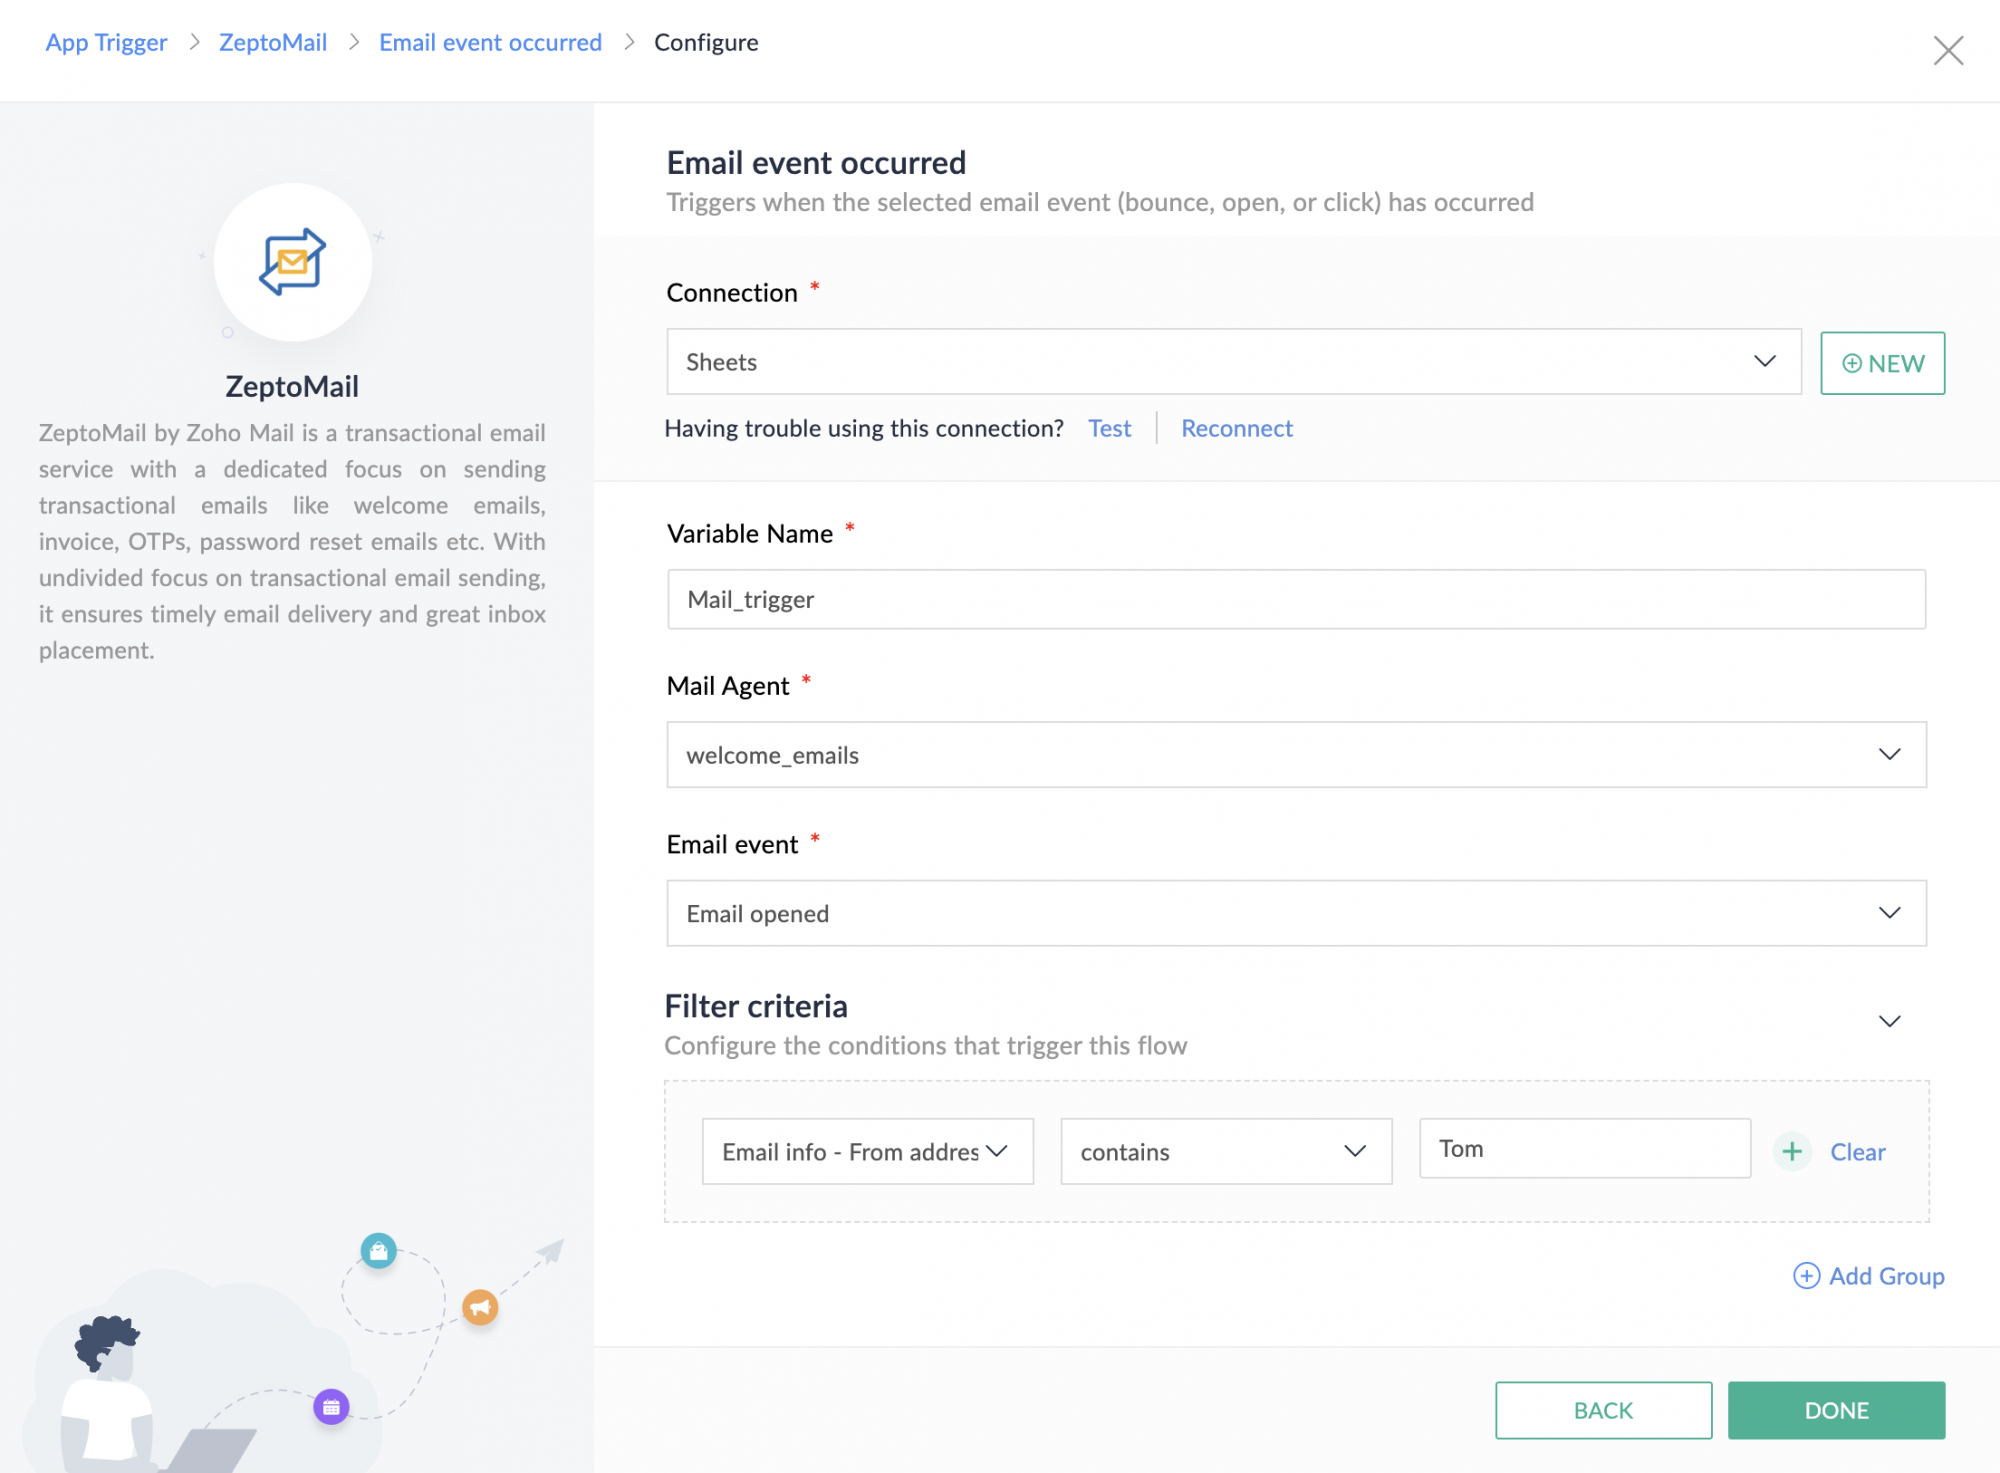
- You can further narrow down your trigger criteria from the drop down box. Once you have selected the required parameters, click Done.
- You will be taken to the Builder page where trigger will be displayed
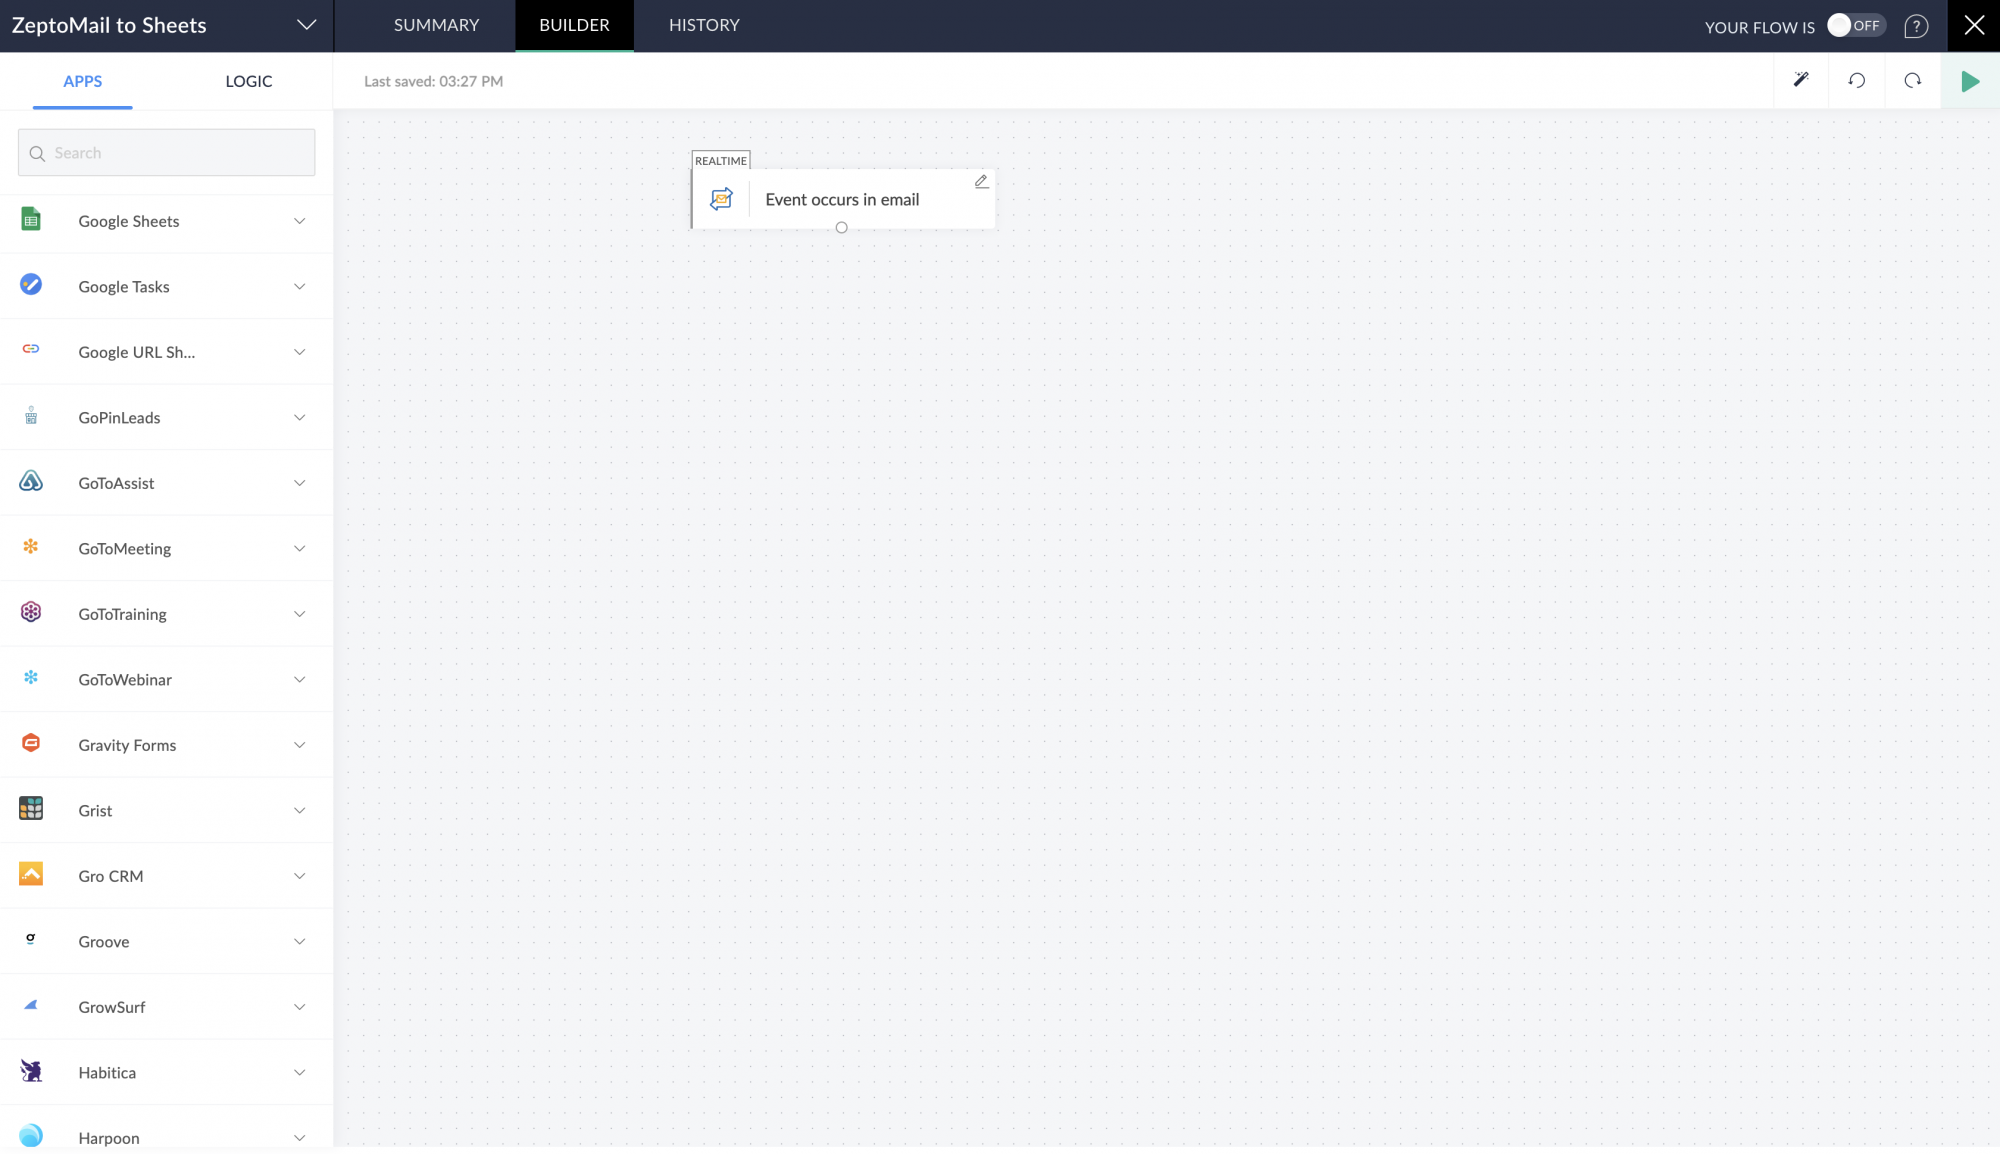
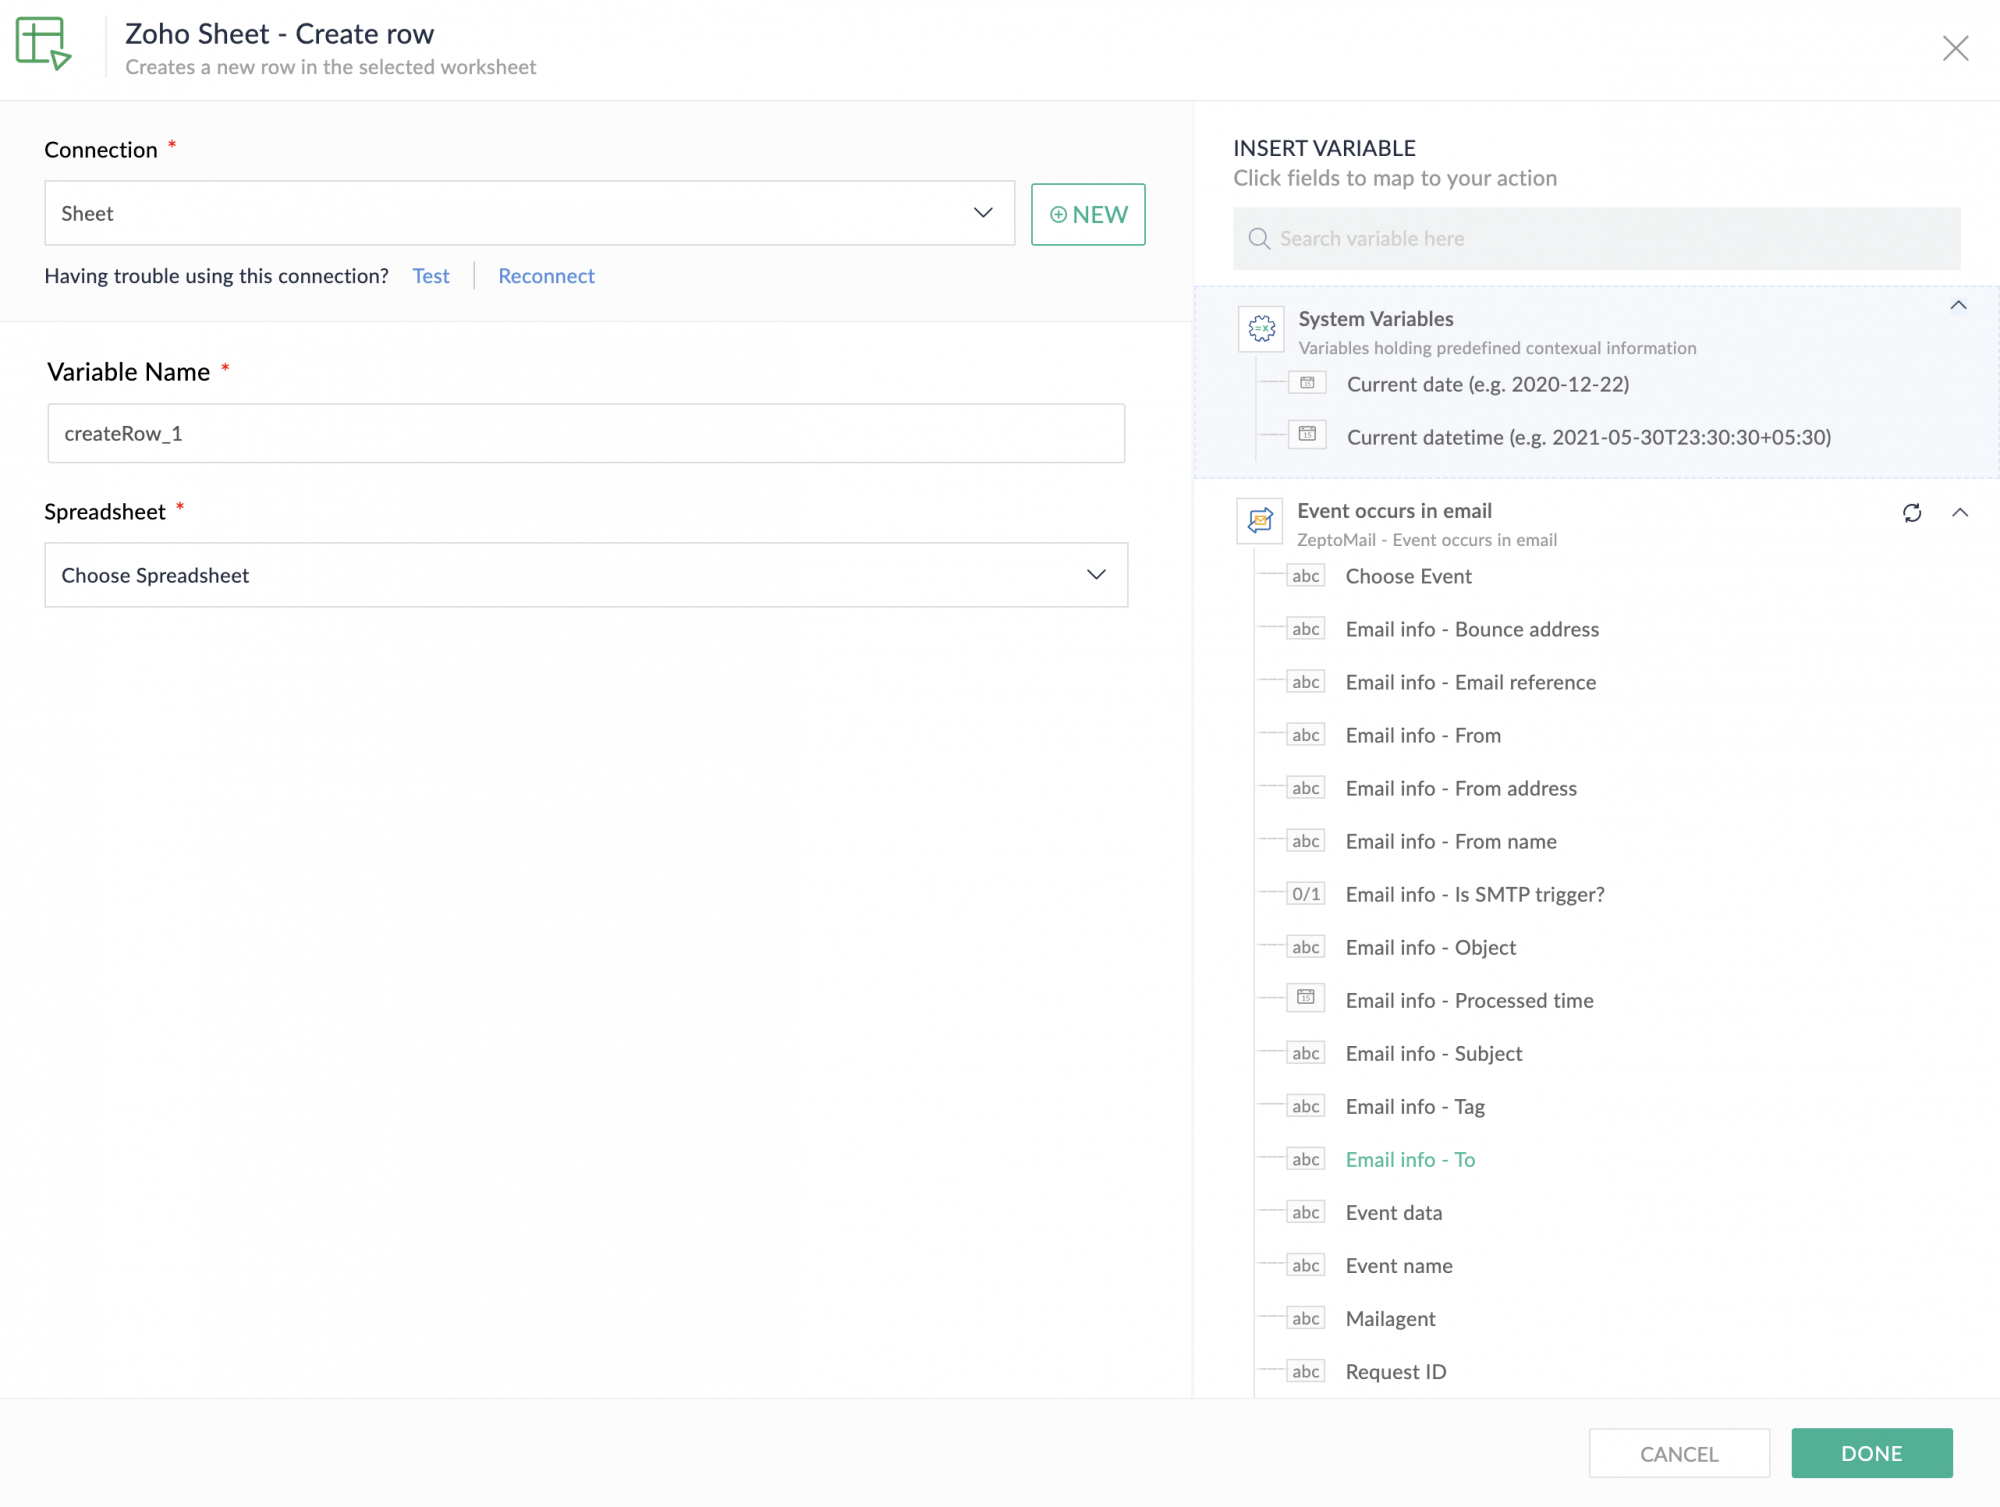
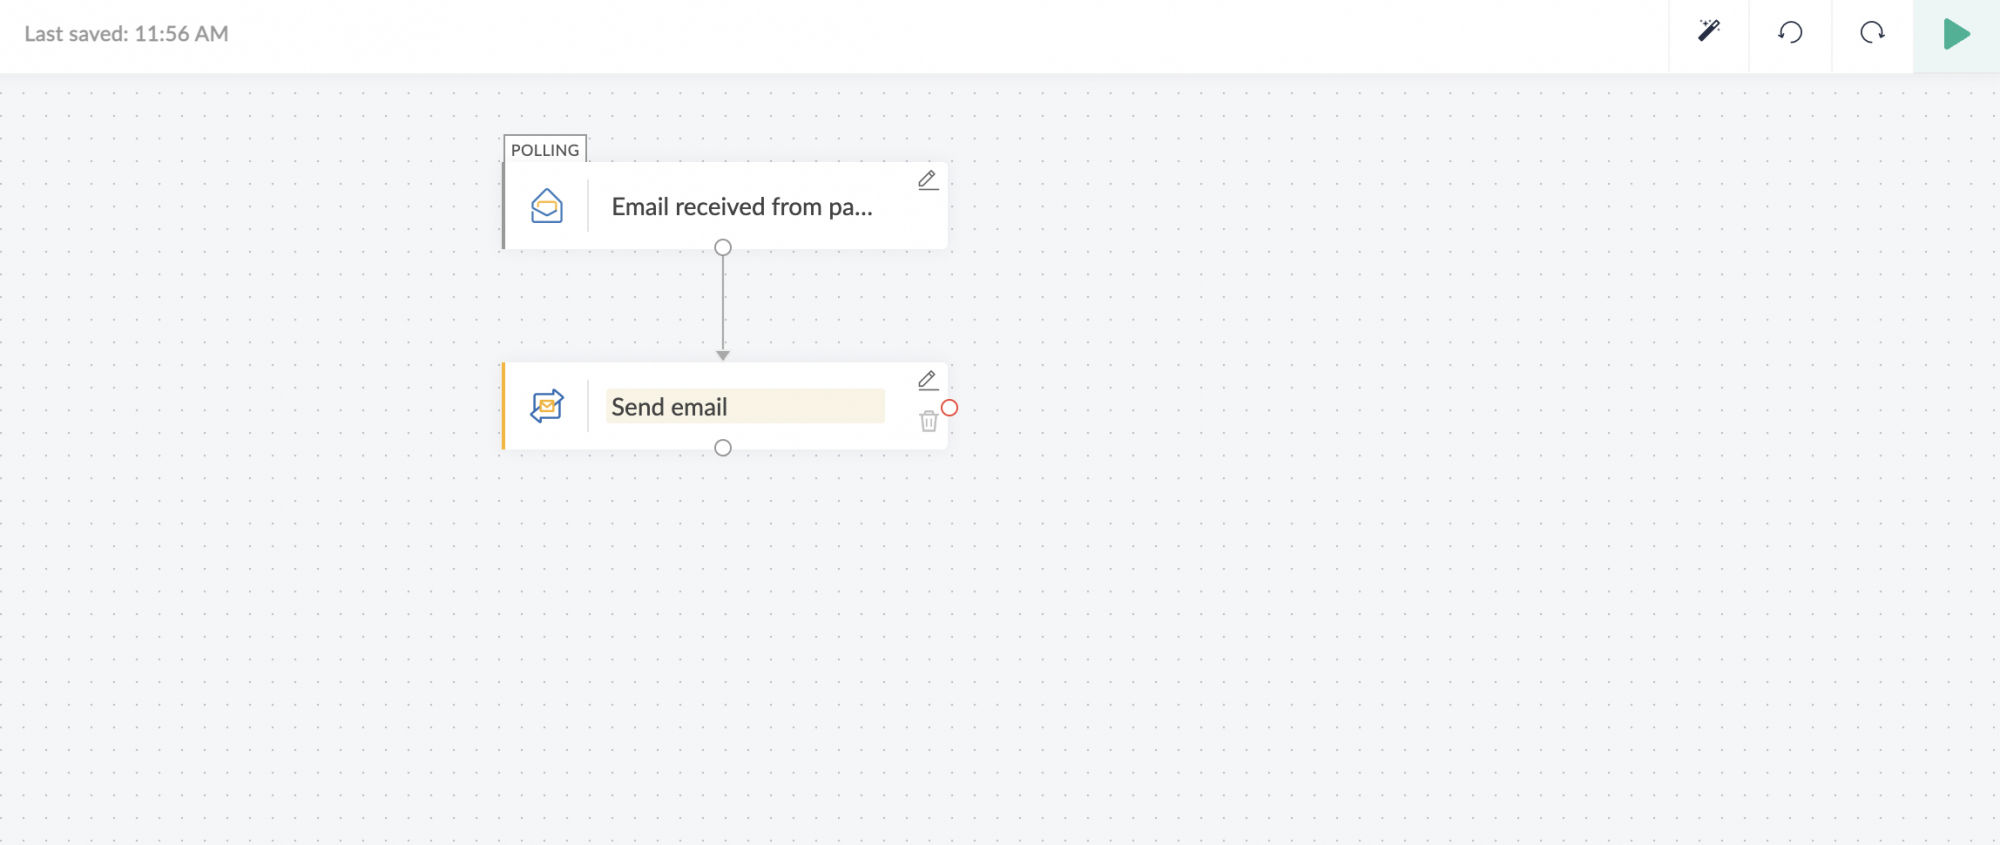
- Search the action app from the left menu. In this case, Zoho sheet. Choose the appropriate action for the trigger and drag and drop it below the trigger.
- If the action application has not been authorised, authorise it by following the steps 8 through 10.
- Next, choose appropriate event(s) that the action app should perform and click Done.
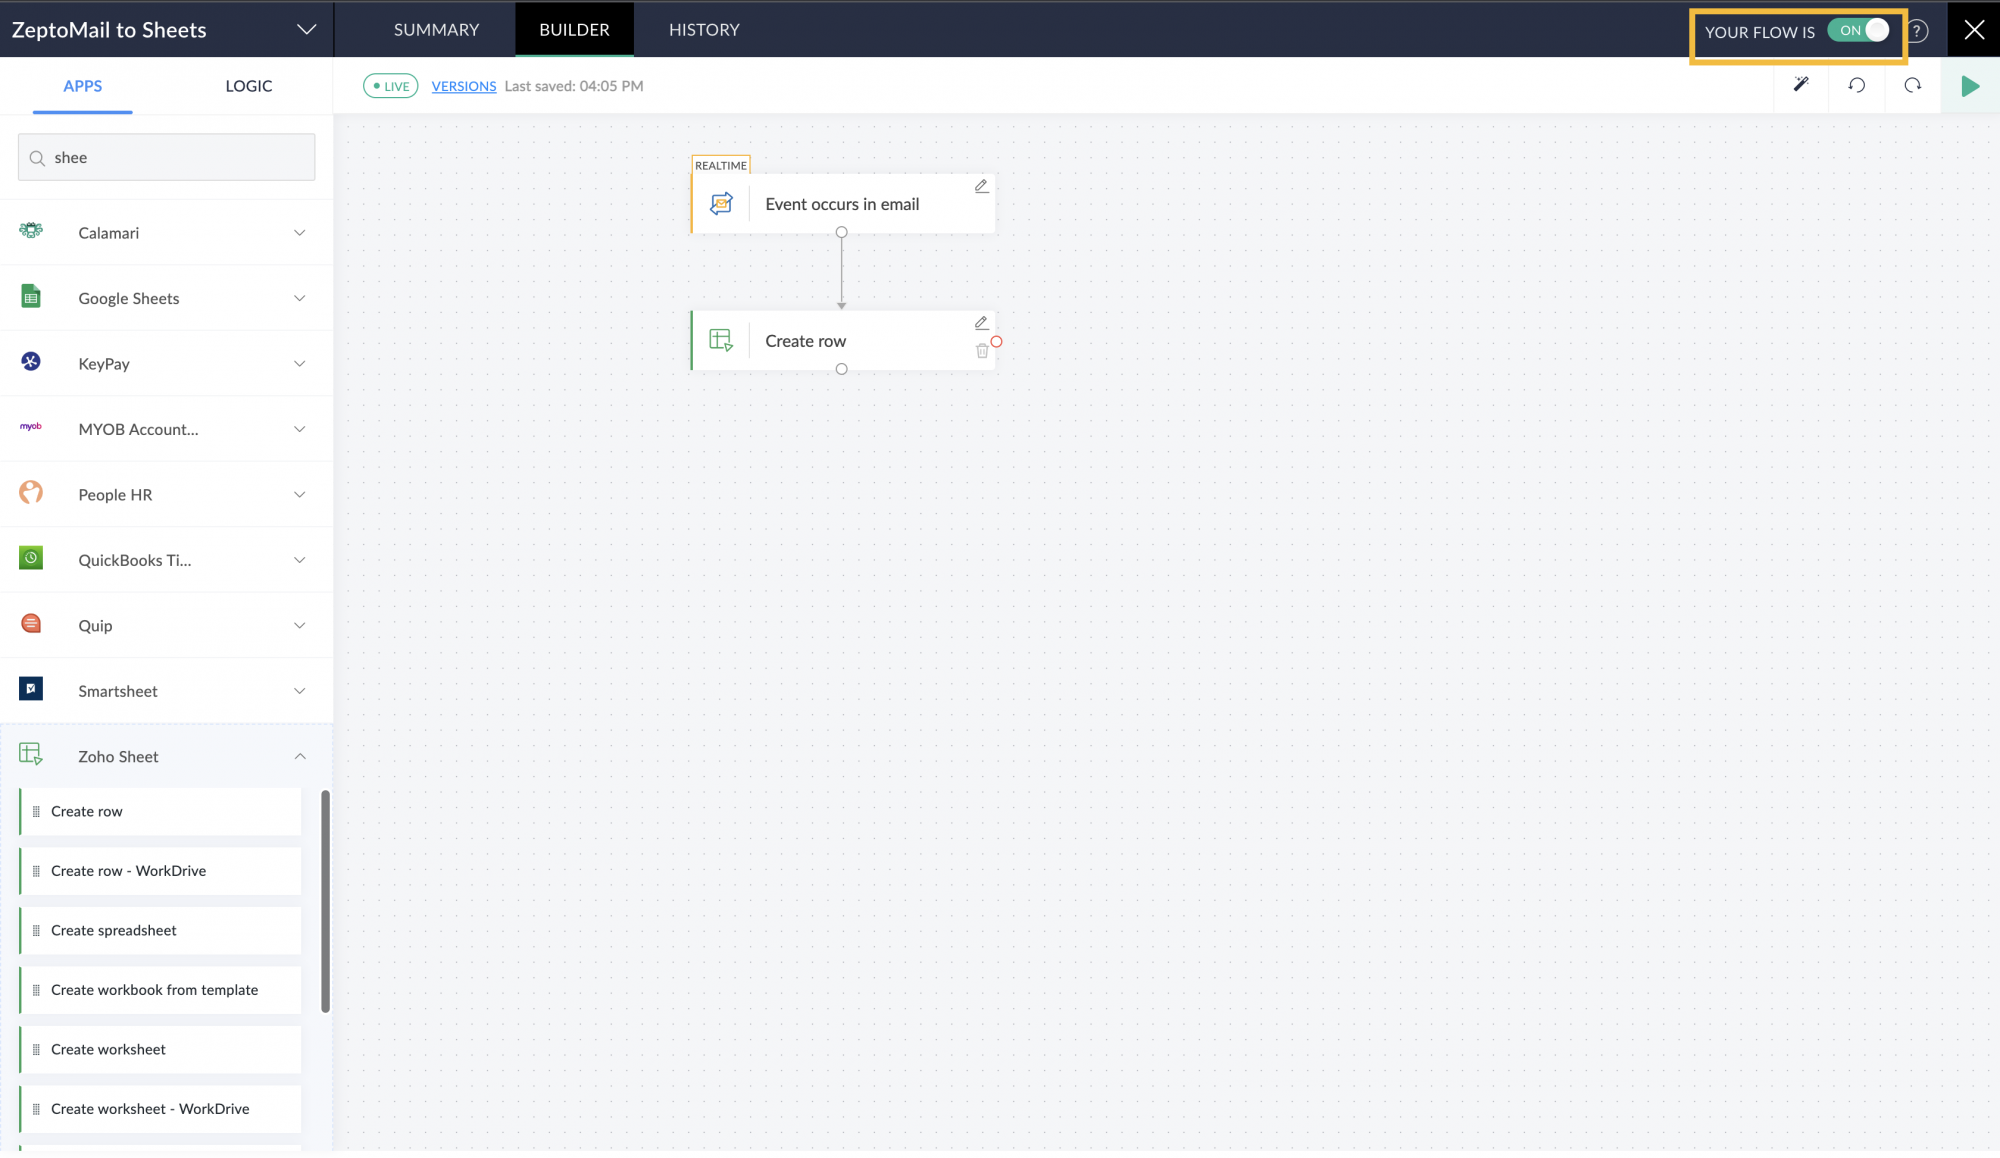
- Turn on the flow using the toggle button. You flow will automatically be executed.


Configuring ZeptoMail as action :
- Create a new flow from the left menu in the Zoho flow webpage.
- Configure the app of your choice as the trigger.
- To use ZeptoMail as the action, search for ZeptoMail in the left pane and select it.
- Drag and drop the send email action menu below the selected trigger.
- Fill in the relevant details such as :
- Variable name
- Agent name
- From and To addresses
- Subject
- Mail content and its type
- Select Done.
- ZeptoMail will be added as the action for your trigger.

