Zoho ZeptoMail plugin for WooCommerce
WooCommerce is an open source e-commerce plugin for WordPress. Designed for varying scales of businesses, it gained popularity for its ease of use and simplicity. The Zoho ZeptoMail plugin for WooCommerce lets you send transactional emails from your online store built with WooCommerce. Use the custom email templates to securely send your order confirmations, invoices, security code requests and more.
Pre-requisites to using the plugin :
- A reviewed Zoho ZeptoMail account
- Self hosted WooCommerce account
Steps to install Zoho ZeptoMail plugin
Follow the steps below to install the plugin :
- Login to your self hosted WooCommerce site and navigate to the admin dashboard.
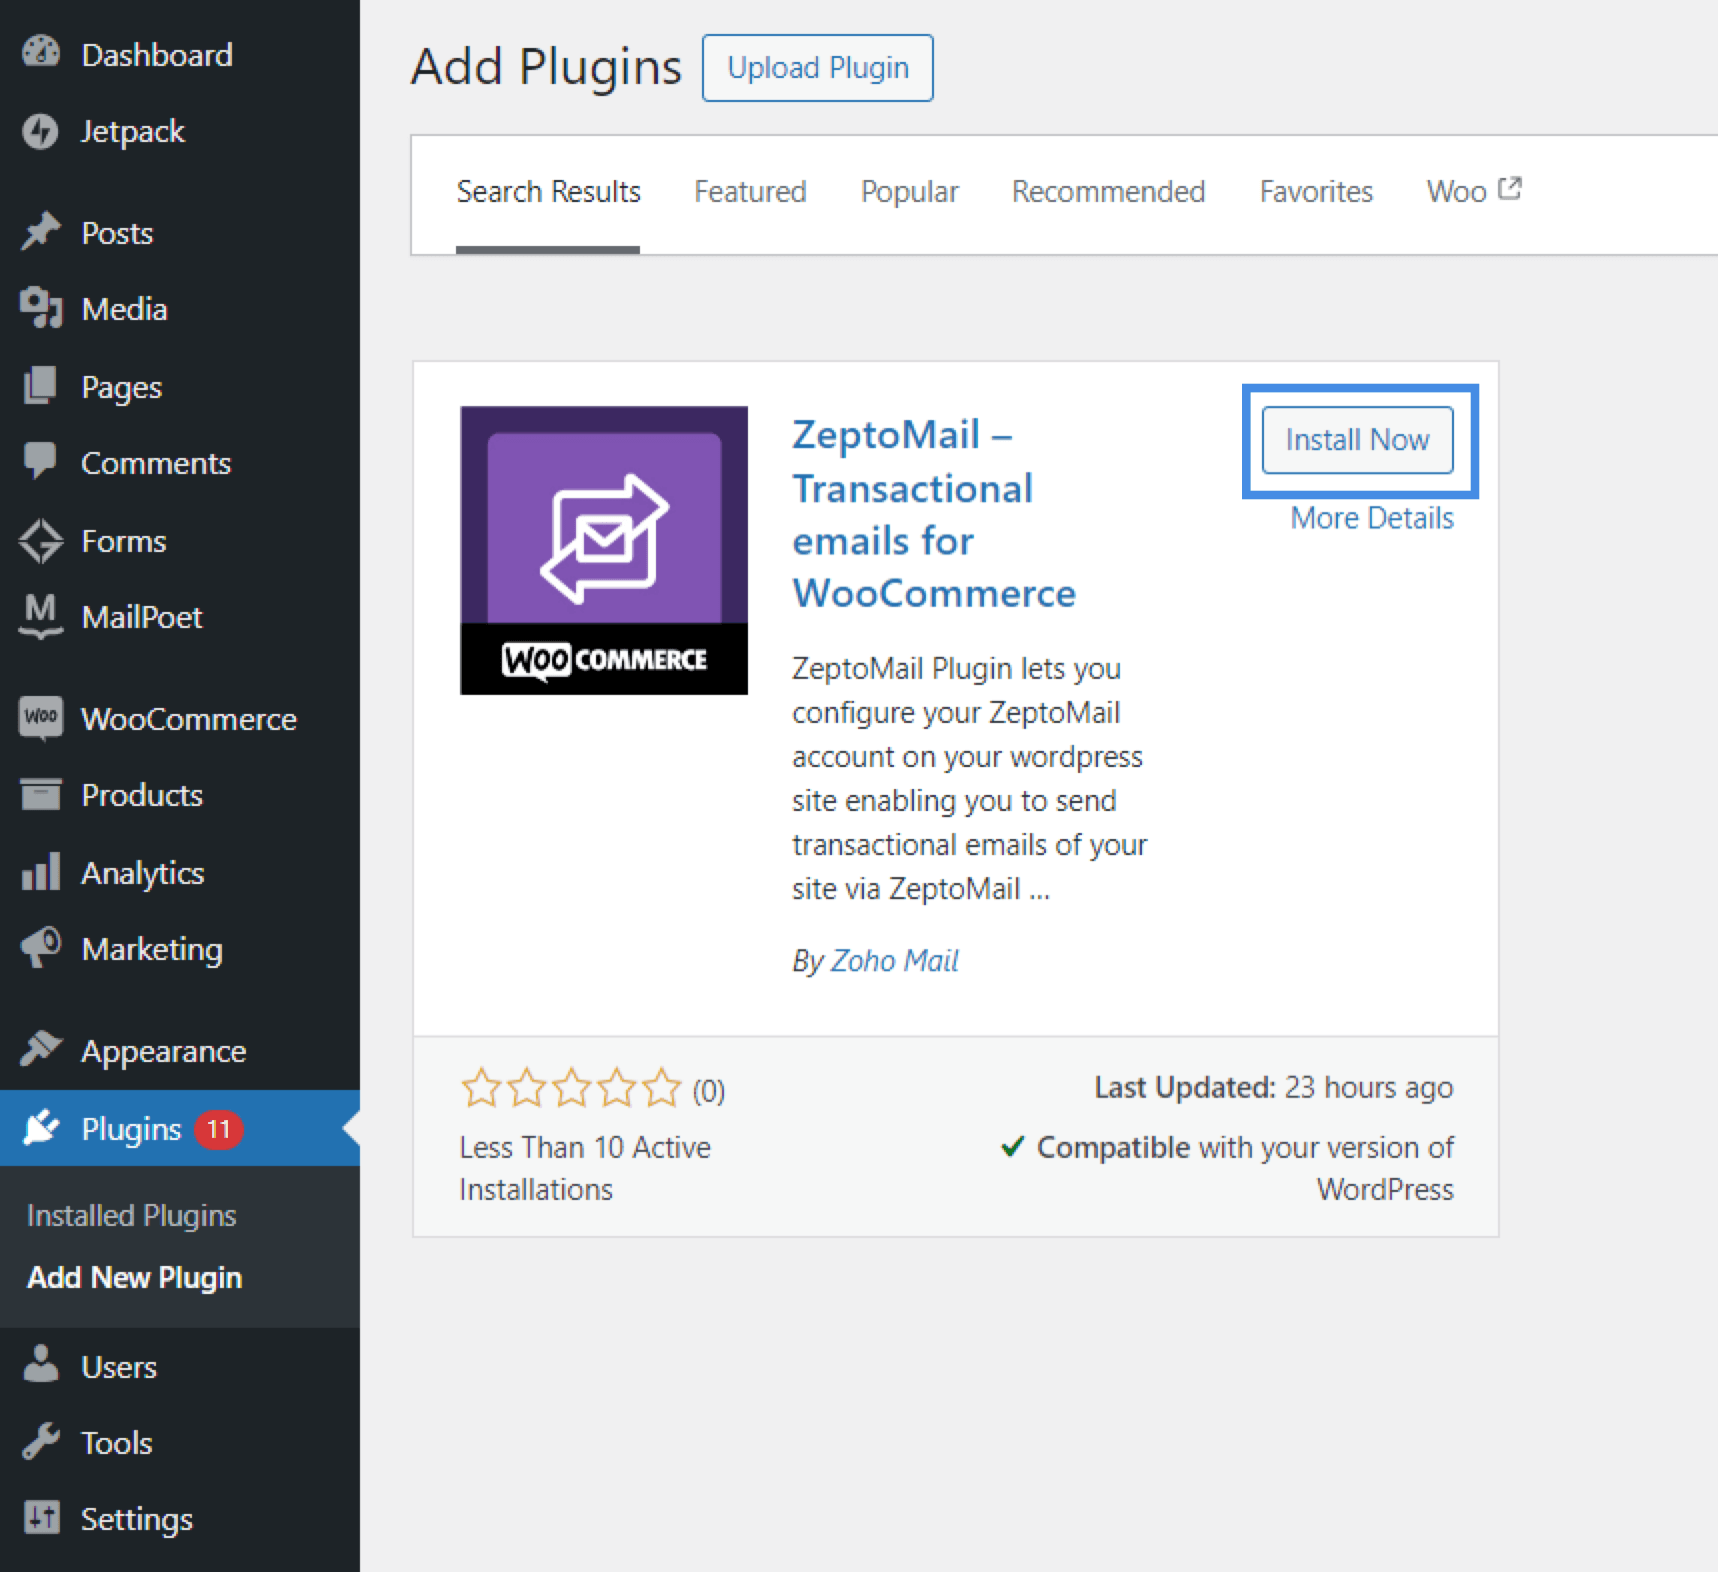
- Go to the Plugins section. Click Add new plugin.
- Search for the ZeptoMail plugin and click Install now.
- To start using the plugin, navigate to Plugin>Installed plugins.

- Click the activate button corresponding to the plugin.
- To use the plugin to send out emails, you should configure it within your WooCommerce account.


Configuring ZeptoMail plugin
- To configure your account, you should authorize WooCommerce to use ZeptoMail's services.
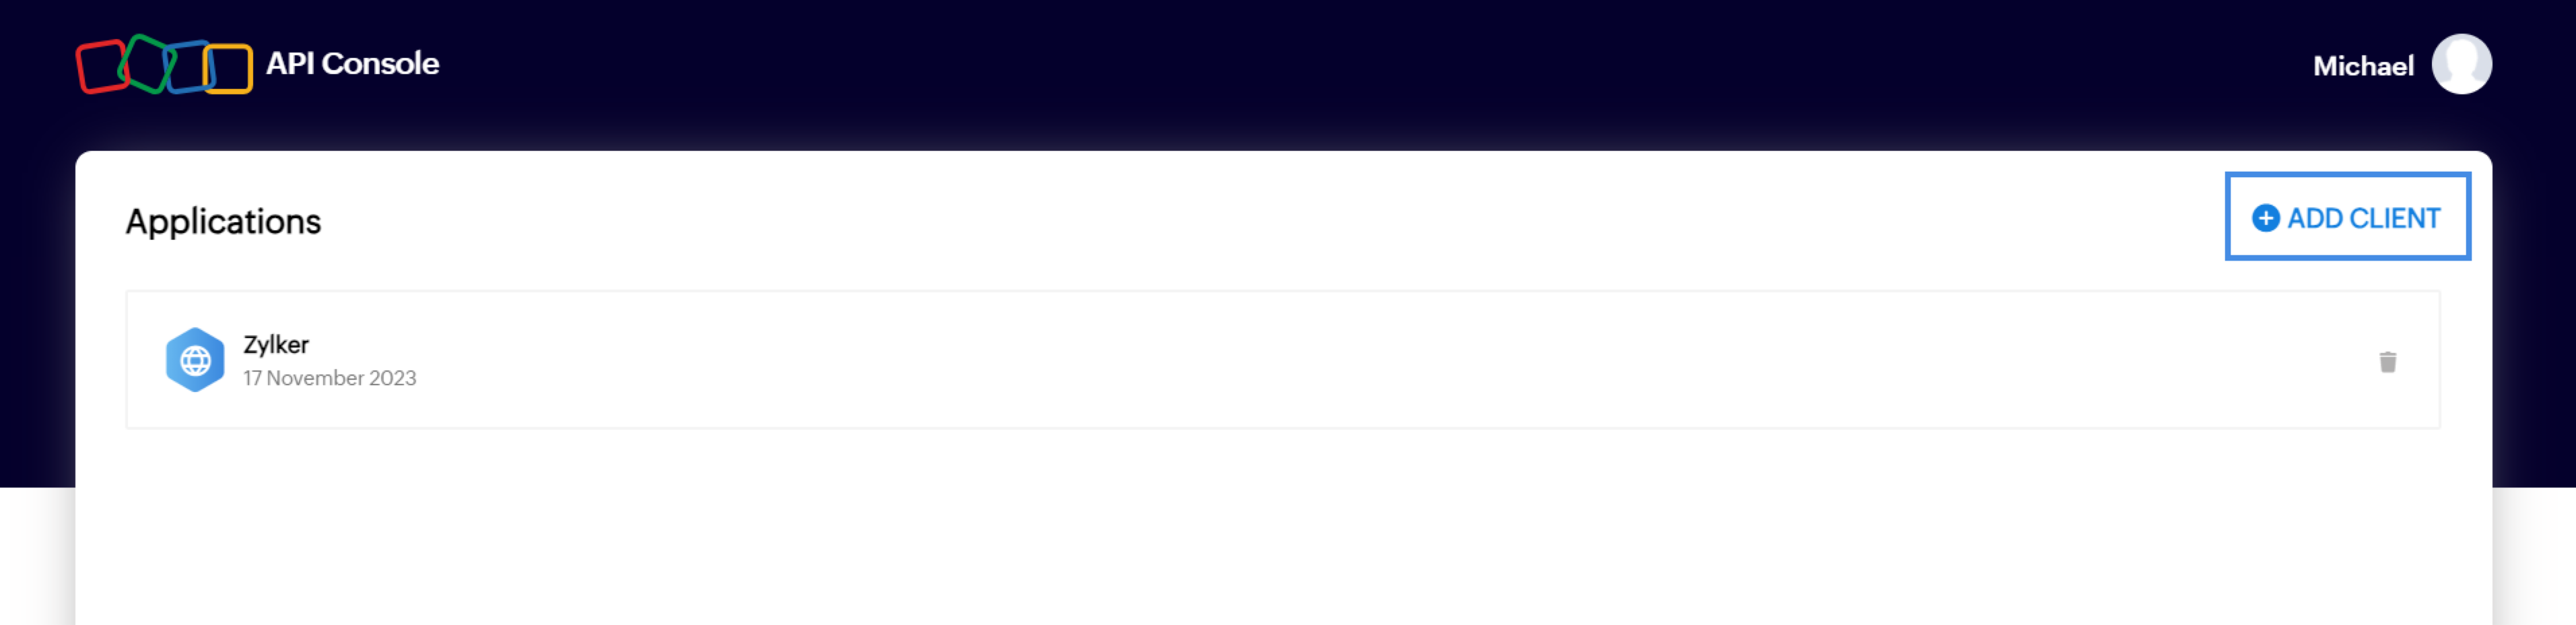
- Go to Zoho's API console page to generate the client id and client secret parameters.
- Select the Add client option on the right.
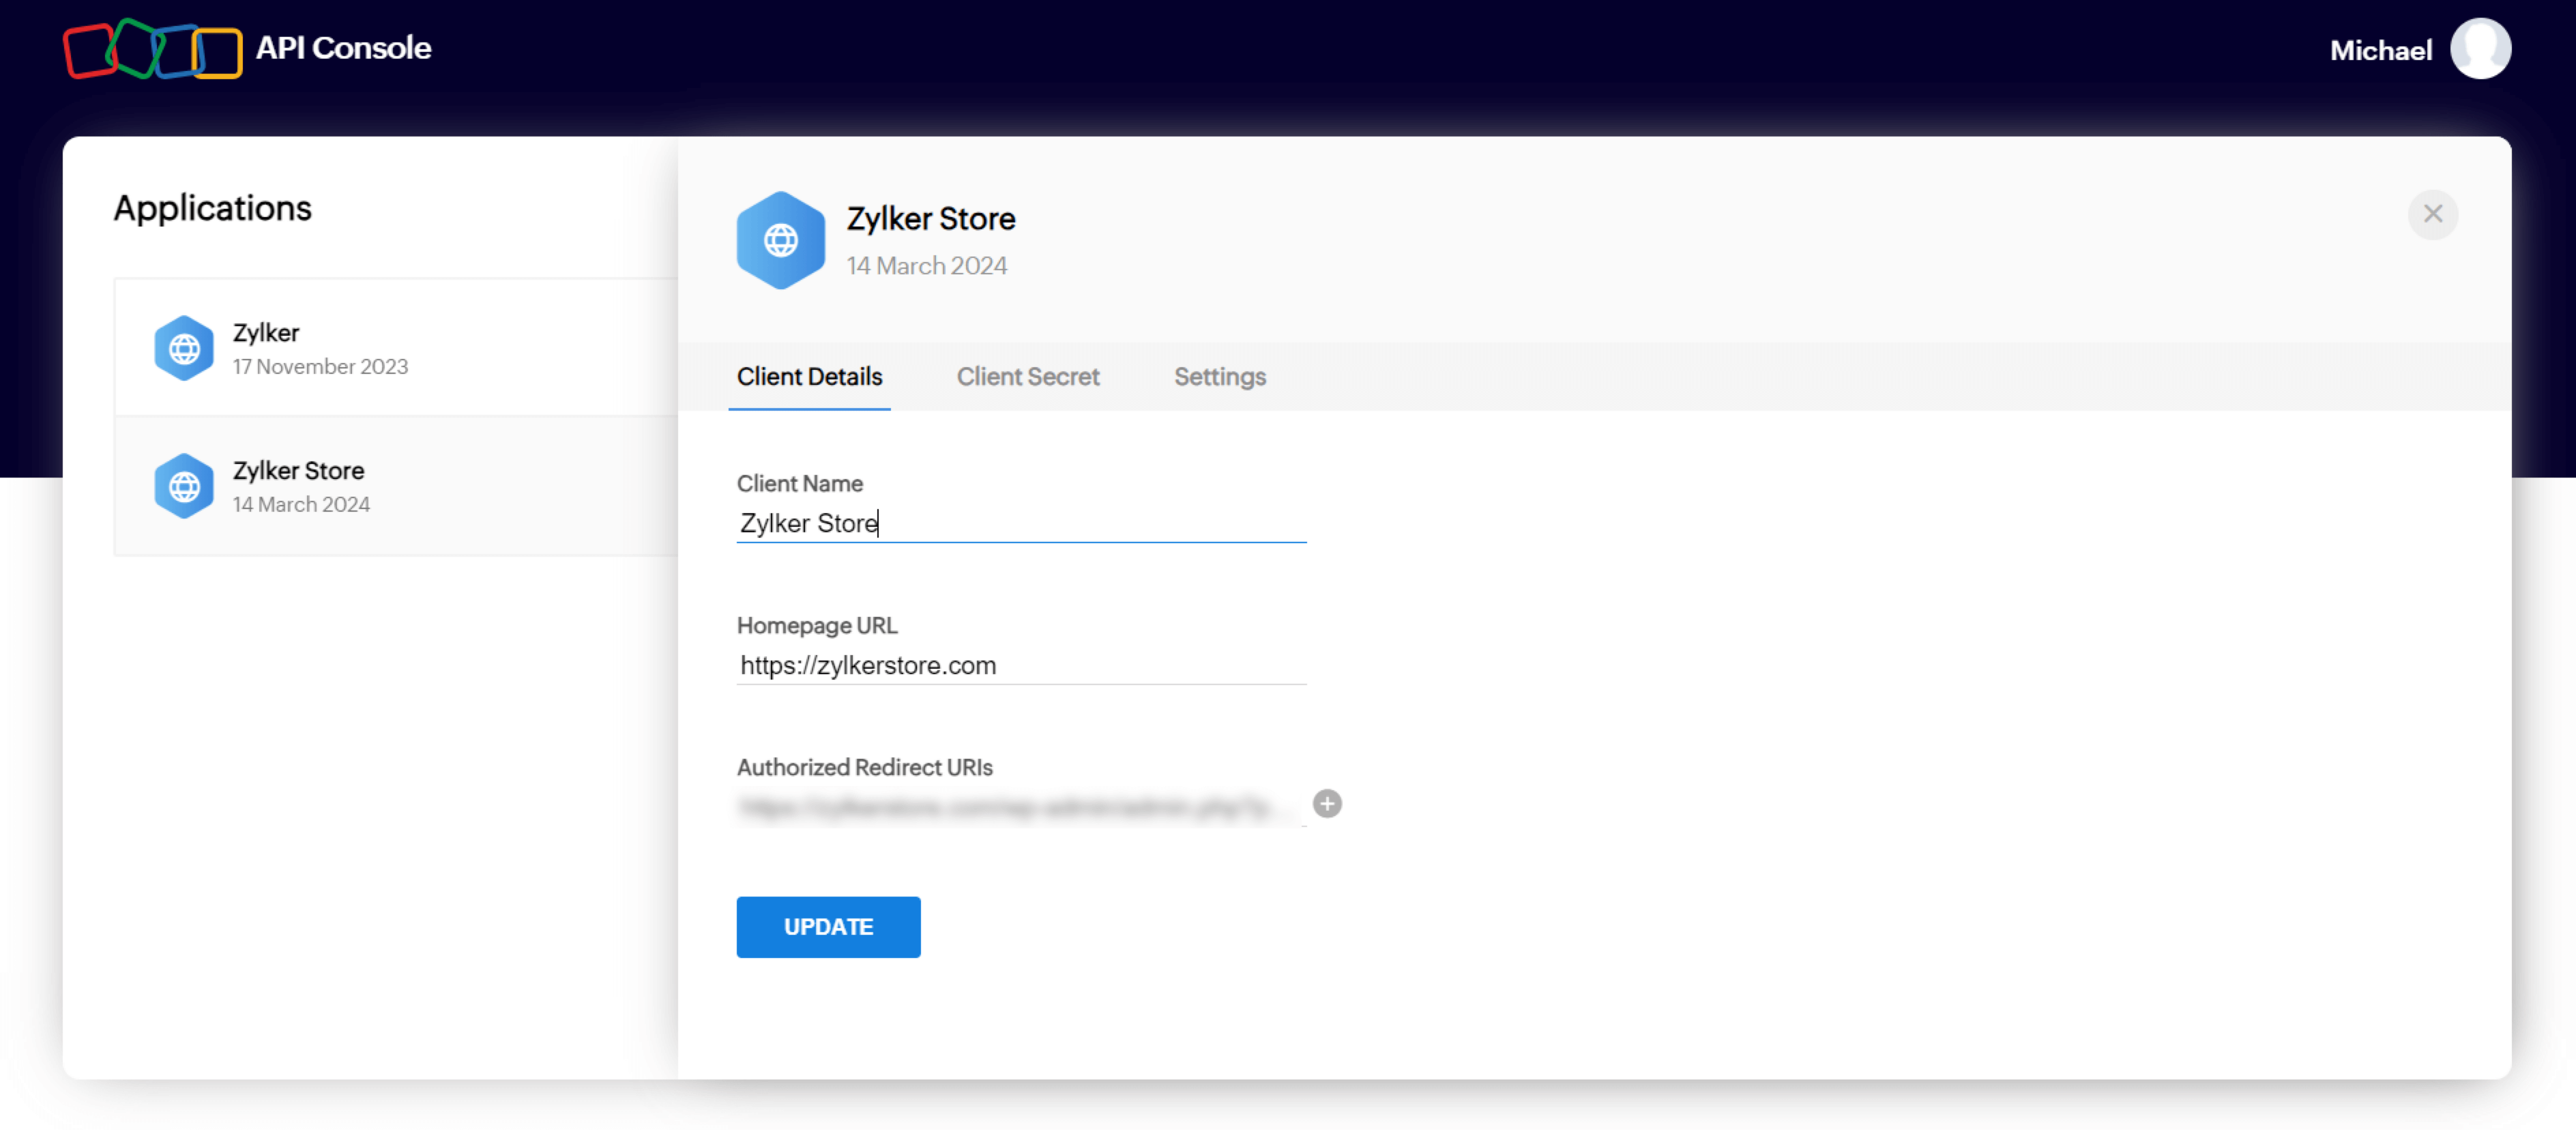
- Choose Server based applications from the options and fill out your application details - the store's name, your store URL and copy the Authorized redirected URI from the configuration page in WooCommerce. Select Update.
- The client id and client secret will be generated.
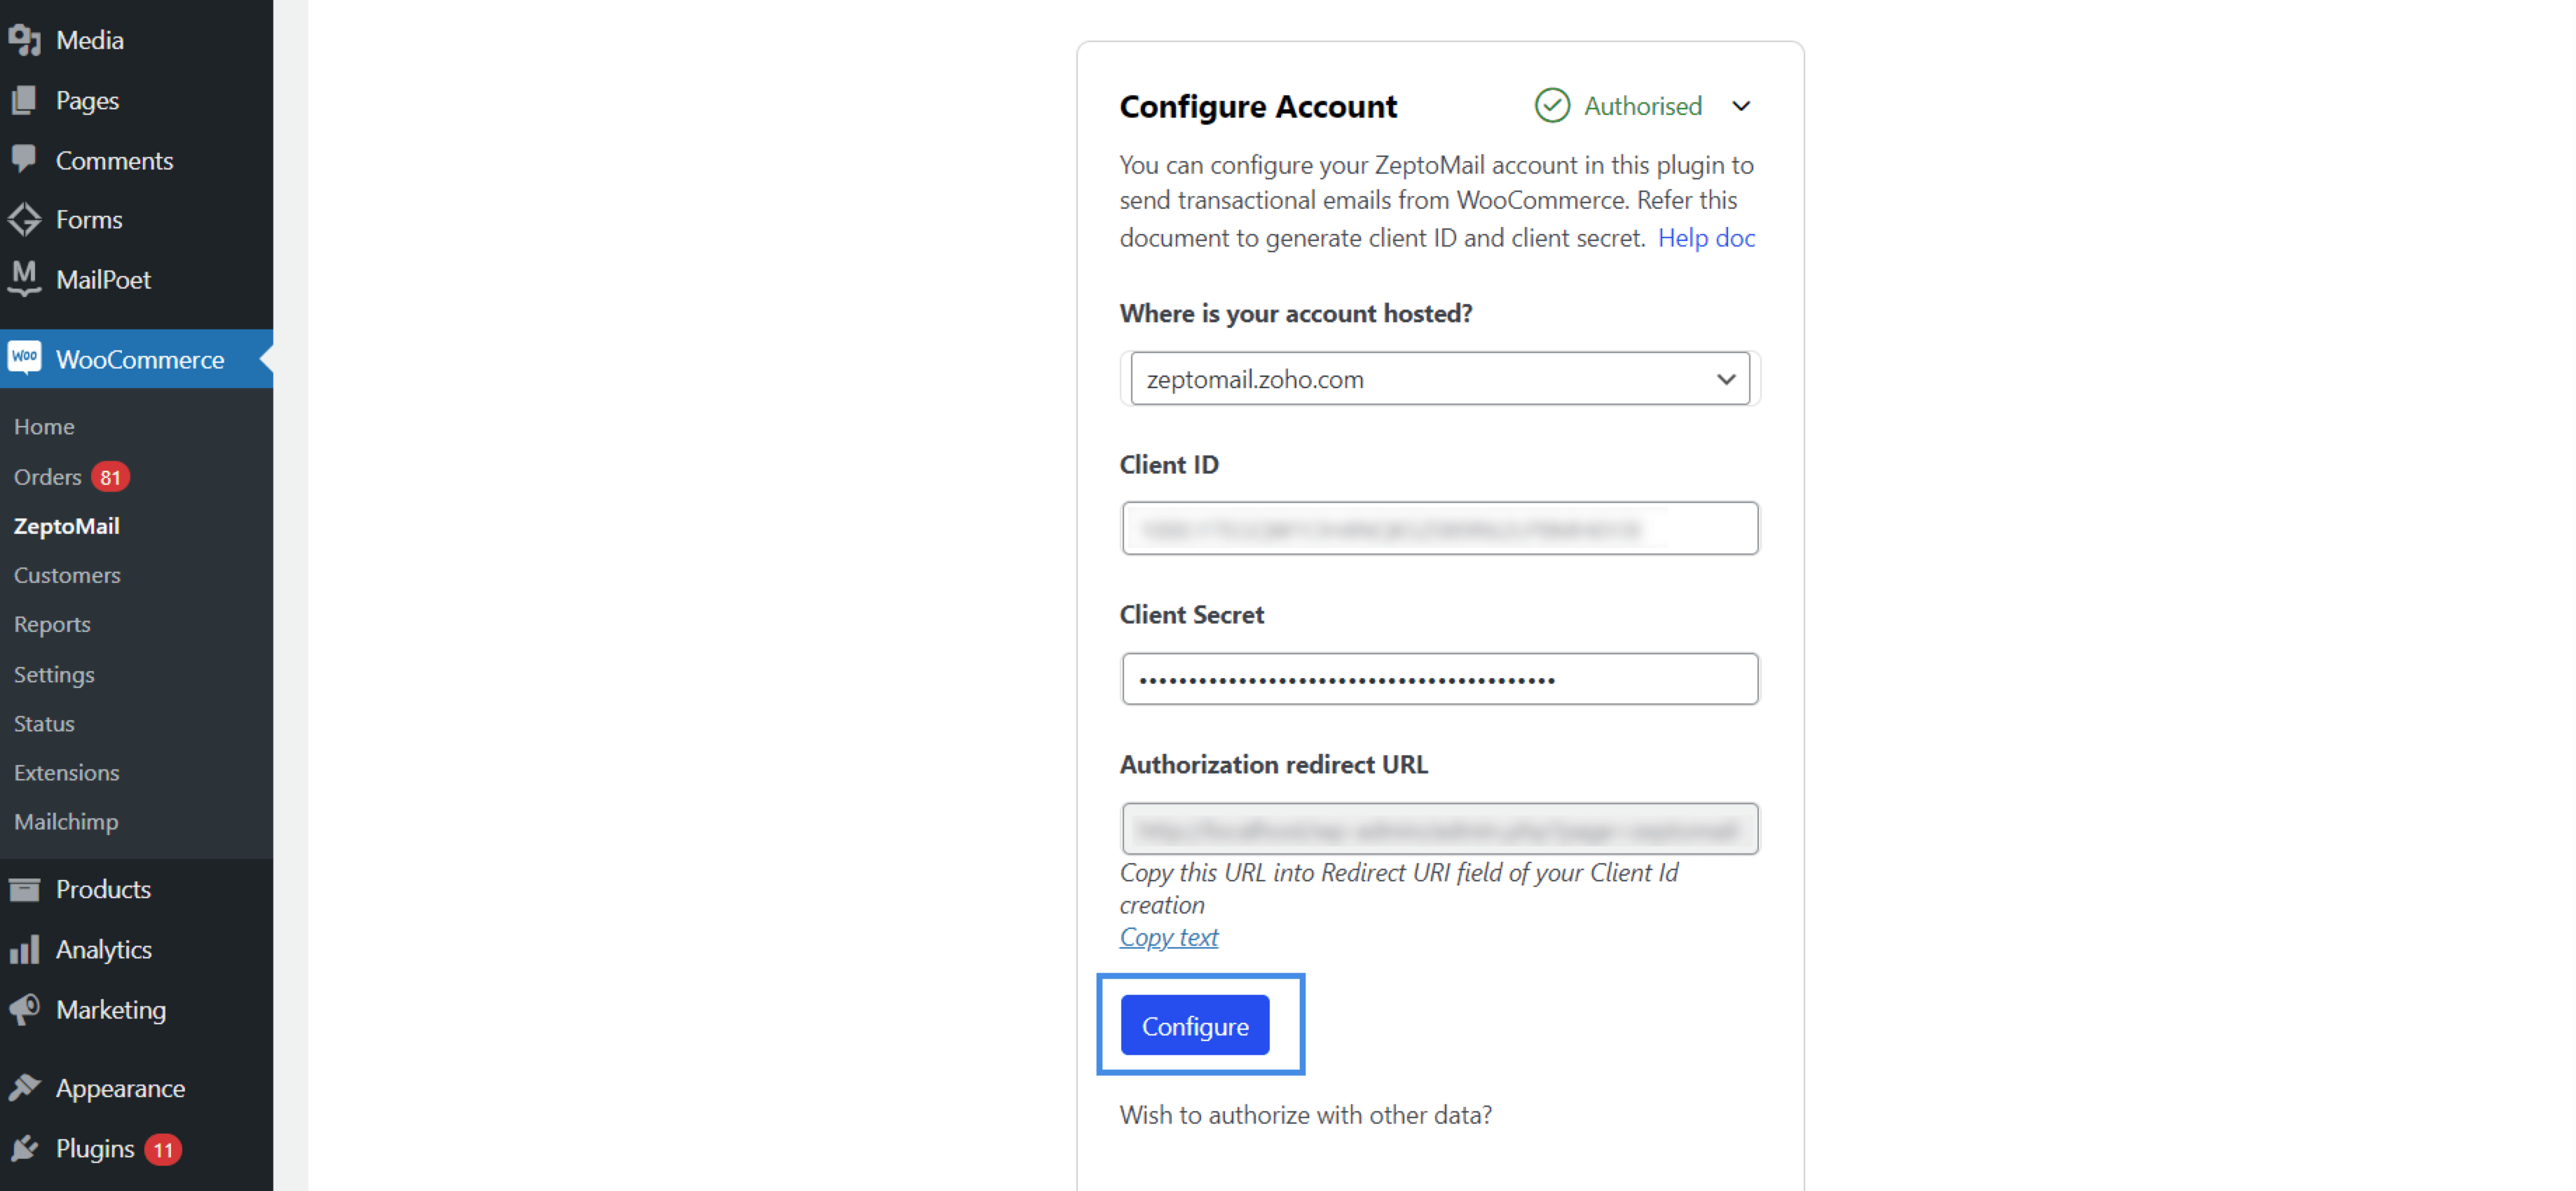
- In the configuration screen, select the region where your account is hosted, copy paste the client id and client secret parameters. Click Configure.
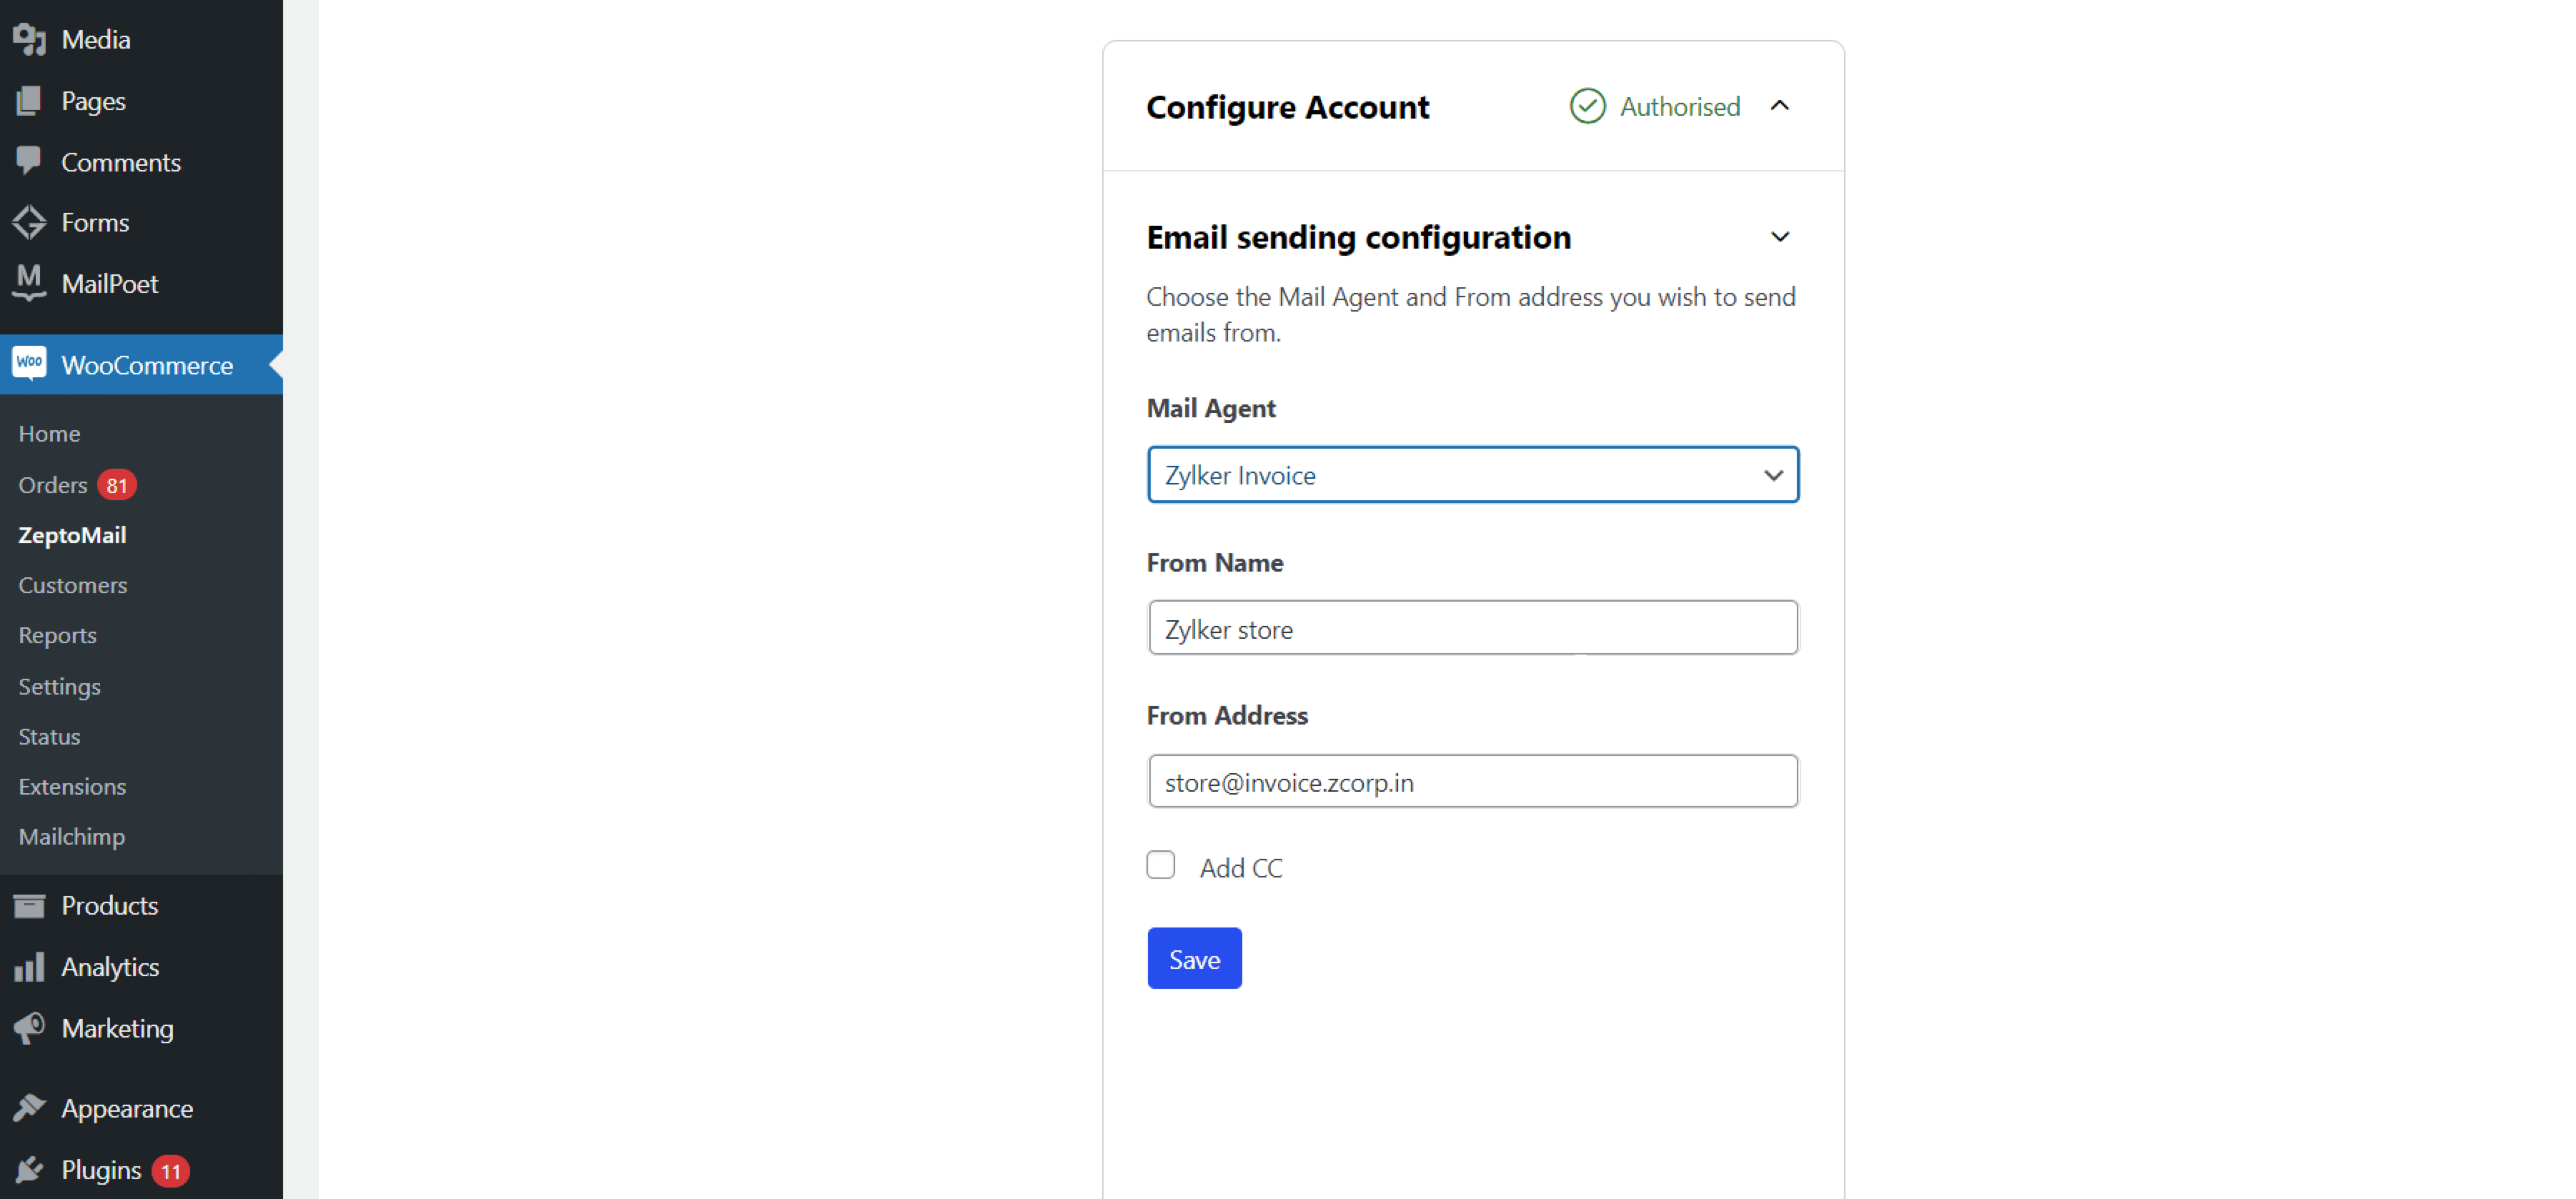
- Once you configure your account, you should setup your email sending options. Select the desired Agent, enter a suitable From name and From email address. If you wish to CC the emails, you can do so by selecting the CC checkbox. Click Save.
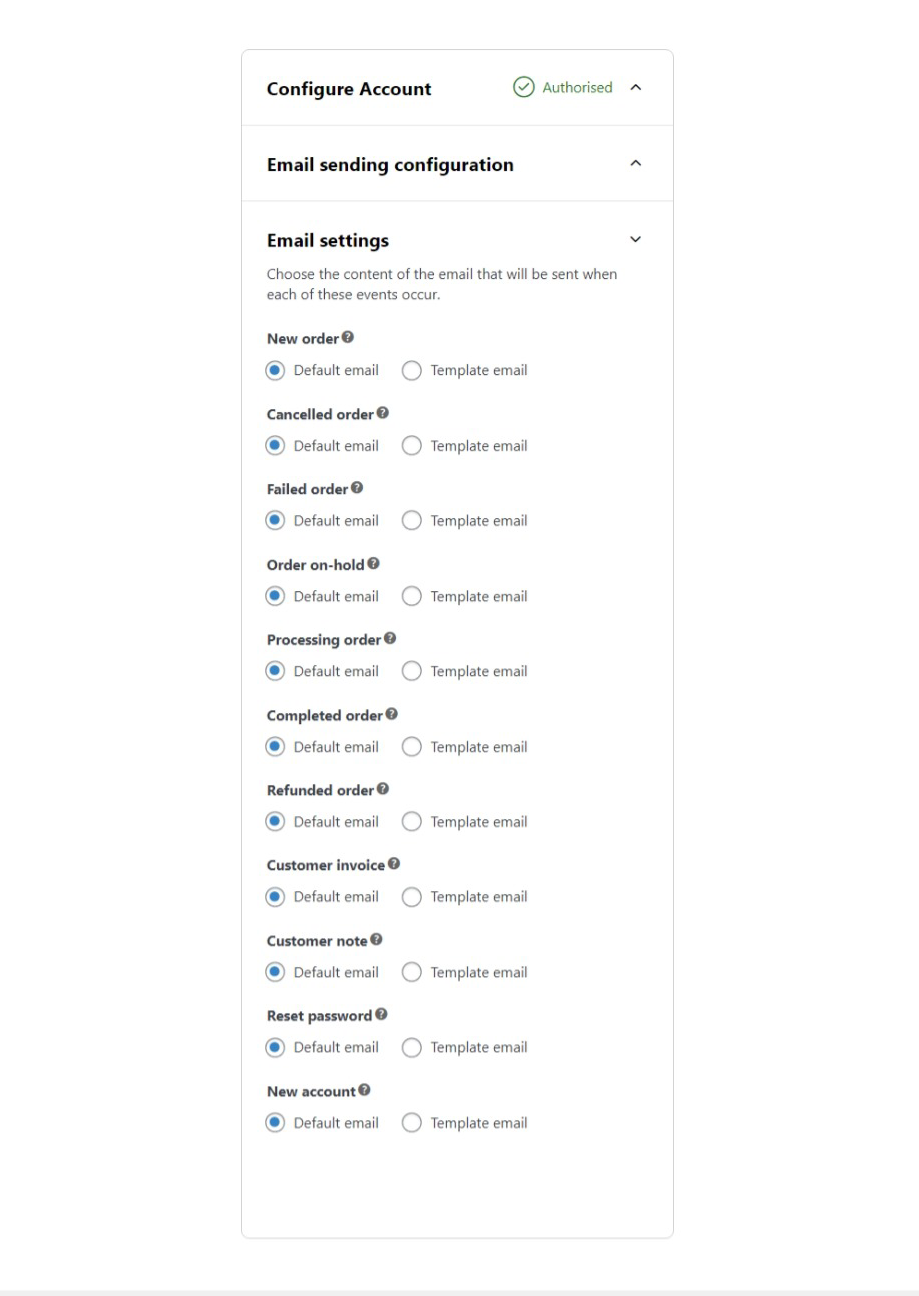
- Next, you have the option to choose the email settings for individual emails. You can either choose to use the default email option or use a template.
- To add a template, in your ZeptoMail account, navigate to the Agent you have linked with your plugin. Go to the Templates tab and copy the template id you wish to use.
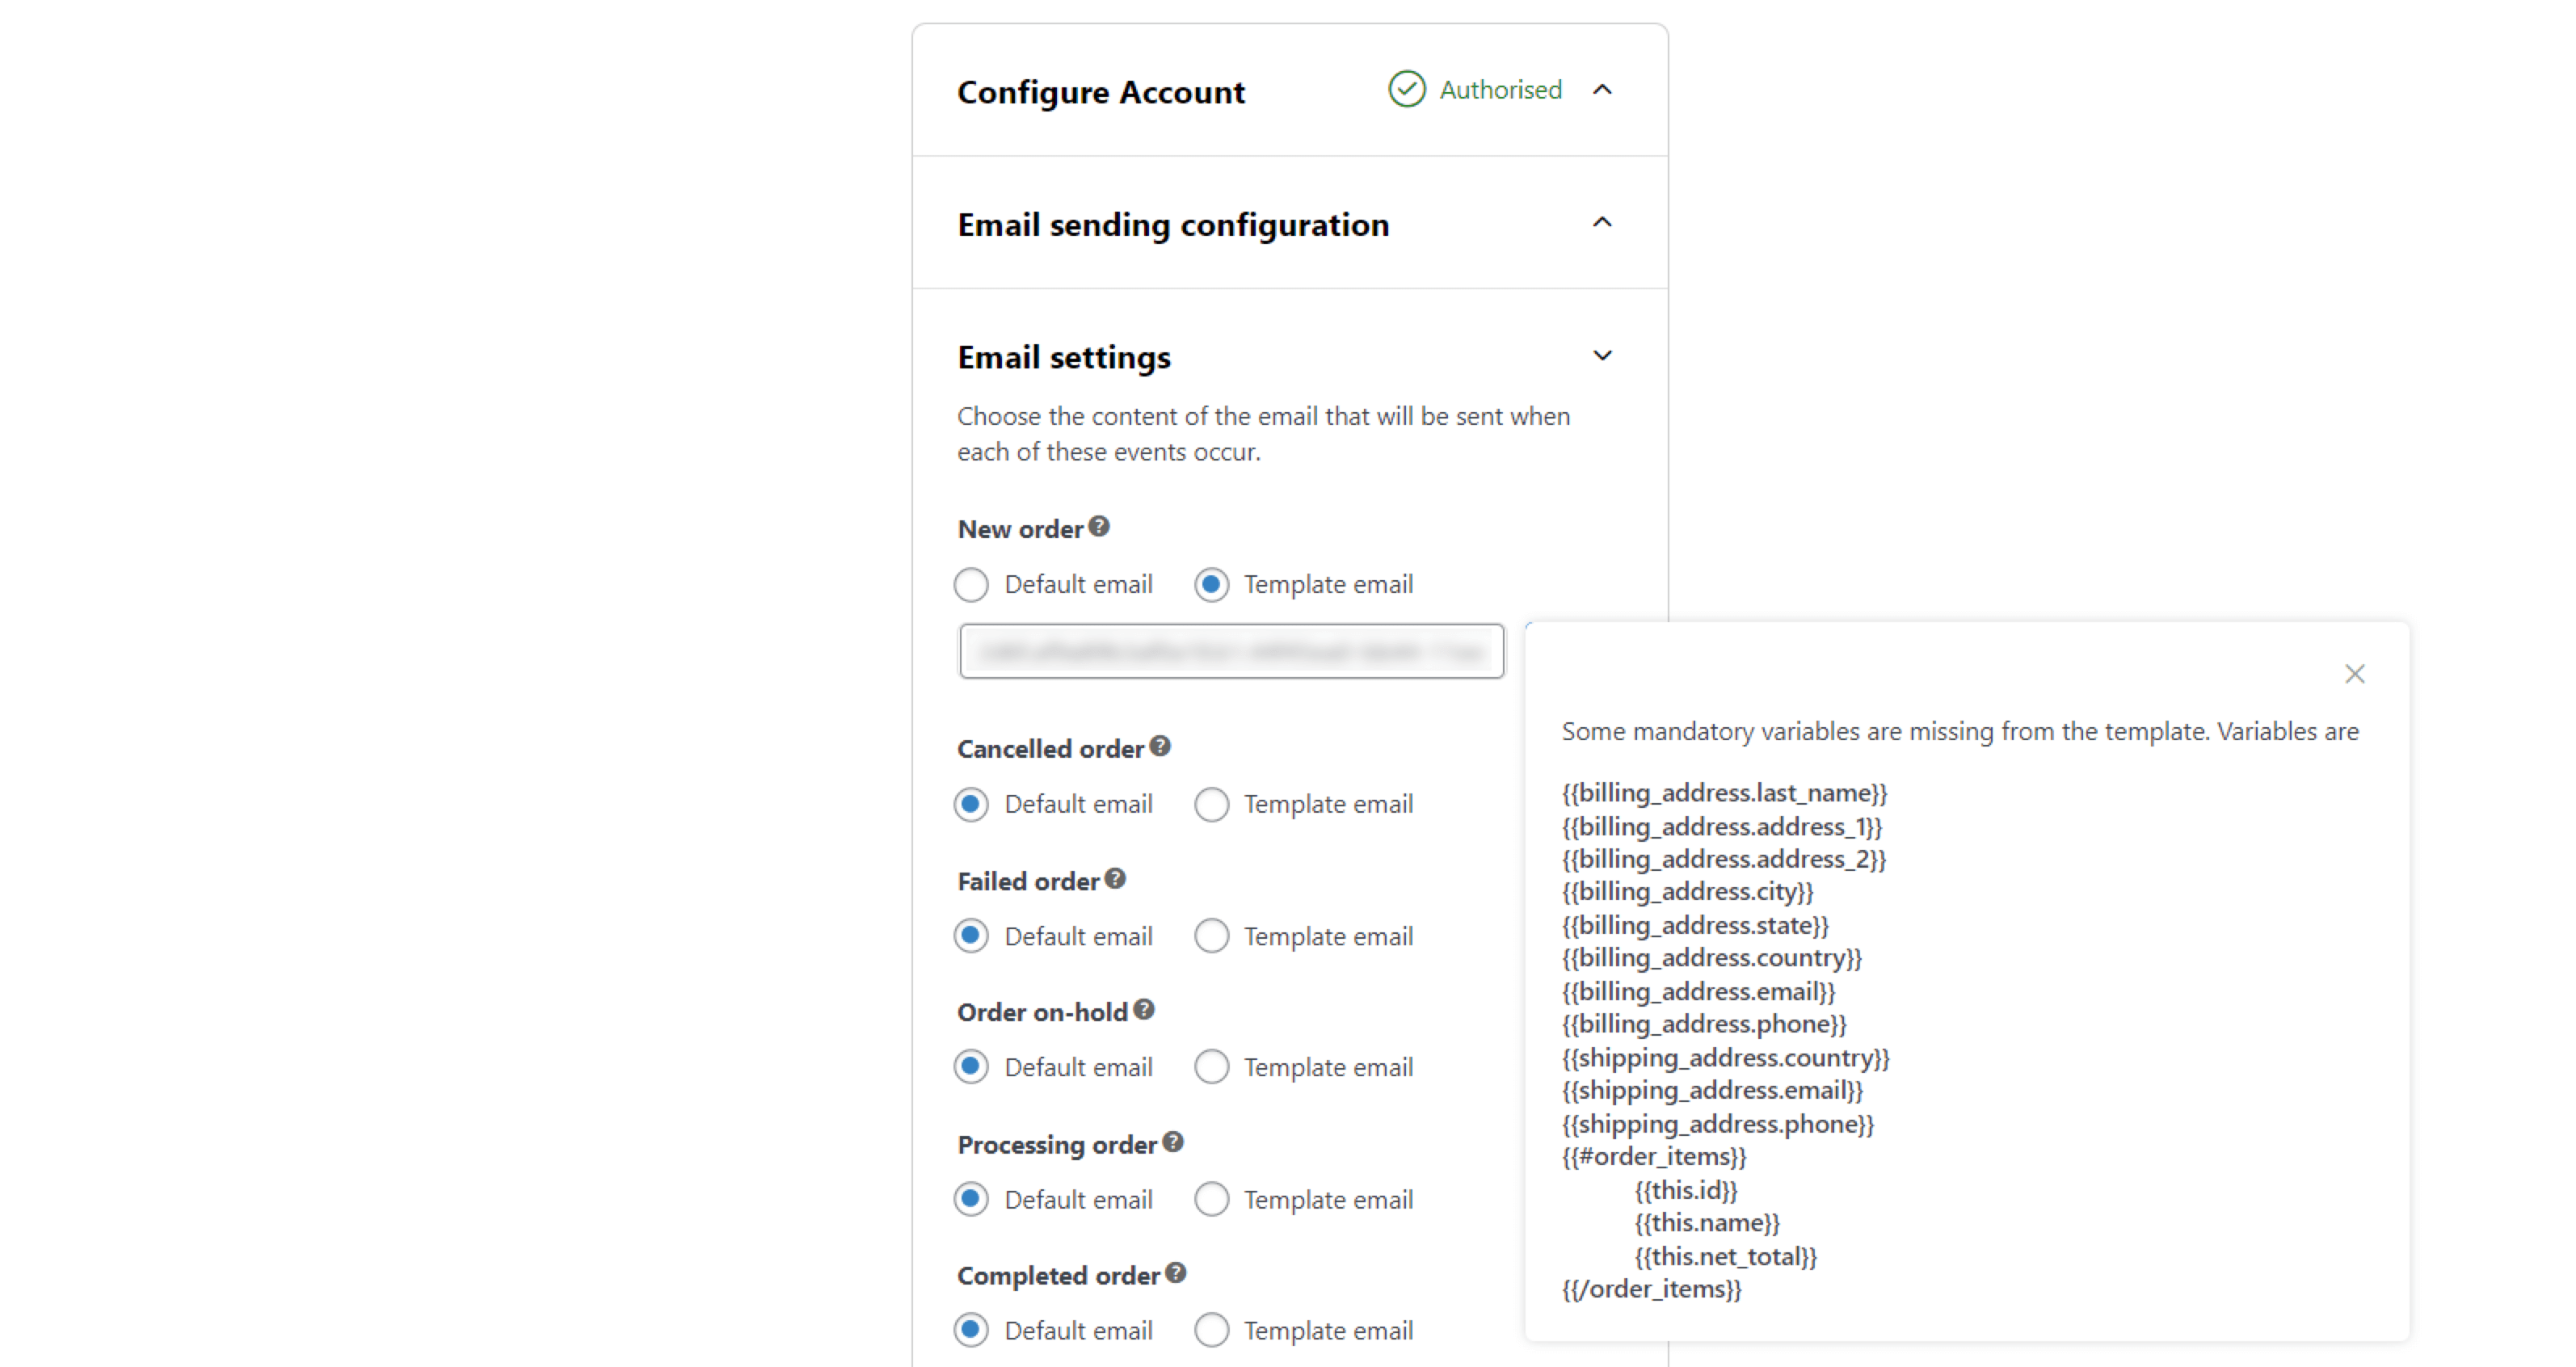
- Paste that in the templates email tab. Click Save.
- You can now start sending out transactional emails from your WooCommerce account.


