ZeptoMail integration with Microsoft Power Automate
Microsoft Power Automate is an integration tool used to connect applications and create workflows. Workflows or flows help you automate repetitive tasks to improve efficiency. Power automate has three types of flows depending on your working model and needs.
They are :
- Cloud flows : Cloud flows help you automate your triggers instantly, via a schedule or automatically.
- Desktop flows : Desktop flows help create workflows on your desktop.
- Business process flows : Business process flows enables you to streamline tasks within your organization.
The ZeptoMail integration with Microsoft power will help you automate your email sending process by developing a trigger and action model. With this integration, you can have your emails sent out instantly when a set trigger occurs. ZeptoMail allows you to send out a custom email or using the available email templates.
Pre-requisites
- A ZeptoMail account.
- A valid Microsoft Power account.
Integrating ZeptoMail with Microsoft Power Automate
For a particular trigger, you can send custom emails or using pre-built templates using ZeptoMail.
Follow the steps below to connect to ZeptoMail :
- Login to your Power Automate account and click Create from the left menu.
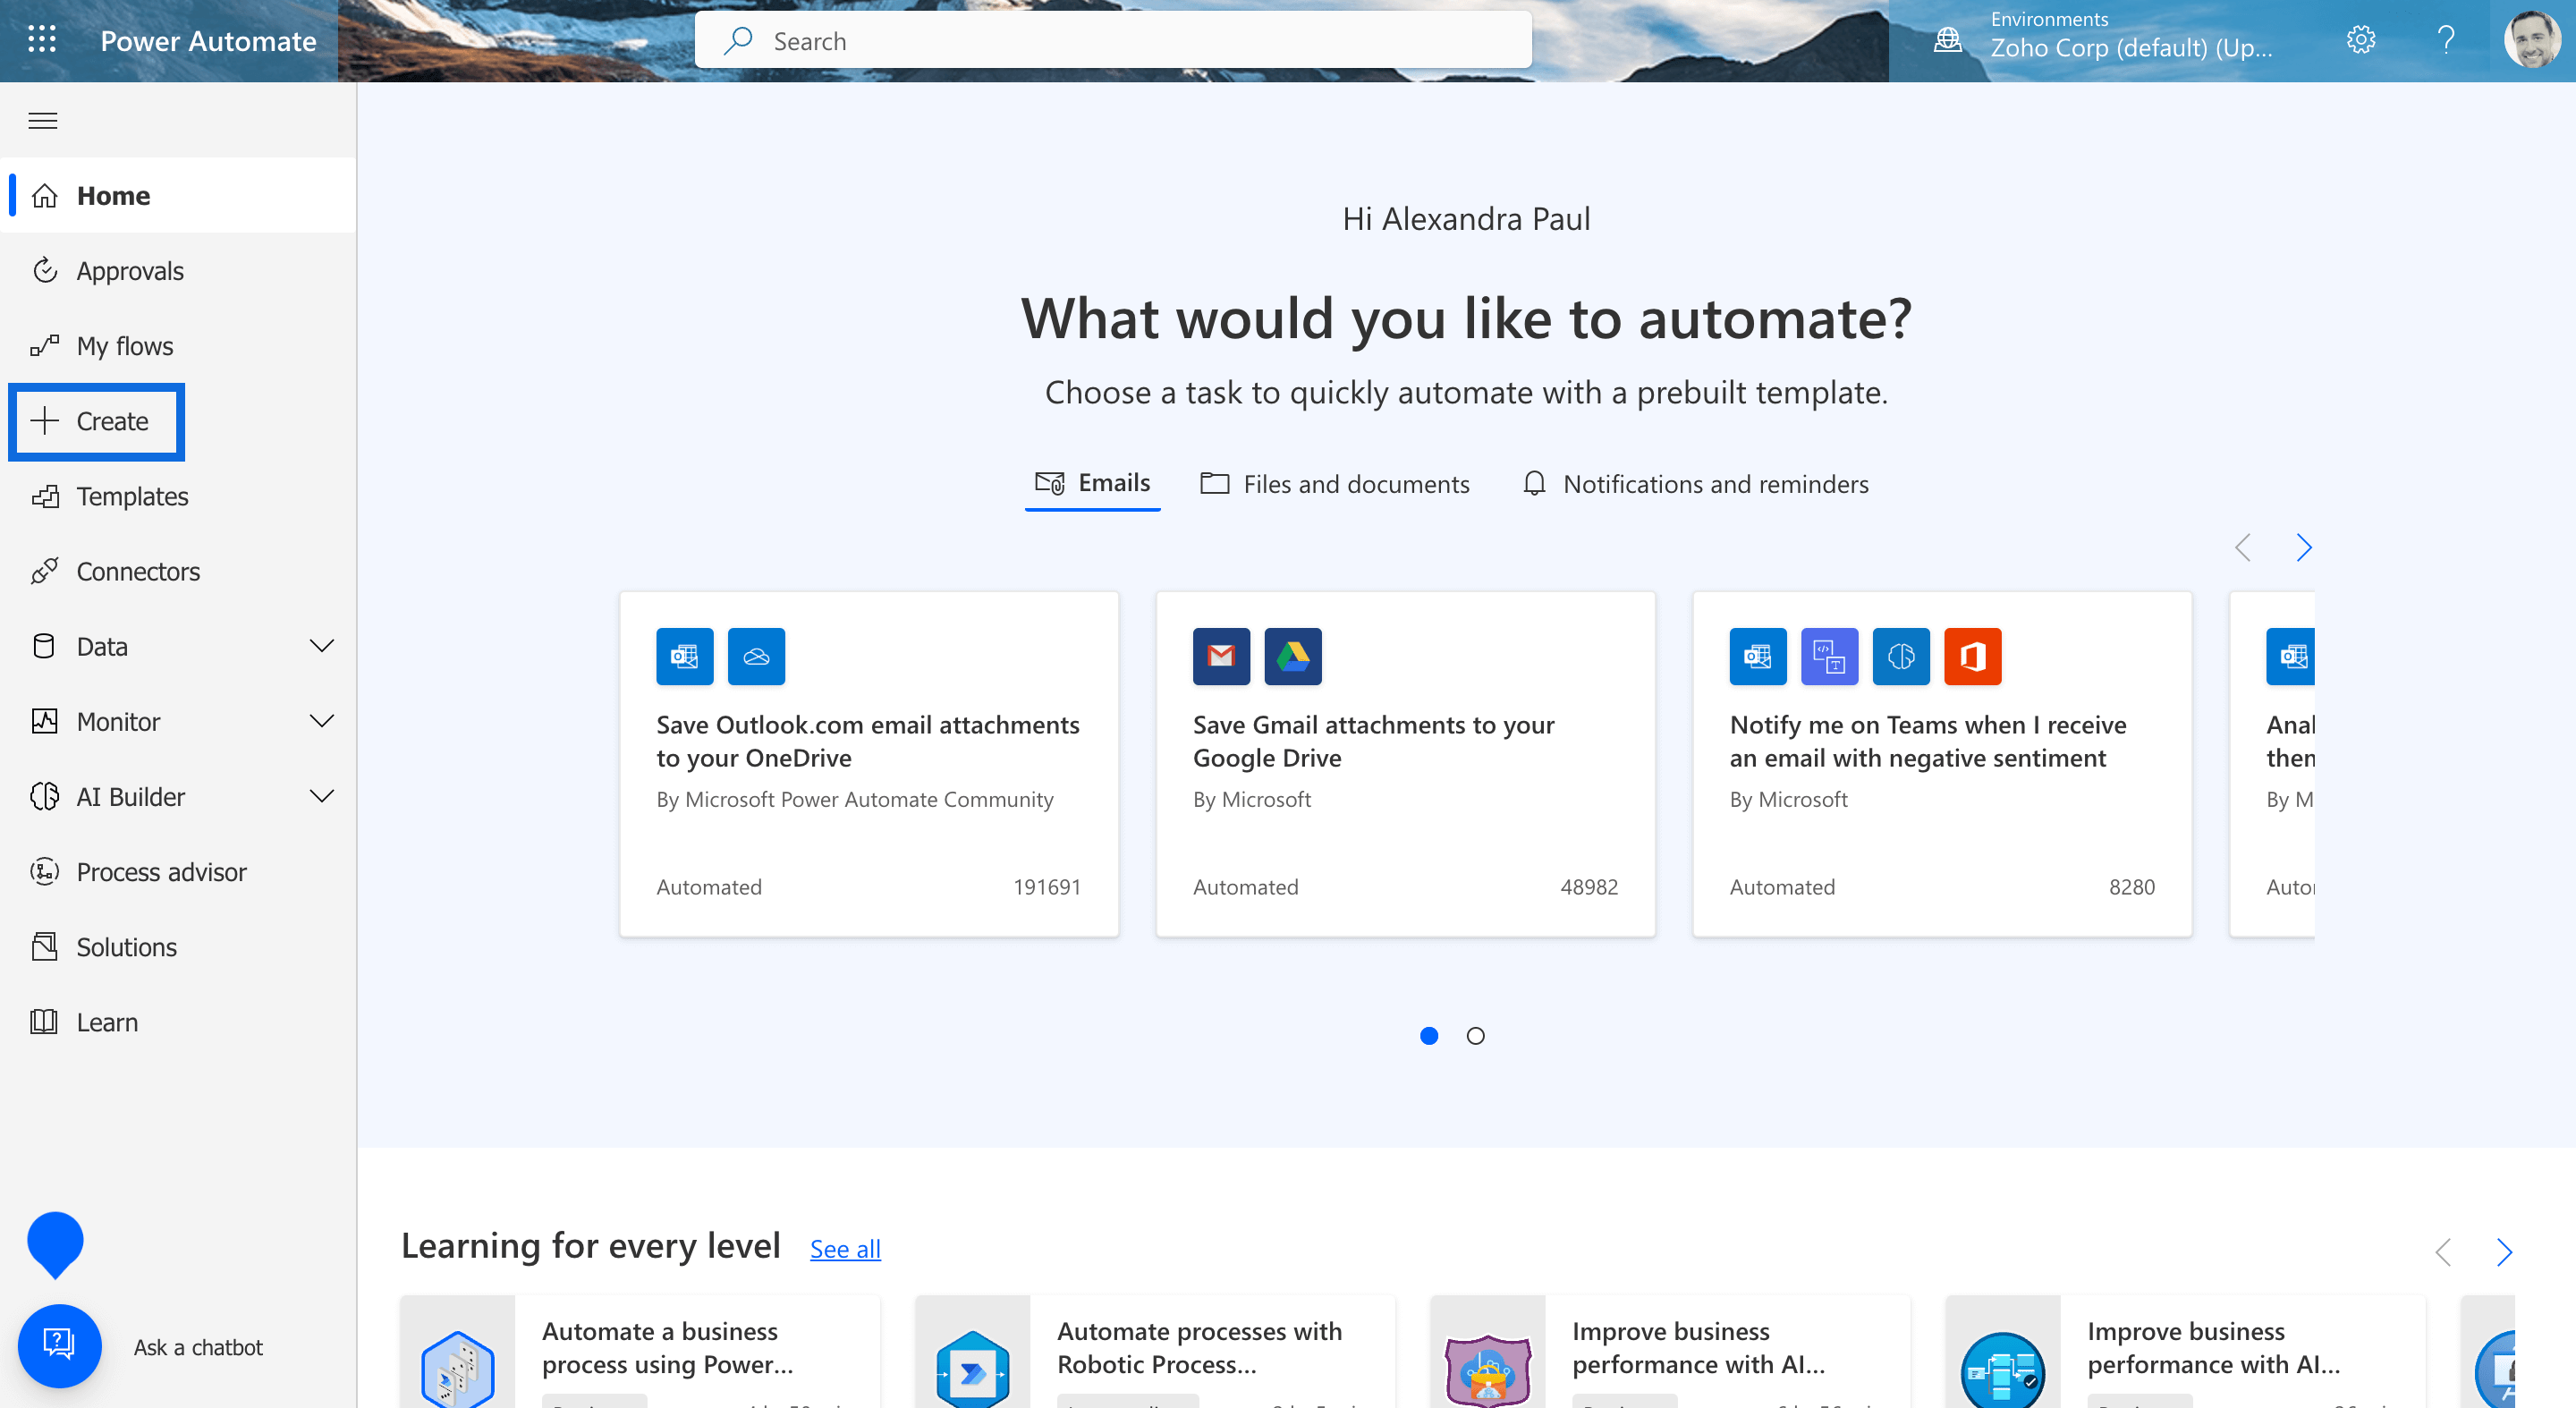
- You can choose to create a cloud flow, desktop flow or business flow.
- You can create a flow in three ways :
- Create a custom flow by starting from blank.
- Choosing from available templates.
- Choosing to start from a connector.
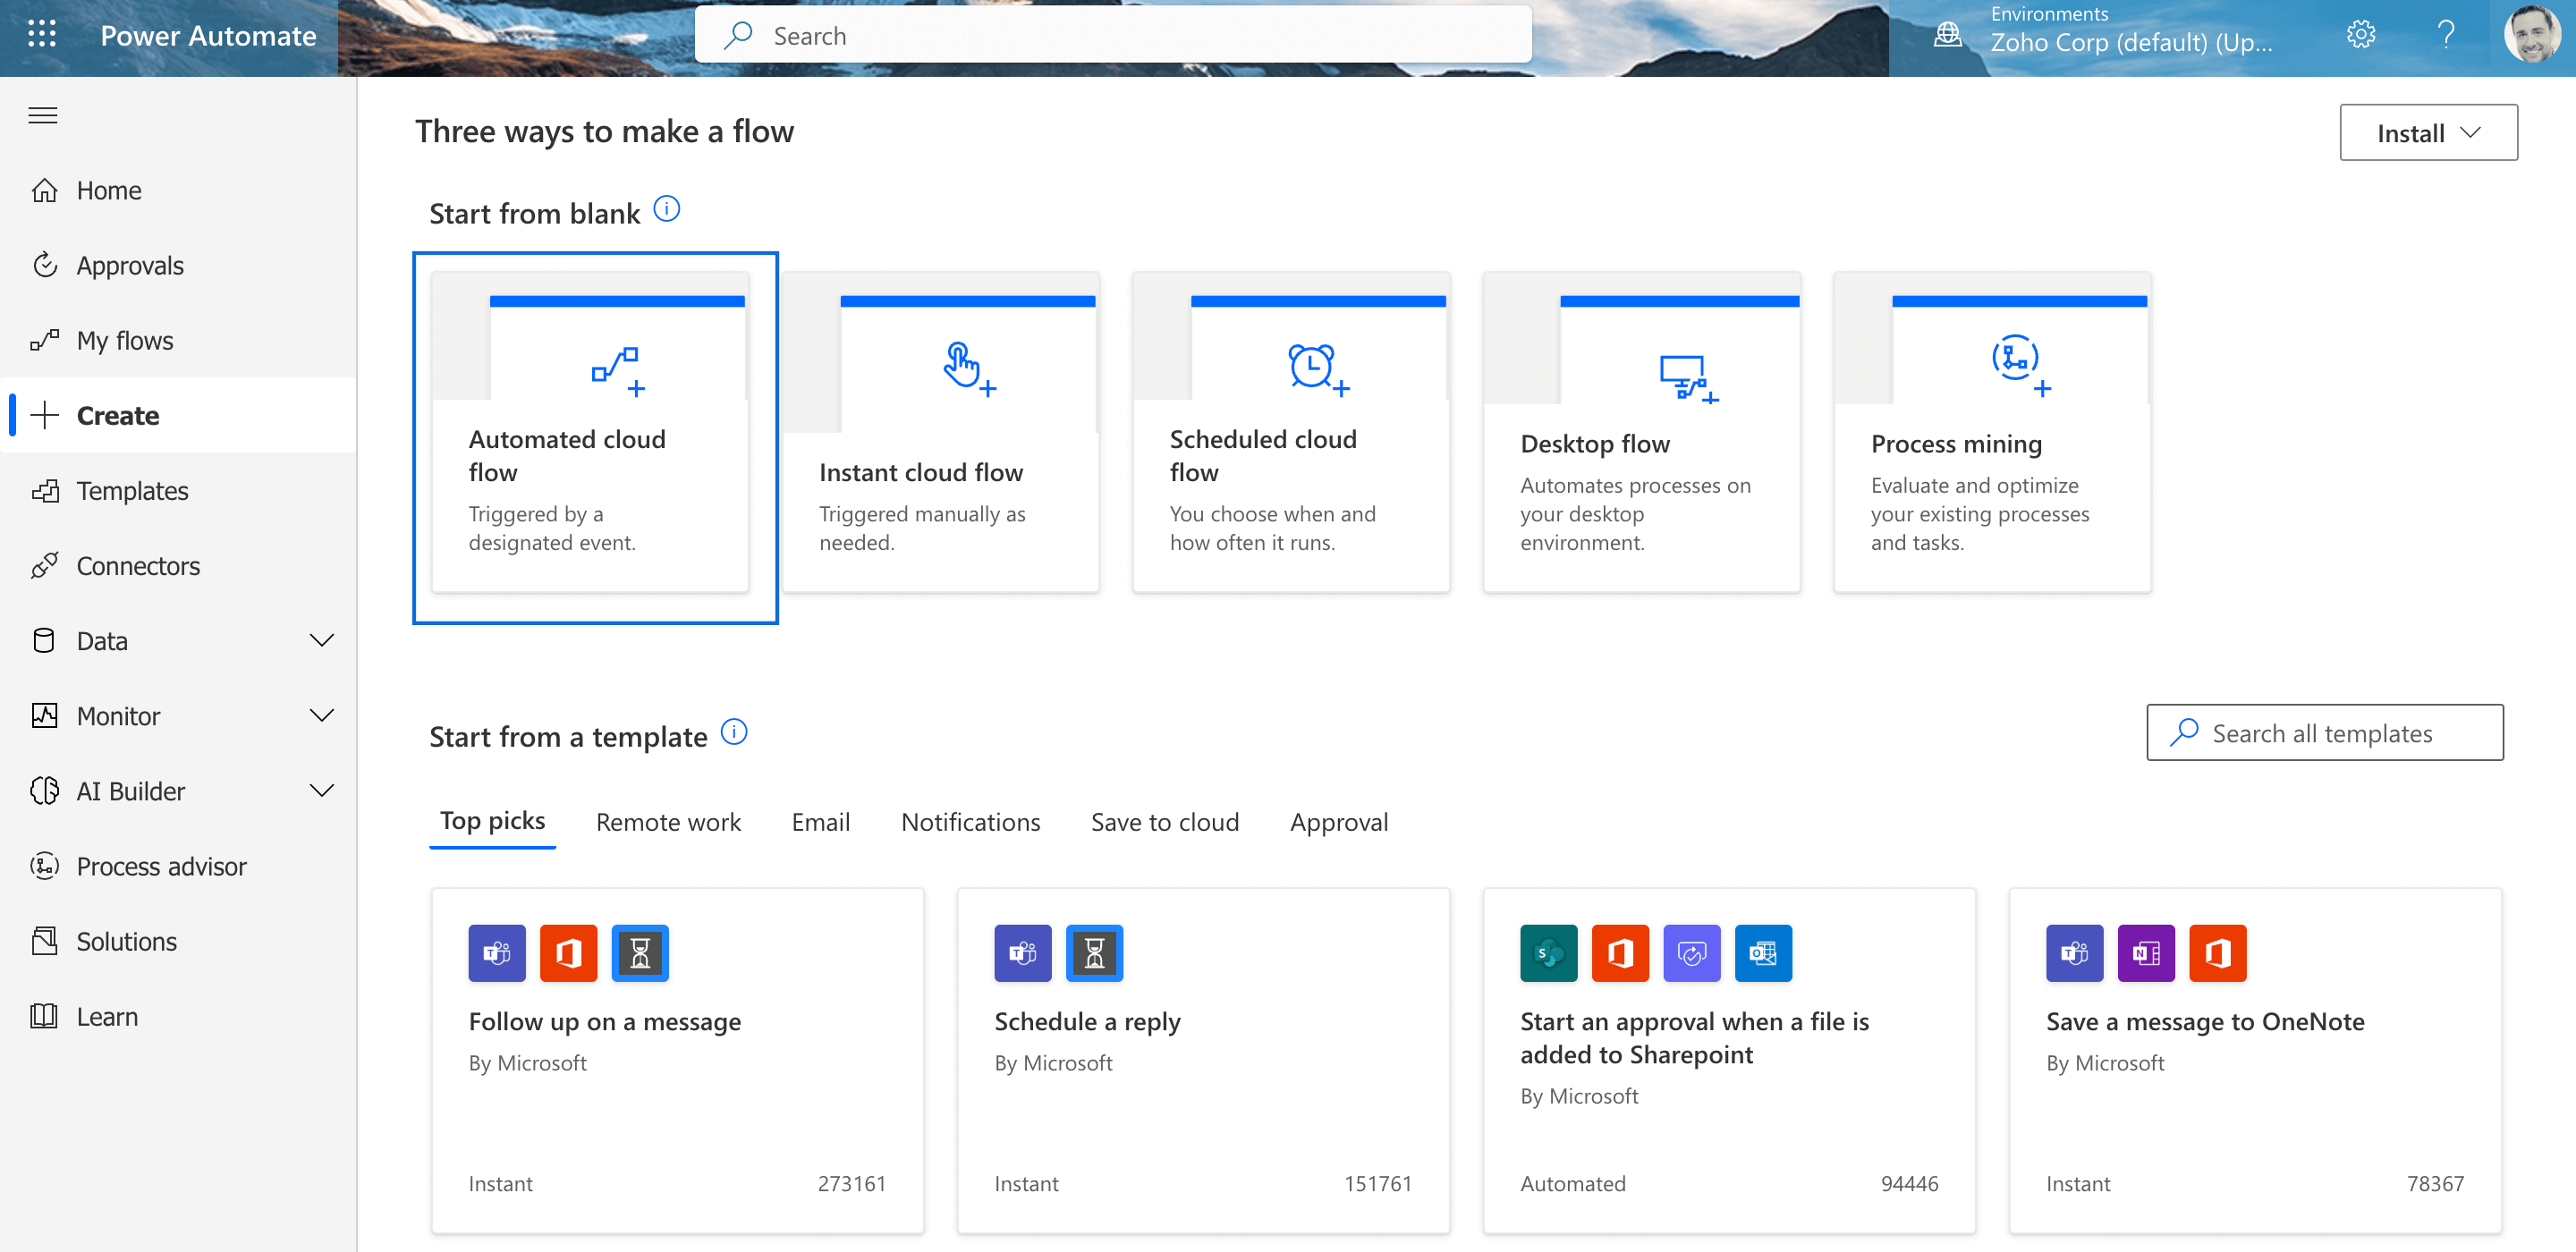
- Let us consider the scenario of creating a flow to send emails whenever a new response is submitted in Microsoft forms.
- Click on Automated cloud flow from start from blank to create a connection from scratch.
- Enter your desired flow name and choose the trigger for which you wish to send your emails.
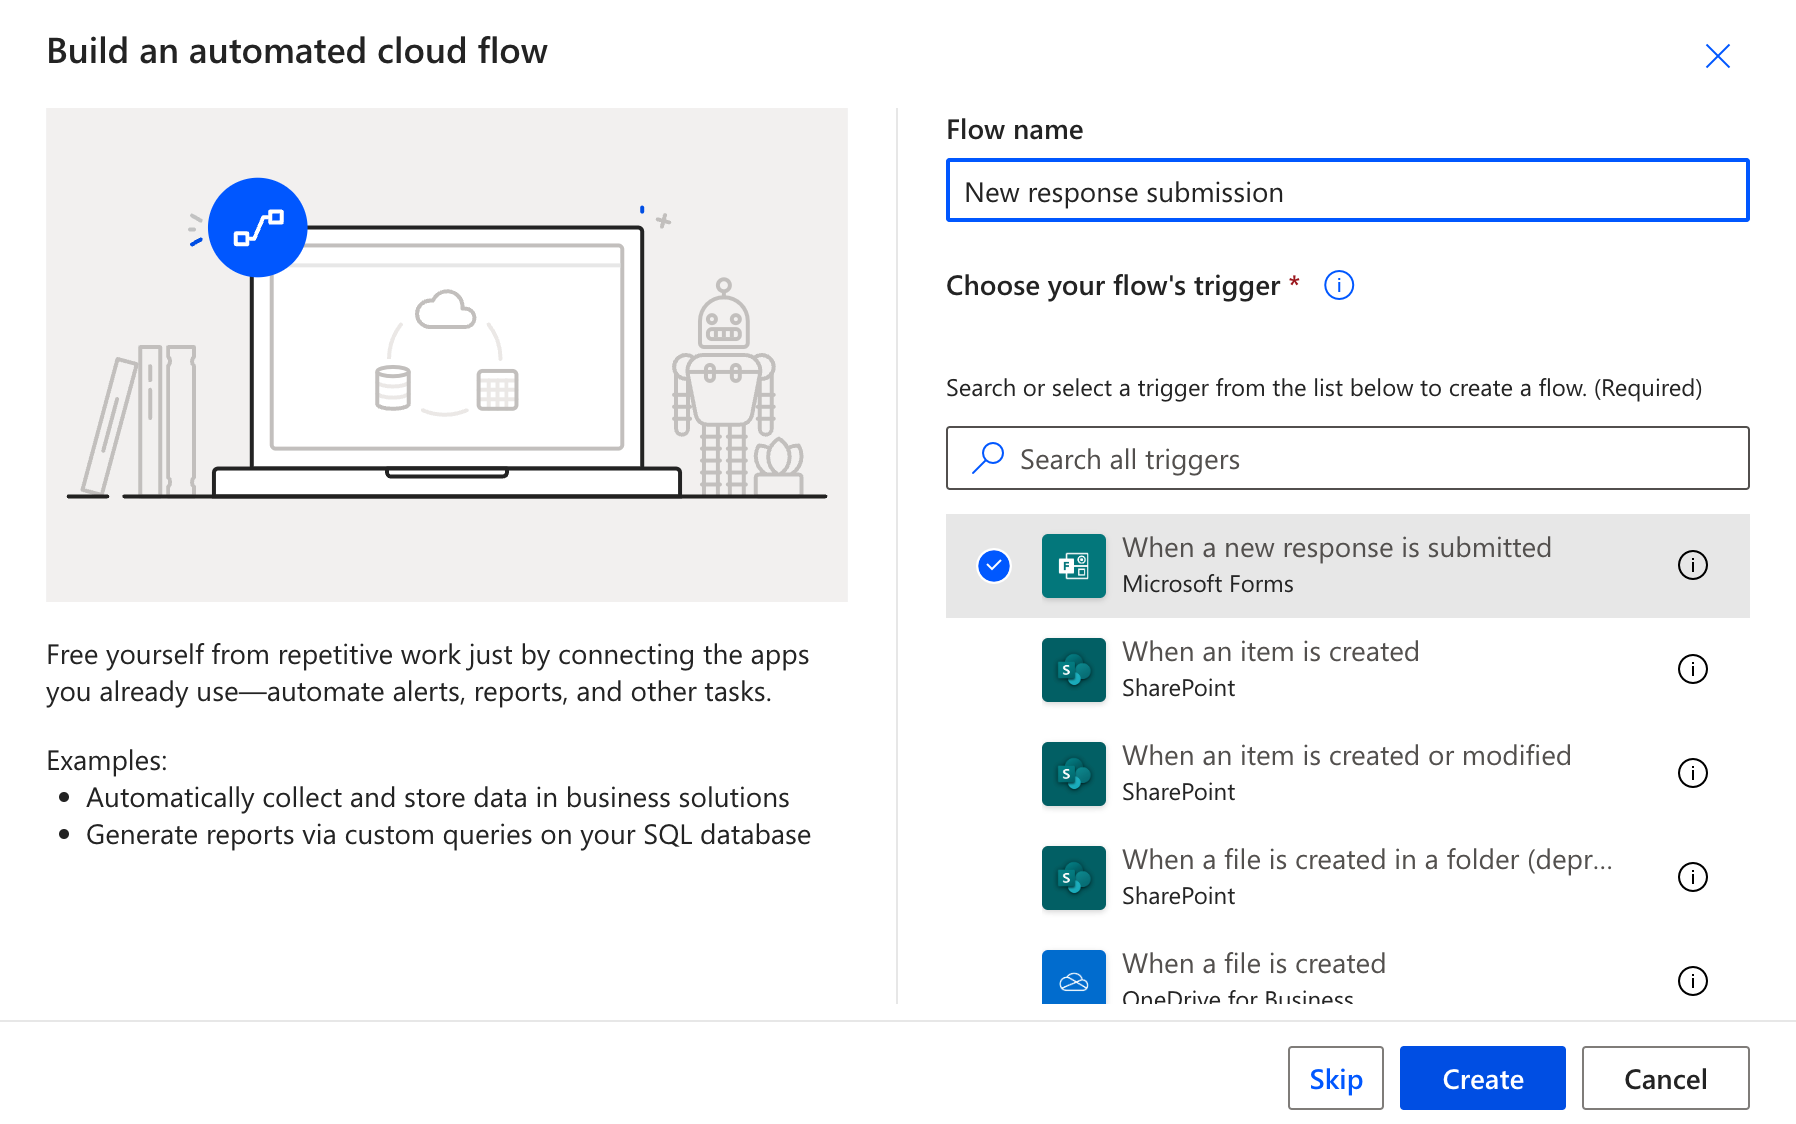
- Click Create.
- The trigger for the flow will be created. Click New step to add the action for the trigger.

- In the actions tab, search for ZeptoMail. Select your choice of method by which you wish to send emails- using templates or a custom email.
- If you wish to send custom emails, follow the steps below:
- Fill in the mandatory parameters - Agent which you wish to use, bounce address, From address prefix, From address domain, From name and subject.
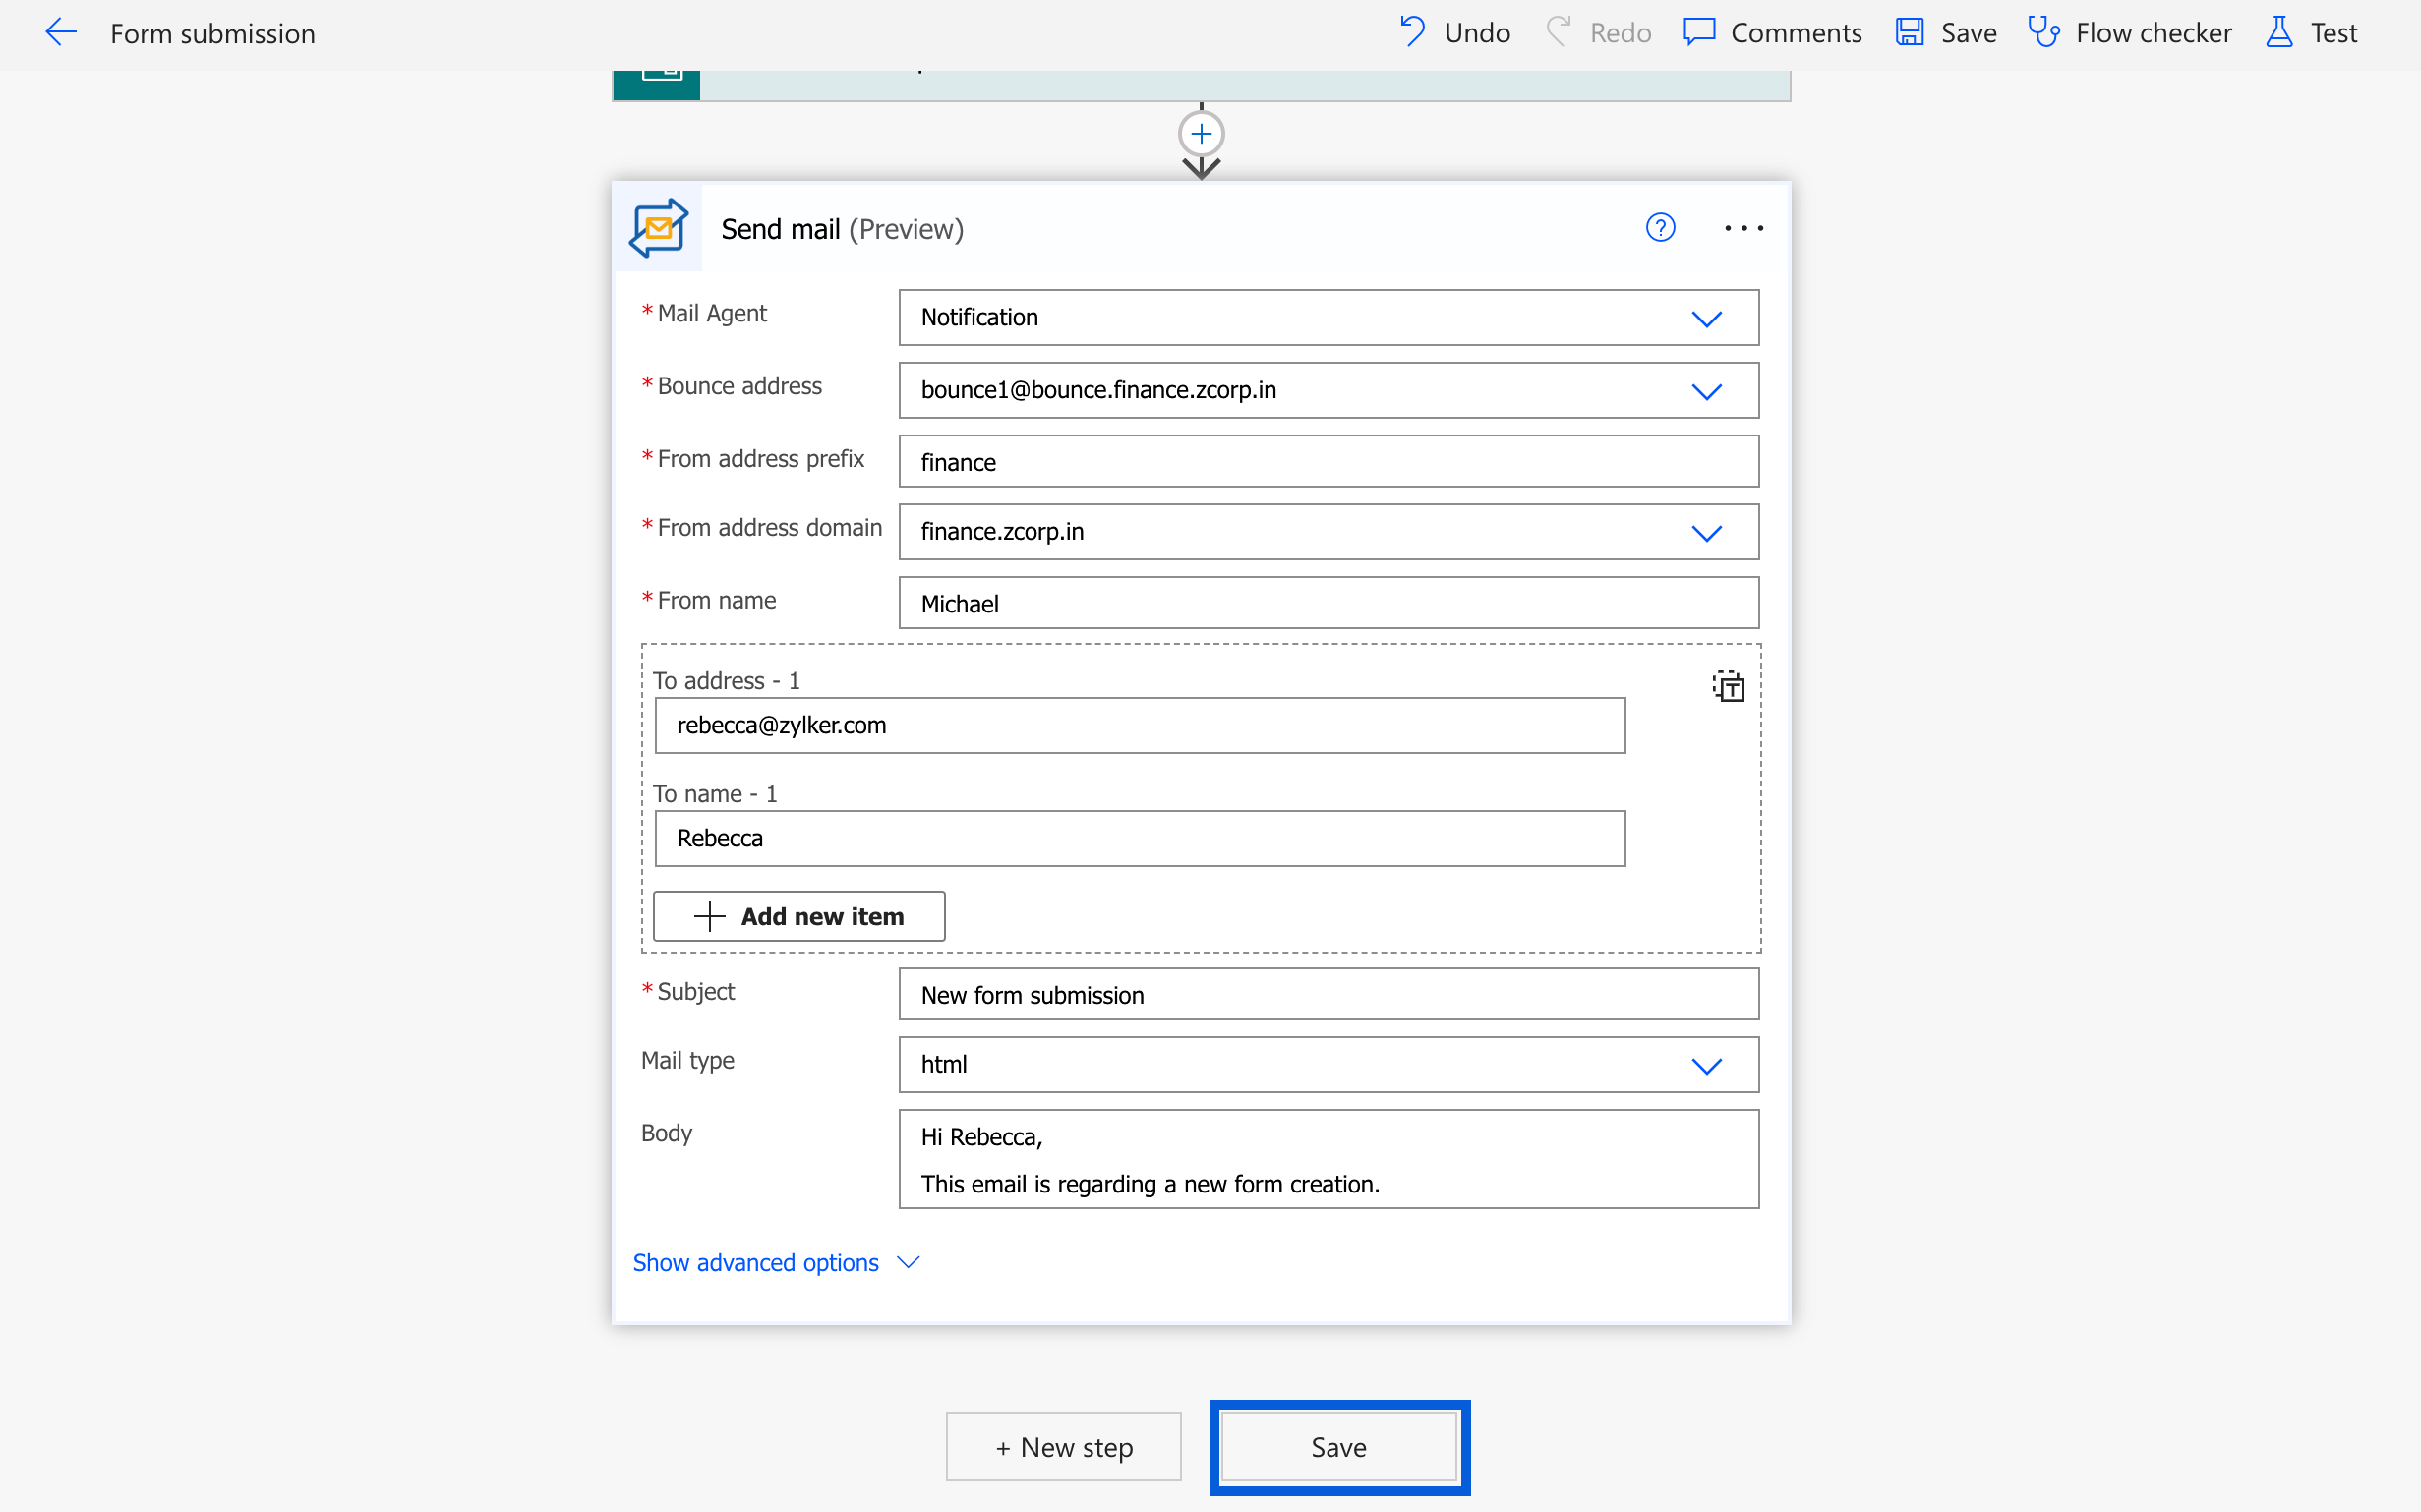
- You can add the CC, BCC and other attachment related details in advance options section.
- Click save.
- If you want to send emails using templates :
- Select the Send email template.
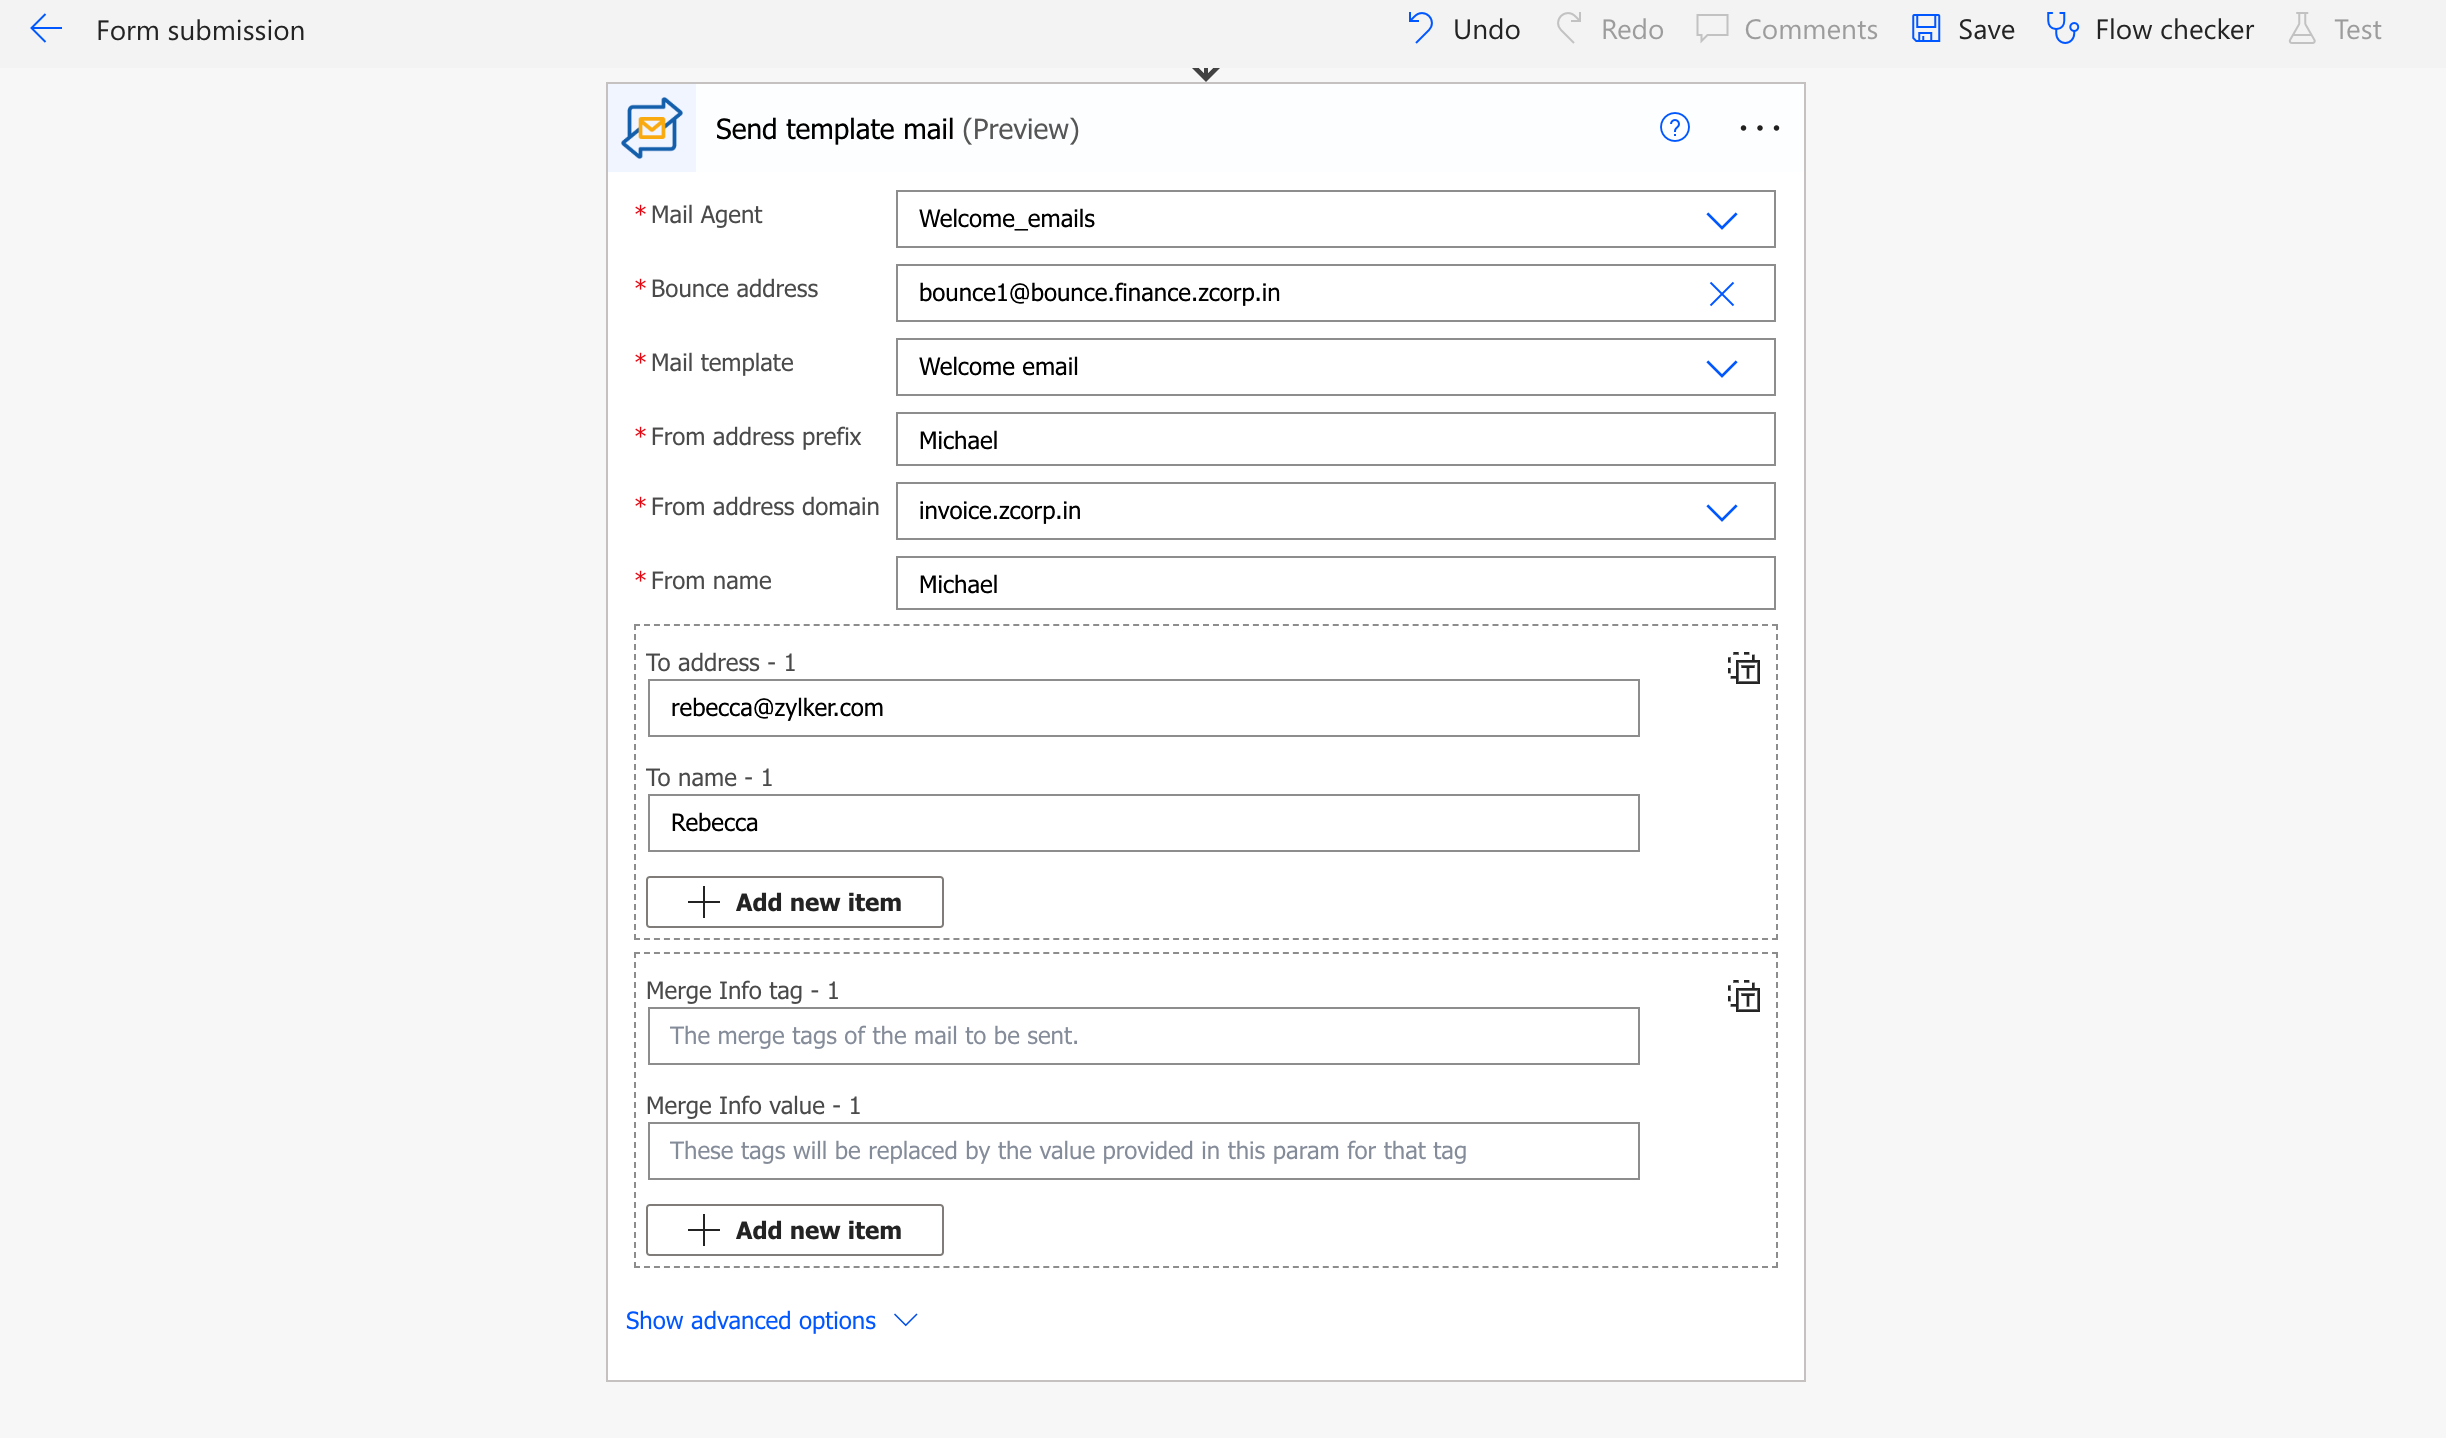
- Fill in the mandatory parameters - Agent you wish to use, bounce address, From address prefix, From address domain, From name, Email template available in your Agent and subject.
- If you need to add any merge tags to your templates, you have an option to add them too.
- Click save to add the action.Your flow will be created. You can test it by clicking the Test button on top right.


Note:
- While selecting the domain of your ZeptoMail, select the correct domain where your account is hosted to avoid Authentication errors.
- The From address domain should be a verified domain added to your ZeptoMail account.