
Custom Dashboards
Zoho Books allows you to create custom dashboards to get a specific overview of your business. Using custom dashboards, you can add new panels that provide insights on the key metrics of your business. Also, you can reorder and resize the panels so that you get to see what’s important at a glance.
Note: This feature is available only for certain plans of Zoho Books. Visit the pricing page to check if it’s available in your current plan.
Create Custom Dashboards
Prerequisite: If you want to invite a user to your organisation to view and manage dashboards, ensure that you have provided the necessary permissions before you invite the user. However, all admins in your organisation will be able to view and manage custom dashboards by default.
You can create multiple custom dashboards in Zoho Books. Here’s how:
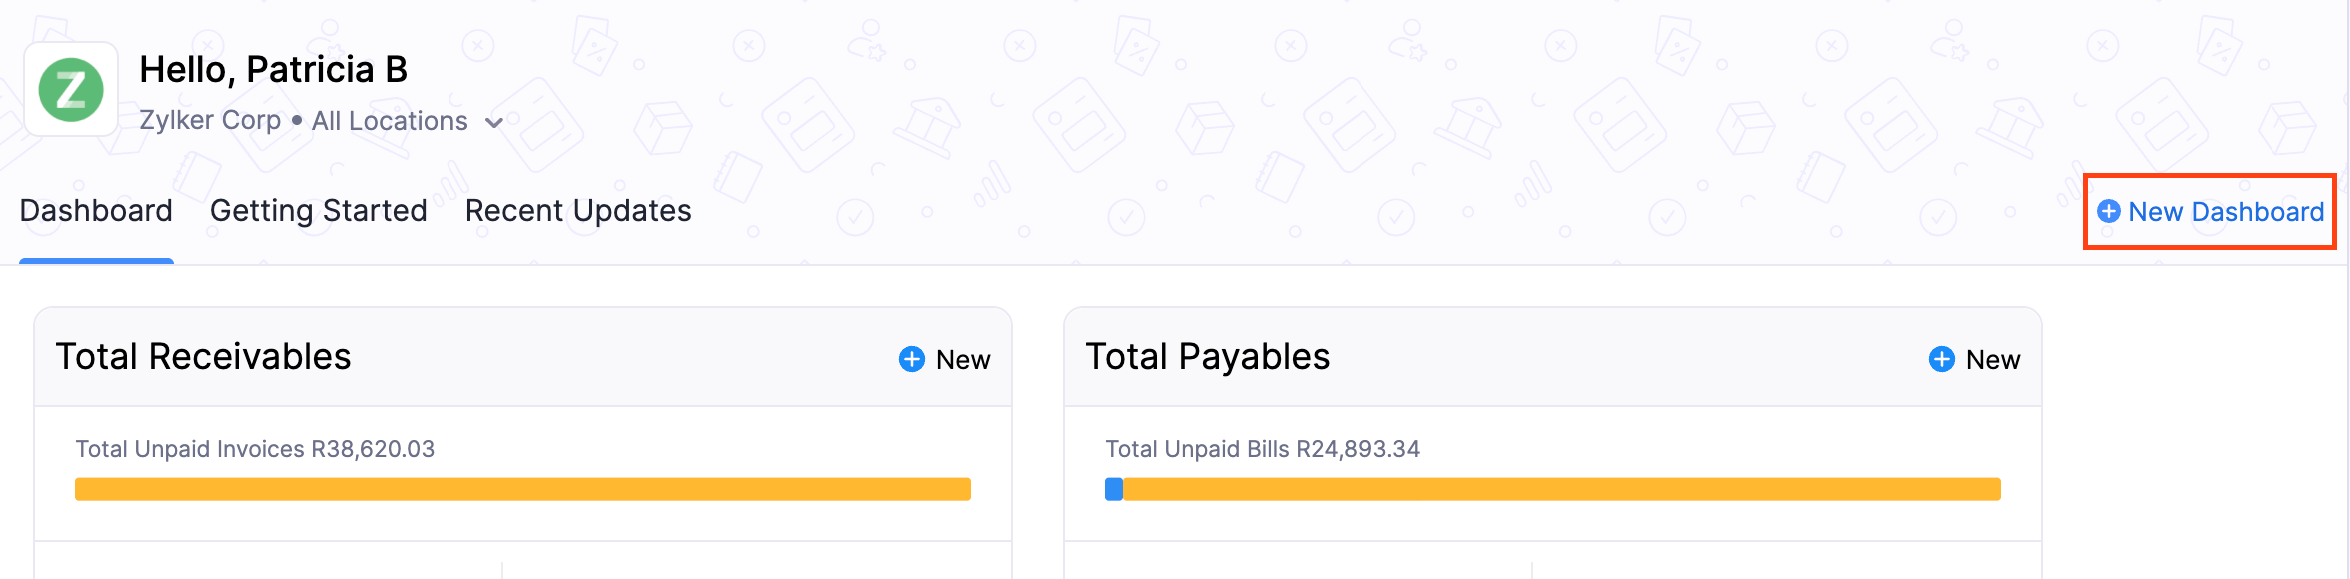
Go to the Dashboard tab.
Click + New Dashboard in the top right.
In the pop-up that appears, enter a Dashboard Name and provide a short Description, if required.
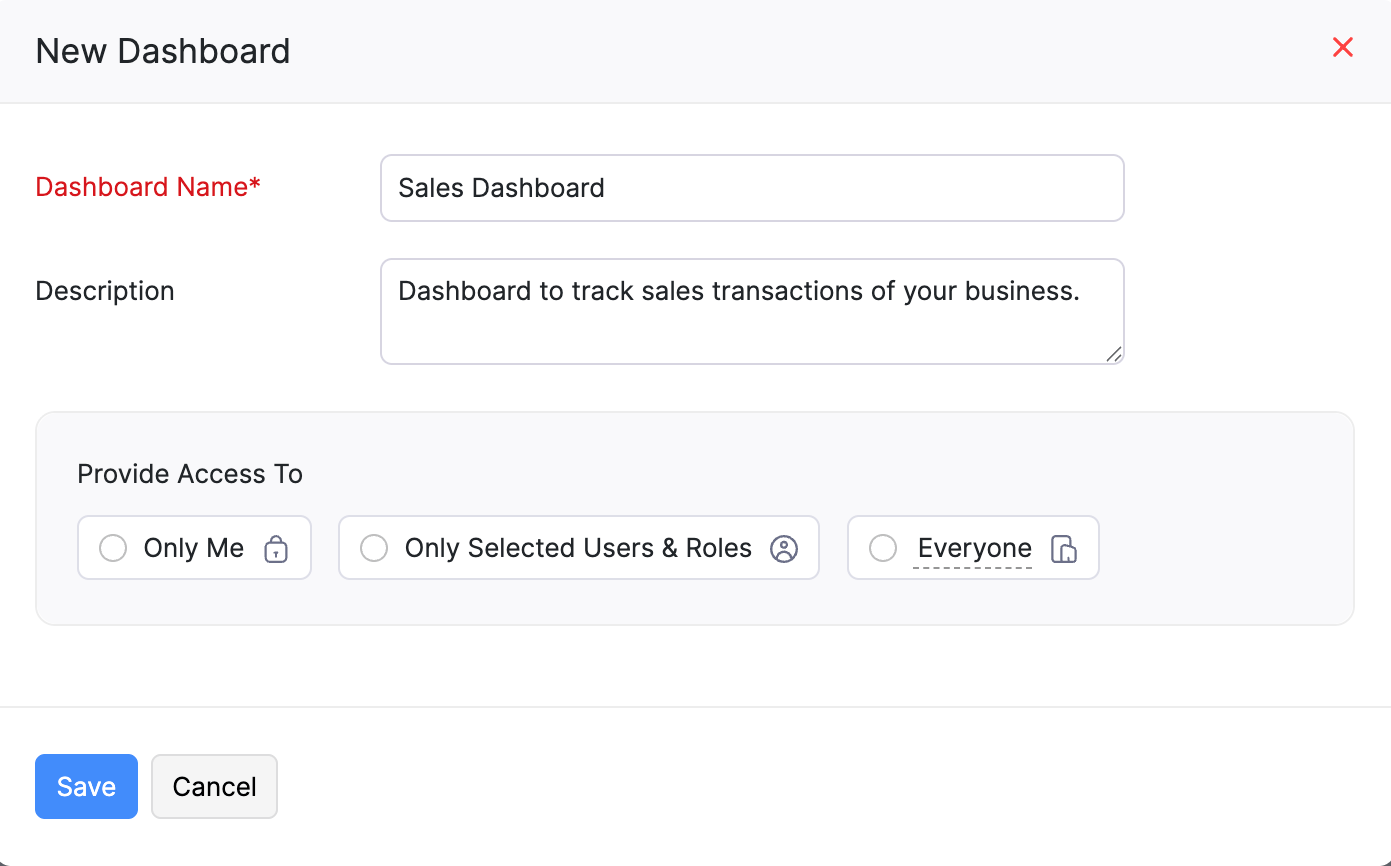
Select the users for whom you want to provide access to view and manage the custom dashboard under Provide Access To.
- Only Me - Only you can view and manage the custom dashboard.
- Everyone - All the users in your organisation can view and manage the custom dashboard.
- Only Selected Users & Roles - You can provide access to specific users in your organisation and configure necessary permissions for them.
Once this option chosen, select the required users from the Select Users dropdown.
Click Add User. The list of users who can access the custom dashboard will be displayed under Access Details.
You can change permissions for each user under Permissions. There are two permissions that can be configured for a user:
- View Only - Allows users to only view the custom dashboard.
- View and Manage - Allows users to view, edit, delete, and share the custom dashboard.

Click Save.
Similarly, you can also configure access permissions based on Roles.
The custom dashboard will be created. You can add the required panels to it in the dashboard setup page.
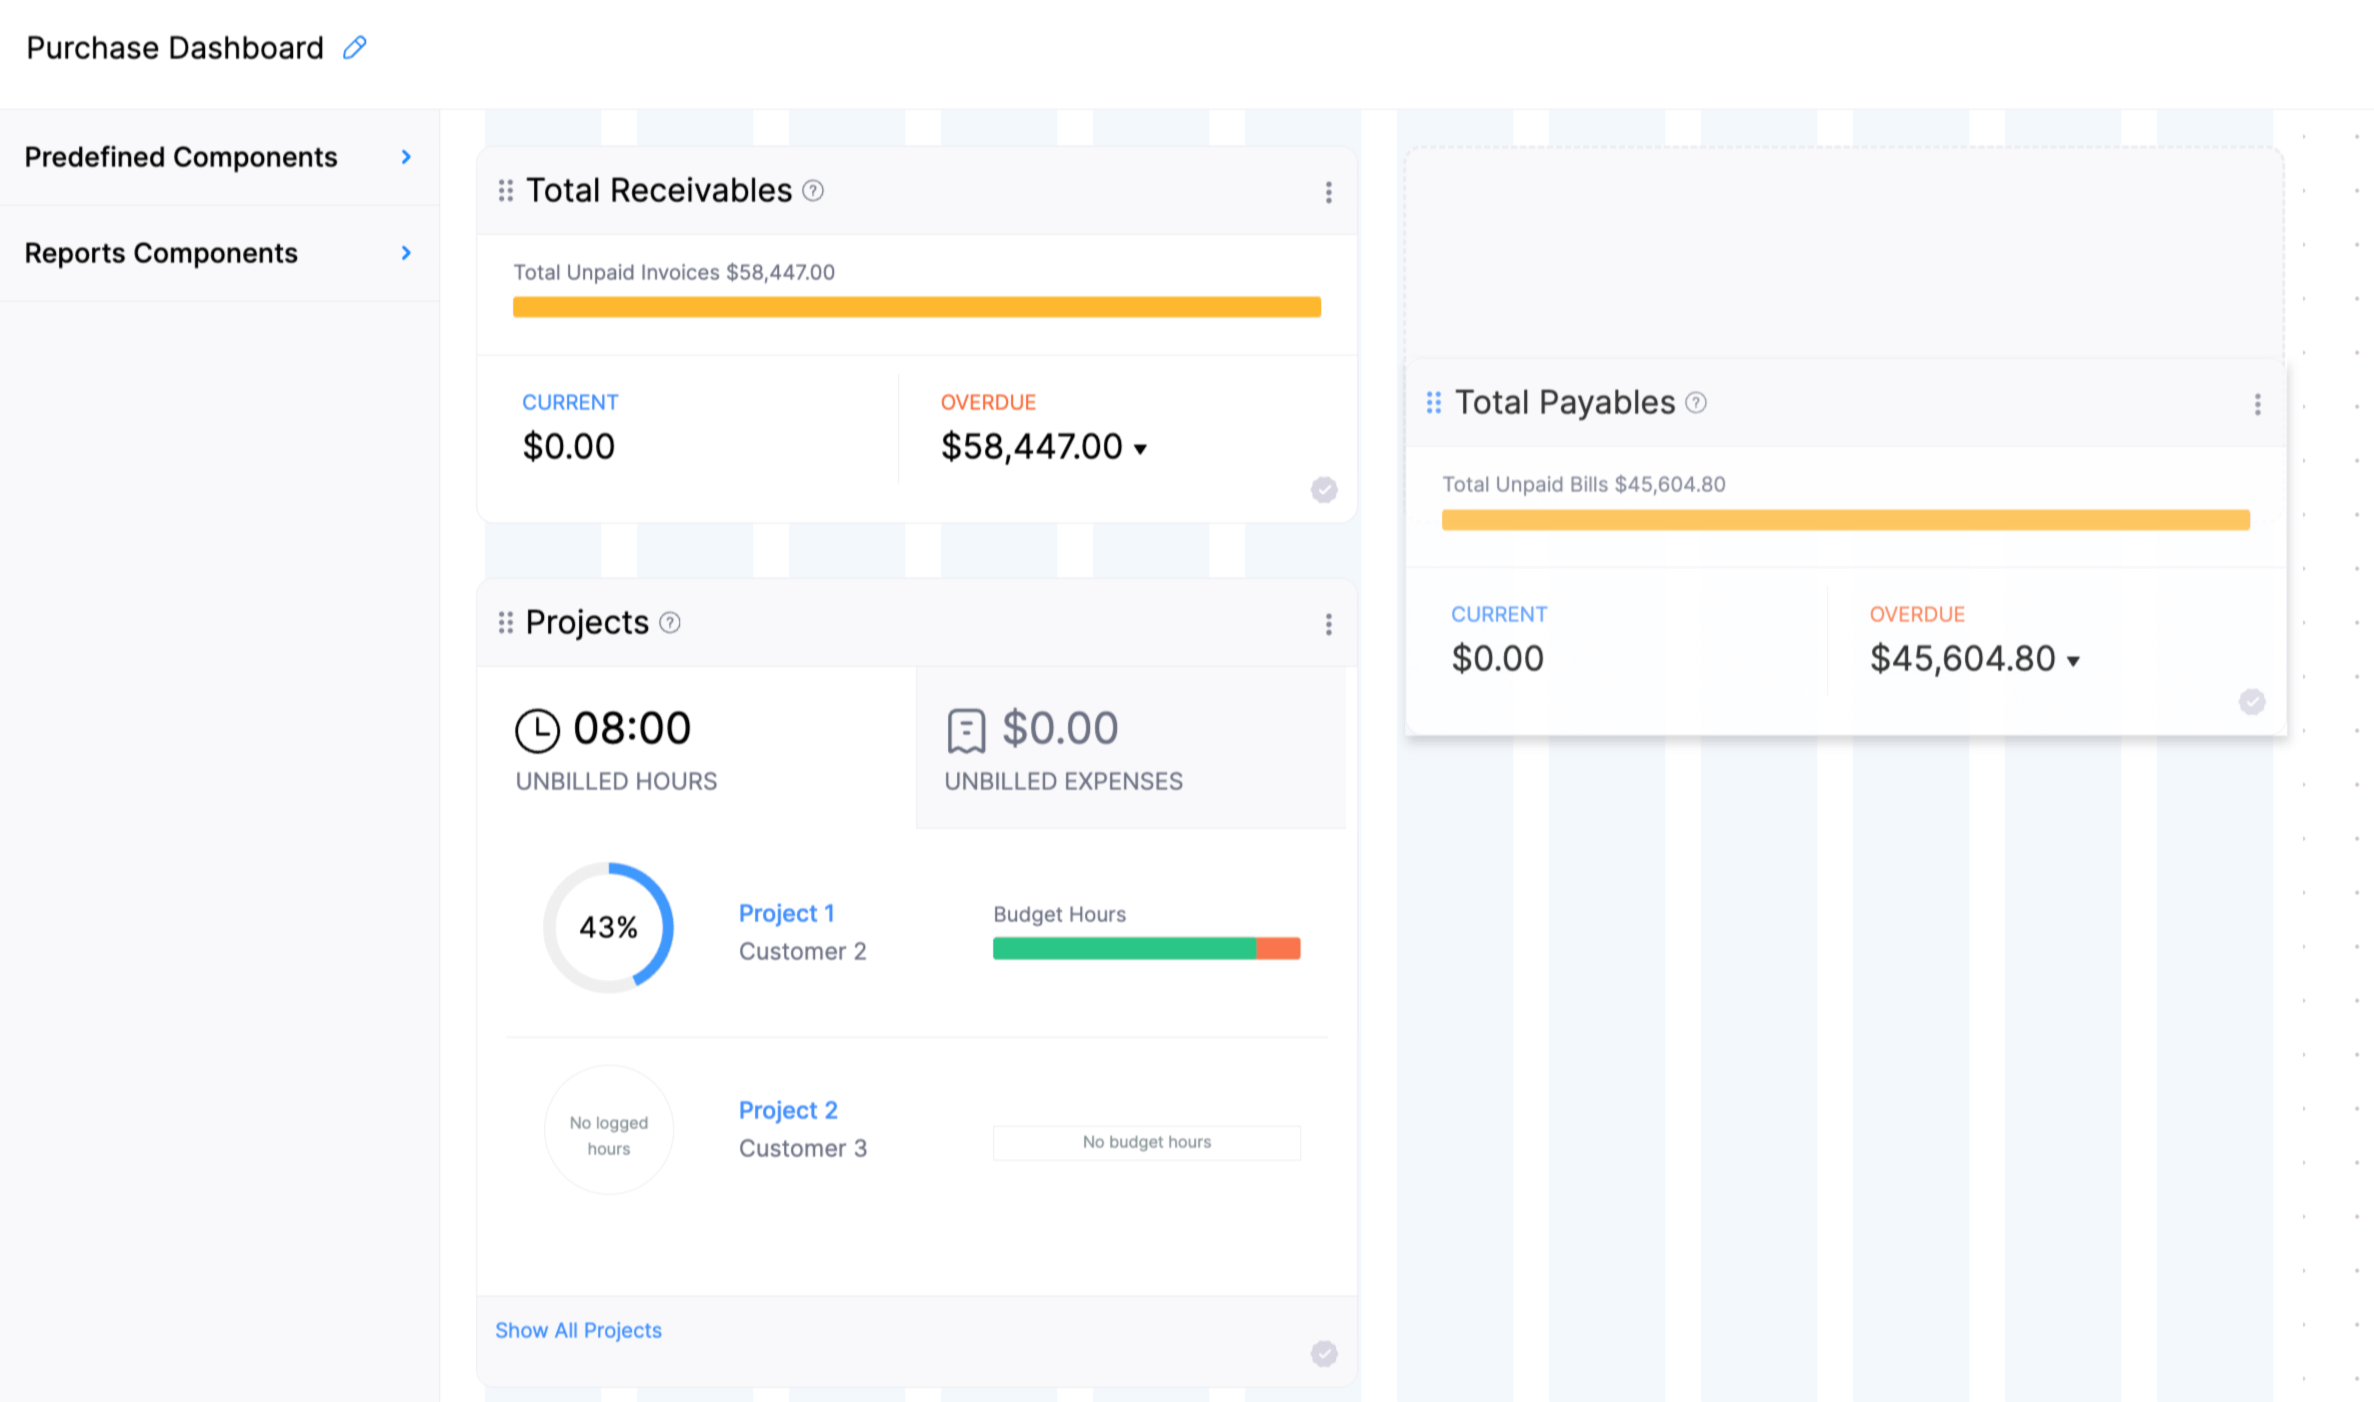
Add Panels to the Custom Dashboard
The custom dashboard consists of two different panels:
Predefined Panels
Zoho Books has predefined panels that are available by default. You can create a custom dashboard and add these panels to it. Here’s how:
- In the Dashboard Setup page, click Predefined Panels in the left pane.
- Hover over the required predefined panel and click the Create Panel icon.
- Click Save Changes in the top-right corner of the page.
The predefined panel will now be displayed in the custom dashboard.
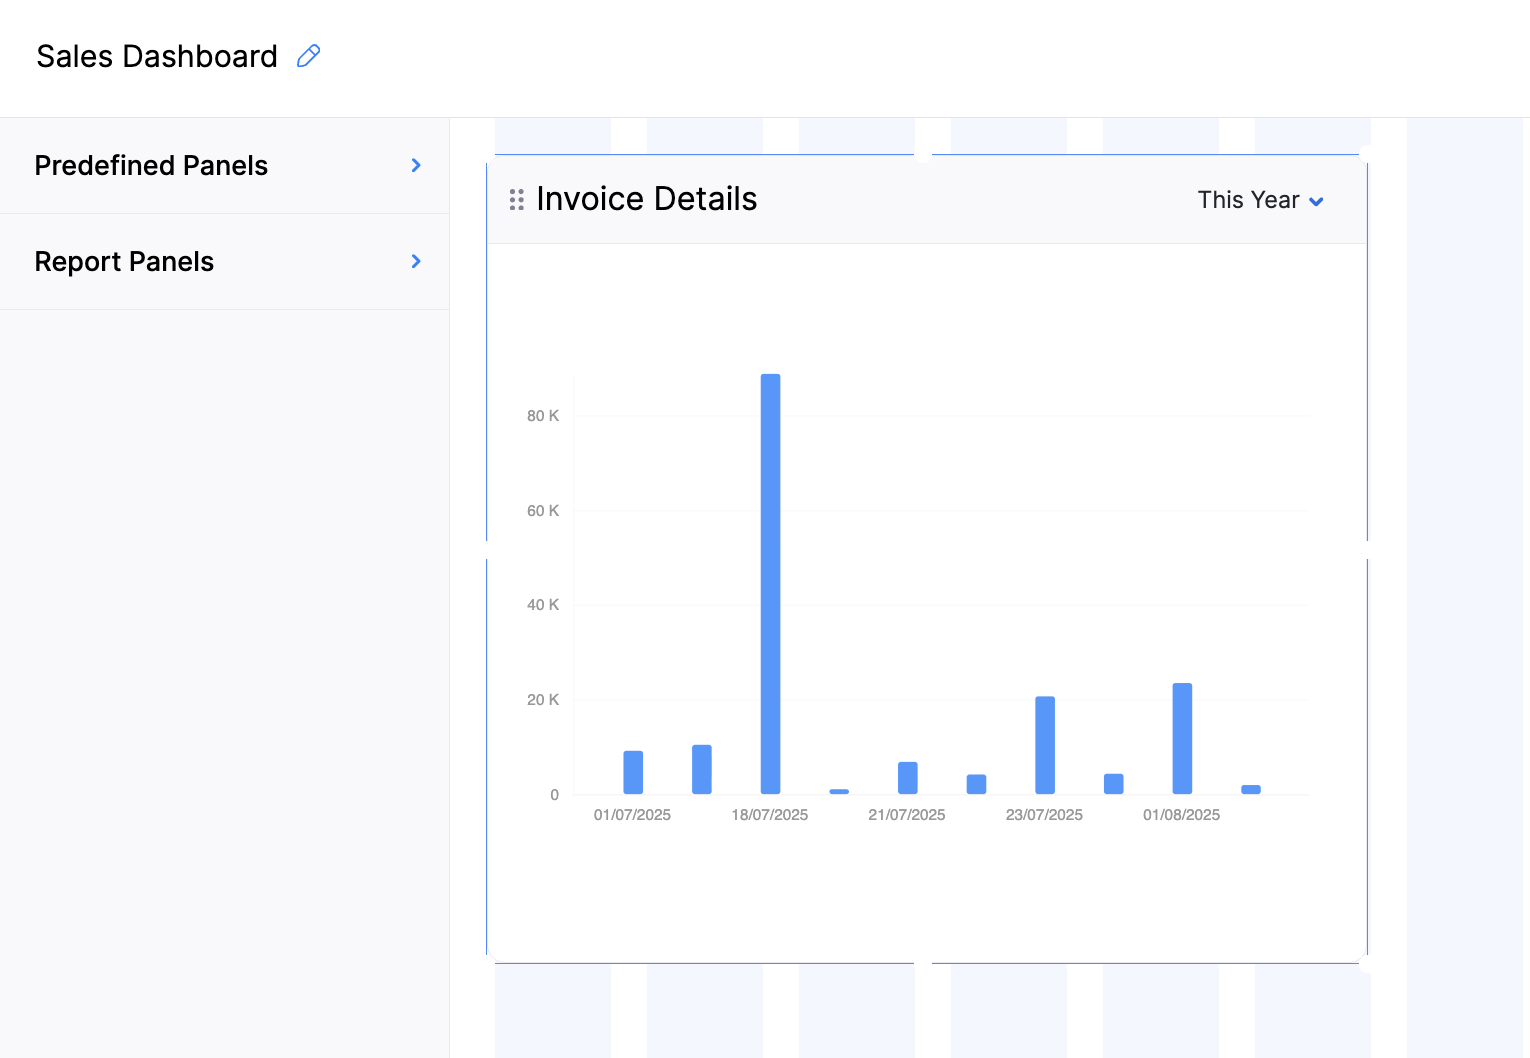
Report Panels
Note: Only the following reports and their custom reports can be added as report panels in the custom dashboard. Profit and Loss, Sales by Customer, Sales by Item, Sales by Sales Person, Invoice Details, Sales Order Details, Delivery Challan Details, Quote Details, Receivable Summary, Receivable Details, Payments Received, Credit Note Details, Bills Details, Vendor Credits Details, Purchase Order Details, Purchase Orders by Vendor, Purchases by Vendor, Purchases by Item, Expenses by Customer, Expenses by Project, and Billable Expense Details.
It displays the list of reports and custom reports that you can choose to display on the dashboard.
To add a report panel:
In the Dashboard Setup page, click Report Panels in the left pane.
Hover over the required report panel and click the Create Panel icon.
| Report Category | Description |
|---|---|
| Business Overview | Contains reports displaying the business’s performance and health over a specific period. |
| Sales | Contains reports that provide a summary of all the sales transactions with respect to Sales By Customers, Sales By Items, and Sales By Salesperson in your organisation. |
| Receivables | Contains reports about the amount your customers owe you. |
| Payments Received | Contains reports about the payments you have received from your customers. |
| Payables | Contains reports about the amount that you are yet to pay your vendors. |
| Purchases and Expenses | Contains reports about the Purchase and Expense transactions you have recorded in Zoho Books. |
| Custom Reports | Contains custom reports you generated, based on the preferences you had set in the existing reports. |
- In the pop-up that appears, enter the required details in the Panel Details tab.
| Field | Description |
|---|---|
| Time Period | Select the time period for which you want to create the panel. The time period for a panel can be Today, This Week, This Month, This Quarter, This Year, etc. |
| Panel Name | Enter the name of the Panel. |
| Description | Provide a short description for the panel. |
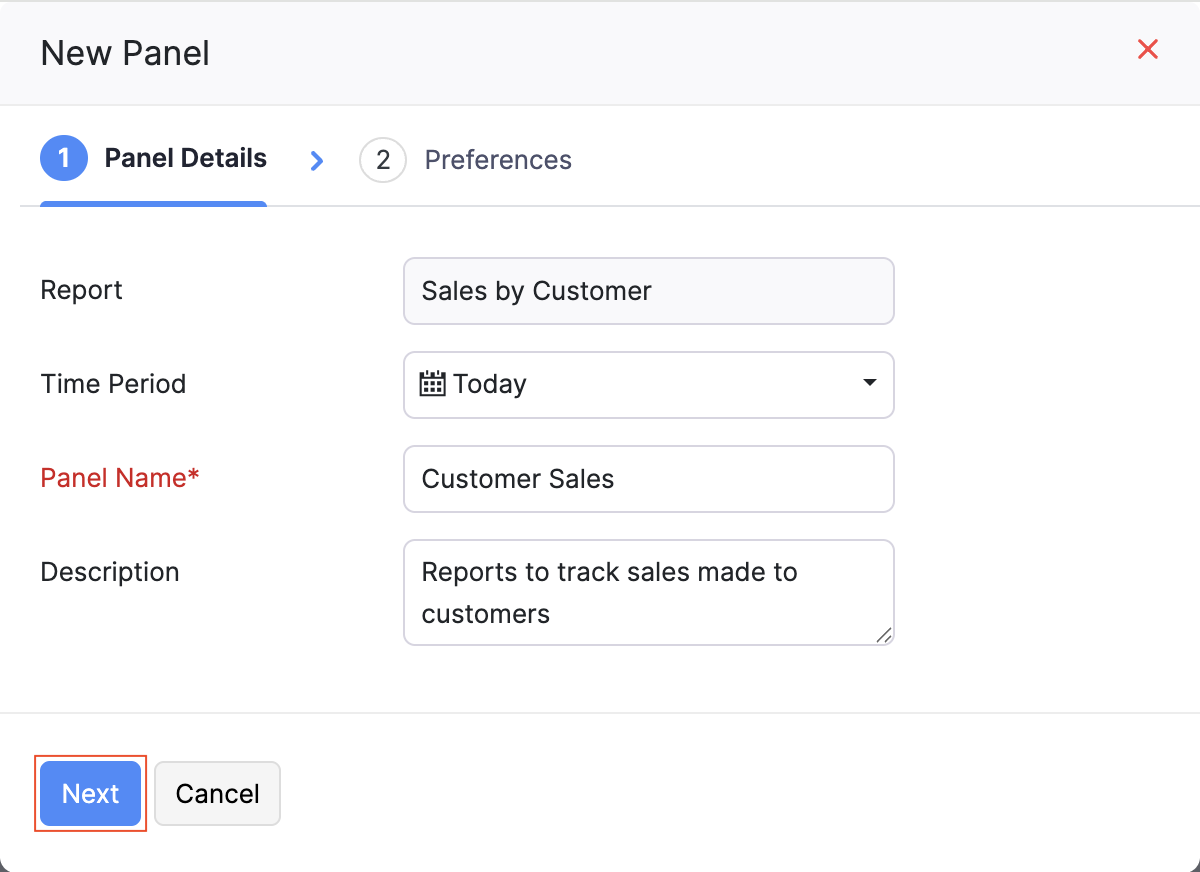
Click Next.
In the Preferences tab, enter the required details.
| Field | Description |
|---|---|
| Chart Type | Select the chart type of the report panel. It can be a Pie Chart, Bar Chart, or a Line Chart. |
| X-Axis Data Points | Select the X-Axis Data Points you want to display, like Item Name or Customer Name. |
| Y-Axis Data Points | Select the Y-Axis Data Points you want to display, like Amount or Quantity. |
| Sort By | Select the order in which you want to sort the data. |
| Maximum Data Points On X-axis | Select the maximum limit of data points you want to have along the X-axis. |
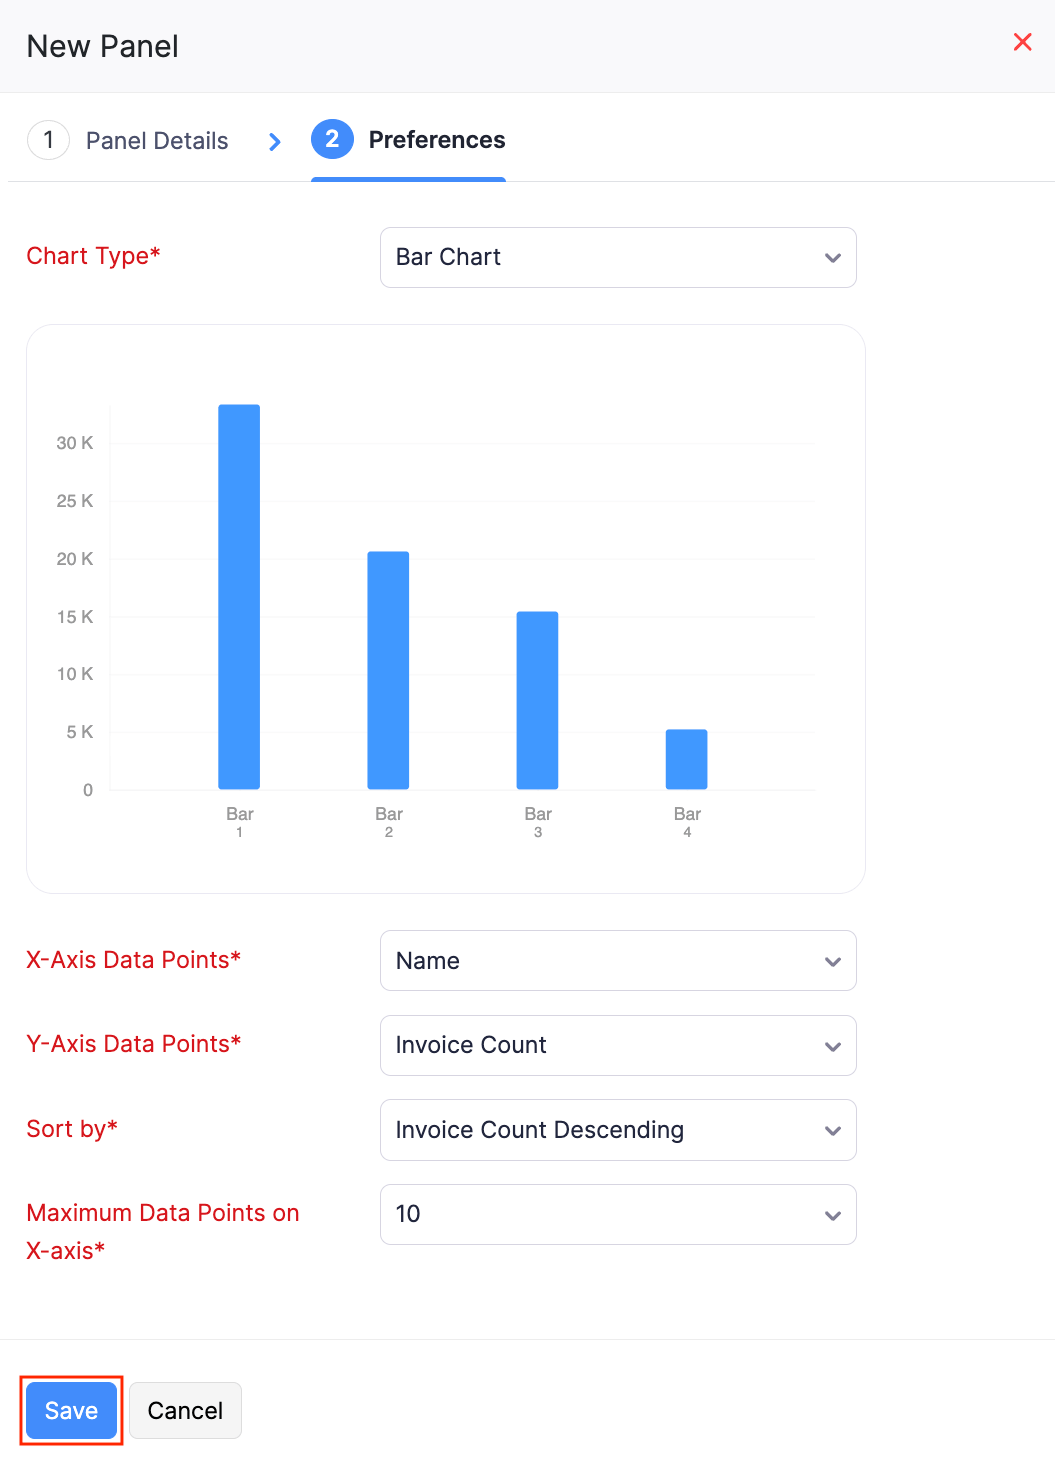
- Click Save.
- Click Save Changes in the top-right corner of the page.
The report panel will now be displayed in the custom dashboard.
Other Actions
You can also perform various actions on the Dashboard Setup page, like:
Reorder Panels
Once you add panels to your custom dashboard, you can reorder them based on your preference. Here’s how:
In the Dashboard Setup page, drag the panel to the desired location.
Click Save Changes in the top-right corner of the page.
Resize Panels
Note: You can only resize and edit a report panel.
To resize a report panel:
In the Dashboard Setup page, select the panel to be resized.
Drag the corners of the panel to adjust it’s size as required and click Save Changes in the top-right corner of the page.
Edit Panels
To edit a panel:
Click the Settings icon near the panel name that you want to edit, and select Edit from the dropdown.
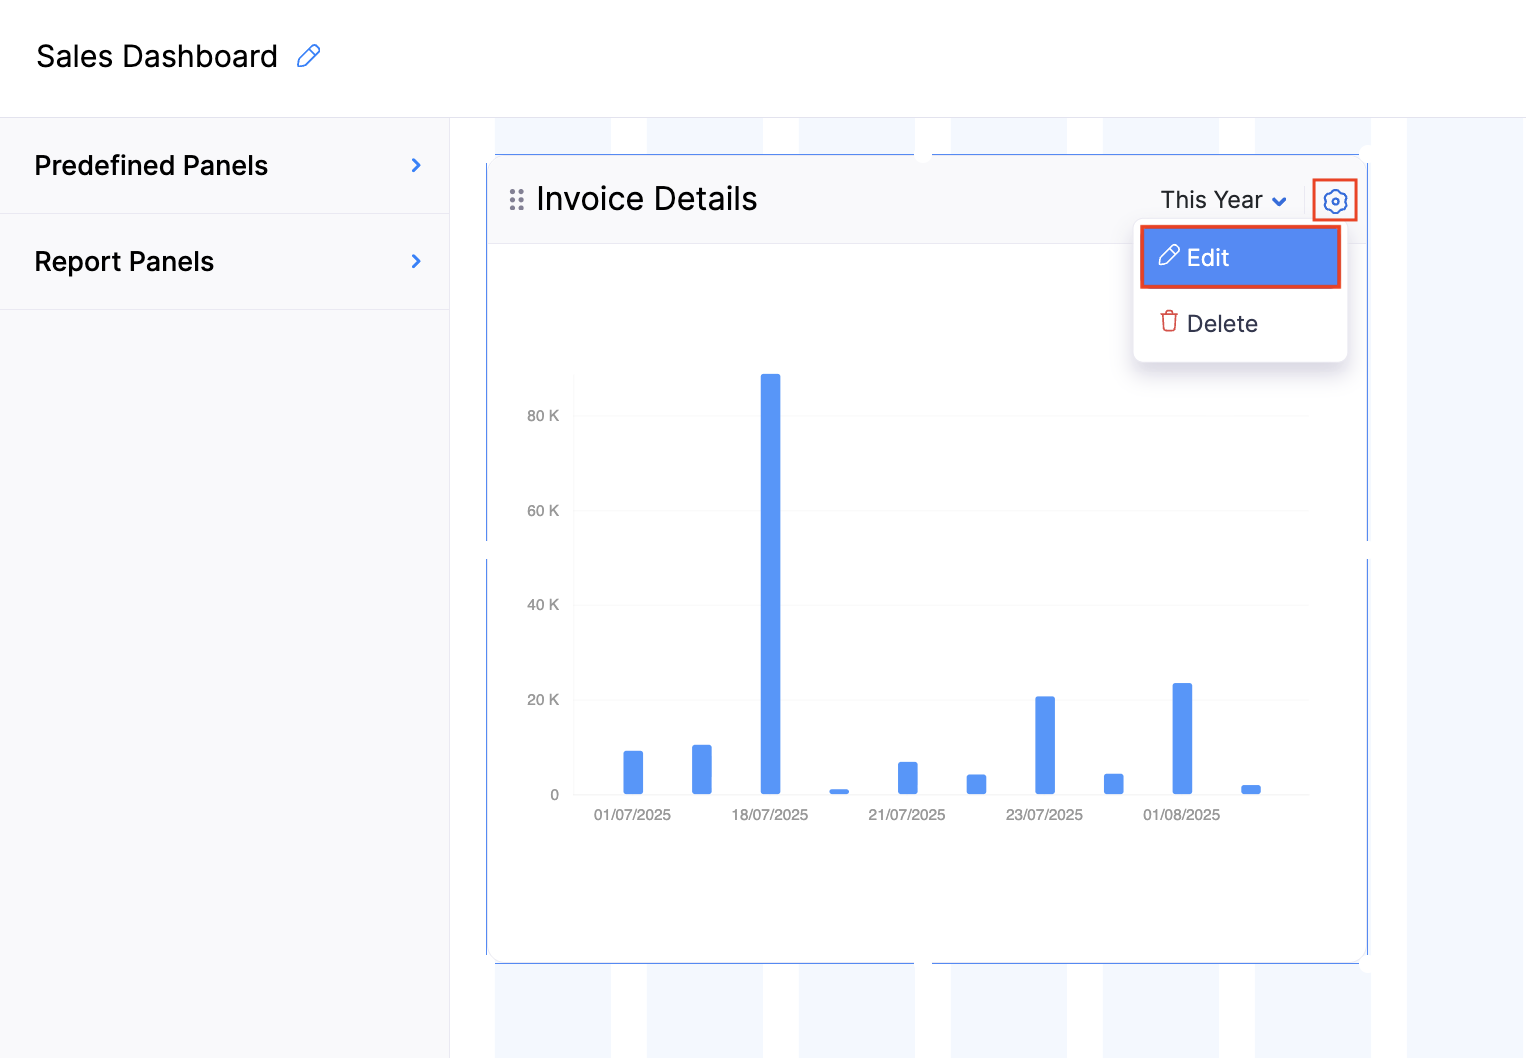
Make the necessary changes to the panel and click Save in the Preference tab.
Click Save Changes in the top-right corner of the page.
Delete Panels
To delete a pane:
Click the Settings icon near the panel name that you want to delete, and select Delete from the dropdown.
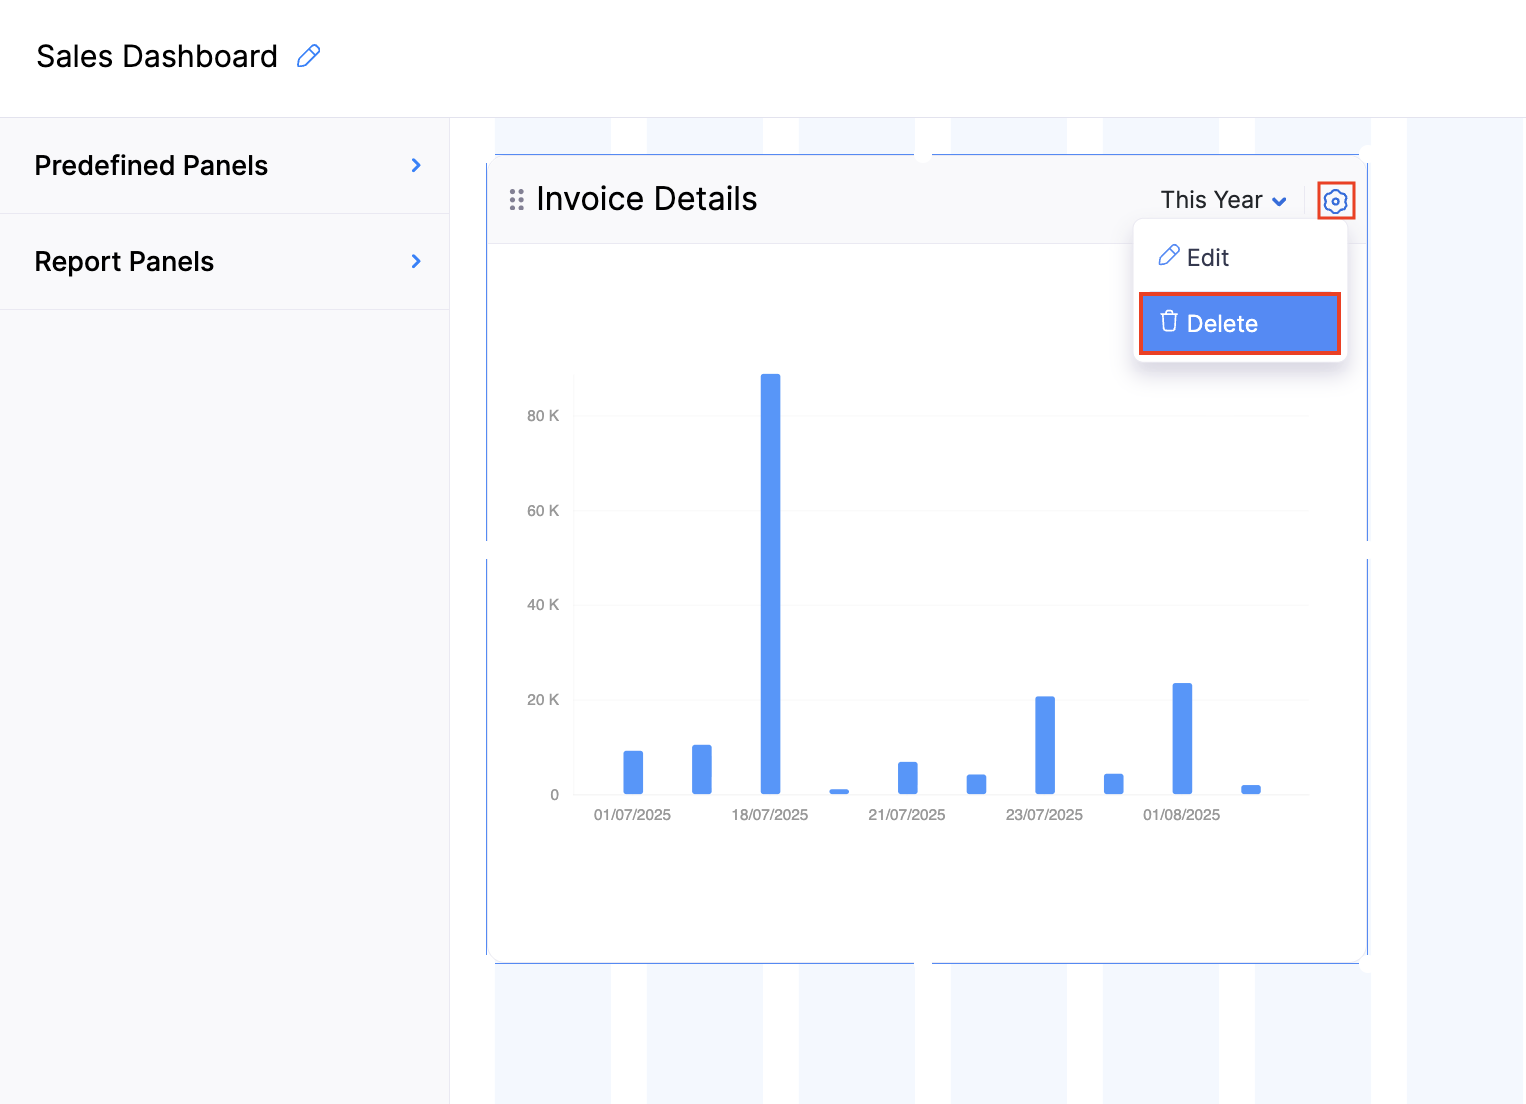
Click Save Changes in the top-right corner of the page.
Dashboard Lists
To view the custom dashboard that you’ve created:
- Go to the Dashboard tab.
- Click the View All dropdown below the Dashboard tab. It contains the list of dashboards present in your organisation:
| Dashboard Category | Description |
|---|---|
| Created By Me | Custom dashboards that you’ve created. |
| Shared With Me | Dashboards that the other users in the organisation have shared with you. |
| Created By Other Users | Custom dashboards that are created by the other users of your organisation. You will only be able to view this list if you are an admin. |
| System | Default dashboard of your Zoho Books organisation. |
You can now use the custom dashboard to get a specific overview of your business.
Mark as Favorite
If you have multiple custom dashboards, and frequently use a certain ones, you can mark them as favorites for easier access.
To do so:
Click the dropdown in the Dashboard tab.
Click the Favorite icon next to the required dashboards.
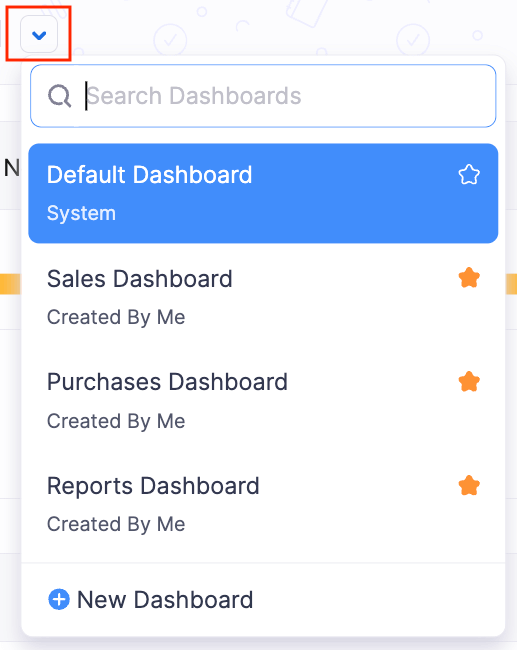
These custom dashboards will now be available in the Dashboard tab.
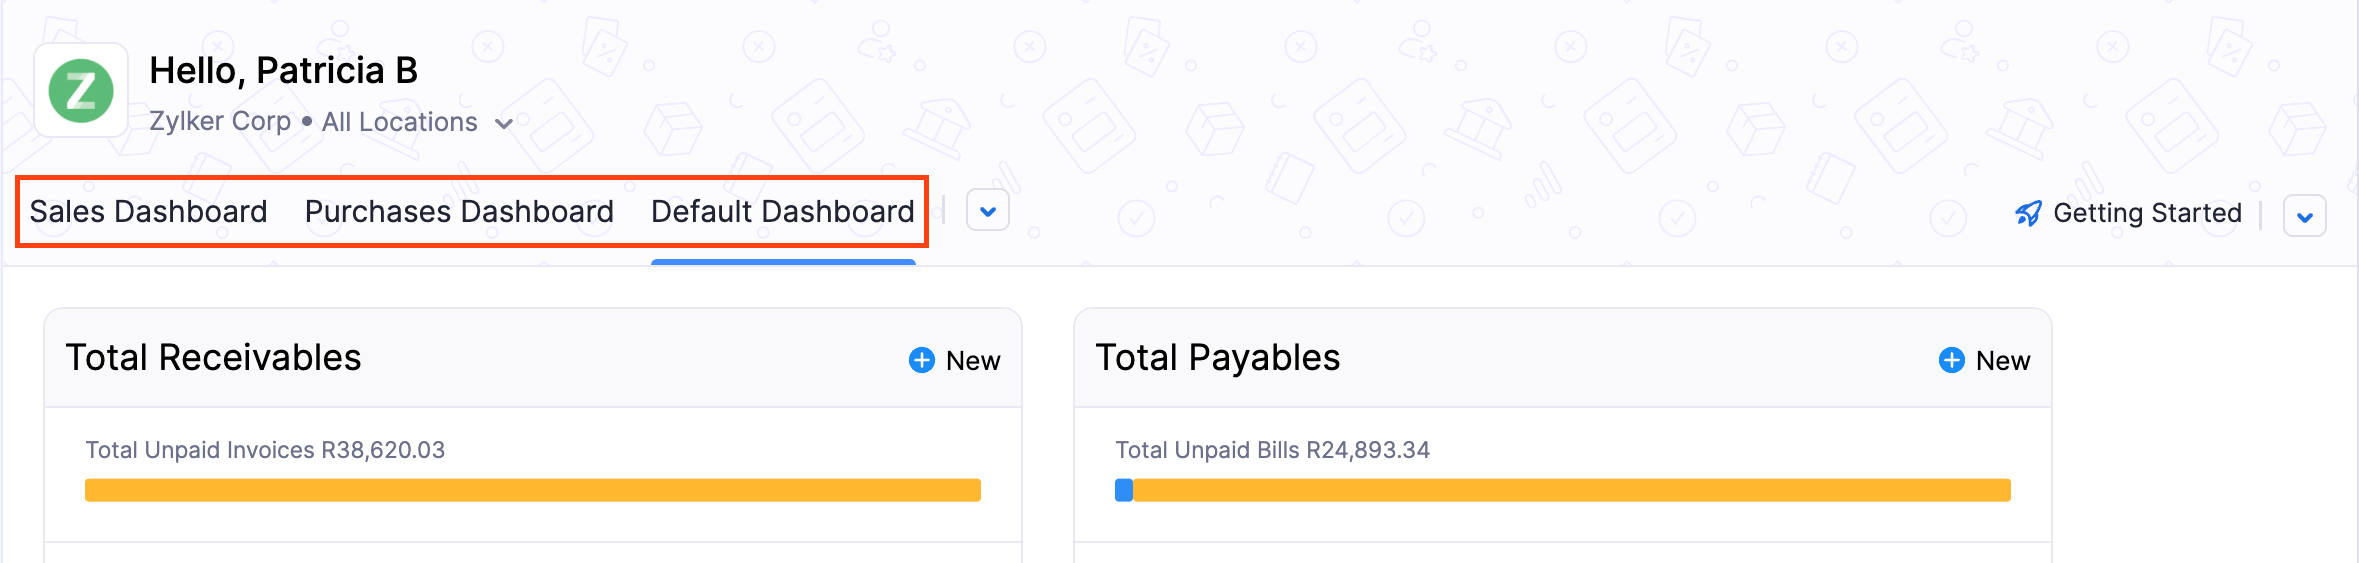
Note: You can mark up to a maximum of three dashboards as favorites in the dropdown. However, only two of them will be displayed in the Dashboard tab along with the Default Dashboard.
Provide Access to Manage Dashboards
If you want the users of your organisation to manage the custom dashboards, you will have to create a new role with specified permissions and associate it to the required users. Here’s how:
Go to Settings and select Roles under Users & Roles.
Click New Role in the top-right corner of the page.
Scroll down to the Dashboard section and select the required panels for which you want to provide access. Make sure that the selected dashboards at least have the View Access permission. To do this,
- Go to the required dashboard.
- Click the Settings icon in the Dashboard tab and select Edit Dashboard from the dropdown.
- In the Dashboard Creation Page, Click the Edit icon in the top left.
- In the pop-up, click Enable View Access.
- Click Select All below the required access to be provided.
Check the Allow Dashboard Management option.
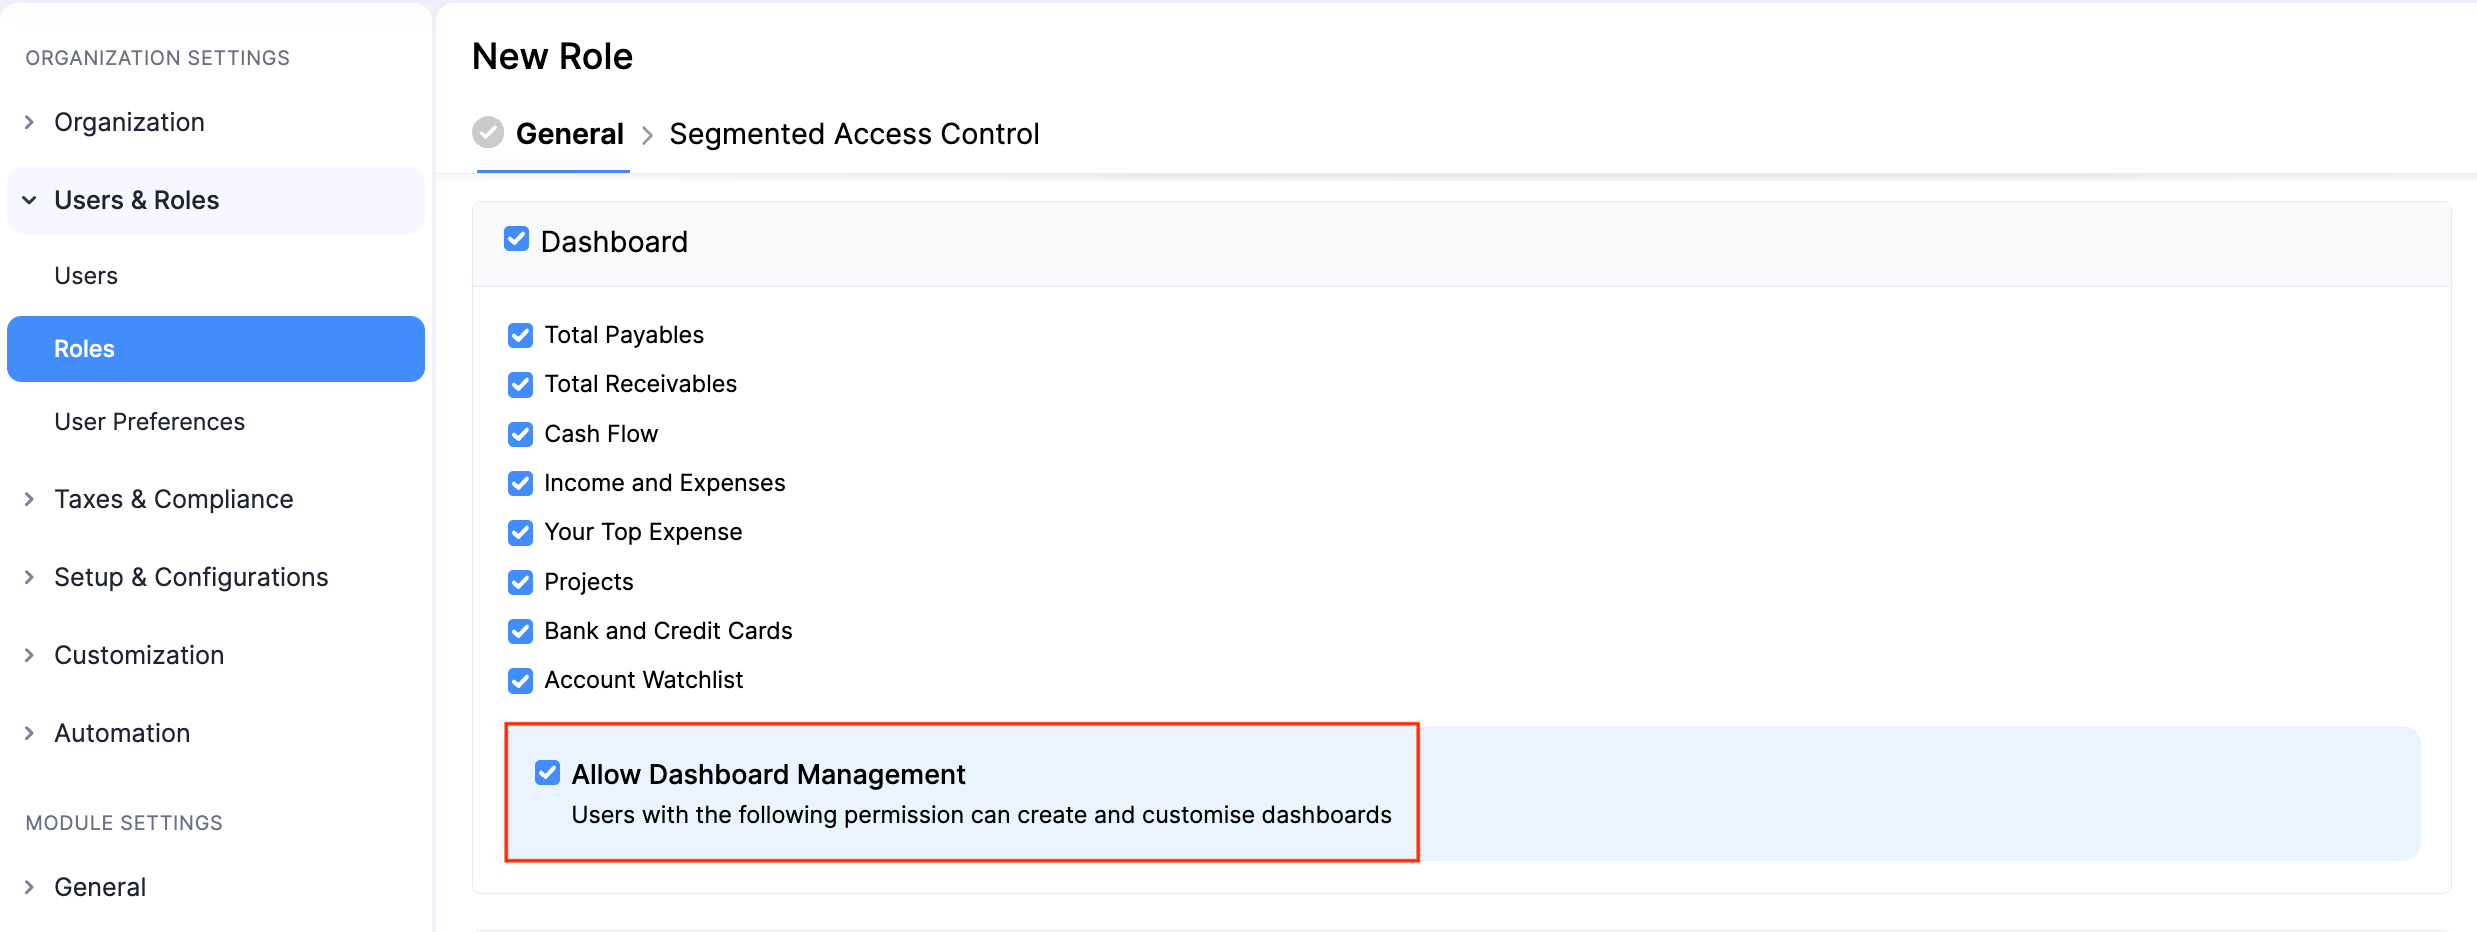
Enter the other required details and click Save.
After creating a role with the required permissions, you can associate the role to the existing users or invite new users to your organisation.
Other Actions in Dashboard
In the Dashboard tab, you can perform various actions after creating a custom dashboard.
Edit Dashboards
To edit a custom dashboard:
Go to the Dashboard tab.
Click the Settings icon next to required dashboard and select Edit Dashboard from the dropdown.
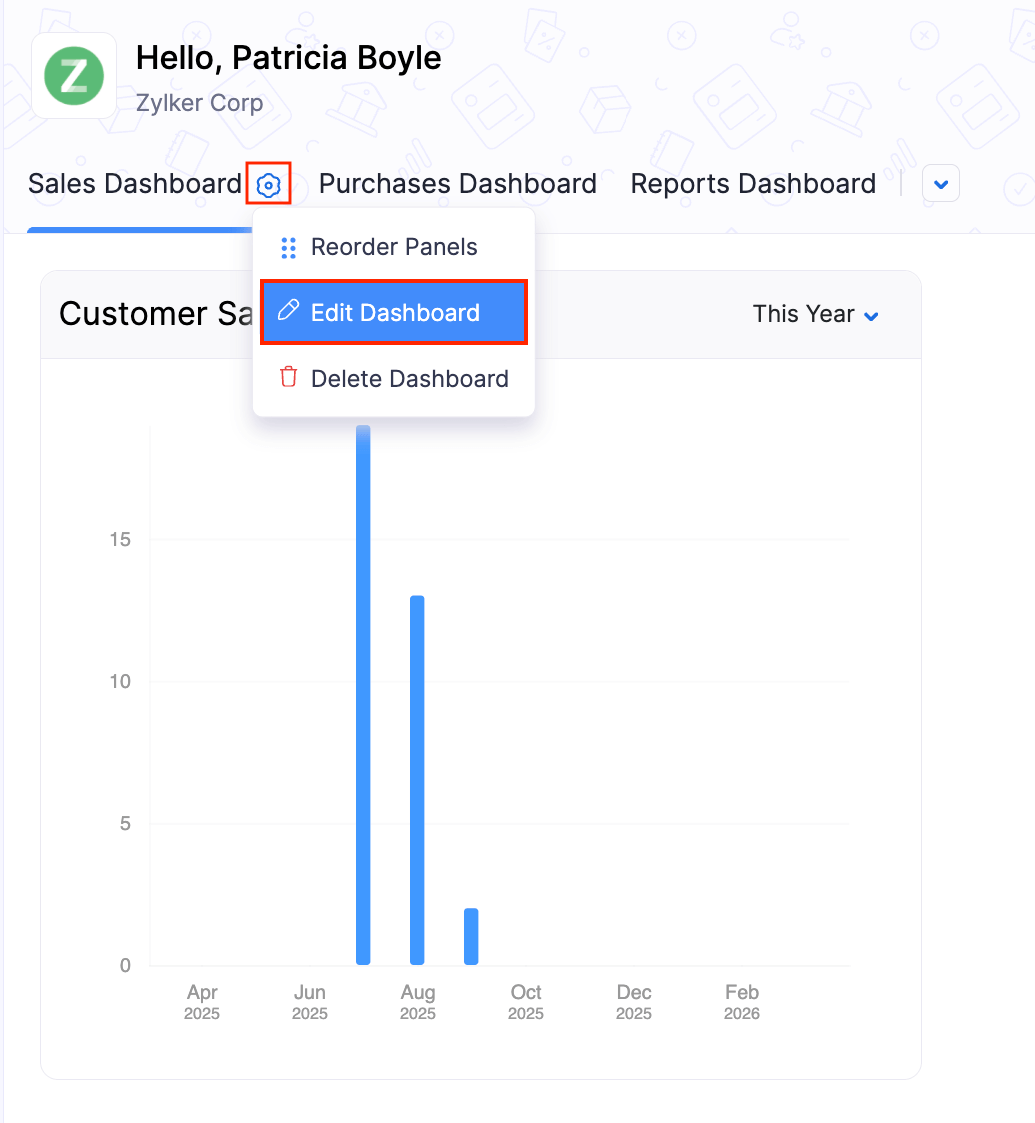
Make the necessary changes to the dashboard and click Save Changes.
You can also edit the panels when you edit a custom dashboard.
Delete Dashboards
To delete a custom dashboard:
Go to the Dashboard tab you want to edit.
Click the Settings icon next to required dashboard and select Delete Dashboard from the dropdown.
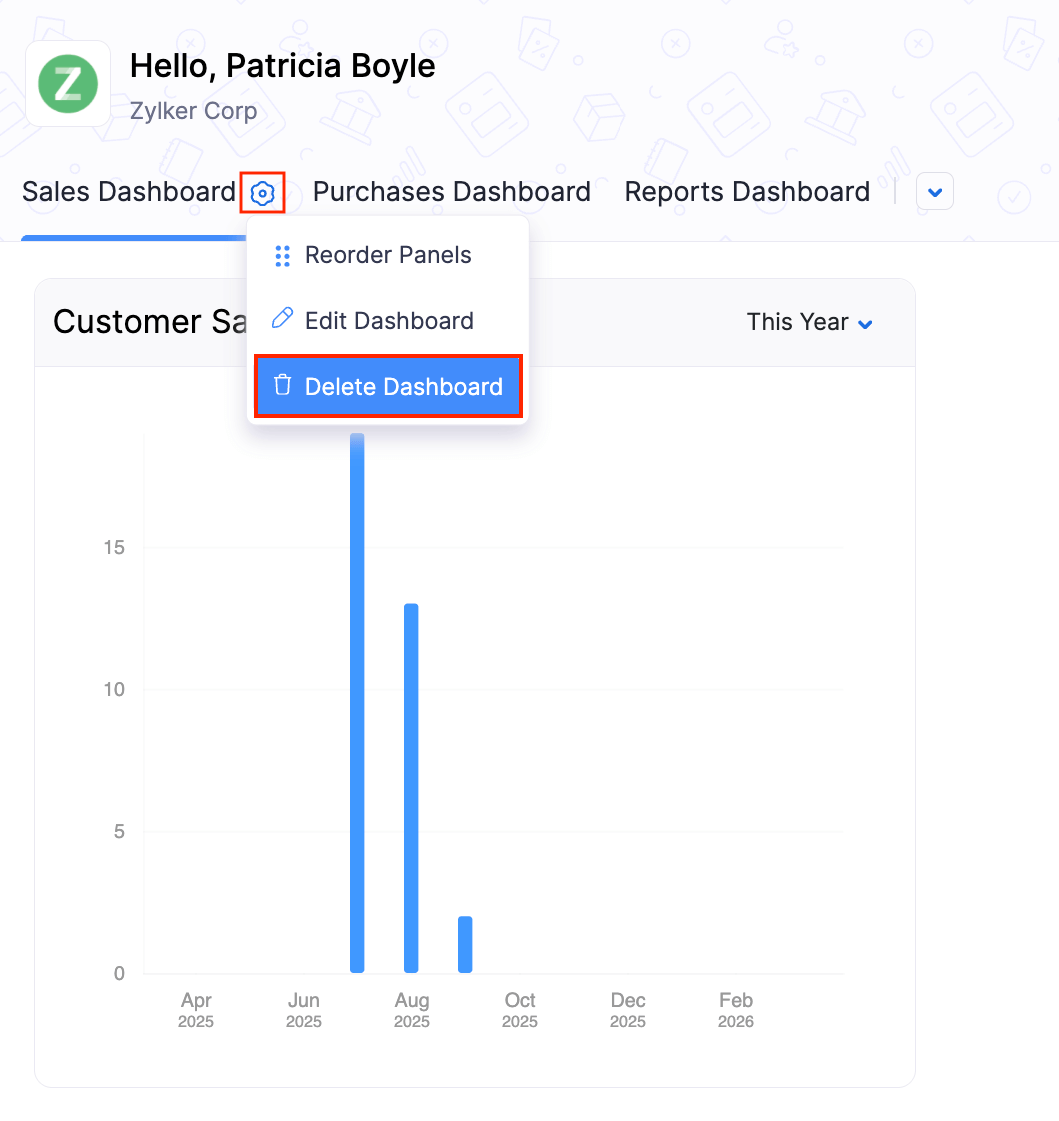
Click Delete in the confirmation pop-up.
Note: You will not be able to edit, reorder, or delete the default dashboard.
 Yes
No
Yes
No
Thank you for your feedback!