Client Portal
The Client Portal in Zoho Books is a dedicated space for your customers to view and manage all their transactions. It provides them more control over actions such as accepting estimates or paying invoices, from one place.
Once you set up the client portal, you’ll be able to:
- Collaborate with customers on estimates and get them approved.
- Check when a customer has viewed your invoice.
- Enable customers to pay for all their invoices from a single place.
- Submit your time entries for approval before you invoice them.
- Get reviews from the customers about your business.
- Interact and discuss with customers in real-time over comments.
IN THIS PAGE…
Configure Client Portal for Customers
The Client Portal will be available for your organization by default. You can view (or change) the URL to access the portal in Preferences. To provide your customers with access to the Client Portal, you have to configure the portal for each contact person individually in Zoho Books.
Prerequisite: The Client Portal can be configured only for customers who have an email address.
To configure the portal access for a customer:
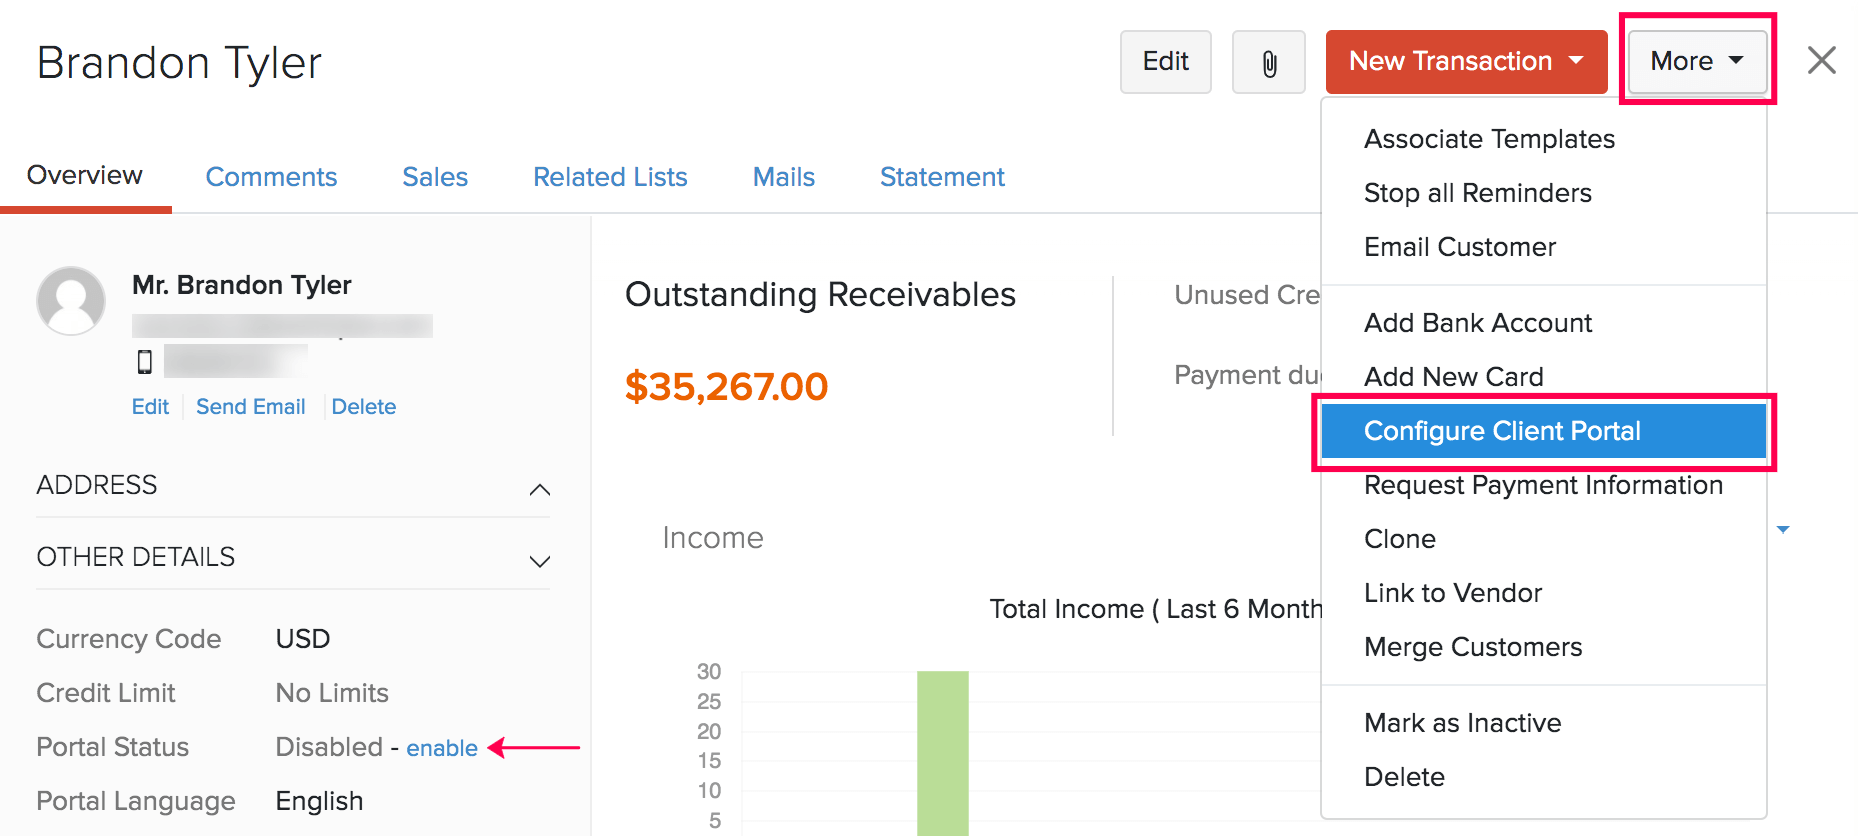
- Go to Sales > Customers.
- Select the customer for whom you want to provide access.
- Click More > Configure Client Portal. Or, you can also click enable in the Other Details section.
- In the pop-up, select the contact persons for whom you want to provide access.
- Click Set Portal Password, and enter the password that the customer needs to use to log in to the portal.
- Once you click Save, Zoho Books will send an email to your customers inviting them to the portal. You can customize this email’s content.
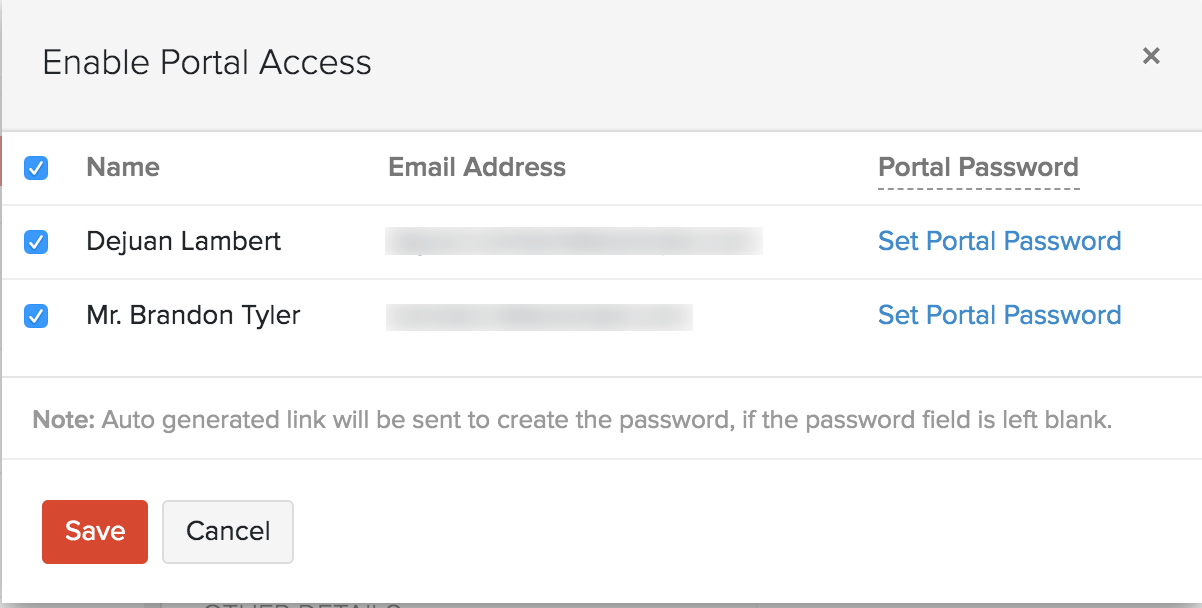
Insight: If you do not set a password, an auto-generated link will be sent to your customer’s email address, using which they will be able to configure their password.
Pro Tip: To enable the client portal for multiple customers at a time, you can select the required customers from the list view in the Customers module, click More Actions, and select Enable Portal. (Ensure that all the selected customers have an email address)
Logging in to the Client Portal
Once the client portal has been enabled for a customer, they will receive an email invitation. You may request your customers to check their email and accept the invitation to access the portal. This email will contain the following:
- Portal URL: The link to access the portal
- Username: Their email address in Zoho Books
- Password : Their password
- An Accept Invitation button
Your customers will be able to change their password for the client portal after they click the Accept Invitation button. They can then enter their username and password to log in to the portal. When they login successfully, the homepage of the client portal will be visible.
Pro Tip: If your customers missed the portal invitation email by any chance, you can send it to them again by clicking Reinvite under the customer’s details in the Overview tab.
Functions in the Client Portal
Transactions that you have created for your customers will be visible for them in the client portal. Let’s take a look at the various actions your customers will be able to perform in each module.
Home
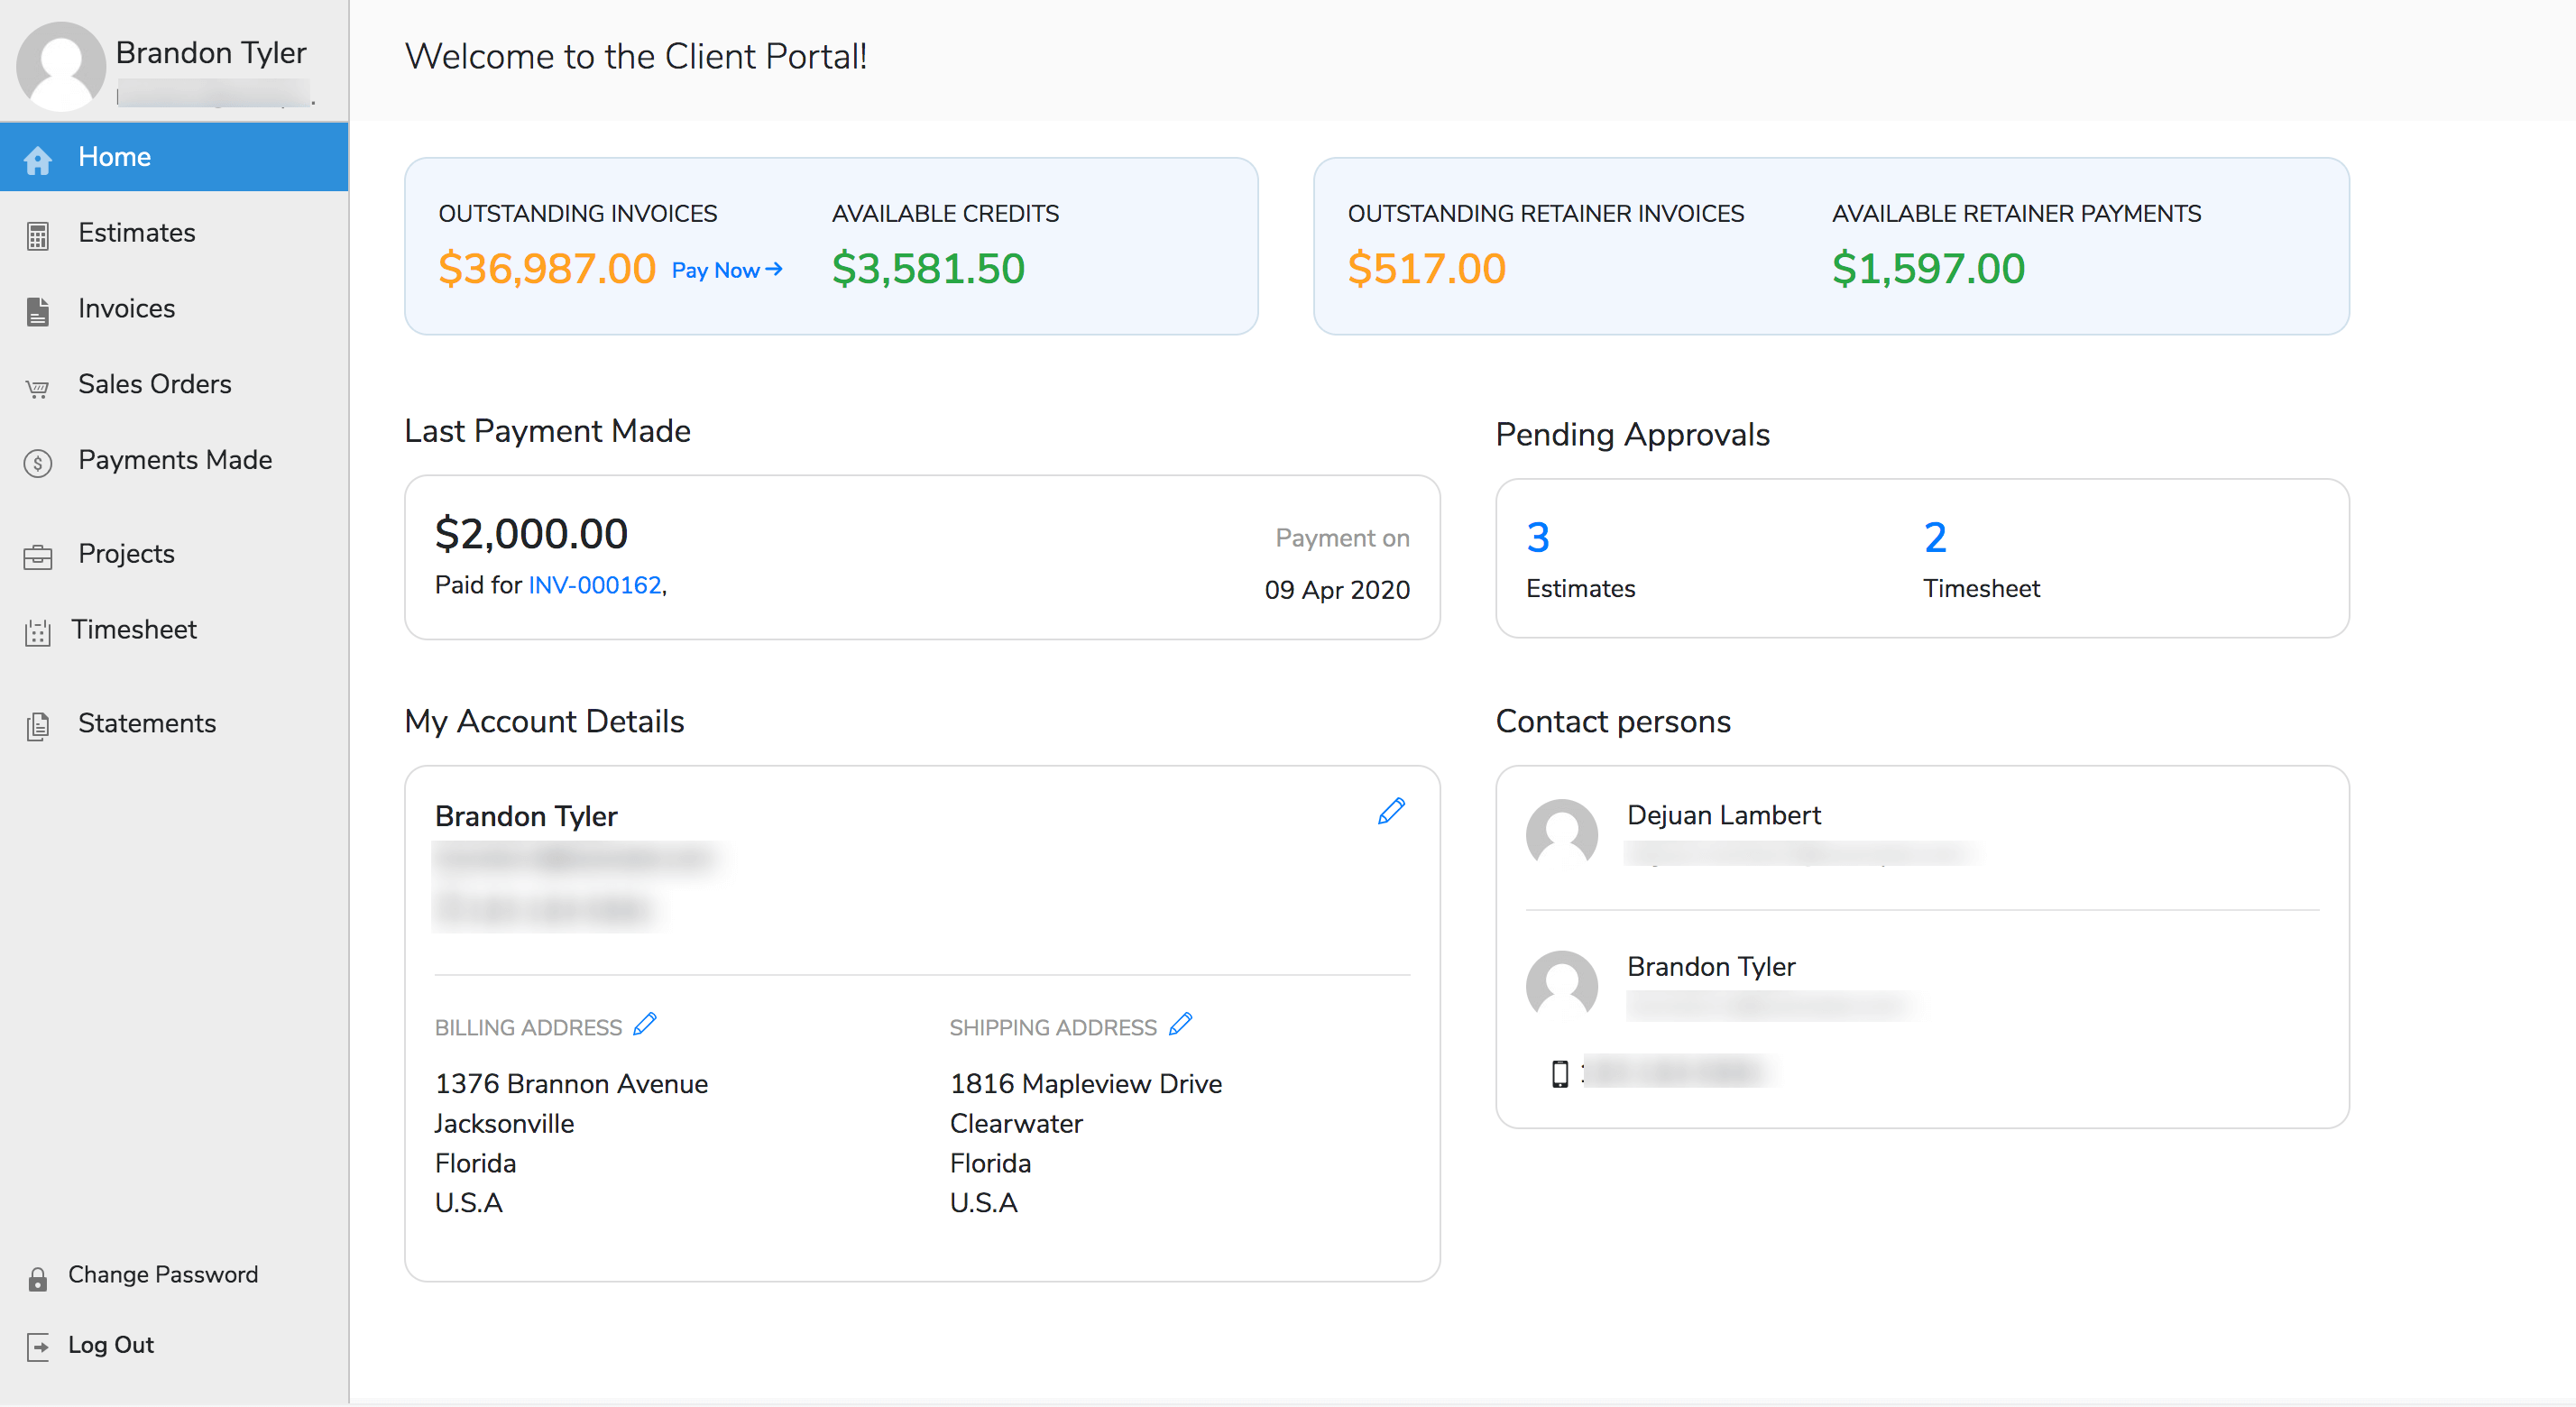
The Home or Dashboard is the first screen that your customers see when they login to the client portal. It gives them an overview of the transactions that took place between you and your customers. They can view the following details on the dashboard:
- Outstanding Invoices: The total amount your customer owes you for their unpaid invoices. Customers can click Pay Now to pay this entire amount.
- Available Credits: The total amount that you owe to your customer. This could be any refunds or credit notes you had created for that customer.
- Outstanding Retainer Invoices: The total amount your customer owes you for their retainer invoices.
- Available Retainer Payments: The total retainer amount available that you can refund or apply to their invoices.
- Last Payment Made: The amount and date of the recent payment done by your customer.
- Estimates: The number of estimates your customer has to approve. Clicking on this will display all their open estimates.
- Timesheets: The number of timesheets your customer has to approve. Clicking on this will display all their pending approvals.
Apart from the above details, the home page also displays your customer’s account details, their contact persons, and your organization’s contact details.
Accept Estimates
You can negotiate with your customers over the value of a product or service you’re selling by sending them an estimate. In the client portal, your customers can view the list of estimates they’ve received from you in the Estimates section. They can click on an estimate to view its details. They can also filter the list to display a particular type of estimate by clicking the drop-down menu above the list.

If they are satisfied with the price and deal, they can accept the estimate. Here’s how:
- Click Estimates in the left-sidebar.
- Select the estimate that needs to be approved.
- Click the Accept button.
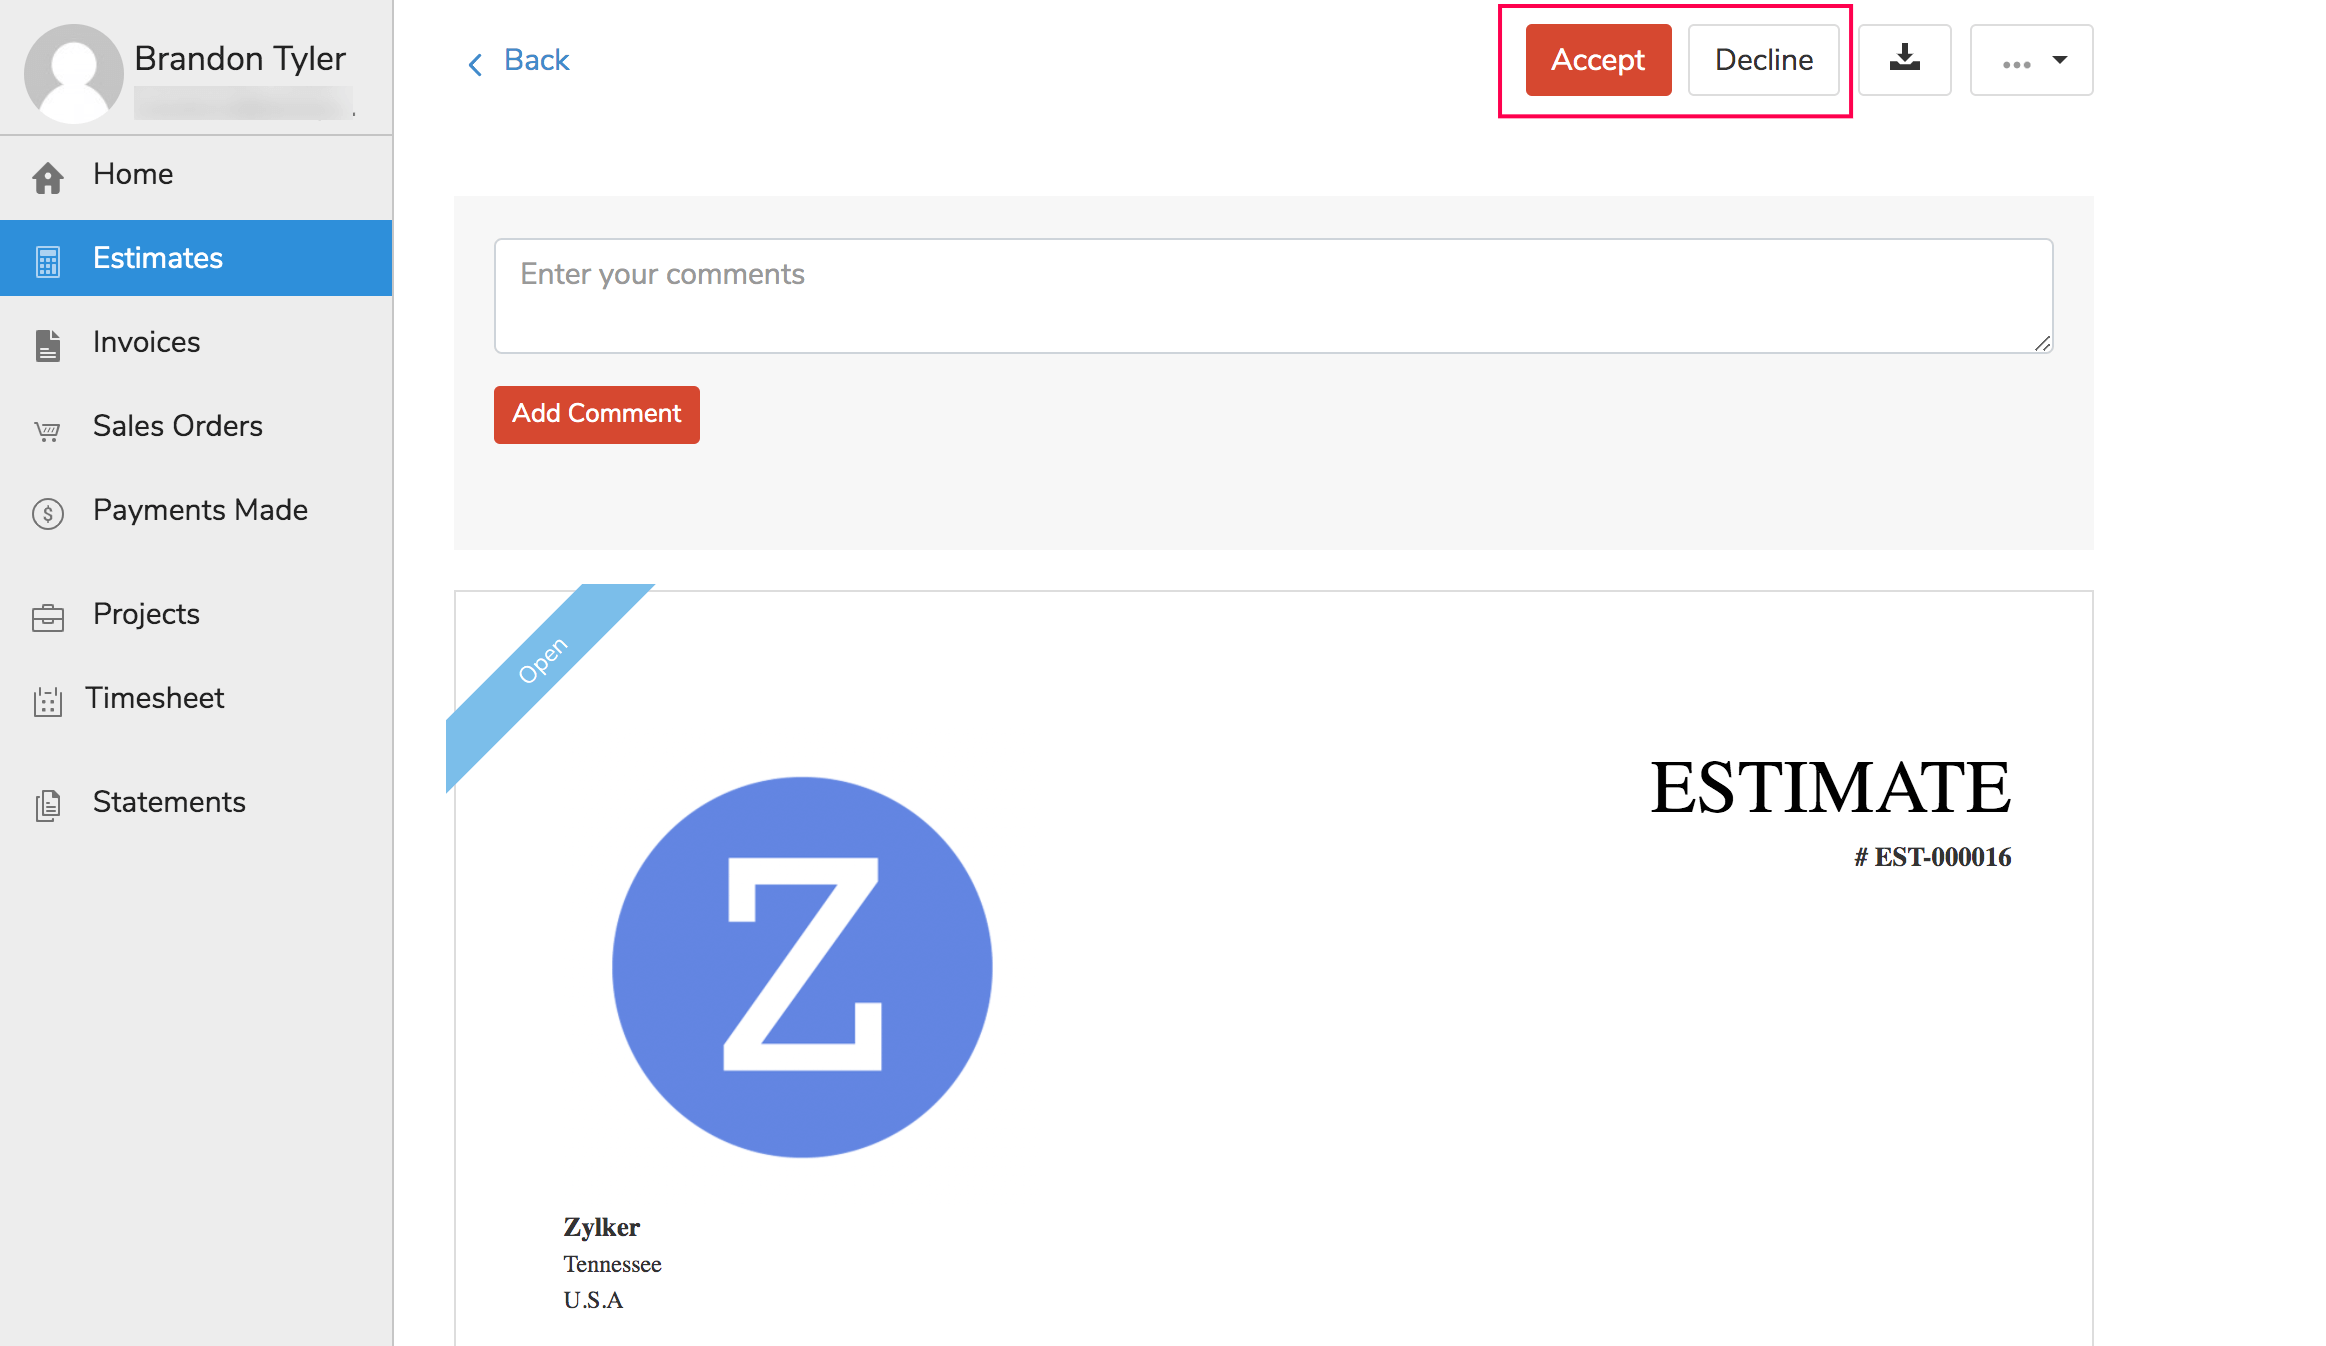
Your customers can decline an estimate if they aren’t okay with it and want a better offer, by clicking the Decline button. They can negotiate with you through the comments. You can then reply to the comments from your Zoho Books organization (Mark the Display in portal option to make the comments visible in the portal), edit this declined estimate to make a promising offer, and submit it again for approval.
Insight: You will receive a notification in your Zoho Books organization whenever a customer views, accepts, or declines an estimate in the client portal.
Pro Tip: You can get your estimates signed by the customer right from the client portal, by integrating with Zoho Sign.
Pay Invoices
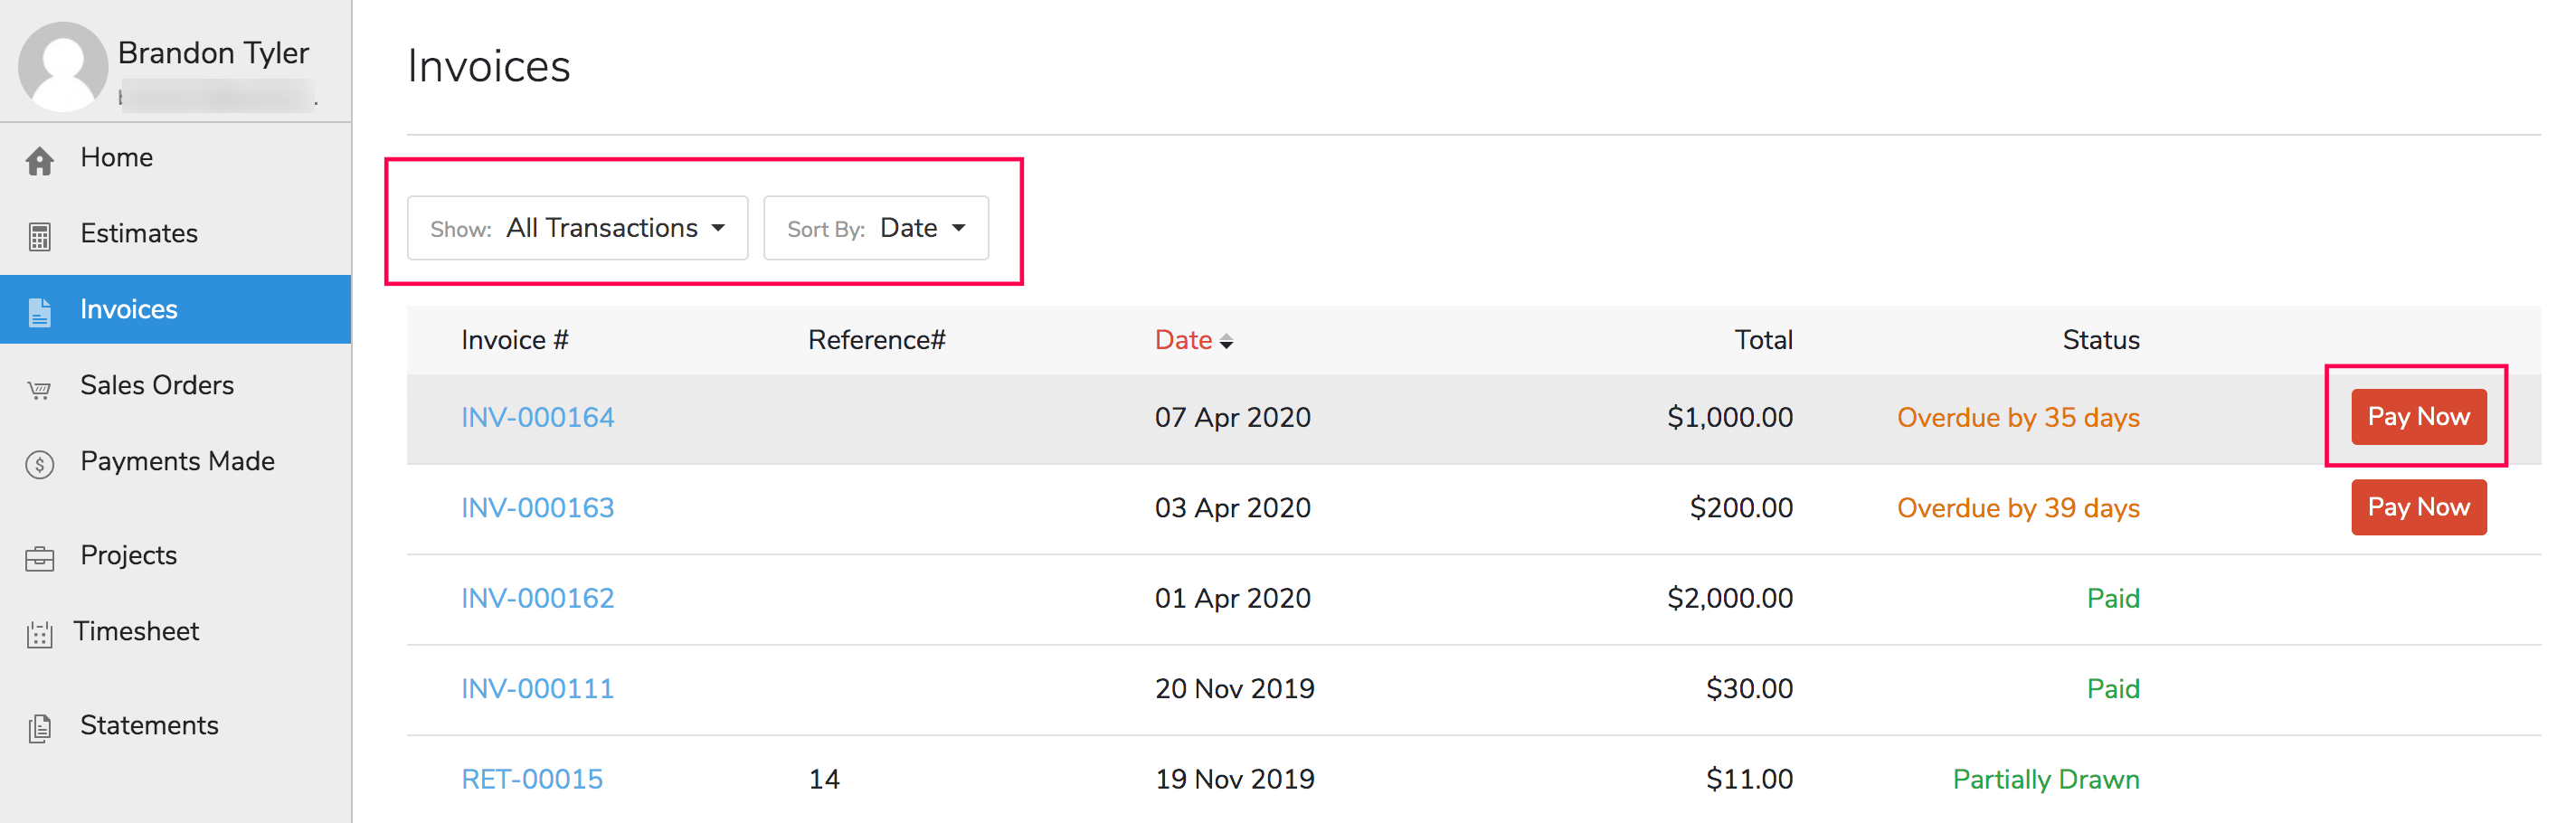
Your customers can view the list of all their invoices and retainer invoices in the Invoices section of the client portal. They can click on an invoice to view its details. If the invoice is unpaid, they can choose to pay for it instantly by clicking Pay Now. Customers can choose to filter the list to display a particular type of invoice, or sort the invoices by clicking the drop-down above the list.
Prerequisite:Your customers can make an online payment for an invoice only if you have associated a payment gateway for that invoice. Zoho Books can be integrated with multiple online payment gateways.
Insight:You will receive a notification in your Zoho Books organization when your customer views an invoice for the first time in the client portal.
When your customer clicks Pay Now for an invoice, the payment page will open up. If you have enabled partial payments for that invoice (in the invoice creation screen), then your customer can enter the amount they wish to pay now. Otherwise, they will have to pay the full invoice amount.
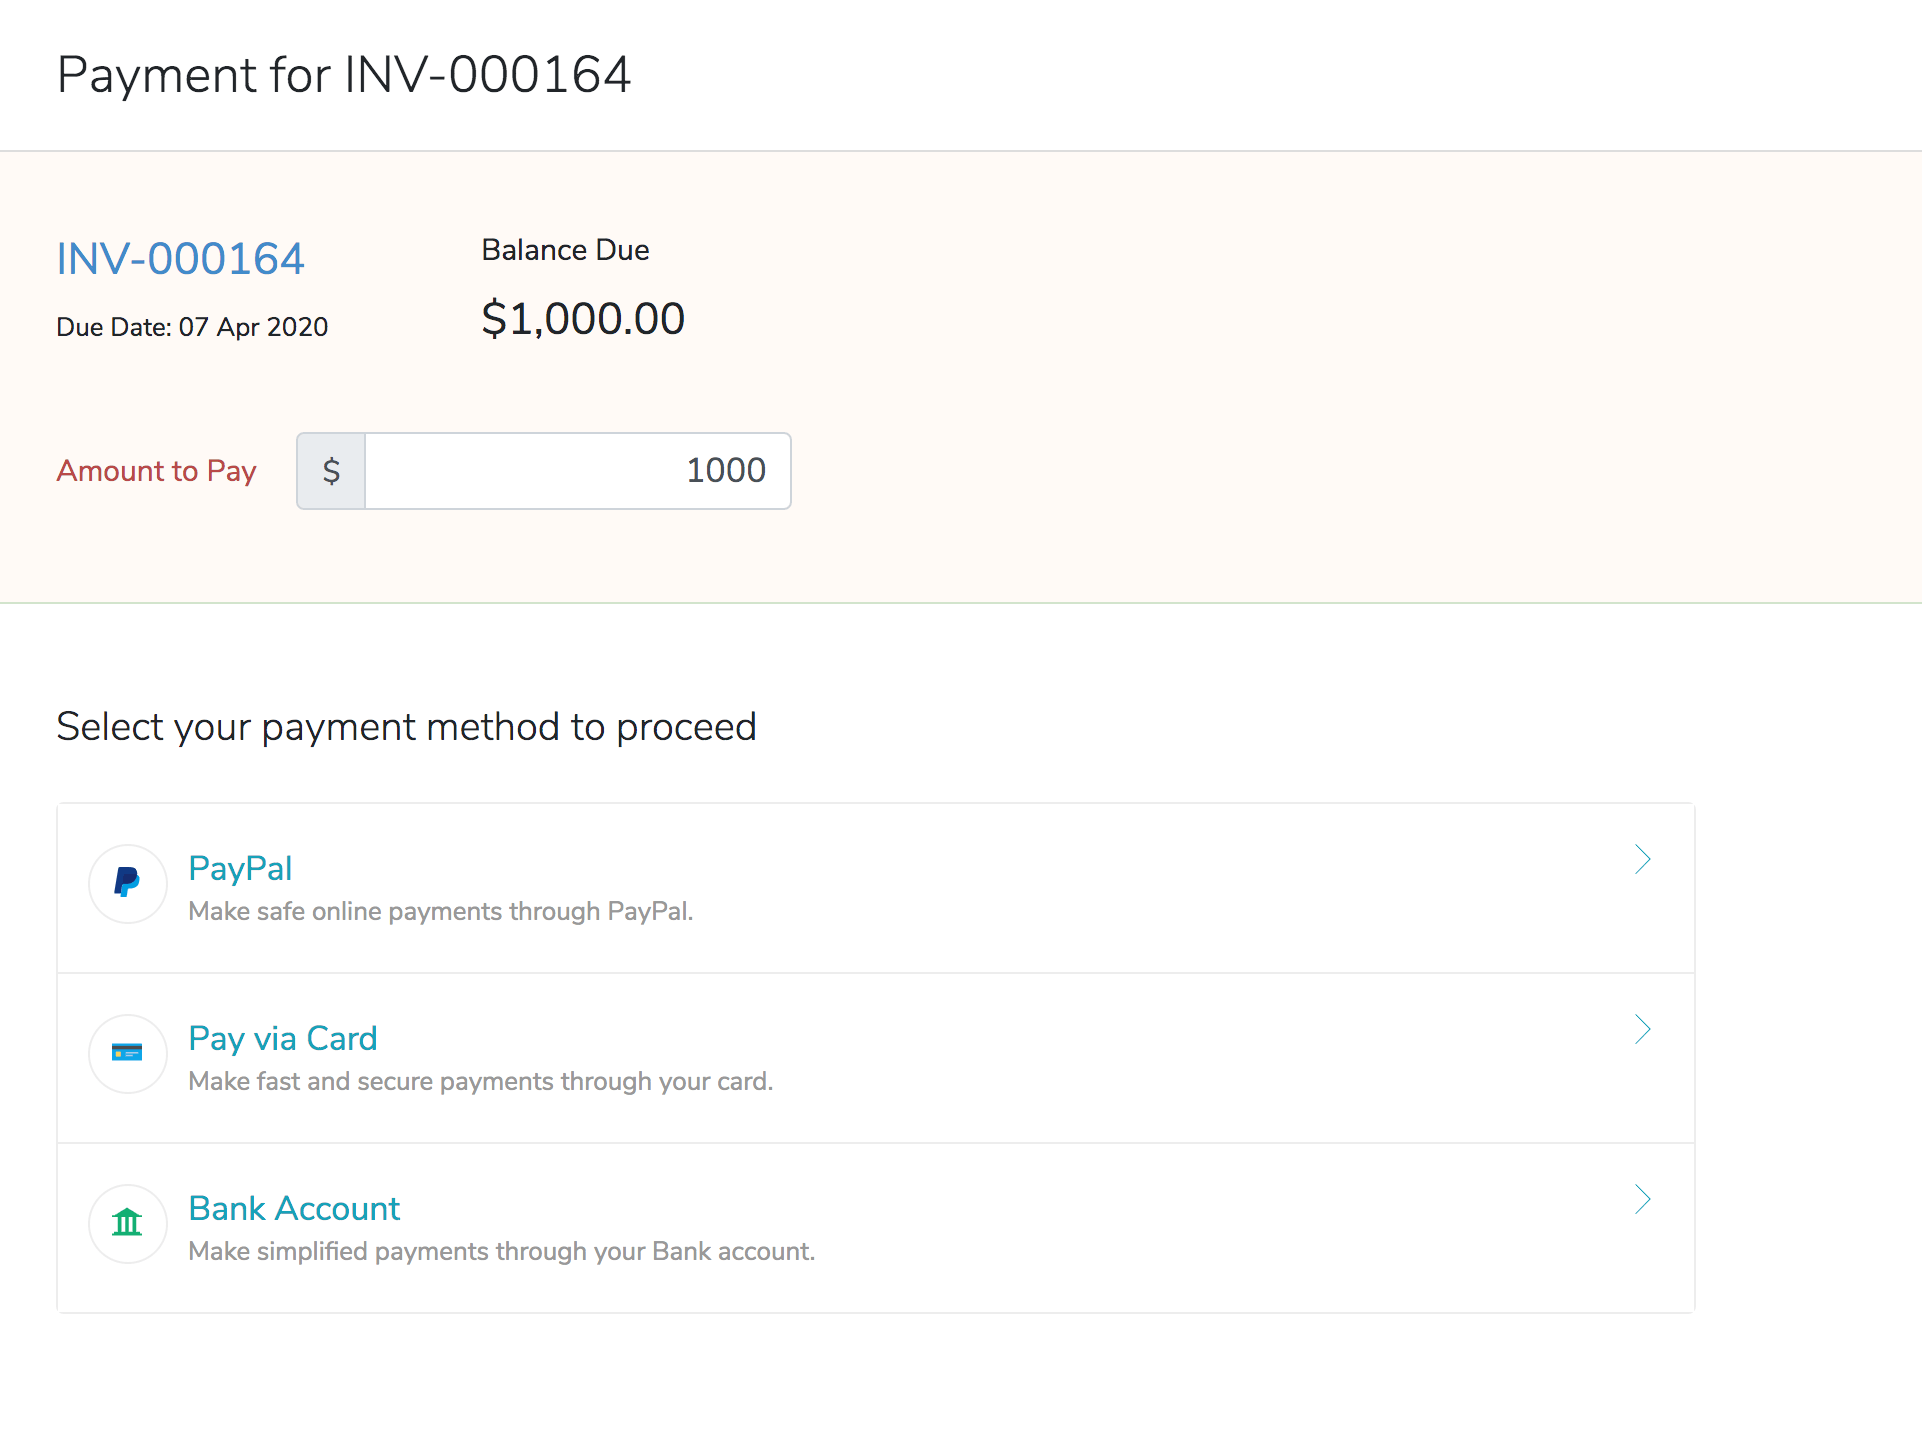
Customers can make payments by choosing their preferred mode of payment (The payment methods available depends upon the configured payment gateway). You can provide various payment gateway options to your customer while creating an invoice for them.
Card Payments
For making payments using Credit/Debit card, customers can enter their card number, CVV, expiry date, billing address and the country to make payment. They can also save the cards and use them while making payments for future invoices.
ACH Payments
In order for customers to make ACH payments, you need to enable Allow this customer to pay via their bank account option for them under the Other Details section in the customer creation screen. Customers can choose to save their bank account details for future transactions by checking the Use this account for future transactions option.
Track Payments Made
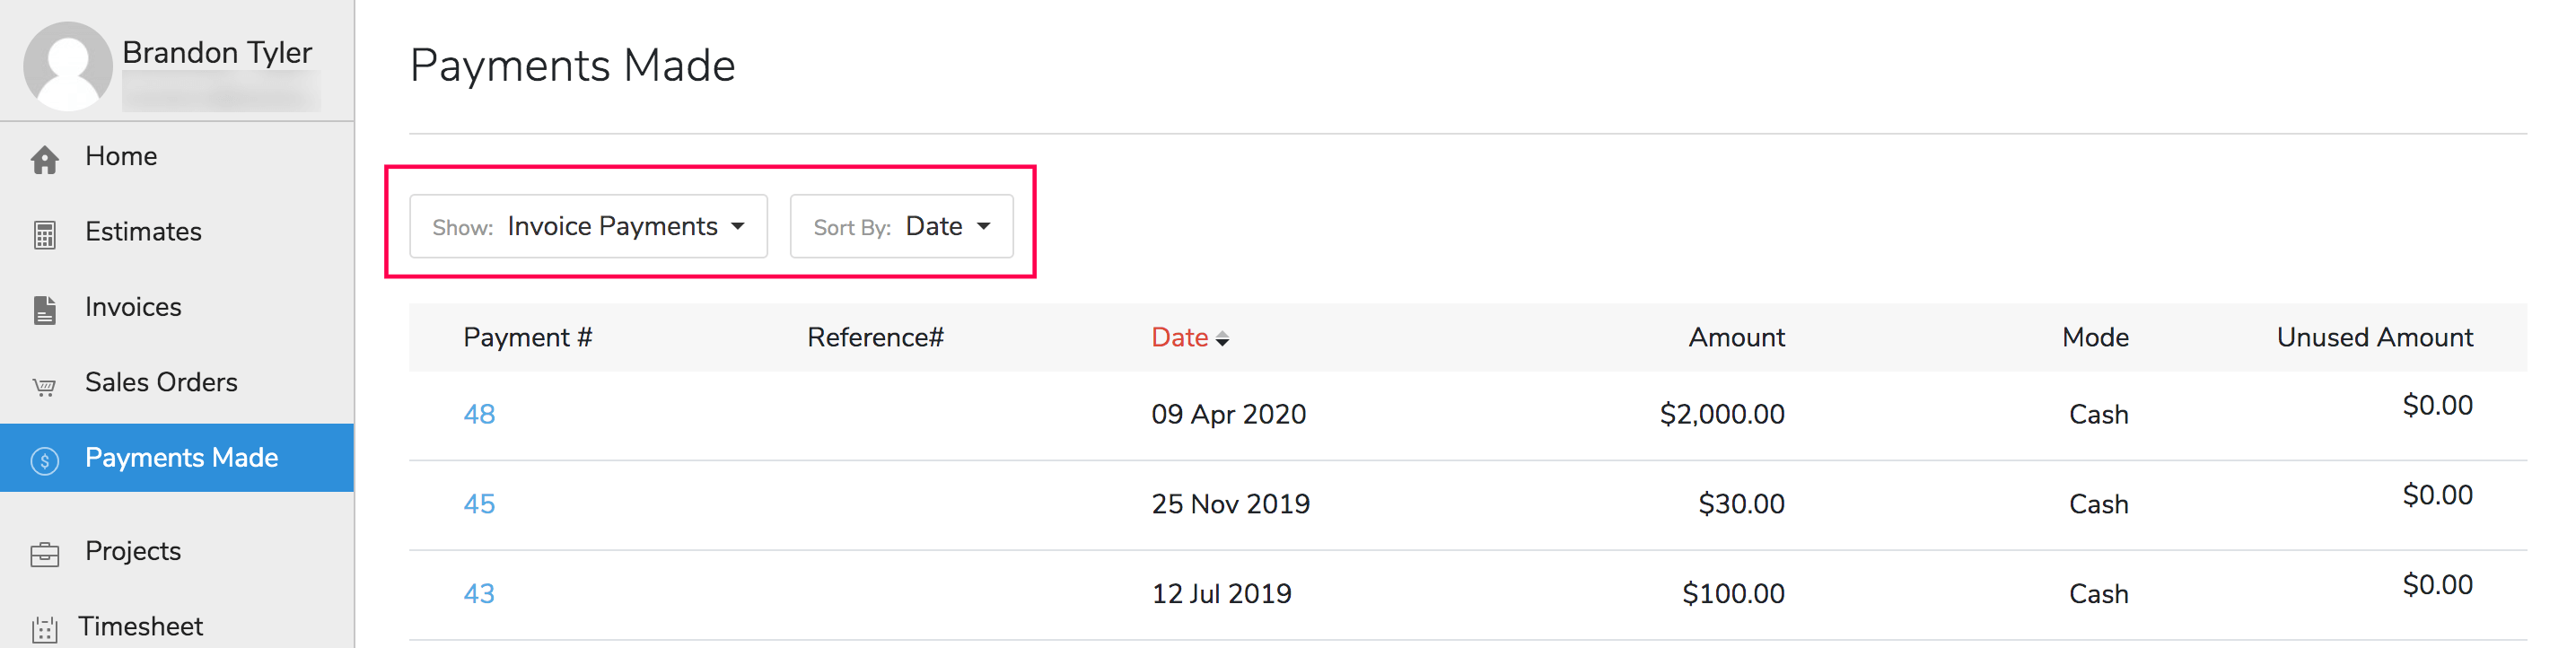
In the Payments Made section in the client portal, your customers can track all the payments they have made towards your business. This includes both the online payments as well as the offline payments you’ve recorded for them in Zoho Books. Customers can filter the list to view only invoice payments and also sort the payments by Date or Amount.
They can click on a particular payment to view its payment receipt, and also check the details of the invoice or retainer invoice for which this payment was made. Your customers can click the Download PDF or Print button to keep a copy of the receipt.
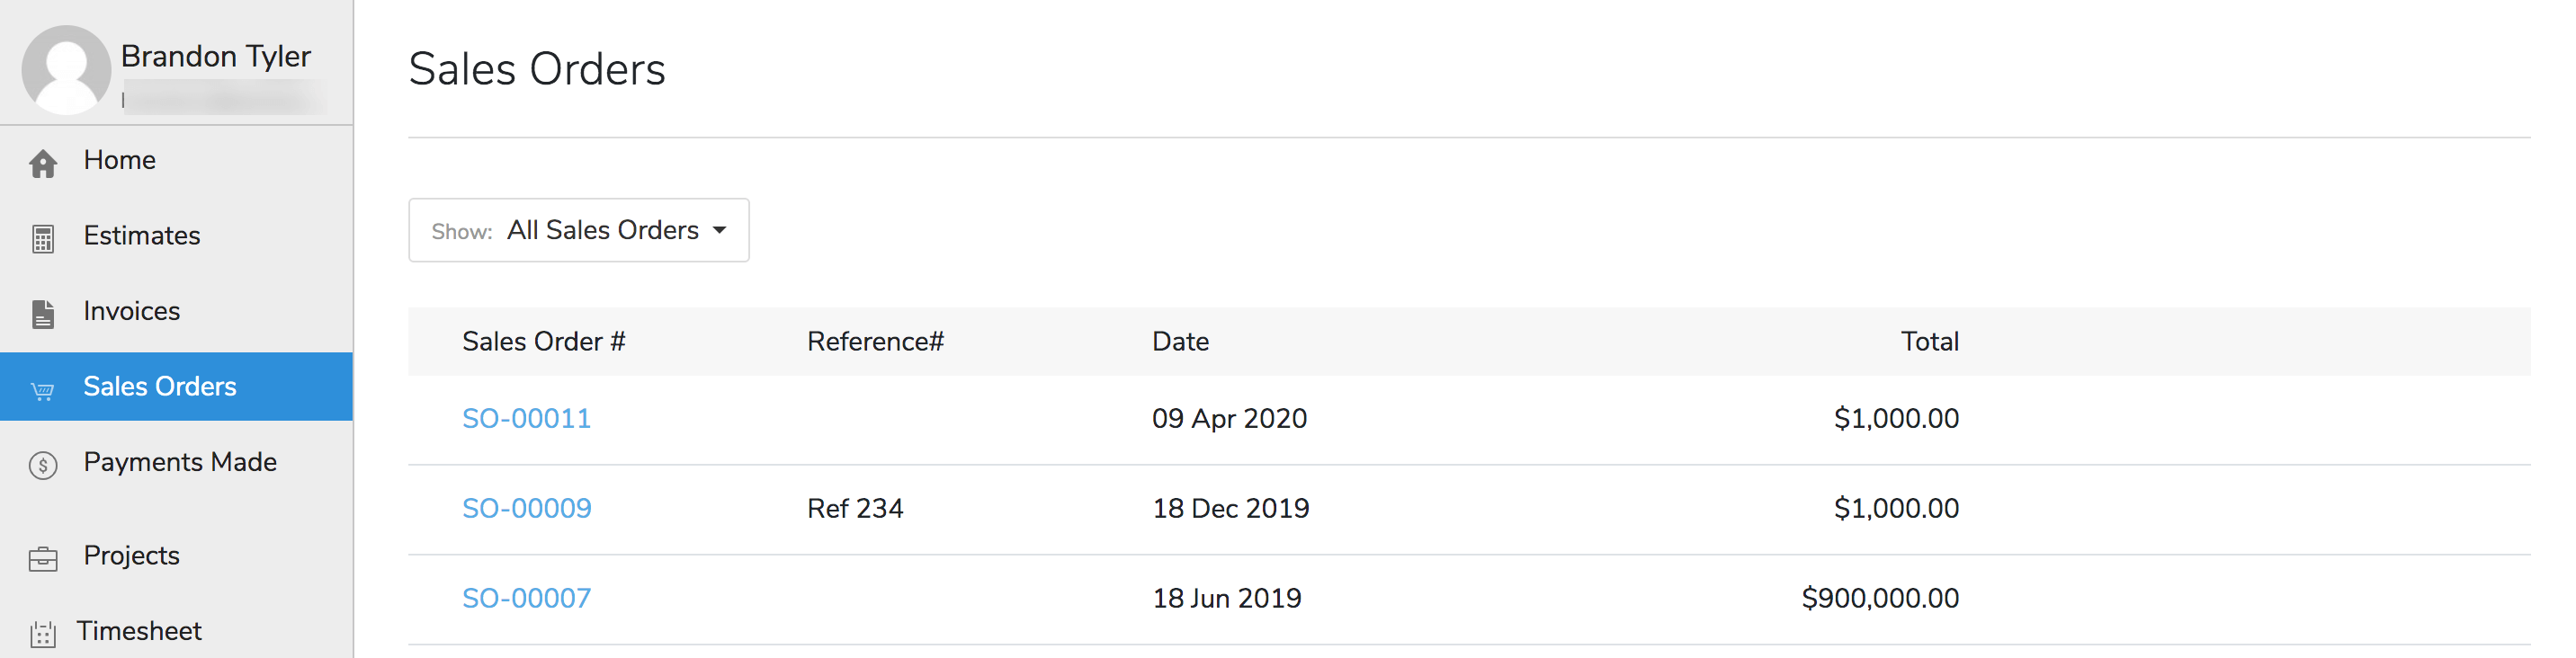
View Sales Orders
Prerequisite:To let your customers view sales orders in the client portal, you have to enable this option in the client portal preferences.
If you have created a sales order for your customer to confirm the items and price of a sale, they can view it in the portal under Sales Orders. To drill down on a particular sales order’s details, they can click on the sales order number. Along with the order’s details, customers can also view the details of the invoice associated with a fulfilled sales order.
Insight:You will receive a notification in your Zoho Books organization when your customer views a sales order for the first time in the client portal.
Manage Timesheets
Prerequisite:To let your customers view projects and timesheets in the client portal, you have to enable this option in the client portal preferences.
Projects
Your customers can view the list of all their active projects in the Projects section of the client portal.
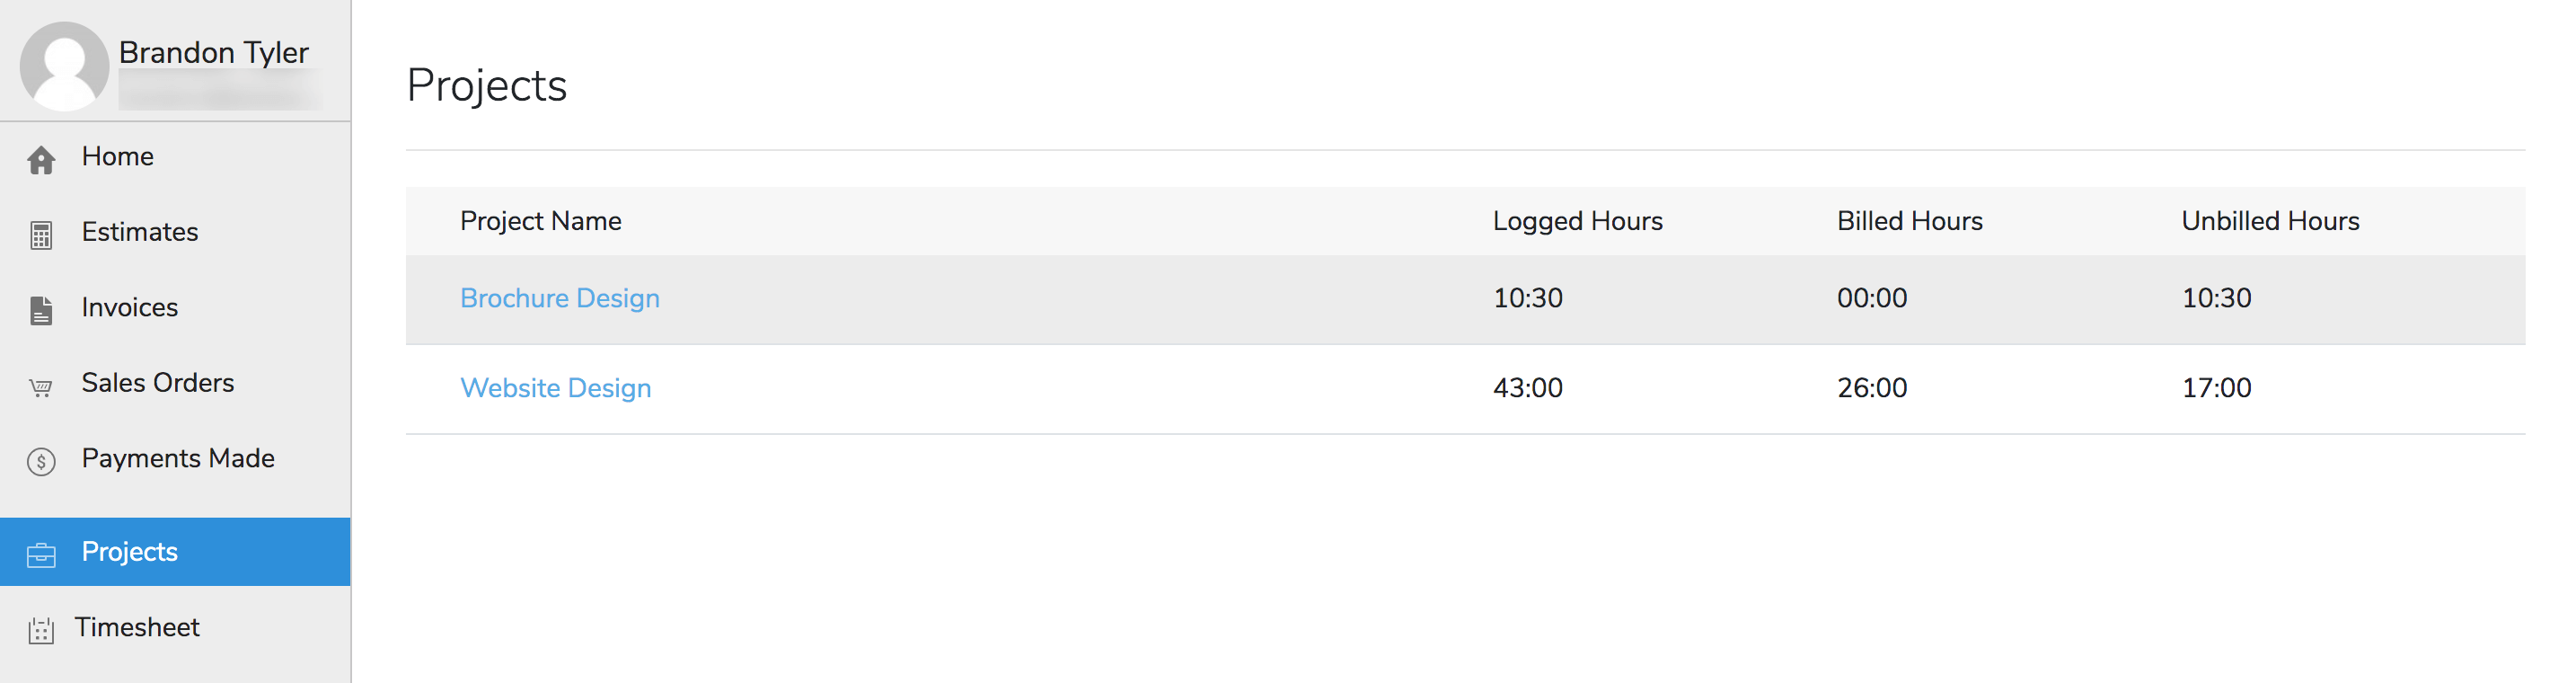
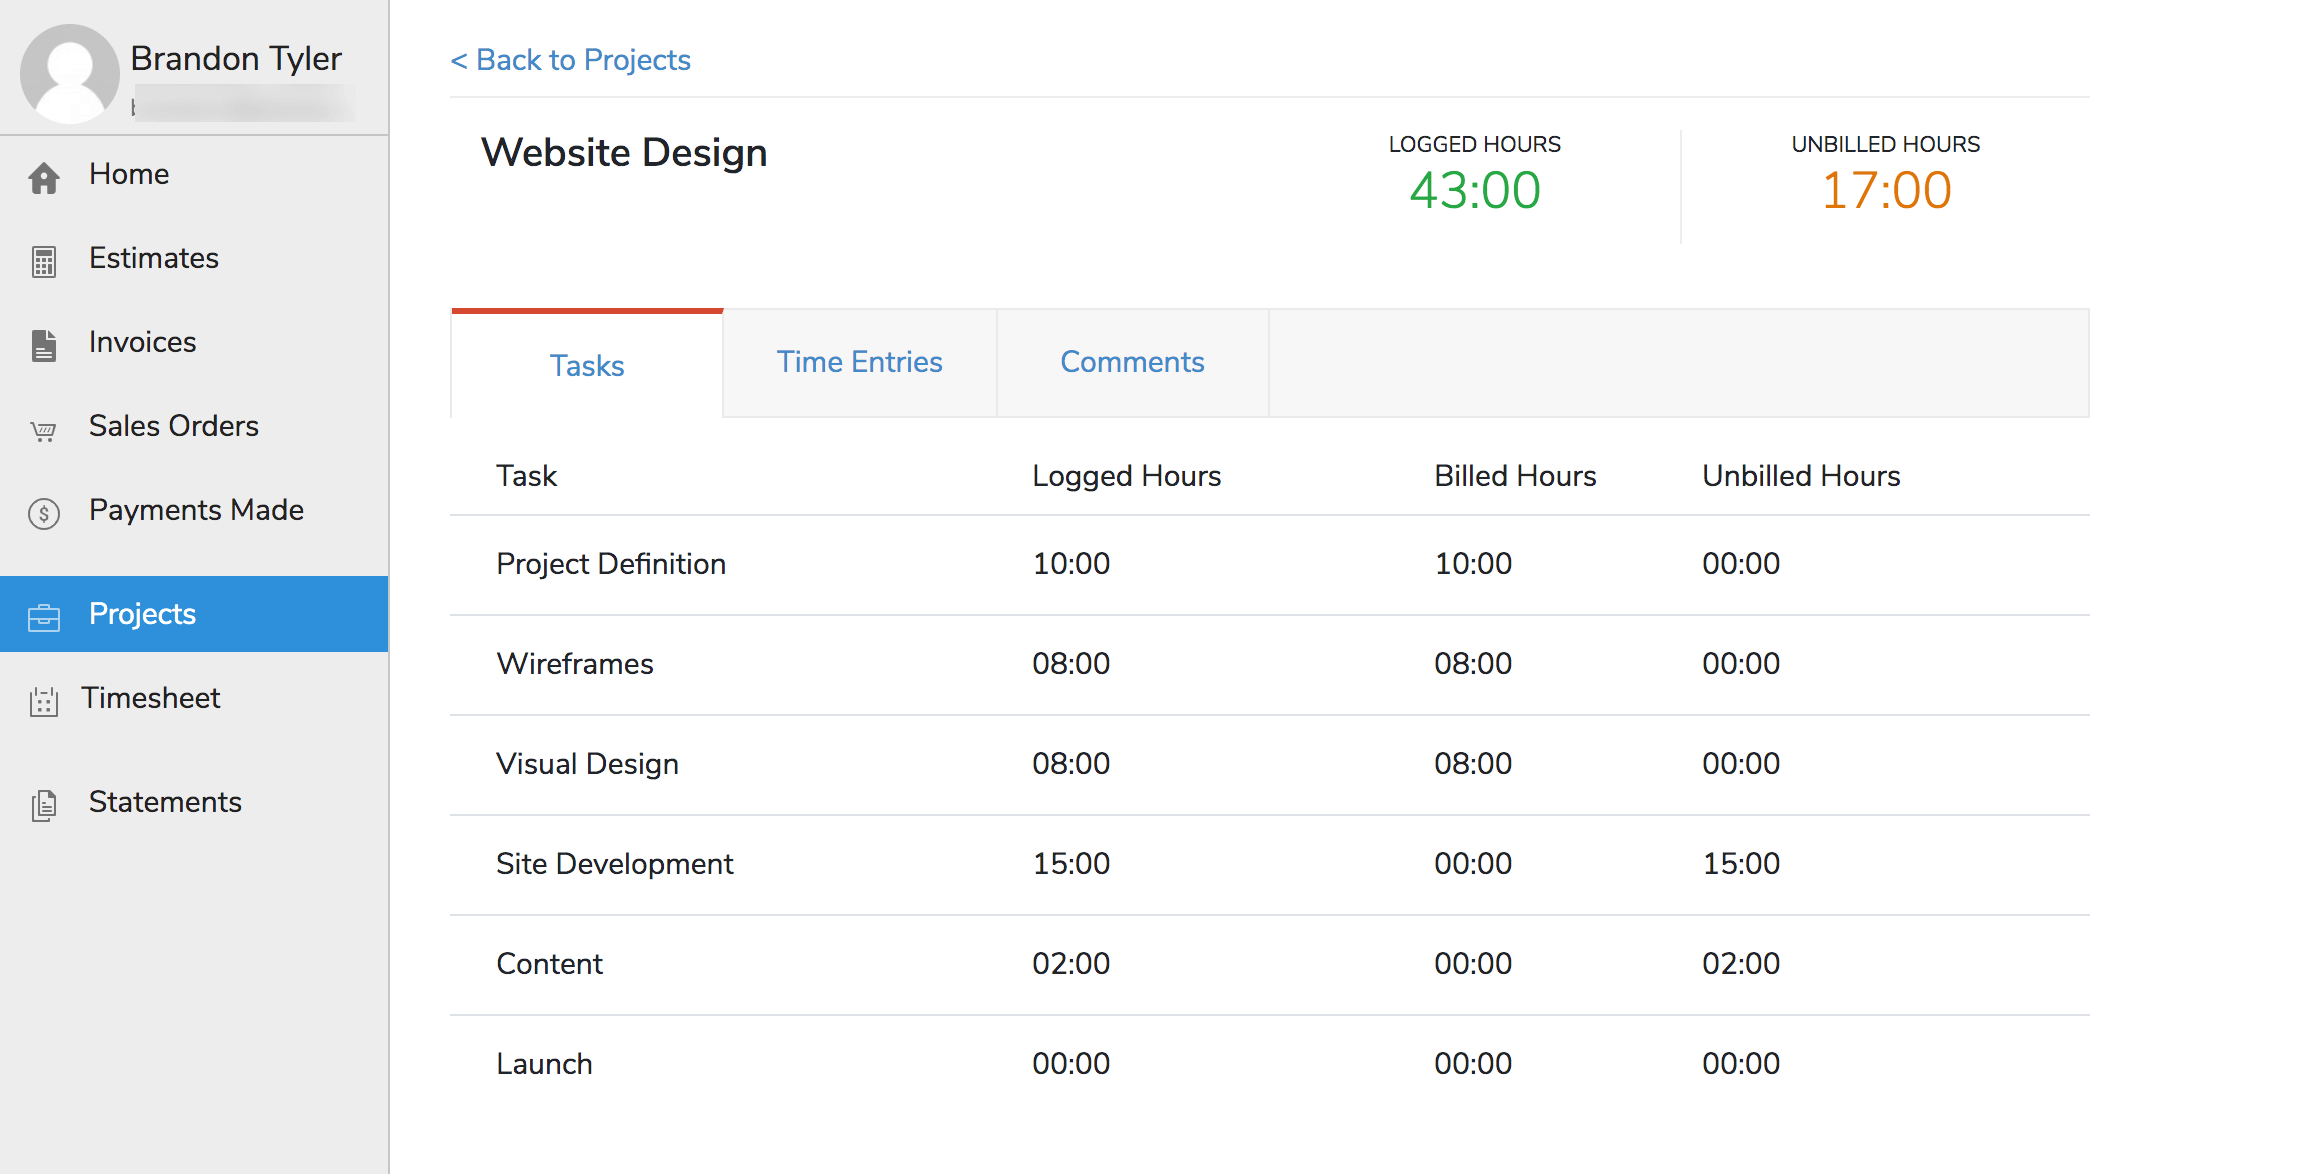
To check more details of a particular project, they can click on a project name. They can view the following details of the selected project:
- Tasks: All the billable tasks you have created for this project will be listed here along with its corresponding Logged Hours, Billed Hours, and Unbilled Hours.
- Time Entries: All the billable timesheet entries that you have recorded for this project will be listed here along with the logged hours and the billing status.
- Comments: Customers can use this space to collaborate with you regarding this project. The comments added here will be displayed in the Comments section of the project in your Zoho Books organization.
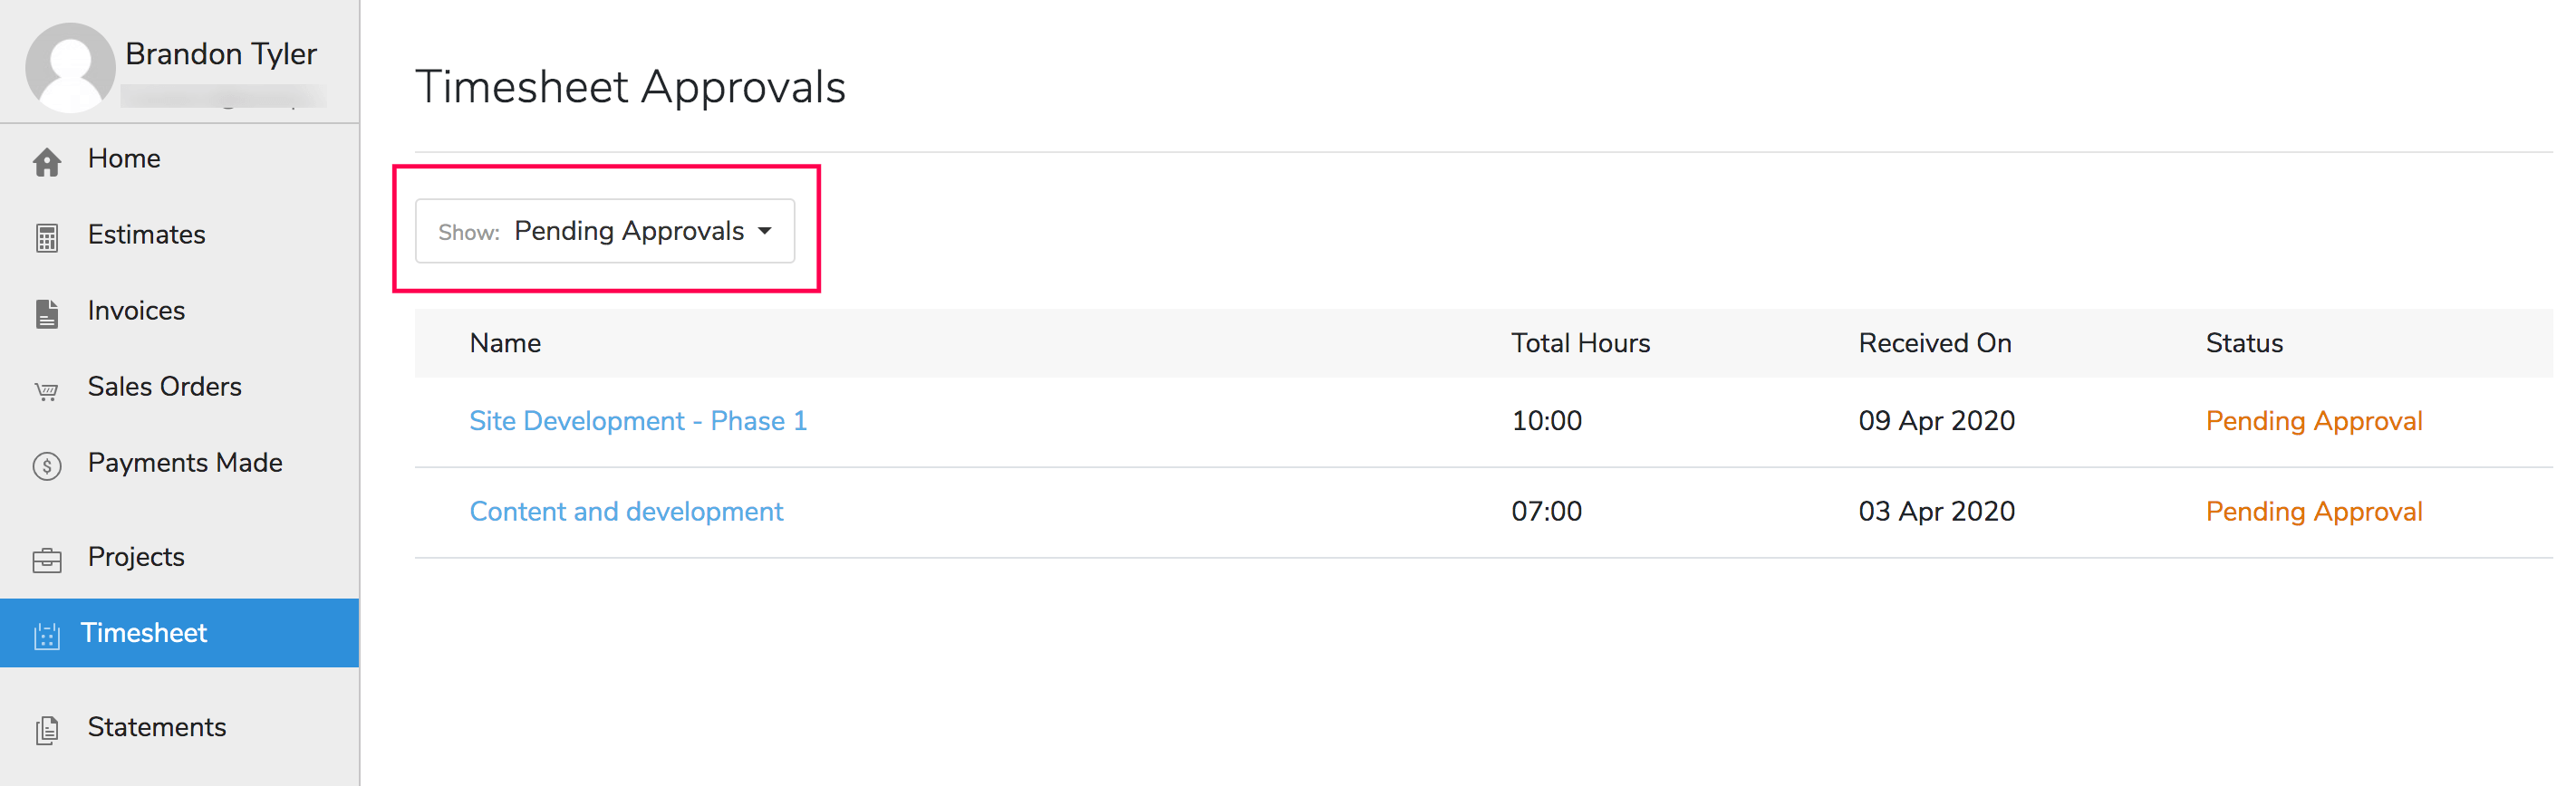
Timesheet
To let your customers know the exact time spent working on a project (so that you can bill them accurately), you can get your timesheets approved by customers. For this, you have to create a client approval in Zoho Books.
Your customers can then view all the timesheet approvals you have sent them under the Timesheet section in the client portal. They can also filter and view the approvals based on the approval status.
Customers can click on a particular approval to view its details. If satisfied with the time entries, they can approve the submitted approval by clicking the Approve button. If not, they can Reject it and provide the reason. They can also communicate with you through the comments.
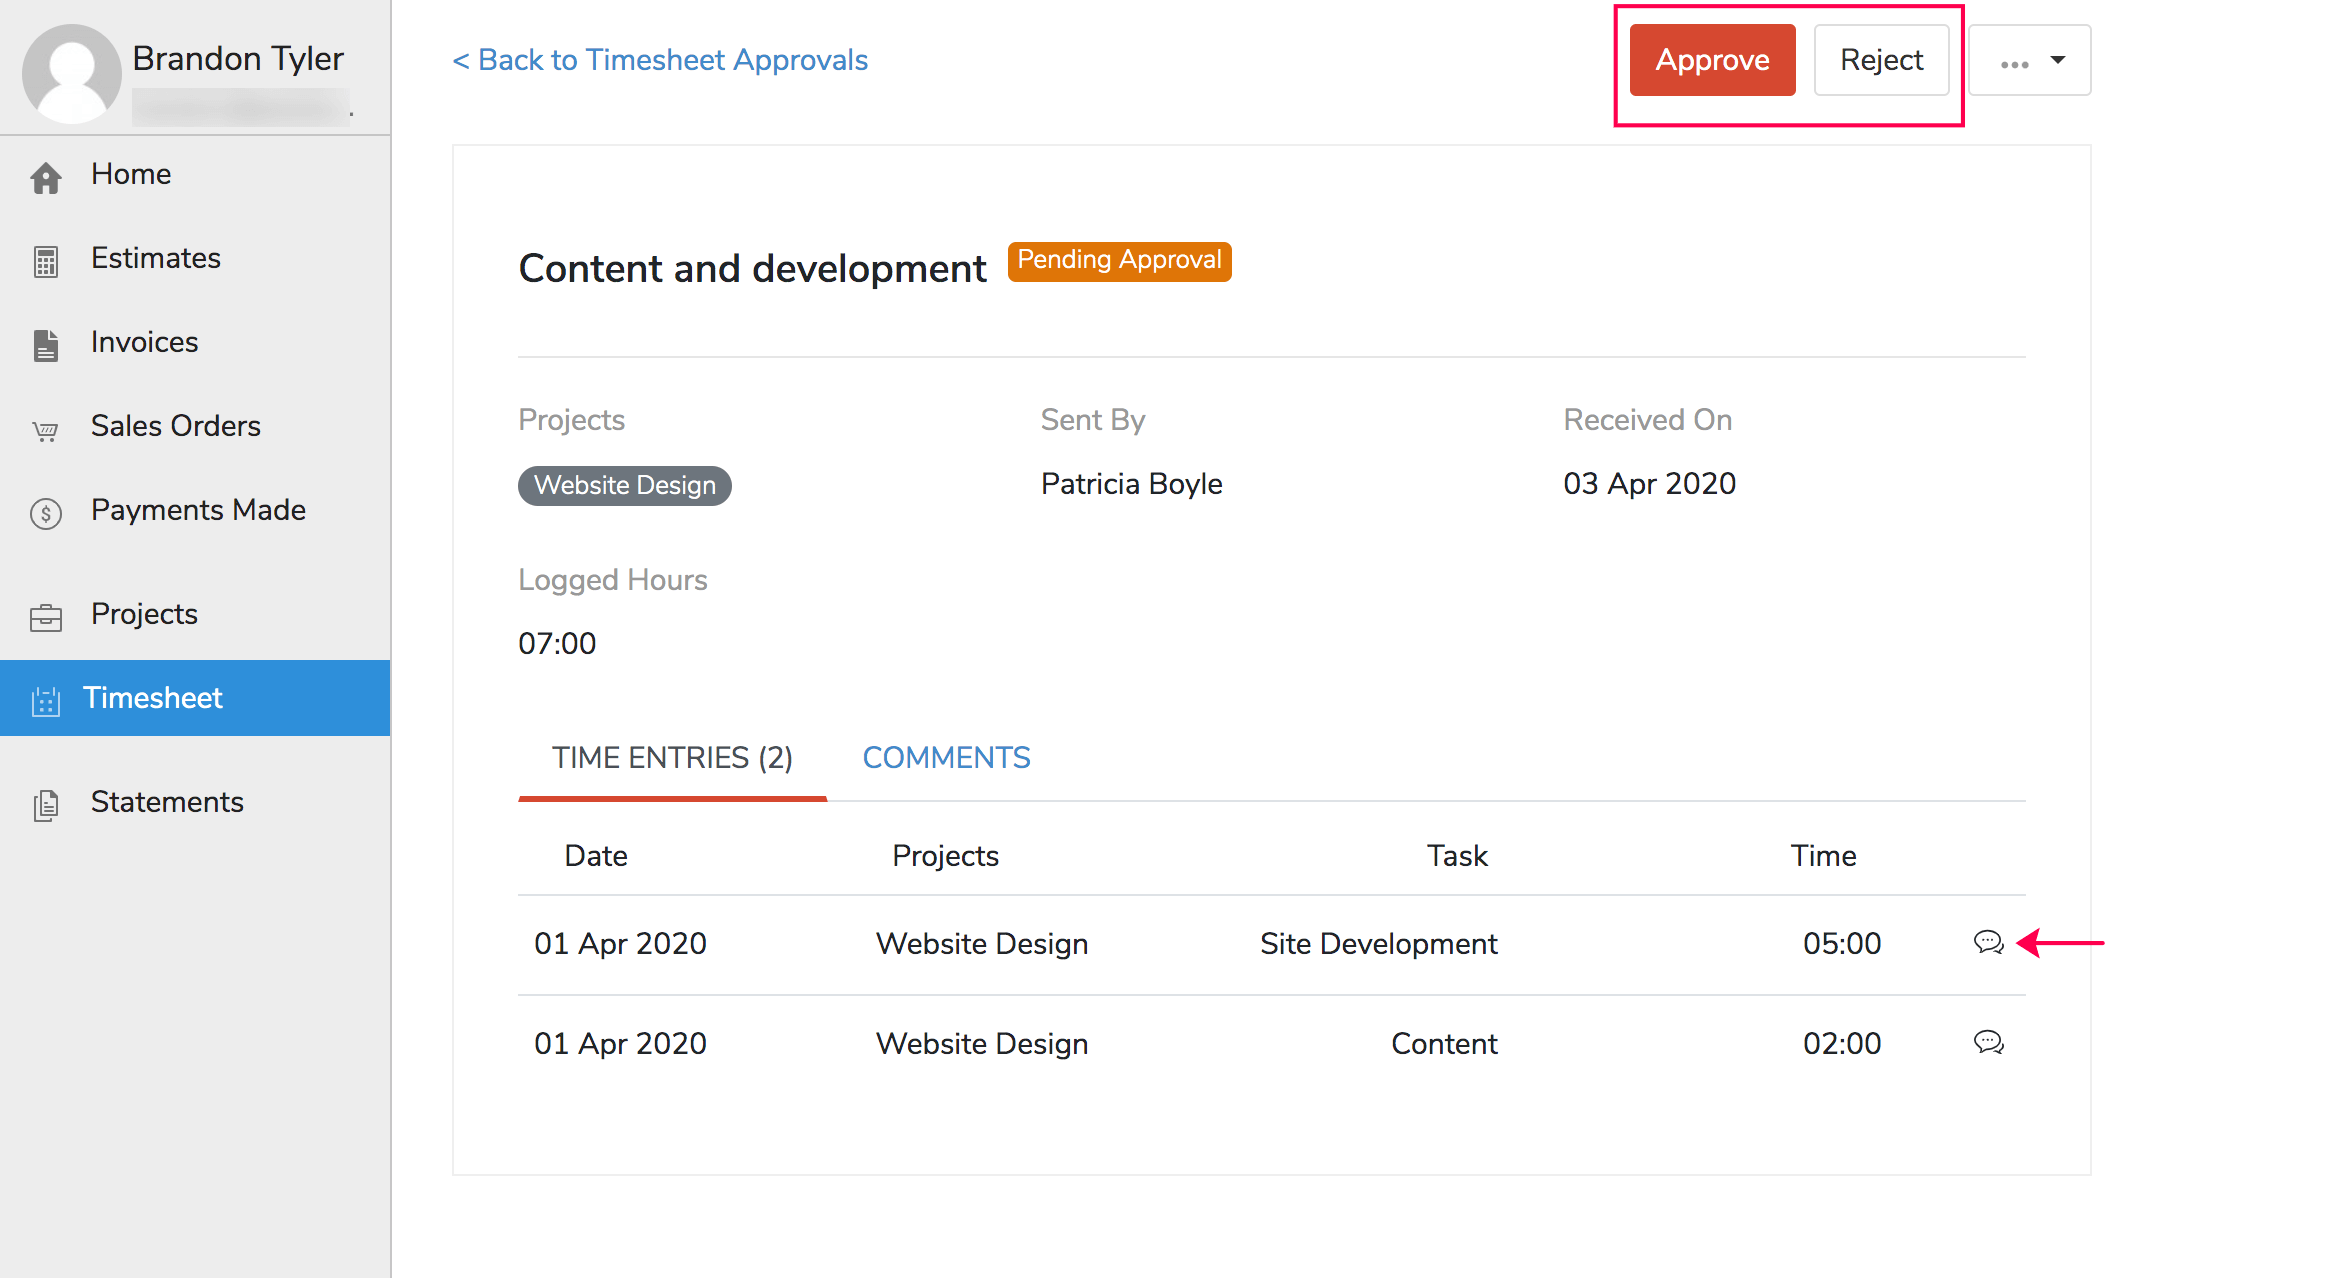
Insight:You will receive a notification in your Zoho Books organization when a customer views, accepts, or rejects an approval and also when they view it for the first time in the client portal.
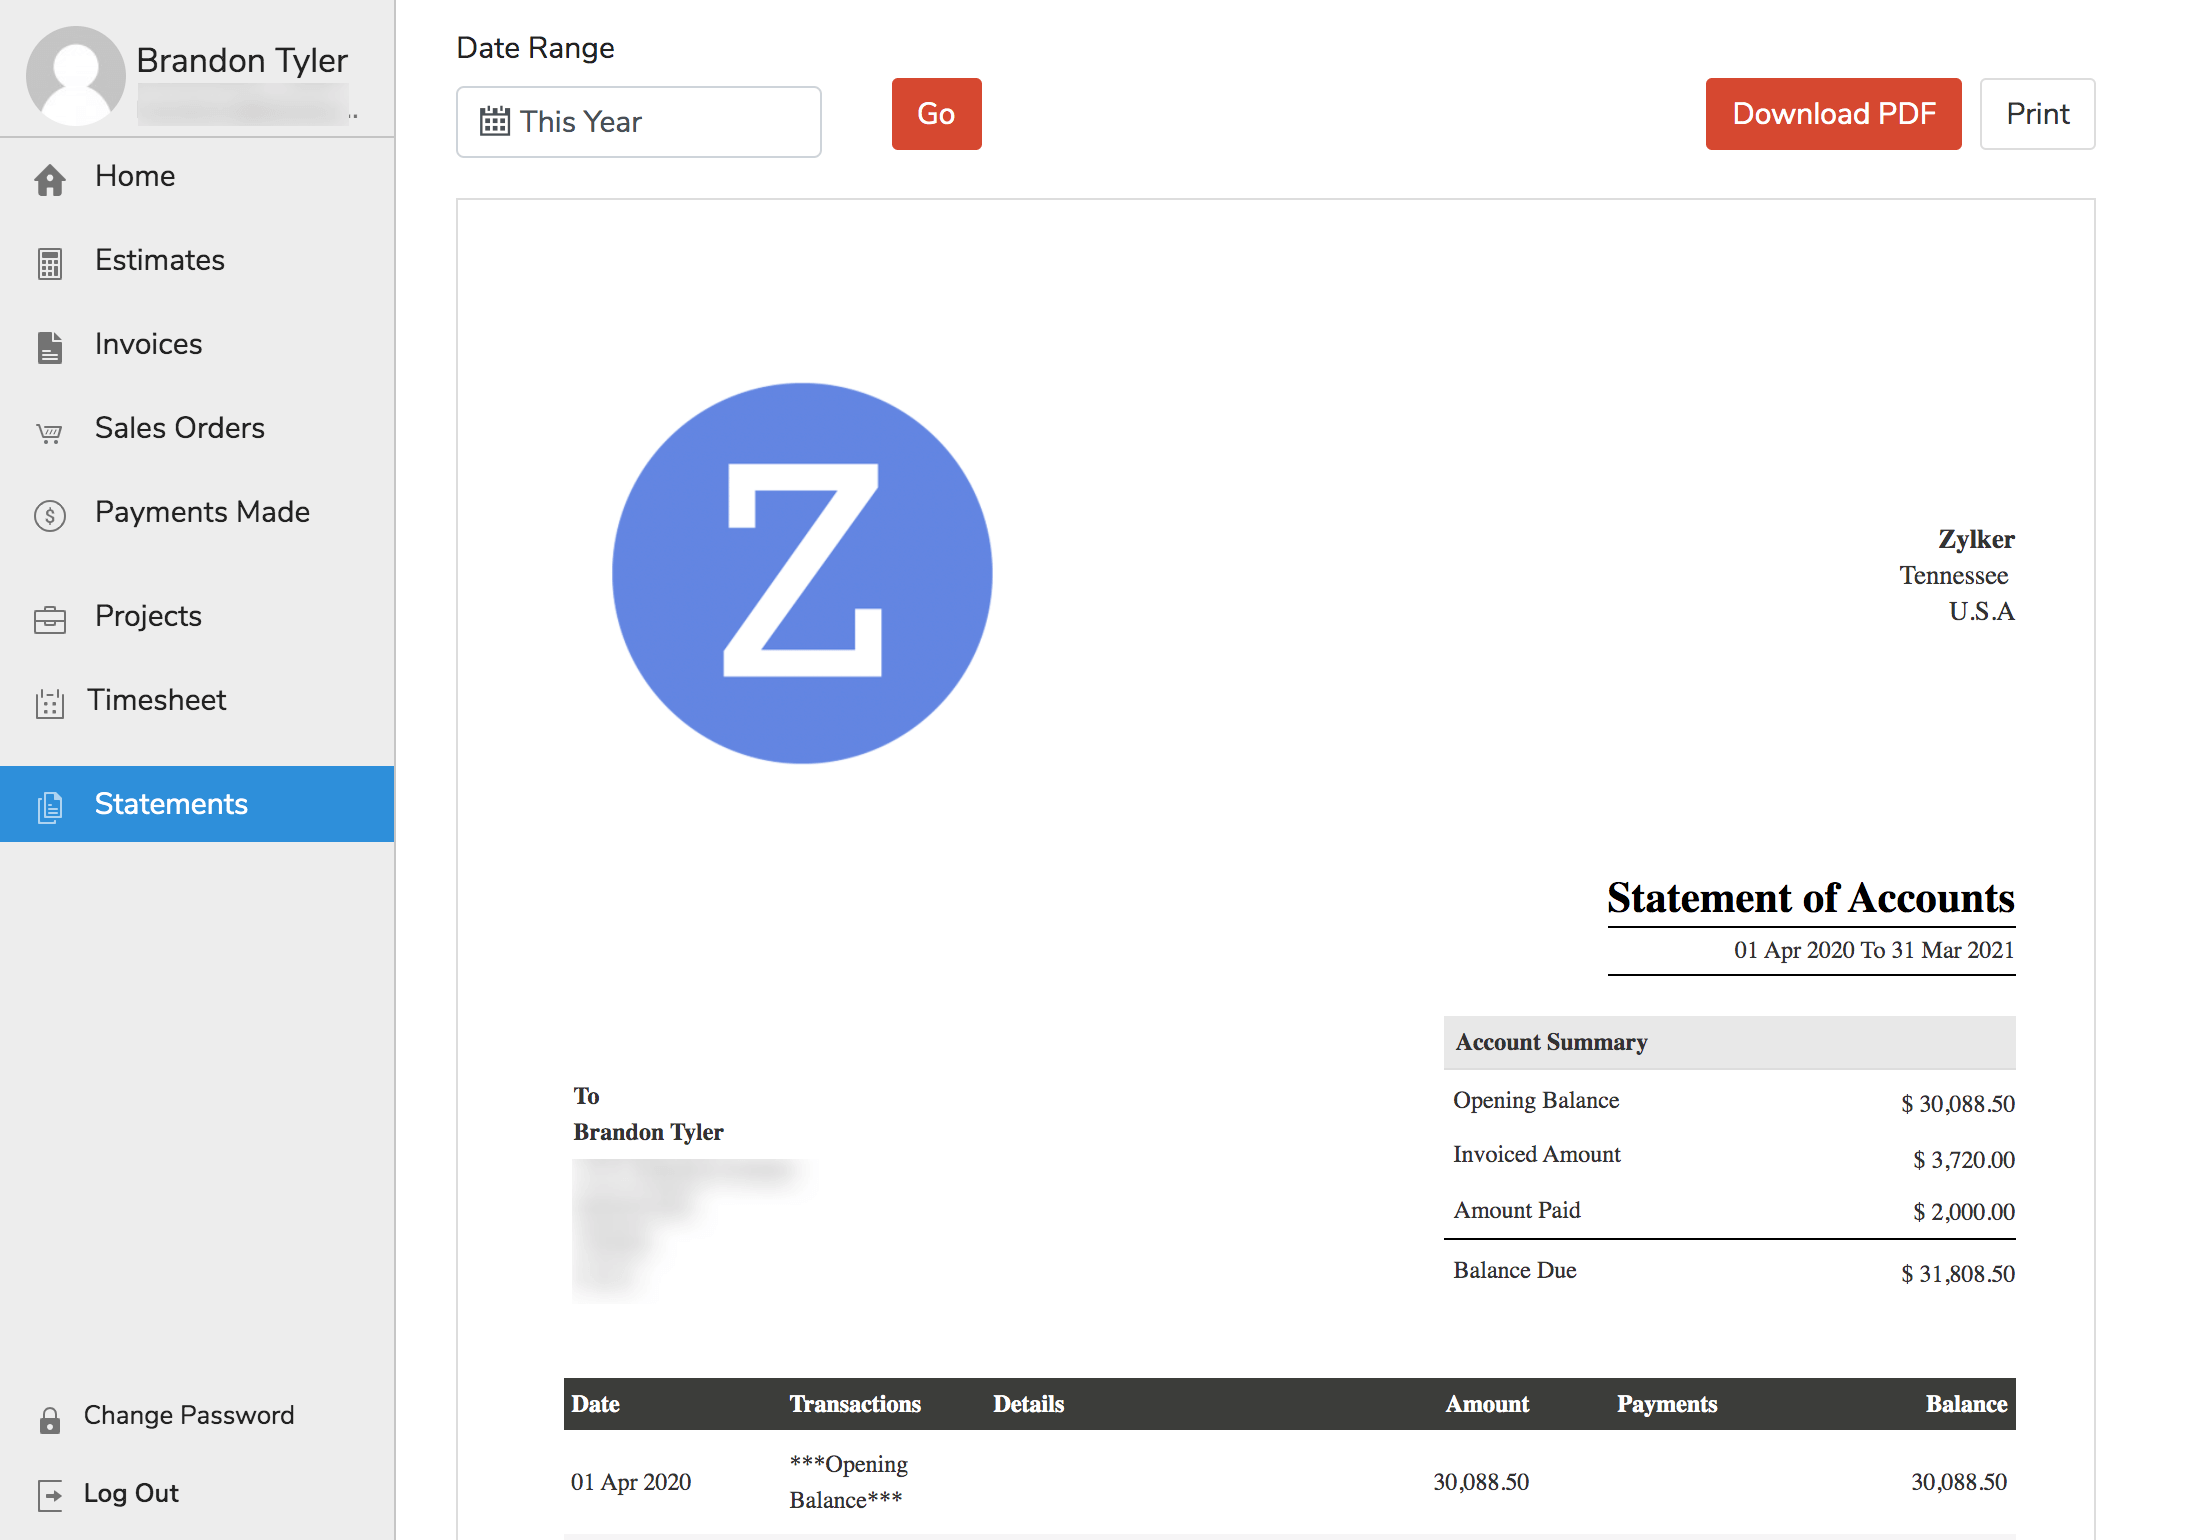
Generate Statement of Accounts
A statement of accounts is a document that lists out all the transactions that took place between you and your customer over a particular period of time. This statement lets your customer know the total amount that they owe you for the sales that took place during that period.
Customers can generate this statement in the client portal to view their outstanding balance. Here’s how:
- Go to the Statements section in the client portal.
- Select the Date Range in the top-left corner.
- Click Go to generate the statement.
- Click the Download PDF or Print button to keep a copy of the statement.
Share Documents
Estimates, Invoices, and Sales Orders in the client portal can be printed, downloaded as PDFs, and forwarded to other contacts by your customers from the options provided inside the More icon.
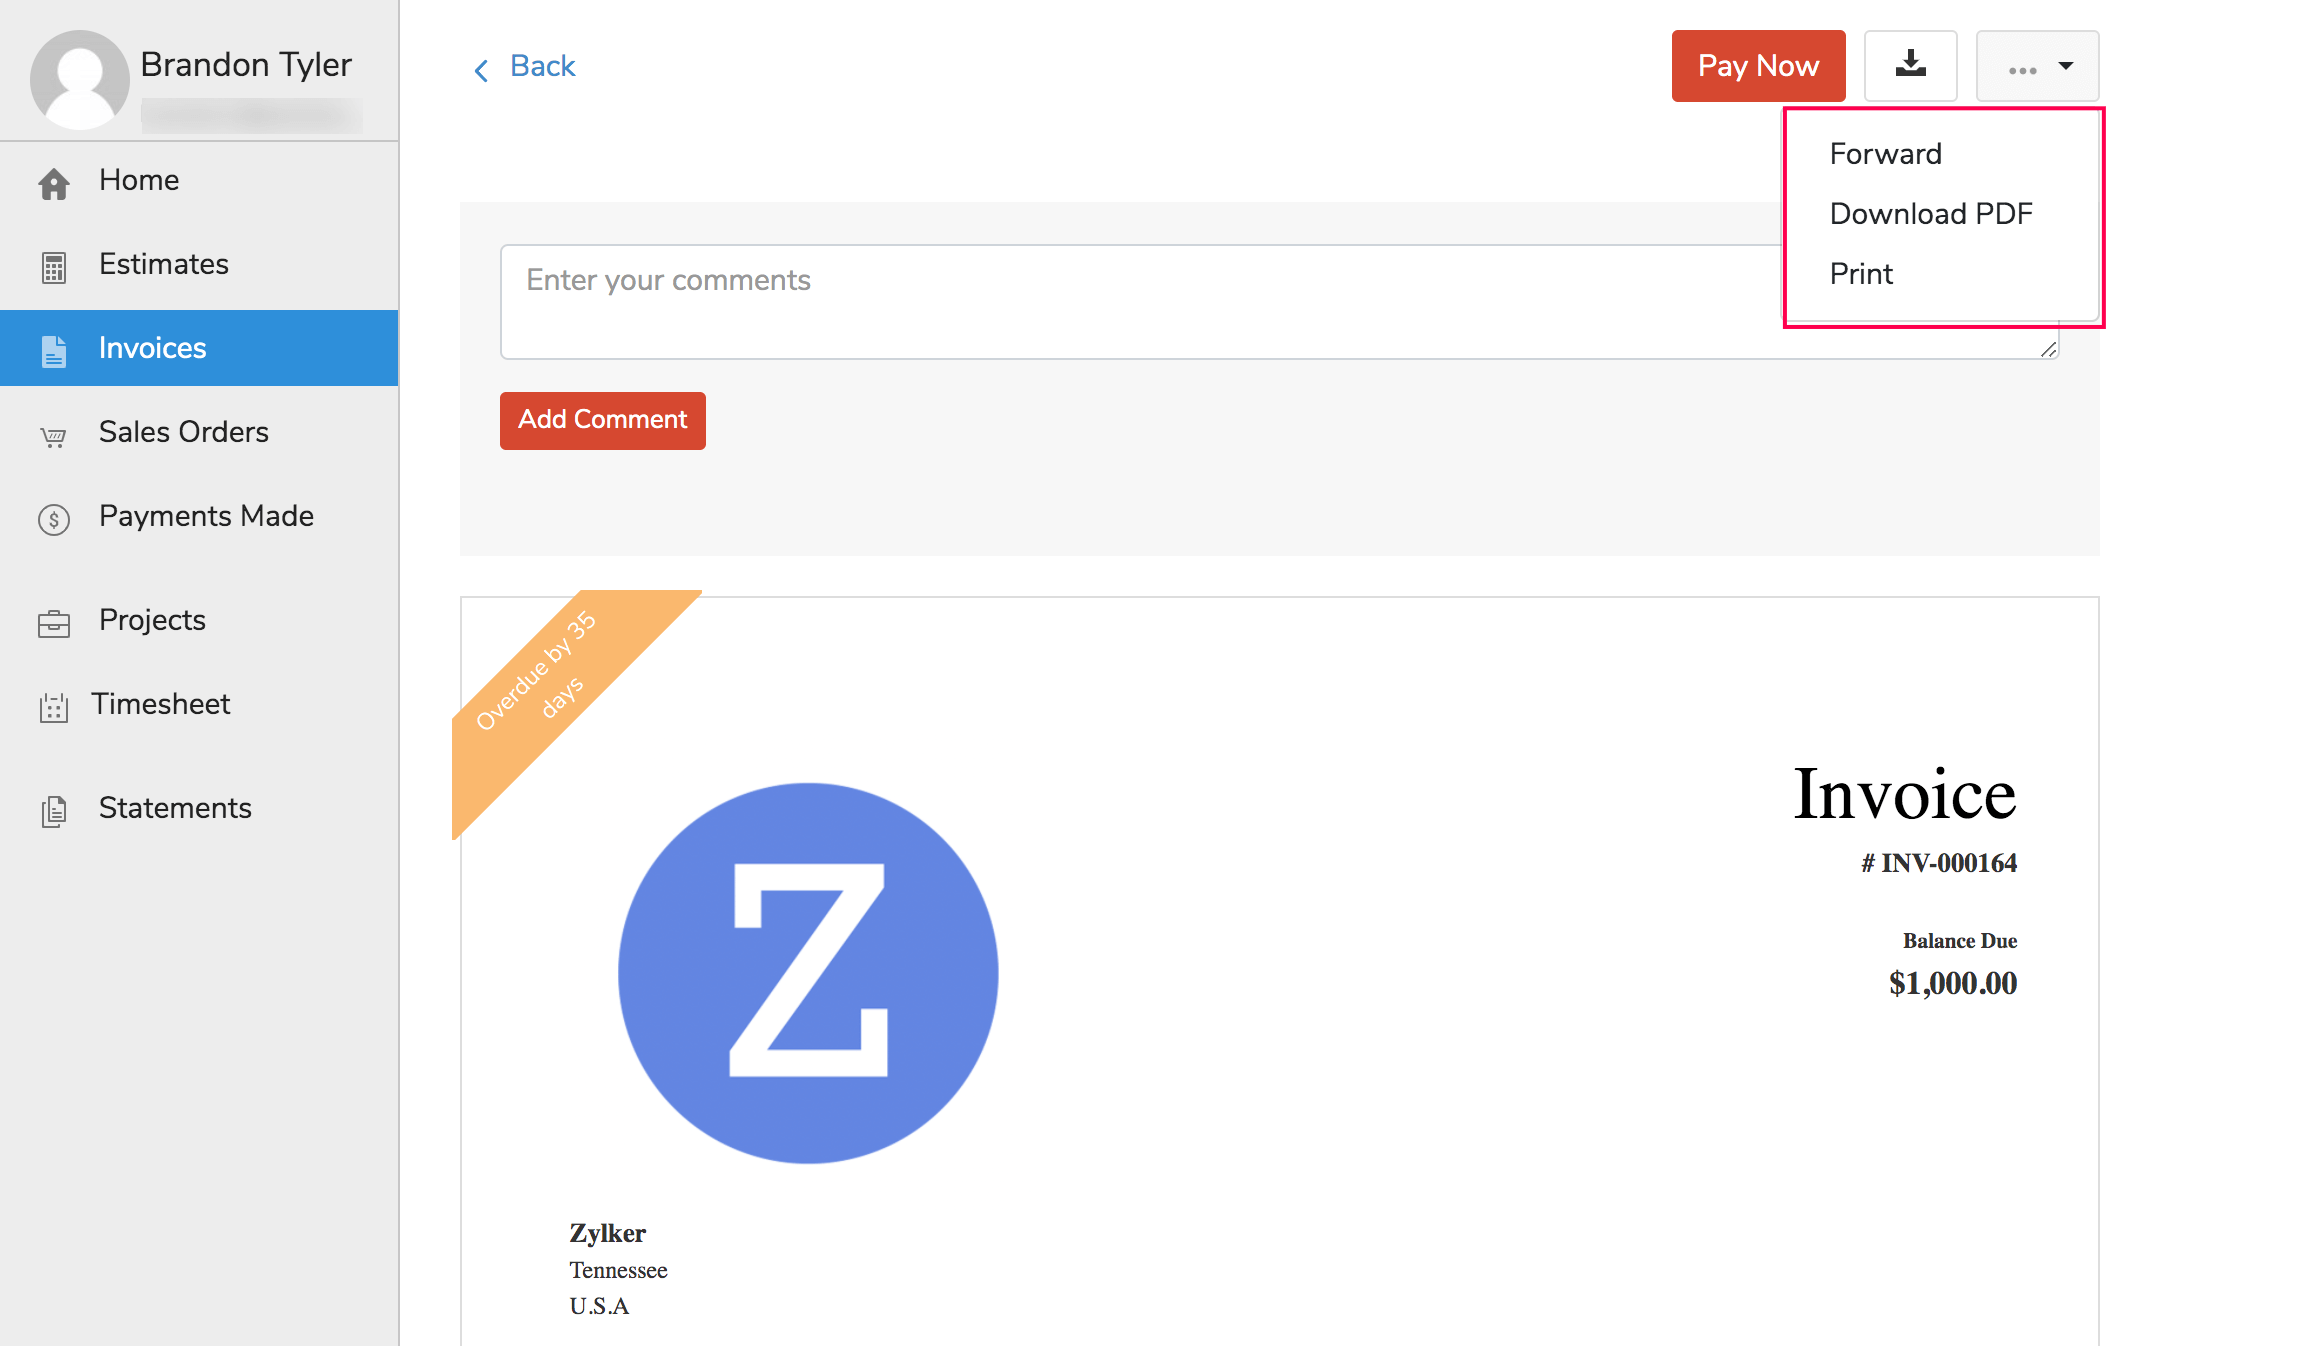
Notes:Once your customer forwards a transaction to a contact, that contact gets added up as a contact person for that client in your Zoho Books organization.
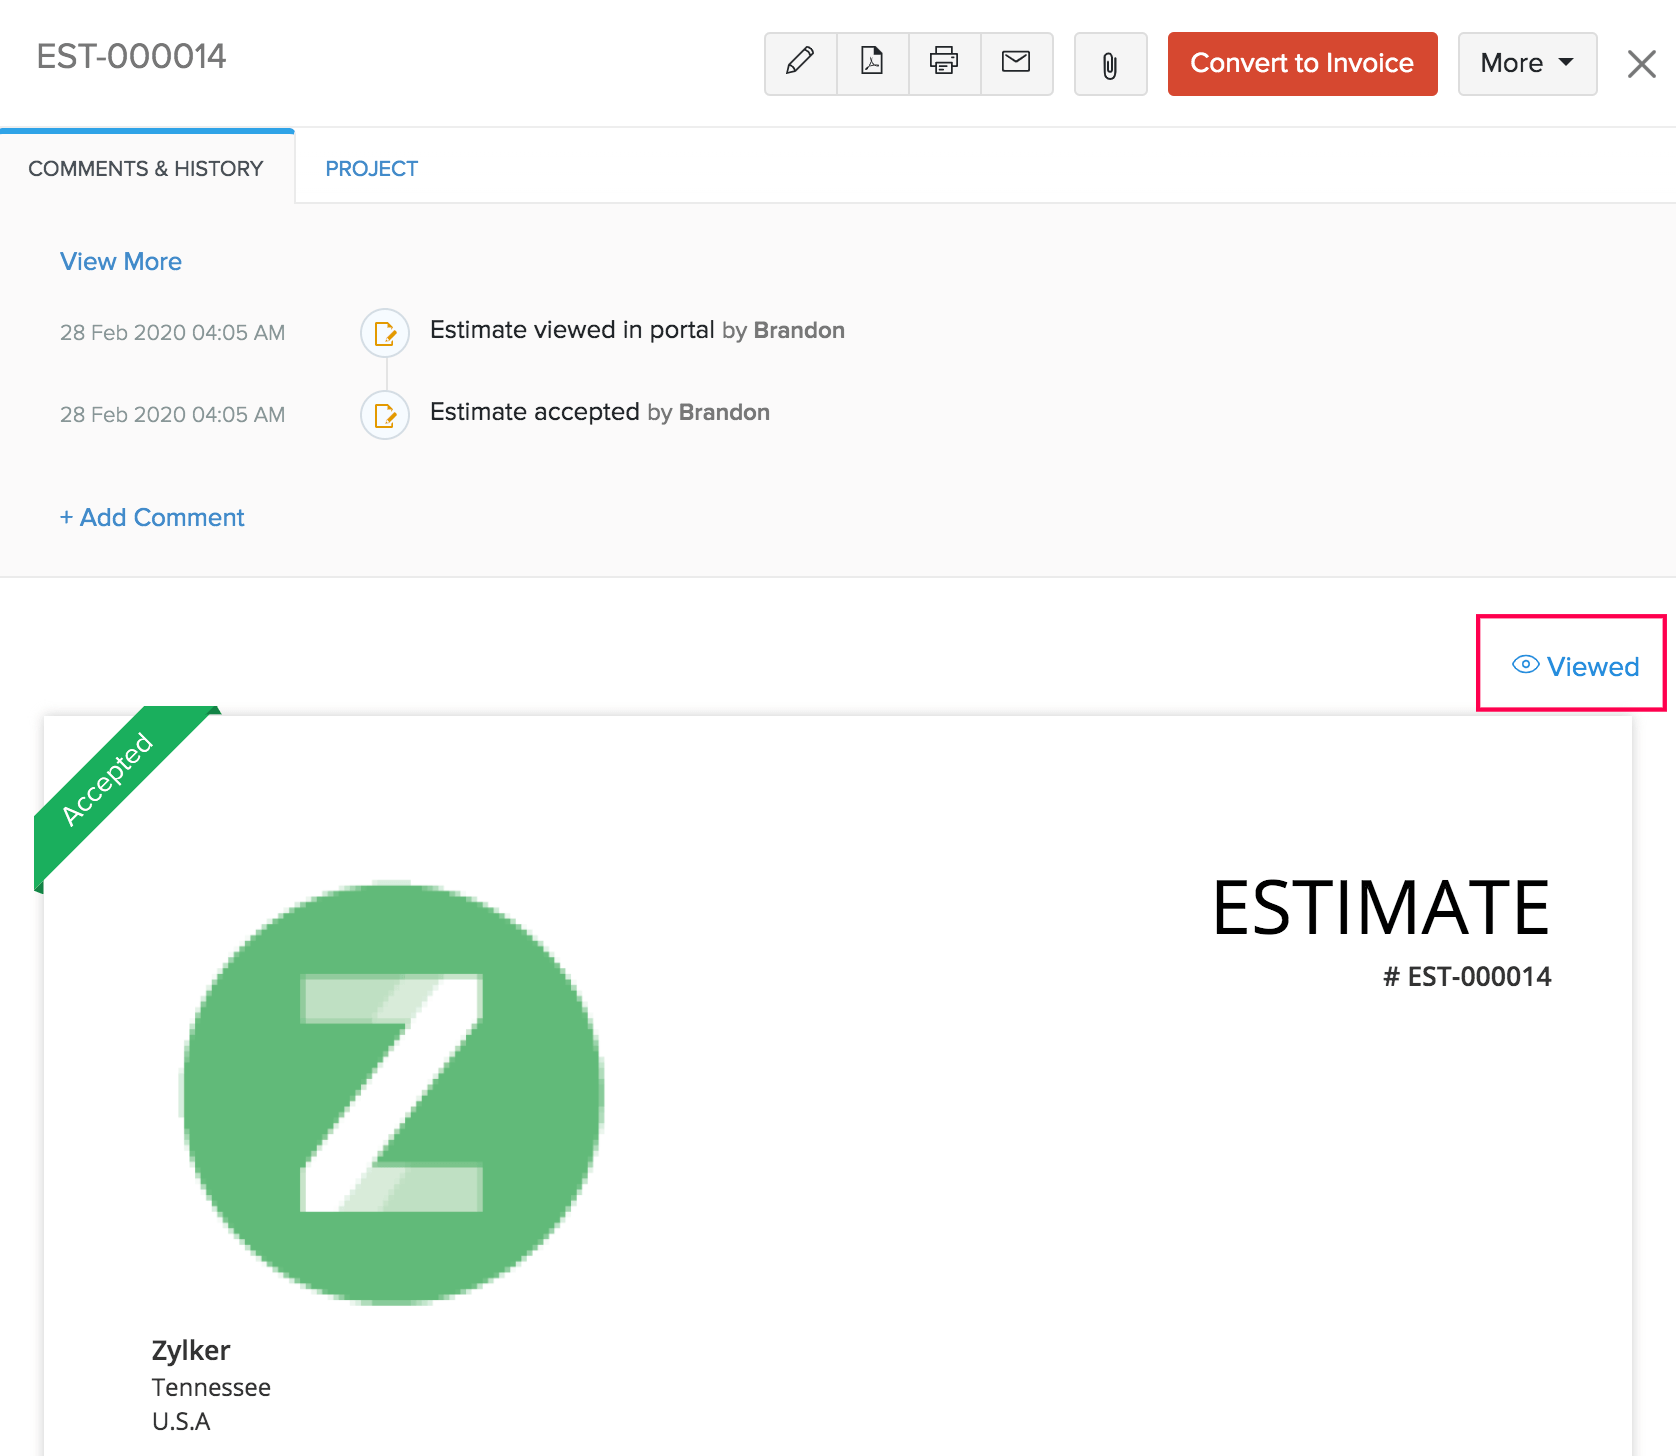
Get Notified
The Client portal is a great way for you to check if your customers have viewed your transactions. Once a customer views your estimate or invoice in the portal, you will be notified about it with a ‘Viewed’ icon on the specific estimate or invoice in your Zoho Books organization.
A notification email will be sent to your primary email address in Zoho Books when your customer:
Accepts or declines an estimate. Adds a comment on an estimate, invoice, or timesheet. Makes a payment for an invoice. Updates their details.
Pro Tip: You can choose when you want to be notified, in the client portal preferences.
Client Details
Update Account Details
If your customers have changed their personal or company details, they can update it in the client portal. Here’s how:
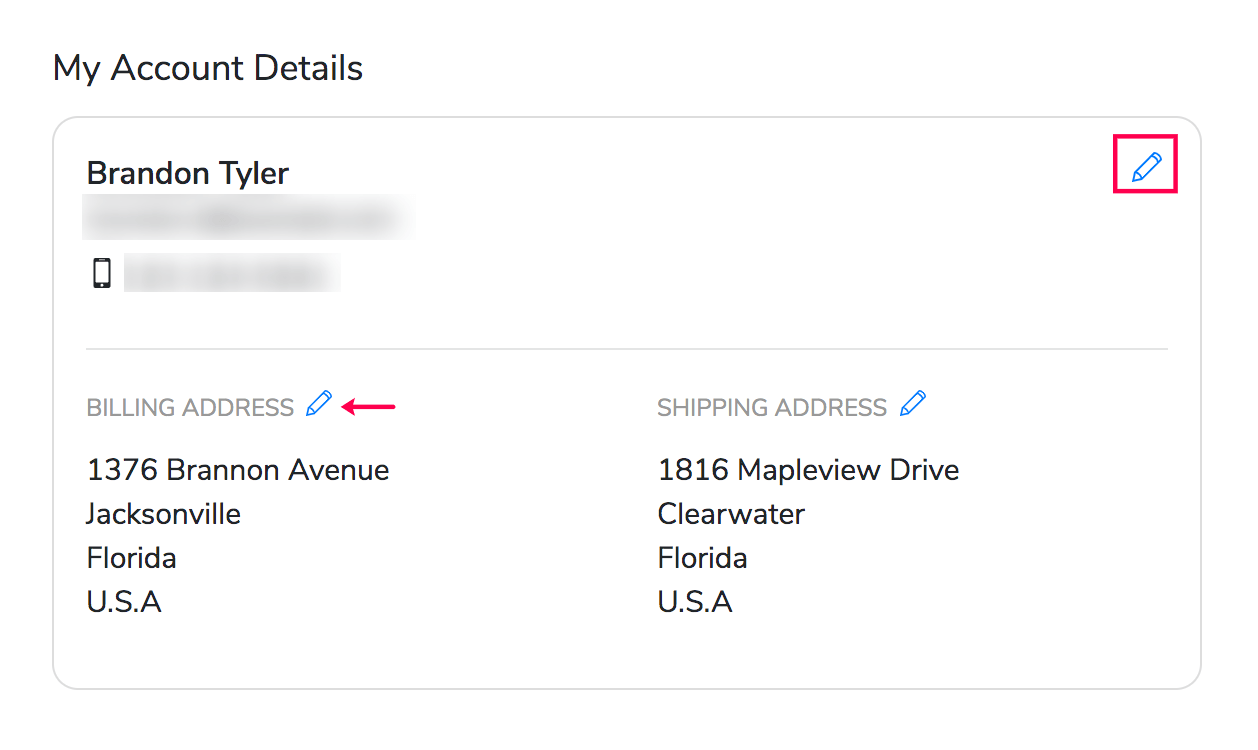
- Go to the Home page of the client portal.
- Scroll down to My Account Details and click the pencil icon.
- Fill in the details and click Save.
They can also change their address by clicking the pencil icon next to the address.
Insight: All the changes made here will be updated in your customer’s corresponding details in your Zoho Books organization.
Edit Card Details
Customers can view their card details in the client portal if:
- You have added their card details in Zoho Books.
- You have requested payment information from customers, and they had added their card details.
- Your customers had saved their card details during a previous payment in the portal.
Customers can edit their card details anytime. Here’s how:
- Go to the Home page of the client portal.
- Scroll down to the Card Details section and click Edit next to the card whose details you want to change.
- Fill in the details and click Save.
Change Password
To safeguard their transactions, customers can regularly change their password for the client portal. Here’s how:
- Click Change Password in the left sidebar of the client portal.
- Enter the Old Password and enter a New Password that satisfies the password requirements.
- Re-enter the password to confirm and click Save.
Other Actions
Send Email
Customers can contact you directly from the portal by sending an email to your registered email address in Zoho Books. Here’s how:
- Go to the Home page of the client portal.
- In the bottom of the page, your business details will be mentioned.
- Click the Send Email button and enter the Subject and Message.
- Click Send.

Write Review
Gauge your customer’s satisfaction with your business by asking them to write a review. You can market or publicize positive reviews and identify areas of improvement from the constructive criticism. Here’s how your customers can write a review:
- Go to the Home page of the client portal.
- In the bottom of the page, your business details will be mentioned.
- Click the Review button.
- Enter a message and click Submit Review.
Insight: When a customer submits a review, it will appear in Zoho Books in that contact’s Overview page under Client Reviews
Logout
To logout from the client portal, customers can click Logout from the left sidebar.
Disable the Client Portal for Customers
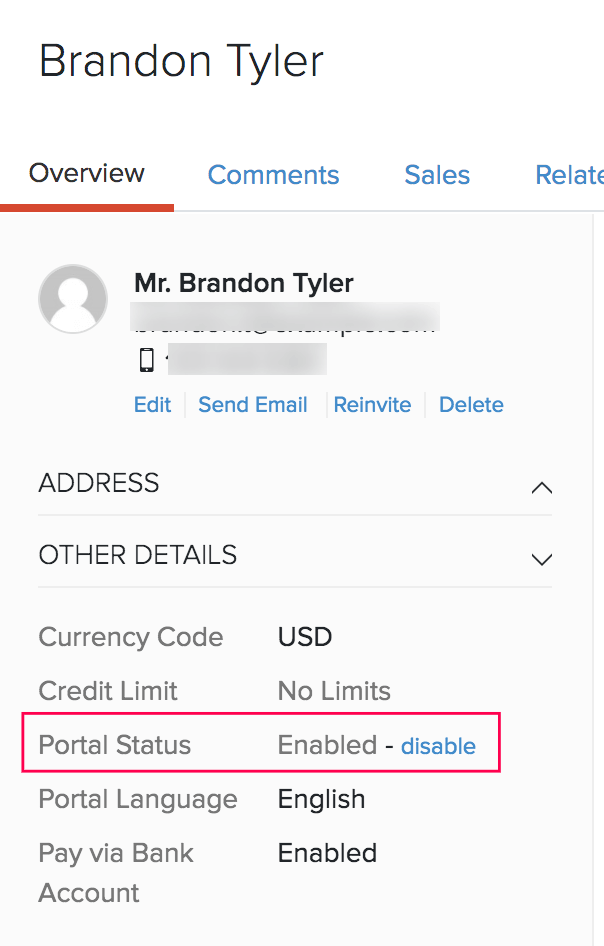
If you have stopped doing business with a particular customer, you can disable their access to the Client Portal from Zoho Books. To do this:
- Go to Sales > Customers.
- Select the customer for whom you want to disable access.
- Click disable near Portal Status in the Other Details section in the Overview tab.
Troubleshooting
Your customers might face the following errors when they try to make payments through the client portal:
| Error Code | What went wrong? | What can you do? |
|---|---|---|
| CP1003 | Your customer’s client portal might be associated with a deleted customer contact. | Verify that the associated customer contact still exists. |
| CP1004 | Your customer’s client portal might be associated with a deleted recurring profile. | Verify that the associated recurring profile still exists. |
| CP2001 | You have not set up default taxes for your organization. | Go to Settings > Taxes and create a default tax. |
| CP3001 | You have not enabled reference transactions in your merchant account. | Enable reference transactions in your merchant account. |
| CP3002 | You have configured the payment gateway with invalid credentials or have made recent changes to your merchant account. | Re-enter the correct credentials in Settings > Integrations. |
| CP3003 | The payment has been declined due to the fraud detection filters that you’ve set up in your merchant account. | Verify if the transaction was fraudulent or not. Moderate your fraud filters, if necessary. |
| CP3004 | The transaction has been declined as the payment gateway couldn’t verify the address of your customer. | Configure the address fields for your payment pages in Settings > Customer Payments > Card Verification Settings. |
| CP3005 | A transaction with the same amount and card details was made within a few minutes of the previous transaction. | Ask your customer to try again after a few minutes. |
| CP4001 | The transaction amount is less than the minimum amount allowed by the payment gateway. This may be due to the discounts or credits applied. | Make sure that the transaction amount is greater than the minimum transaction amount. |
| CP4002 | Payment gateway that you’ve configured doesn’t support recurring payments. | Configure a payment gateway that supports recurring payments. |
| CP4003 | The payment gateways that you’ve configured don’t support the transaction currency. | Configure a payment gateway that supports the transaction currency. |
Let your customers access all their transactions and make payments, all in one central place, with an online customer portal.