Create Widget
Summary
This guide explains how to create widgets for your Zoho Writer extension. It covers configuring widget properties in plugin-manifest.json, building widget HTML files, and implementing functionality using standard web technologies.
Prerequisites
- Sigma workspace and extension created
- Basic HTML/CSS/JavaScript knowledge
- Images prepared and stored in
app/img/
Step-by-Step Guide
Step 1: Define Widget in Plugin-Manifest.json
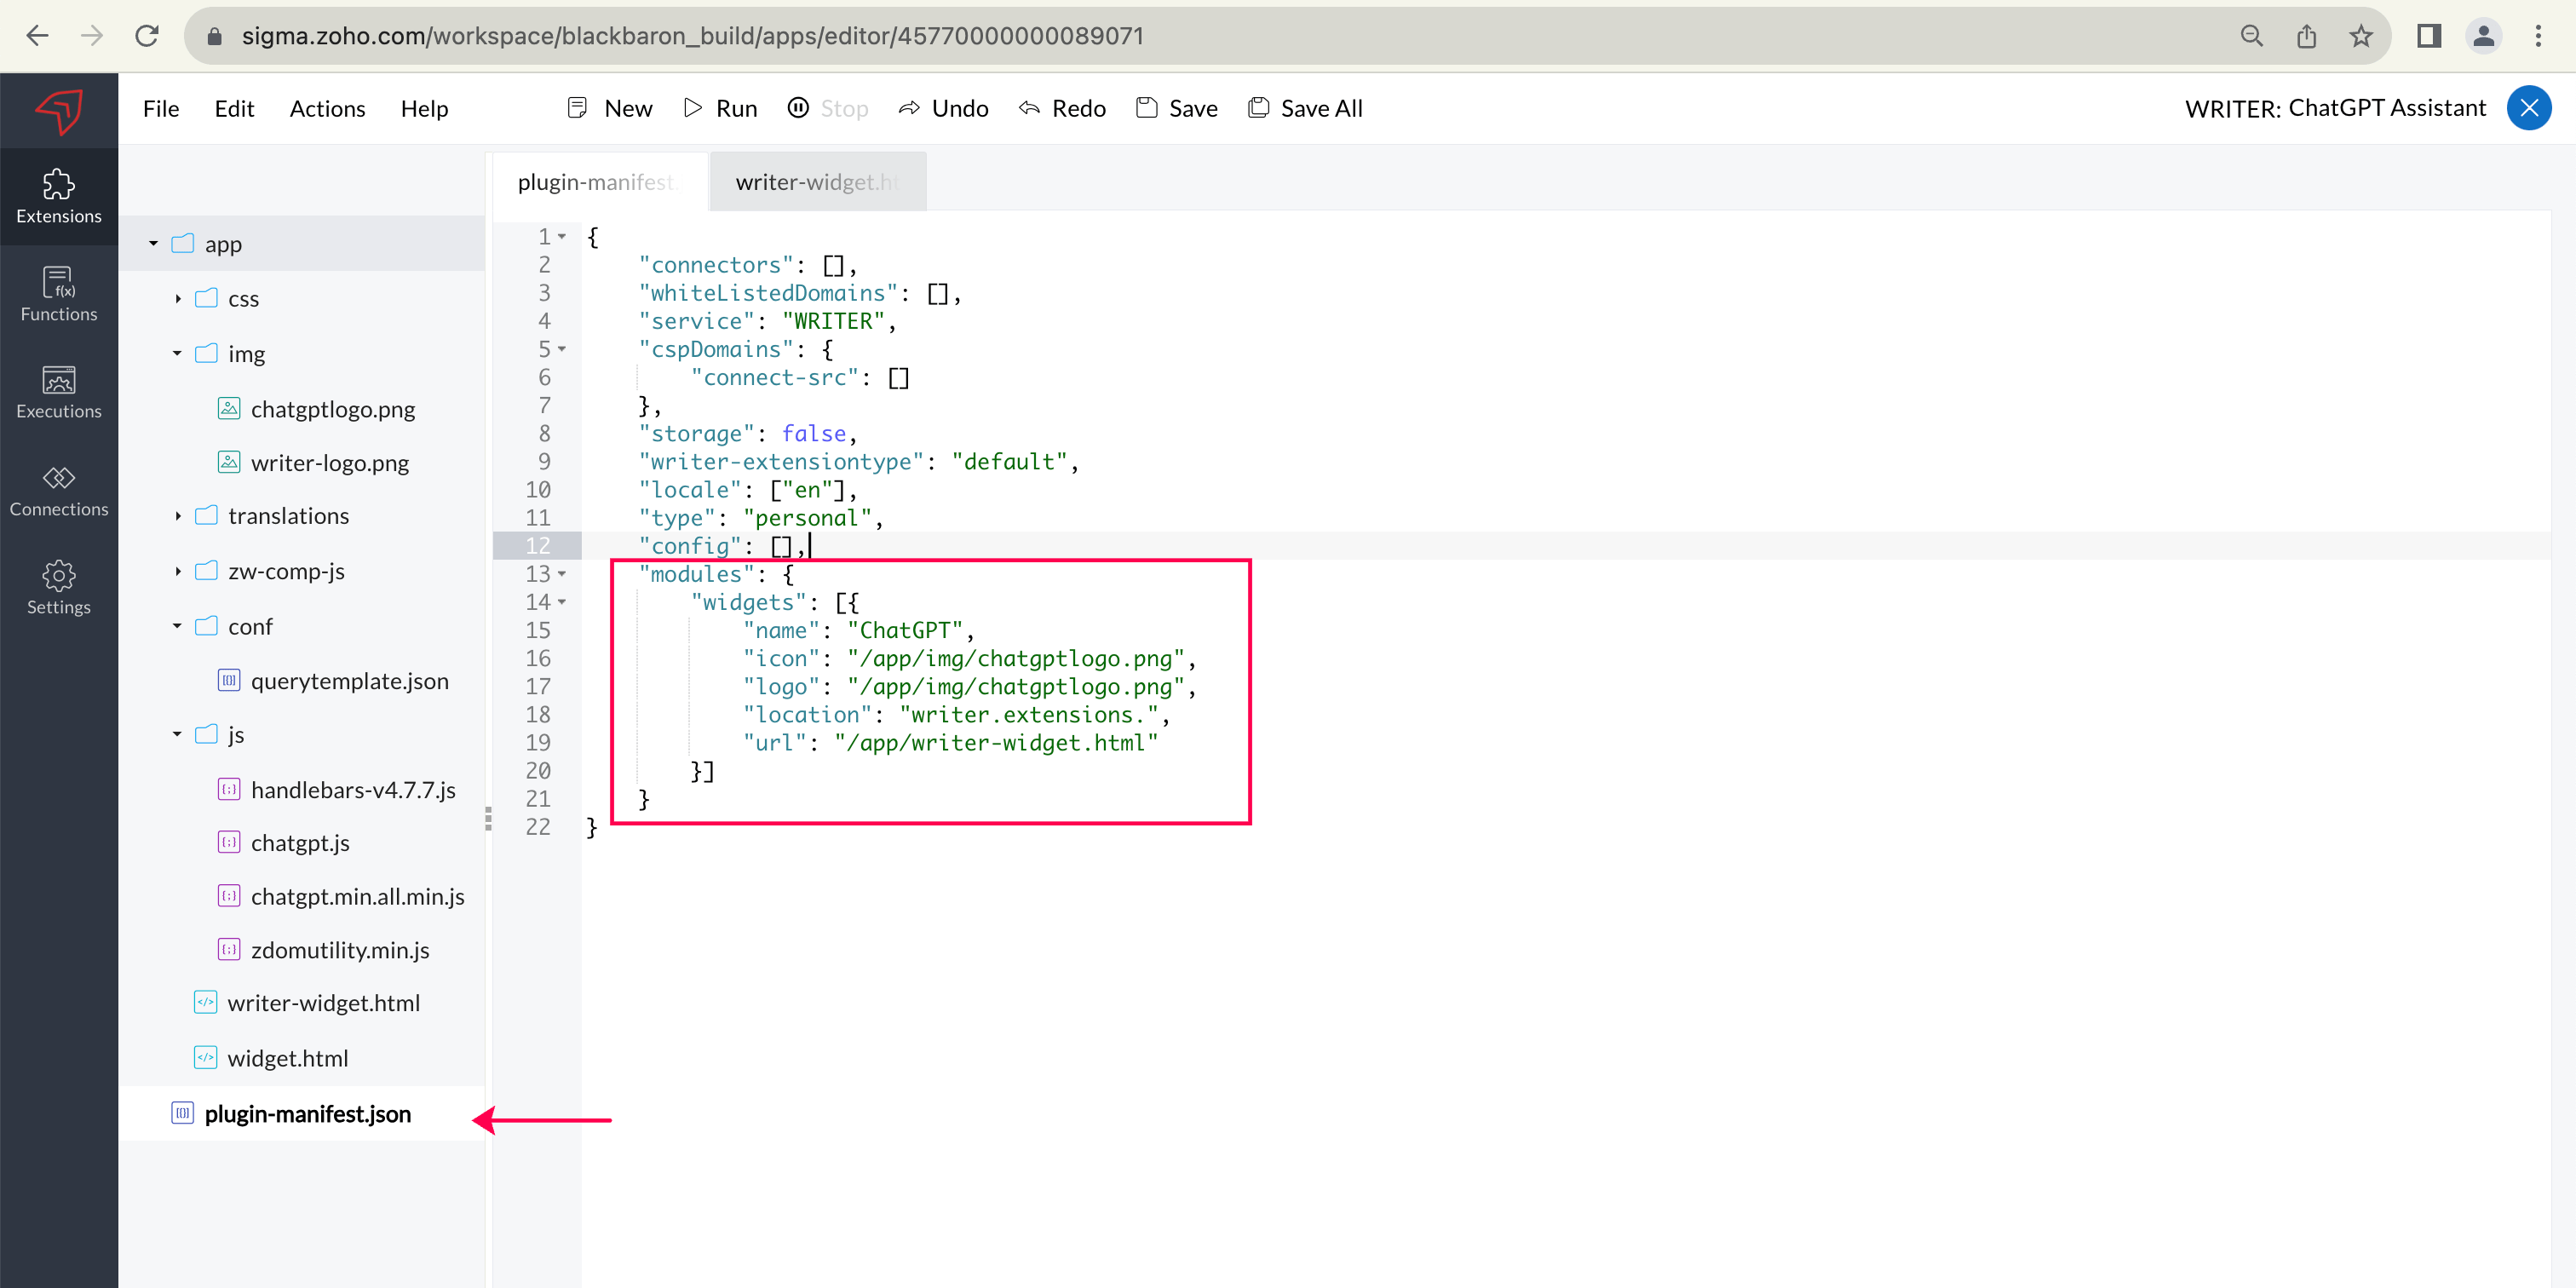
Open plugin-manifest.json and add widget configurations under the "modules" section.
Required Widget Attributes
| Attribute | Type | Description |
|---|---|---|
title | String | Display name of the widget (can be duplicated) |
name | String | Unique identifier for the widget (cannot be duplicated) |
icon | URL | Widget icon URL — place image in img folder |
logo | URL | Widget logo URL — place image in img folder |
location | String | Widget location in Writer interface |
url | URL | Path to widget HTML file (relative or absolute) |
Step 2: Create Widget File
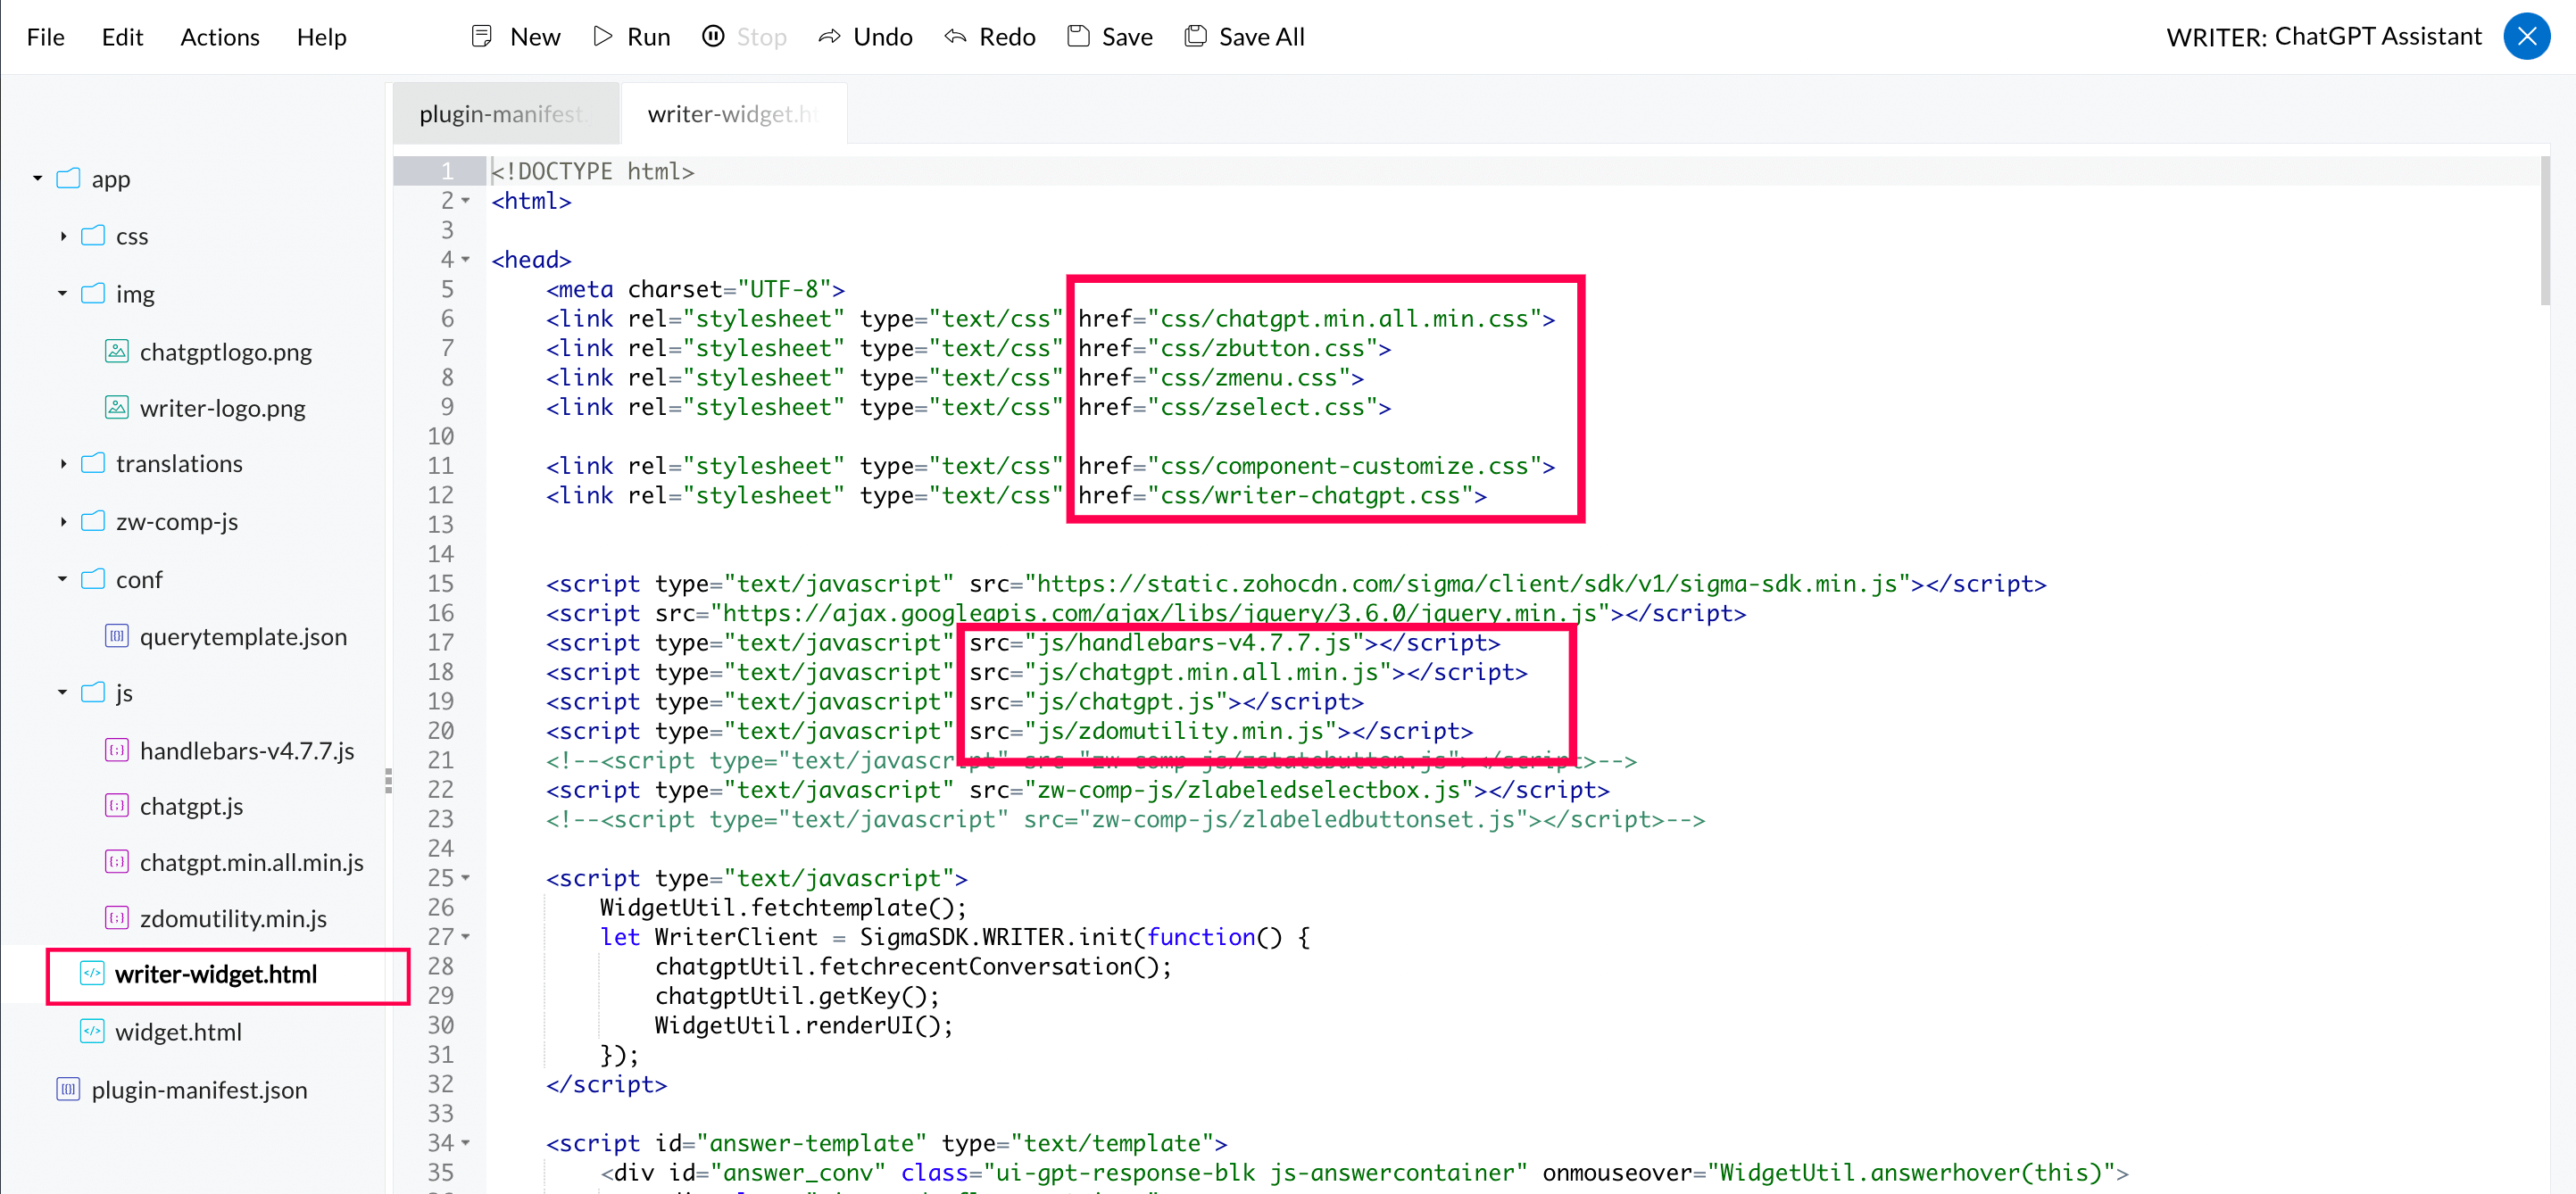
Create your widget HTML file (e.g., writer-widget.html) under the app folder. File naming is optional — use any name relevant to your use case.
Important:
- Use relative paths for JavaScript, CSS, and image references
- Do not include
/appat the beginning of paths - Example:
<script src="js/script.js"></script>
Step 3: Build Widget HTML
Construct your extension within the HTML file using HTML, CSS, and JavaScript.
Step 4: Save the Extension
Click Save to save your extension code and configuration changes.
Step 5: Test Your Widget
- Click Run in the app editor top menu
- Select a Zoho Writer document
- Click Extensions in the left panel
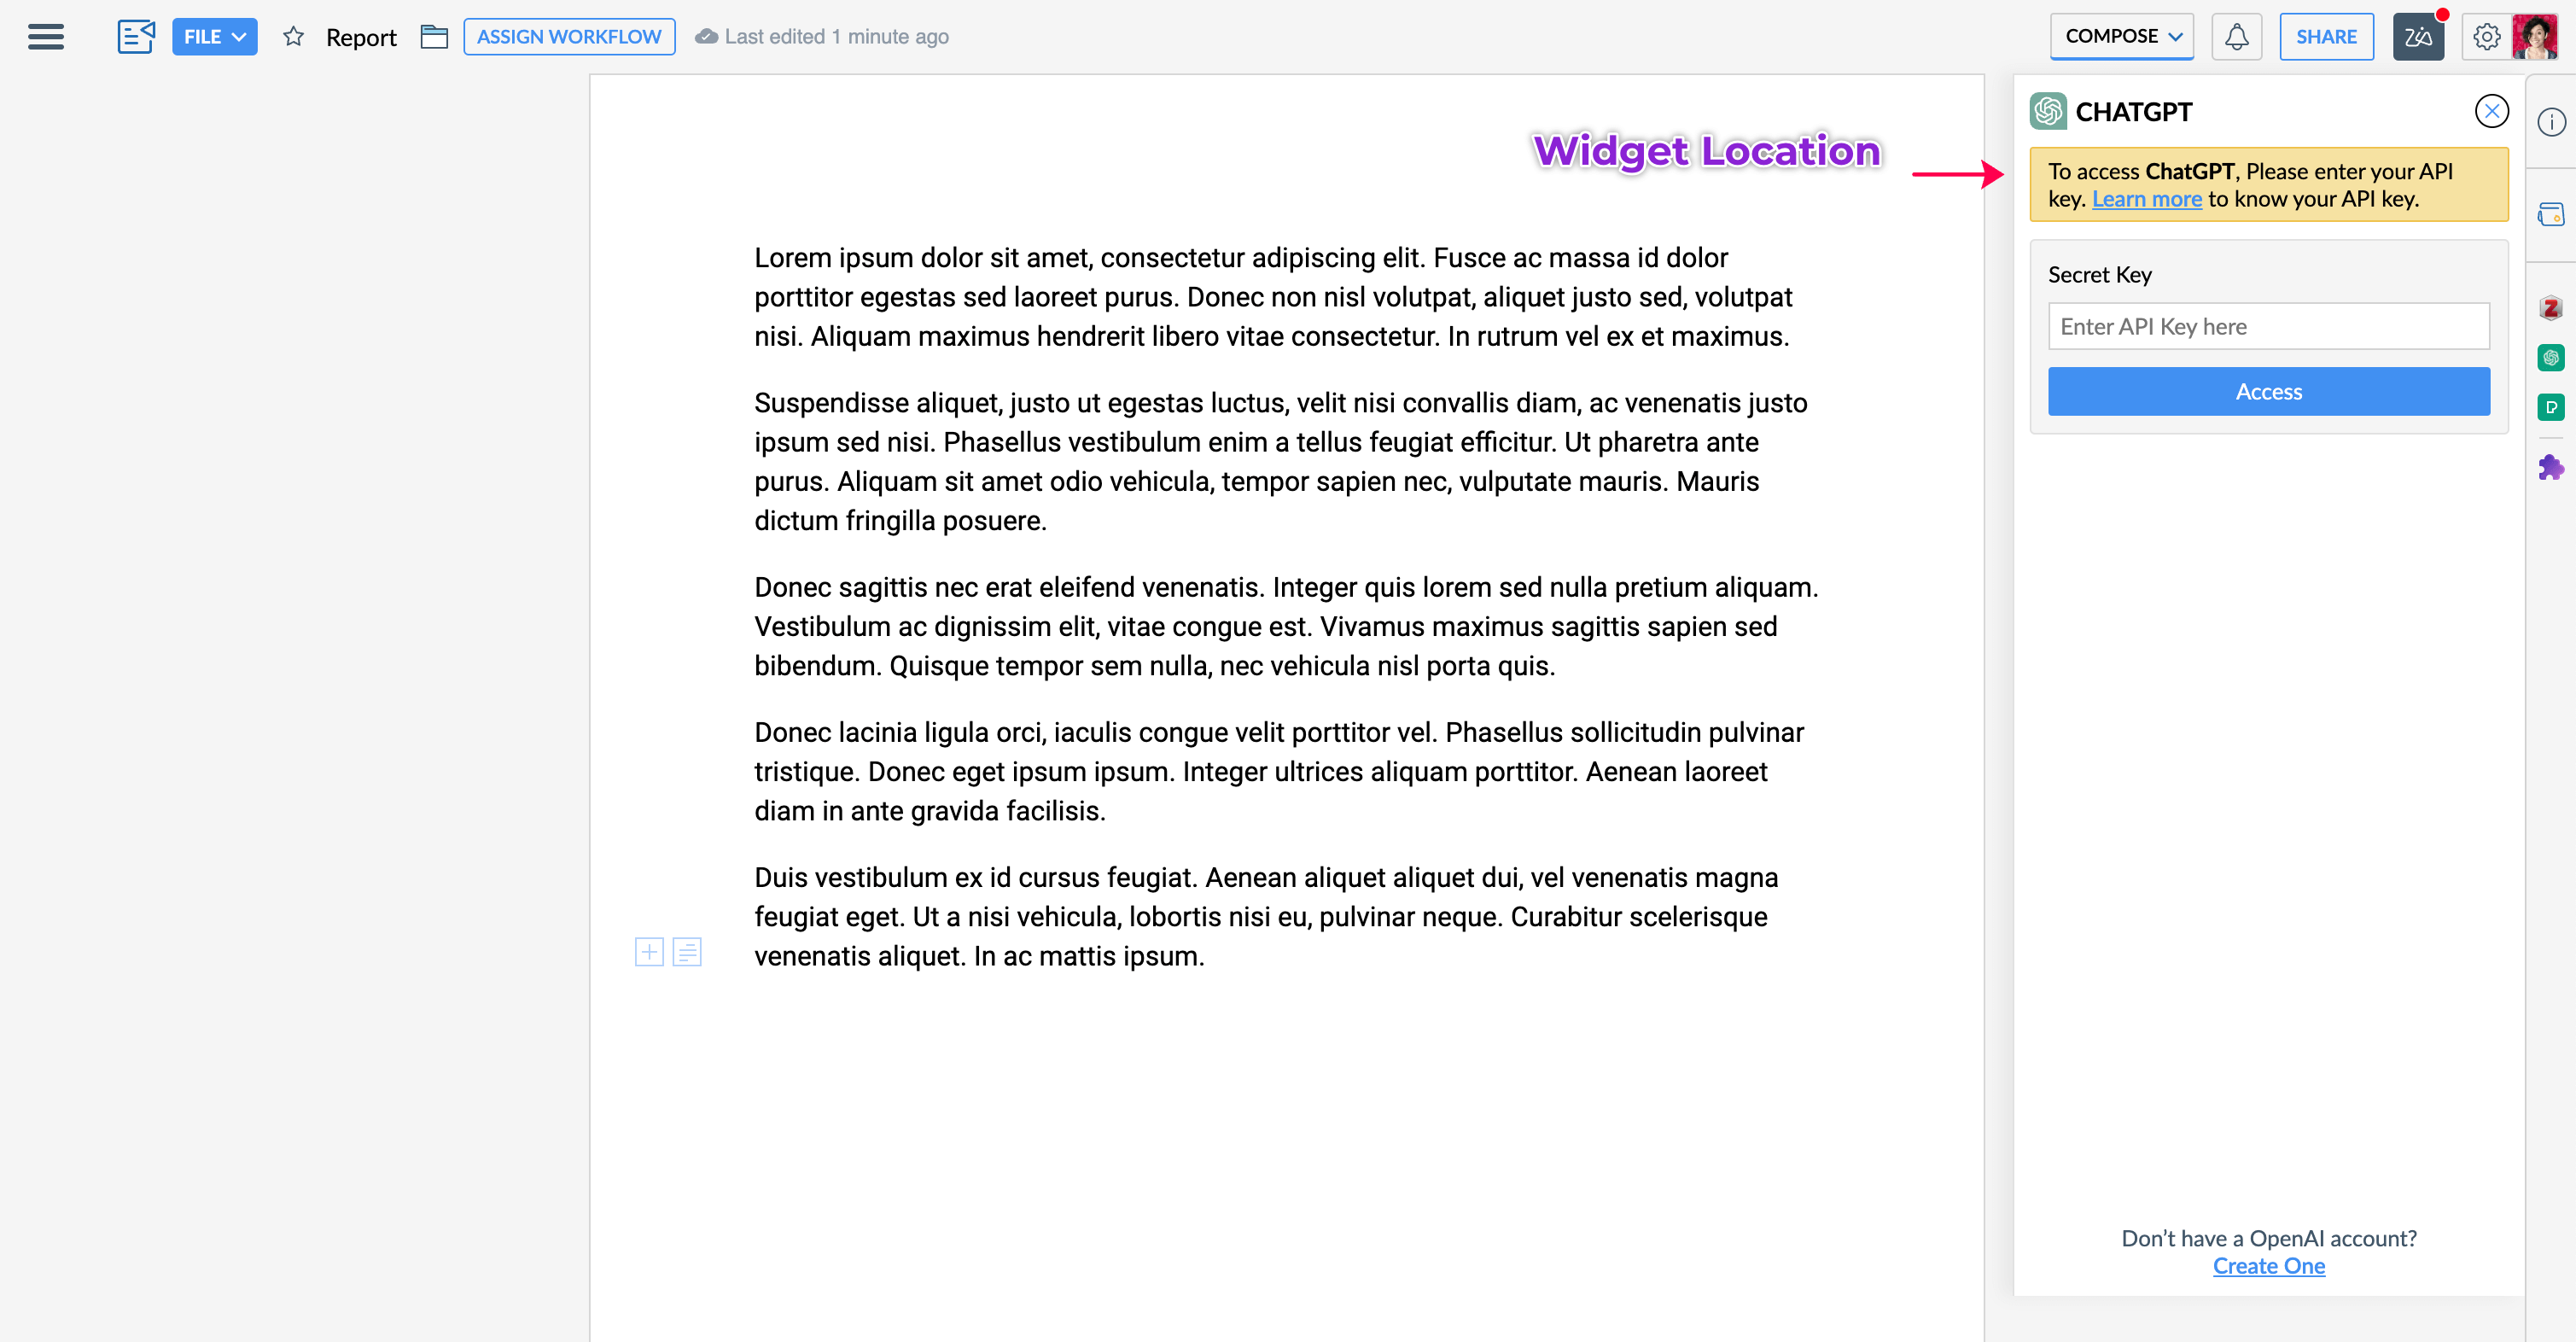
- Your widget appears based on its configured location
- Click Stop when done testing
Recommended File Structure
app/
├── writer-widget.html
├── css/
│   └── style.css
├── js/
│   └── script.js
└── img/
    ├── icon.png
    ├── logo.png
    └── other-images/
Best Practices
1. Keep It Simple
✓ Do: Build focused, single-purpose widgets that are easy to maintain.
✗ Avoid: Overloading a single widget with too many unrelated features.
2. Responsive Design
✓ Do: Ensure your widget works at different panel sizes.
✗ Avoid: Hard-coded pixel widths that break on smaller panels.
3. Always Use Relative Paths
✓ Do: Use src="js/script.js" for local resources.
✗ Avoid: Using src="/app/js/script.js" — the leading /app will cause load failures.
Troubleshooting
Problem: Widget not appearing in Writer
Solution: Verify the location is correctly specified in the manifest. Check that the widget url is correct and the HTML file exists.
Problem: Images not loading
Solution: Ensure images are stored in the img folder under app/ and that you are referencing them with relative paths.
Related Pages
Sample Widget Configuration
Copied{
  "service": "WRITER",
  "modules": {
    "widgets": [
      {
        "title": "Sample Widget",
        "name": "sample_widget",
        "icon": "img/icon.png",
        "logo": "img/logo.png",
        "location": "writer.extensions",
        "url": "writer-widget.html"
      }
    ]
  }
}
Multiple Widgets in One Extension
Copied{
  "modules": {
    "widgets": [
      {
        "title": "Widget 1",
        "name": "sample_widget_1",
        "icon": "img/icon1.png",
        "logo": "img/logo1.png",
        "location": "writer.extensions",
        "url": "widget1.html"
      },
      {
        "title": "Widget 2",
        "name": "sample_widget_2",
        "icon": "img/icon2.png",
        "logo": "img/logo2.png",
        "location": "writer.extensions.popup",
        "url": "widget2.html"
      }
    ]
  }
}