How to Integrate Zoho WorkDrive with Zoho Voice
Integrating Zoho Voice with WorkDrive provides a centralized storage system for your call recordings and voicemails. During setup, a WorkDrive Team folder (drive) is mapped to your Zoho Voice account, enabling organized storage of recordings in designated locations.
For example, if you are part of both the support and sales teams, you may belong to multiple Team folders in WorkDrive. Once integrated, you can map these drives to your Zoho Voice account so that recordings from each queue (e.g., Support or Sales) are stored in their respective WorkDrive folders. This ensures clear separation and organization of recordings.
Note
- You can add up-to 10 folders to your Zoho Voice account.
- If you do not have a Zoho WorkDrive account, follow these steps. Otherwise, skip and proceed to integration.
- A super admin or admin in Zoho Voice must set up the WorkDrive account. Since the integration supports only one WorkDrive account per Zoho Voice organization, it is recommended to use a super admin account for configuration.
Create and Use Zia Hubs Folder
Note
Zia Hubs is currently available in beta. Visit this page to request early access.
Before integrating with Zoho Voice, it is recommended to create a Zia Hubs folder in your WorkDrive account to store your recordings and voicemails, as it enables content intelligence and allows you to interact with and extract insights from your files.
You can choose to skip this step and create folders during the integration process if needed.
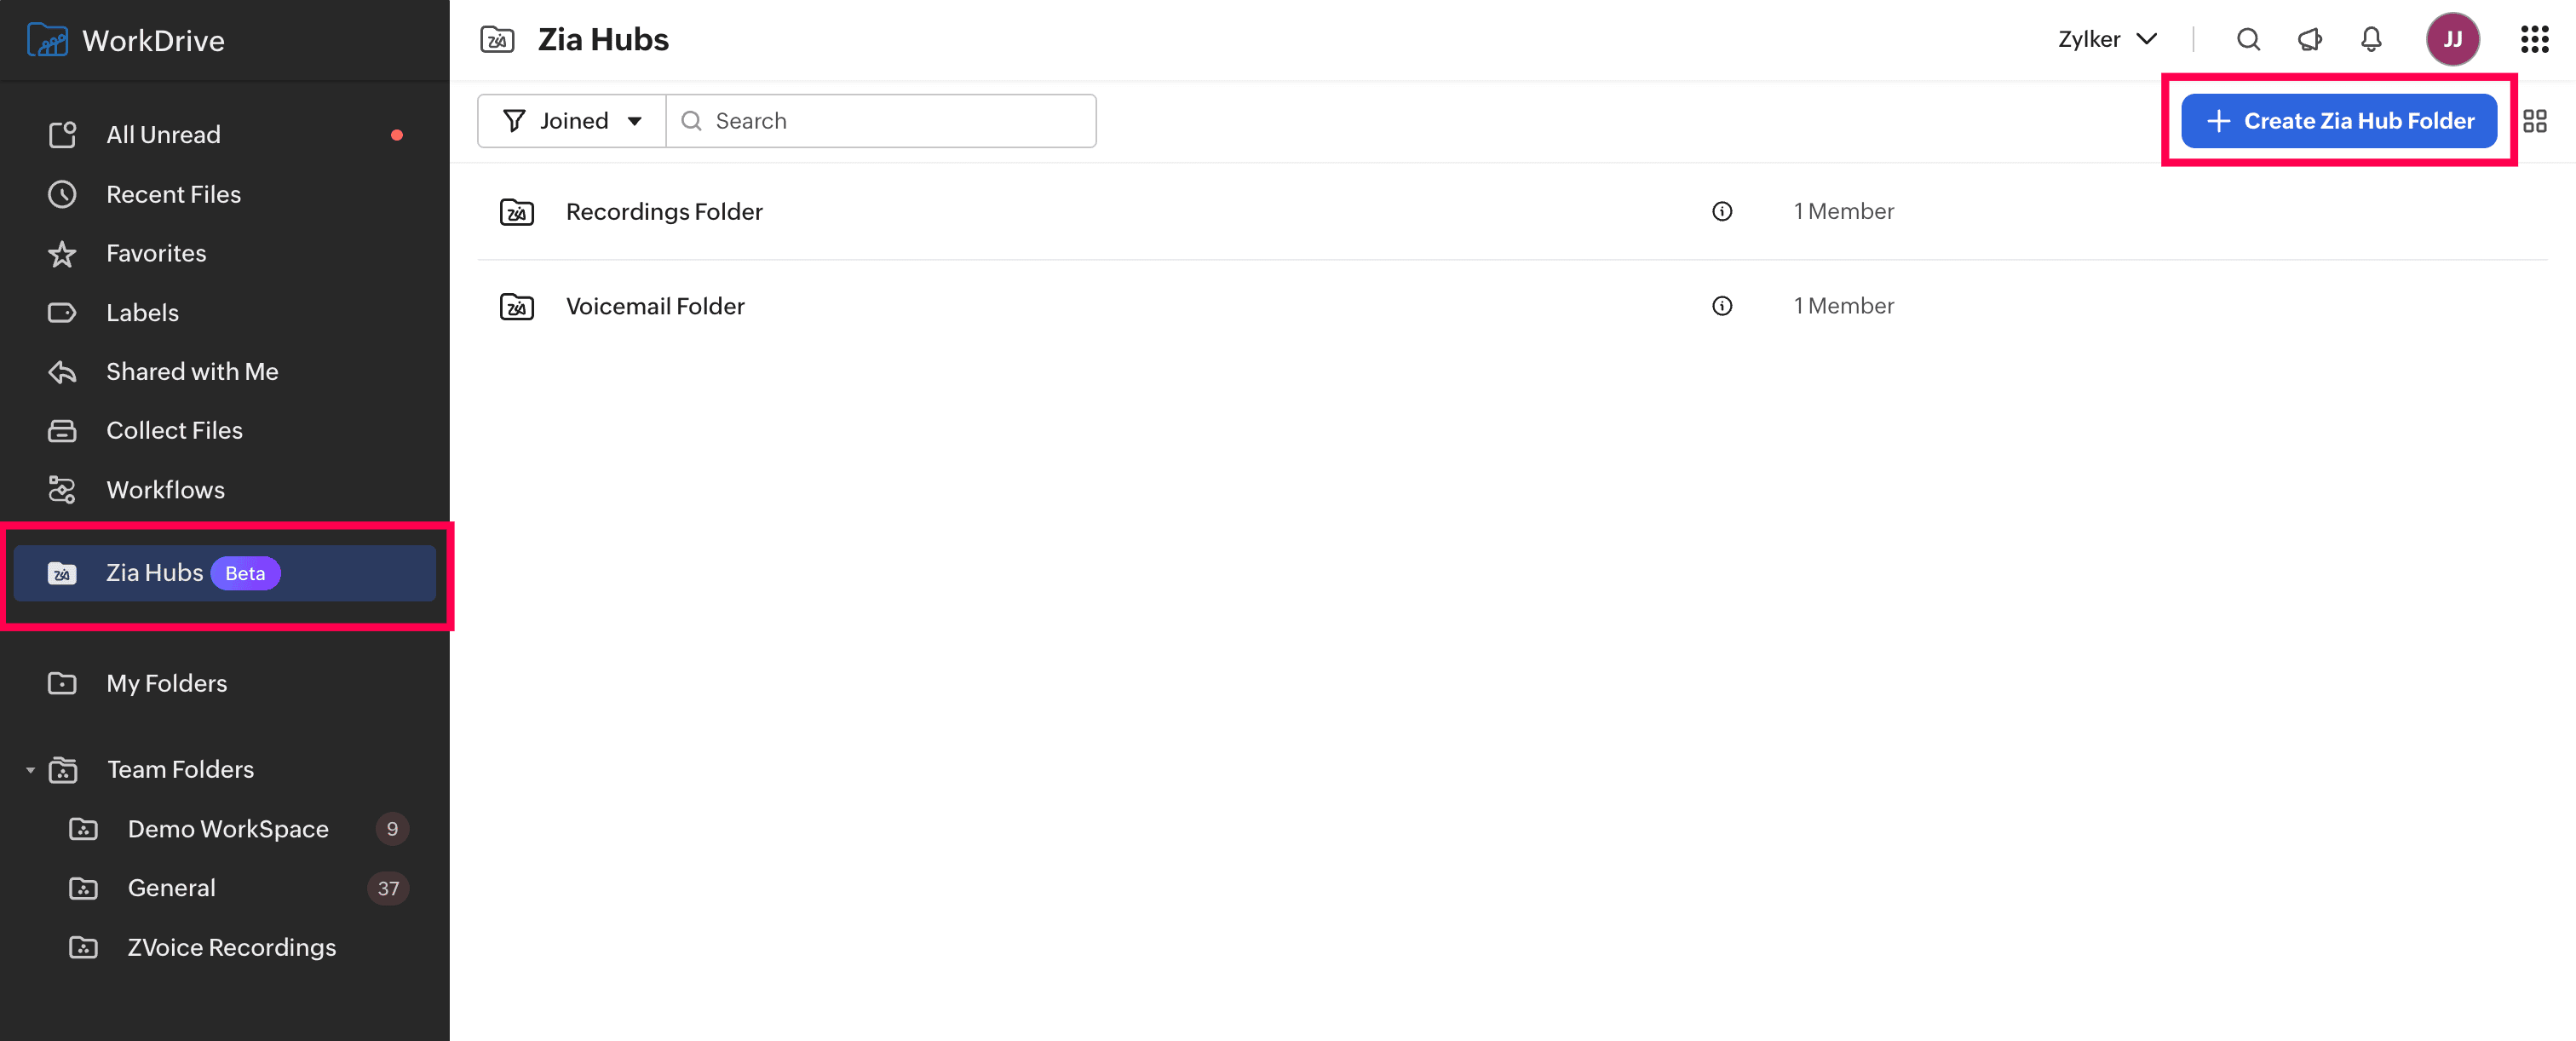
In your WorkDrive account, select Zia Hubs from the left panel.
Click Create Zia Hub Folder.

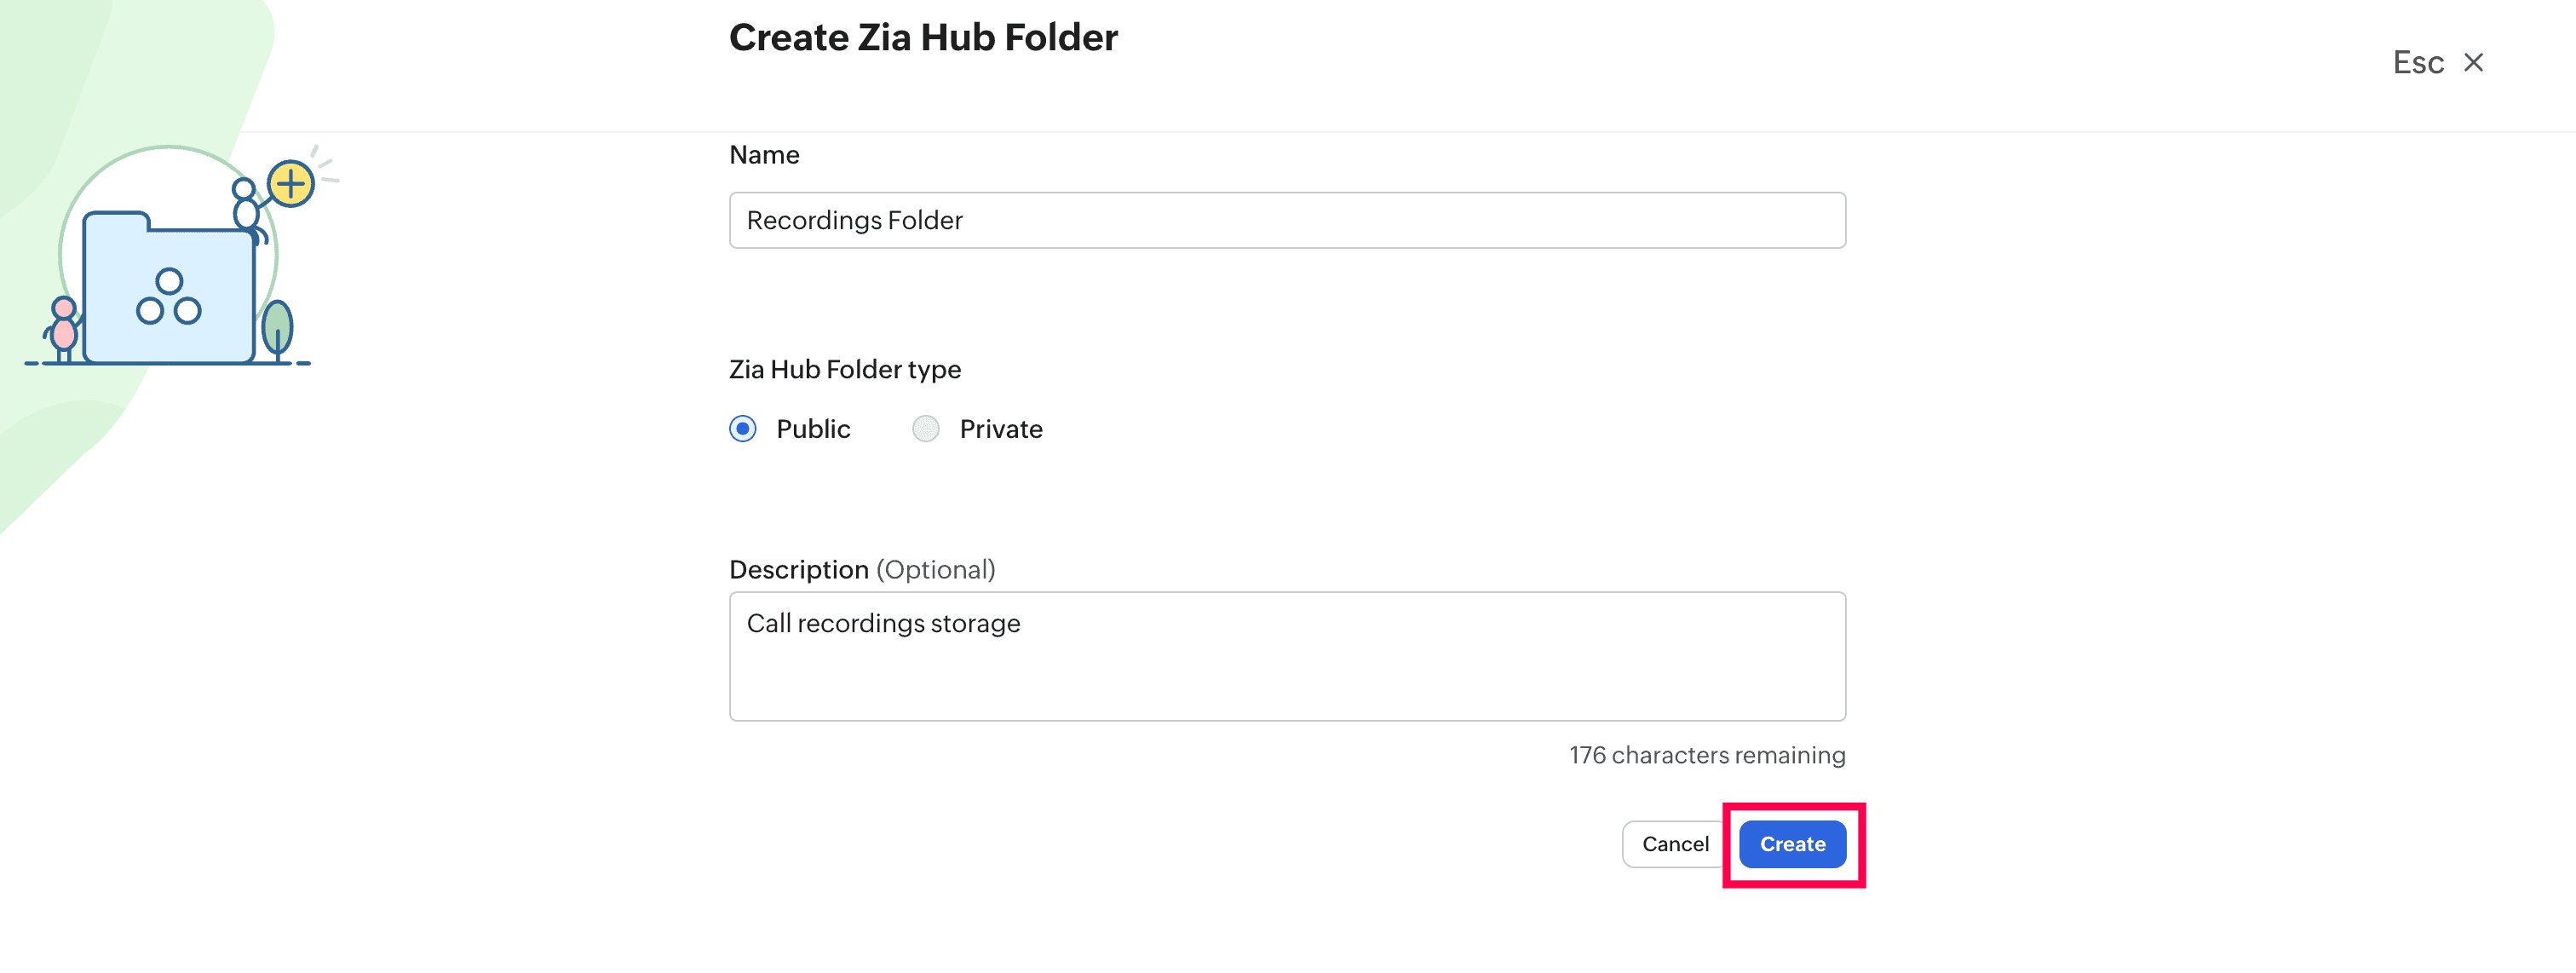
Enter a folder name, choose the type (Public or Private), add a description if needed, and click Create.
Once created, the folder will be available for selection during integration.

Add members to a Zia Hub folder:
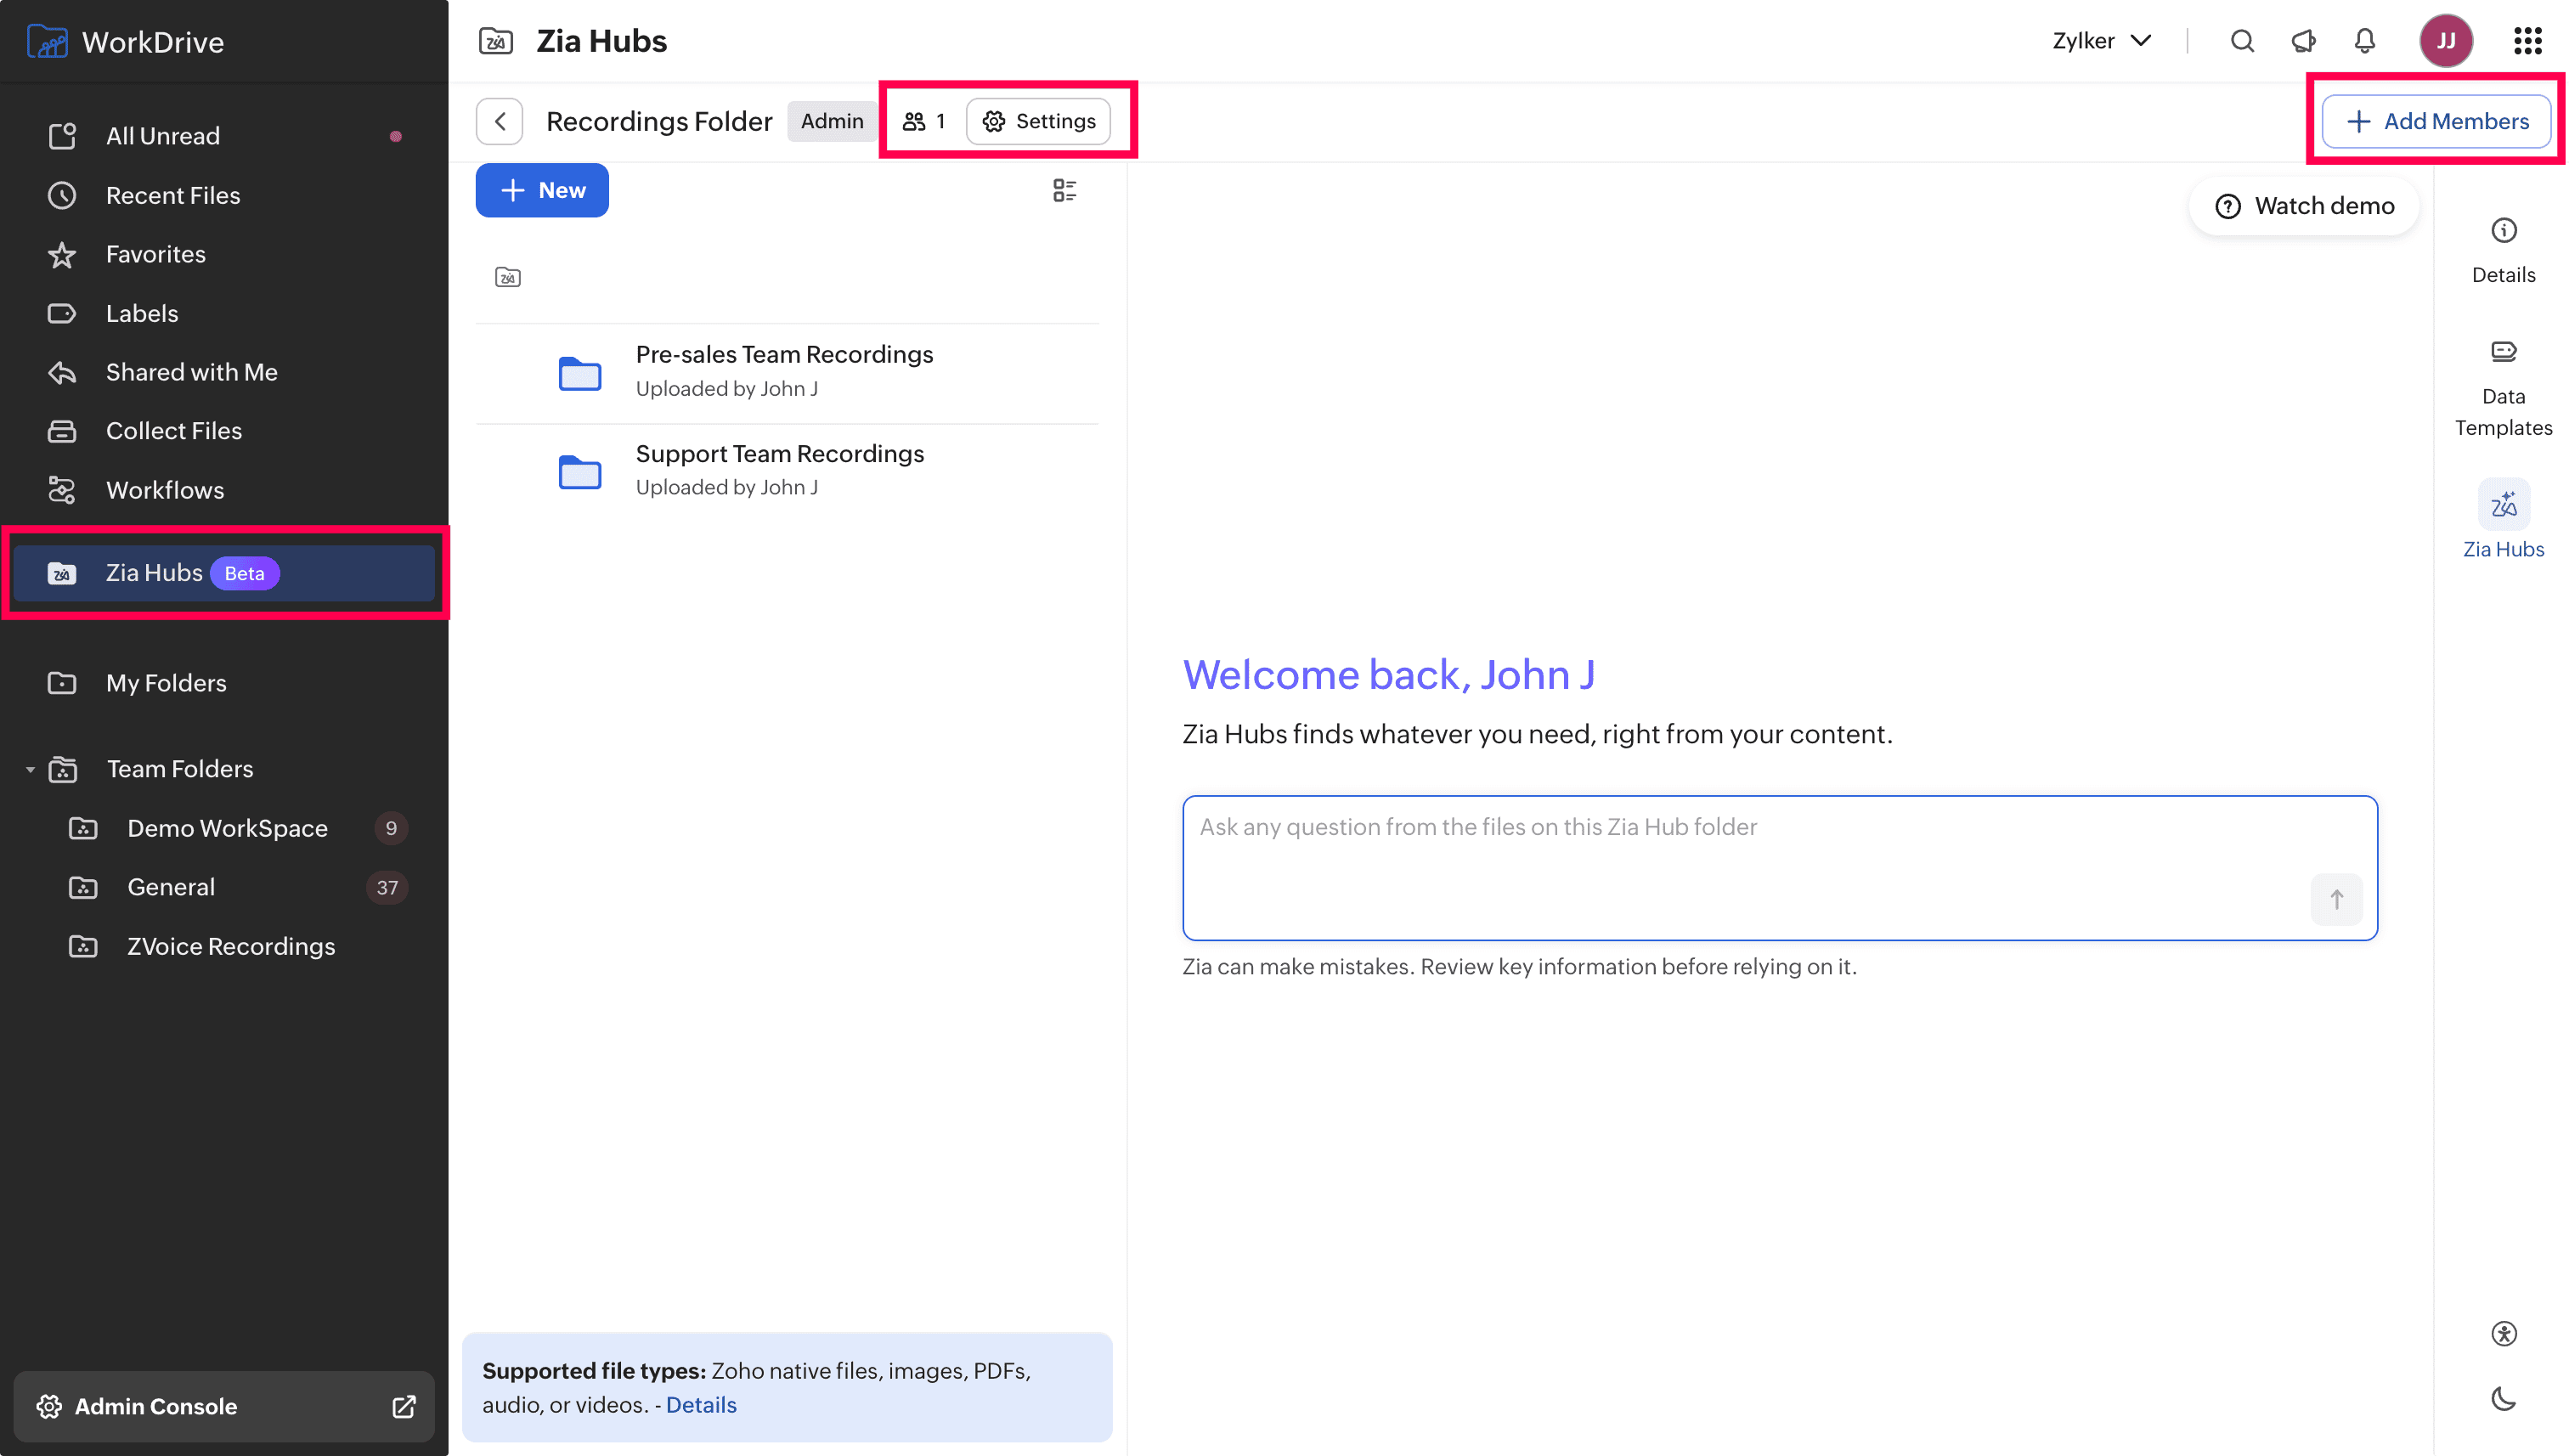
Open the Zia Hub folder.
Click the Settings icon and go to the Members tab, or click Add Members from the right panel in your Zia Hub folder.

Enter user email addresses.
Assign roles from the dropdown (Admin, Organizer, Editor, Commenter, Viewer). Users with admin, organizer, or editor roles can perform on-demand uploads of call recordings and voicemails from Zoho Voice to the selected drive.
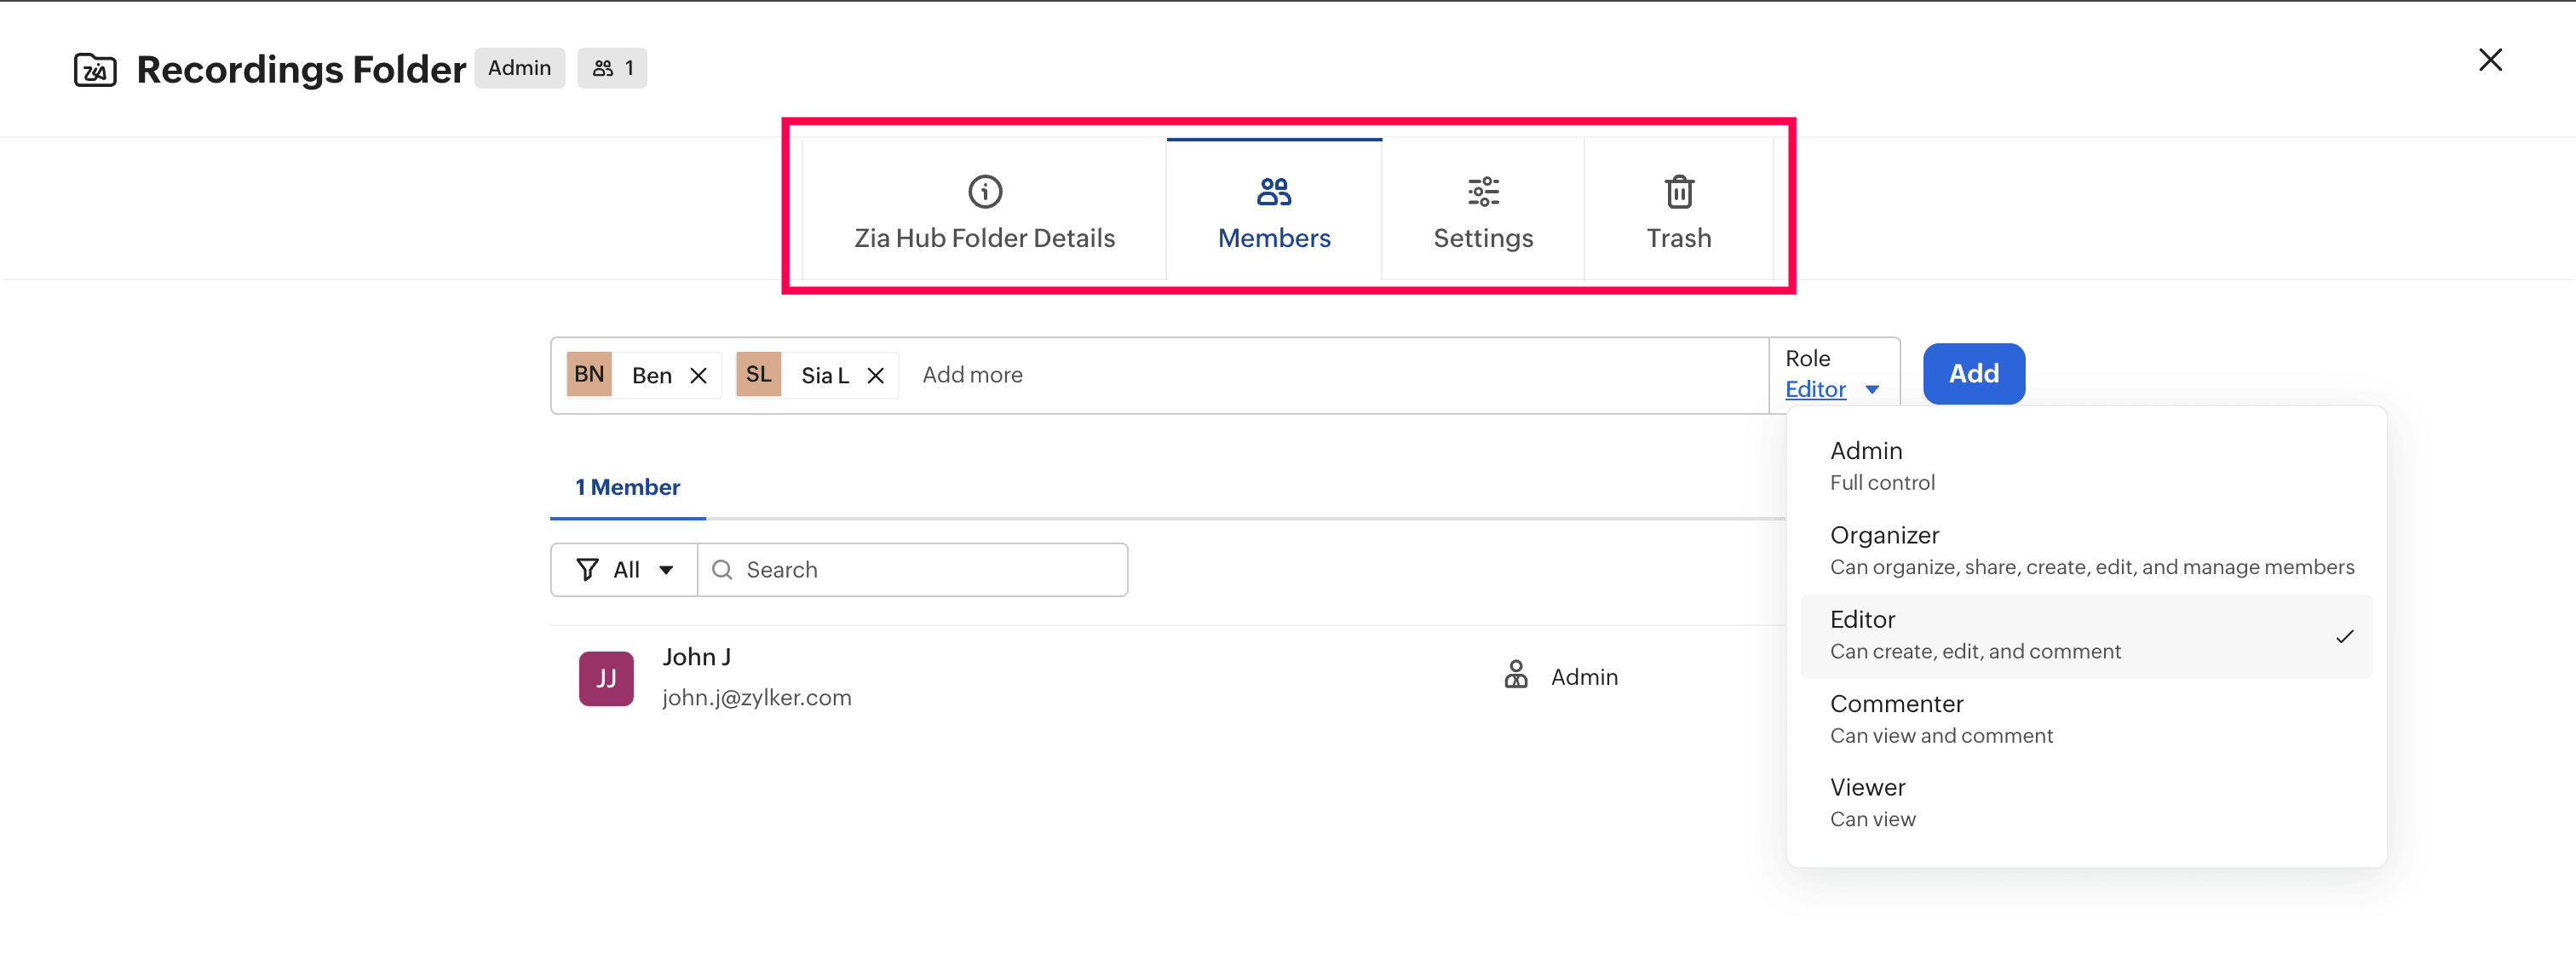
Click Add.

Note
All Zoho Voice users who are added as members in your WorkDrive account must have access to the selected folder to view and access the files.
Edit folder details:
Open the folder, click the Settings icon, and navigate to Zia Hub Folder Details tab to update the name or description.


How to Integrate WorkDrive with Zoho Voice
Once your folders are set up in WorkDrive, follow these steps to setup the integration:
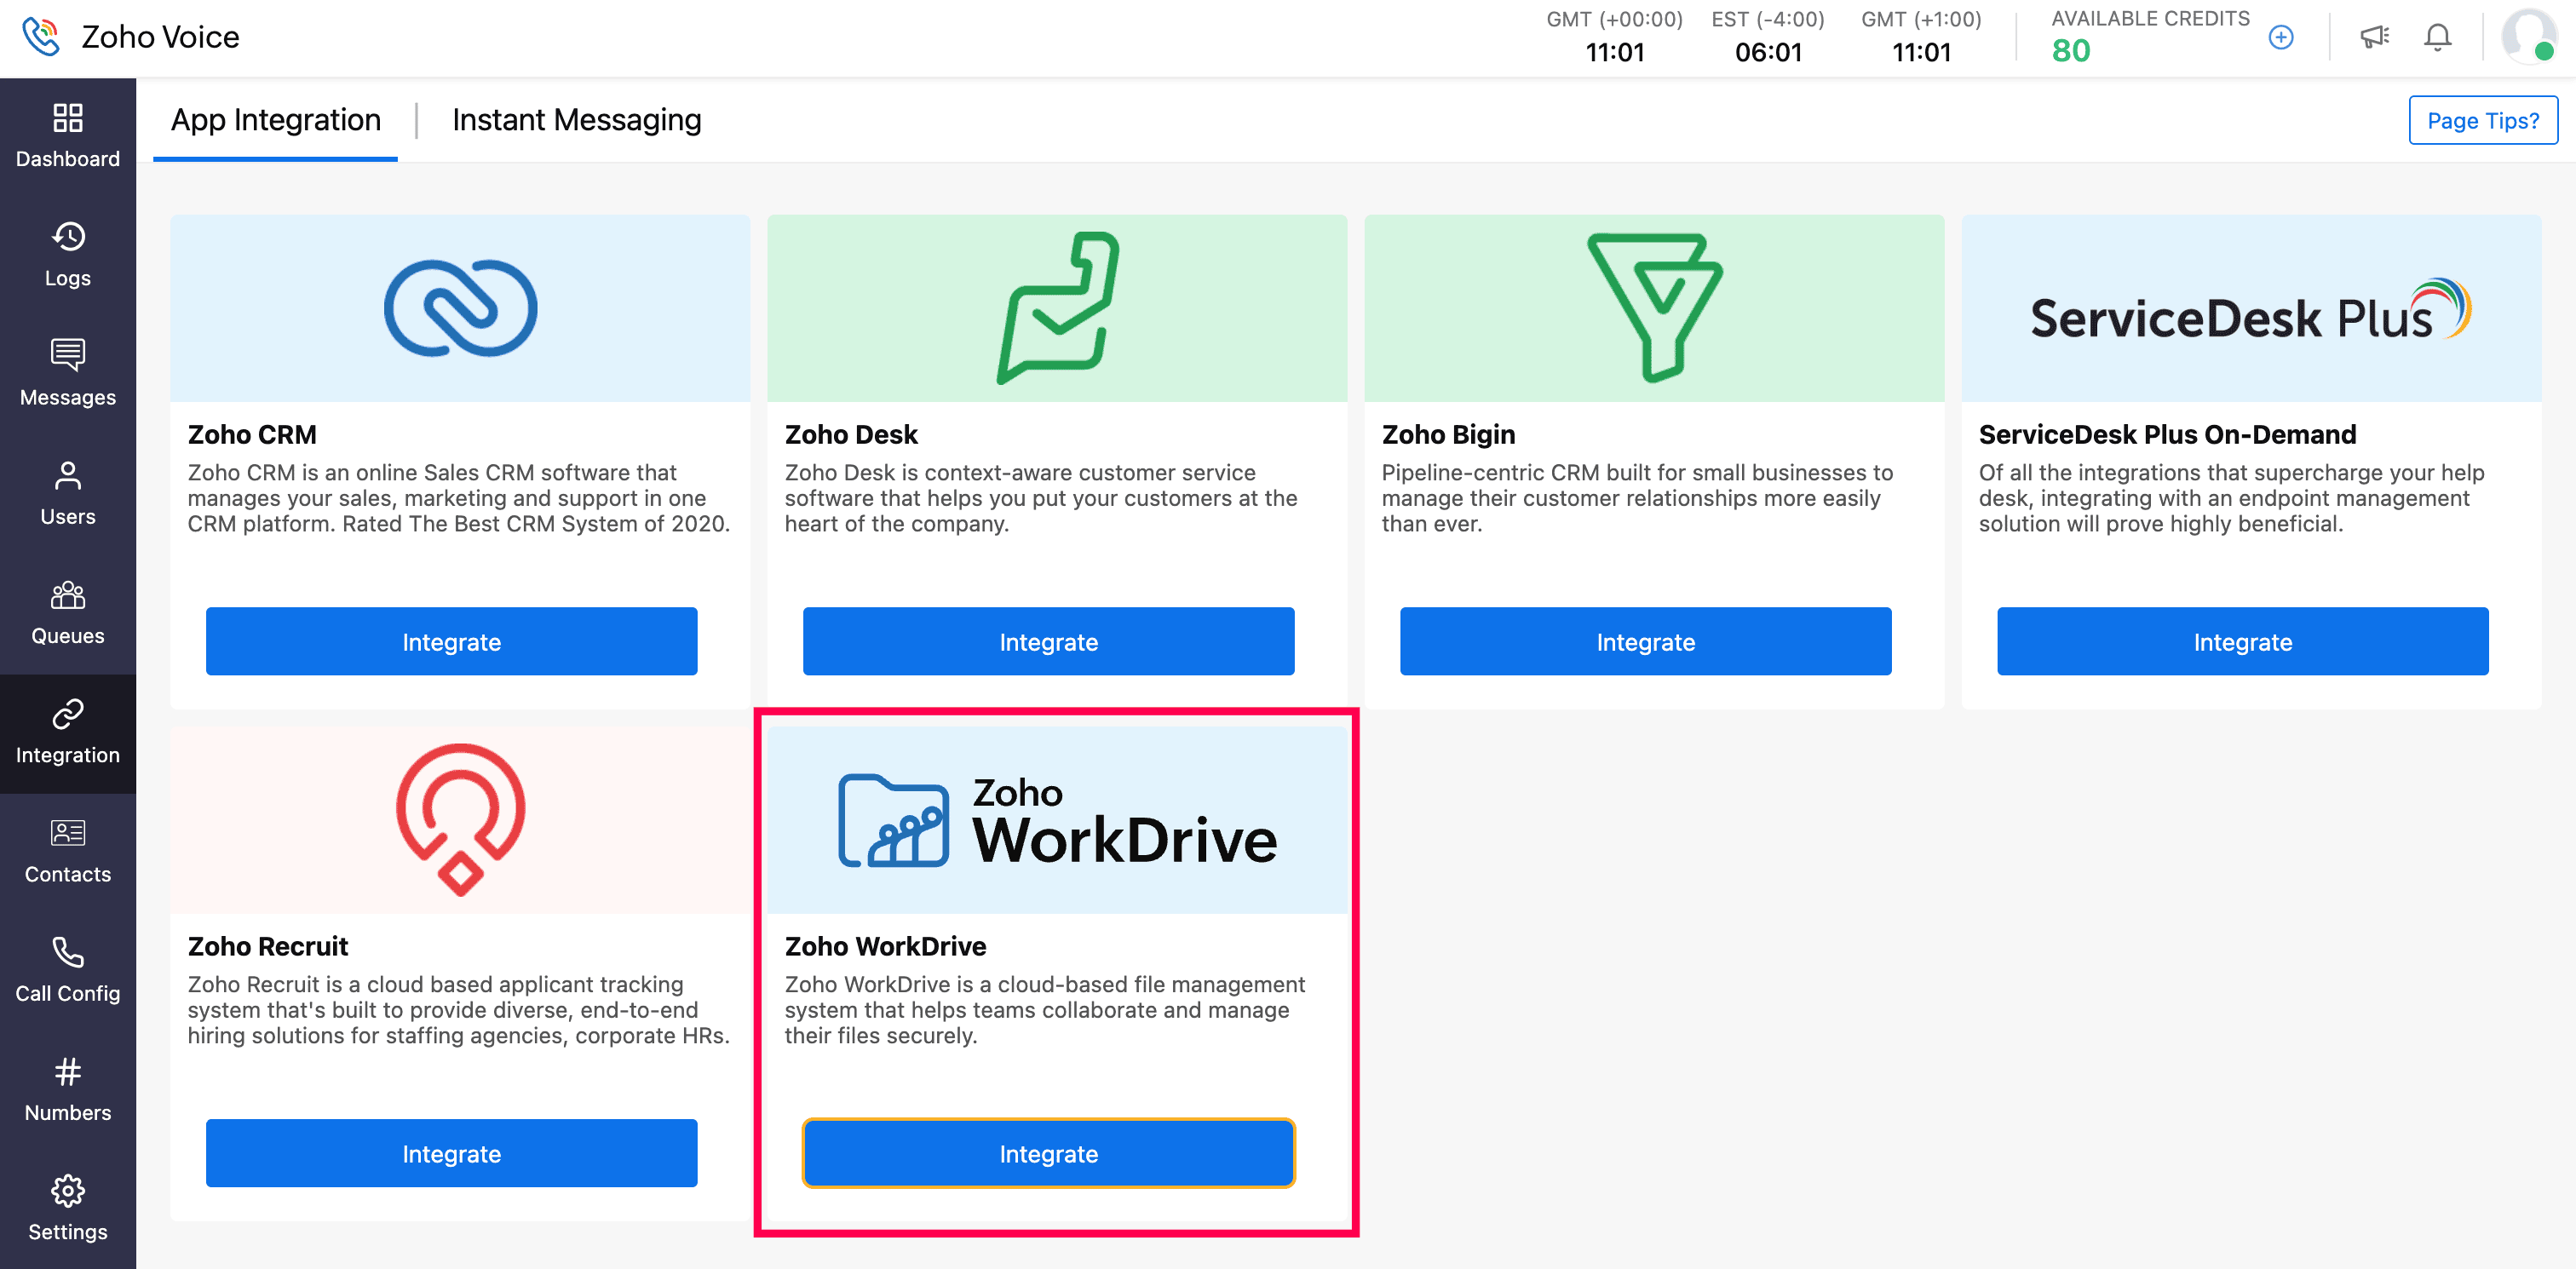
Go to the Integration module in your Zoho Voice account.
Under App Integrations, click Integrate for Zoho WorkDrive.
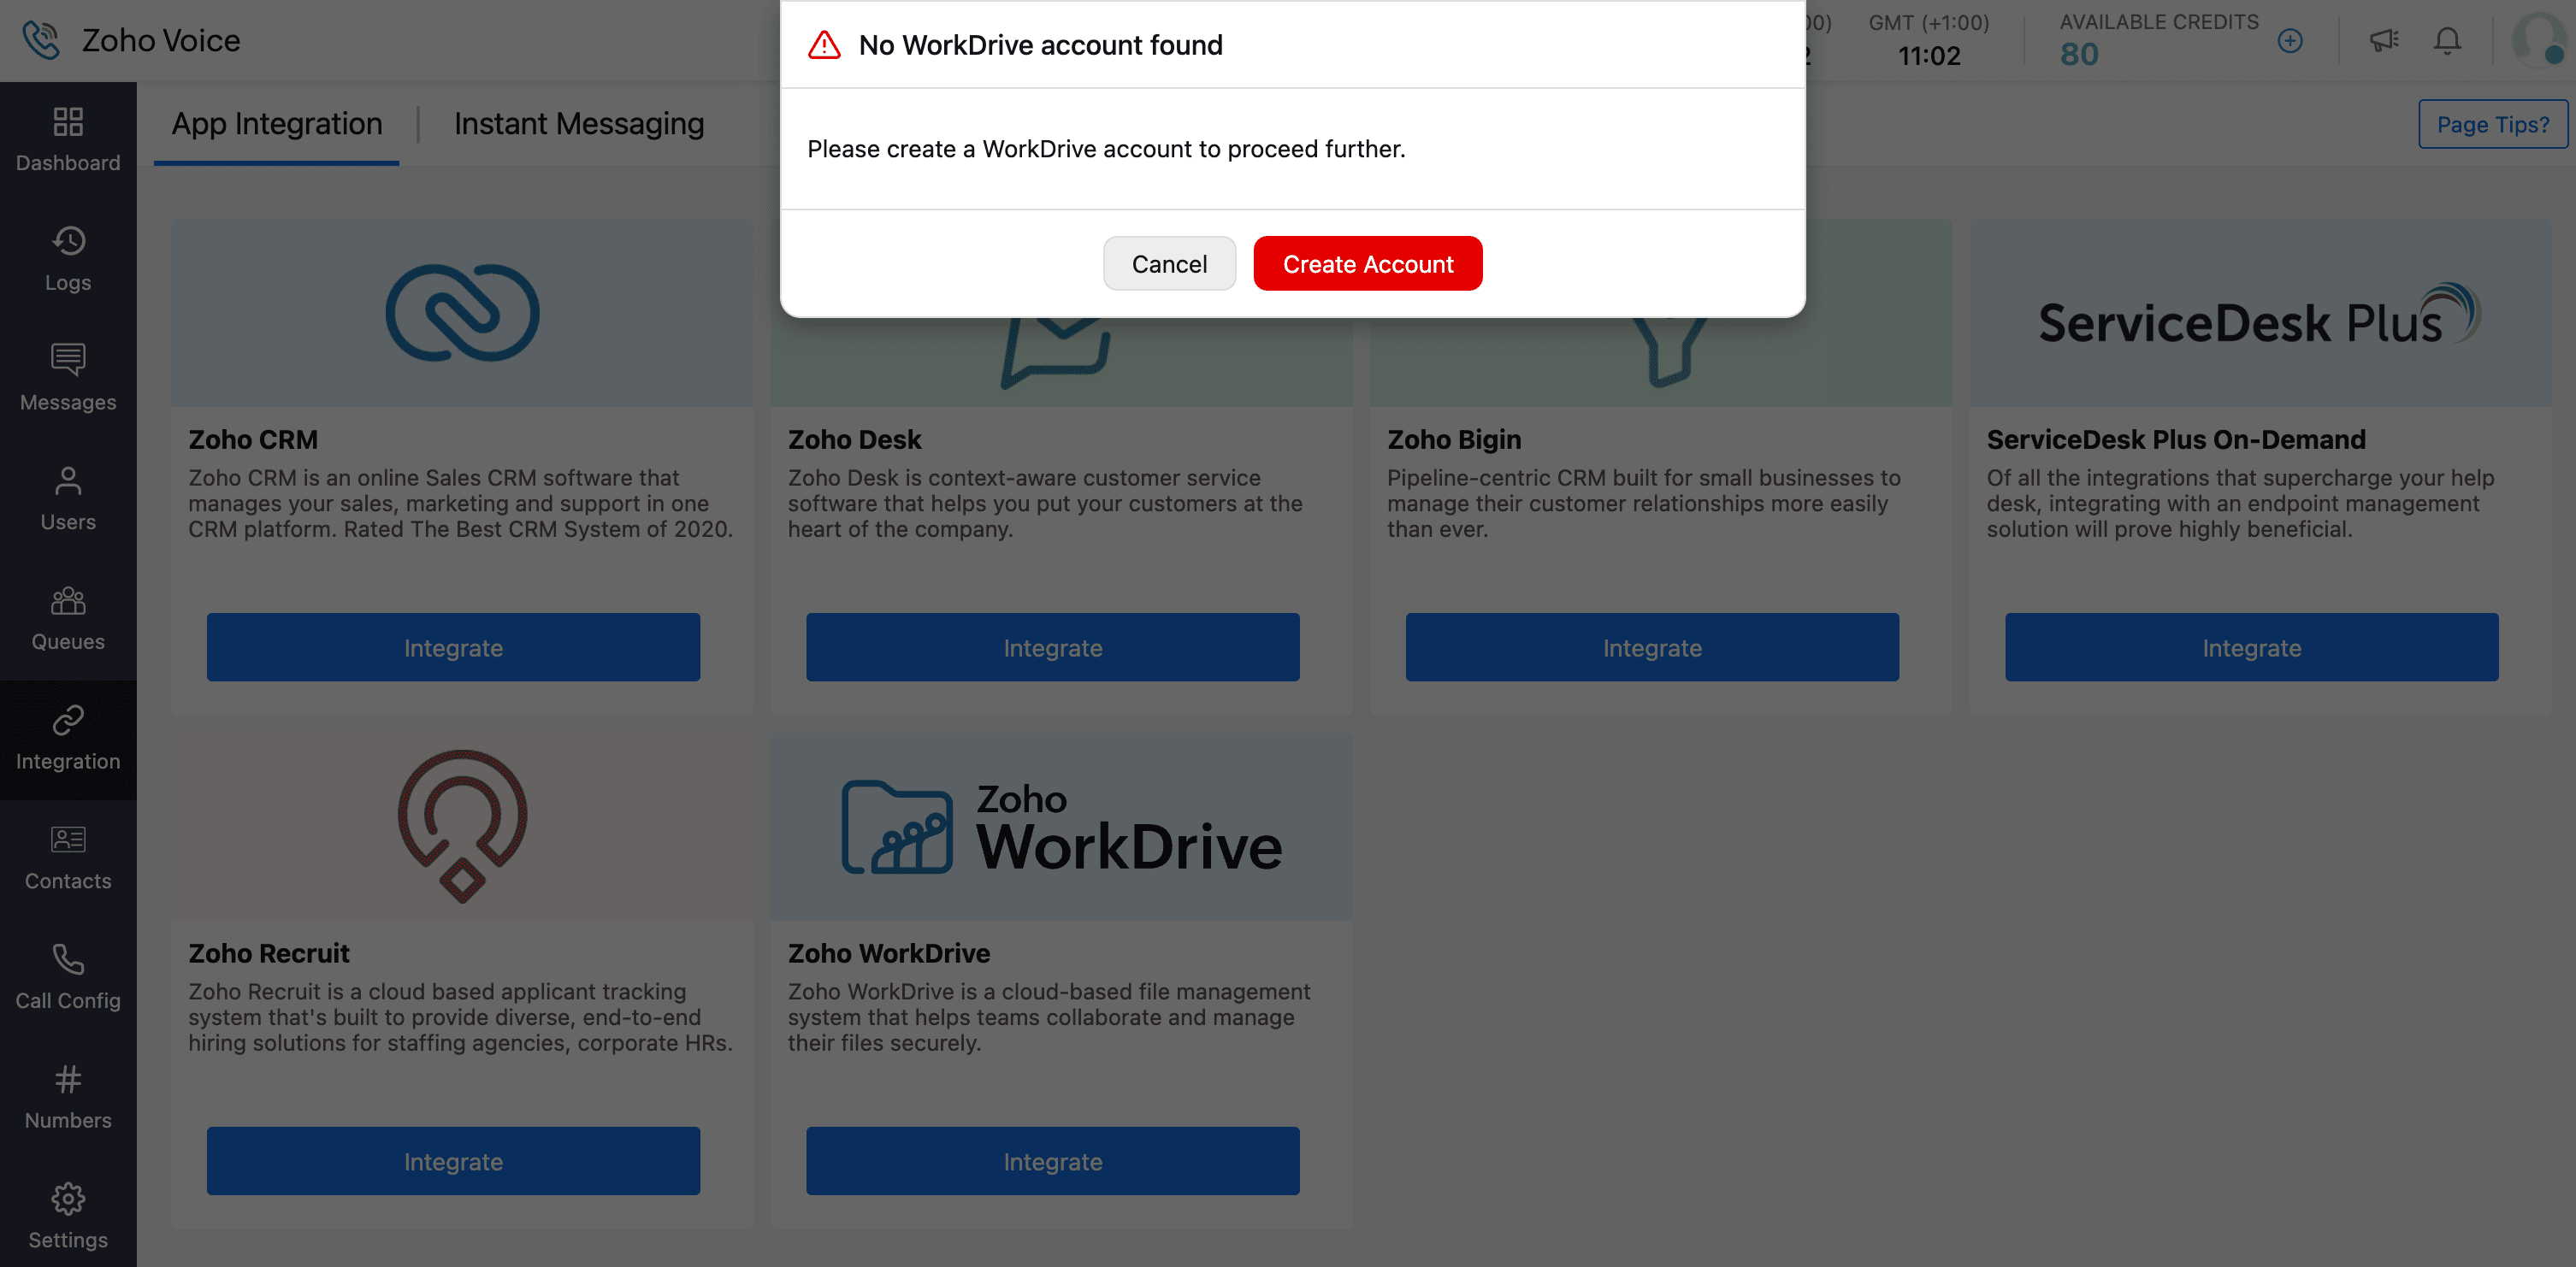
If you don’t have a WorkDrive account, you’ll be prompted to create one. Click Create Account, complete the setup, create a folder (Zia Hubs folder recommended) and continue with the remaining steps.
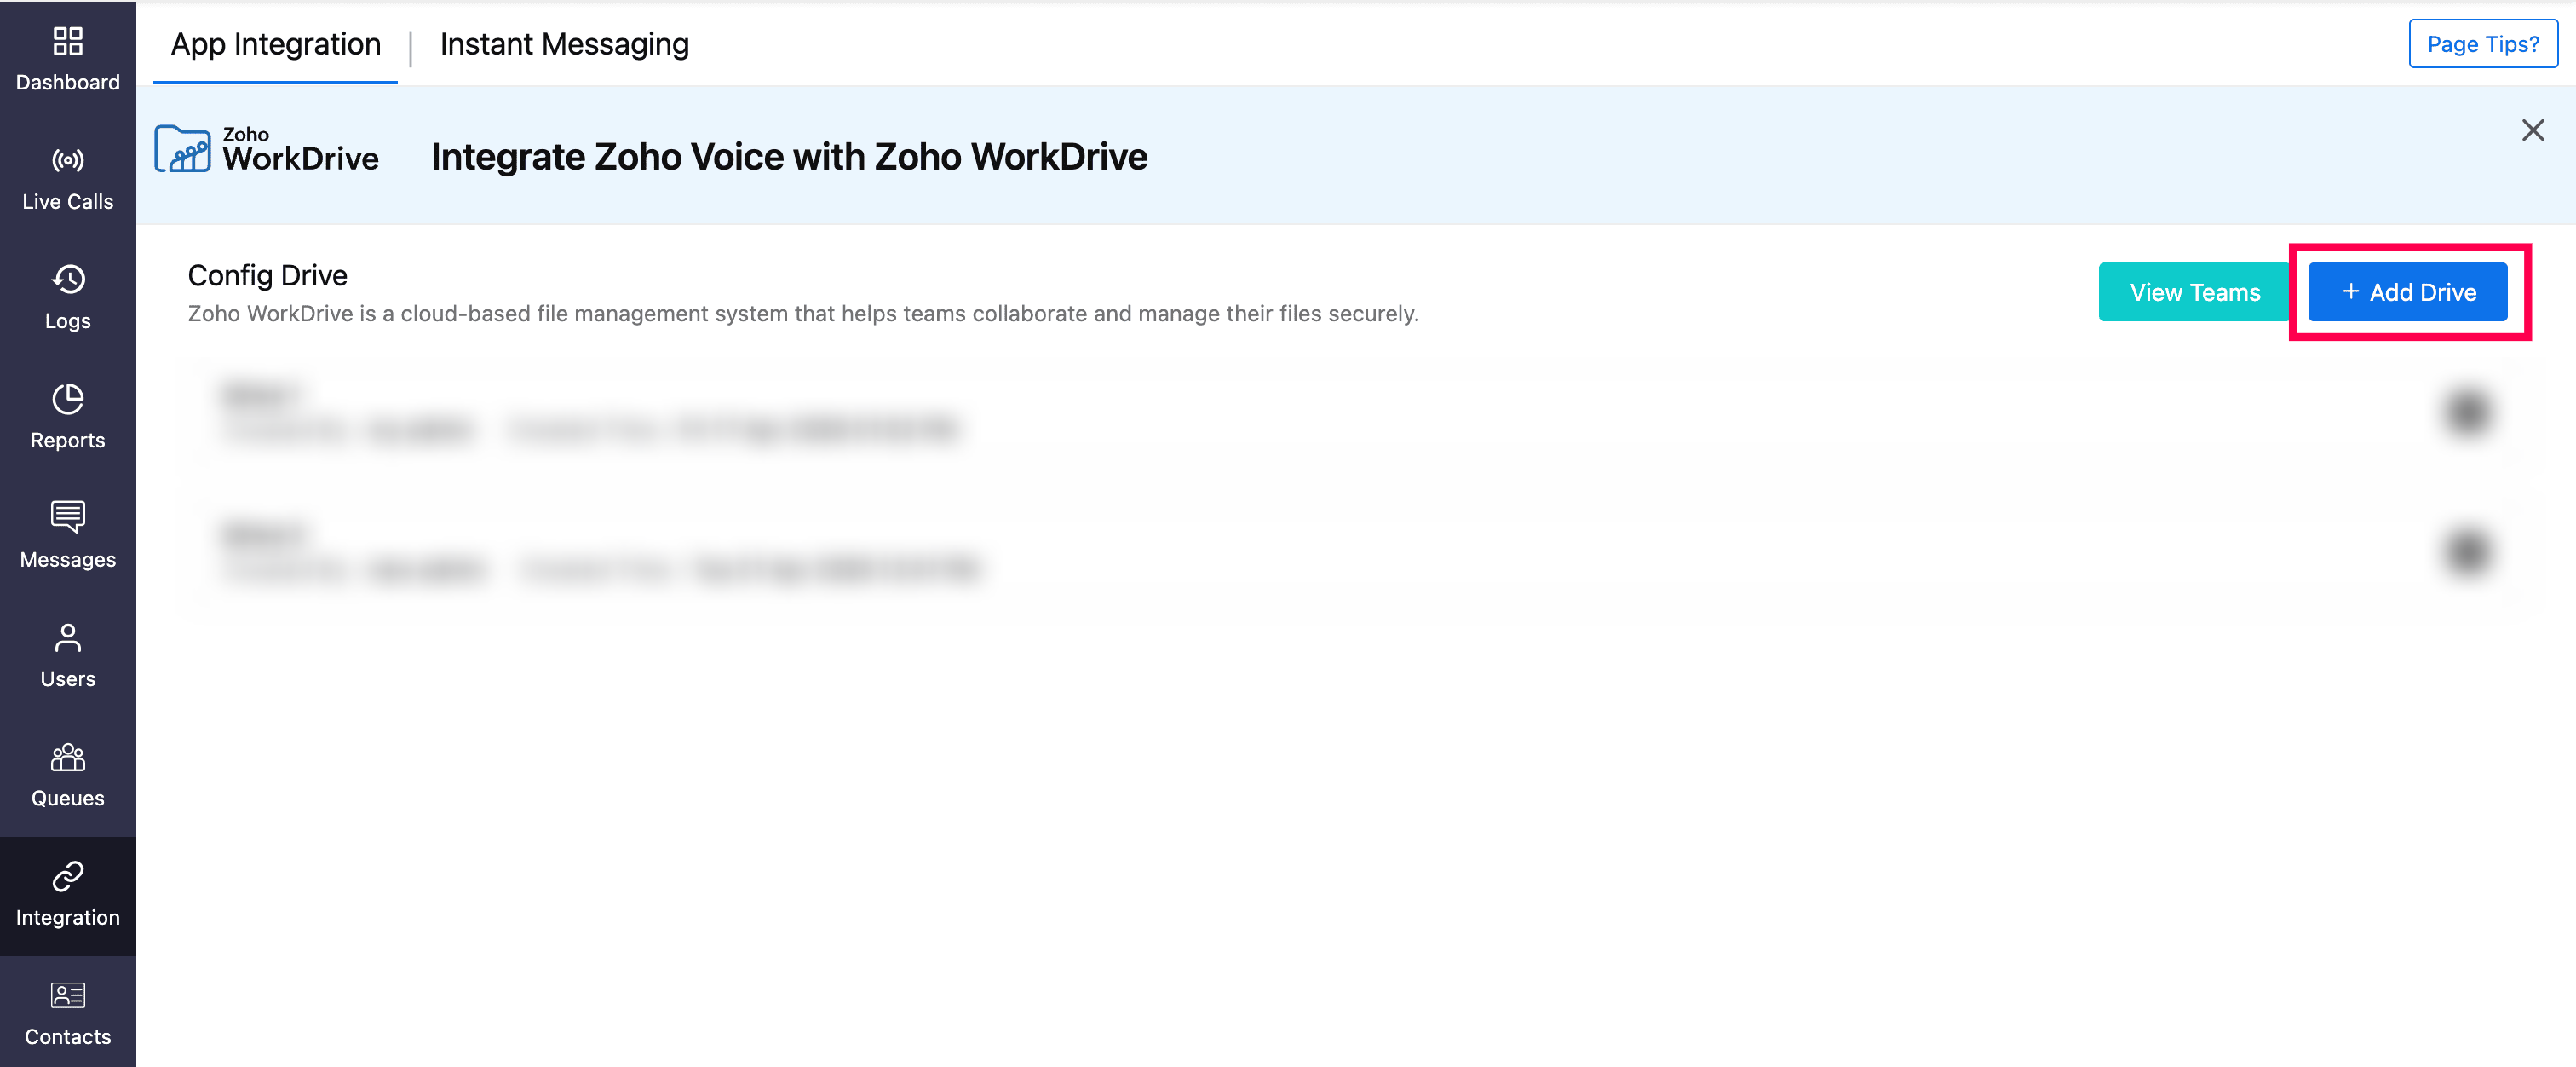
Click Add Drive.
Enter a name for the drive.
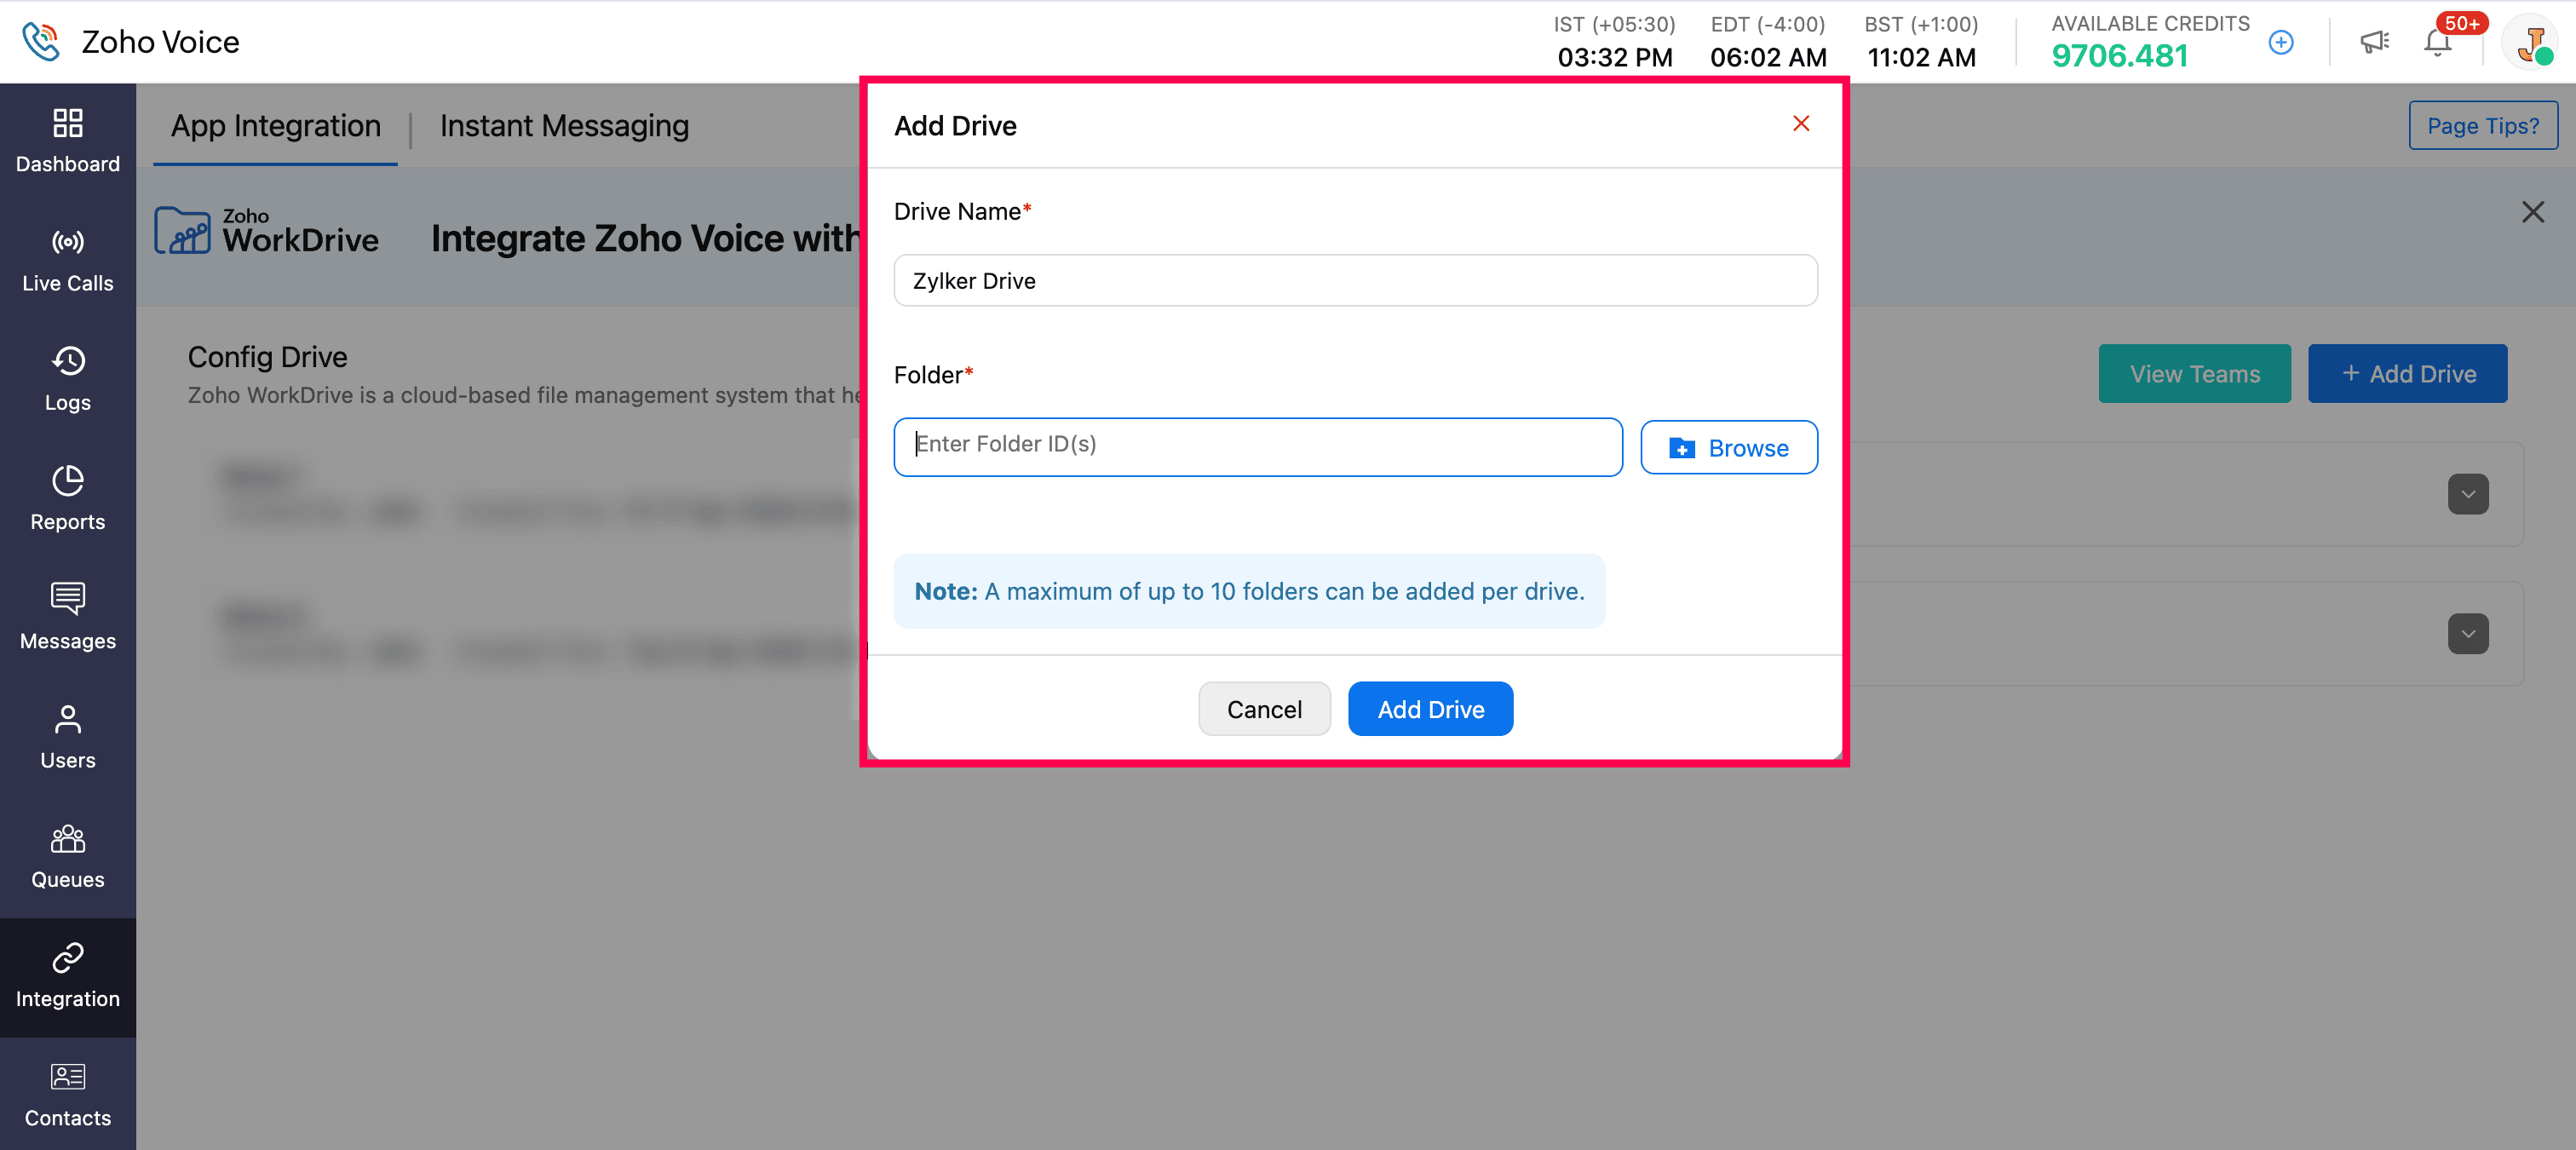


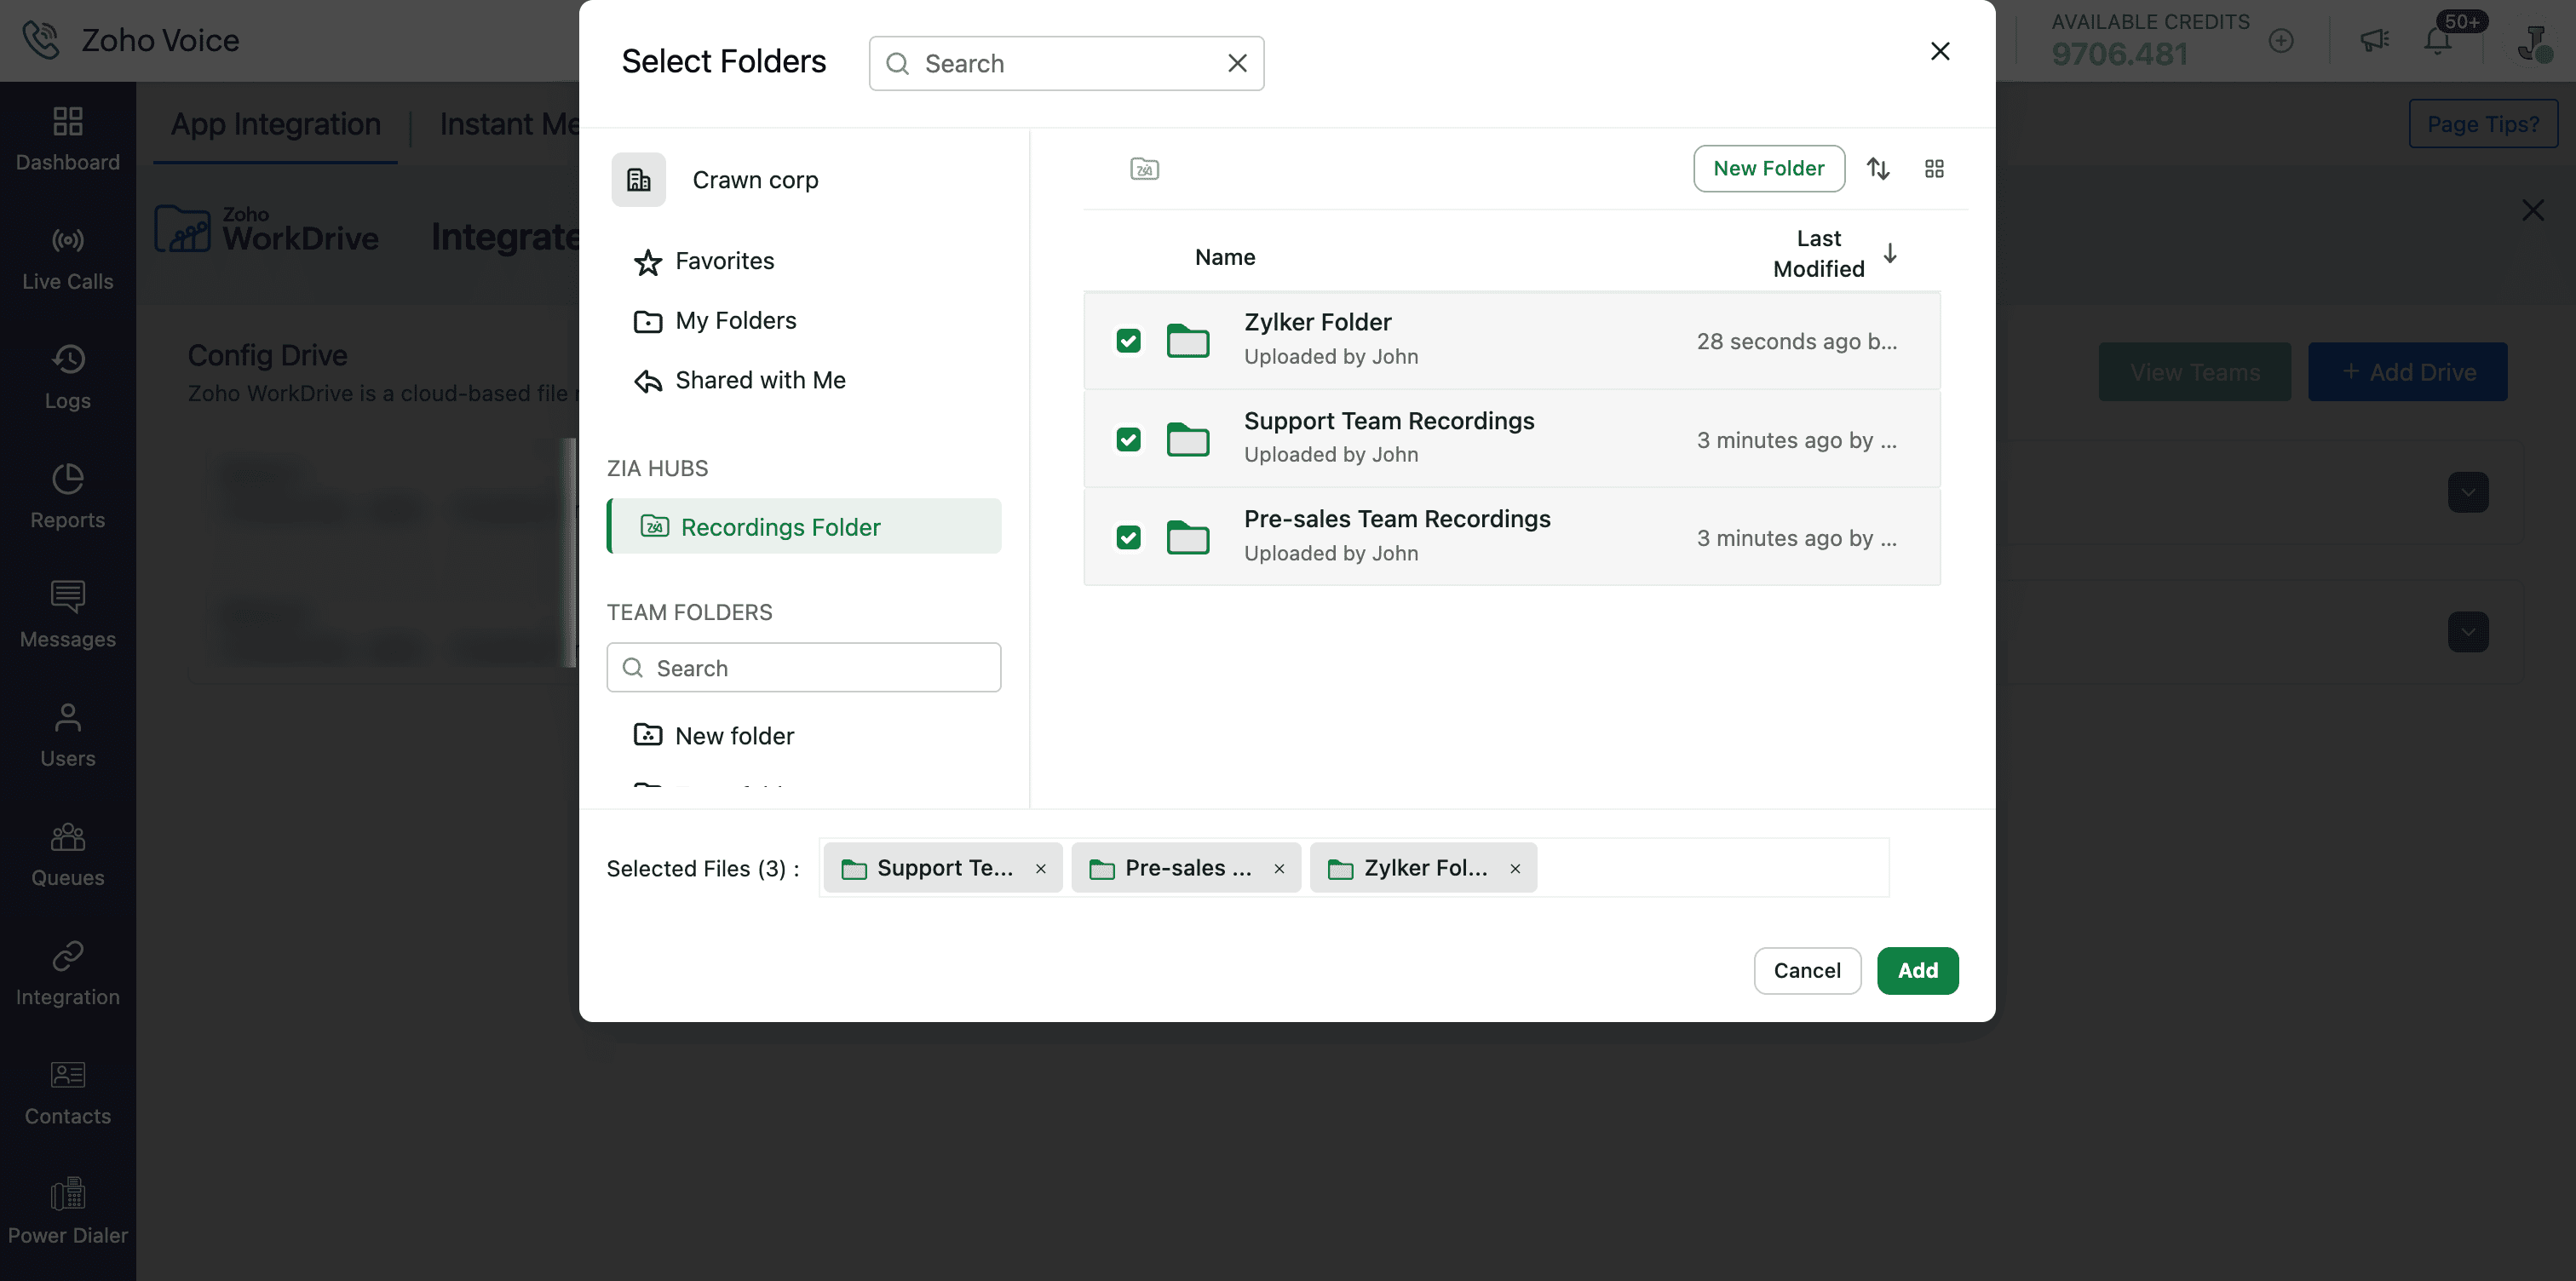
Select the Folder ID using one of the following methods:
Paste the unique identifier (ID) from your WorkDrive folder URL
Select a folder using the Browser picker.
To use the picker, click the Browse, select the required Zia Hubs folder, and click Add.
Note
- You can add up to 10 folders per drive and a maximum of 4 drives.
- You can also create a new folder by clicking New Folder in the top-right corner of the pop-up.
Click Add Drive.


To view all of your WorkDrive teams, click View Teams.

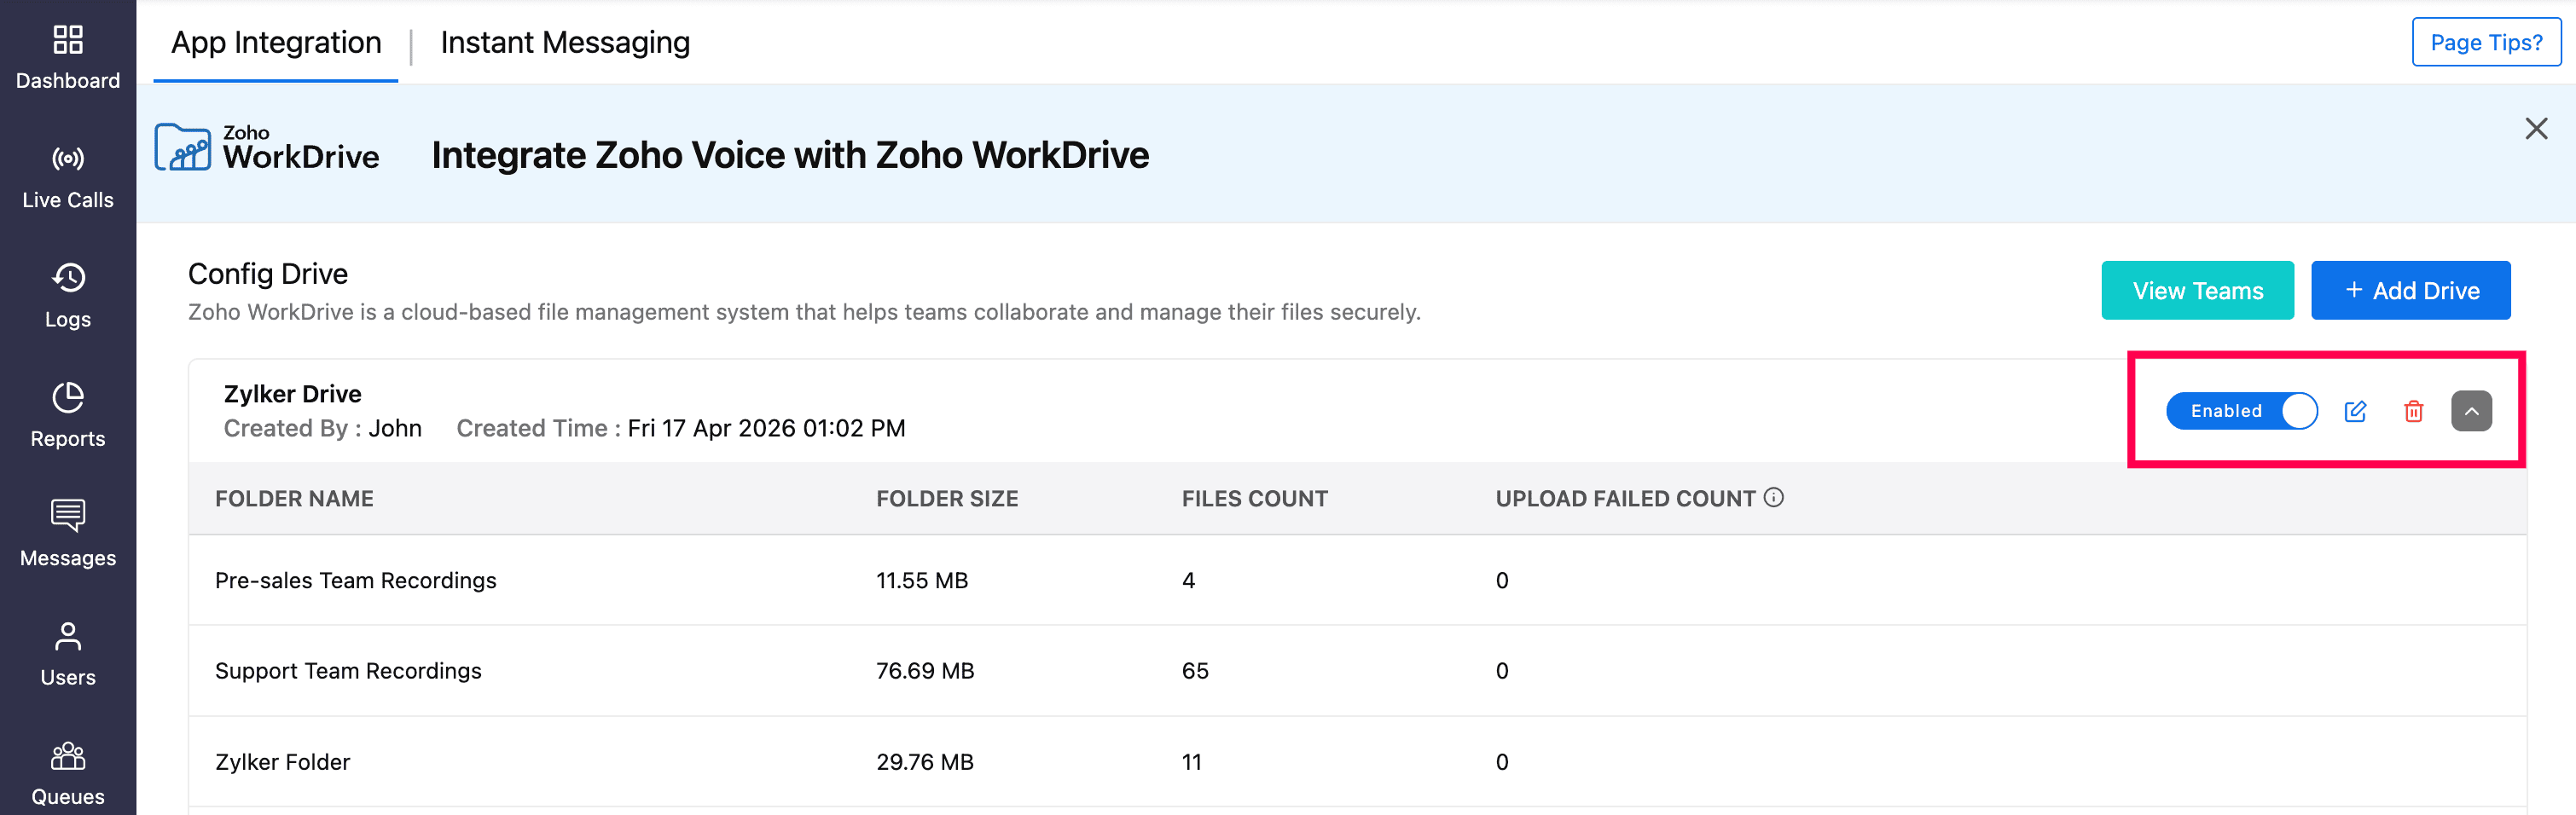
Additional Drive Settings:
A single drive can contain up to 10 folders. A drive represents your WorkDrive team/group and acts as the primary storage location under which folders are created.
To edit a drive, hover over the drive and click the Edit icon.
To stop uploading recordings to WorkDrive, toggle Enabled off. Note: Disabling this option stops files from being uploaded to the associated folder.

Managing Folders
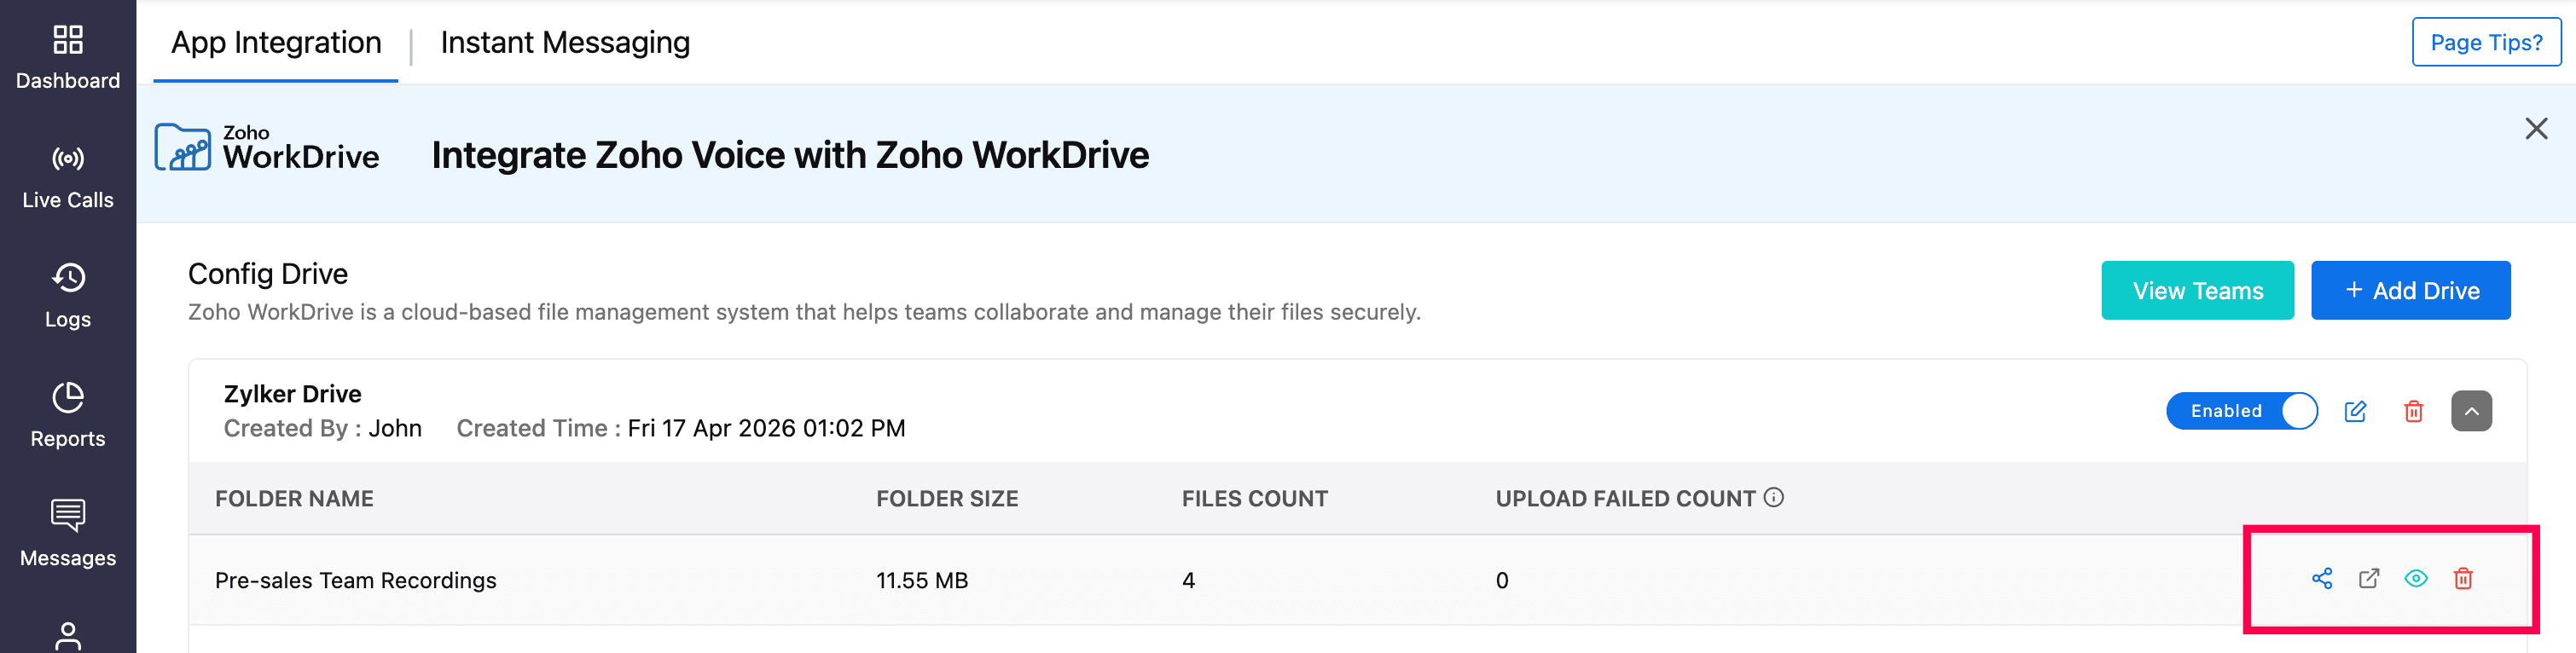
To share a folder with agents, hover over the folder and click the Share icon. Sharing in Zoho WorkDrive can be extended to external users (users without WorkDrive access or an WorkDrive account). This sharing is managed within WorkDrive and does not affect role-based access in Zoho Voice.
For example, if agents Ben and Theo are part of a Zoho Voice organization, but only Ben has access to a WorkDrive folder, they cannot view each other’s recordings within Zoho Voice. However, if Ben shares a recording from WorkDrive, Theo can access the shared file.
To open the folder directly in WorkDrive, click Go to WorkDrive.
To view folder details, click View Details.
To remove the folder, click Delete.
Note
This deletes the folder configuration in Zoho Voice only, and will not impact the folder in WorkDrive.

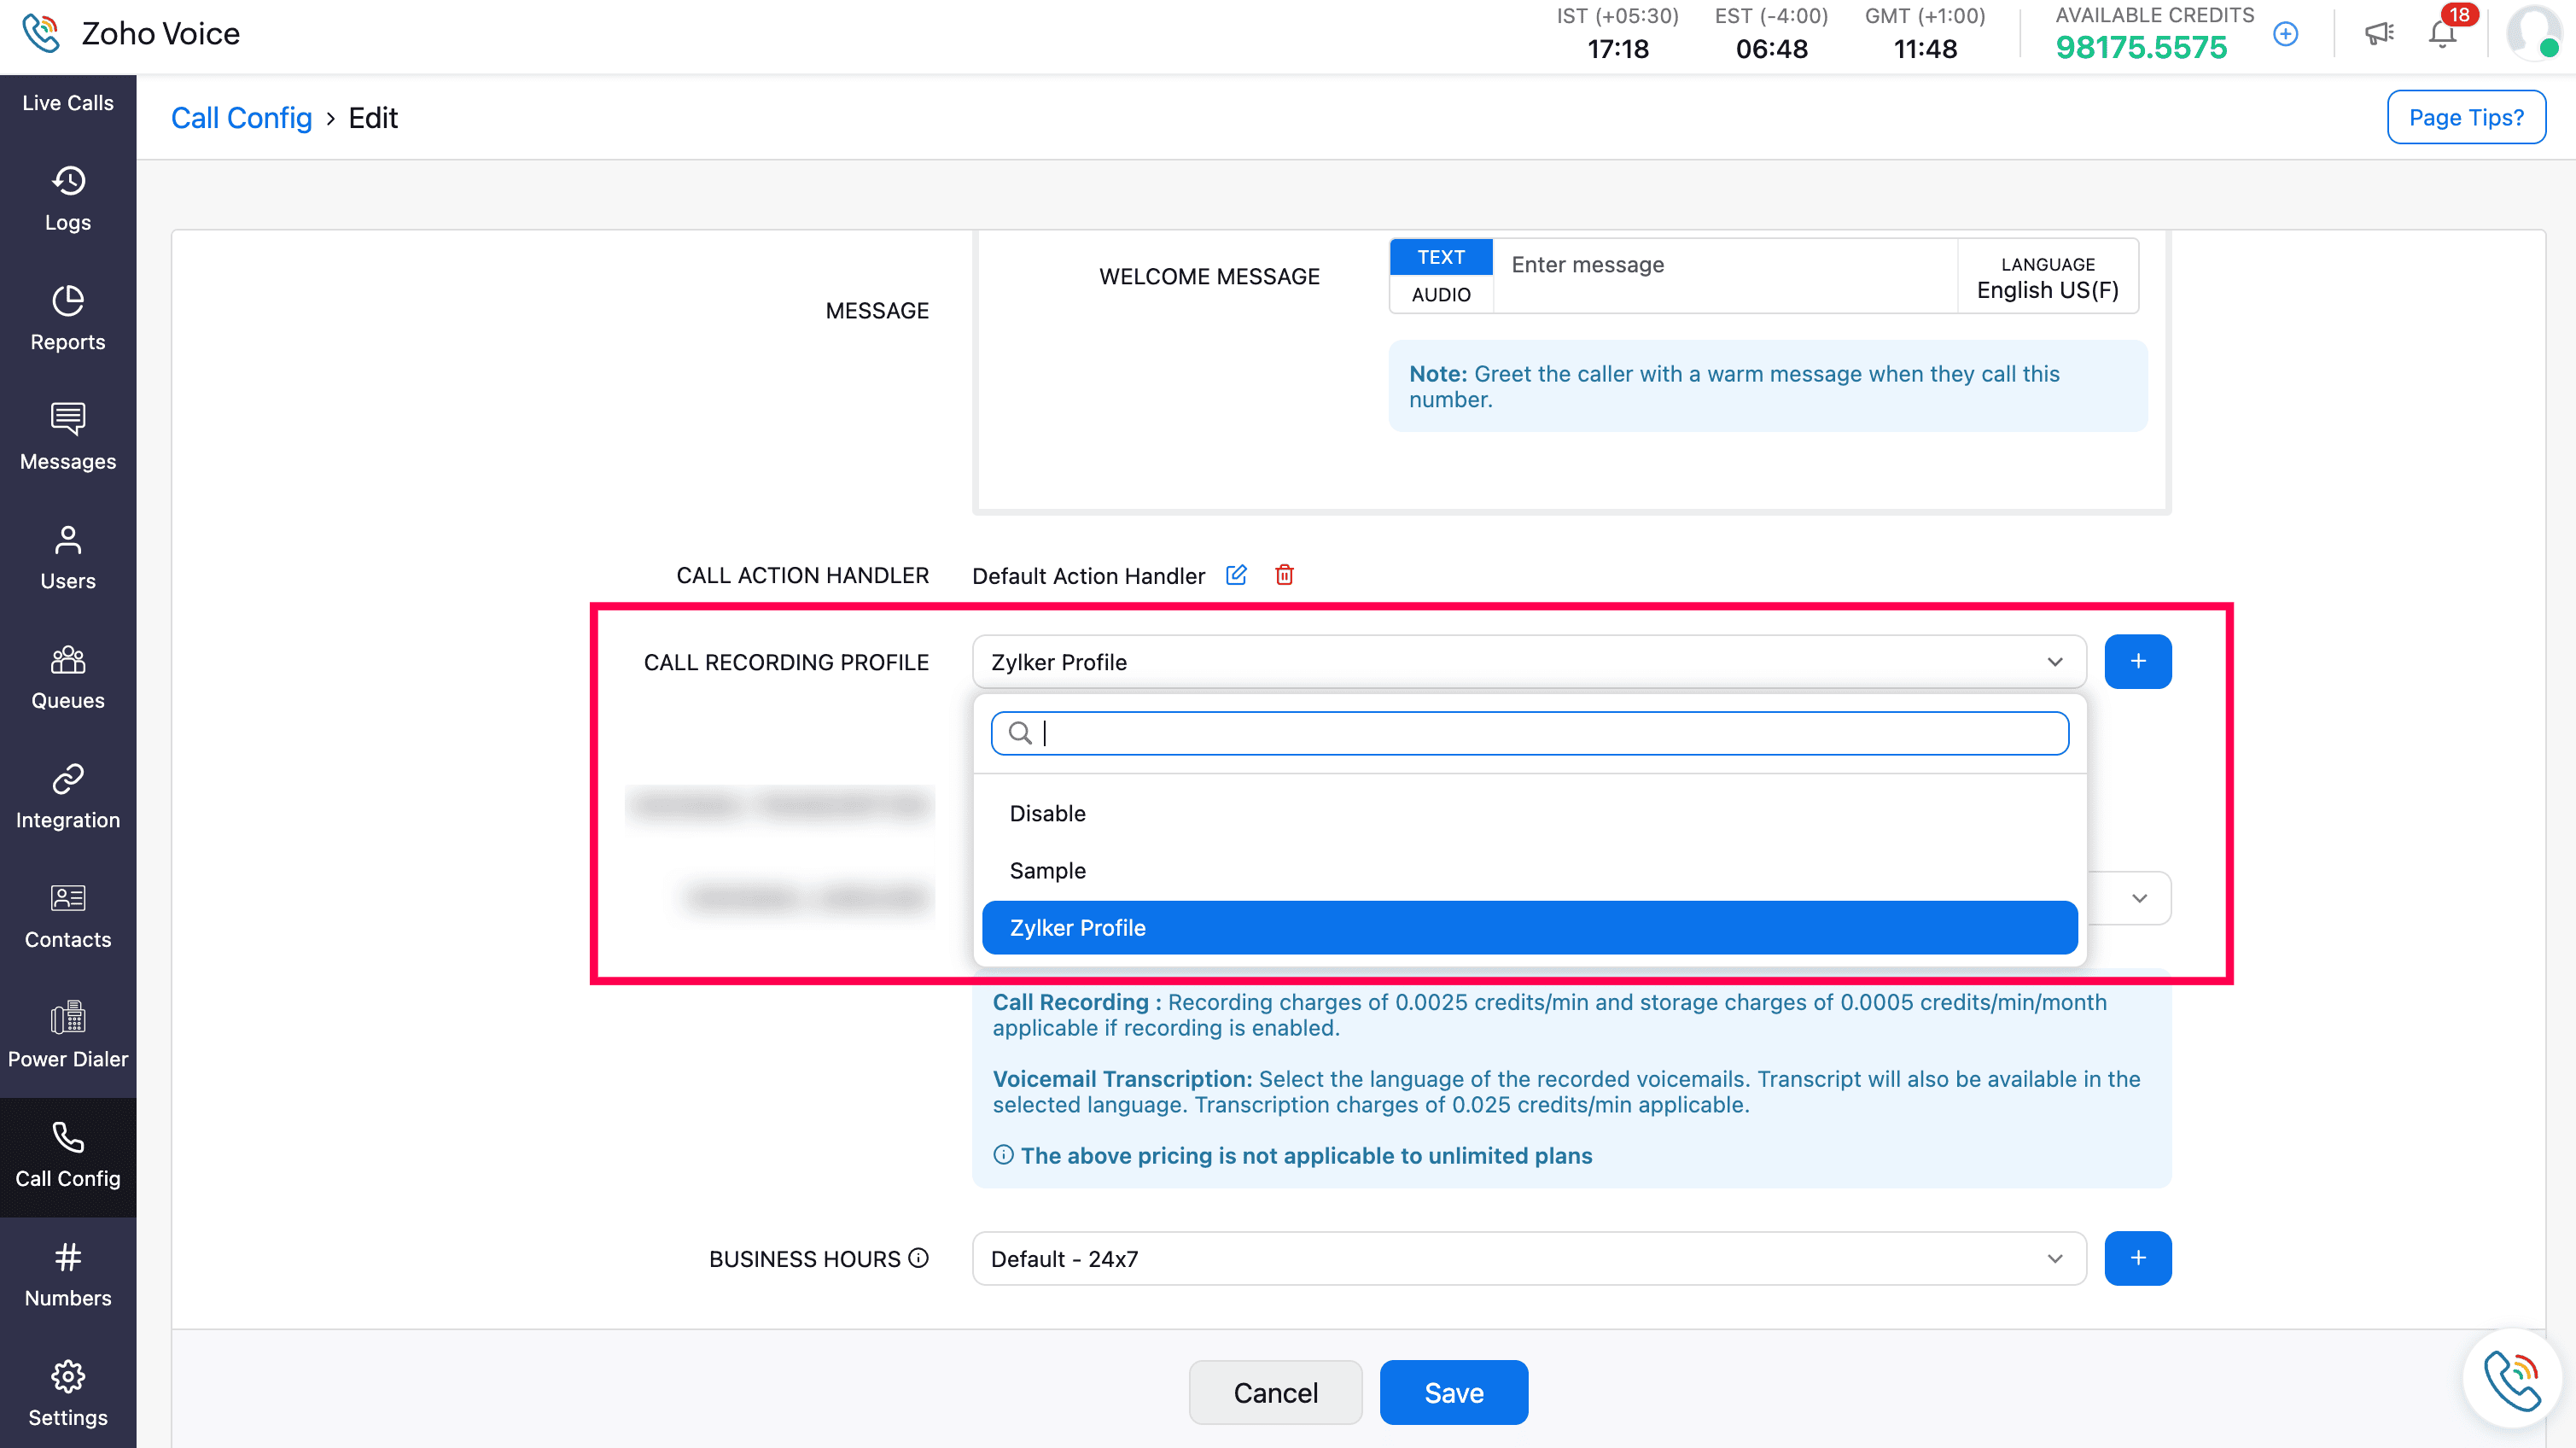
Configure Storage for Call Recordings
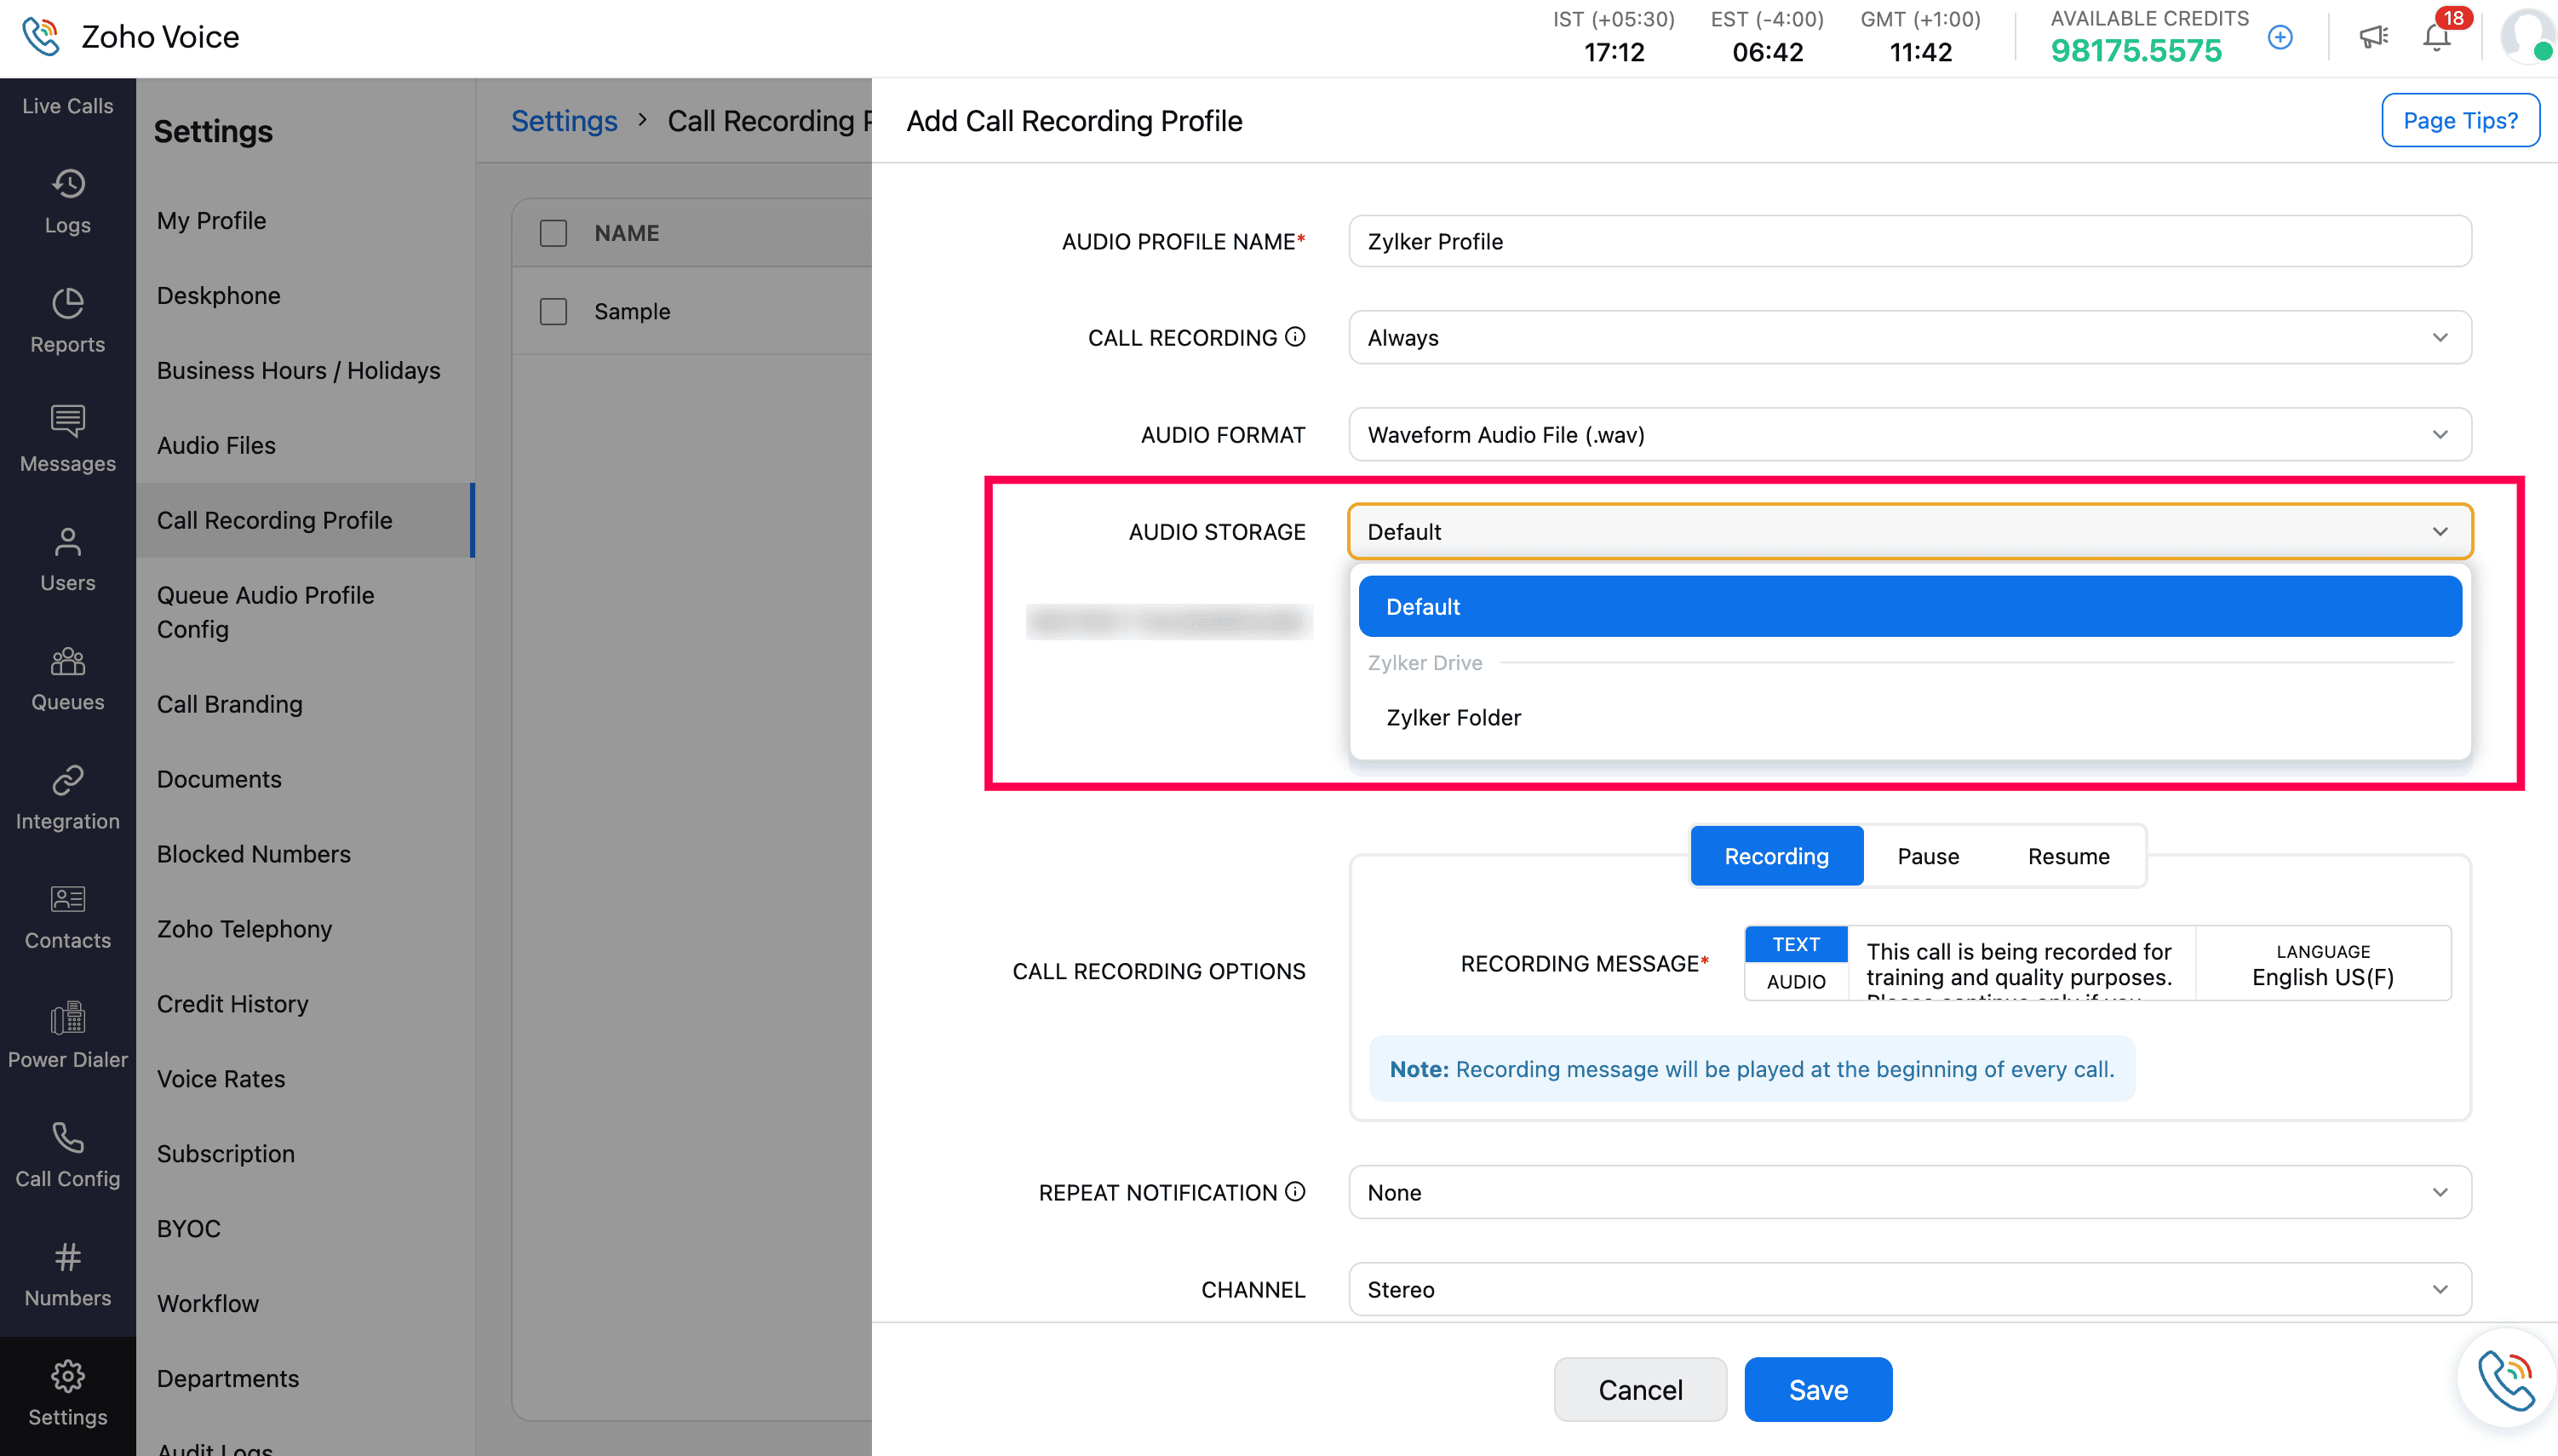
Go to Settings → Call Recording Profile.
Create a new profile or edit an existing one.
Under Audio Storage, you’ll see all integrated WorkDrive folders.
The Default option continues using Zoho Voice storage.
Select a WorkDrive folder from the dropdown to store recordings in your Zoho WorkDrive account.
Click Save.

Go to Call Config to associate the call recording profile with the numbers:
Click Edit Config.
Under Call Recording Profile, select the saved profile and click Save.

Uploading Recordings
After configuration, all new call recordings and voicemails for the associated numbers will automatically upload to WorkDrive, as long as the integration remains active.
For older recordings or failed uploads:
Go to the Logs module.
Select either Voicemail or Call Recordings logs.
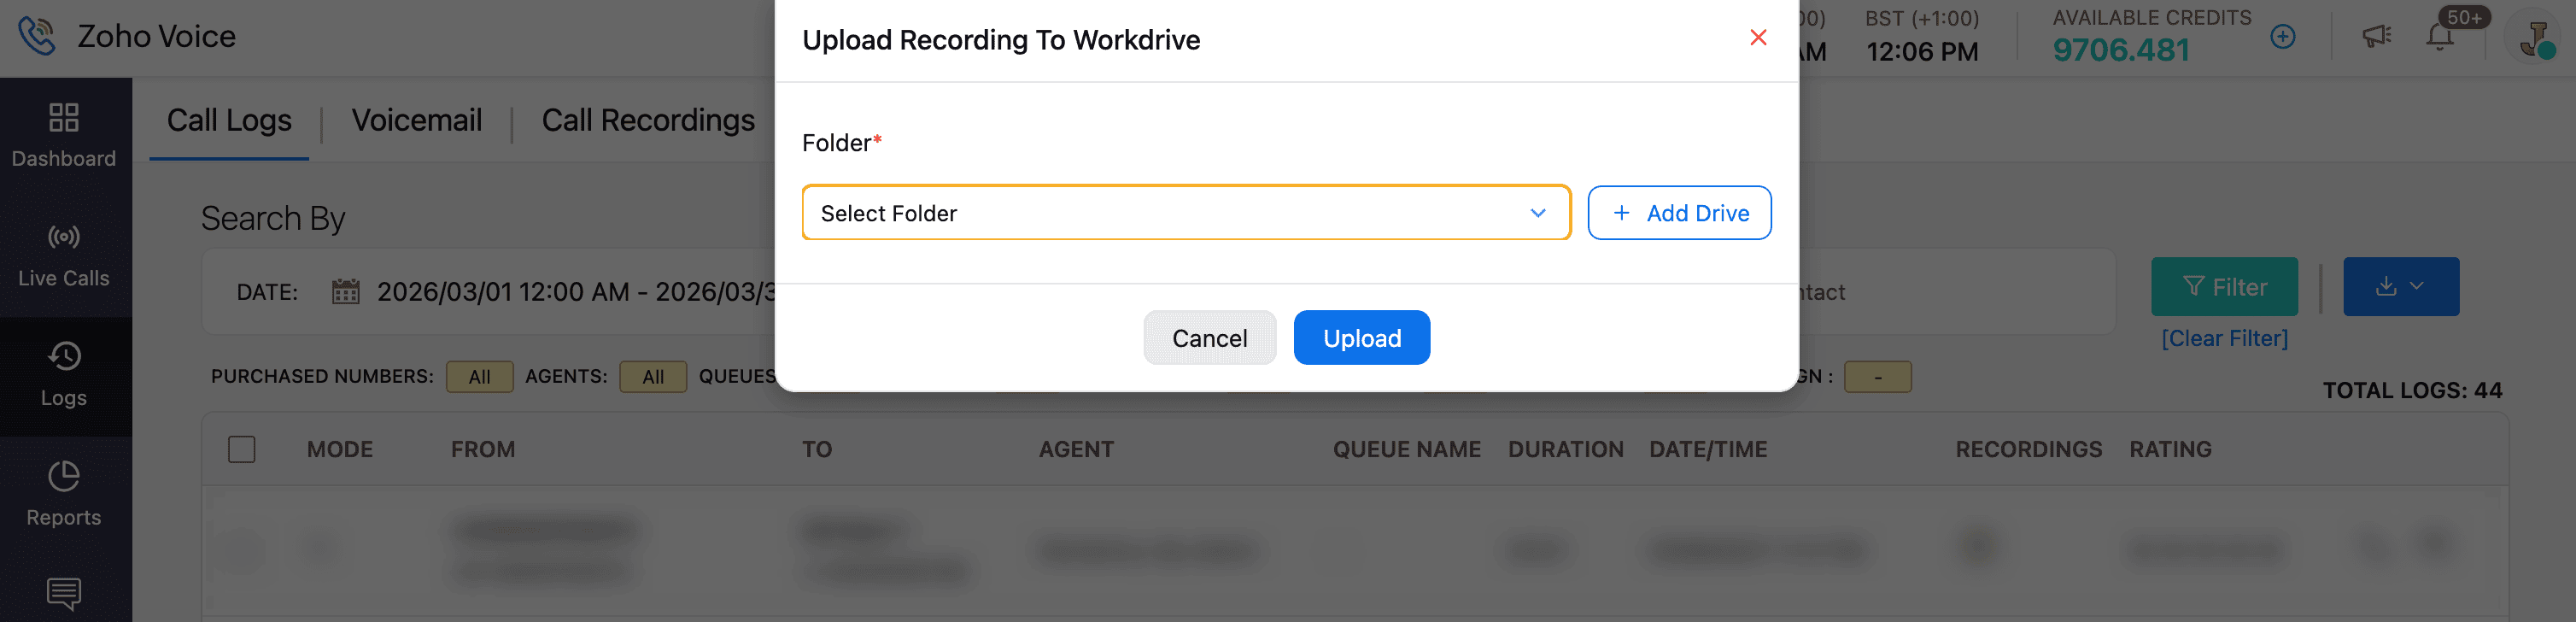
Hover over the recording button of the log and choose Upload to Drive.
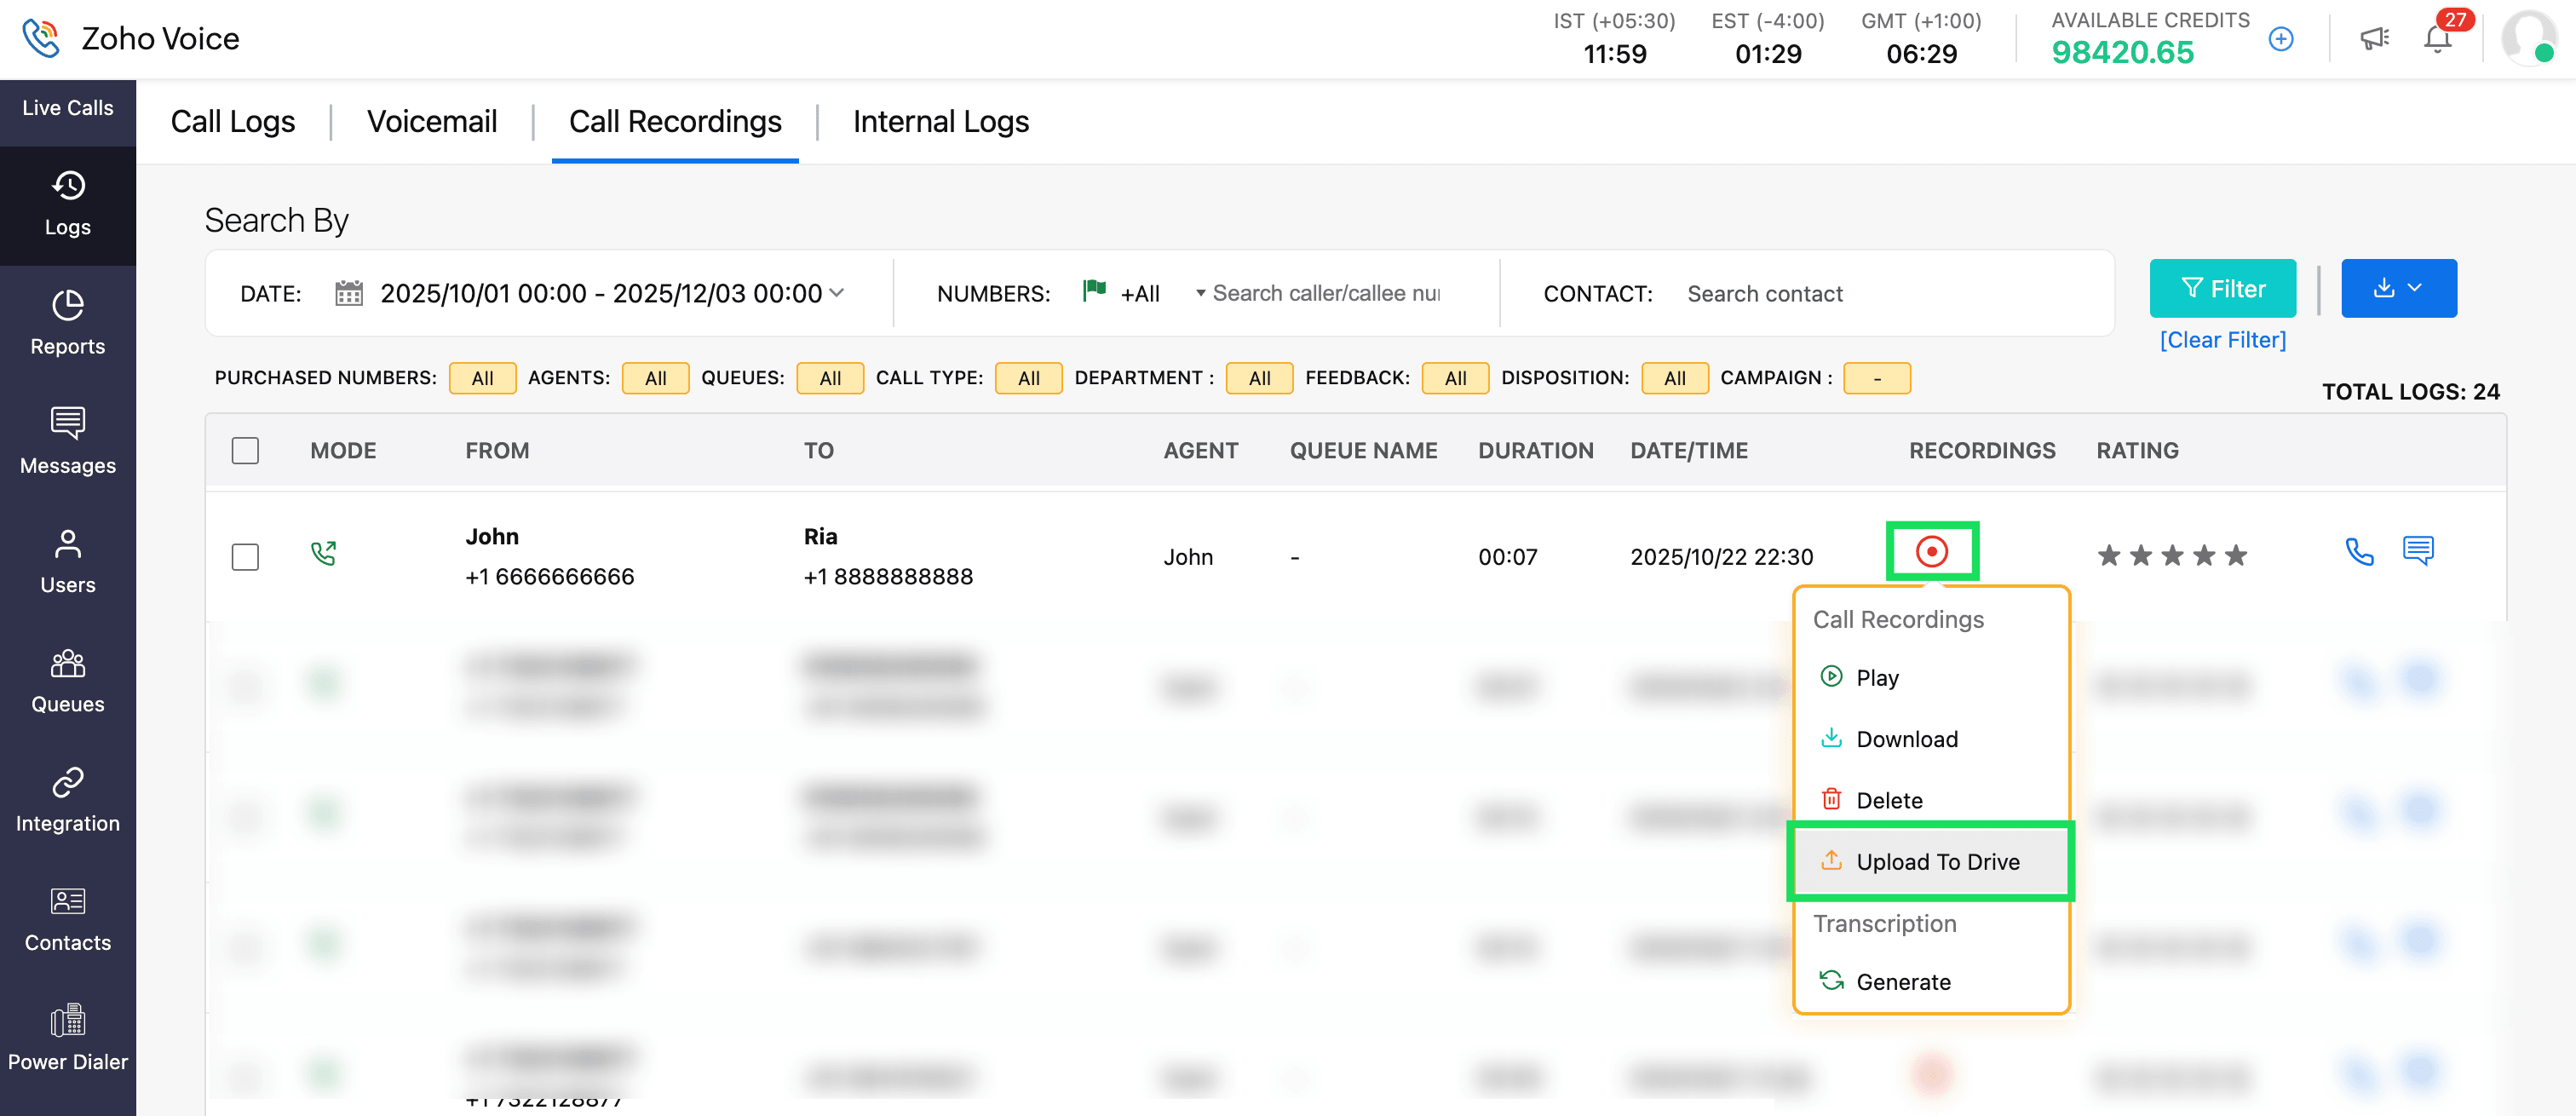

Select the appropriate WorkDrive folder from the dropdown.
Click Upload.

To check the status of an upload:
Click the specific voicemail or call recording log.
In Log Details, navigate to Storage Details.
Here, you can view the provider, drive name, folder name, file name, upload time, upload status, and upload task ID.

Use Zia Hubs AI
After completing the Zoho Voice and WorkDrive integration:
Open the Zia Hub folder where your recordings are stored.
In the right panel, use the search bar labelled “Zia Hubs finds whatever you need, right from your content.”
Enter your query to analyze recordings.
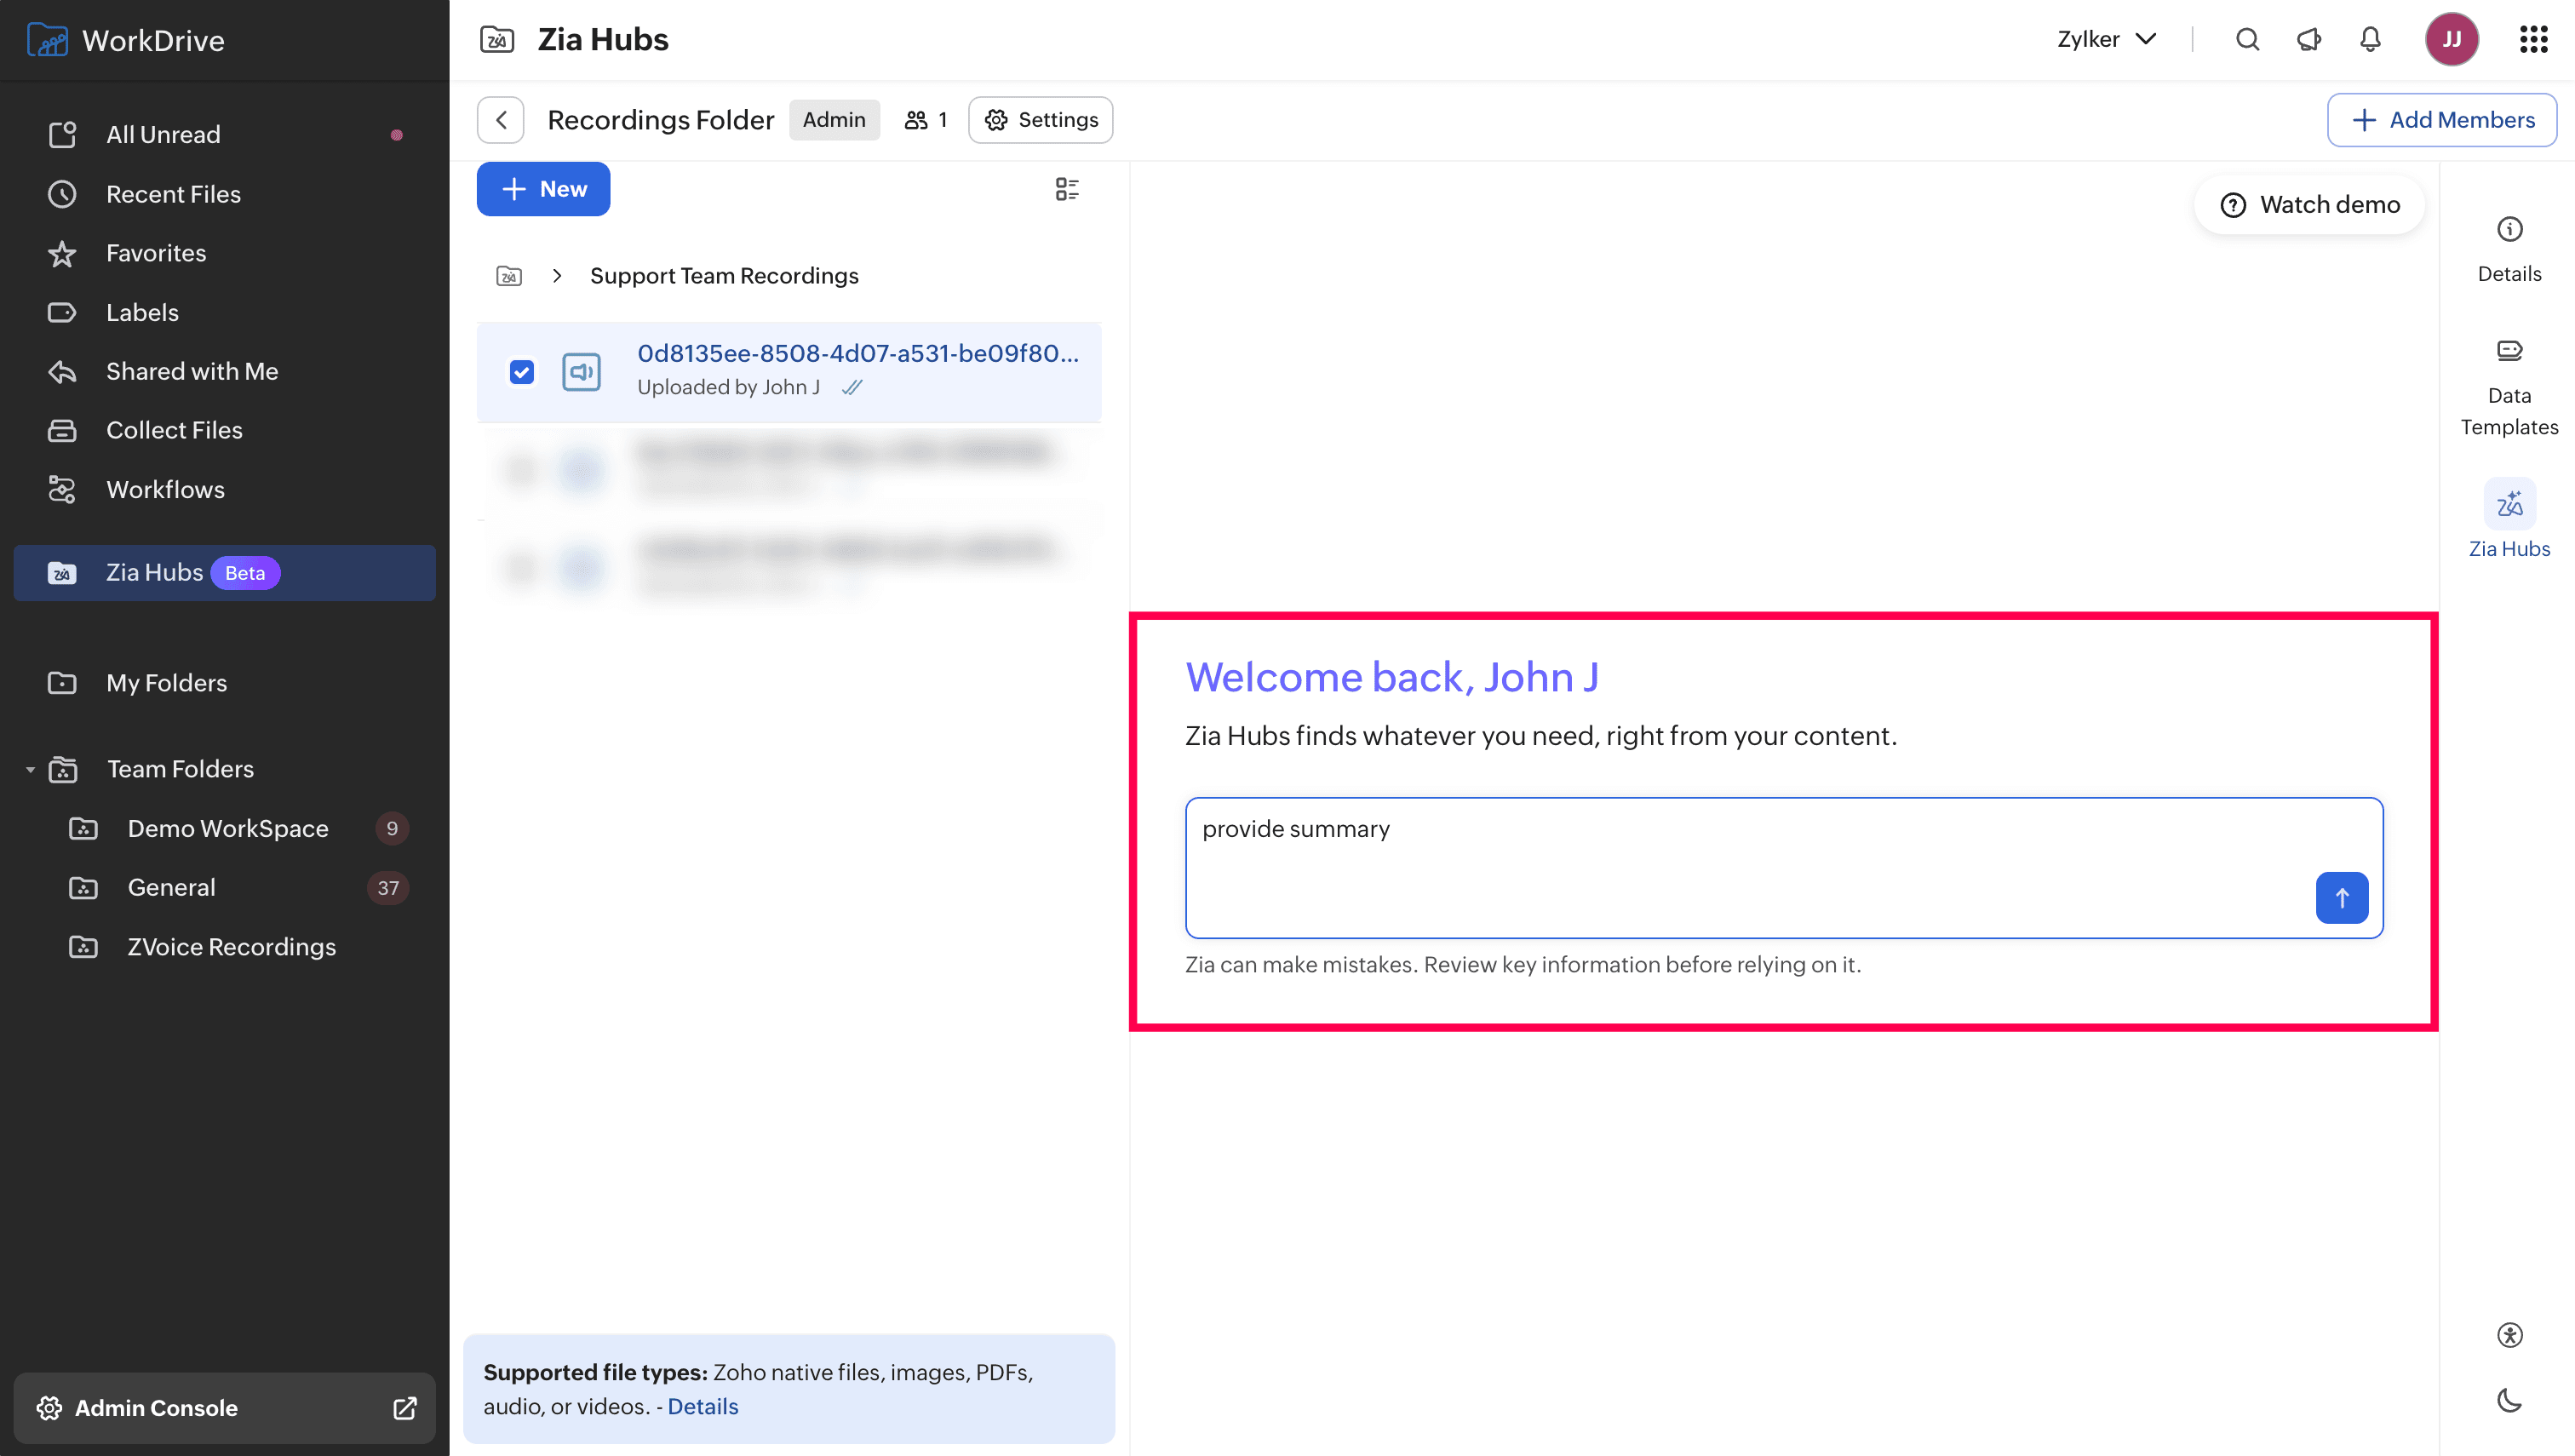

Zia automatically transcribes and analyzes the audio, then provides context-based answers. You can save or copy the response using the available options.
