Configure Yealink Desk Phone with Zoho Voice
Zoho Voice enables you to connect your account with any type of IP-enabled Yealink desk phones, which are one of the prominent workstations in major call centers. This enables you to easily make and receive Zoho Voice calls using Yealink Session Initiation Protocol (SIP) phone devices.
Note
Zoho Voice now supports all SIP phone models under the Yealink brand.
Configuring Yealink SIP Phone
Follow the steps below to connect a Yealink SIP phone with your agent's Zoho Voice account.
Steps to configure in Zoho Voice
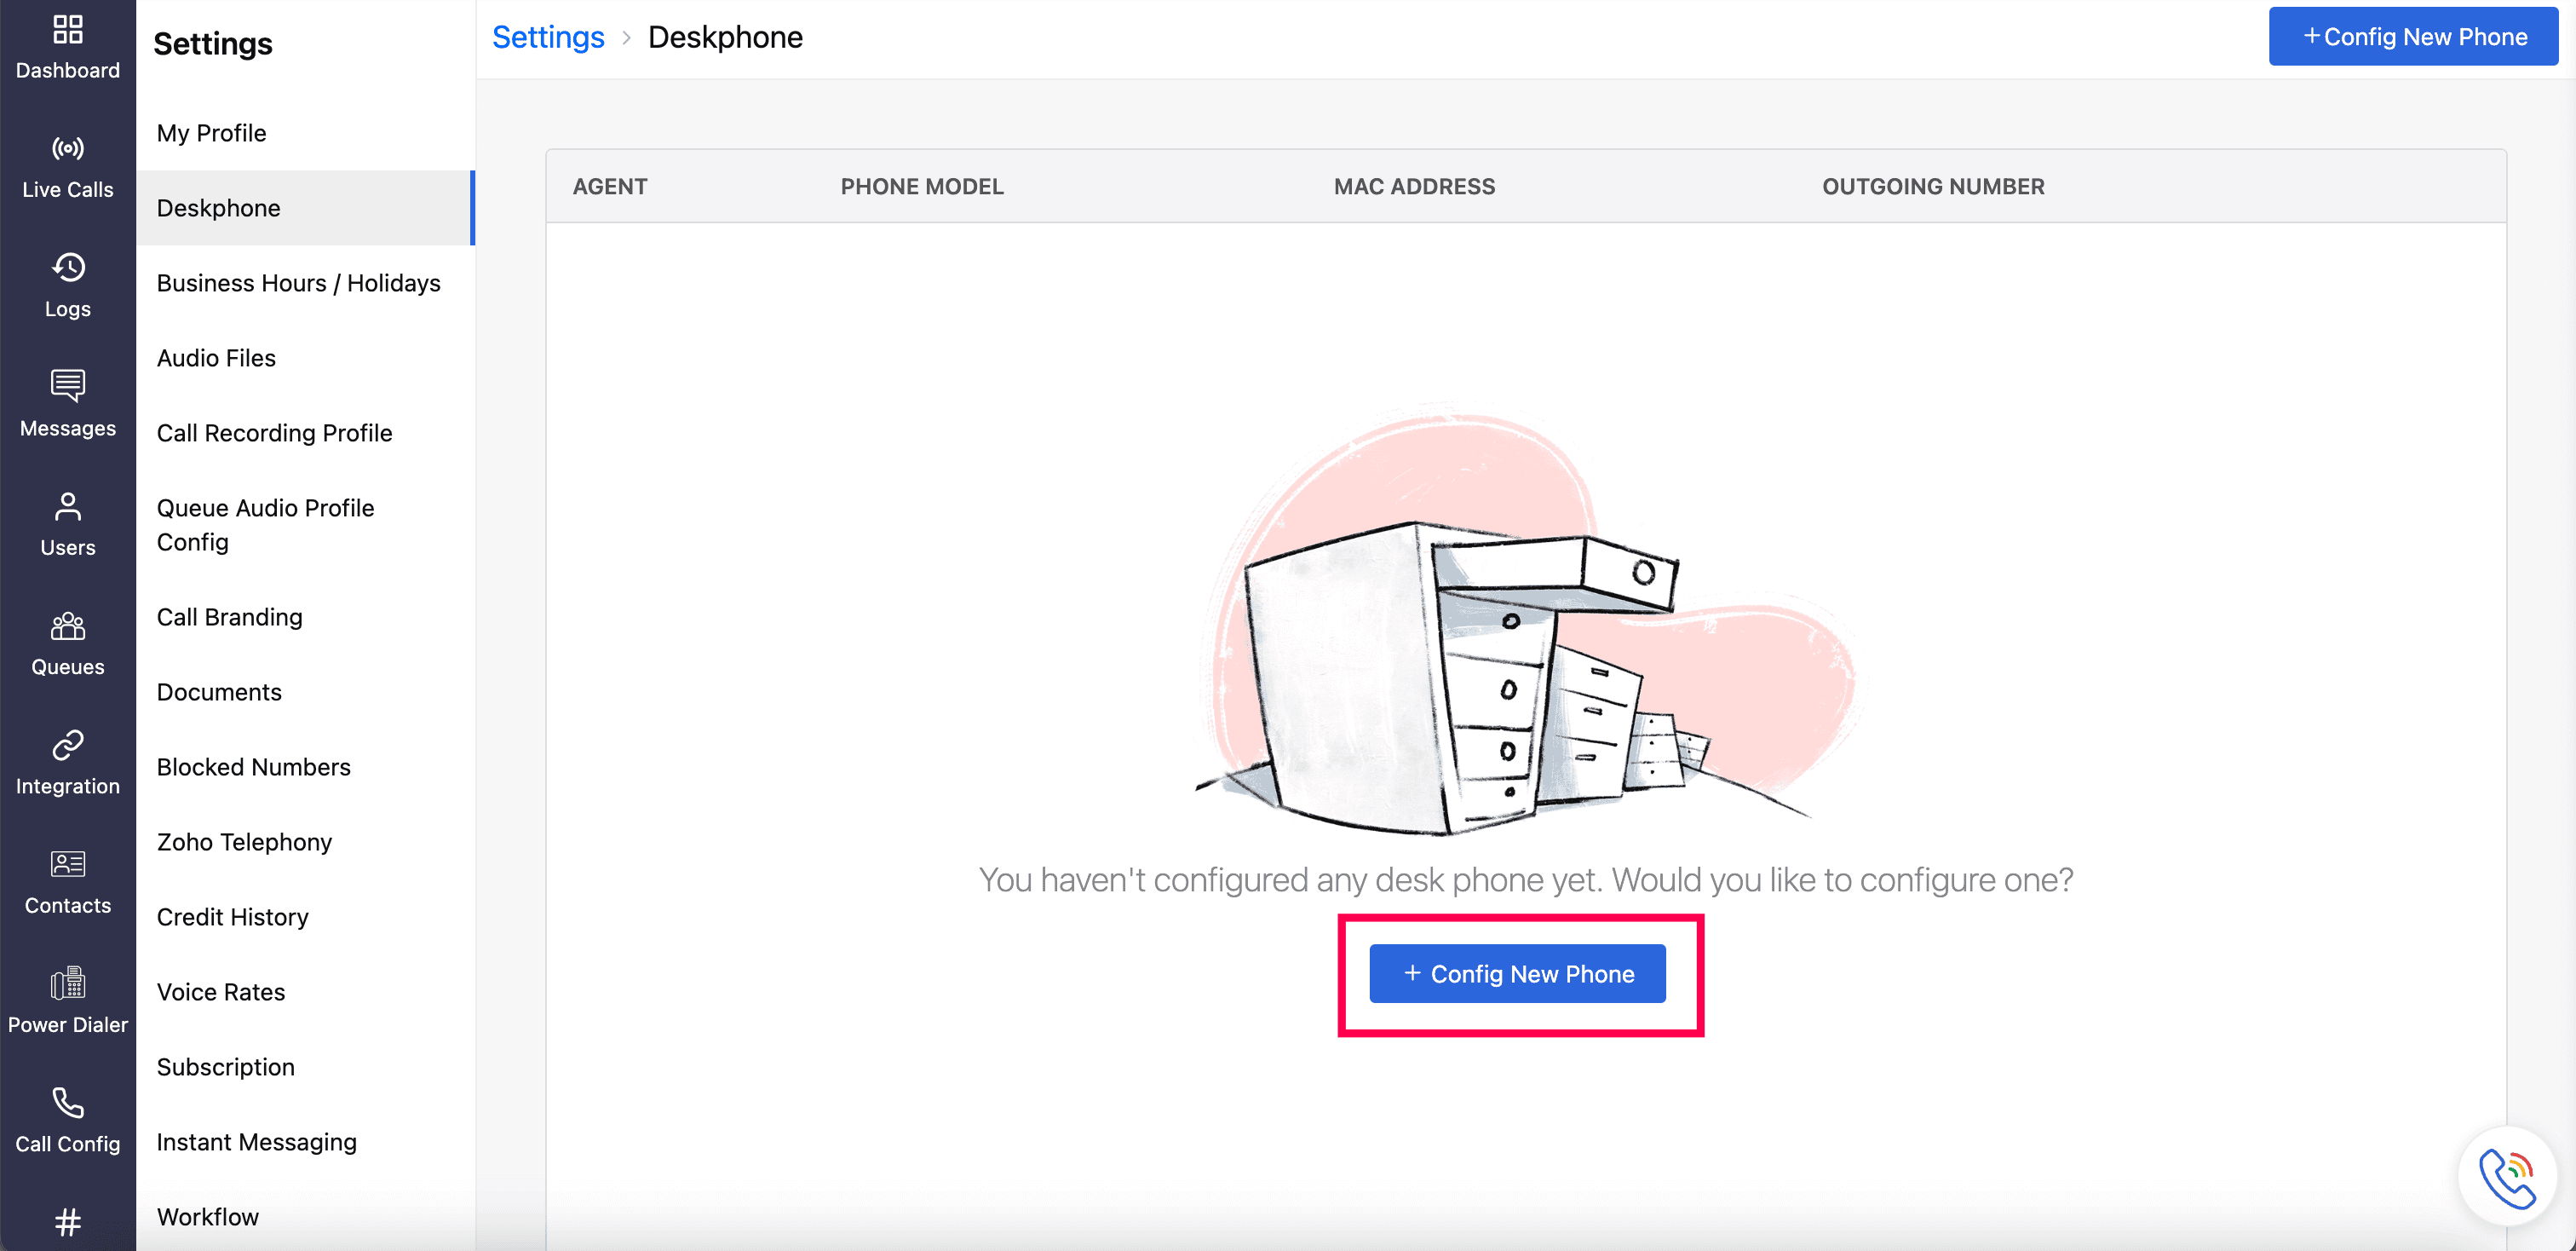
Go to Settings → Deskphone and click Config New Phone.
In the Add New Deskphone prompt, select the agent for whom you want to configure the desk phone and select the model as Yealink.
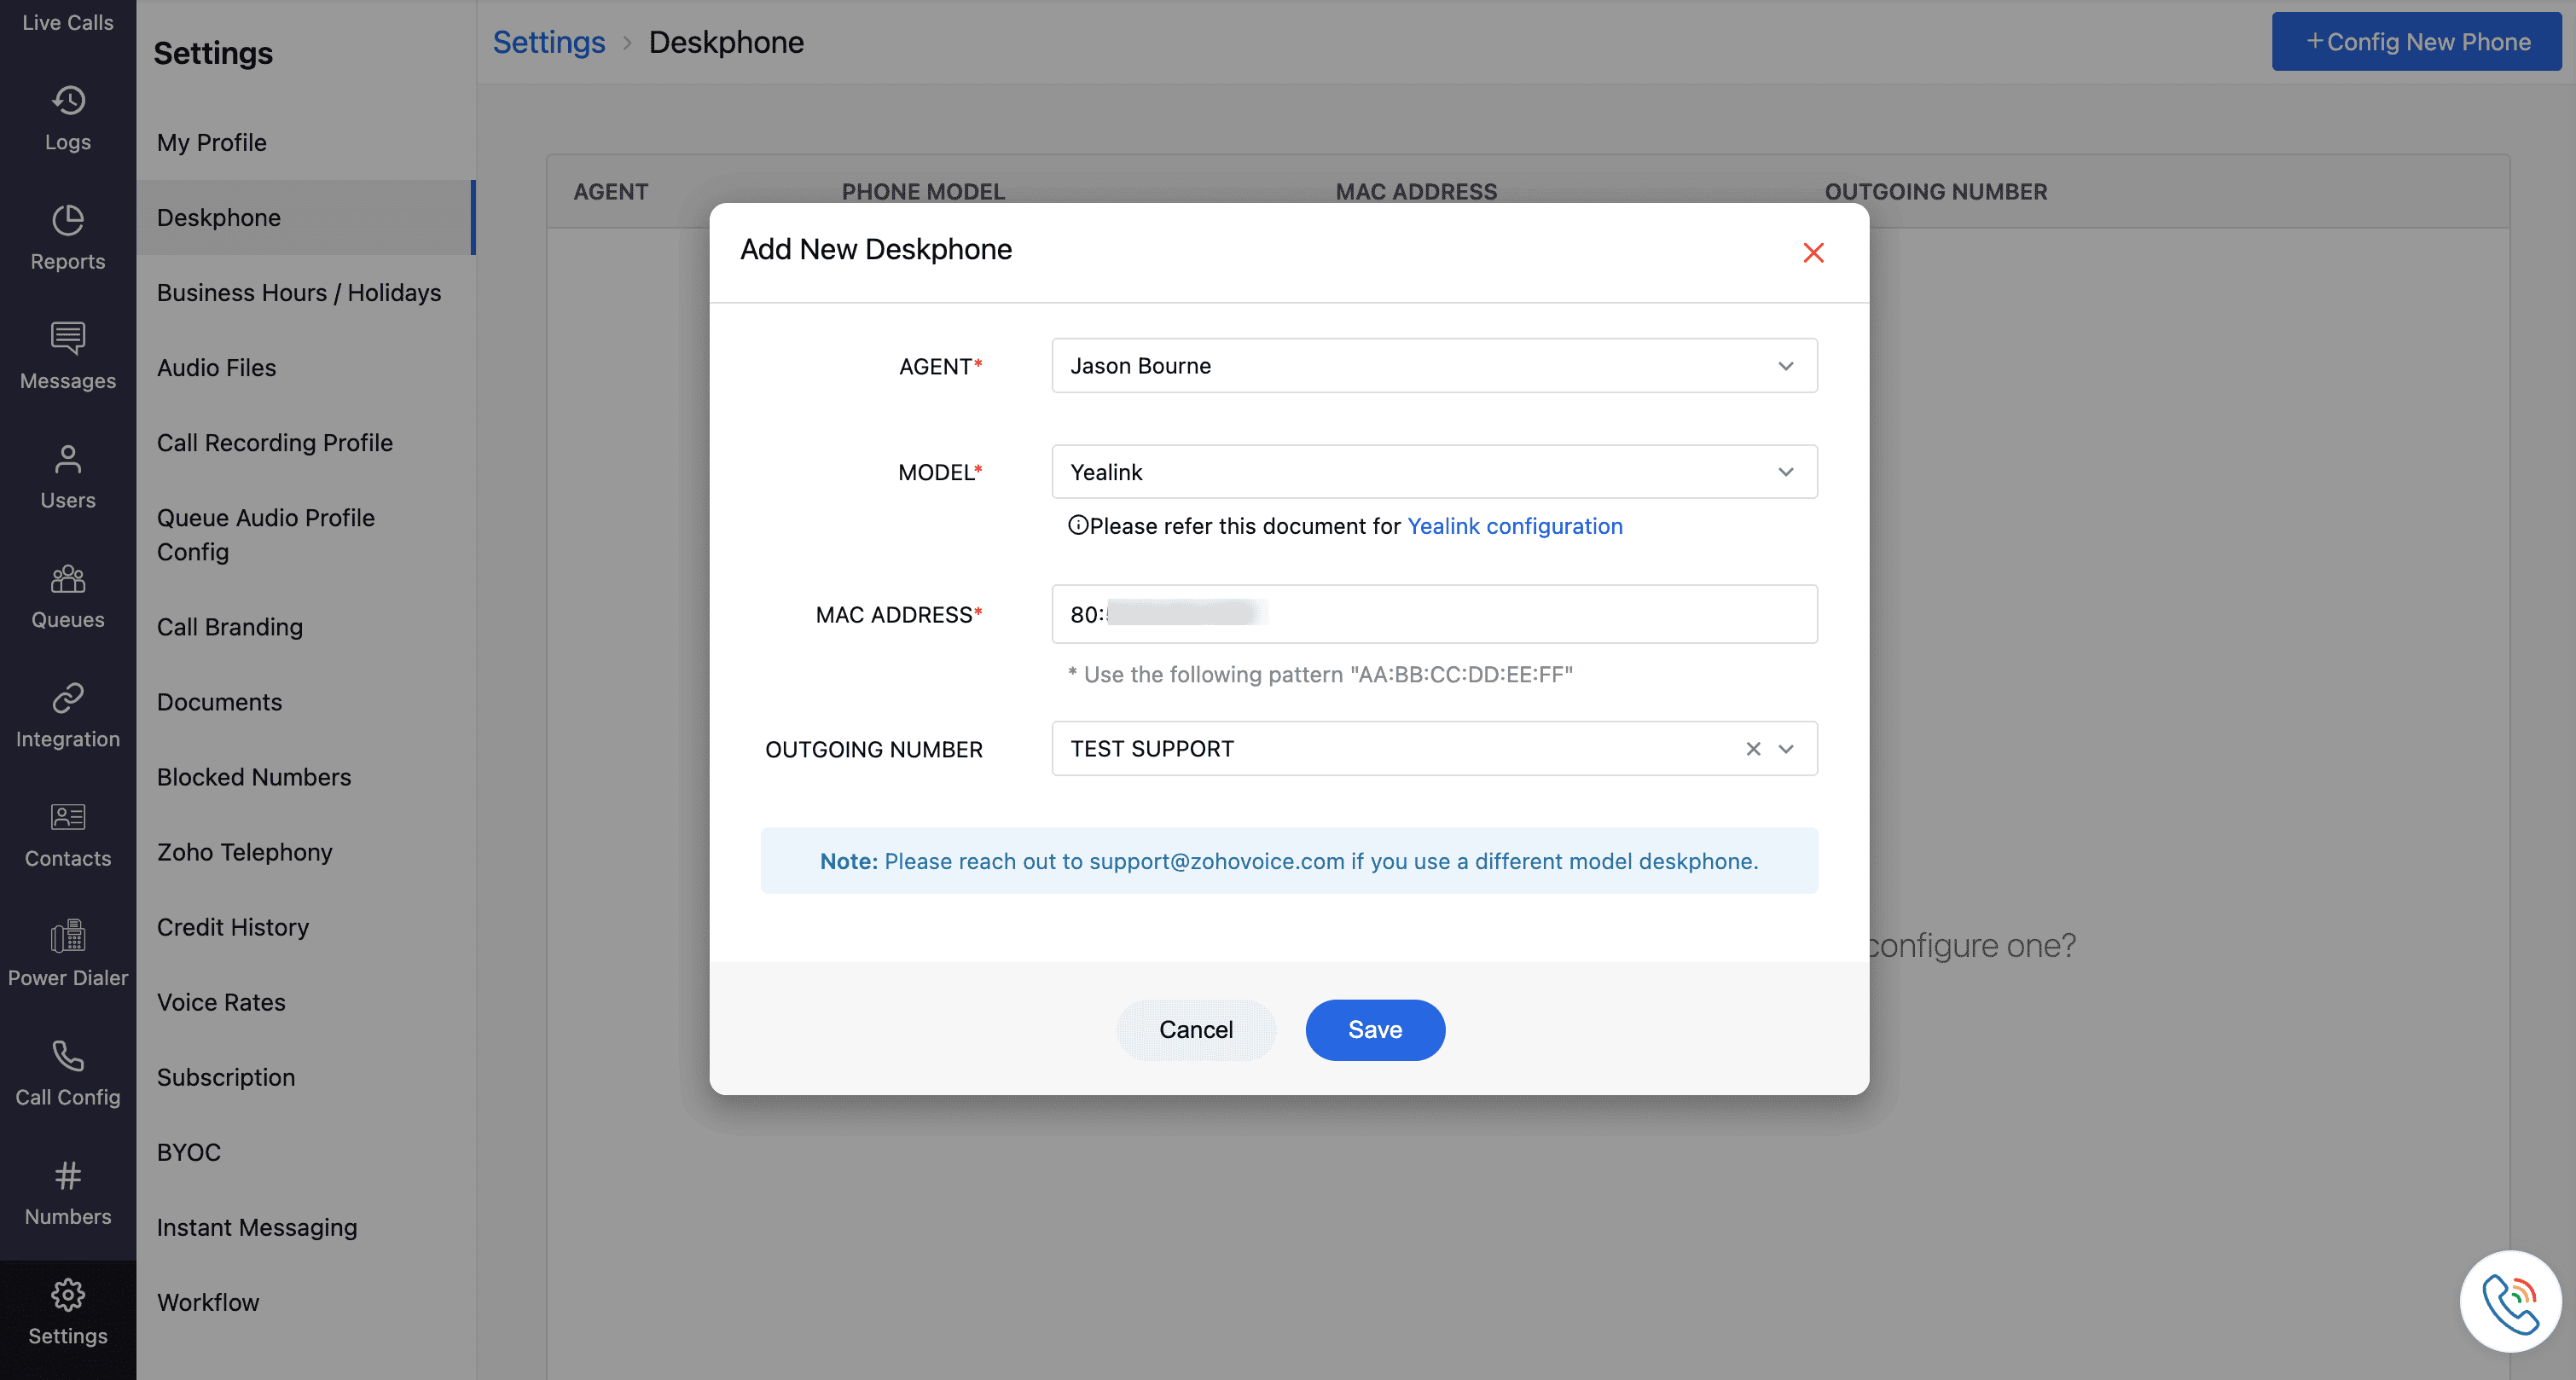
Enter the MAC address of your hardphone device.
Note
You can find the MAC address on a label at the back of your desk phone. Alternatively, press the OK button in the middle of the navigation pad or press Menu and select Status to open the Status screen, where you’ll see the IPv4, MAC, and Machine ID.
Select the phone number you want to use as the Outgoing Number while making calls from your desk phone.
Click Save to confirm your selection.
Zoho Voice will then generate a configuration file (.cfg) - download this file to proceed with your desk phone setup.
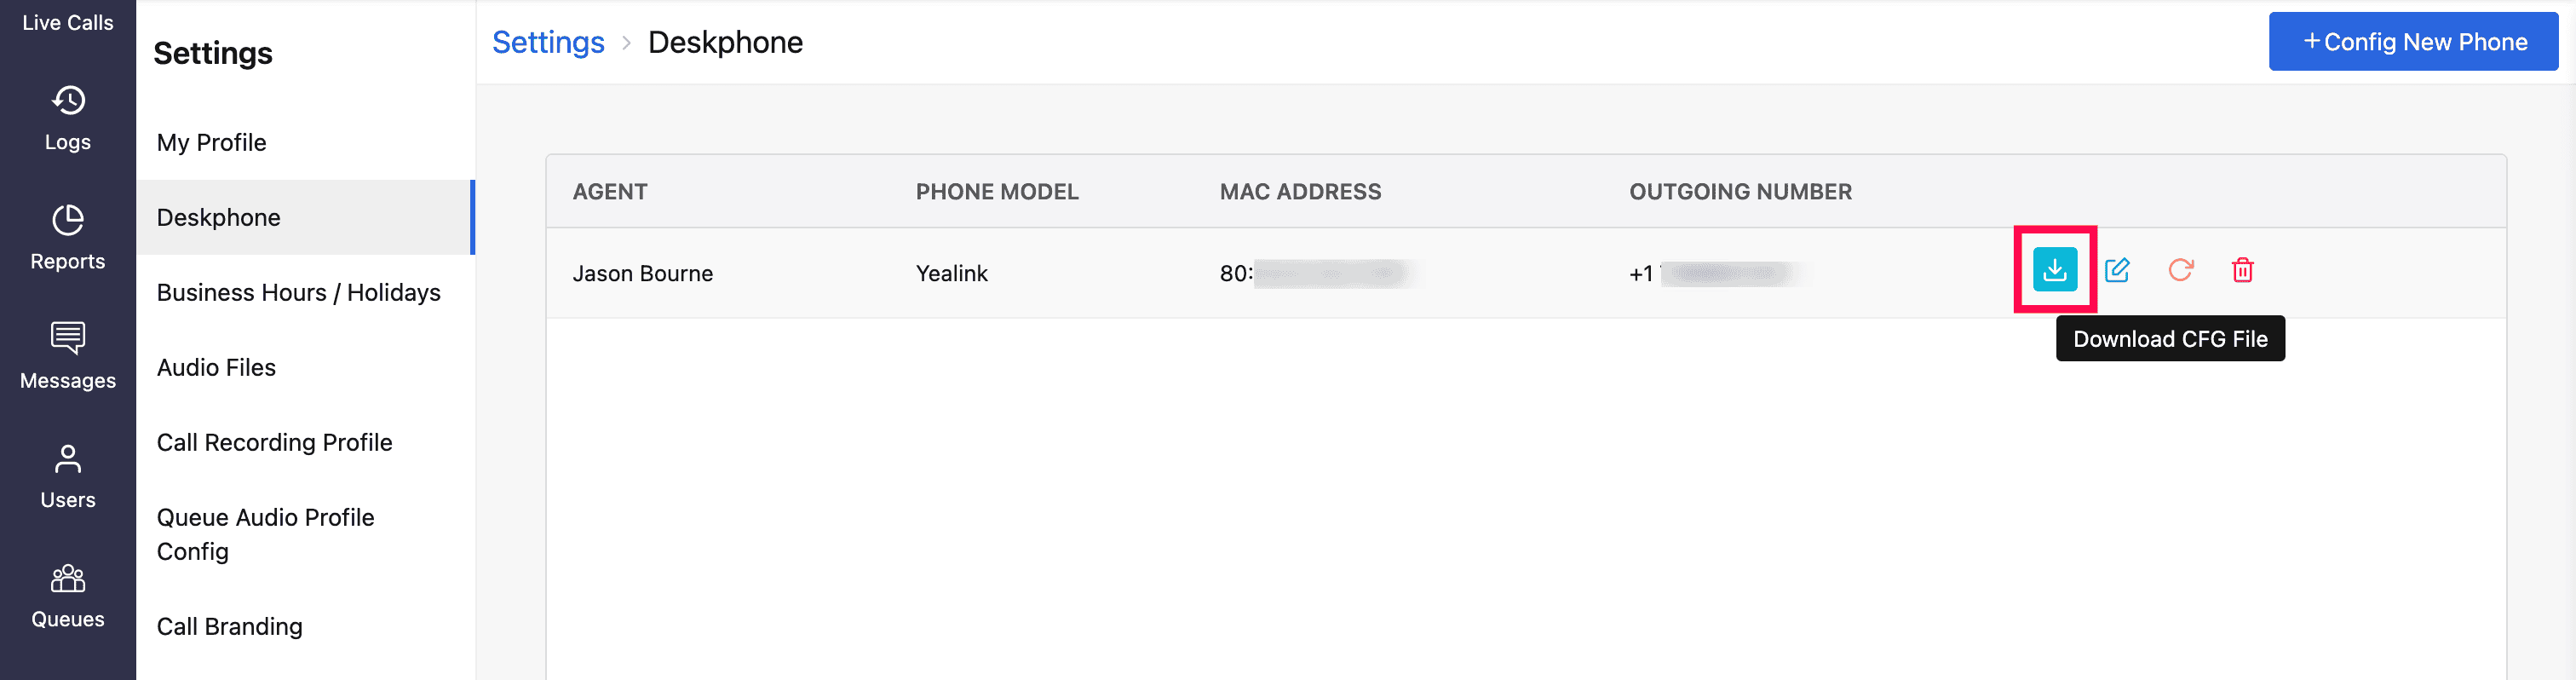
The saved configuration will appear on the Deskphone homepage. The agent specified in the configuration will receive an email with their SIP authentication details. If they haven’t received it, click the Reload (Resend Credentials) icon to resend the credentials.


To change the agent assigned in the saved configuration, click the Edit icon. Similarly, to remove the configuration, click the Delete icon.

Steps to follow on your Yealink Desk Phone
For successful configuration, you need to log in to the Yealink device web User Interface. In order to access the web User Interface, you need to know the IP address of your Yealink IP phone.
To find the IP address of your desk phone:
On your Yealink IP phone, press the OK button in the middle of the navigation pad, or press Menu and select Status.
On the Status screen, note the IPv4 address. This is your IP address of your desk phone.
Once you have obtained the IP address, Enter the IP address in your browser (e.g., https://192.168.0.10 or 192.168.0.10). This will take you to your Yealink device's web UI.
Steps to configure in your Yealink web UI
Enter the Username and Password of your device, or enter the default Yealink administrator user name and password, which are both "admin" (case-sensitive).
Click Login.

Click the Settings tab in the top-right corner.
From the left sidebar, select Configuration.
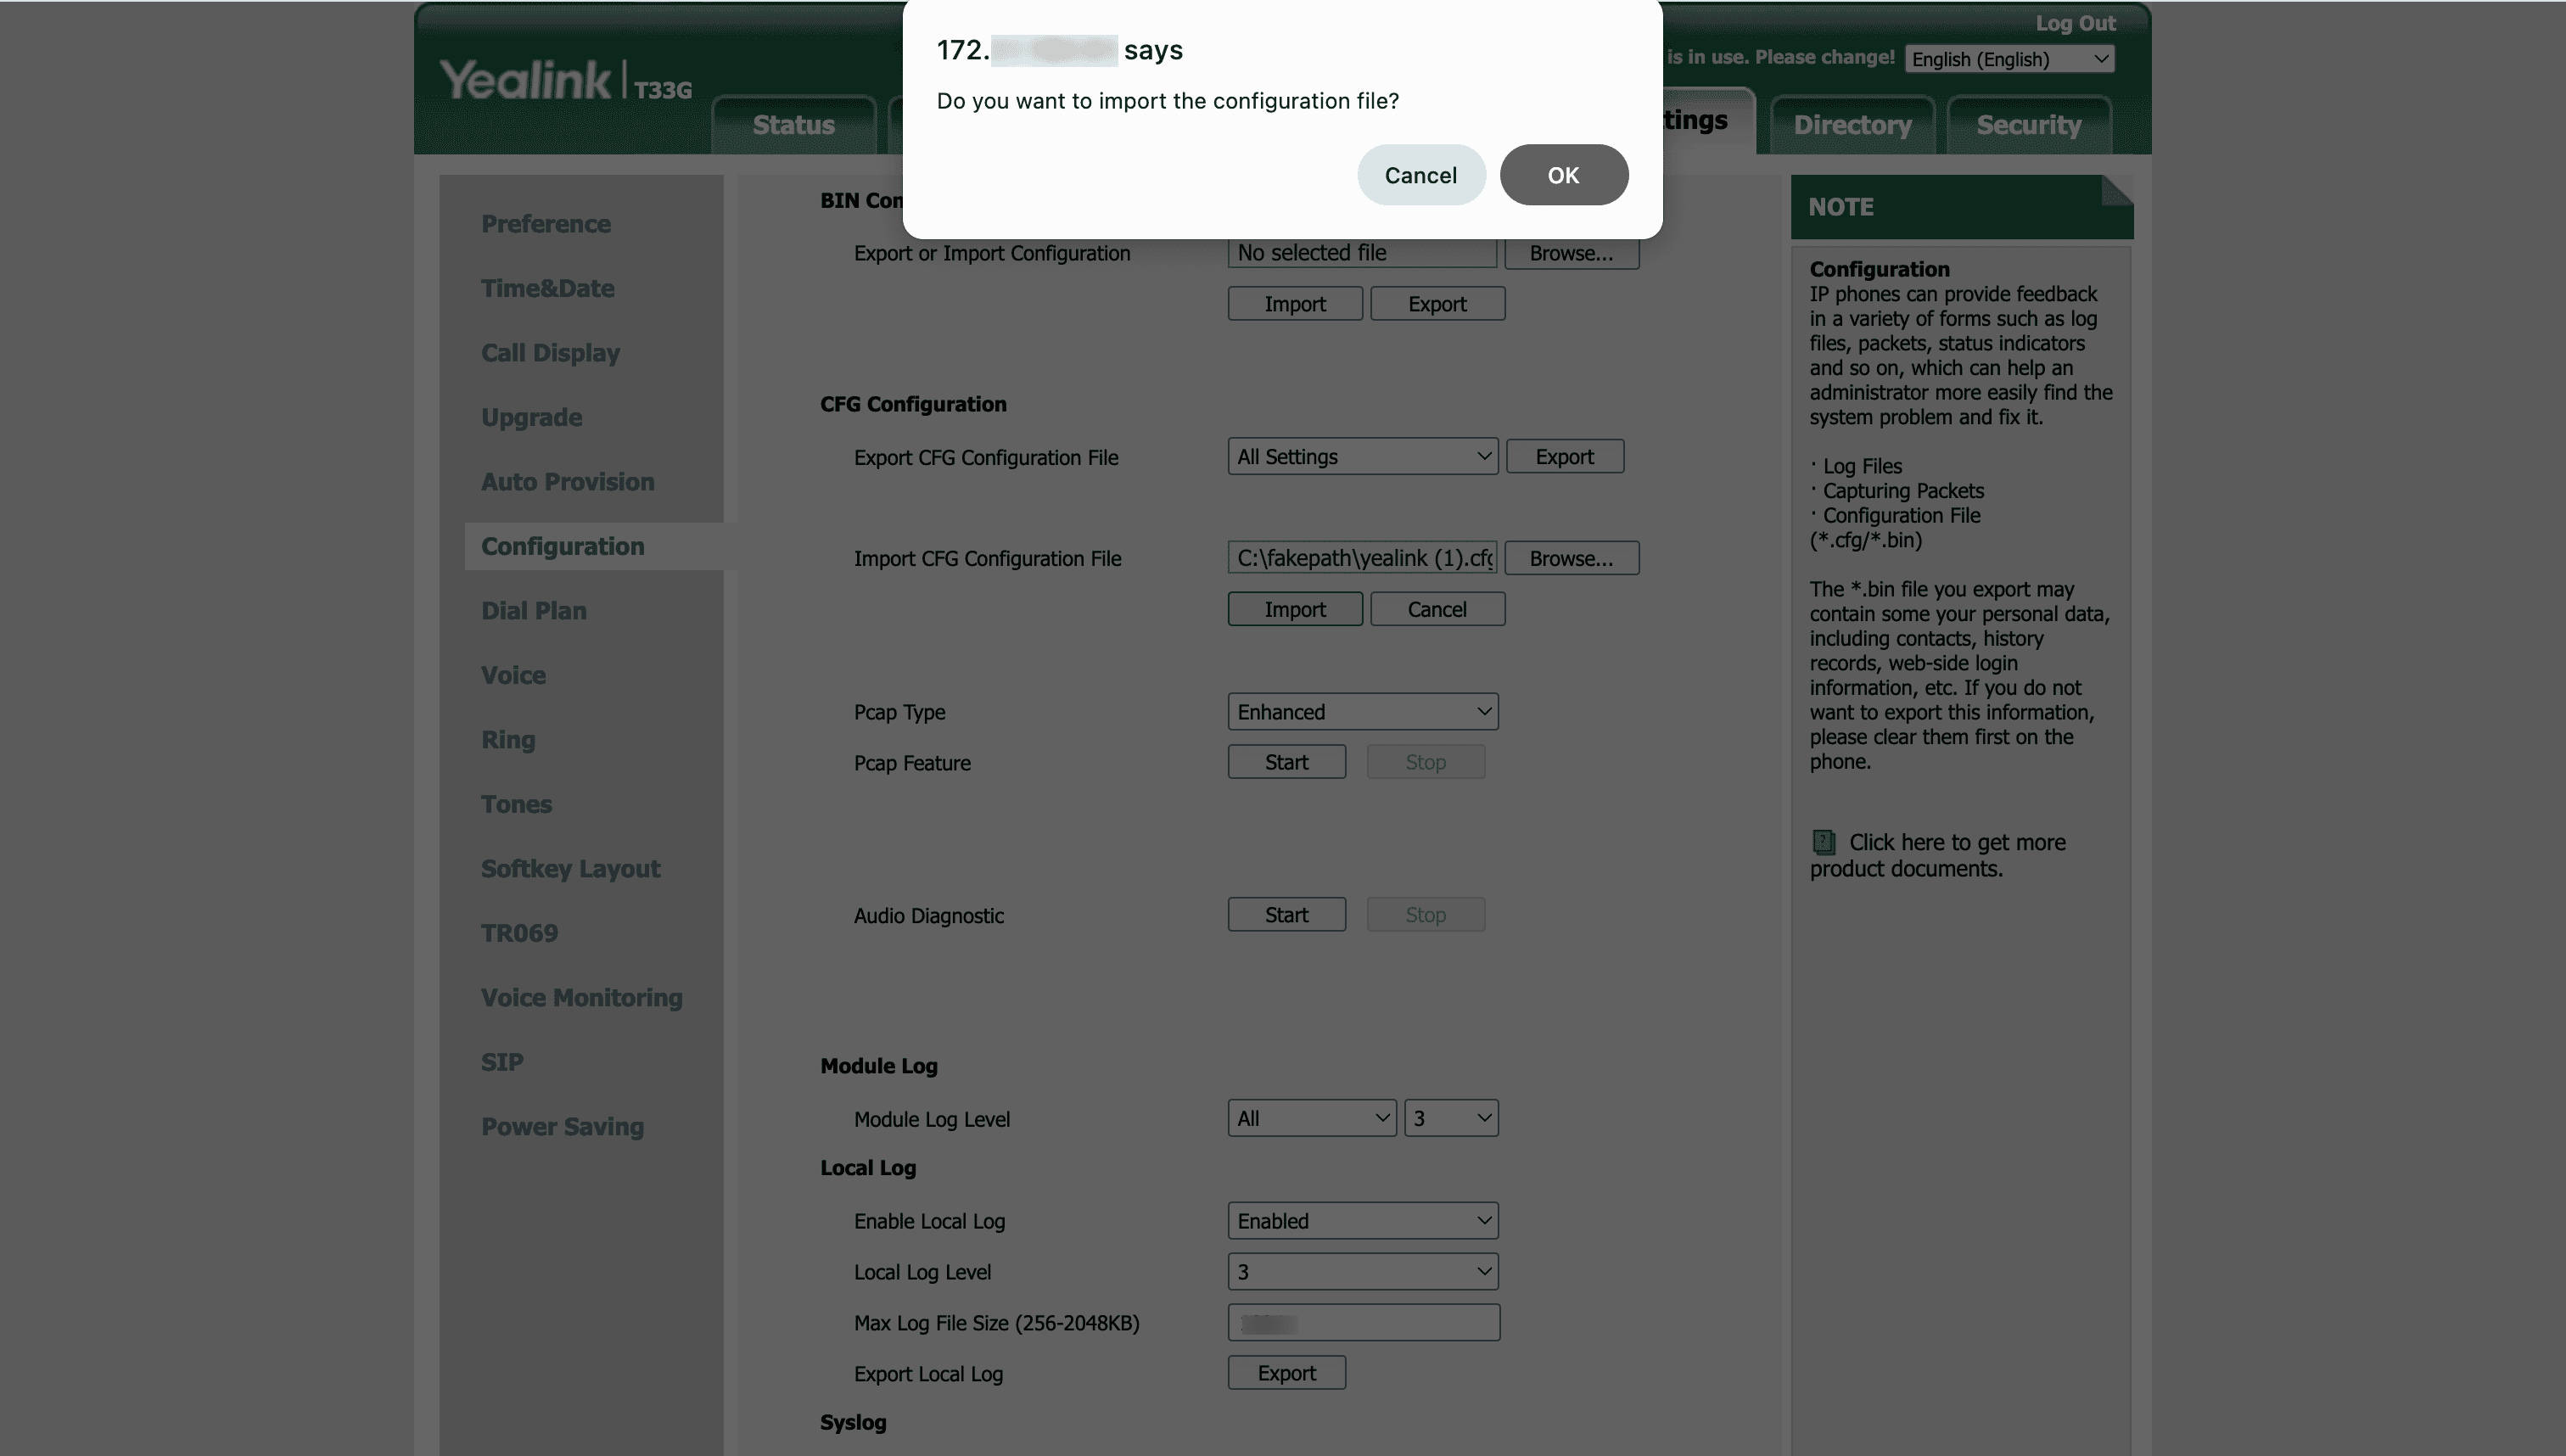
Under the CFG Configuration section, locate the Import CFG Configuration File option. Click Browse and upload the .cfg file you previously downloaded from Zoho Voice.
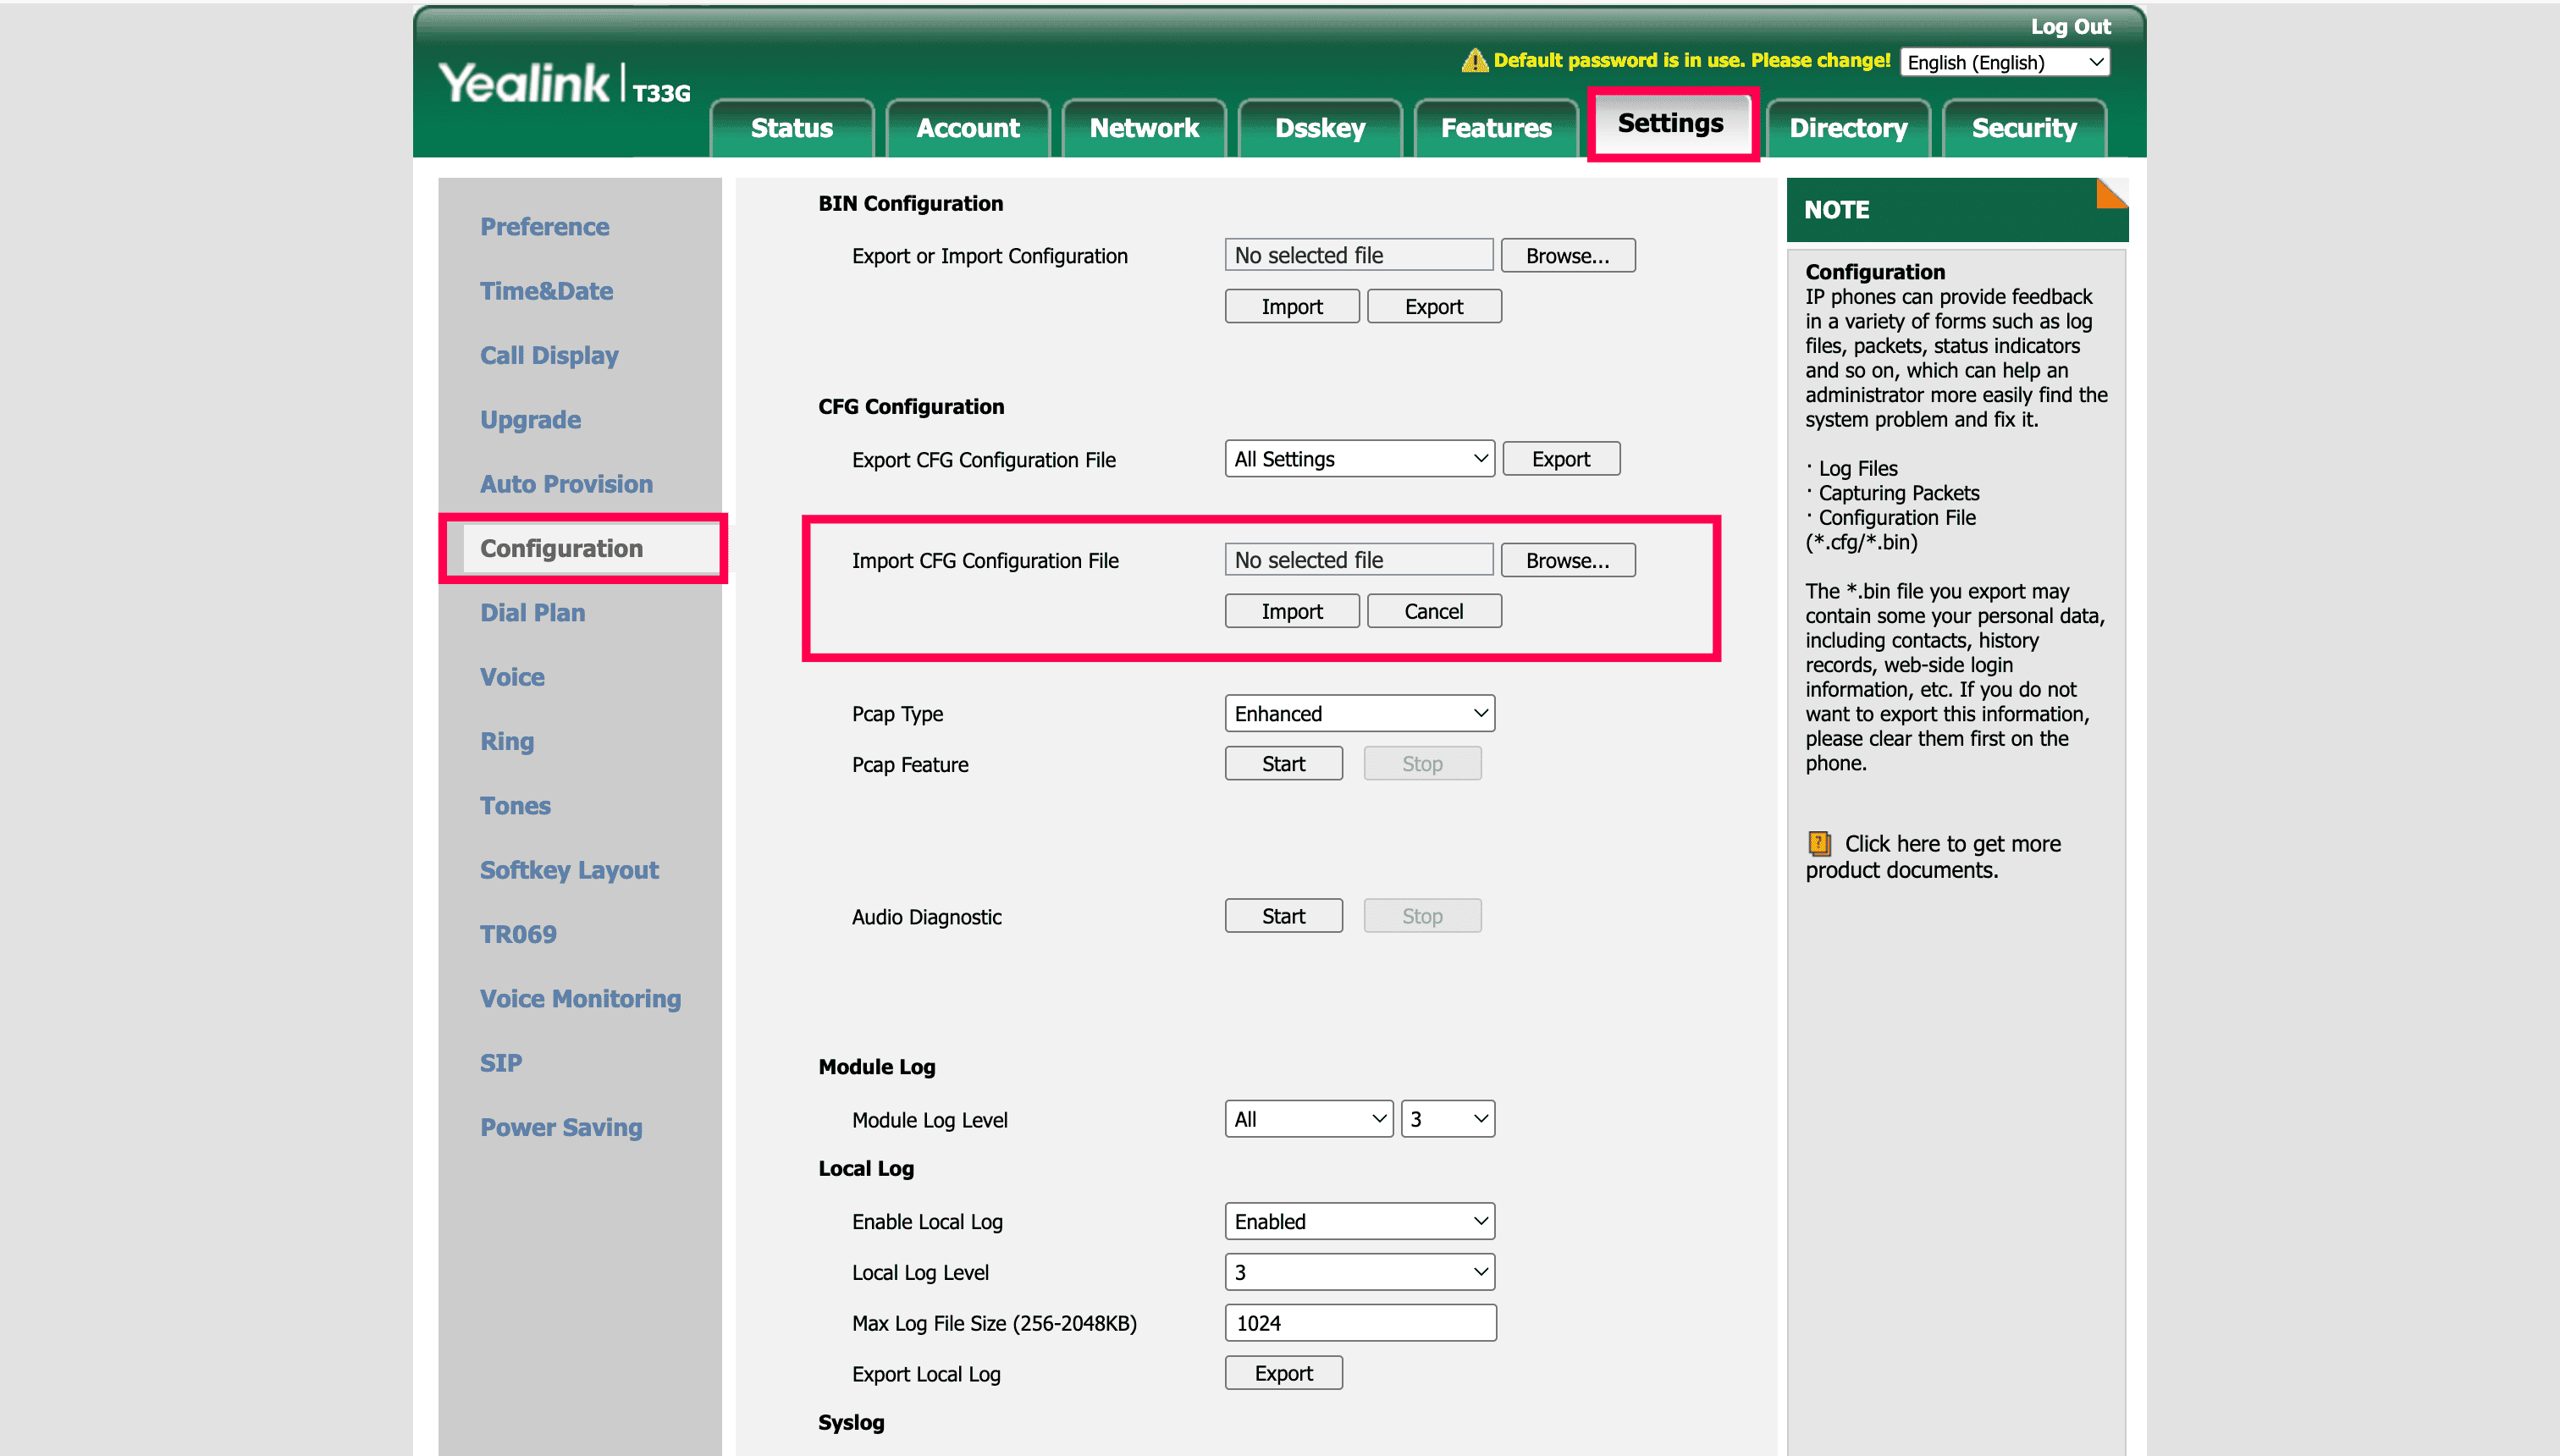
Click Import, then click OK to import the configuration successfully.
Navigate to the Account tab. This opens the Register page, where you can register your account for the Yealink IP phone.
Paste the SIP Authentication Password (sent via email) into the Password field.
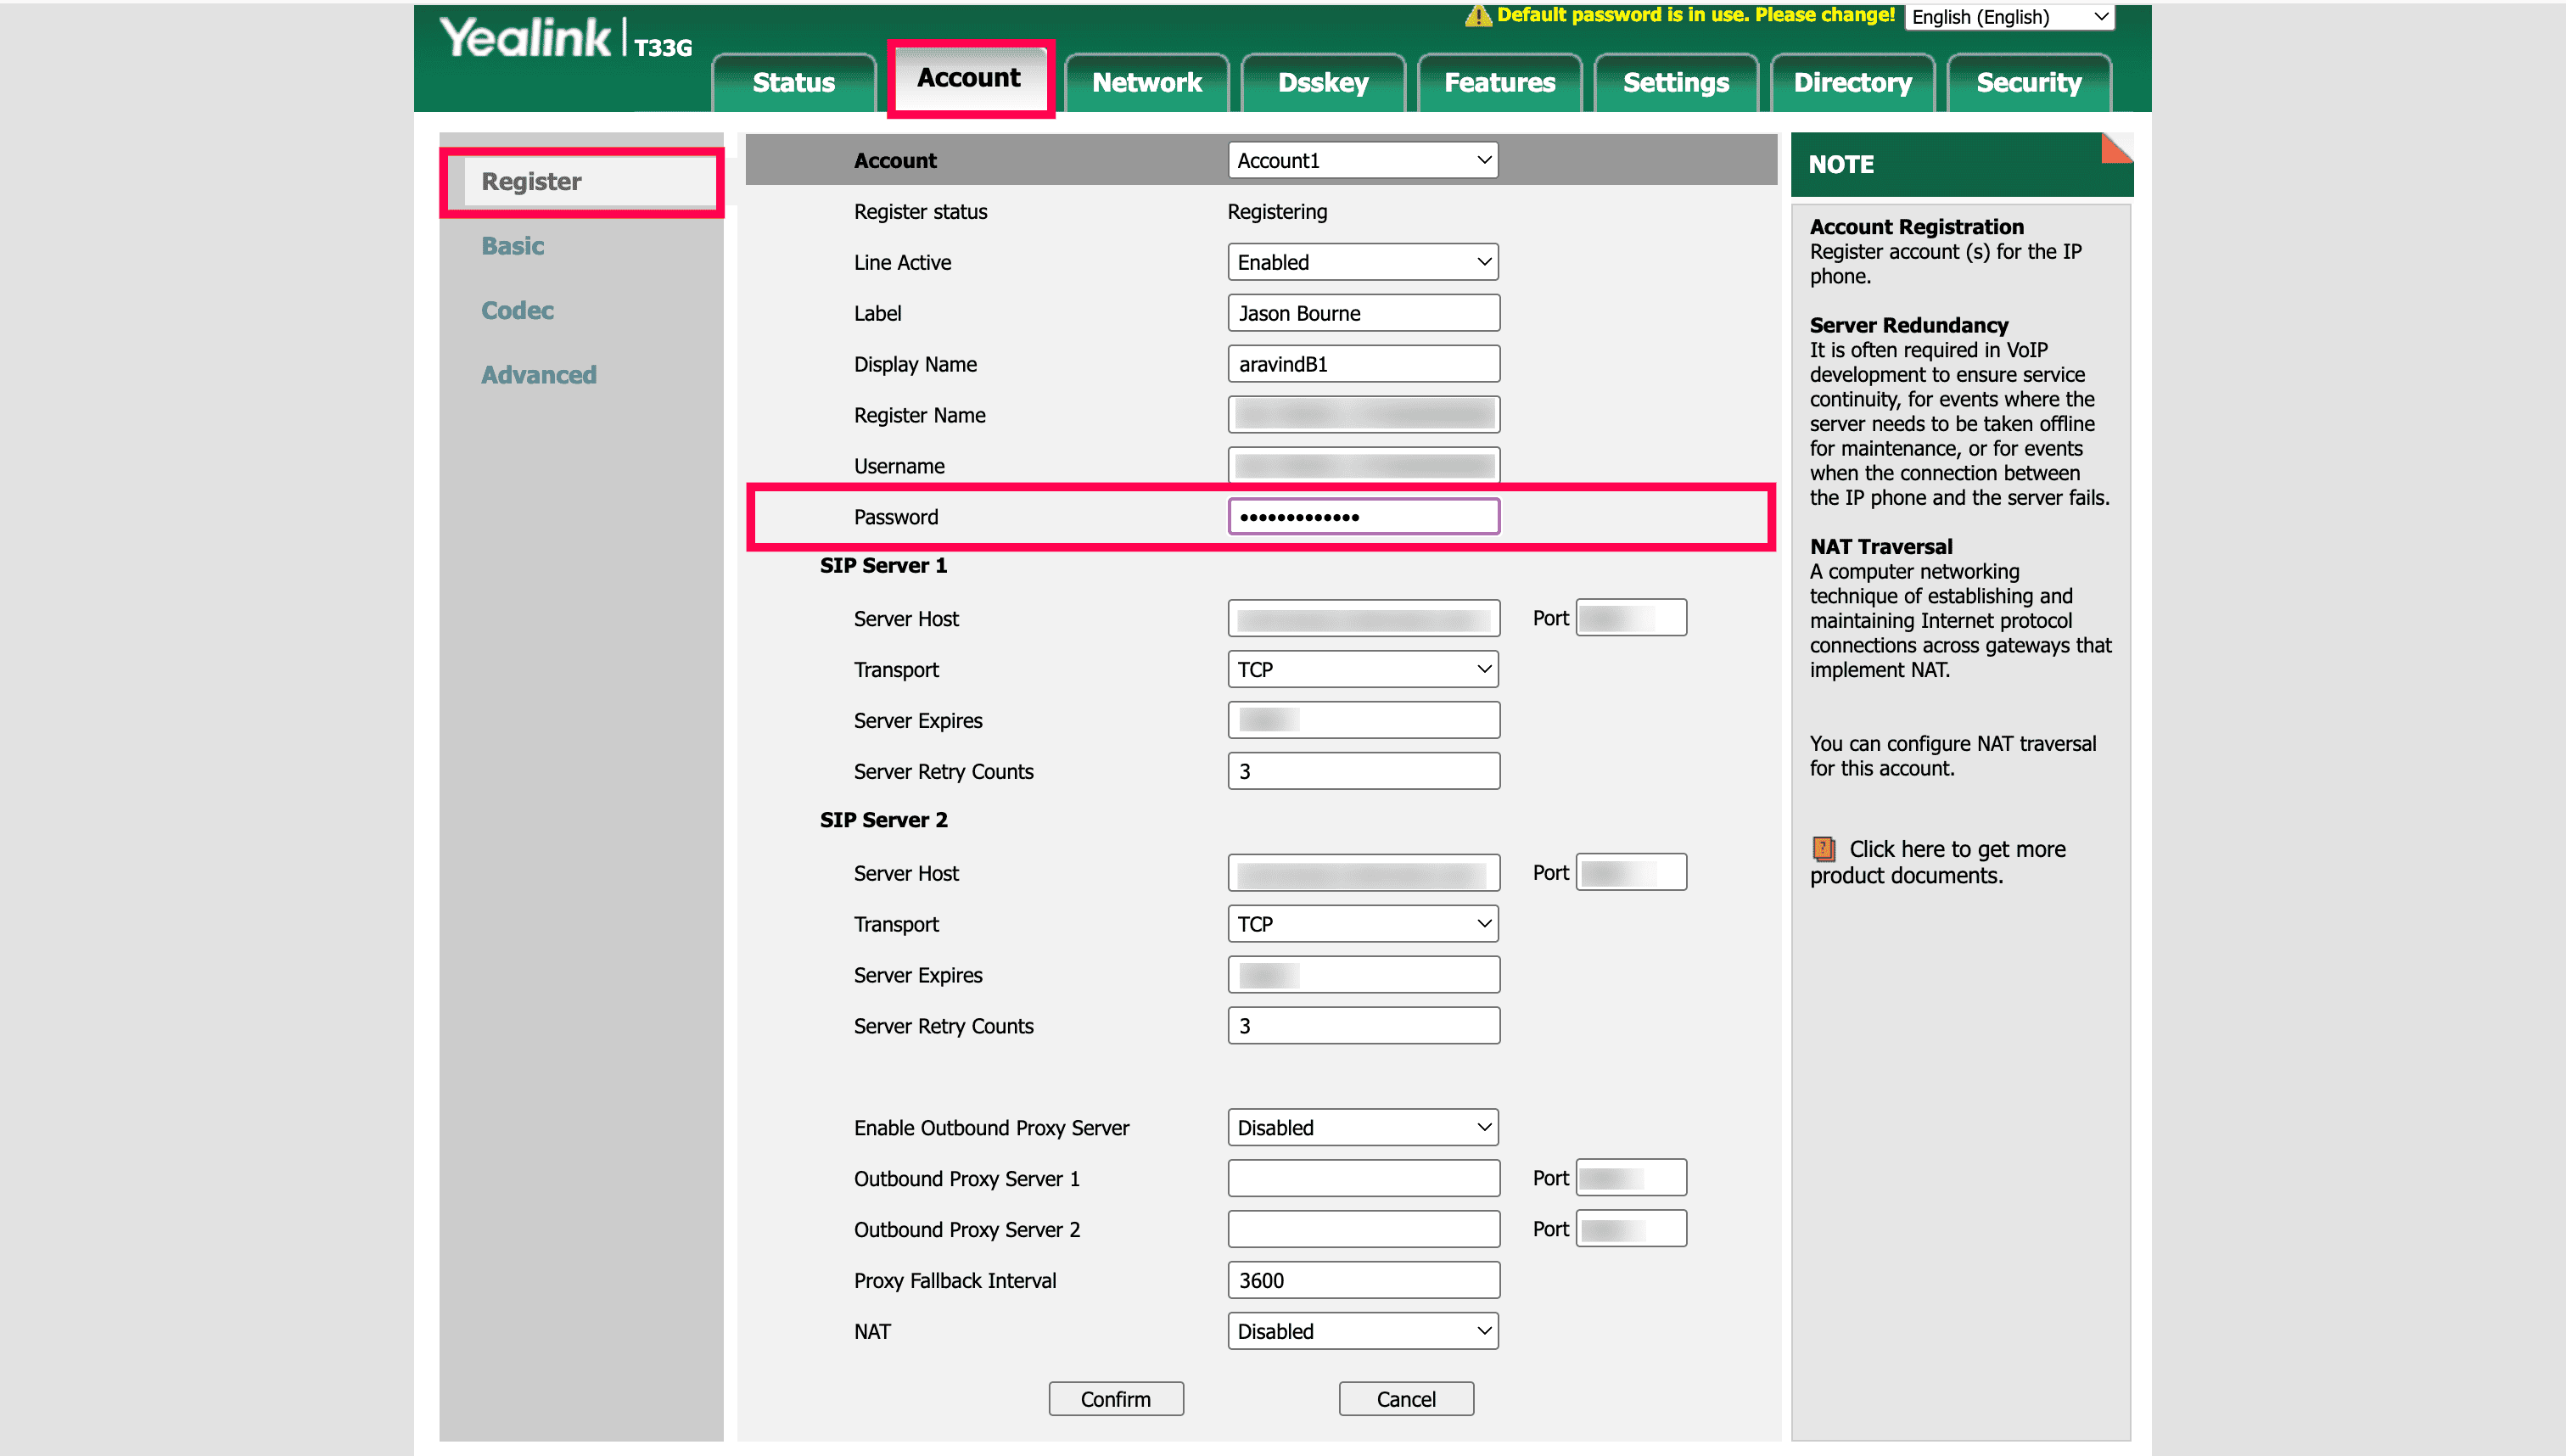
Click the Confirm button at the bottom.
After confirming, check the Register Status. It should show Registered, indicating your Yealink phone is now connected to Zoho Voice.

Note
In the event of an unsuccessful registration, please make sure to factory reset your device, then retry the registration steps mentioned above.


After completing the above steps, your Yealink desk phone is fully configured to manage all Zoho Voice calls that are assigned for the specific agent.
Troubleshooting Yealink Desk Phone Registration and Call Handling
To quickly troubleshoot the issues that arise while performing certain procedures or activities, make sure you reproduce the whole sequence of steps involved in a specific process using your Yealink deskphones while activating Yealink's Packet Capture functionality.
Note
Packet Capture is a special network troubleshooting functionality offered by Yealink that enables you to capture easily, read, and effectively troubleshoot those SIP packet captures.
This can be especially useful while:
Registering your Yealink deskphones with Zoho Voice's SIP servers or while
Handling inbound and outbound calls via your Yealink deskphones
Here’s how you can capture SIP packets from your Yealink devices:
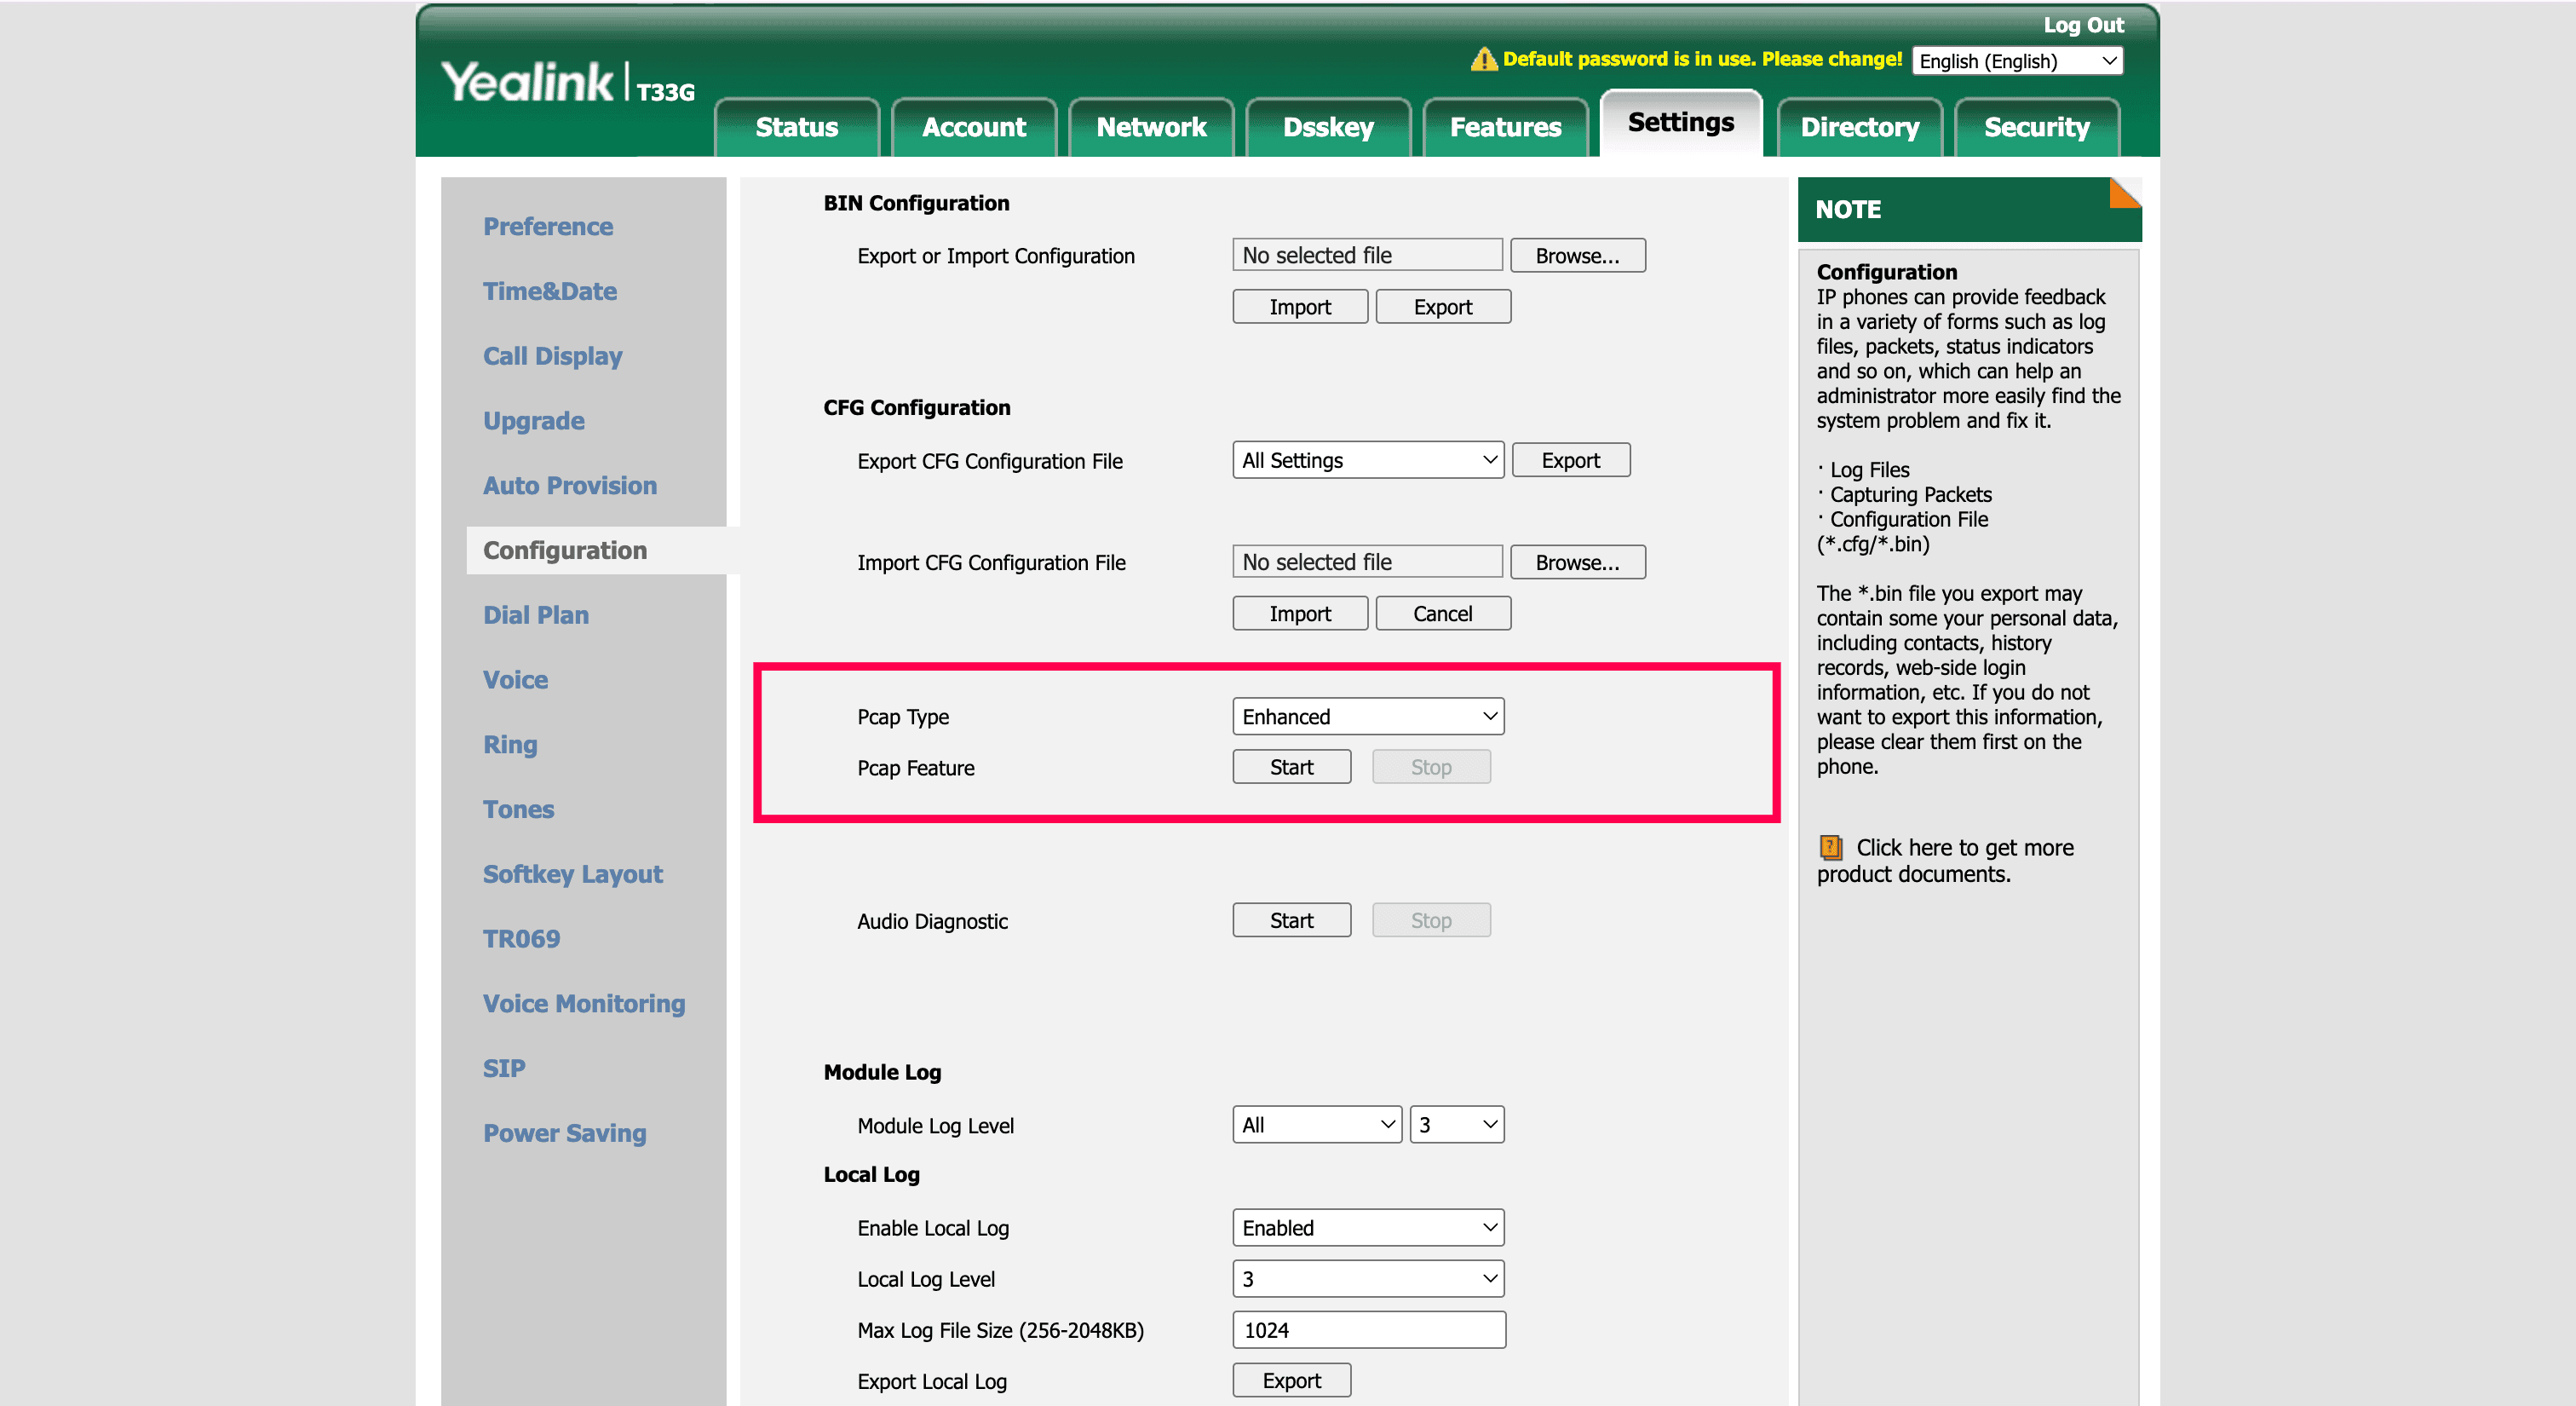
Select the Settings menu at the top menu bar and choose the Configuration option from the left menu bar. The Configuration page appears.
Go to the CFG Configuration section. First, click on the Start button at the left end to start the network packet capture.
Immediately, reproduce the whole sequence of steps involved in the process you intend to troubleshoot. The process can be the registration process, making an outbound call via your Yealink device, receiving an inbound call and more.
Once you're done reproducing the whole sequence, Click the Stop button.
The SIP packets involved in a specific process are captured and automatically downloaded as the Captures.tar file.
Send the downloaded file to the Zoho Voice support team for analysing.

Special Notes
- User extensions in Zoho Voice must be between 4 to 5 digits long. Ensure that all your current extensions follow this format to ensure proper functionality.
- Contacts from the Zoho Voice Contacts module are displayed only during incoming calls.
- When transferring calls via your Yealink desk phone, the recipient cannot record or further transfer the call.
If you face any issue while configuring Zoho Voice with any model under the Yealink brand, reach out to us at support@zohovoice.com.