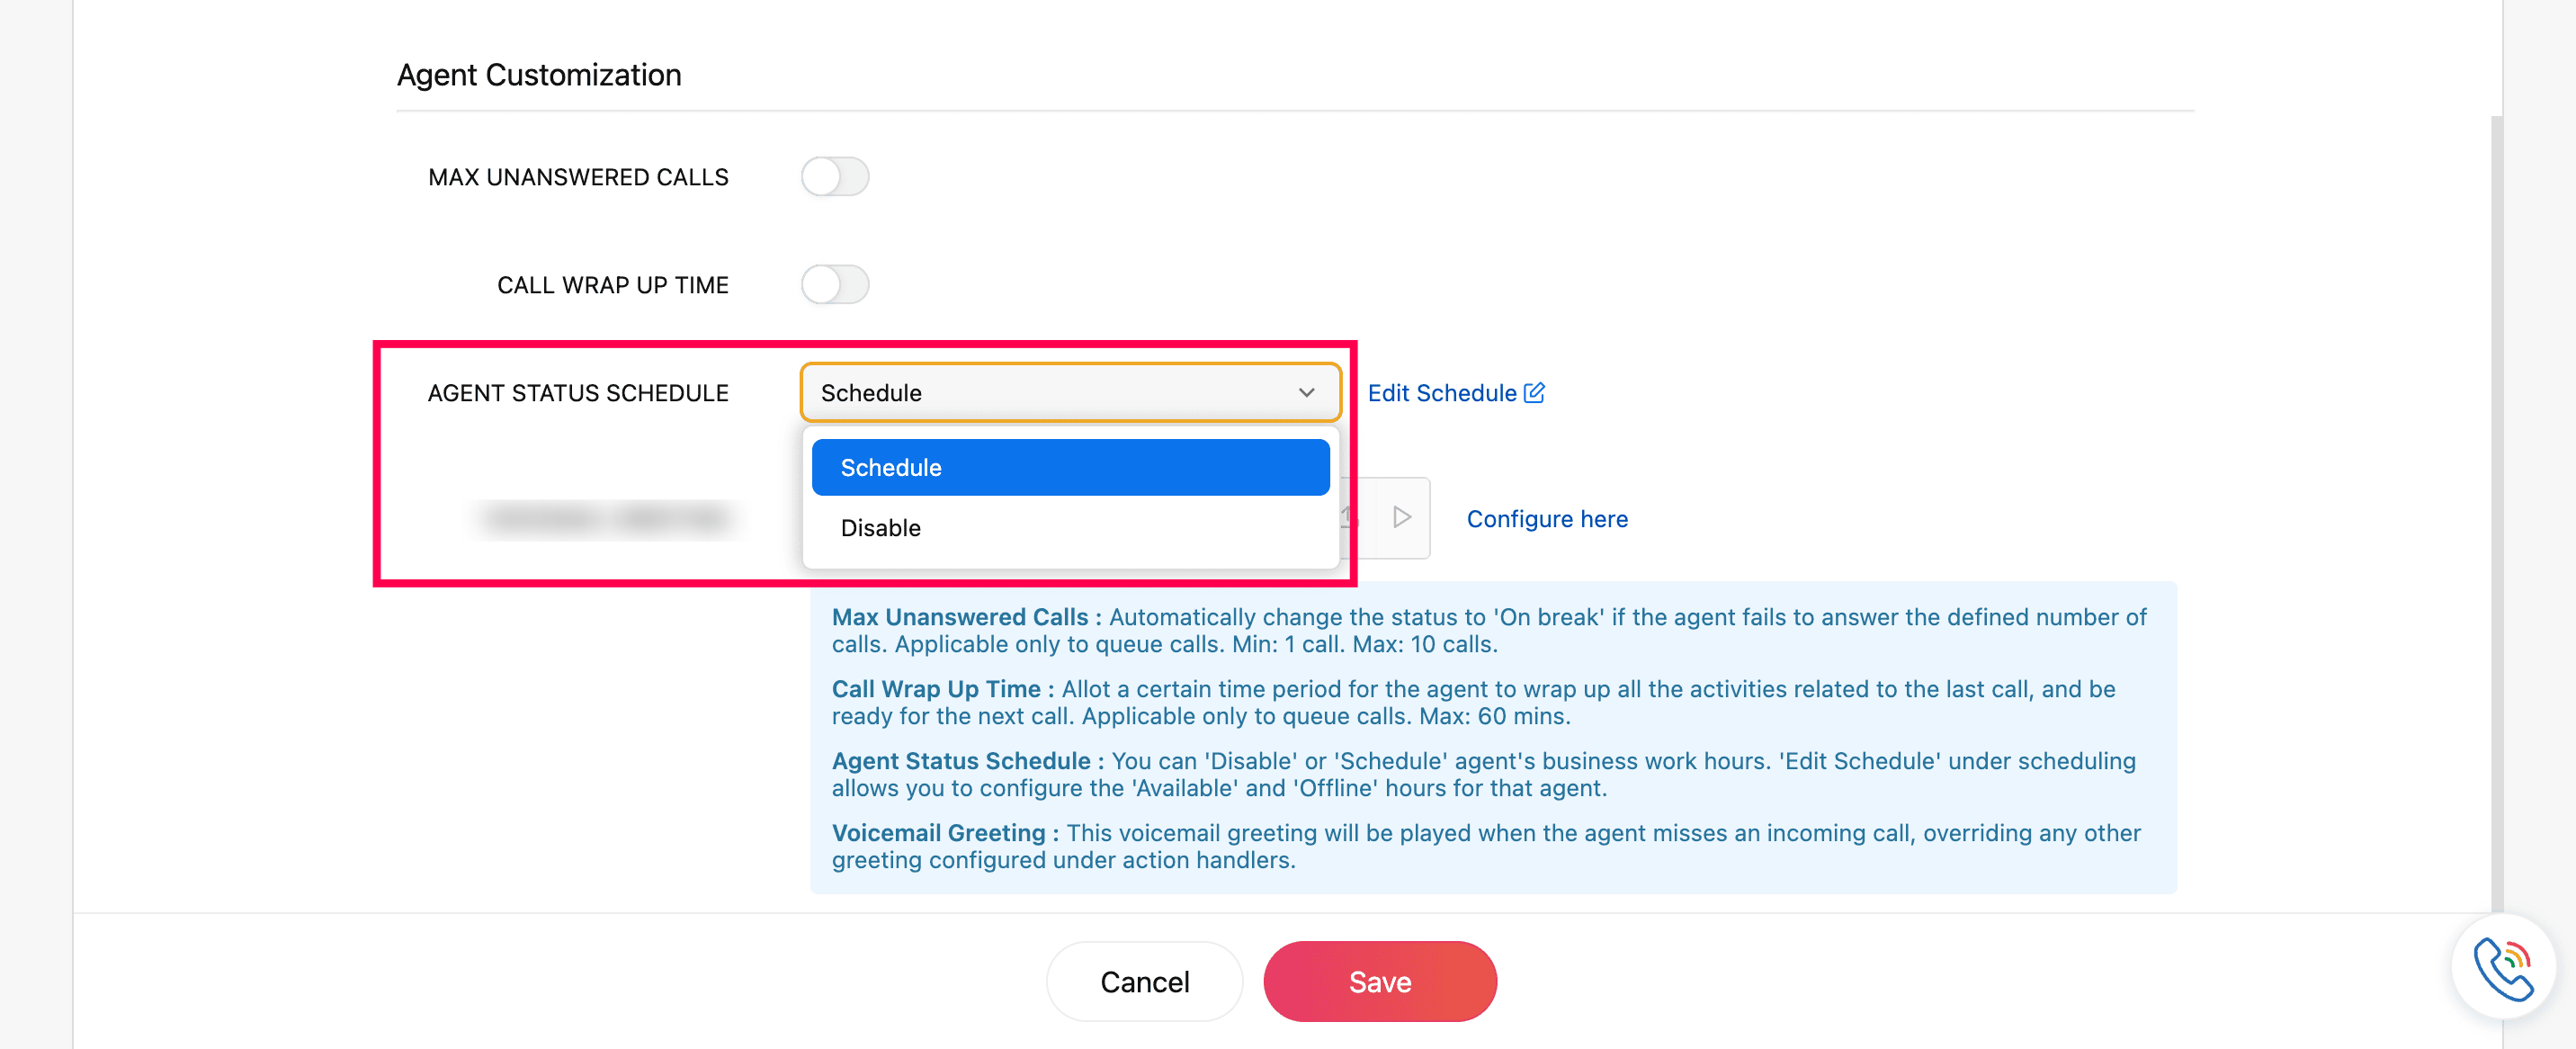
Agent Status Schedule
You can manage your daily availability by scheduling specific time slots. Add multiple intervals to define when you’ll be available and when you’ll be offline. This option can be enabled or disabled at any time.
Super Admin and Admins can apply schedules for all users in the organization.
Supervisors Plus and Supervisors can apply schedules for the agents under their supervision.
Technicians can set and manage schedules only for themselves.
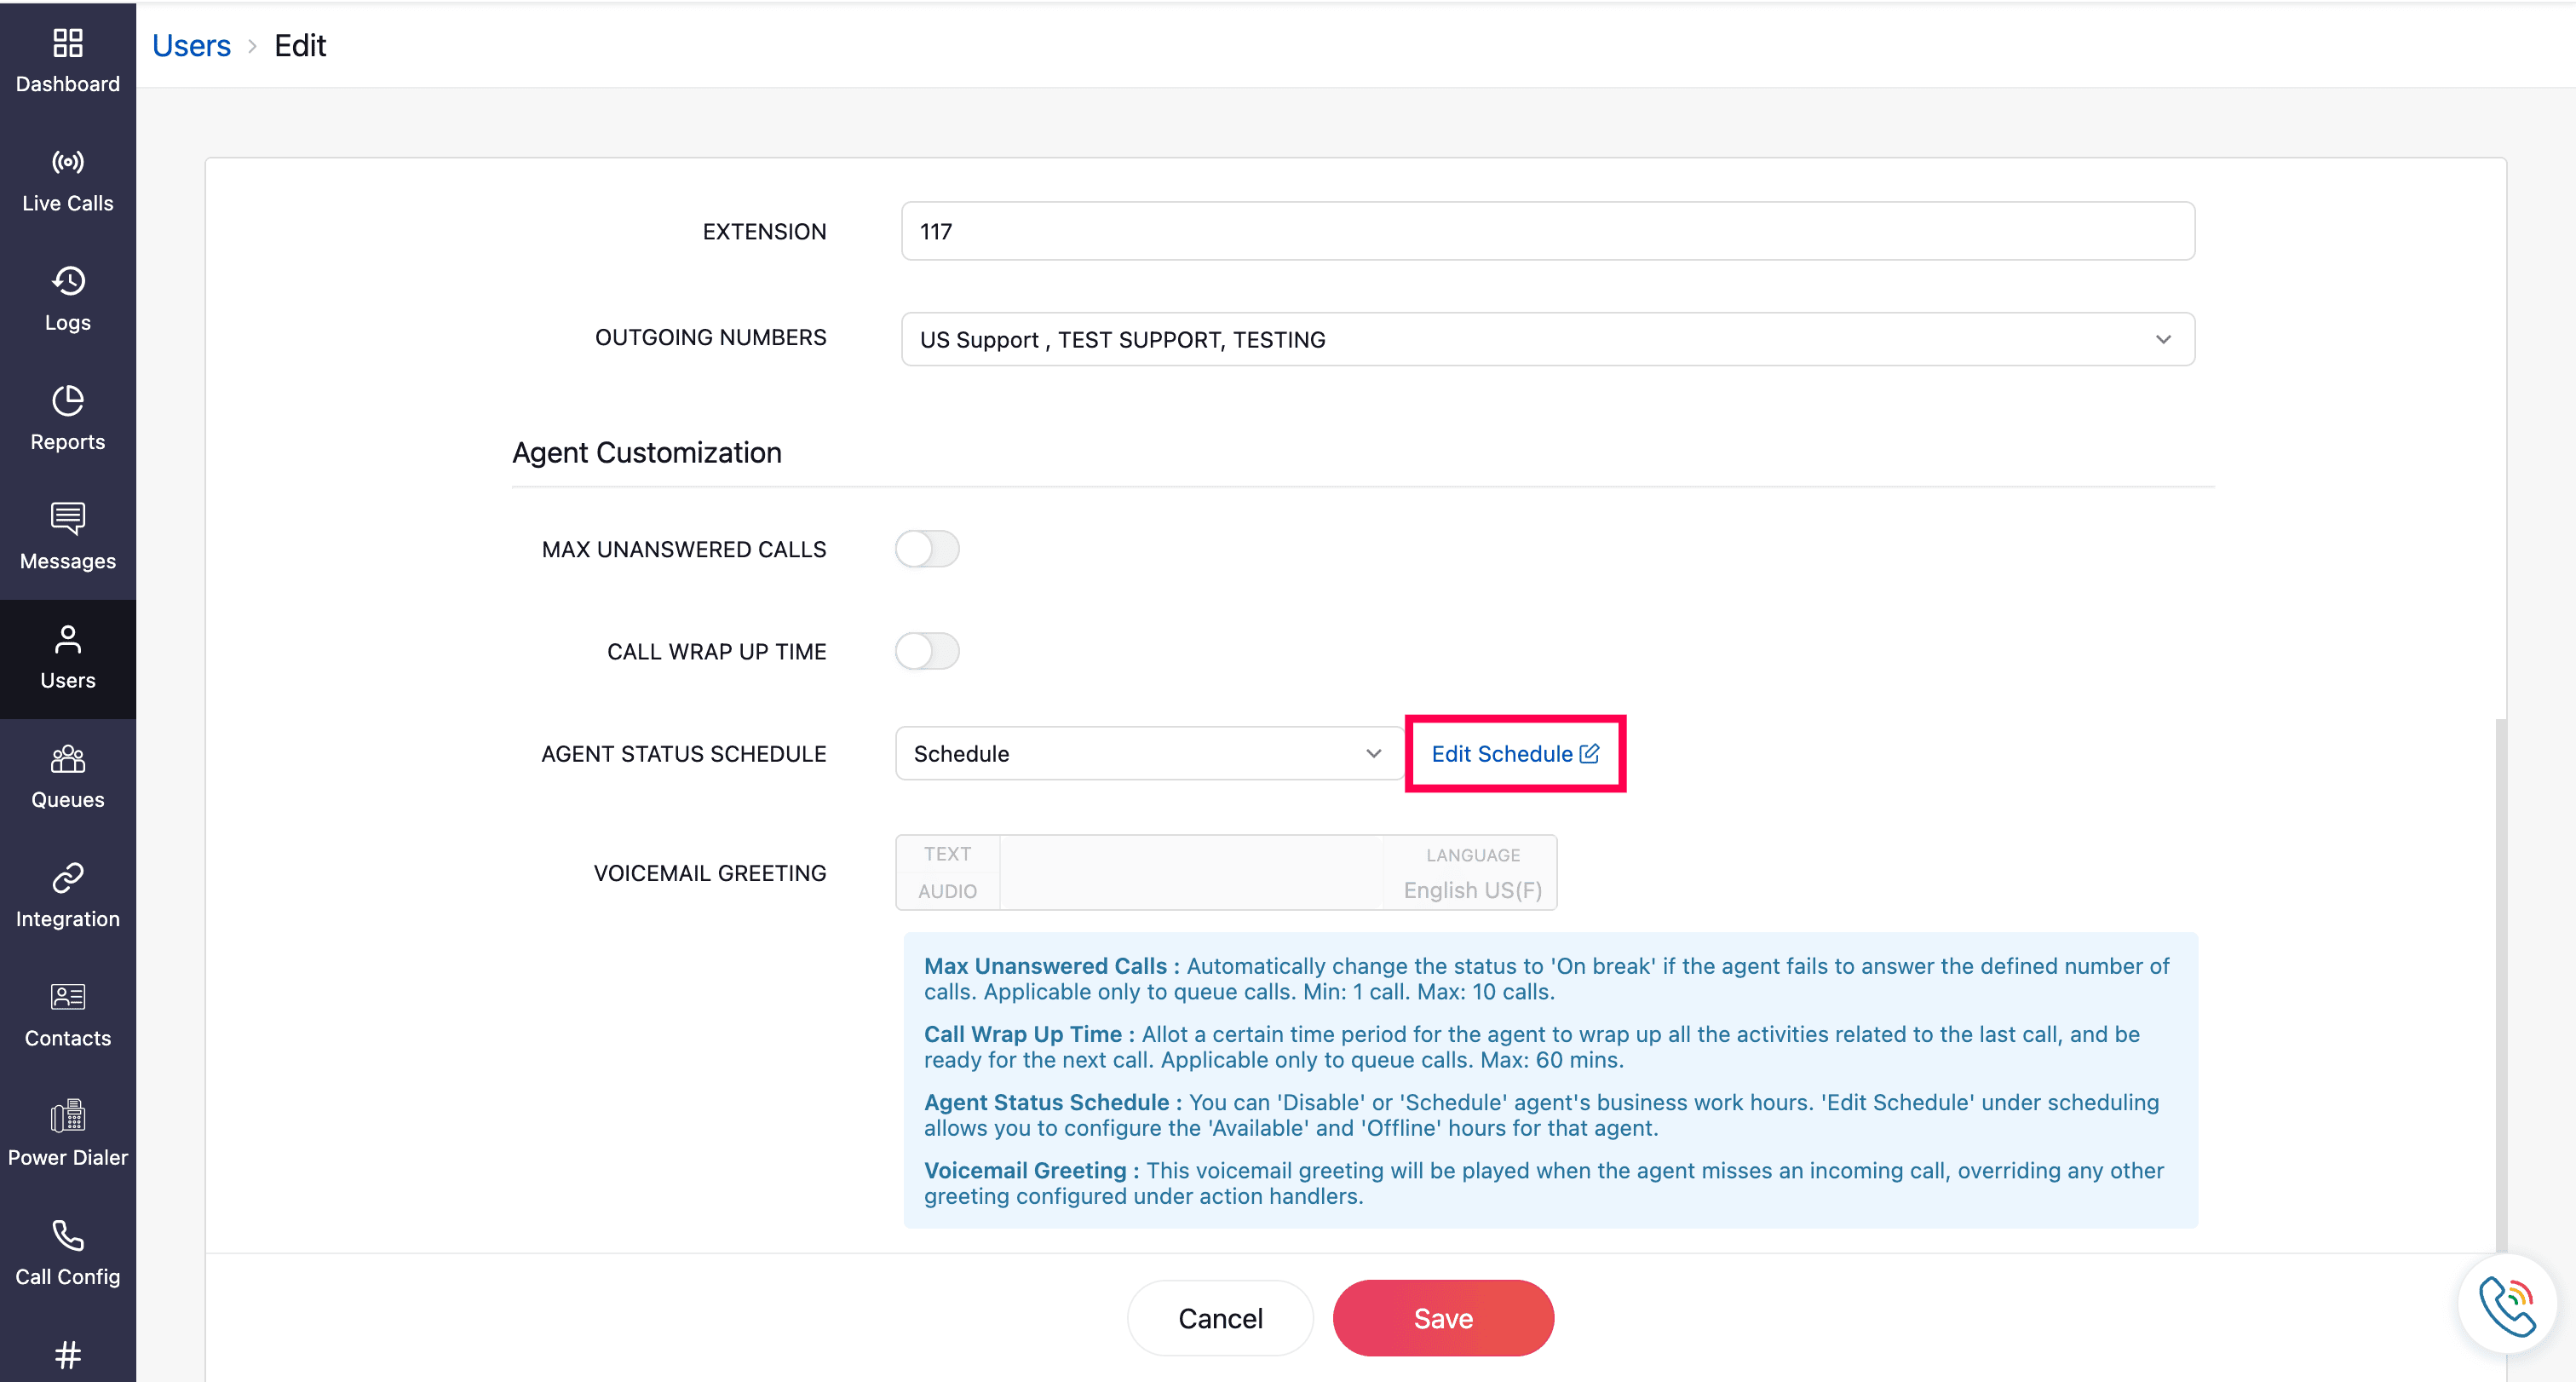
To schedule the agent status:
Go to the Users module from the left sidebar menu.
Click the Edit icon for the desired user profile.
Scroll down to the Agent Customization section.
Select Schedule from the dropdown.
In the Scheduled Status prompt, Select the days using the checkboxes.
Add multiple hours by clicking Add Hours.
Choose the time and status (Available or Offline) from the respective dropdowns.
To quickly apply the first scheduled status of the first day to all other days, click Apply for all days.
To remove an added time slot, click the Cancel icon.
Once all required statuses are set, click Save.

To edit an existing scheduled status, click Edit Schedule.
Click Save again to apply the changes to the user profile.


Note
These scheduled status changes can be tracked in Agent Status Audit (Reports → Status Tracking) with the reason Automatic Check-in and Automatic Check-out.