
Integrate Zoho Expense With Zoho Desk
Zoho Desk is the industry’s first context-aware help desk software that helps you interact between businesses and customers. It lets you prioritize, track and solve customer support queries. You can also connect with various apps and automate ticket management to provide a better customer service. Installing Zoho Expense add-on in Zoho Desk will allow you to create expenses for the support tickets from within the Zoho Desk application. You can also track the status of these expenses.
Let us understand this better with an example: John owns a car manufacturing company, ABC Pvt Ltd. His company also provides after sale services for which customers will be billed later. To manage these service requests, the company uses Zoho Desk and they use Zoho Expense to track their expenses. In this case, once they fulfill the service request received from a customer, they can create expenses from the support tickets directly using the Zoho Expense add-on; and bill the customer for the expenses. They can track the status of these expenses within Zoho Desk.
By installing Zoho Expense add-on in Zoho Desk, you can:
- Create expenses for support tickets from within Zoho Desk
- Track the status of the expenses associated with a ticket from Zoho Desk
- Associate ticket numbers with the expenses, reports and trips in Zoho Expense and track them under ticket expenses in Zoho Desk
- Access multiple Zoho Expense organizations and create expenses for different organizations from any support ticket.
Prerequisites
- Please ensure that your customer support agent is a user in your Zoho Expense account.
- Your customer support agent should have access to your Zoho Desk account which has Zoho Expense add-on installed in it.
Install Zoho Desk Add-on
Installing the Zoho Expense add-on is easy! To install:
- Log in to your Zoho Desk account.
- Click the Gear icon on the top right corner of the page.
- Click All under Marketplace and select Zoho Expense.
- Click Install to integrate Zoho Expense to your Zoho Desk account.
- After the installation, select the Zoho Desk Portal for which you would like to add the Zoho Expense add-on.
Access Zoho Expense from Zoho Desk
To access Zoho Expense from Zoho Desk:
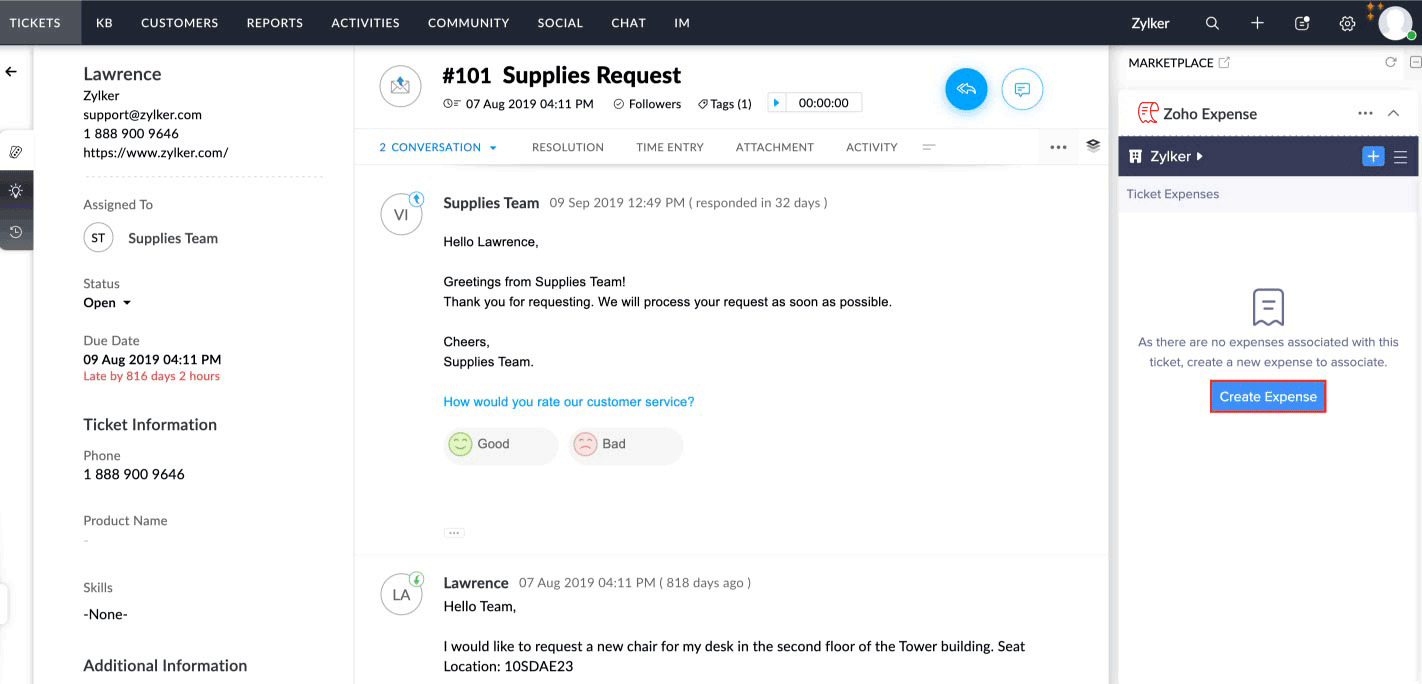
- Click the Tickets tab on the top left corner of the page to view the support tickets.
- Pick a ticket that might require your access to Zoho Expense and click the Stack icon at the right corner of the window.
- Click Create Expense or "+" to create an expense from the support ticket.
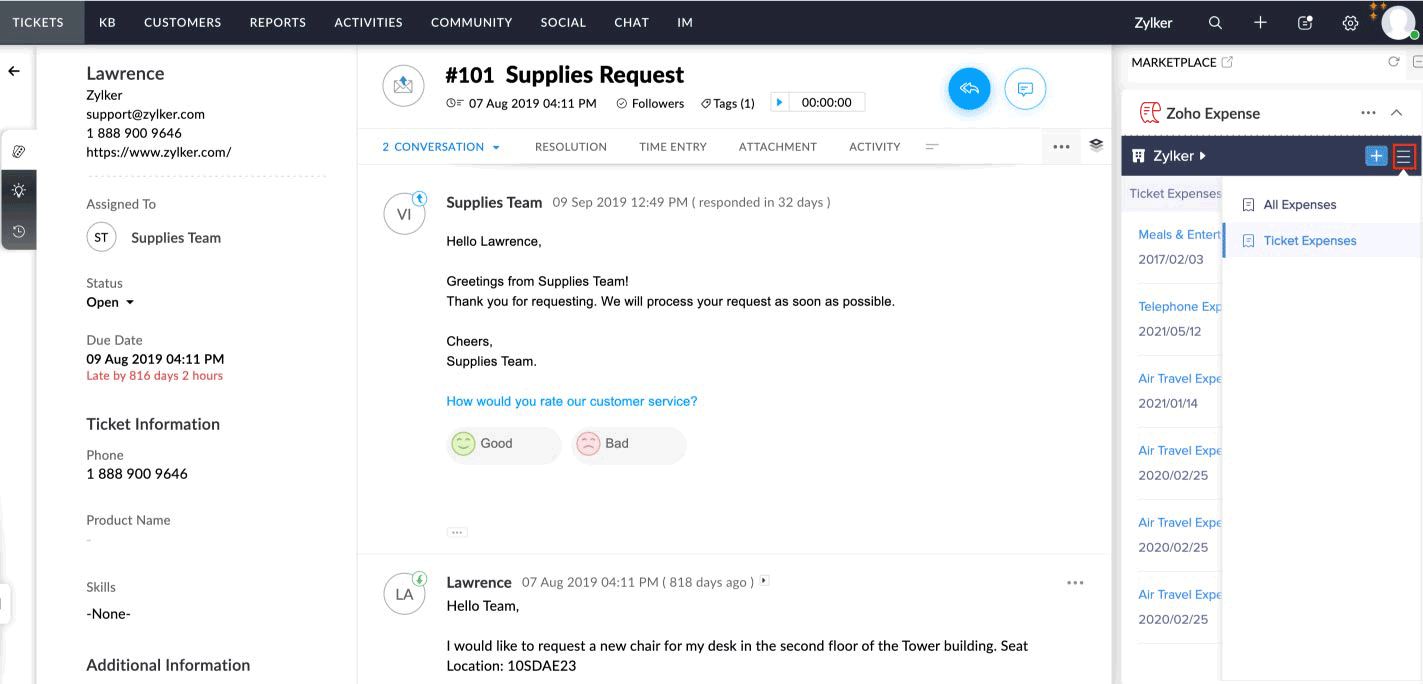
- Click the Hamburger icon and select:
- All Expenses - To view all the expenses of the selected organization or
- Ticket Expenses - To view the expenses created from the support ticket and the expenses associated with the corresponding ticket in Zoho Expense.
Associating Tickets in Zoho Expense
In Zoho Expense, you can associate tickets to expenses, reports and trips by creating custom fields with the data type as External Lookup. You can associate tickets from Zoho Expense, even before installing the Zoho Expense Add-on in Zoho Desk. To associate tickets to expenses:
- Click Admin View.
- Click the Gear icon at the top right side.
(OR)
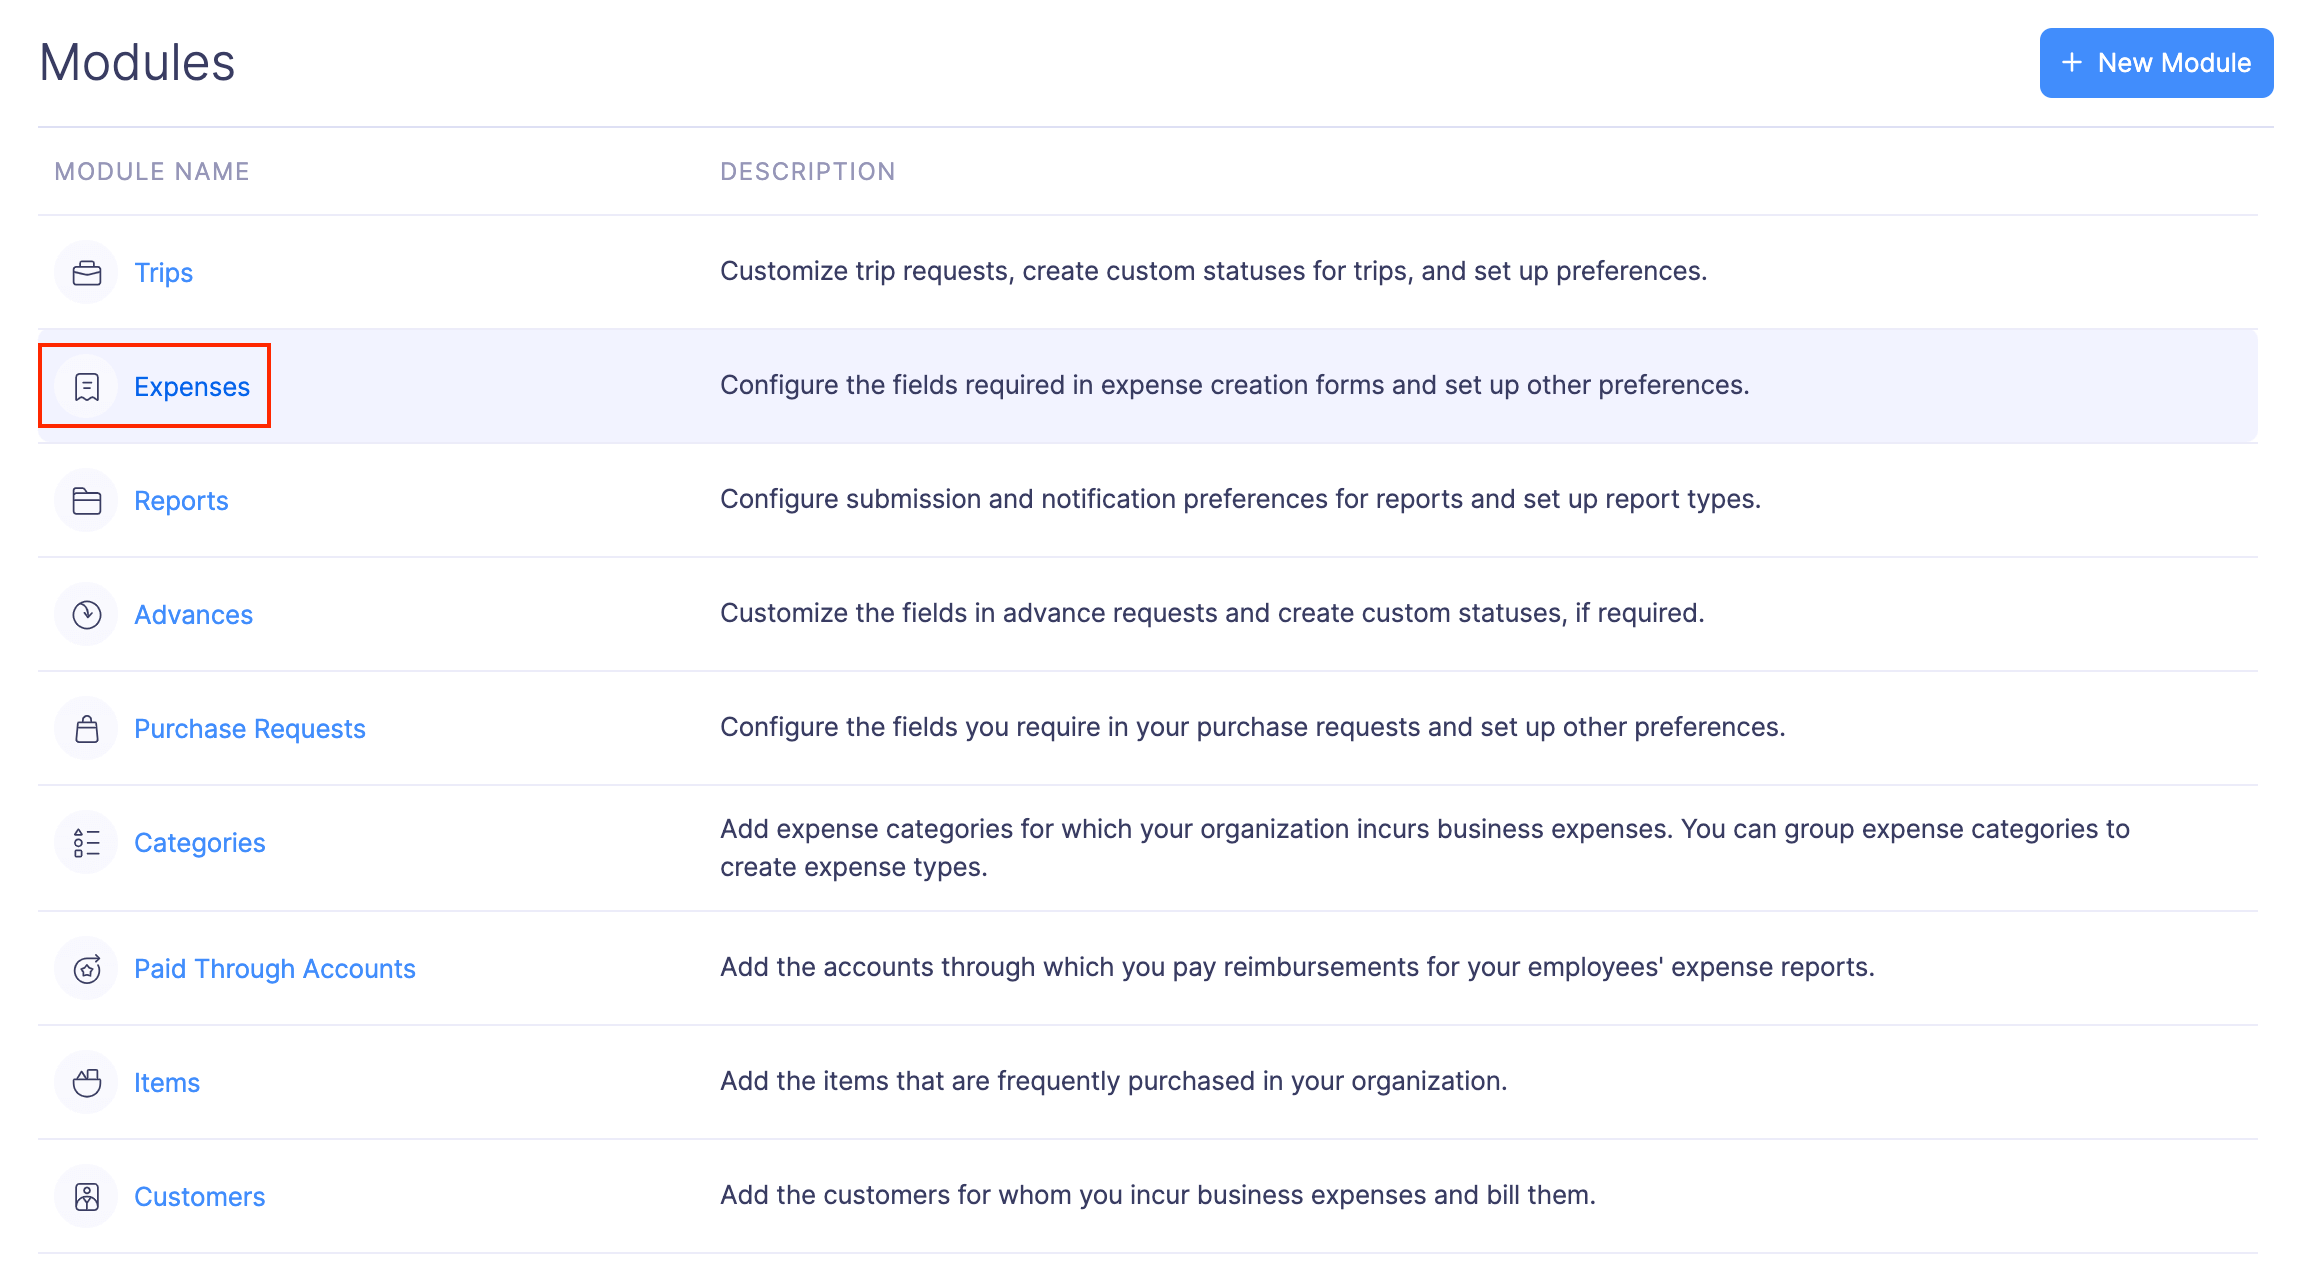
Go to Settings on the left sidebar. - Go to Modules under Customization.
- Click Expenses.
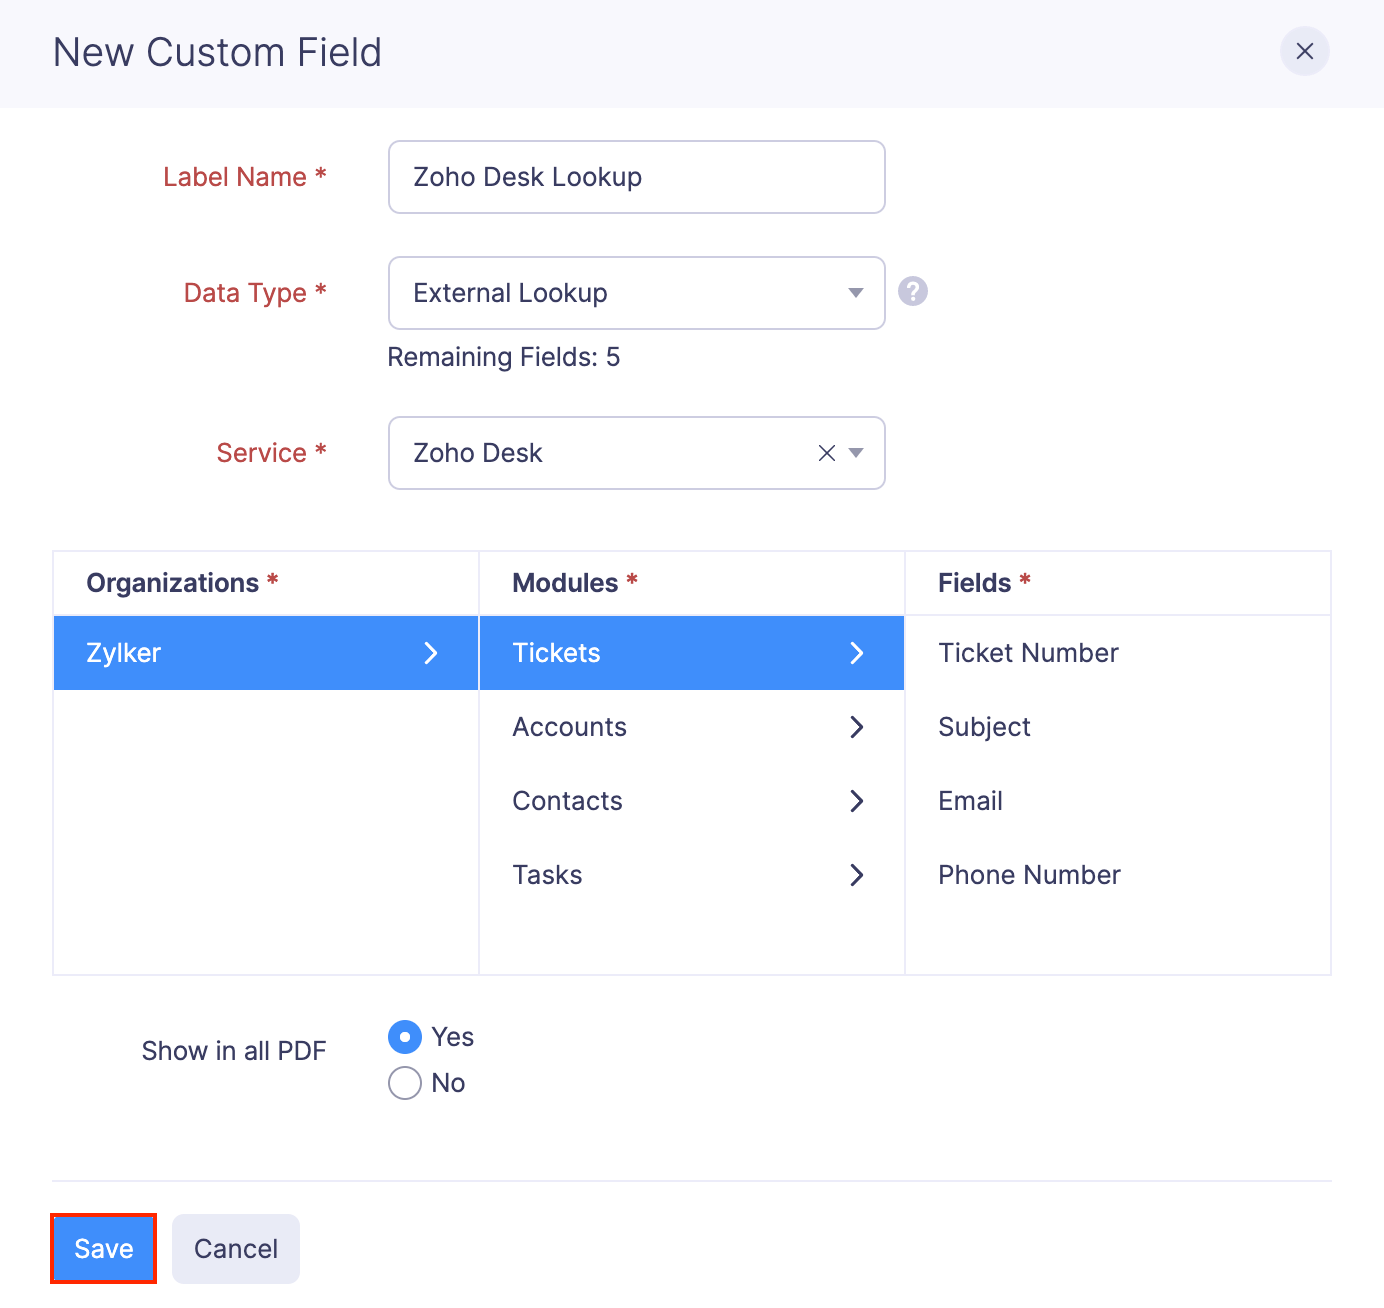
- Navigate to the Fields tab and click + Add New Field.
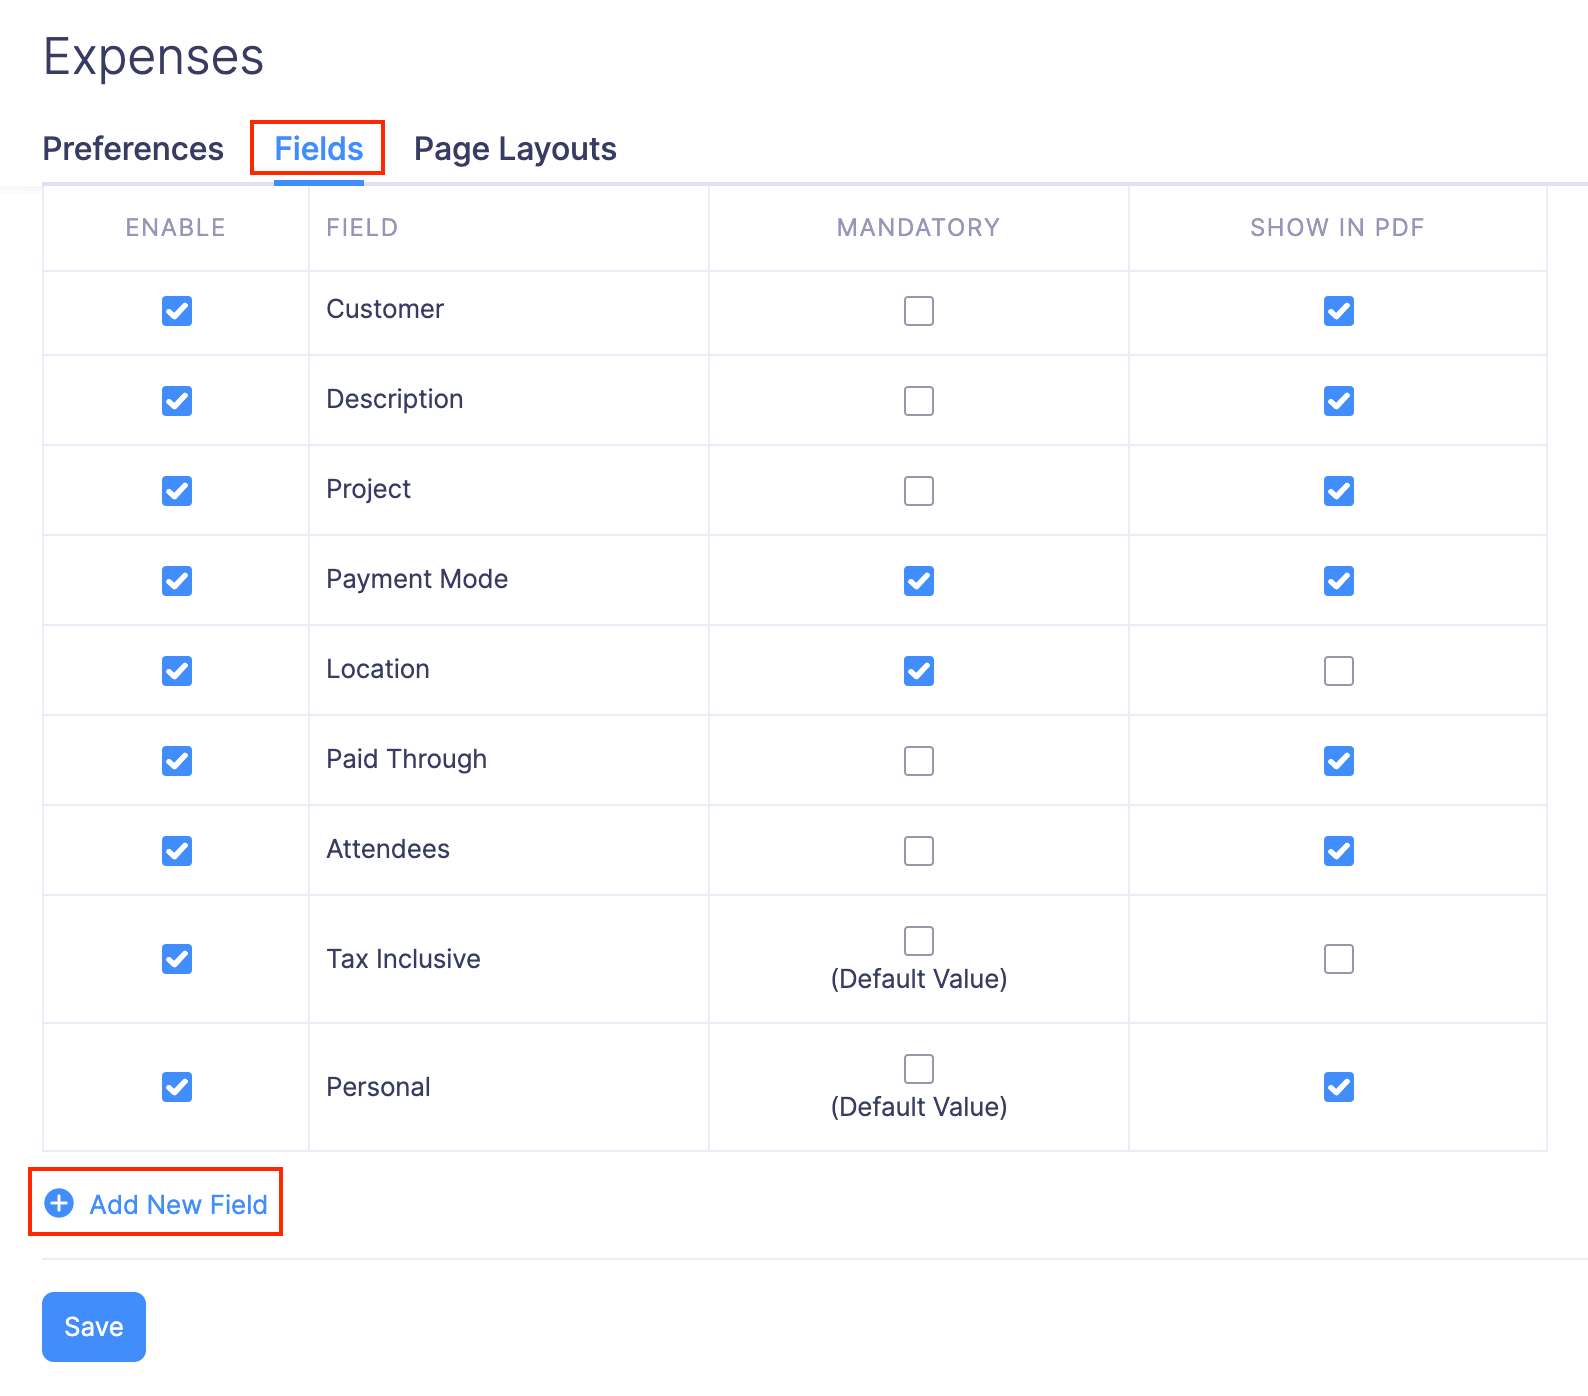
- Provide a Label Name and select the Data Type as External Lookup from the dropdown.
- Select Zoho Desk from the dropdown in the Service field.
- Select the Zoho Desk Portal for which you want to associate support tickets.
- Select Tickets under Modules and select a preferred field to lookup.
- Click Save.
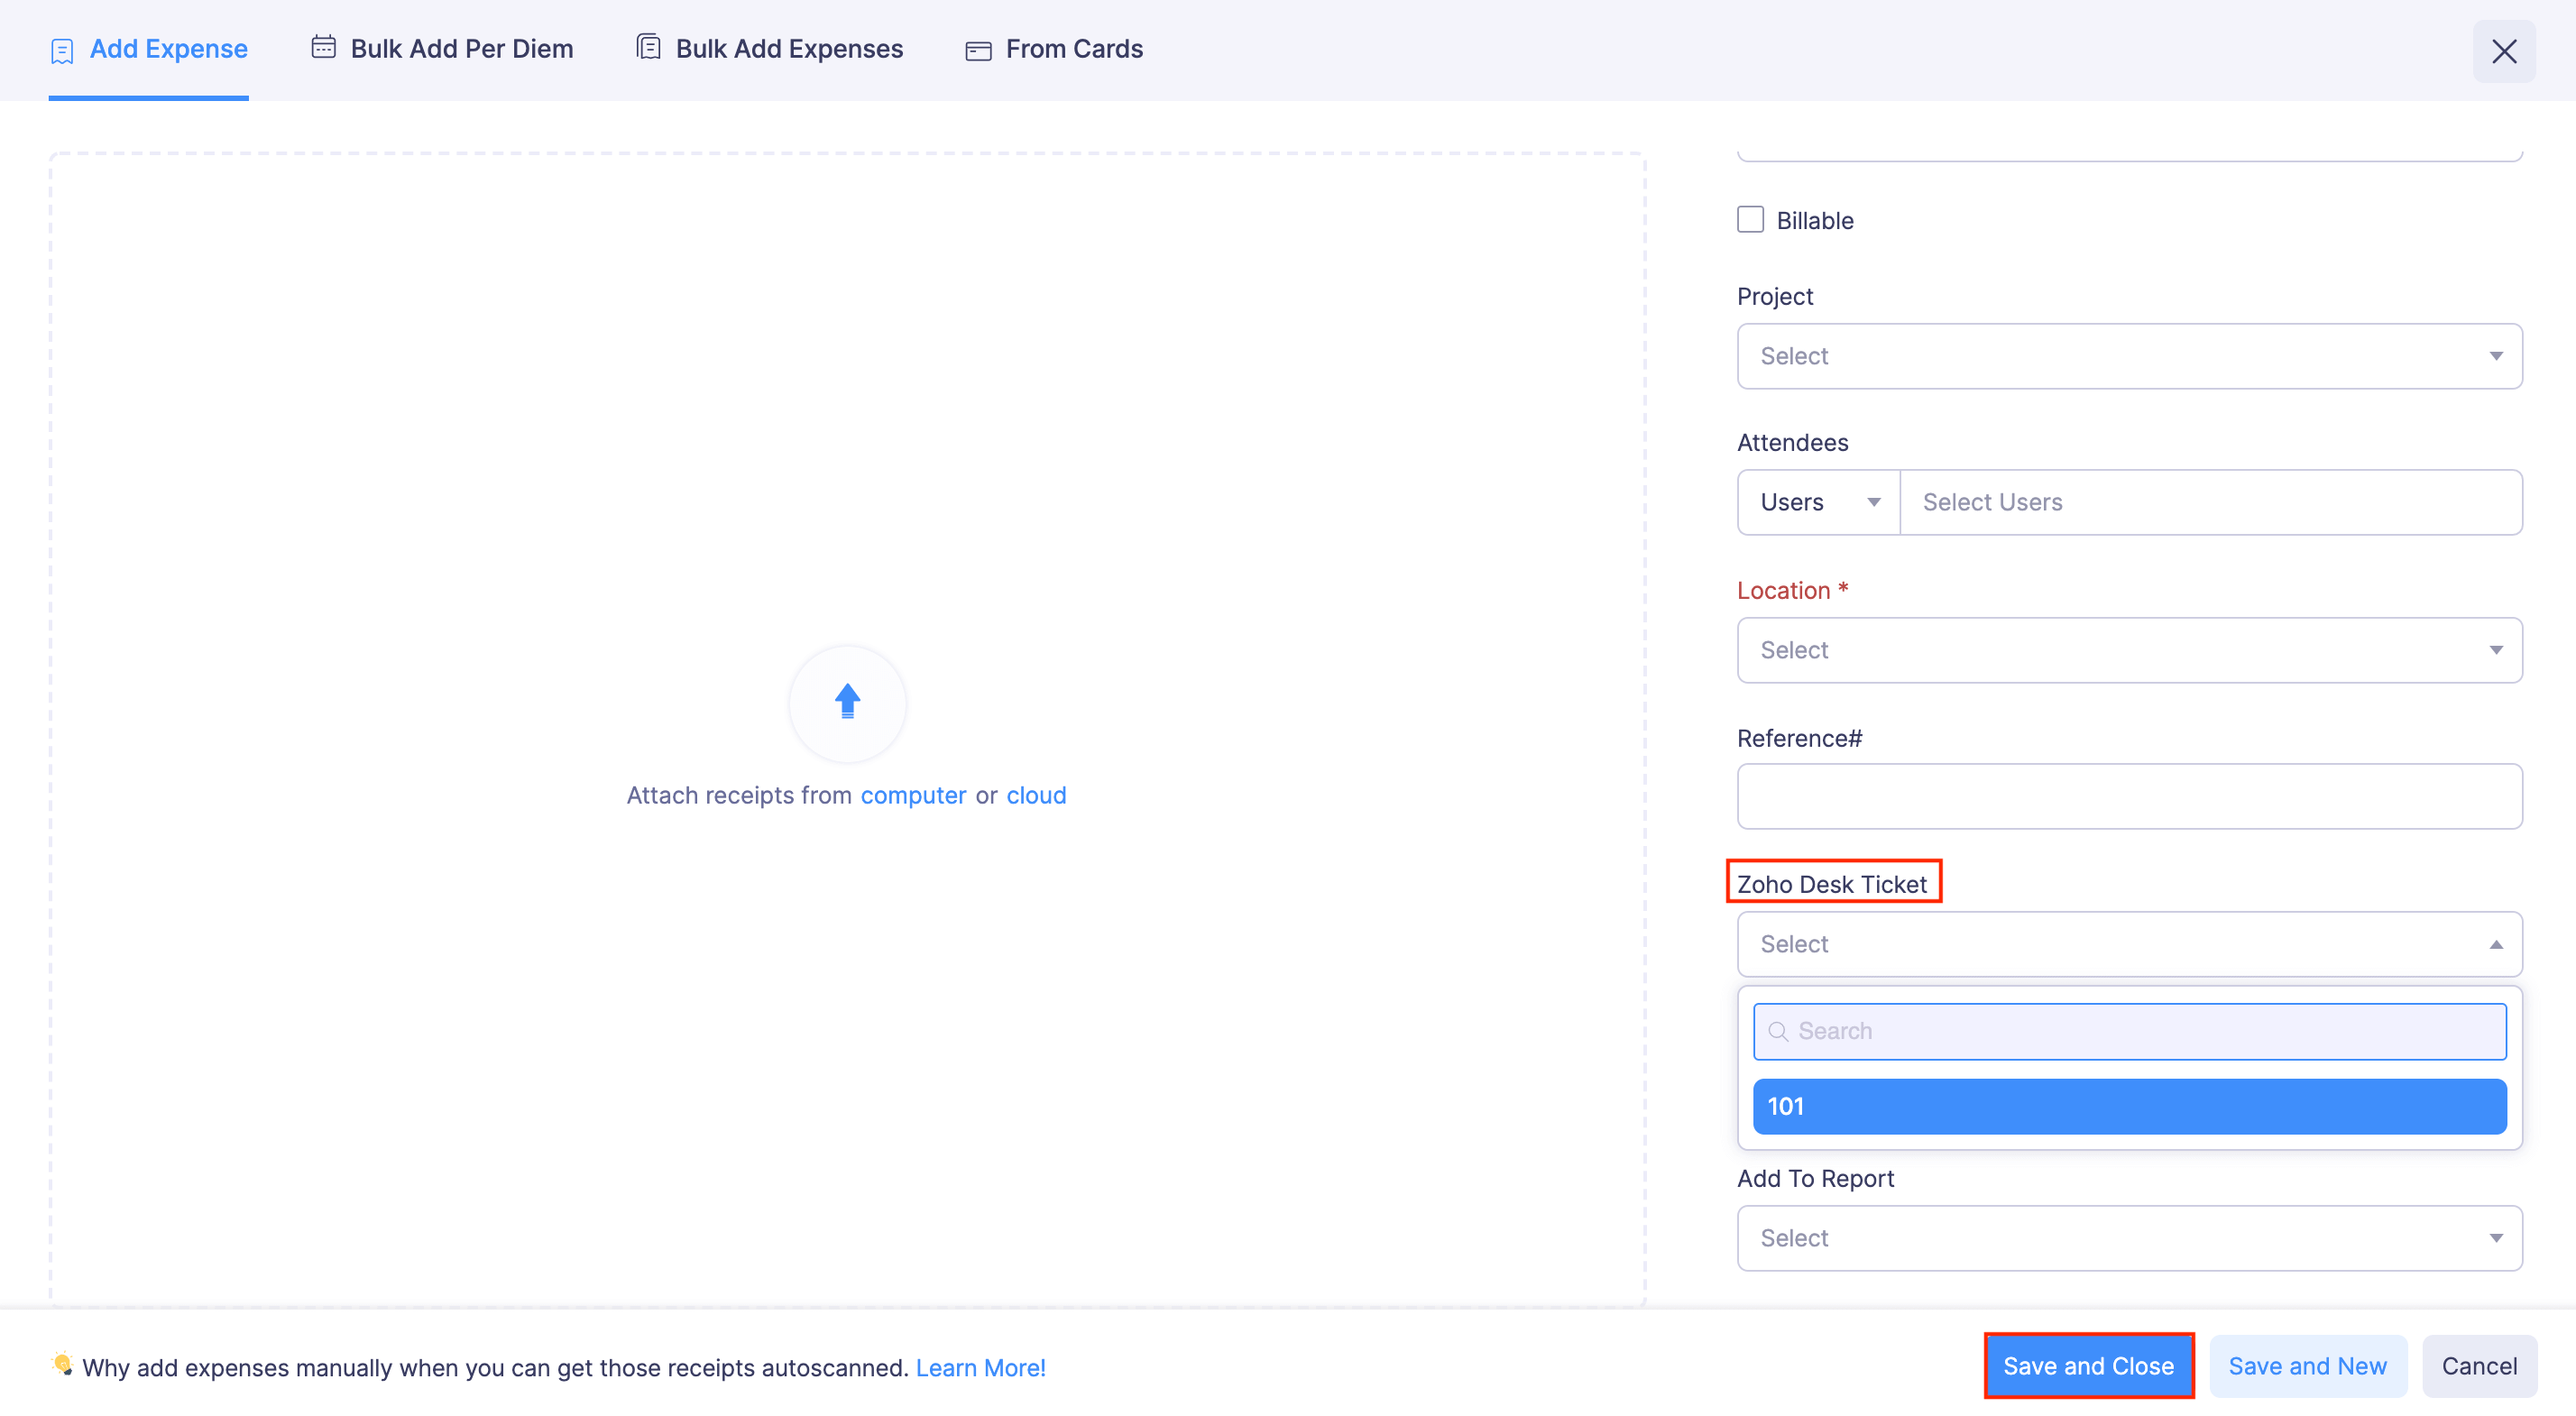
Once this is done, navigate to the expense creation page and you can associate the ticket using the custom field you have created.
Note:
- You can lookup only the Tickets module for now.
- You can follow the same steps mentioned above in reports and trips to create custom fields and to associate tickets.
 Yes
No
Yes
No
Thank you for your feedback!