
Web Forms
Web Forms are public forms that you can use to collect data from individuals both inside and outside your organization. In Zoho Books, you can create web forms and associate them with custom modules. Once you publish a web form, you can share its URL with individuals, allowing them to submit information. The information provided by these individuals will be stored in the custom module associated with the form.
Note: This feature is available only in specific plans of Zoho Books. Visit the pricing page to check if it’s available in your current plan.
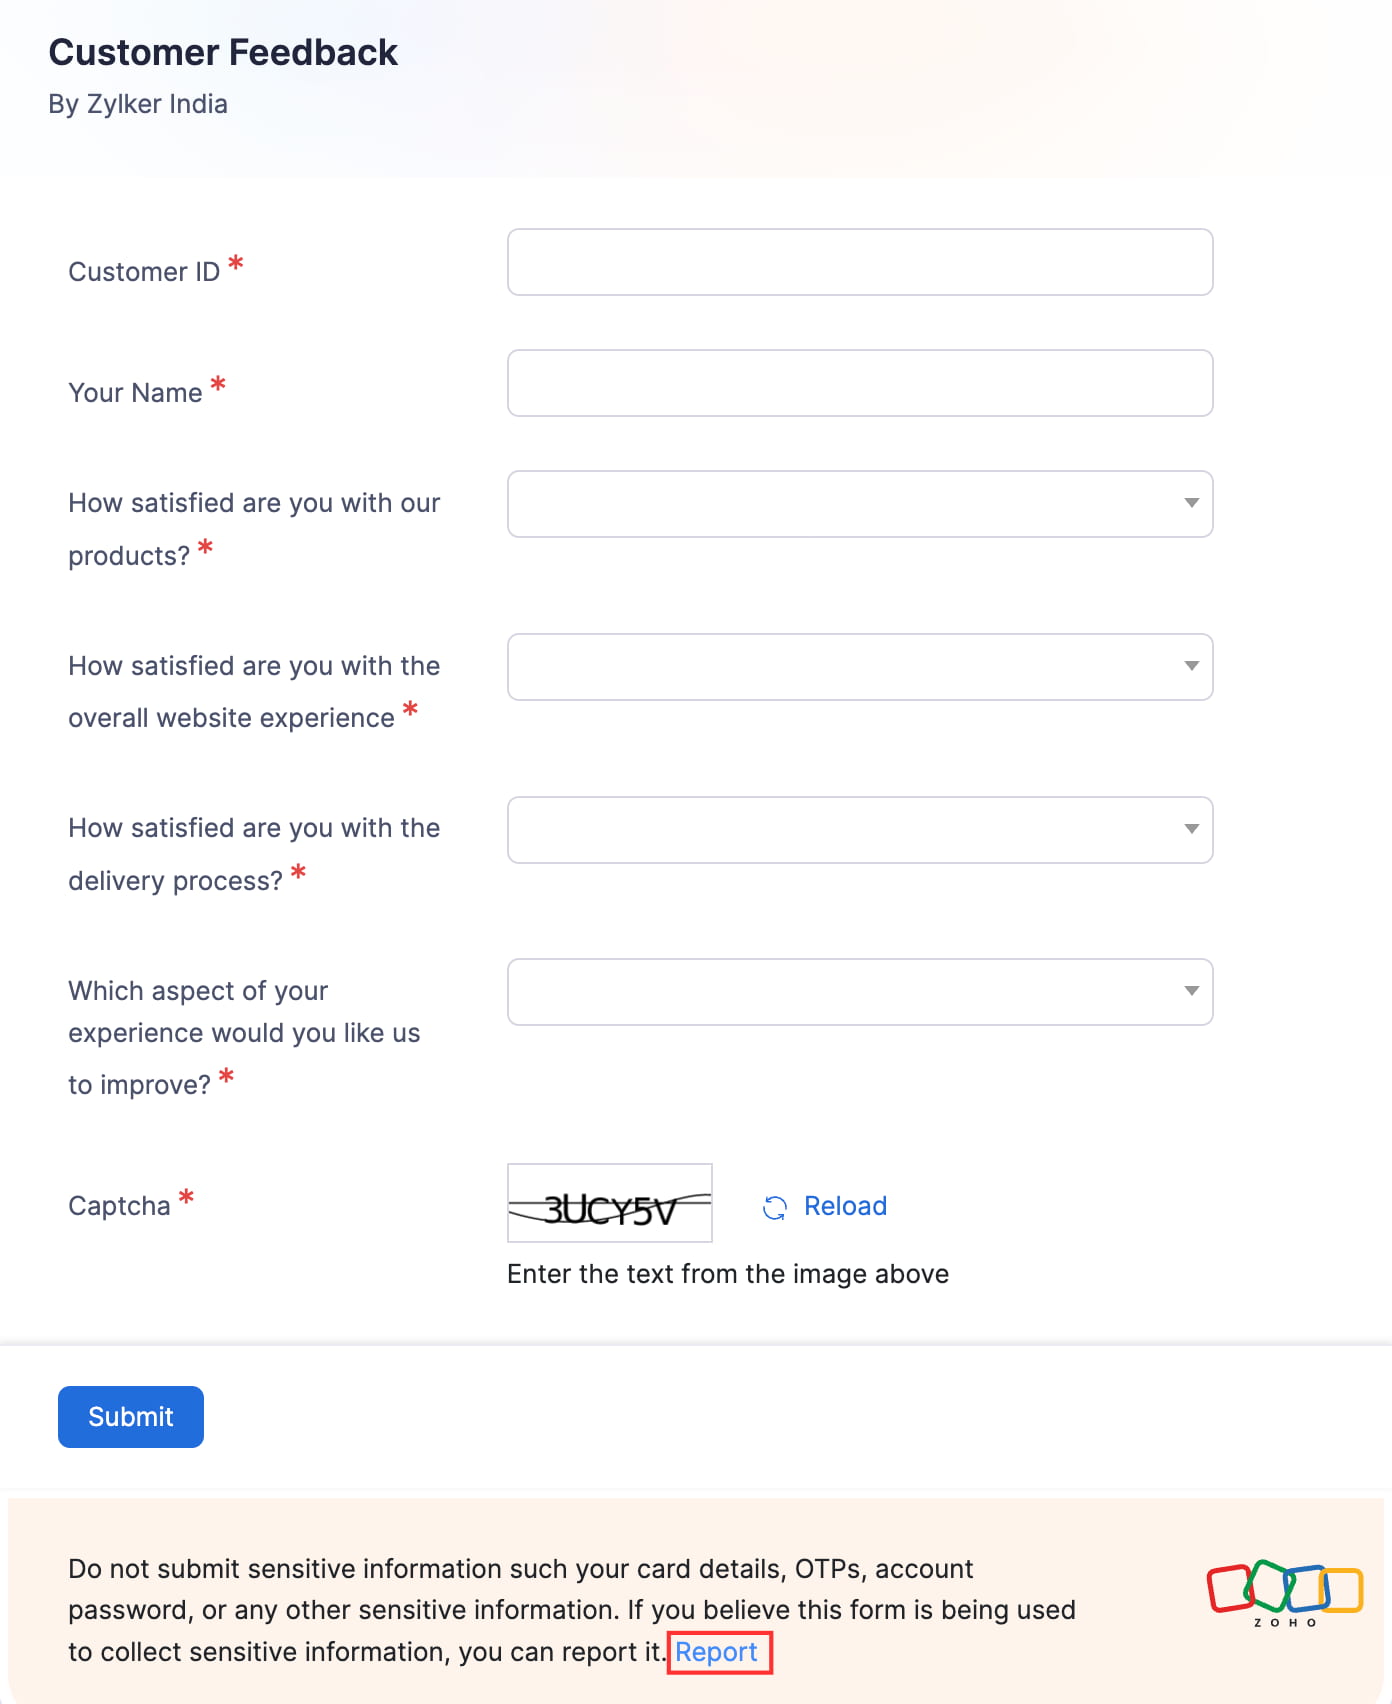
Scenario: Zylker Electronics wishes to collect feedback from its regular customers to improve their business. To gather this feedback, they use the Web Forms feature for Custom Modules in Zoho Books and create a web form called Customer Feedback. They share the web form’s URL with their customers, who then provide feedback using the form.
Create a Web Form
You can create a web from:
From the Web Forms Page in Settings
To create a web form from the Web Forms page in Settings:
- Go to Settings in the top right corner.
- Click Web Forms under Developer Data.
- Click + New Web Form in the top right corner.
- Enter the Web Form Name.
- Select the Custom Module. The information submitted using the web form will be stored in this custom module. Click + New Custom Module if you want to create a new module. Learn how to create a custom module.
- Click Next.
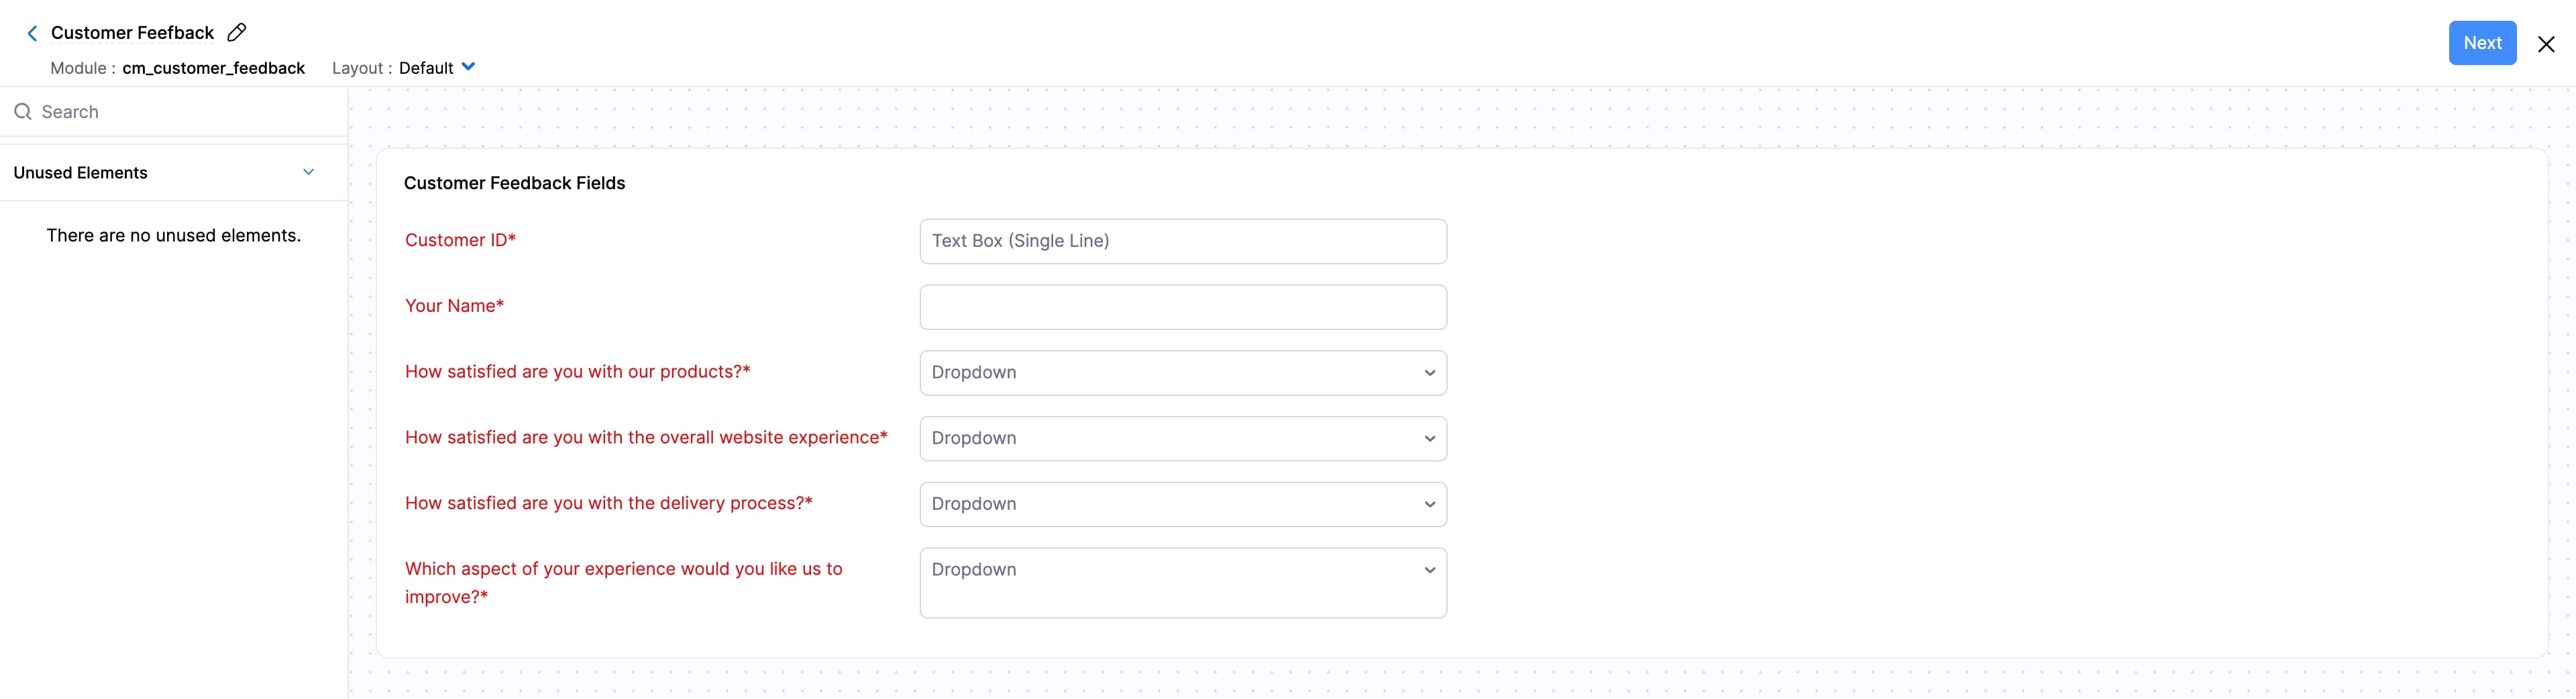
- The default layout of the custom module will be displayed. If there are other layouts available, you can select the required one from the dropdown next to Layout in the top left corner.
- Once you’ve added the fields required for the web form, click Next.
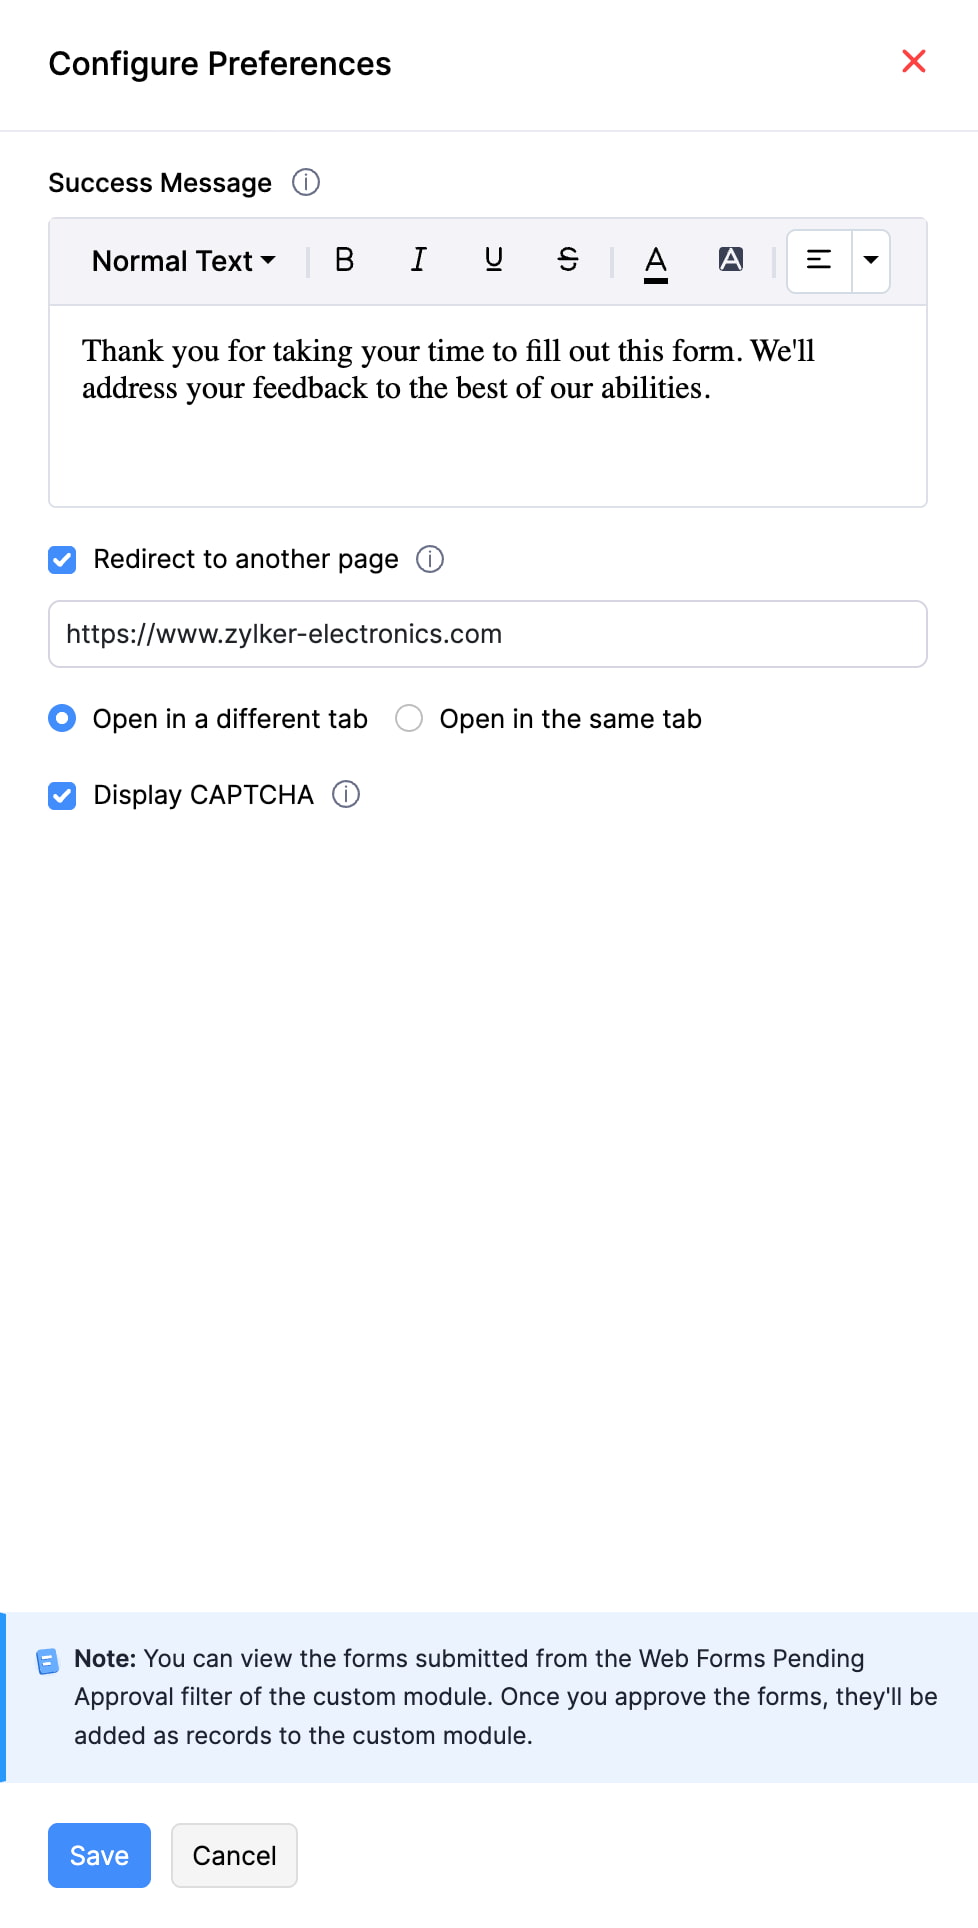
- Fill in the following in the Configure Preferences pane:
- Success Message: Enter the message to be displayed when a form is submitted. You can use the rich-text editor to format your message.
- Redirect to another page: Enable this option if you want individuals to be redirected to another page after they submit the form.
- Select Open in a different tab if you want the redirection to occur in a new tab.
- Select Open in the same tab if you want the redirection to occur in the same tab.
- Display CAPTCHA: Enable this option if you want individuals to be able to submit forms only after they enter the CAPTCHA provided in the form.
- Click Save.
- The web form’s URL will be displayed in the pop-up. Click Copy and Close.
- If the web form contains fields that collect sensitive information, such as card details, OTP, and other sensitive information, the web form will be saved, but you won’t be able to publish it. The status will be updated to Spam. A pop-up with the list of fields used to collect sensitive data will appear. Click Go Back, remove those fields, and then click Publish.
- If you click Cancel, you’ll not be able to publish the web form until you remove the fields listed in the pop-up.
From a Custom Module
You can create a web form directly from a custom module if layouts have been created for it. Here’s how:
- Go to Settings in the top right corner.
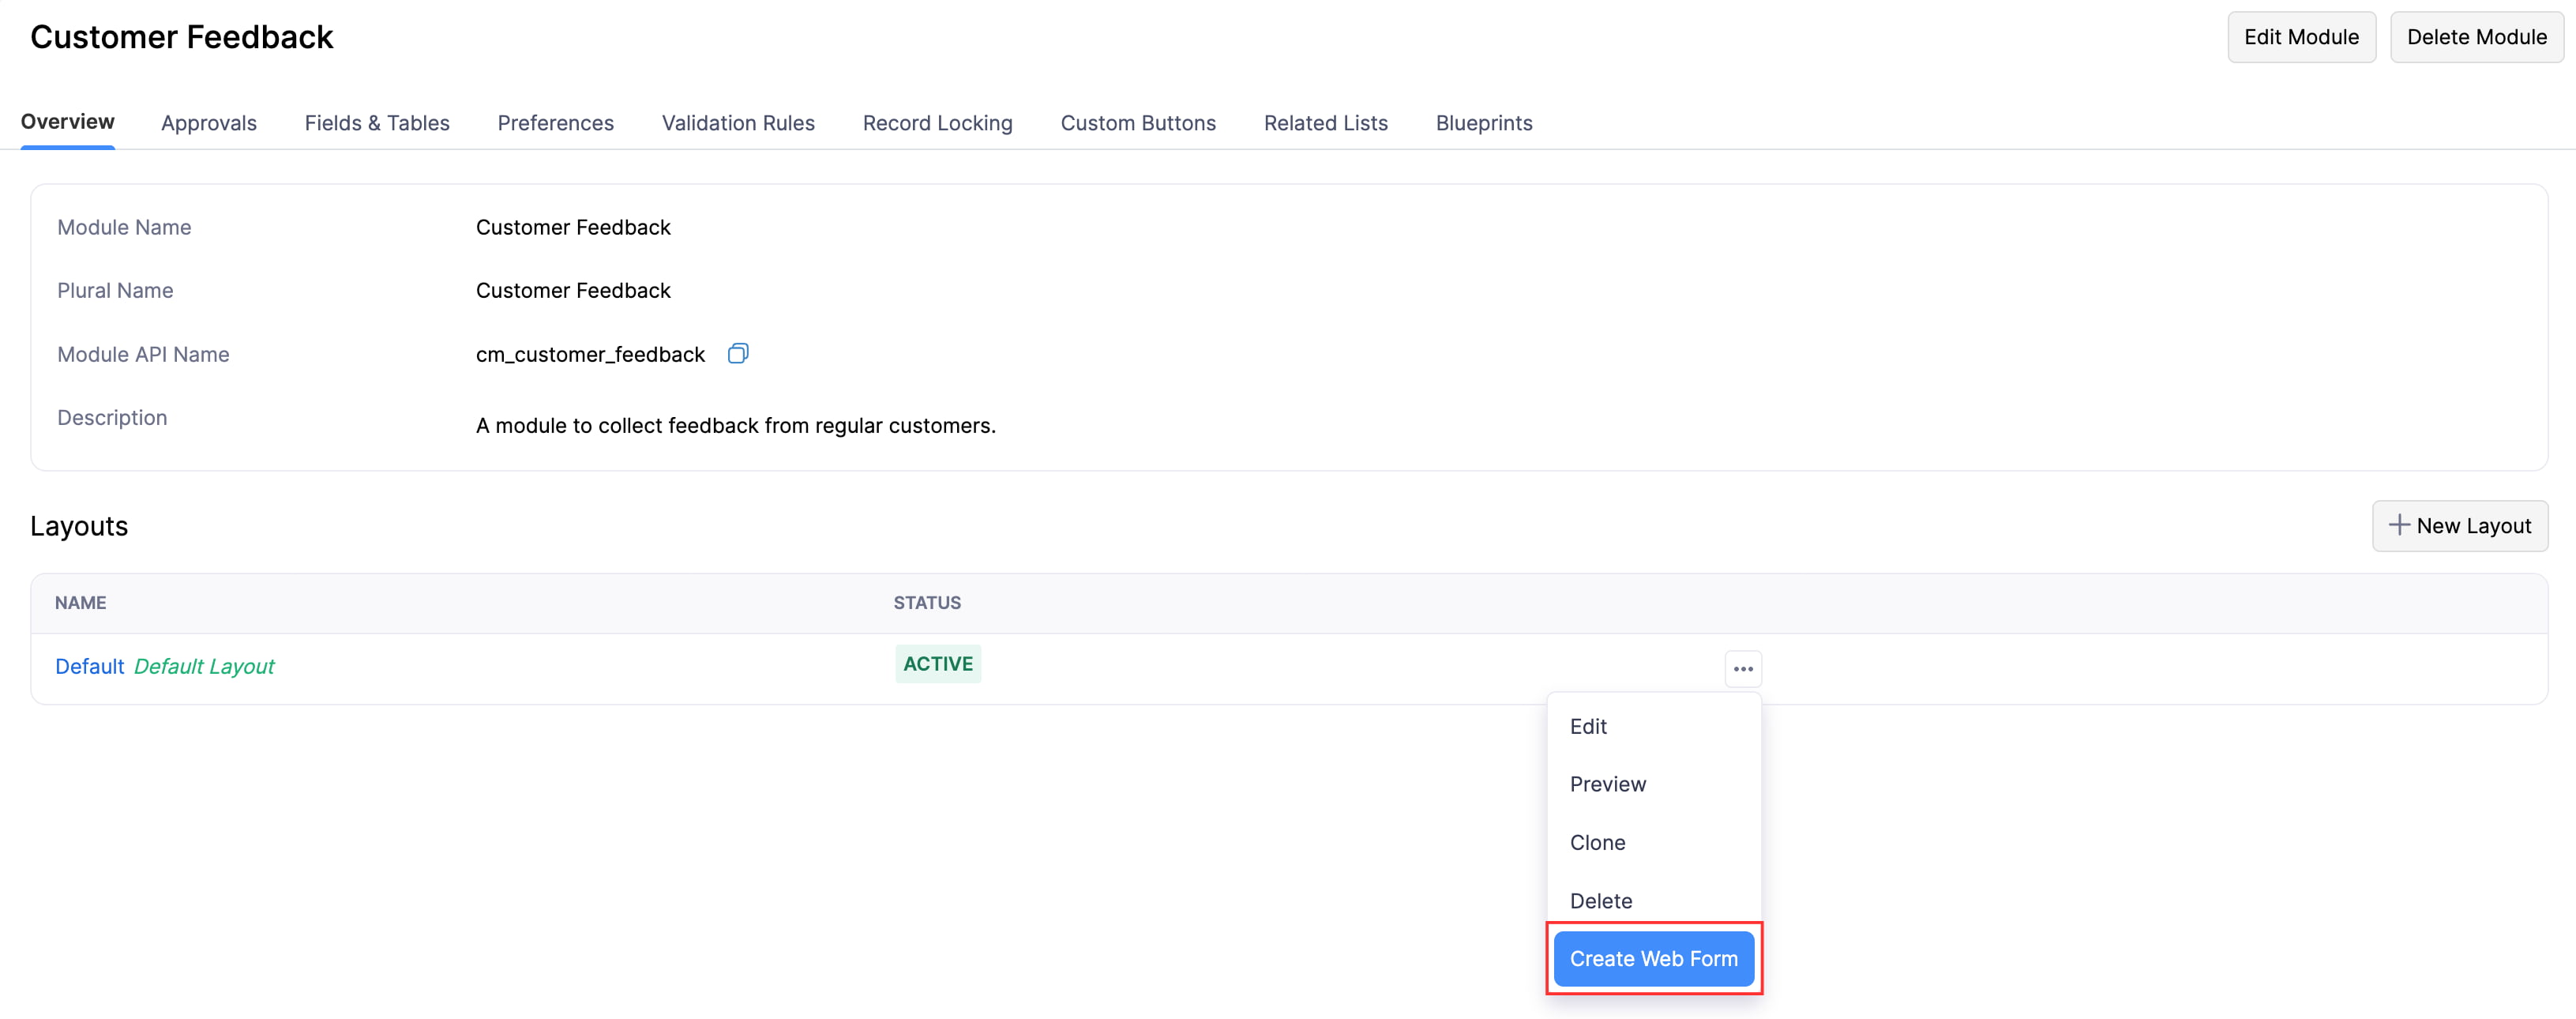
- Click the required custom module under Custom Modules.
- In the Overview tab, hover over the required layout and click the More button.
- Click Create Web Form from the dropdown.
- Continue from step 4 of the From the Web Forms page in Settings section.
Fill Details in a Web Form
If you’ve received the URL of a web form, here’s how you can fill in details and submit it:
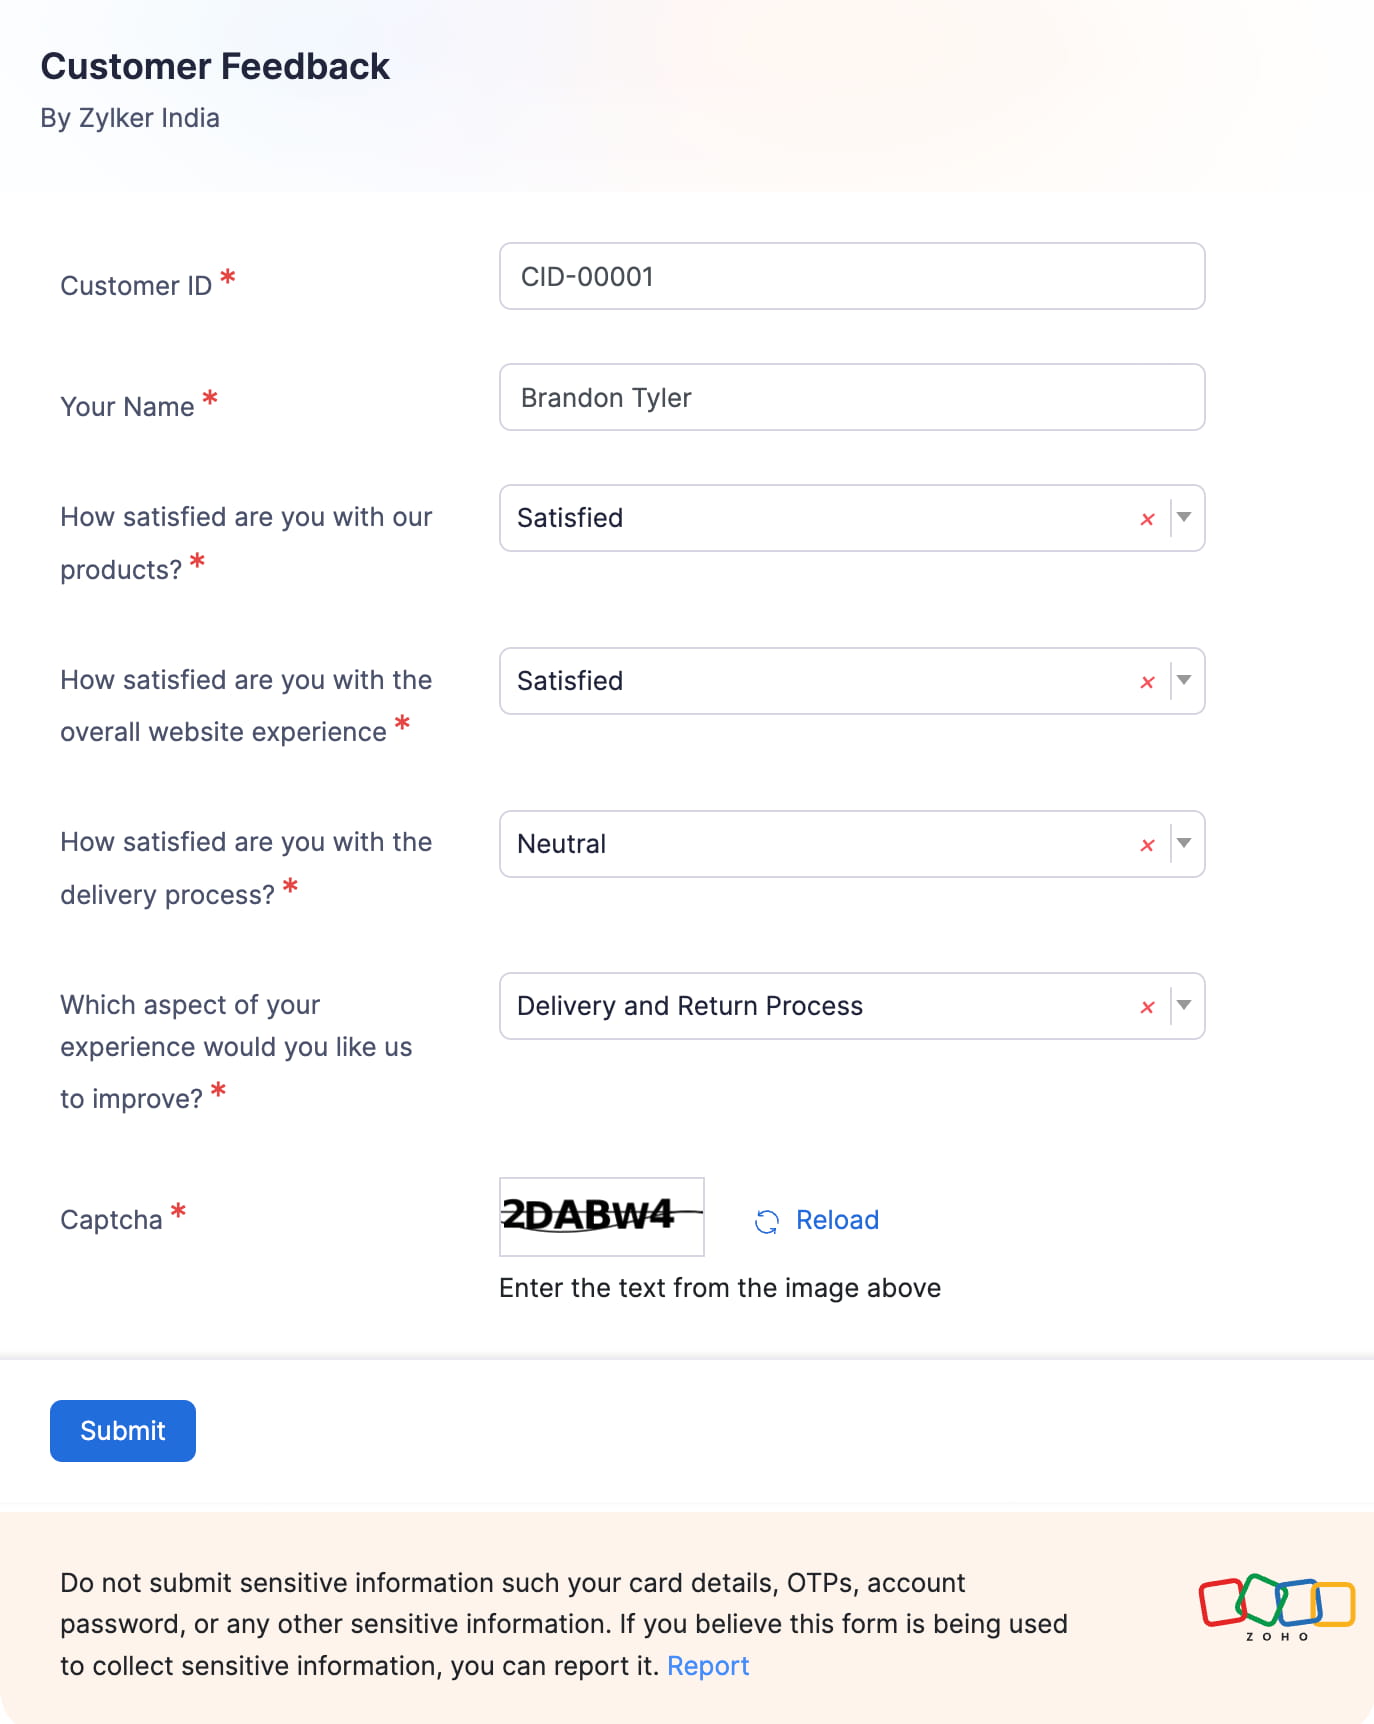
- Open a new tab in any browser and paste the web form’s URL.
- Fill in details in the required fields.
- Enter the CAPTCHA if it is displayed.
- Click Submit.
You can pre-fill values for fields in the web form by appending a question mark (?) at the end of the URL, followed by the API name of the custom field, and then entering the value after the equals sign (=). You can add additional fields using an ampersand (&). For example, https://books.zohopublic.com/webforms/xxxxxxxxx?cf_customer_name=bailey_miles&cf_order_id=12345.
Report a Spam Form
If you believe a form is being used to collect sensitive information, you can report it. Here’s how:
- Click Report at the bottom of the form. You’ll be redirected to Zoho’s Report Abuse page.
- Fill in the details requested and click Submit. We’ll review the web form and block it after verification.
Approve a Submitted Form
If individuals submit forms using the link shared with them, the submissions will be temporarily stored in the custom module associated with it. You need to approve them to add them as records in the custom module. Here’s how:
- Click Custom Modules on the left sidebar and click the custom module associated with the web form you created.
- Click Web Forms Pending Approval in the top right corner.
- Click the submission you want to approve.
- Click Accept at the top.
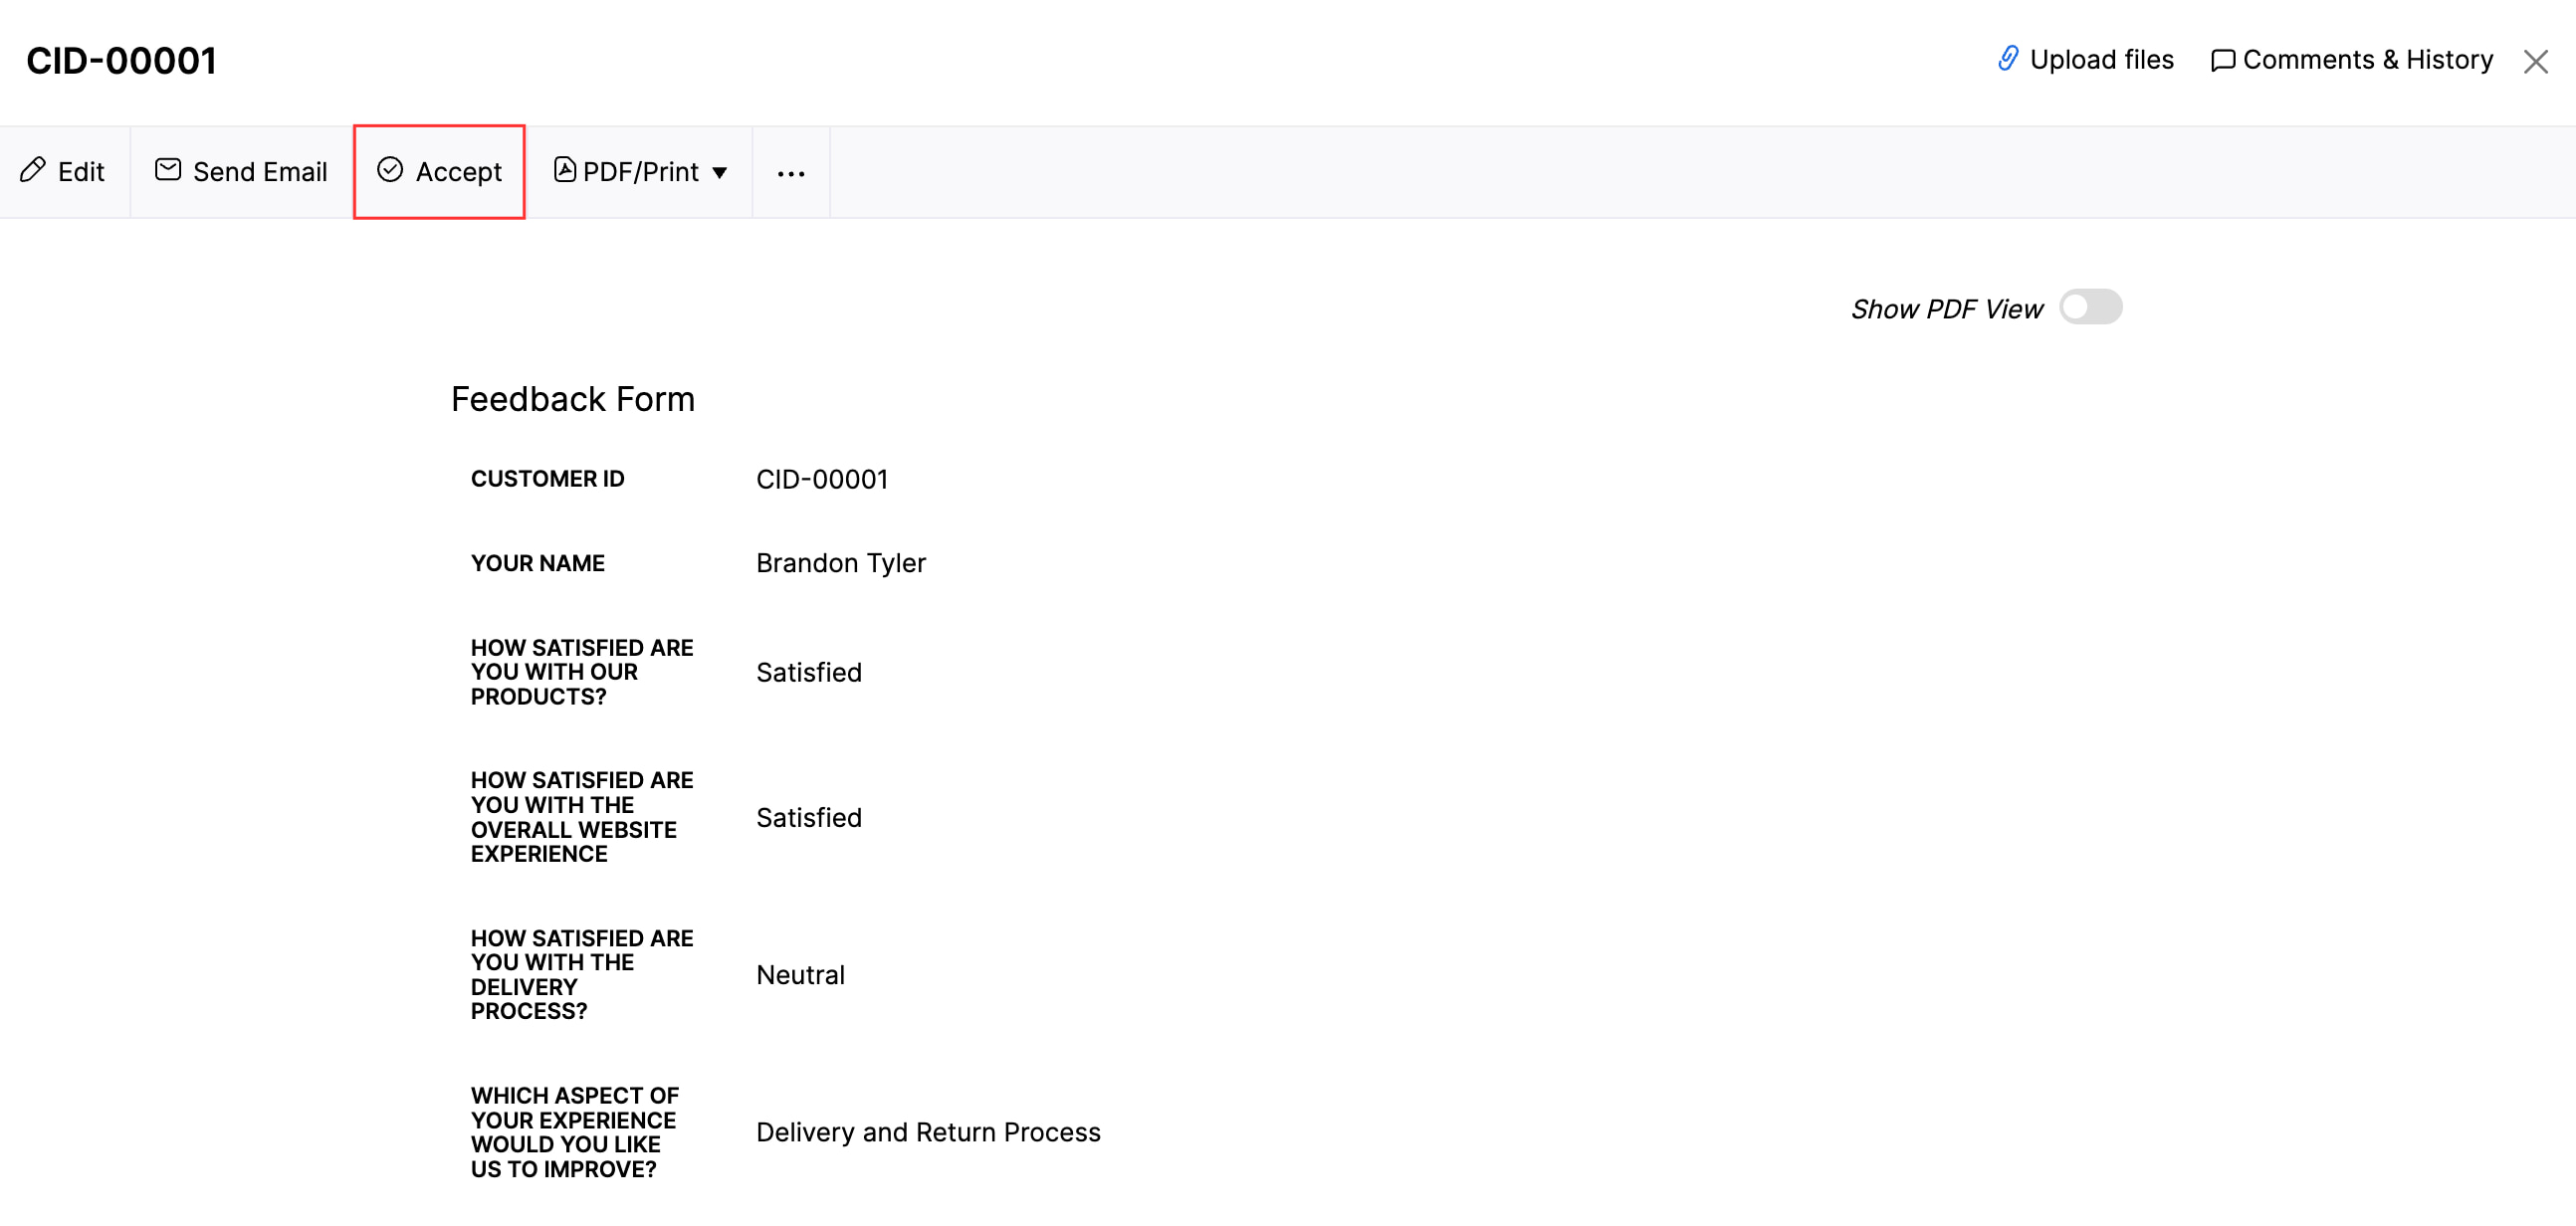
- Click Yes in the pop-up that appears.
The form will be added as a record in the custom module. You can view from the custom module’s List page.
Delete a Submitted Form
If individuals submit forms using the link shared with them, the submissions will be temporarily stored in the custom module associated with it. You can delete the submission if required. Here’s how:
- Click Custom Modules on the left sidebar and click the custom module associated with the web form you created.
- Click Web Forms Pending Approval in the top right corner.
- Click the submission you want to delete.
- Click the More icon at the top and select Delete.
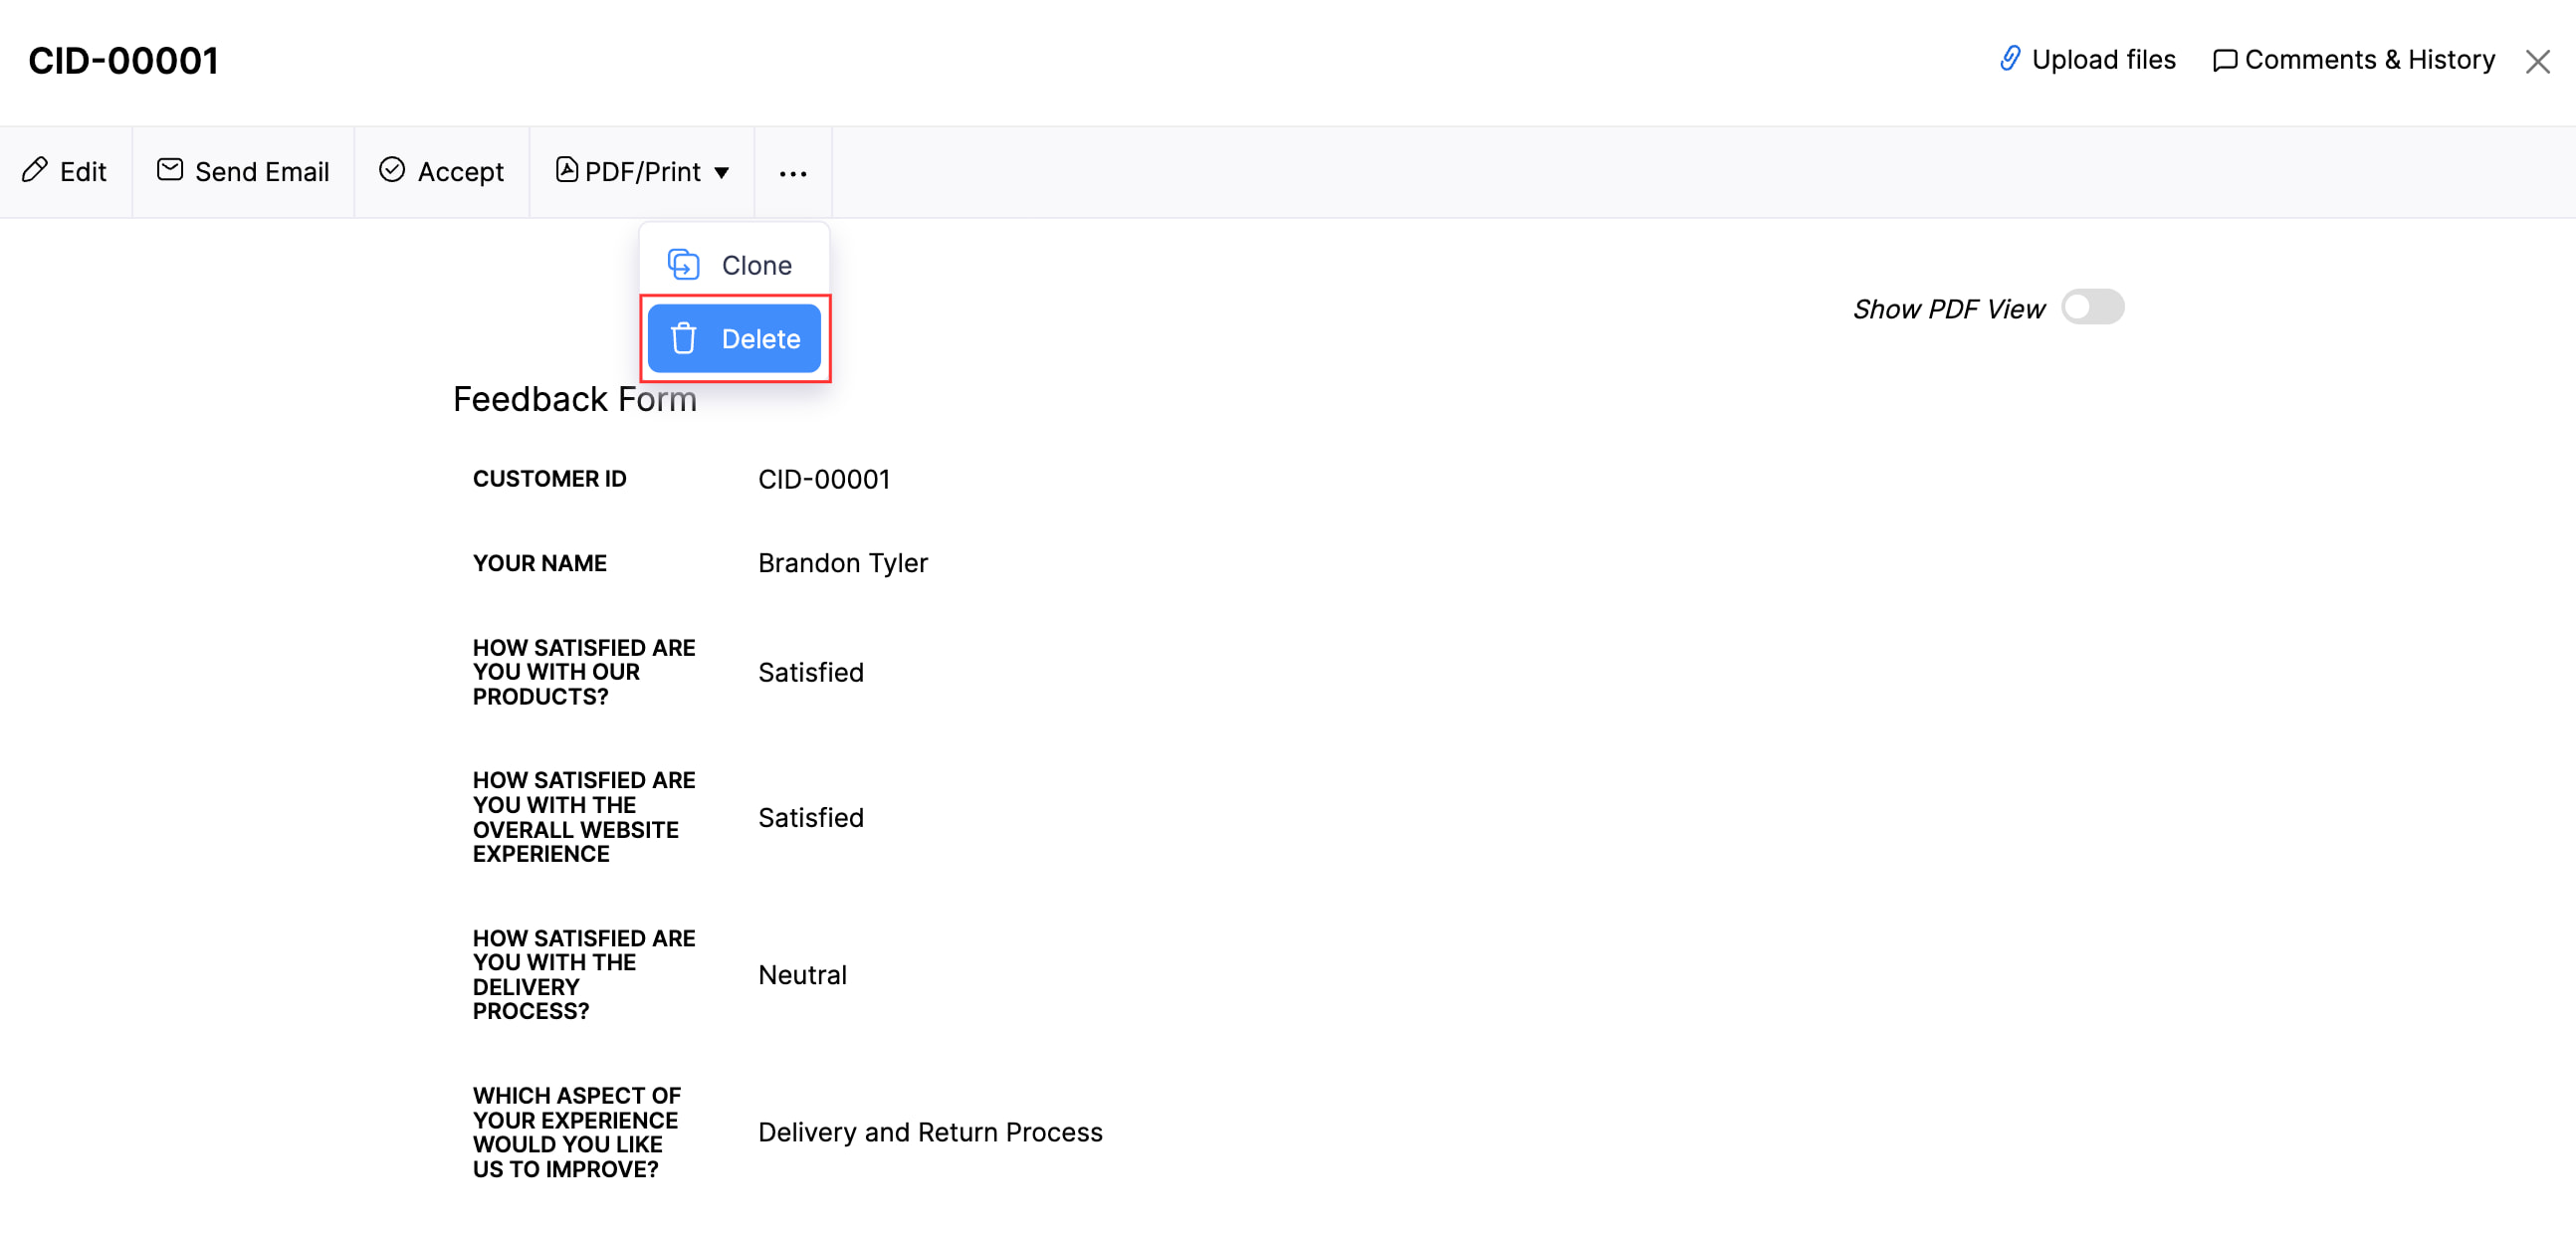
- Click Proceed in the pop-up that appears to confirm your action.
Edit a Web Form
If you want to make changes to a web form, you can edit it. Here’s how:
- Go to Settings in the top right corner.
- Click Web Forms under Developer Data.
- Click the More icon next to the required web form and click Edit from the dropdown.

- Click Edit Layout in the top right corner if you want to update the fields used in the web form.
- Click Configure Preferences to update the web form’s preferences.
- Make the necessary changes and click Save.
Mark a Web Form as Inactive
If you no longer need a web form, but you don’t want to delete it, you can mark it as inactive. Here’s how:
- Go to Settings in the top right corner.
- Click Web Forms under Developer Data.
- Click the More icon next to the web form and click Mark as Inactive.

Mark an Inactive Web Form as Active
If you require an inactive web form, you can mark it as active and start using it again. Here’s how:
- Go to Settings in the top right corner.
- Click Web Forms under Developer Data.
- Click the More icon next to the inactive web form and click Mark as Active.

Delete a Web Form
Warning: If you delete a web form, individuals will not be able to use it to submit information using the web form. However, the submissions you are yet to approve will still be available.
If you no longer need a web form, you can delete it. Here’s how:
- Go to Settings in the top right corner.
- Click Web Forms under Developer Data.
- Click the More icon next to the web form and click Delete from the dropdown.
- Click Delete again in the pop-up that appears.

Blocked Web Forms
If anyone using your web form reports it for collecting sensitive information, we’ll review your form and block it if it is being used to collect sensitive data. You can contact support@zohobooks.com to unblock your web form.
 Yes
No
Yes
No
Thank you for your feedback!