
Manage Customers & Vendors
Explore how you can utilize the available options efficiently to manage your network of customers and vendors.
Manage Addresses
Apart from the billing and shipping address, you can also store additional addresses for a customer or a vendor and manage them. In this section you’ll learn how to:
Add New Address
Apart from the billing and shipping address, you can also store additional addresses for a customer or a vendor and manage them. In this section you’ll learn how to:
Insight: To enter additional addresses for a customer or vendor, ensure that you have already entered the billing and shipping address.
To add a new address:
- Go to the Customers or Vendors module in the sidebar.
- Click to open a customer or a vendor.
- In the Overview page, go to the Address section.
- Click the Add New Address option under Additional Address.
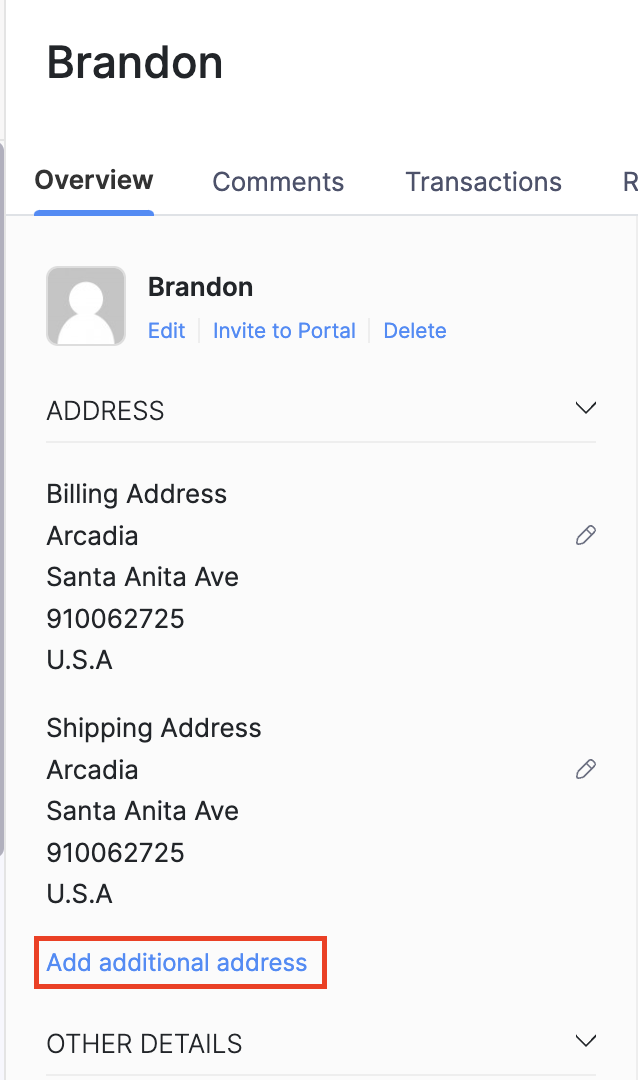
- Enter the new address and click Save.
Insight: You can enter up to ten additional addresses for a customer or a vendor excluding the default billing and shipping addresses.
Change Default Address
If your customer or vendor has temporarily changed their billing/shipping location, you can also change the default address assigned to them in Zoho Inventory. To do so:
- Go to the Customers or Vendors module in the sidebar.
- Click to open the preferred customer or vendor.
- Go to the Address section in the contact details page.
- Click the Gear icon beside one of the addresses listed under Additional Address.
- Select the Mark as default billing address or Mark as default shipping address option.
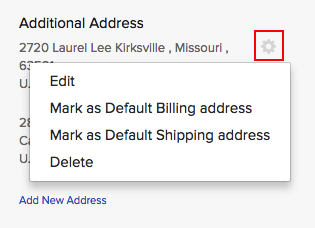
The default billing/shipping address will be changed and the old address will be moved to the Additional Address section.
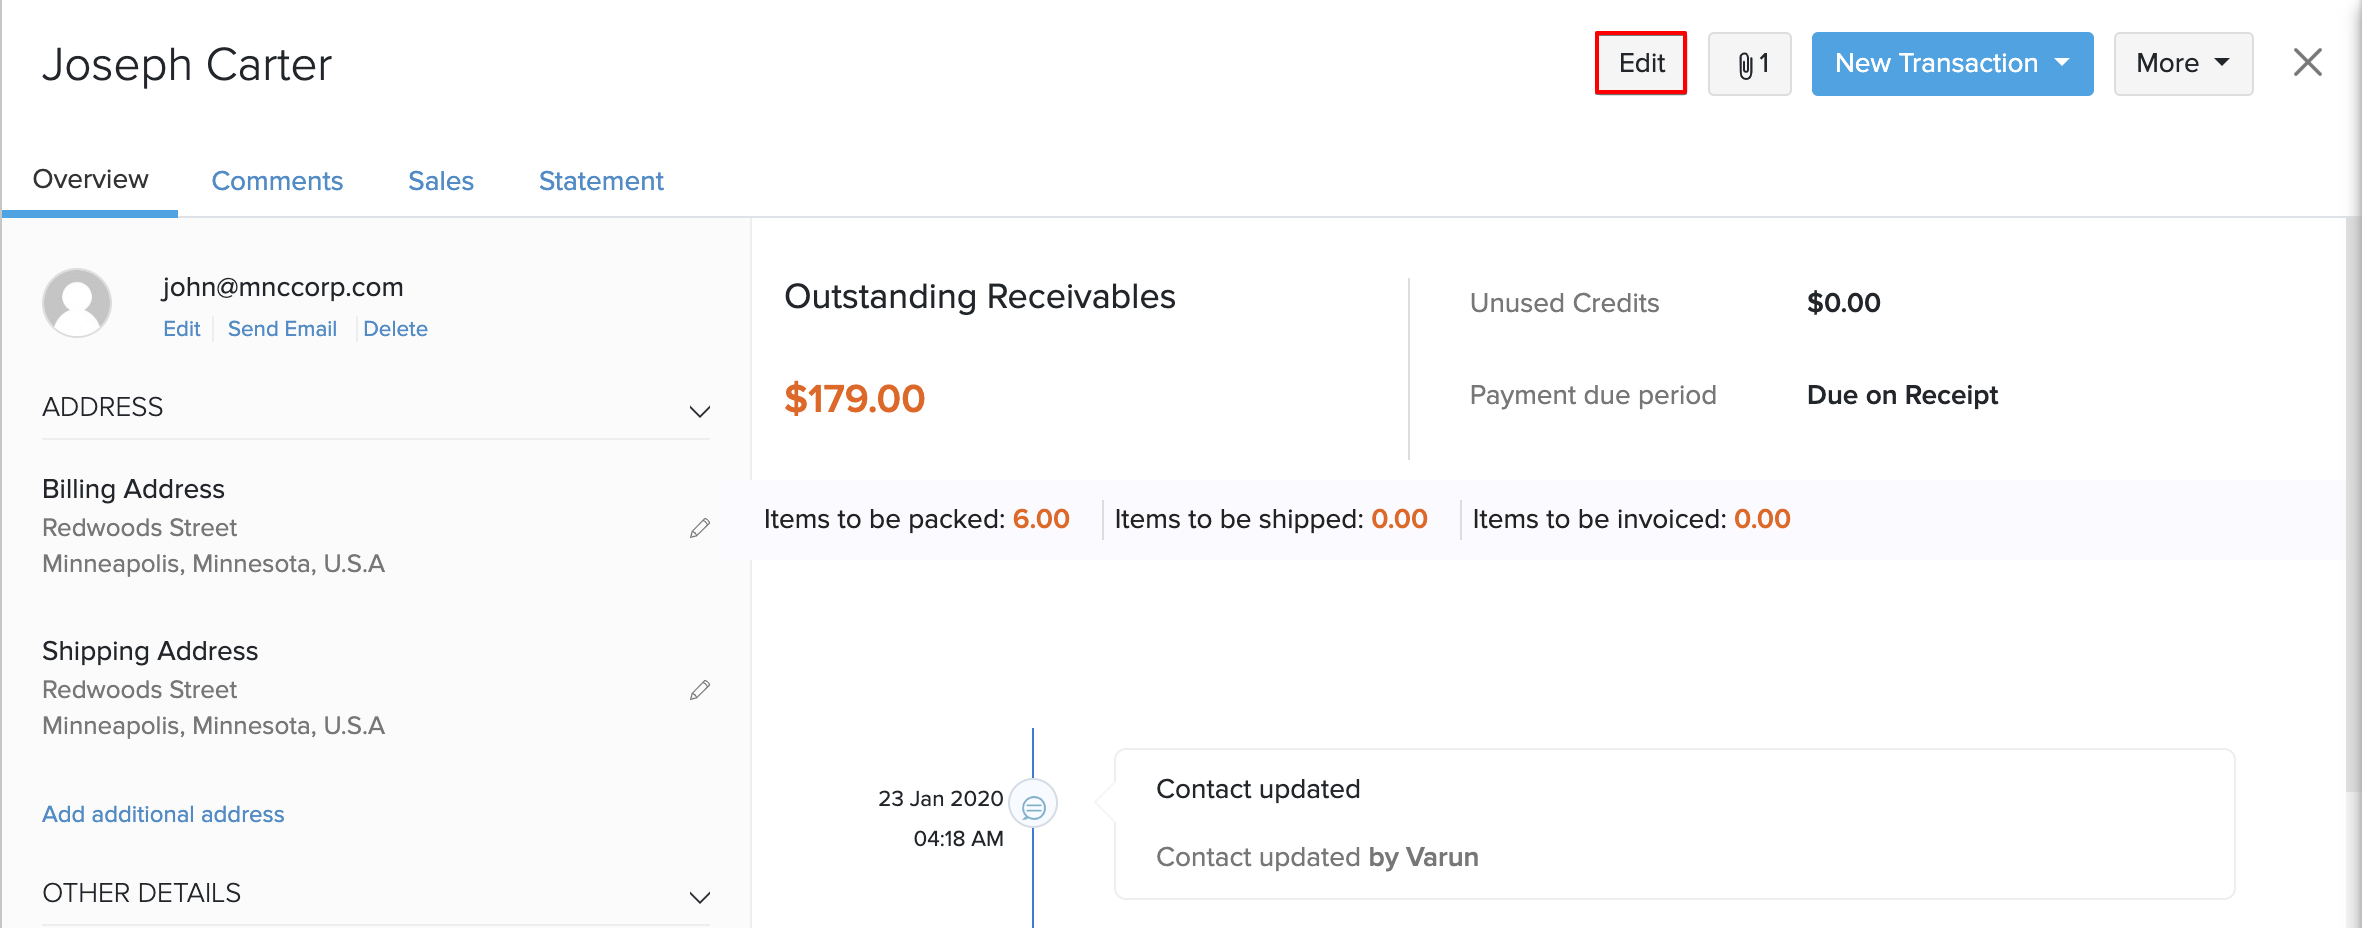
Edit Address
To edit an address for a customer or a vendor:
- Go to the Customers or Vendors module in the sidebar.
- Click to open the preferred contact.
- Go to the Address section in the contact details page.
- Click the Gear icon beside one of the listed addresses.
- Click Edit.
- Make the necessary changes to the address in the pop-up.
Insight: Select the Update the address in all previous transactions option if you wish to update this address in all transactions that have used the old address. This includes draft invoices, sales orders, purchase orders and open bills.
- Click Save at the bottom of the pop-up.
Choose Different Address
While creating a transaction, the default billing and shipping address will be populated for the chosen customer or vendor. However, you can also choose from one of the additional addresses as the billing/shipping address.
- Open a new transaction (invoice, sales order etc.)
- Select the customer/vendor name.
- Click the Edit option next to the billing or shipping address.
- Select an address from the list of saved addresses for this contact.
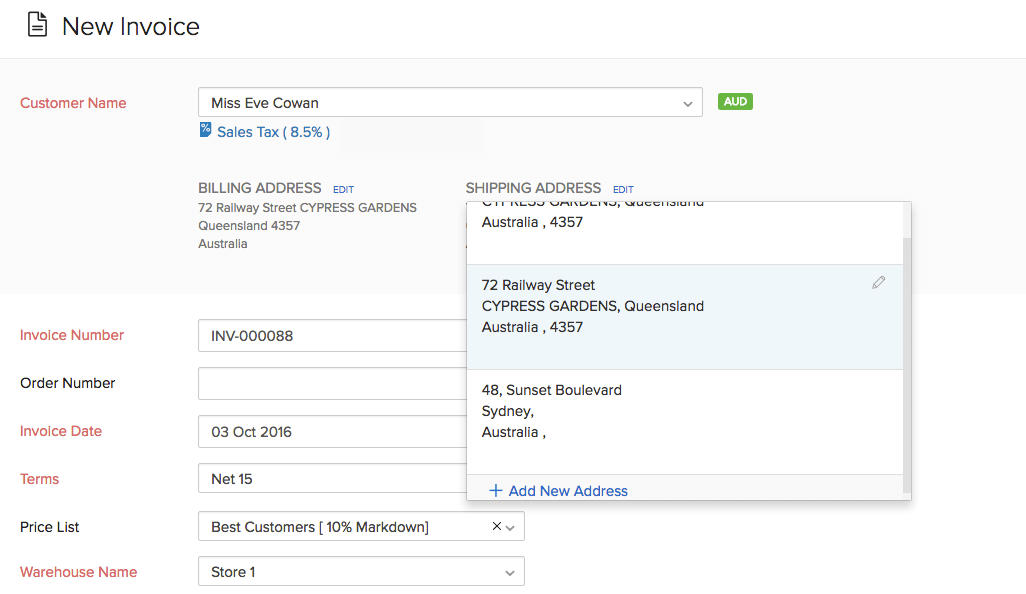
Pro Tip: To add a new address on the fly, scroll down to the end of the address list and click the + Add New Address button. Enter the address and click Save to add and select this address for the contact.
Delete Address
To delete an additional address for a customer or a vendor:
- Go to the Customers or Vendors module in the sidebar.
- Click to open the preferred customer/vendor.
- Go to the Address section in the contact details page.
- Go to the Additional Address section
- Click the Gear icon beside one of the listed addresses.
- Click Delete.
- Confirm your action.
Change Customer Type
To change the customer type:
- Go to the Customers module in the sidebar.
Pro Tip: You can apply the appropriate filter from the top left corner of the module page to narrow down your search.
- Select the customer whom you would like to make the changes to.
- Click the Edit button on the top right corner of the page.
- Change the customer type. For example, if the customer is an individual, change it to business by selecting Business.
- Click the Save button at the bottom of the page.
Deactivate Customers/Vendors
If you don’t want to delete a customer or a vendor but would like to shelf them for the time being, you can change their status to inactive. This ensures that the customer or vendor exists but cannot be used in transactions.
To do so:
- Go to the Customers or Vendors module in the sidebar.
- Click to open the contacts details page.
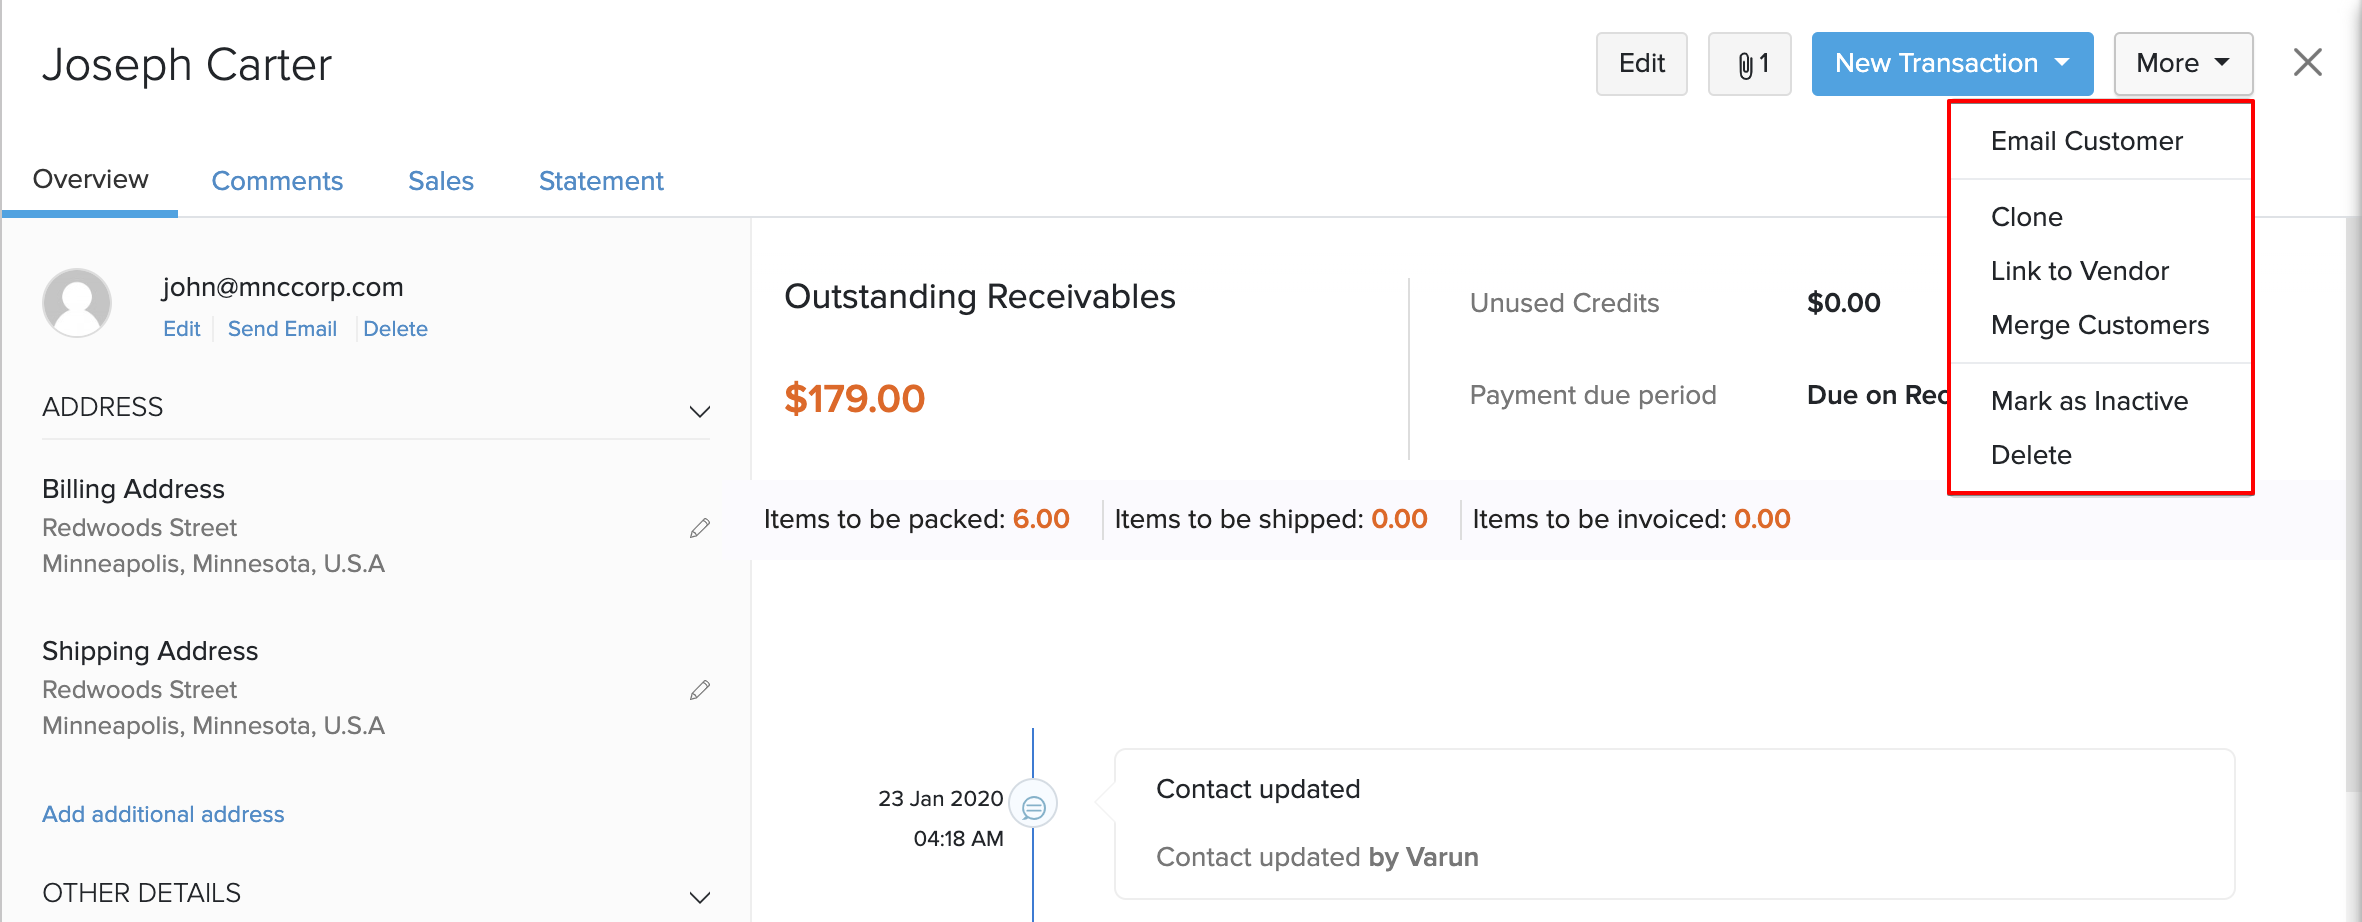
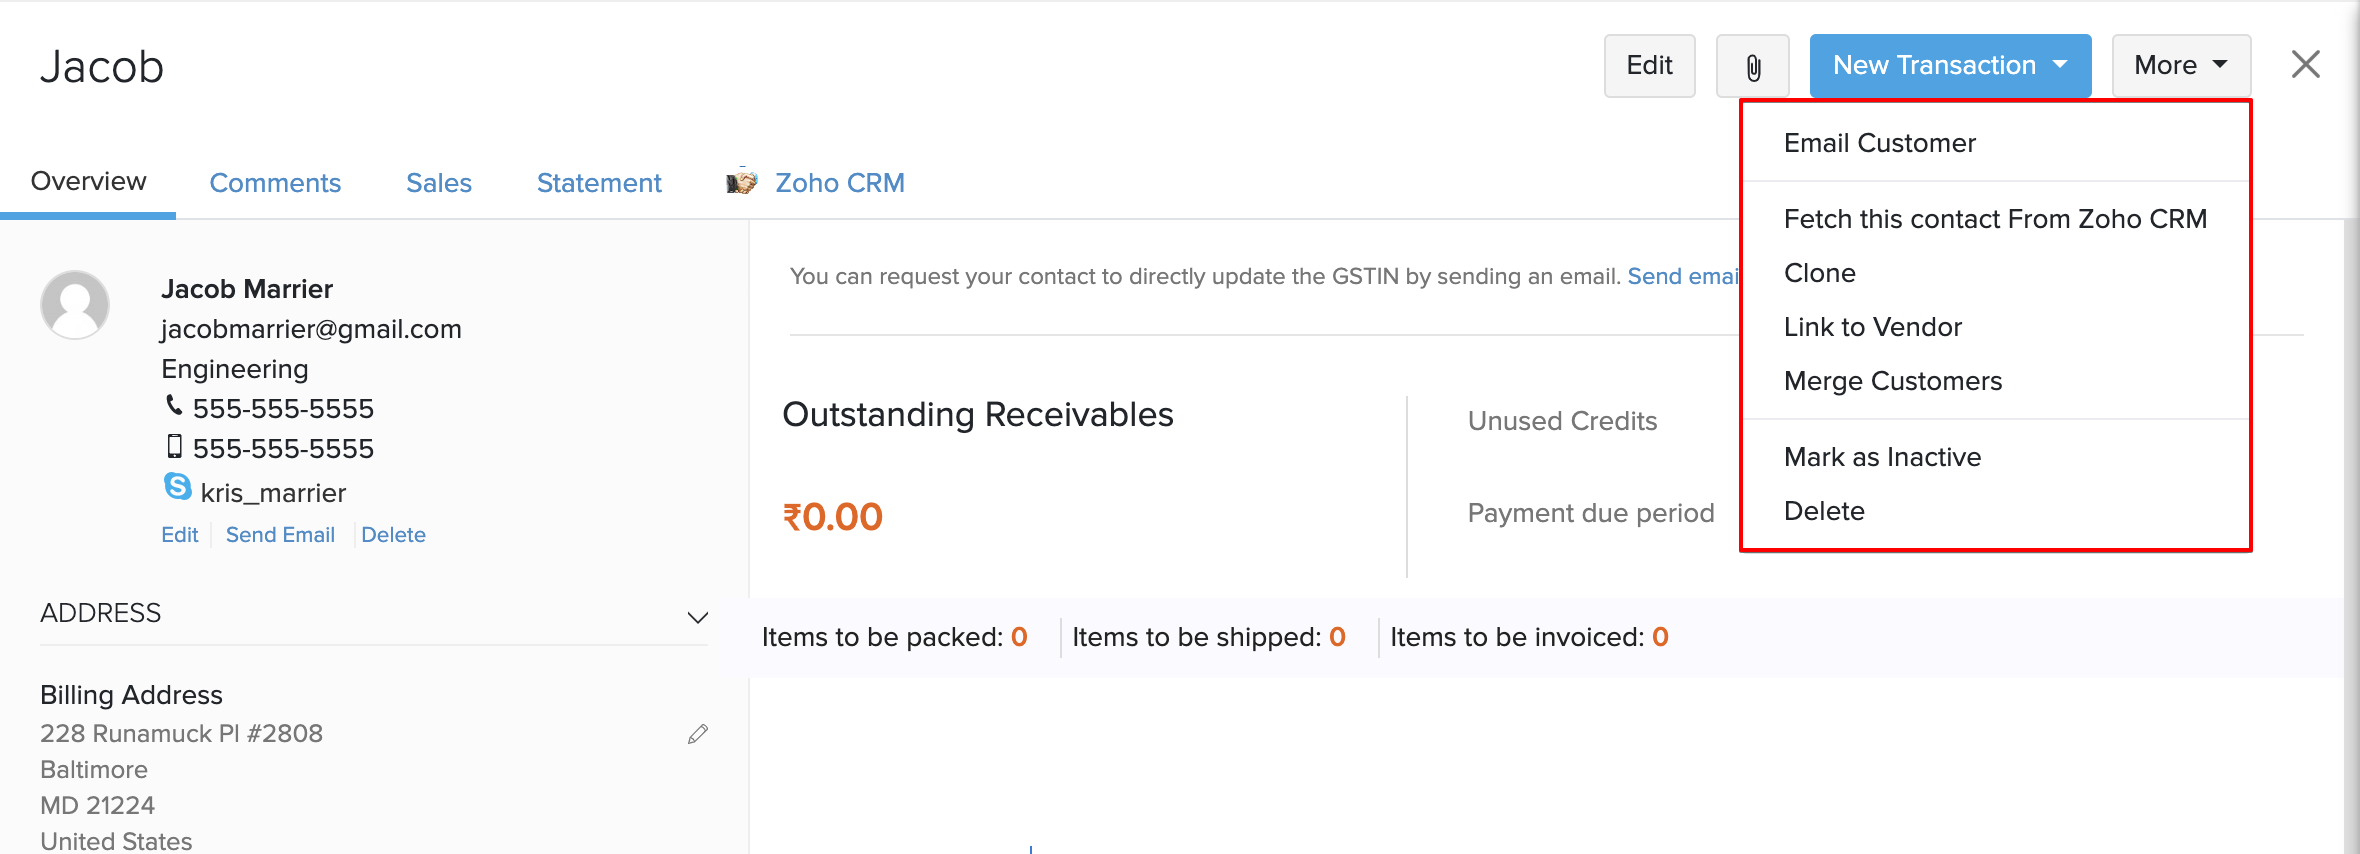
- Click the More button and select Mark as Inactive.
This customer/vendor will be deactivated and will no longer appear while creating new transactions.
Pro Tip: You can make the customer or vendor active again by clicking More > Mark as Active.
Clone Customer/Vendor
Cloning is the quickest and easiest way to create a new customer or vendor from an existing customer or vendor.
To clone a customer or a vendor:
- Go to the Customers or Vendors module in the sidebar.
- Click to open a preferred contact.
- Click More and select Clone.
The existing contact’s details will be auto-populated.
- Make the changes where needed.
- Click Save to create a new contact.
Export Customers/Vendors
To take a backup of your customer or vendor list, you can export them in a file from Zoho Inventory to your computer.
To export your the contacts:
- Go to the Customers or Vendors module in the sidebar.
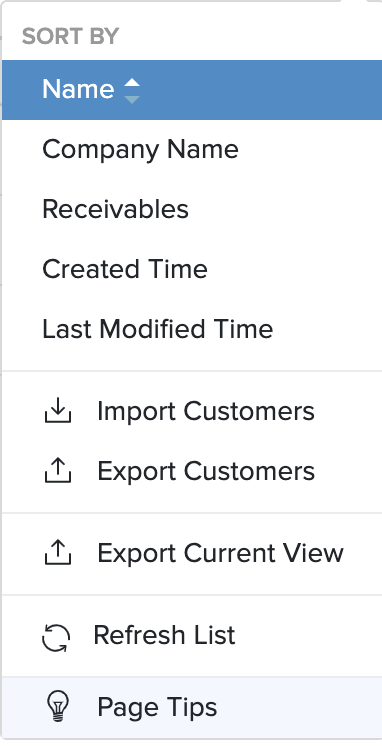
- Click the More menu icon in the top right corner of the module page.
- Click the Export Customers or Export Vendors option from the drop down.
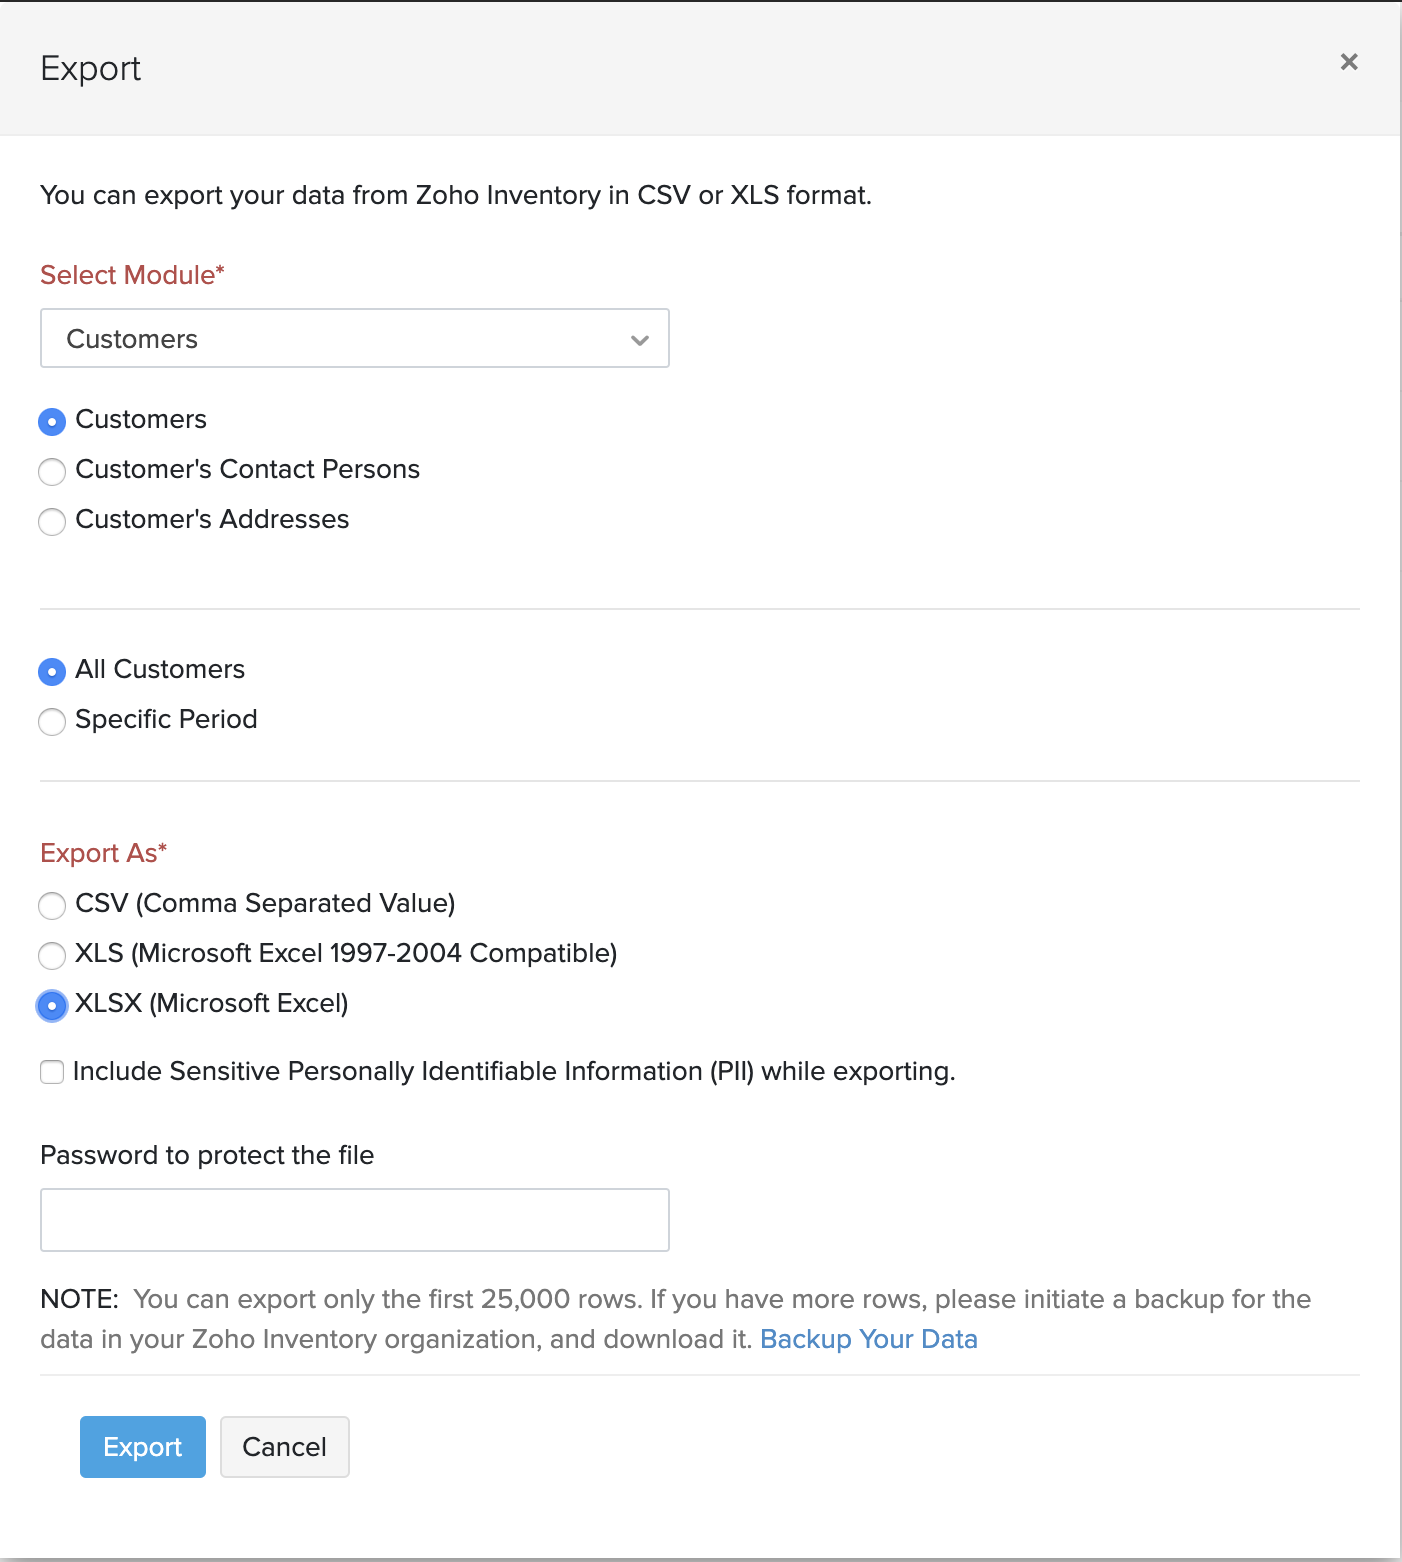
- Apply filter if needed. The Custom filter allows you to export the customers/vendors that were created during the selected dates.
- Choose a format in which the file needs to be exported to your hard drive. CSV or XLS.
- Click the Export button.
A copy of your customers/vendors list will be saved as a .CSV or .XLS inside your default downloads folder.
Merge Customers/Vendors
If two customers or vendors are related, you can merge their details into a single contact in Zoho Inventory.
Insight: The contacts that you choose to merge must have the same currency.
To merge two customers:
- Go to the Customers module in the sidebar.
- Open a customer that you want to merge.
- Click the More dropdown and select Merge Customers.
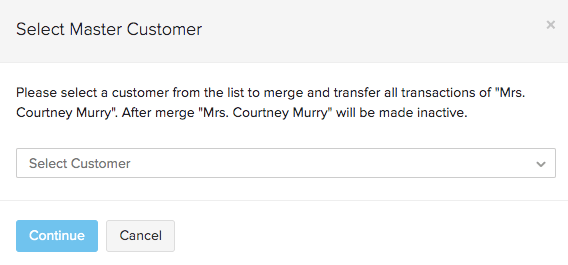
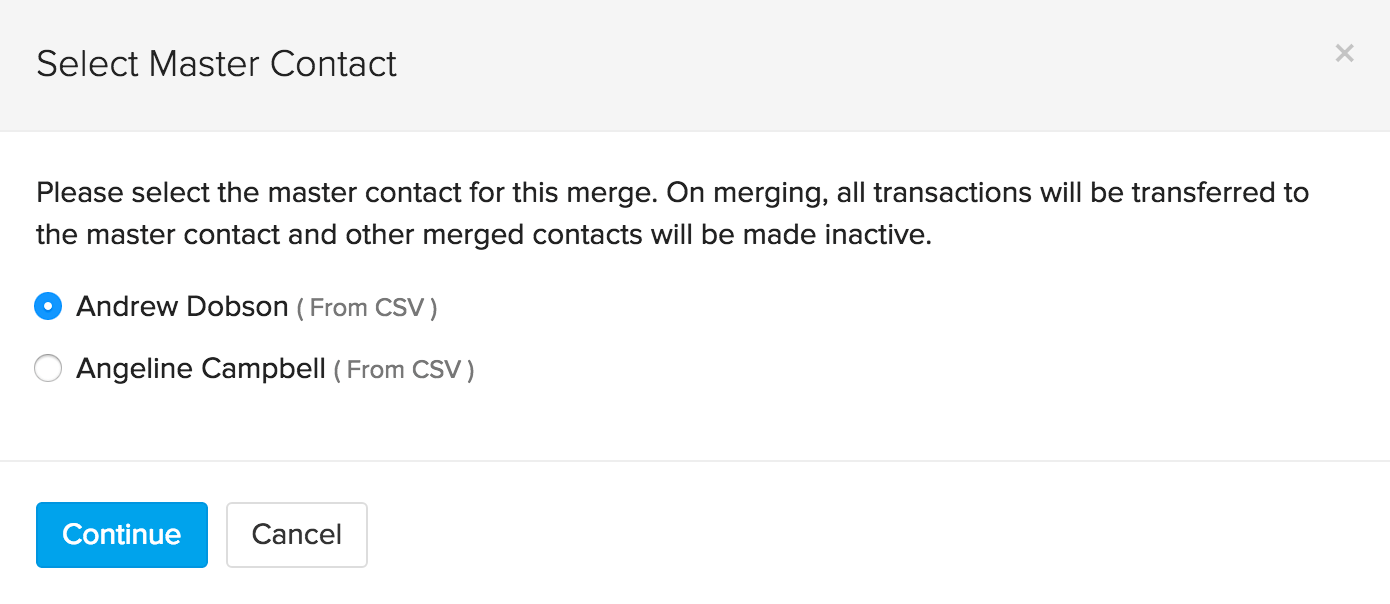
- Select a Master Customer.
- Click Continue to proceed.
Insight: A master customer is the primary contact with which the child contact’s details and associated transactions will be merged. Post merging, the child contact becomes inactive. Do note that you cannot undo the merge.
- Confirm your action.
All transactions associated with the child contact will be merged with the master contact and the child contact will be made inactive.
Pro Tip: You can also merge multiple contacts in one go.
Attach Files
Documents such as contractual agreements, terms of service etc., can be attached to the relevant customers or vendors in Zoho Inventory and used for future reference.
To attach a document:
- Go to the Customers or Vendors module in the sidebar.
- Click to open the preferred contact.
- Click on the Paperclip icon.
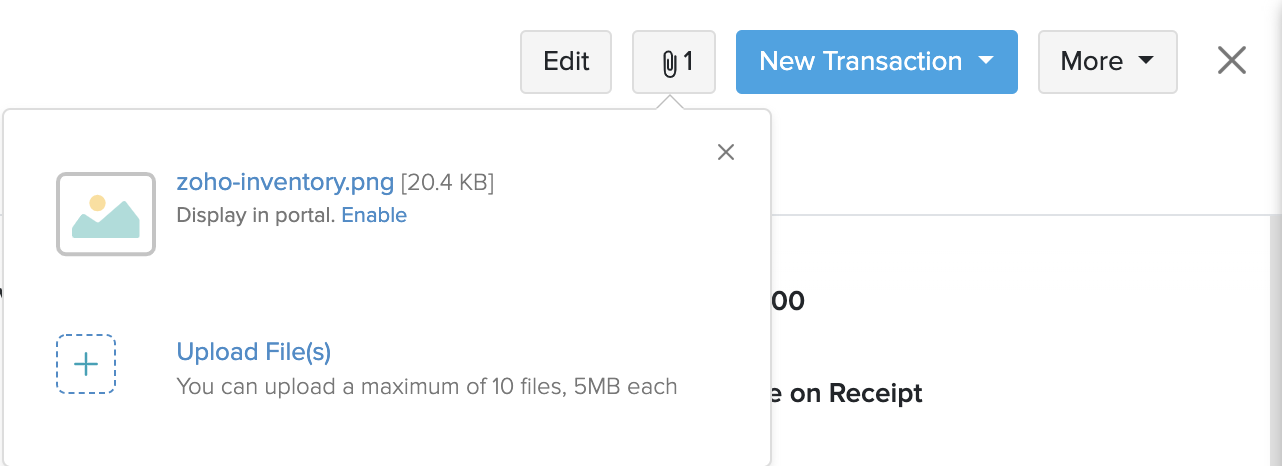
- Browse the file and select it.
The file will be uploaded and attached to the contact.
Insight: A maximum of 5 files (not exceeding a size of 5 MB each) can be attached to a contact.
Update Customer or Vendor from CRM
On integrating Zoho Inventory with Zoho CRM, you can import your customer and vendor details from Zoho CRM into Zoho Inventory.
When you modify a customer or a vendor in Zoho CRM, the automatic sync that takes place once every two hours will normally update the changes in Zoho Inventory.
To fetch the updates for a specific CRM contact instantly:
- Go to the Customers or Vendors module in the sidebar.
- Apply the filter CRM Contacts to narrow down your search.
- Click to open a contact.
- Click the More button to the top right corner.
- Select the Fetch this contact from Zoho CRM option from the drop down.
The customers/vendors will be reimported from Zoho CRM and their information will be updated in Zoho Inventory.
Link Customers & Vendors
Some businesses have customers who are also their vendors. For instance, when you provide food services for a business or individual, they become your client, and when they in turn provide accounting services for you, they become your vendor.
If you have a customer who is also your vendor, you have to create them as two separate contacts in Zoho Inventory and link them.
To link them:
- Go to the Customers or Vendors module in the sidebar.
- Click to open a preferred contact.
- Click More and select the Link to Customer/Vendor option. If the contact is a customer, then you can link it to a vendor and vice-versa.
- Choose the customer/vendor with whom you want to link the contact.
- Click Link. Both of them are now interlinked.
Post linking, you can view the payables and receivables in both contact pages.
Delete Customers/Vendors
To delete a customer or a vendor:
- Go to the Customers or Vendors tab in the sidebar.
Pro Tip: You can apply the appropriate filter to view the desired list of customers/vendords. Learn more about filtering contacts.
- Click a contact name to open it.
- Click the More button and select the Delete option from the drop down.
- Confirm your action.
Insight: If the contact has transactions associated with it, you have to delete the transactions and then delete the contact. An easier way to resolve this would be, to deactivate the contact.
Pro Tip: When you update the billing address or the shipping address of a contact, you have the choice of updating these changes across all draft orders and transactions.
Bulk Action
The bulk operation allows you to perform a specific action (merge, mark as inactive or delete) for multiple customers/vendors in one go.

To perform a bulk action on contacts:
- Go to the Customers or Vendors module in the sidebar.
- Select multiple contacts to which you want to perform the action on.
- Click the More Actions button at the top.
- Select an action.
Merge Multiple Customers/Vendors
To merge multiple contacts
- Go to the Customers or Vendors module in the sidebar.
- Select the contacts to be merged by clicking the boxes before their names.
- Click the More Actions button.
- Select the Merge option from the drop down.
- Choose the contact that has to be the Master Contact.
Insight: A master contact is the primary contact with which the child contact’s details and associated transactions will be merged. Post merging, the child contact becomes inactive. Do note that you cannot undo the merge.
- Click Continue.
- Confirm your action and the customers/vendors will be merged as one with the master contact.