
Other Actions for Custom Modules
Let’s have a look at the various actions that can be performed in a custom module.
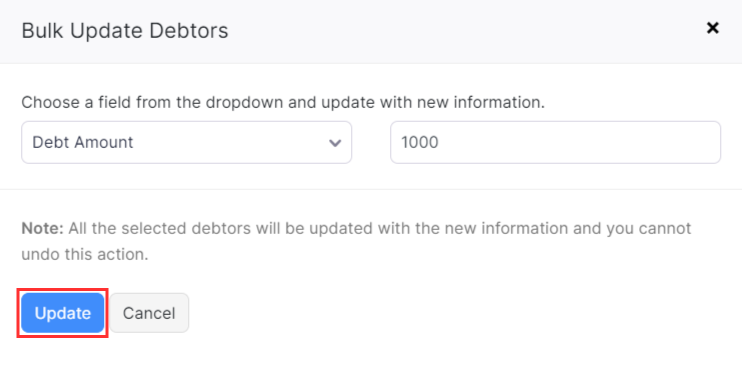
Bulk Update
You can update the fields for multiple records at once using the Bulk Update feature.
- Go to More in the left sidebar and the select the custom module (say, Debtors).
- Select the records that you want to update and click Bulk Update.
- Select the field you want to update and its corresponding value.
- Click Update.
Edit Records
To edit the record of a custom module:
- Go to More and select the custom module (say, Debtors).
- Select the record you want to edit.
- Click Edit at the top of the record’s detail page.
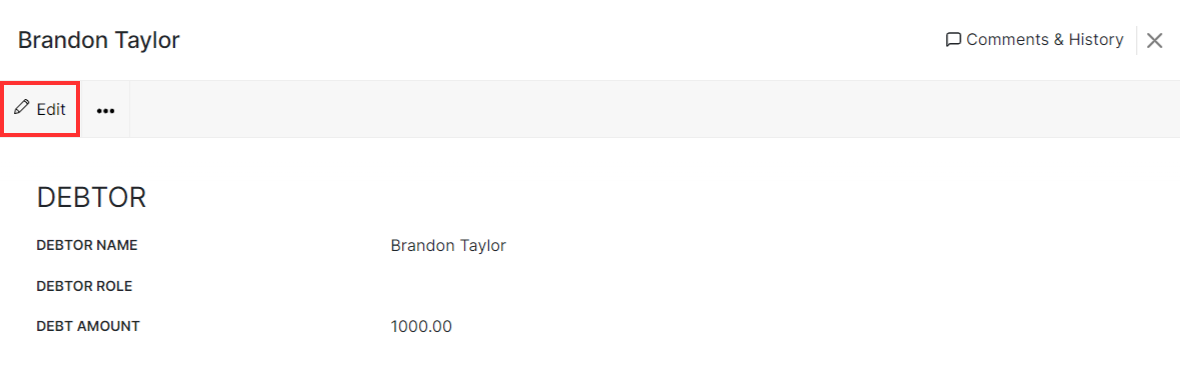
- On the Edit Debtor page (name of the record), make the necessary changes and click Save.
Delete Records
To delete the record of a custom module:
- Go to More and click the Custom Module (say, Debtors).
- Select the record you want to delete.
- Click the More button at the top of the record’s details page and select Delete from the dropdown.
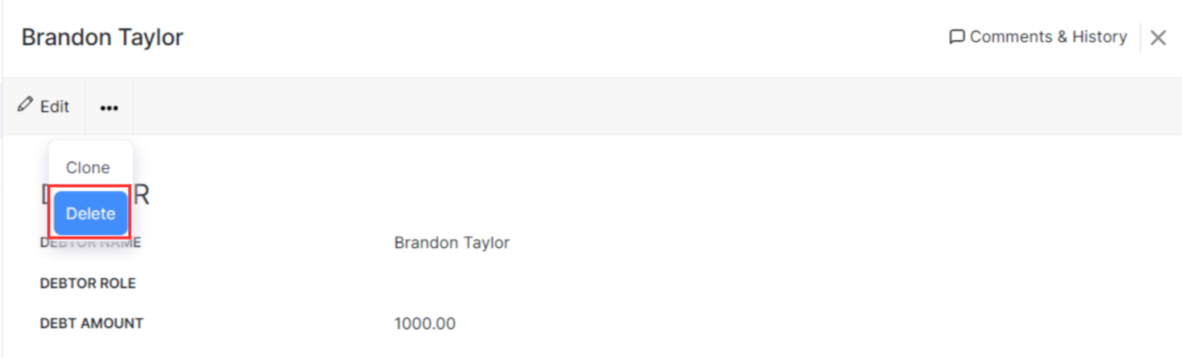
- In the pop up that appears, click Proceed to confirm.
Clone Records
If you want to create a record which has details similar to an existing record, you can clone it. Here’s how:
- Go to More in the left sidebar and select the custom module (say, Debtors).
- Select the record you want to clone.
- Click the More button at the top of the record’s details page and click Clone from the dropdown.
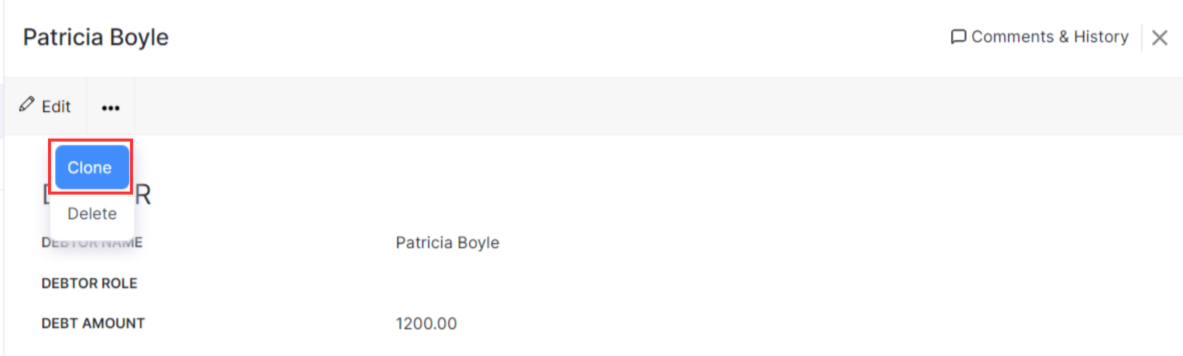
- Go through the details and click Save.
Convert a Custom Module’s Records
You can convert the records of a custom module into records of another custom module or any default module in Zoho Books by creating a Record Conversion Button (a type of custom button) for the custom module.
Scenario: Zylker uses the Custom Modules feature in Zoho Books to create a module called Purchase Requests for tracking items requested by employees. Once a purchase request is approved, the procurement admin needs to create a purchase order to proceed with the procurement process. Instead of manually creating a purchase order and entering details from the purchase request, the procurement admin creates a Record Conversion Button for the Purchase Requests module. Now, whenever a purchase request is approved, the admin simply clicks the button, and the request is automatically converted into a purchase order.
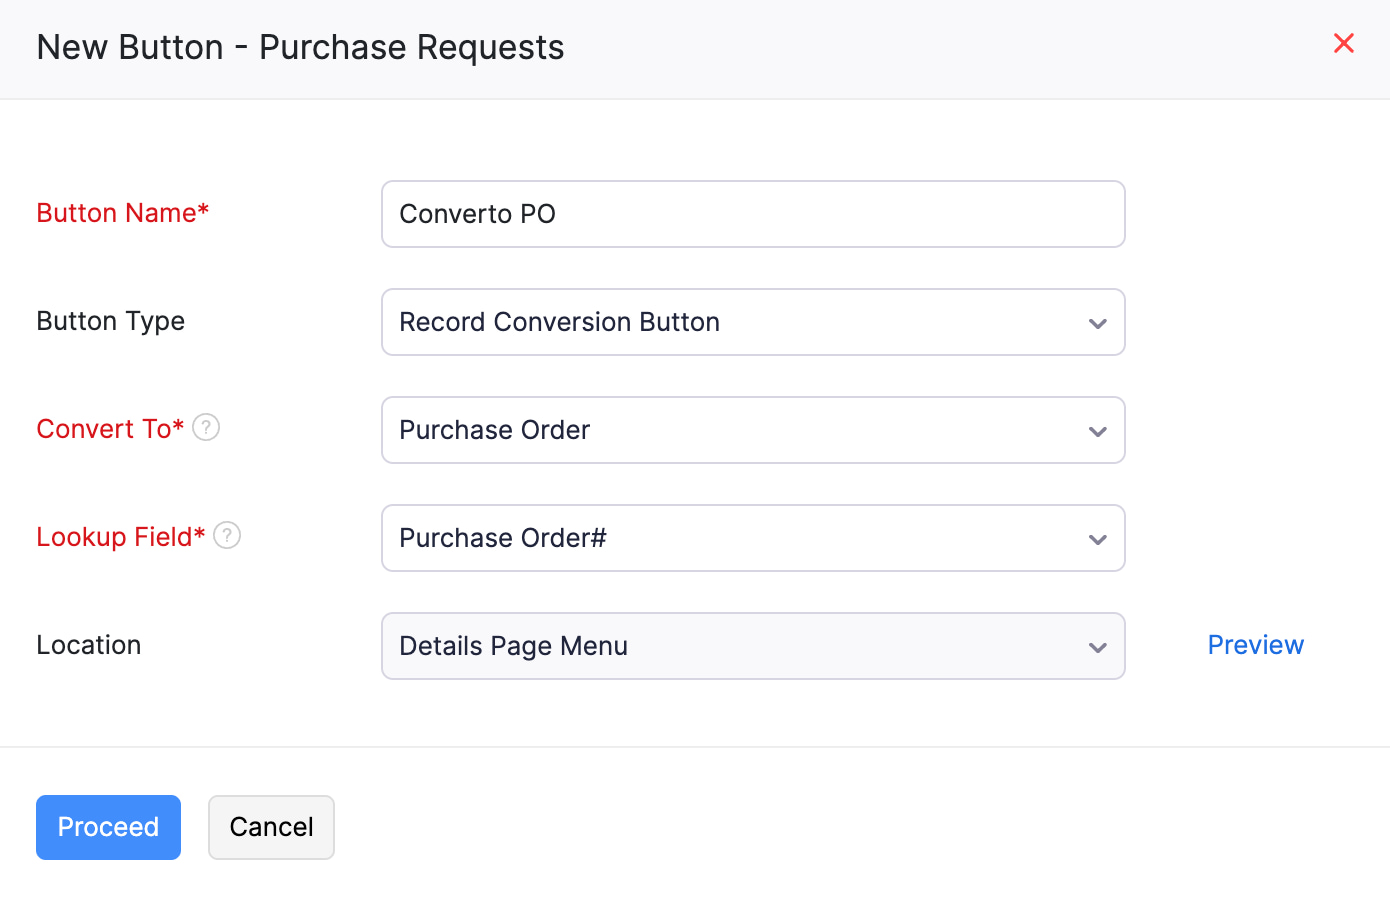
To create a Record Conversion Button for a custom module:
- Go to Settings in the top right corner.
- Click the required custom module under Custom Modules.
- Navigate to the Buttons tab.
- Click + New in the top right corner.
- Fill in the following details in the pop-up:
- Enter the Button Name.
- Select Record Conversion Button as the Button Type.
- Select the Target Module. This is the module into which the records from this custom module will be converted.
Note: You can convert a custom module’s record into a record in any of the following default modules: Quotes, Sales Orders, Invoices, Purchase Orders, and Bills.
- Select the Lookup Field. This is the field in the target module (Purchase Orders) used to look up its records. The lookup field will be available in the Related Lists tab on the record details page of the custom module (Purchase Requests).
- The button’s Location will be Details Page Menu by default.
- Click Proceed. Click Preview to see where the button will be available.
- Fill in the following details on the page that follows:
- Select When to show this button? You can choose Show always or Show based on criteria. If you choose Show based on criteria, enter the criteria to display the custom button.
- In the Deluge Editor, ensure that the fields of the custom module are properly mapped with the required fields of the target module.
- Select Who can access this button? You can set access to Only Me, Only Selected Users & Roles, or Everyone. If you choose Only Selected Users & Roles, click Select Users & Roles, and select the roles and users to whom the button should be visible.
- Click Save & Execute to check if the button is working properly. Click Save if you want to execute it later.
The custom button will be created. It will be available on the Details page of the source custom module’s (Purchase Requests) records. To trigger it:
- Go to Custom Modules on the left sidebar.
- Click the required custom module.
- Select the record you want to convert.
- Click the custom button you created at the top of the page.

- Click Proceed in the pop-up. You’ll be redirected to the New Record page of the target module.
- The data mapped when creating the record conversion button will be auto-filled. Verify and update the record if necessary.
- Click Save.
Edit Custom Modules
To edit a custom module:
- Go to Settings in the top right corner of the page.
- Select the custom module that you want to edit from the Custom Modules card.
- Click Edit Module in the top right corner of the page.
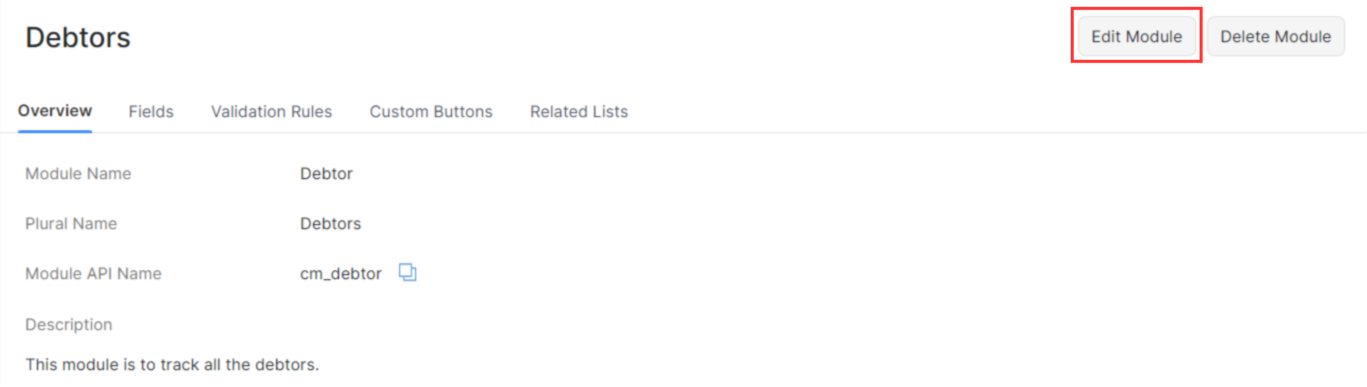
- On the Edit Module page, enter the necessary changes and click Save.
Delete Custom Modules
To delete a custom module:
- Go to Settings in the top right corner of the page.
- Select the custom module that you want to delete from the Custom Modules card.
- Click Delete Module in the top right corner of the page.
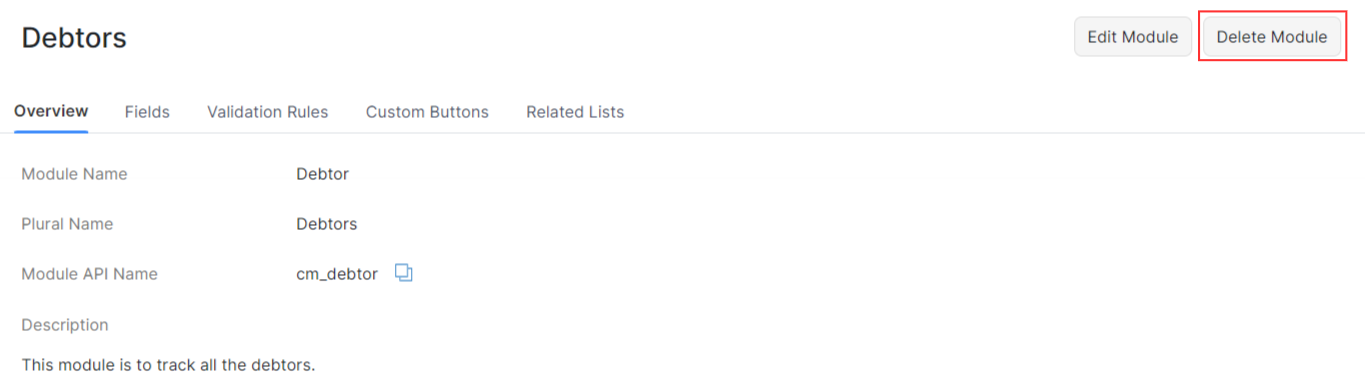
- In the pop up that appears, click Delete to confirm.
Attach Files to a Custom Module’s Record
You can attach files to a custom module’s record using the following methods:
- Upload the files on your device.
- Upload files from cloud resources like Zoho Workdrive, Google Drive, Dropbox, One Drive, and other cloud software.
- Upload files from the Documents module in Zoho Books.
To attach files to a purchase order:
- Click Custom Modules on the left side bar and select the required custom module.
- Click the record to which you want to attach files.
- Click the Upload Files icon in the top right corner.
- Click the dropdown next to Upload Your Files and select the preferred option.
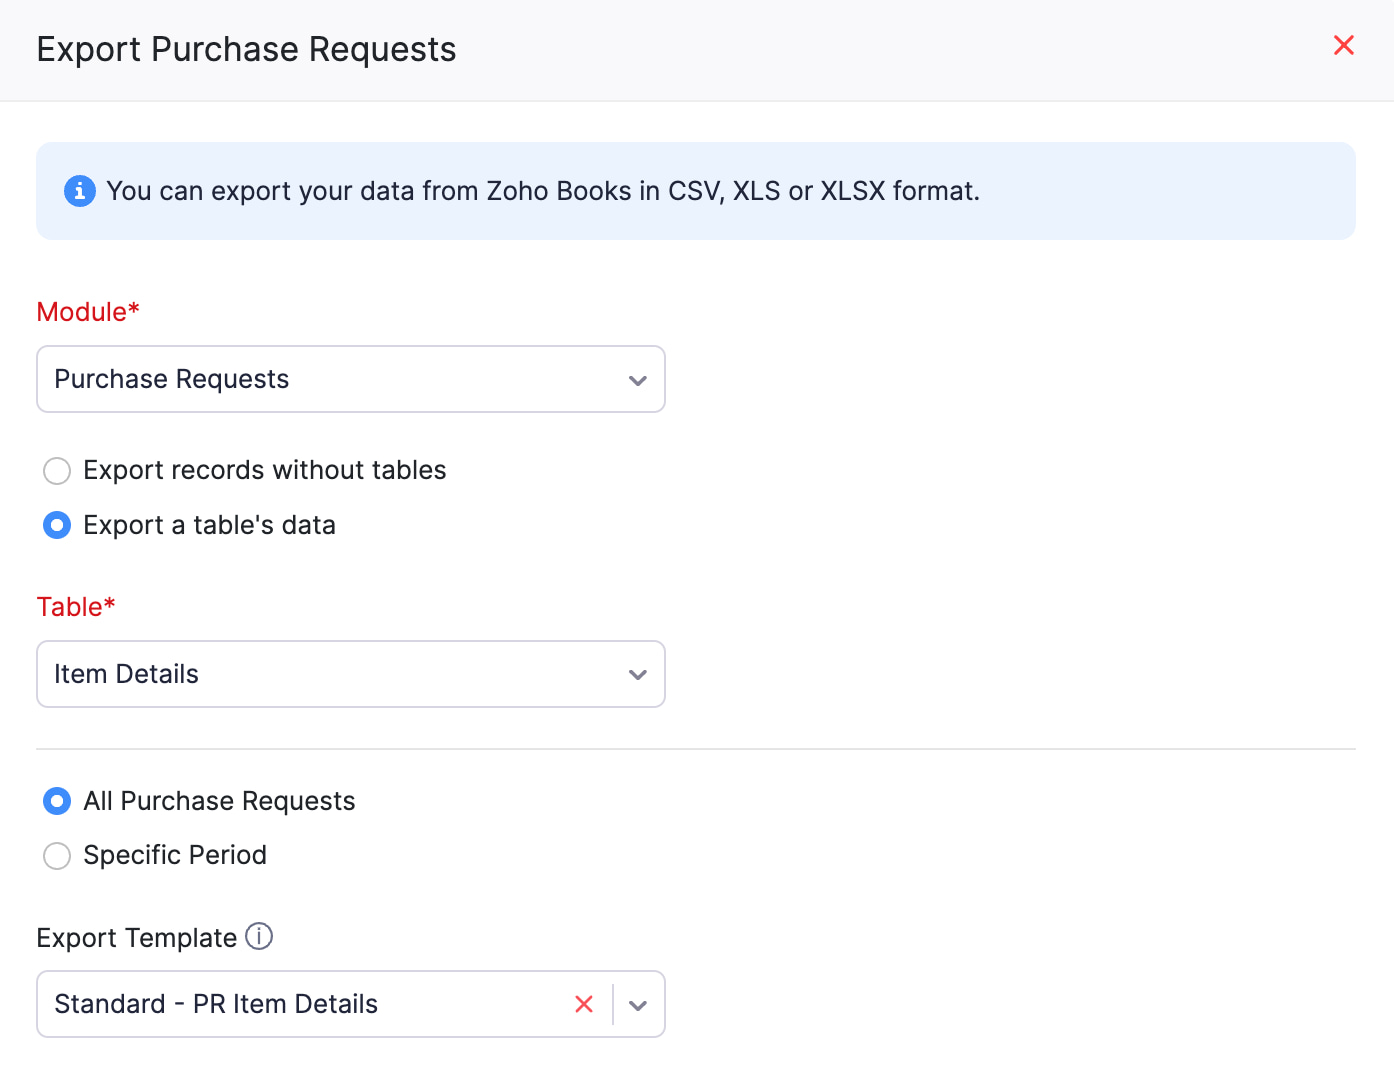
Export Custom Modules
You can export all your custom module records that are in Zoho Books to your system in the CSV, XLS or XLSX format. Here’s how:
- Go to More in the left sidebar and select the custom module (say, Debtors).
- Click the More button in the top right corner of the page.
- Select Export Debtors (name of the custom module).
- Fill in the following fields:
| Fields | Description |
|---|---|
| Module | Select the module you want to export. By default, the custom module will be selected. |
| Export Options | - If you want to only export the records and not the tables, select Export records without tables. - If you want to only export a table’s data, select Export a table’s data and select the required Table. |
| Date Range | Export all records of the custom module or select a specific period for which you want to export the records. |
| Export Template | - If you want to export only certain fields, you can select a template. If you don’t have an export template, you can create a new one by clicking + Add New. - If you don’t select a template, all fields will be exported. |
| Export File Format | Select the format in which you want to export the file. |
| Personally Identifiable Information (PII) | If there is any personally identifiable information in the records you are exporting, check Include Sensitive Personally Identifiable Information (PII) while exporting. |
| Password | Enter a password to secure the export file. |
- Click Export.
Automation
You can automate and create workflows using your custom modules based on your business needs.
Zoho Analytics Integration
If you integrate with Zoho Analytics, you can generate reports in Zoho Analytics for the custom modules you have created in Zoho Books.
 Yes
No
Yes
No
Thank you for your feedback!