GoDaddy DNS configuration
If your domain is hosted with GoDaddy, you can follow the below steps to configure SPF, DKIM, and CNAME records for ZeptoMail. It may take 24-48 hours for the records to be published in the DNS. So your domain will not be verified until that time and you will not be able to send any emails using your domain.
Table of Contents
One click verification
ZeptoMail supports one-click verification for certain accounts hosted with Go-daddy. This way, you can automatically update the records to your DNS server without having to manually add and verify them. Follow the steps below to use the one-click verification :
- Login to your ZeptoMail account.
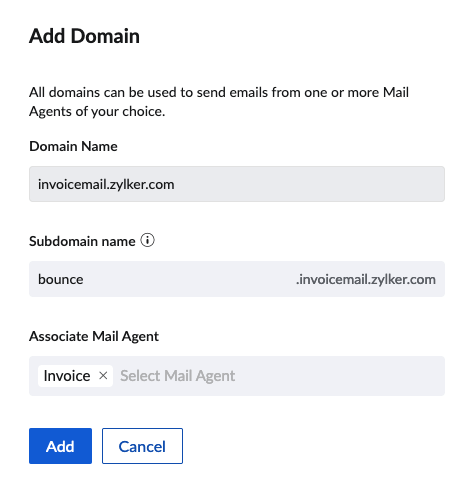
- Navigate to the Domains sections. Click Add domain.
- Enter the domain details - domain name, sub-domain name and the Mail Agent to which you wish to associate the domain. Click Add.
- The Automatic Verification pop-up to add the records will be displayed.
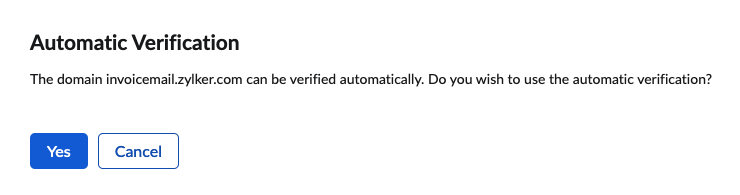
- Click Yes to verify your DNS records automatically.
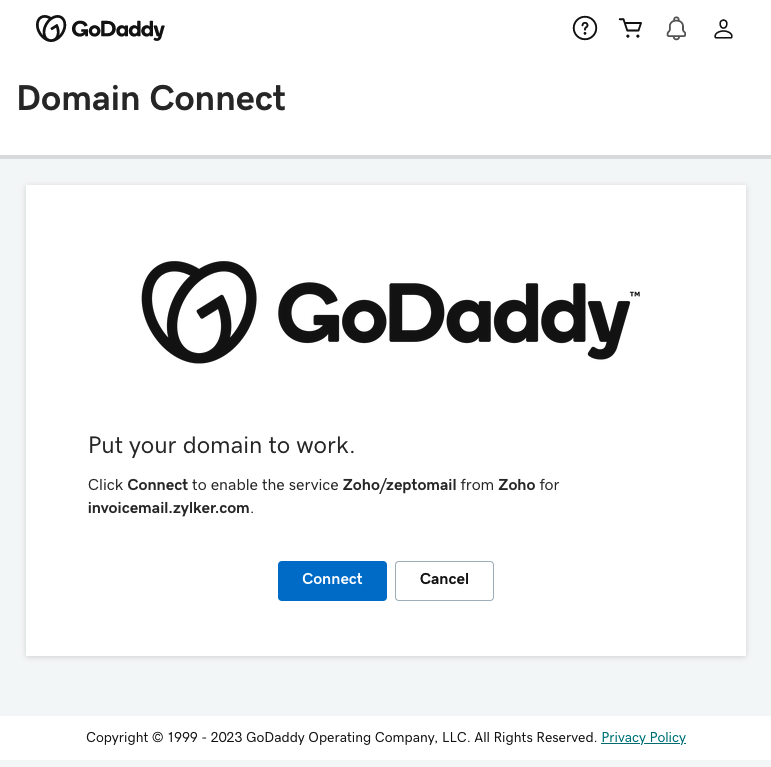
- Login with your Go-daddy credentials and click Connect. Your domain verification will be complete.


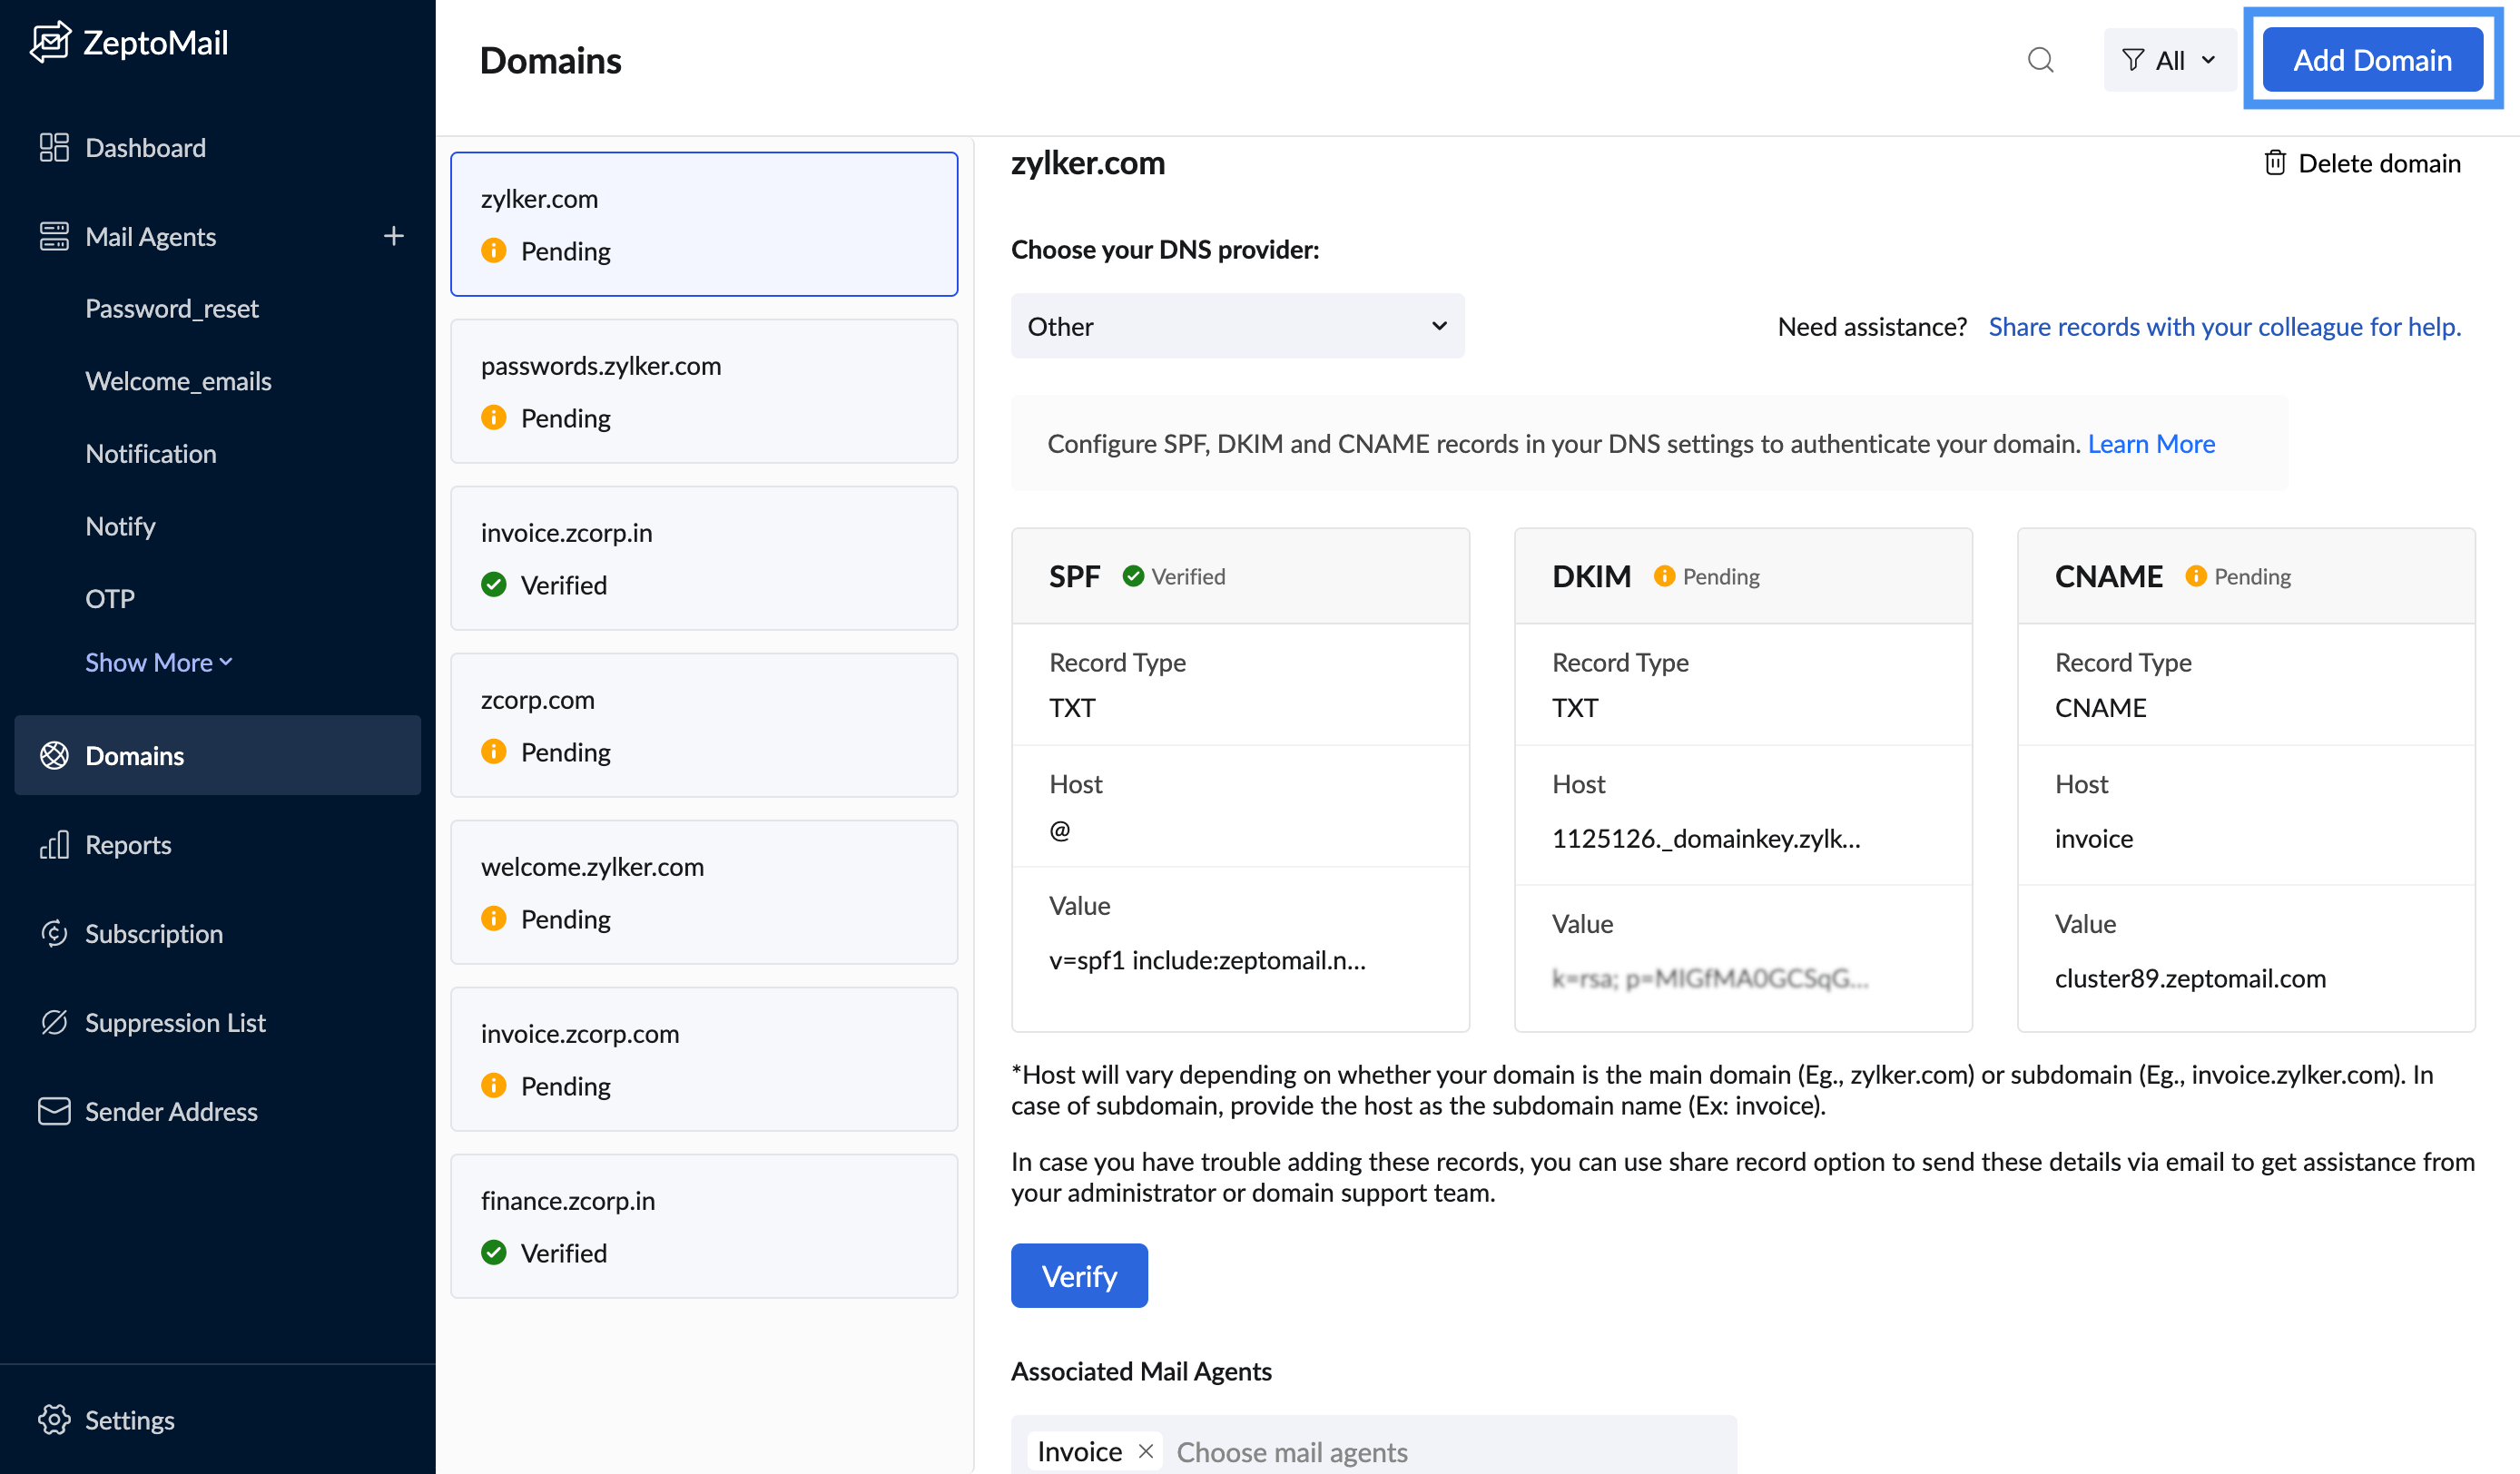
Add SPF - TXT record
- Login to your GoDaddy DNS Manager. Select the My Account menu and choose Domains.
- Expand Domains and click the Manage DNS button for the domain you want to verify.
- The DNS Manager page will open with information about existing DNS records.
- Scroll down to the Records section and click the Add button to add a DNS record. To update a record, click on the edit icon against the respective record.
- Select TXT from the Type drop-down menu.
- In the Host field, specify @ or subdomain name.
In the TXT Value field, enter v=spf1 include:zeptomail.net ~all
Host* Value* Main domain
(E.g., zylker.com)@ v=spf1 include:zeptomail.net ~all Subdomain
(E.g., invoice.zylker.com)Subdomain name
(Eg., invoice)- If you have an already existing SPF TXT record configured for your domain say "v=spf1 include:zoho.com ~all", then you should not create a new SPF TXT record for ZeptoMail. If the new ZeptoMail SPF TXT value is "v=spf1 include:zeptomail.net ~all", then modify your existing DNS SPF TXT value to "v=spf1 include:zeptomail.net include:zoho.com ~all".
- Click Save.
*Get the exact SPF values from the Domains section.
Add DKIM - TXT record
- Login to your GoDaddy DNS Manager. Select the My Account menu and choose Domains.
- Expand Domains and click the Manage DNS button for the domain you want to verify.
- The DNS Manager page will open with information about existing DNS records.
- Scroll down to the Records section and click the Add button to add a DNS record. To update a record, click on the edit icon against the respective record.
- Select TXT from the Record Type drop-down menu.
- In the Host field, enter <selector>._domainkey*.
- In the TXT Value field, enter the DKIM value* generated in your ZeptoMail account.
- Click Finish.
*Get the exact DKIM values from the Domains section.
Add CNAME records
CNAME records are added to configure your bounce address
- Login to your GoDaddy DNS Manager. Select the My Account menu and choose Domains.
- Expand Domains and click the Manage DNS button for the domain you want to verify.
- The DNS Manager page will open with information about existing DNS records.
- Scroll down to the Records section and click the Add button to add a DNS record.
- Select CNAME from the Type drop-down menu.
- In the Host field, enter the subdomain name of your domain. (For example, if subdomain is bounce.zylker.com, enter bounce in the host field).
In the Points to field, enter the value generated in ZeptoMail for this domain:
Host Points to Subdomain name
(Eg., bounce, if subdomain is bounce.zylker.com)- To configure bounce address, get the CNAME value from the Domains section.
- To configure Email Tracking, get the CNAME value from the Email tracking tab under the respective Mail Agent.
- Click Save.
- After an hour or two, log in to your ZeptoMail account and click Verify (usually it takes 24-48 hours for the records to be published in the DNS).
- If the DNS information is correctly propagated, the subdomain will be verified.