With the latest update to the Notification Recipients feature (formerly known as "Email Recipients"), you now have the flexibility to choose multiple communication methods for receiving your notifications. This enhancement allows you to include both phone numbers and email addresses, ensuring that important updates reach you through the channels most convenient for you.
Phone Numbers: You can now receive notifications via SMS or WhatsApp, making it easier to stay updated, especially when you're on the go or prefer quick text alerts.
Email Addresses: Notifications can also be sent to one or more email addresses, ensuring you never miss important information, whether you're working or reviewing updates in your inbox.
This new functionality enables you to customize your notifications preferences, ensuring you receive critical updates through your preferred medium - be it for invoices, general updates, or other service -related notifications.
This guide covers how to manage your notification recipients, including:
Adding Phone Numbers
Adding Email Addresses
Verification Process
Editing Notification Preferences
Deleting Notification Recipients
Navigate to the Manage Subscription Page:
Open the Product Page - Navigate to the product page you wish to add/change your preferred notification method.
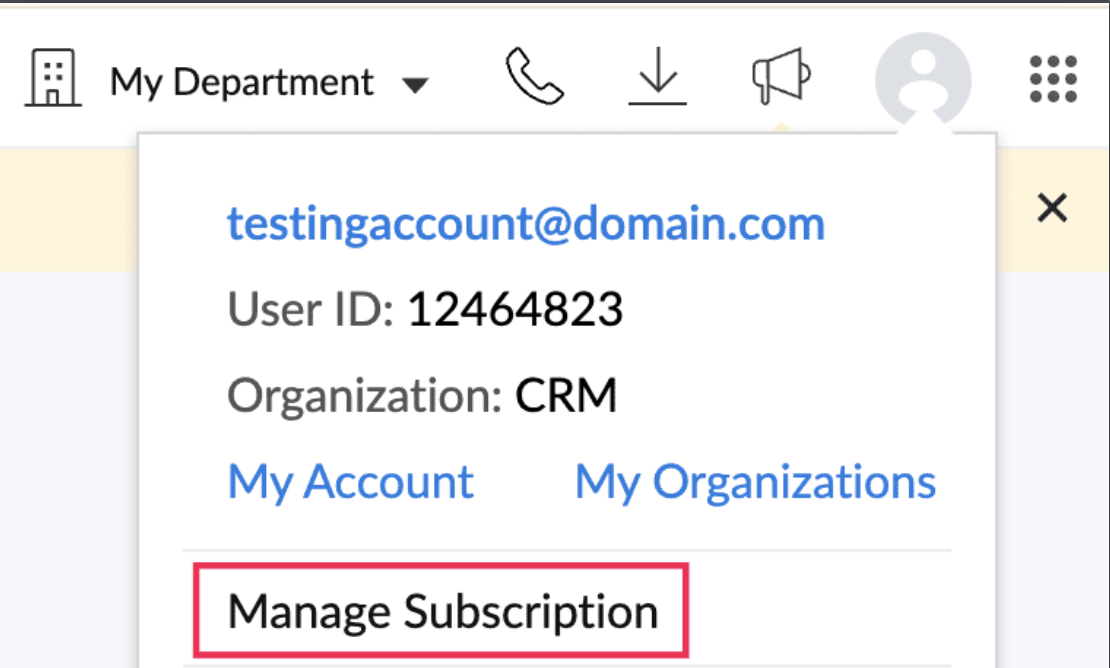
Access Subscription Option - Click on your profile icon in the top-right corner of the page.
Select Manage Subscription - Click the Upgrade/Manage Subscription located below profile details.
You will be redirected to the Subscription dashboard of the product
Click on "Notification Recipients" under the Your Store Details option.

Adding a Phone Number for Notifications
To add a phone number to your notifications:
- Locate the "Actions" section:
- Navigate to the "Actions" section and click the "Add" button.

- Select Service and Notification Type
- Choose the service for which you want to receive notifications.
- Select SMS or WhatsApp as your preferred notification medium.
Add Phone Number:
- Adding Phone number for Existing Subscription:
Click on the Edit icon

Click on "Add New".

You'll be redirected to the Add Phone Number page.

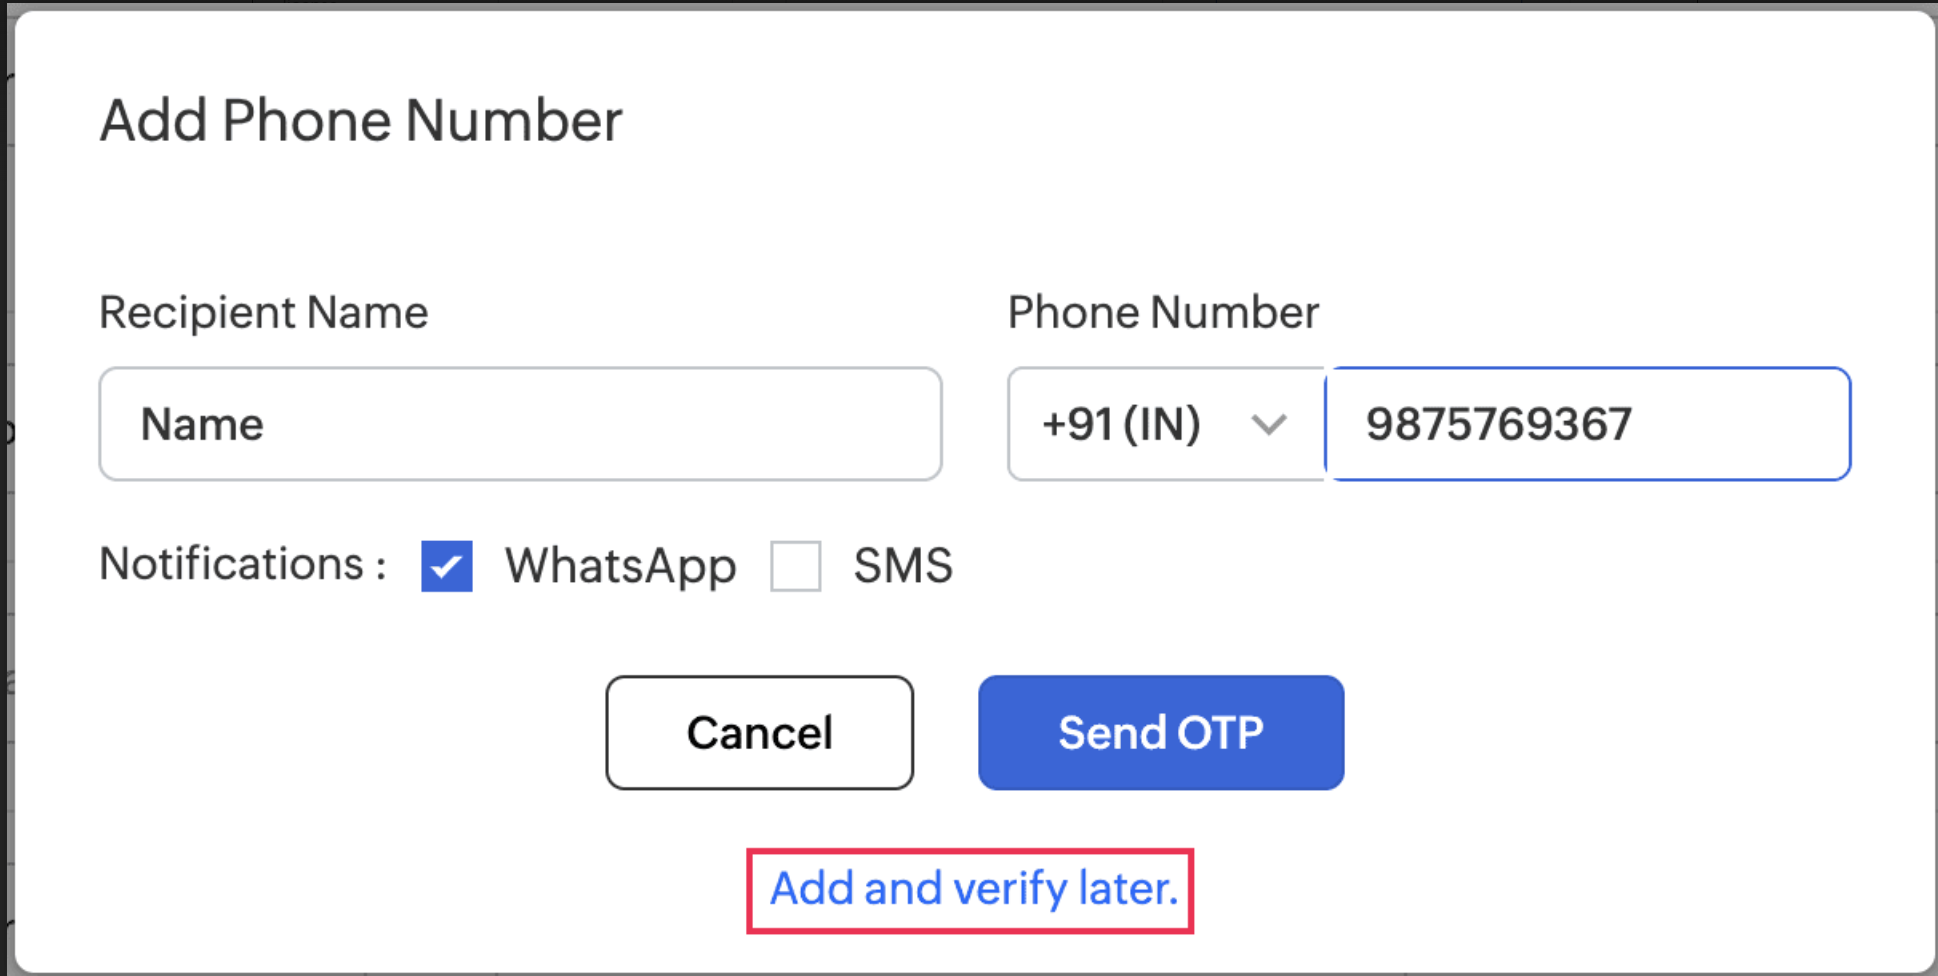
Provide Details
- Enter the recipient's name and phone number. Then, select whether you want to receive notifications via WhatsApp, SMS, or both.
- Note: OTPs will only be sent via WhatsApp, even if both options are selected.

- Send OTP:
- Click Send OTP t generate the One-Time Password (OTP).
- The OTP will be sent through the selected medium.

- Verification and Confirmation:
- Enter the OTP in the provided field to verify the phone number.
- Save the Details:
- Once the OTP is successfully verified, click Save to finalize the addition and enable notifications.

Note: Customers cannot proceed unless all services are selected for both invoice and general notifications.

Adding an Email Address for Notifications
To add an email address for your notifications:
- Click on "Add New":
- Under the Enter Address section, click "Add New".

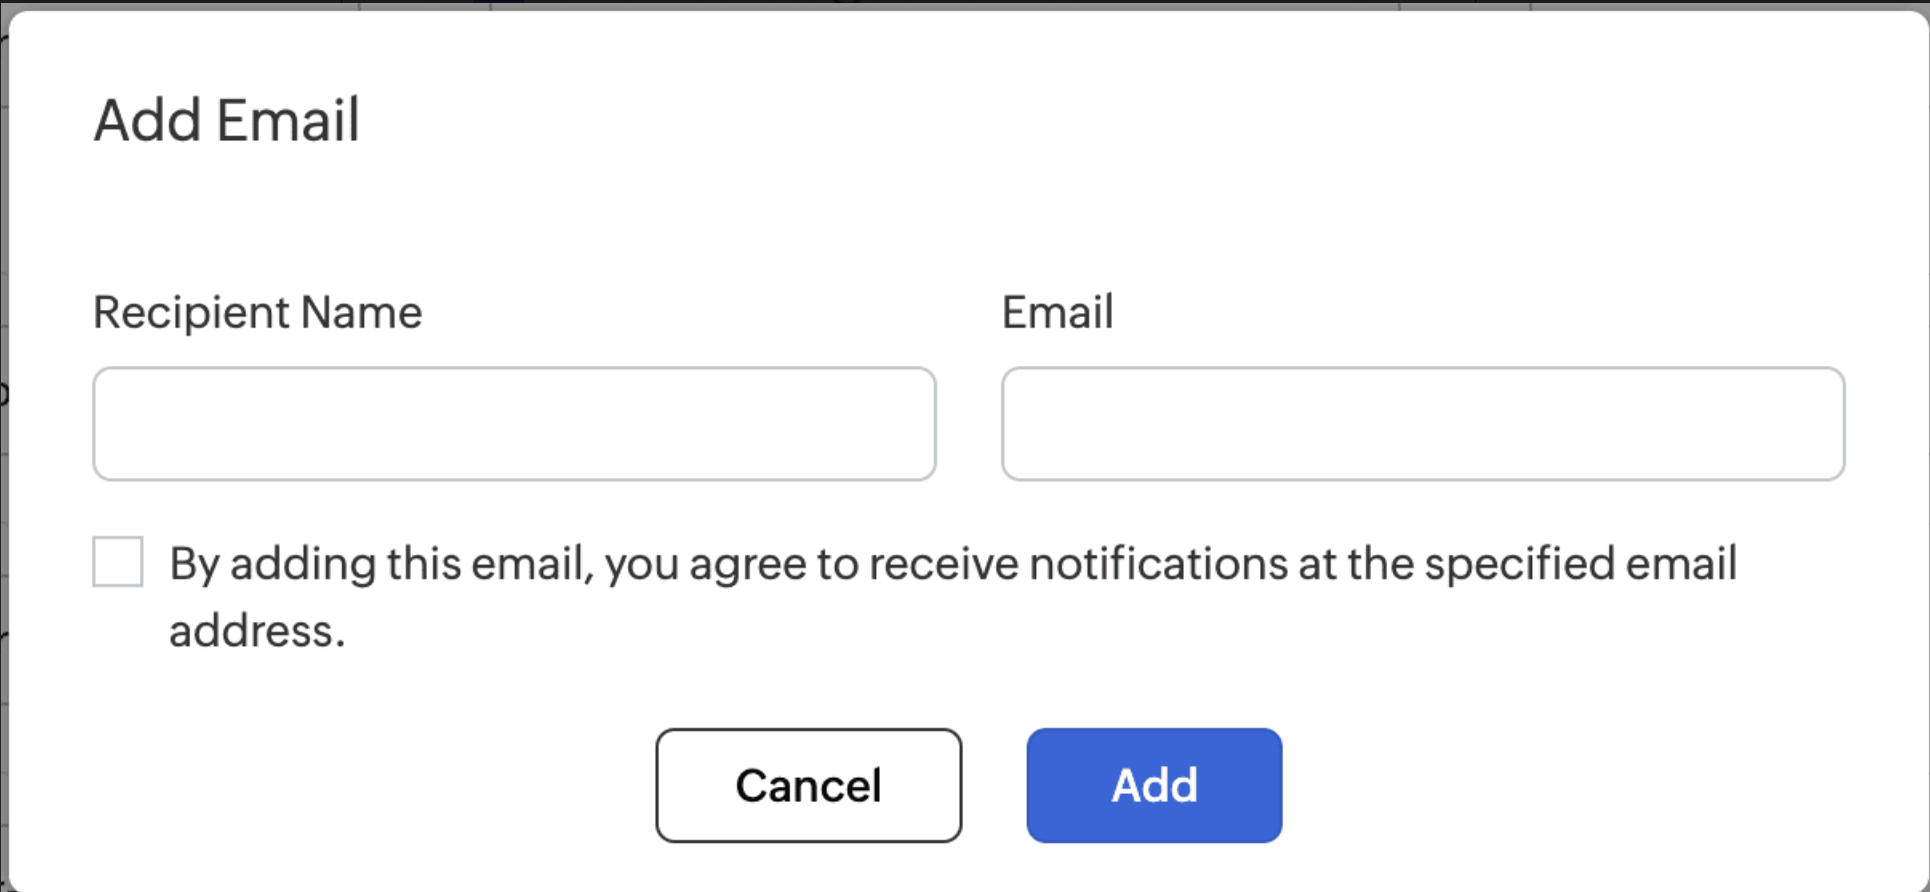
- Enter the Email Address:
- You will be redirected to the Add Email page.
- Enter the email address and check the confirmation box.
Confirm and Add:
- Click the Add button to complete the process.
Finalize the Addition:
- Once the email address is added and confirmed, click Save to finalize the addition and activate notifications for that email address.

Option to Verify later
If you prefer to verify later, you can:
Select "Add and Verify Later":
- Enter the recipient's name, phone number, and select the notification medium (WhatsApp or SMS).
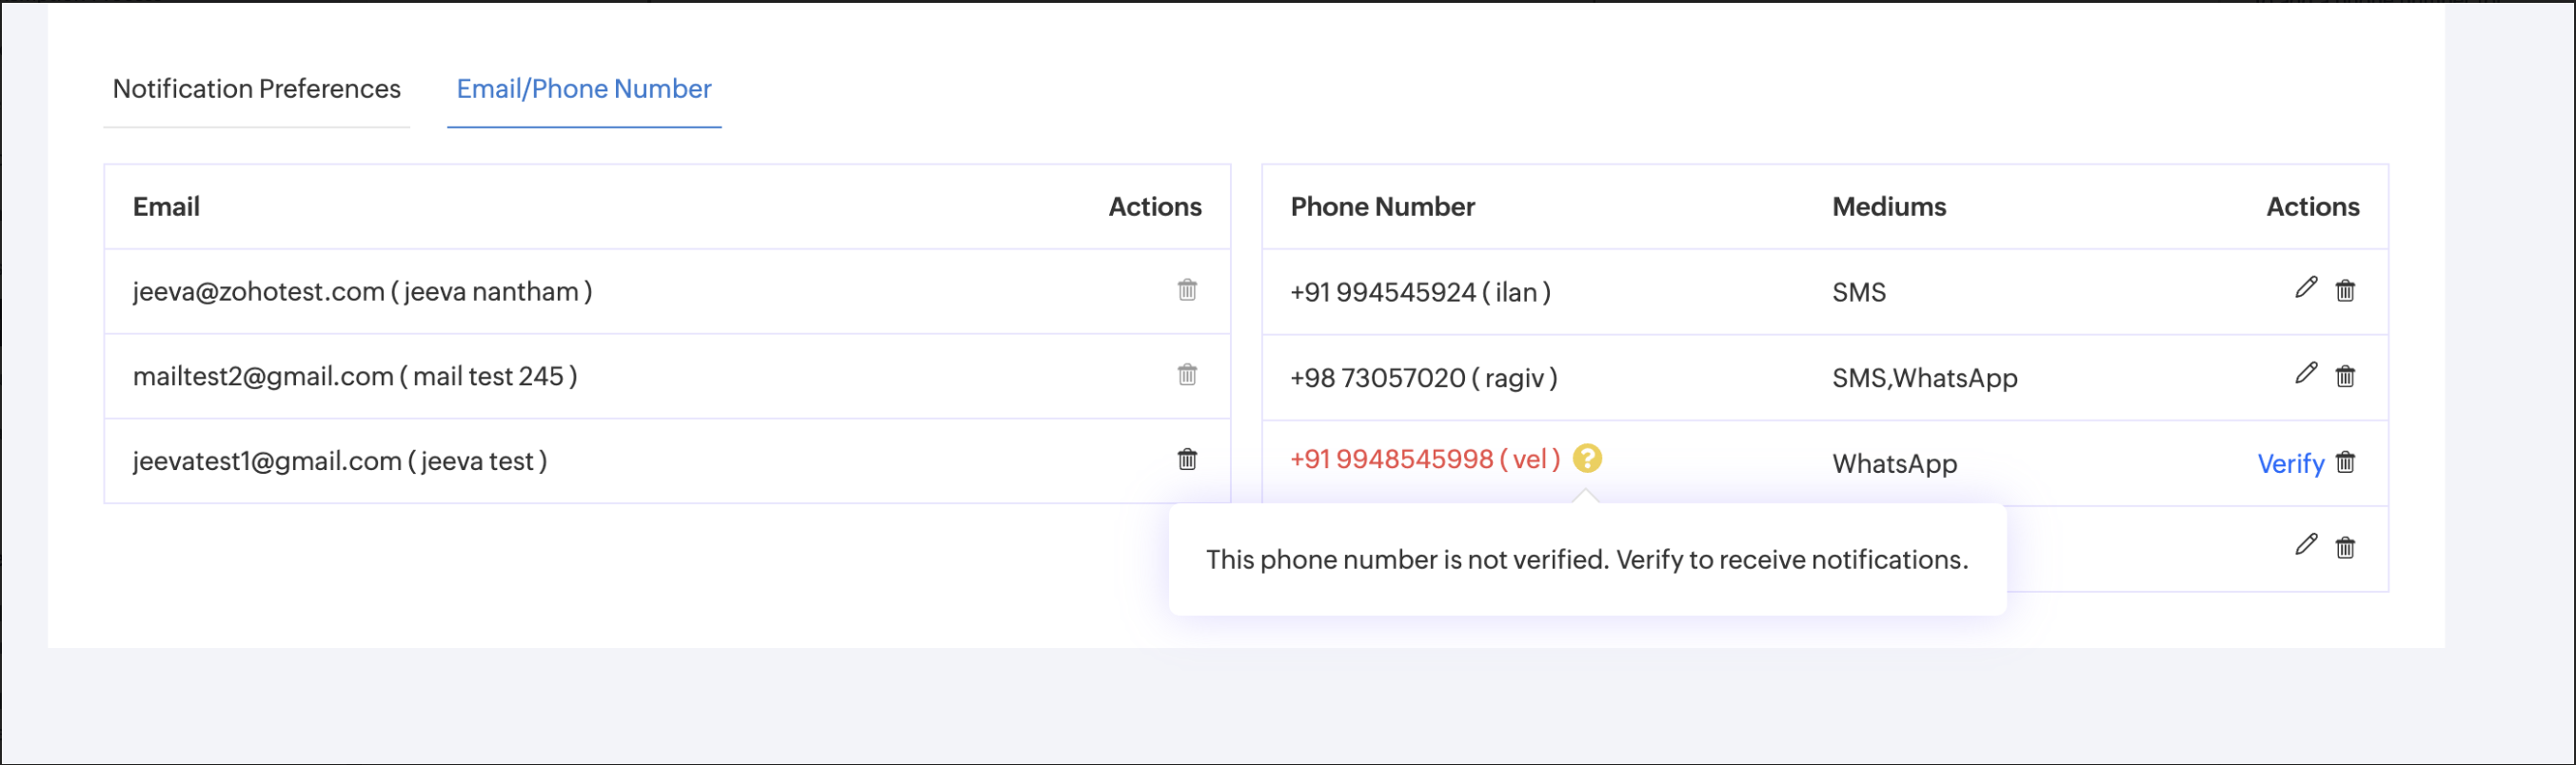
Unverified Status:
- The phone number will be added, but it will remain unverified. Notifications will not be sent until the phone number is verified.


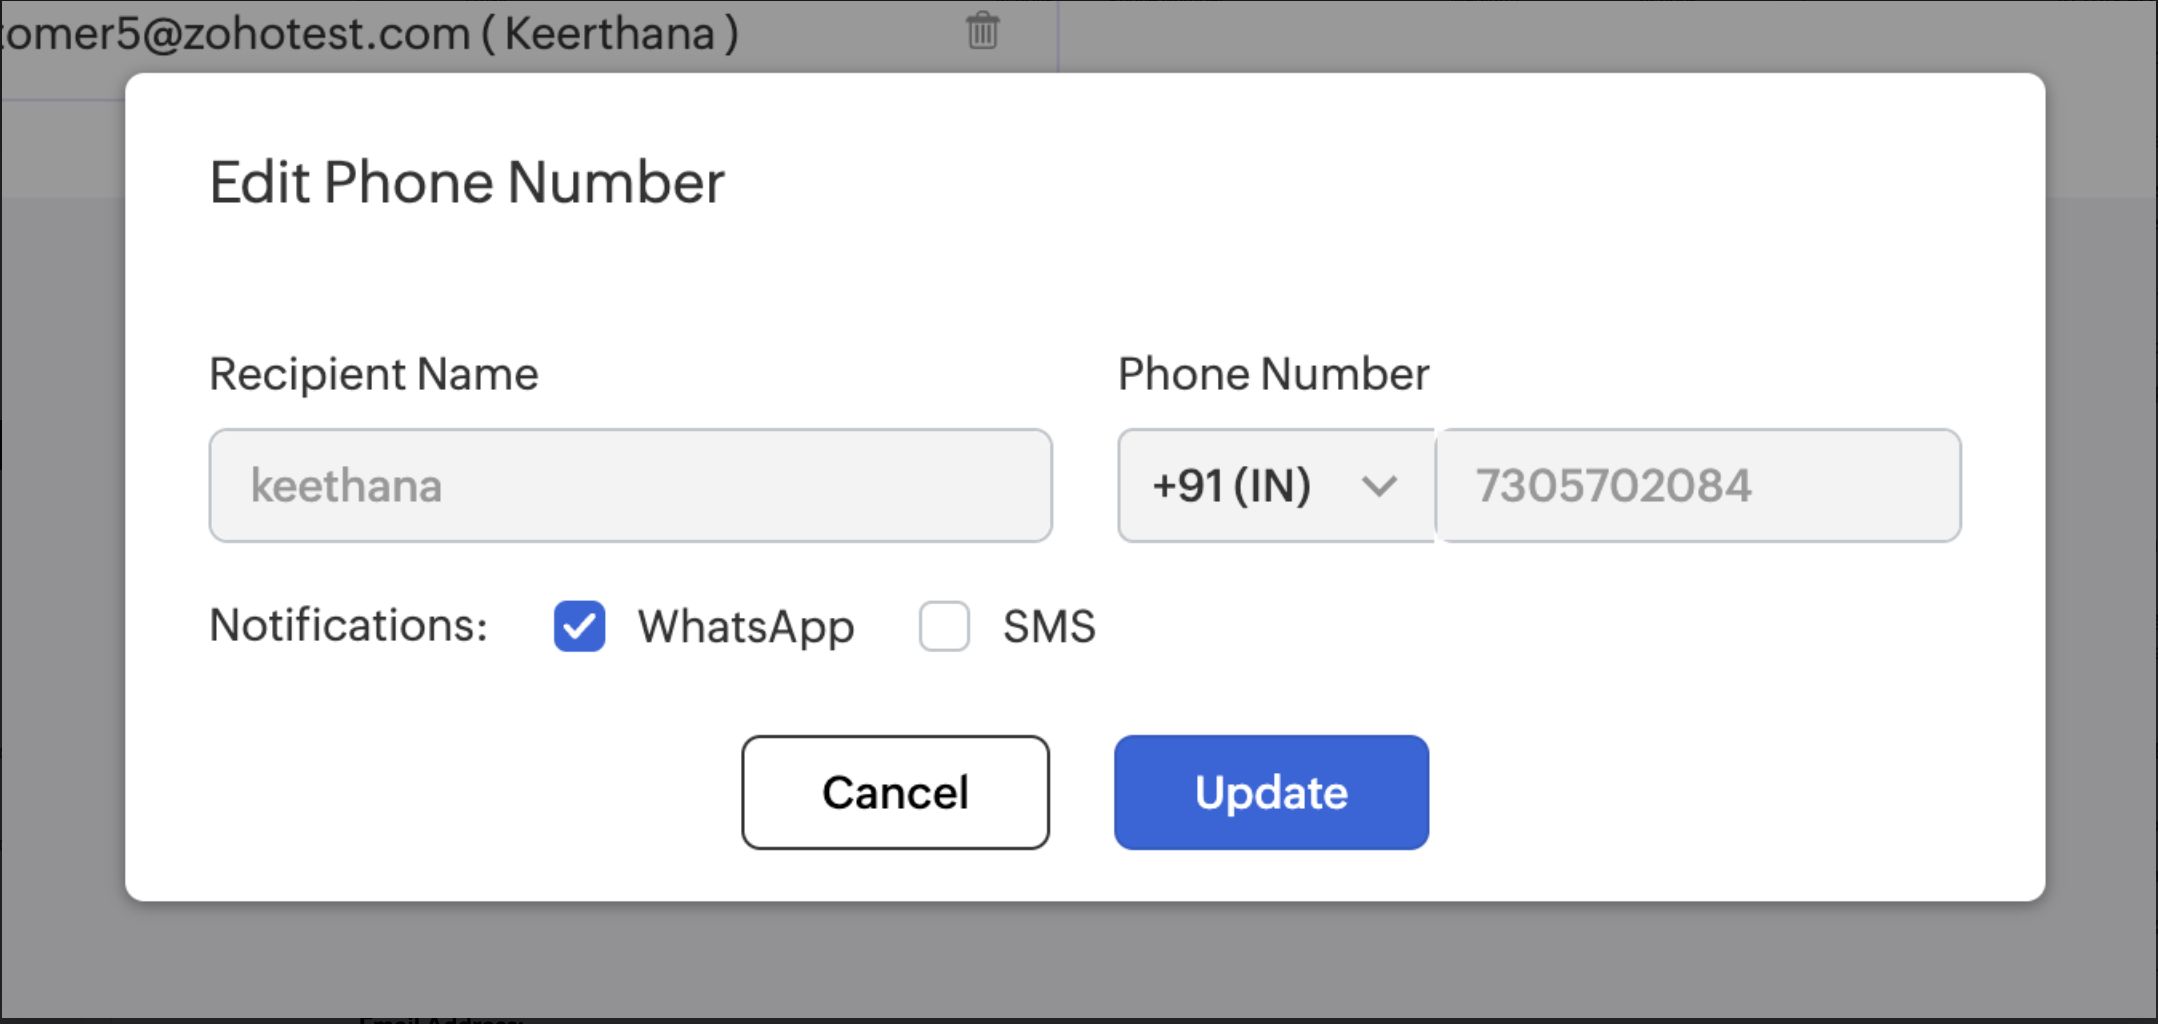
Editing Notification Preferences (Medium Type)
To edit the notification medium (SMS or email) for an existing recipient:
Navigate to the Notification Settings:
Go to the Email/Phone Number section.
Click the Edit Icon:
Find the phone number or email address you wish to edit
Click the Edit icon.

- Choose Preferred Medium:
- Select the preferred notification medium (WhatsApp, SMS, or email) and click Save to apply the changes.
- Select the preferred notification medium (WhatsApp, SMS, or email) and click Save to apply the changes.

Deleting Process:
Email Addresses:
- You cannot delete an email address if it is the only one linked to a subscription.
- Every subscription must have at least one email address to receive notifications.

Example:
- For a customer with the following subscriptions and linked emails:
- CRM & Desk - joseph@gmail.com, alex@gmail.com
- SalesIQ - robert@gmail.com, zylker@gmail.com
- One - john@gmail.com
- Notifications for CRM, Desk, and SalesIQ:
- These services have multiple linked email addresses. If one email address is deleted, notifications will continue to be sent to the other email address.
- Notifications for One:
- This service has only one email address linked. Therefore, this email address cannot be deleted to ensure uninterrupted notifications.
- Phone Numbers:
- There are no restrictions for deleting phone numbers. You can delete phone numbers regardless of how many are linked to a service.
By following these steps, you can efficiently manage your notification recipients to ensure that you receive important updates through your preferred communication channels. If you need further assistance, feel free to reach out to our support team.
Would you like to modify any sections or need additional clarification?