Ping!E-signing just got faster with Zoho Sign + WhatsApp
 Ping!
Ping!It's no exaggeration that instant messaging has completely transformed how we connect, both in life and in business. Naturally, the next step was to make document signing just as instant. With Zoho Sign's integration with WhatsApp, you can send documents for signature right where your customers already are, making signing as quick and easy as sending a text.
Last seen? Just now—signing your document.
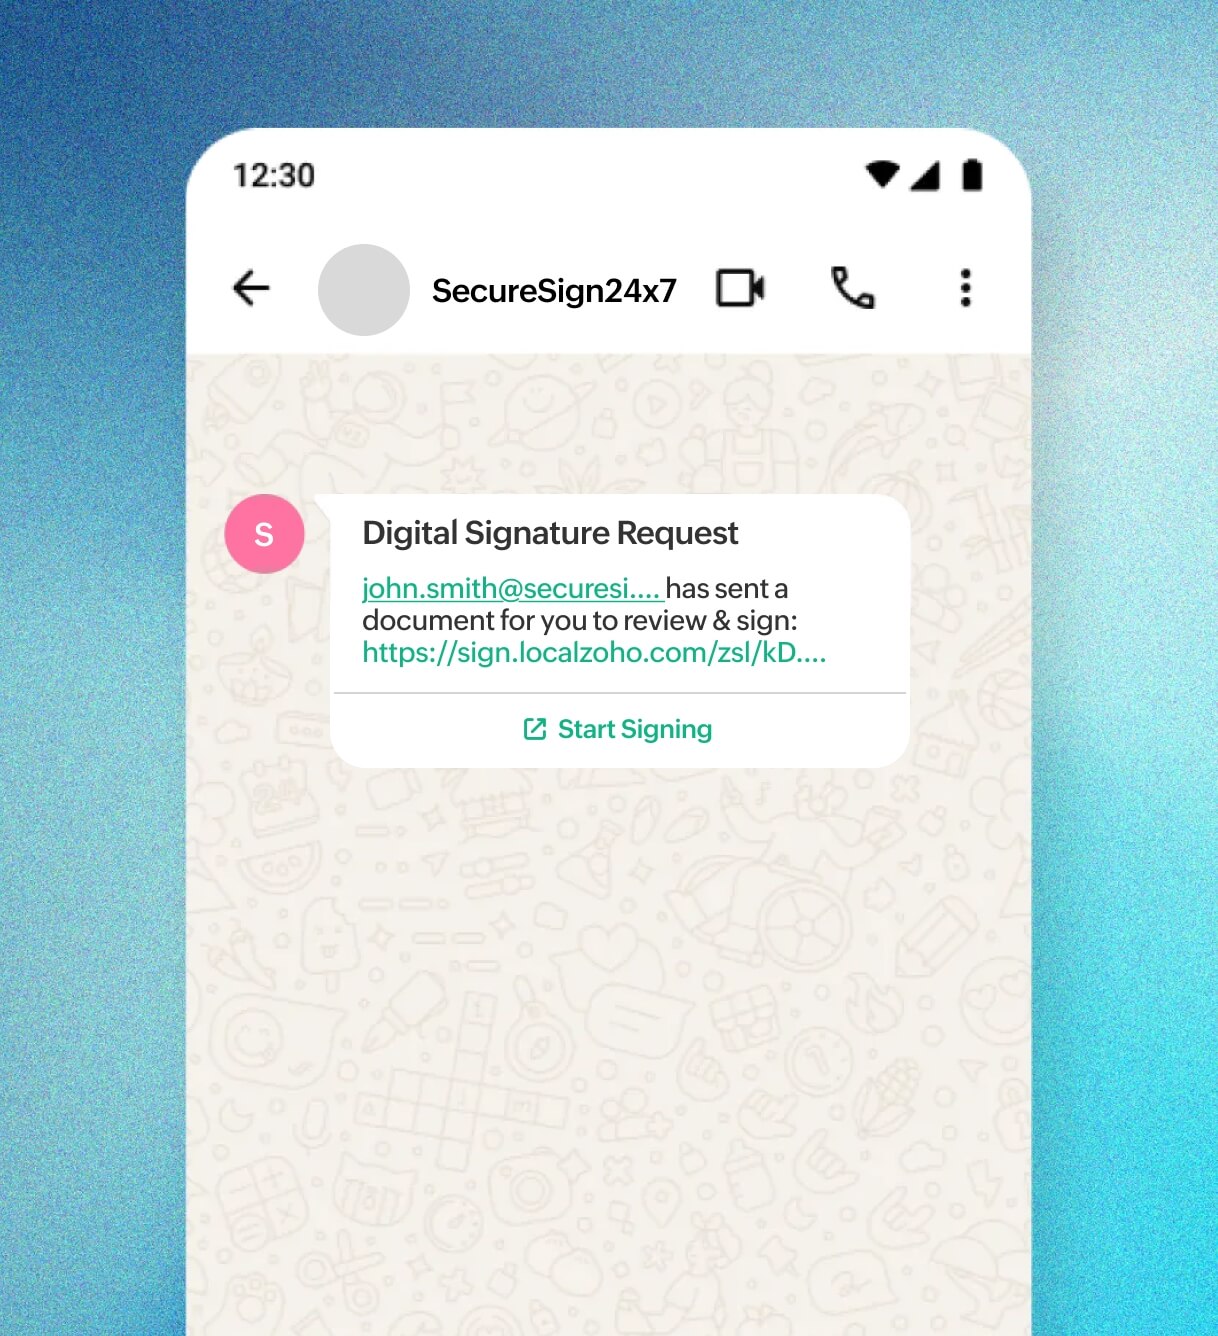
With WhatsApp being the go-to messaging app for billions worldwide, we figured it's only right to bring e-signing into the conversation. Now, you can send signature requests straight to your recipient's WhatsApp. Unlike emails that might sit unopened for hours (or even days), WhatsApp messages pop up front and center, so your documents don't wait—they get noticed.
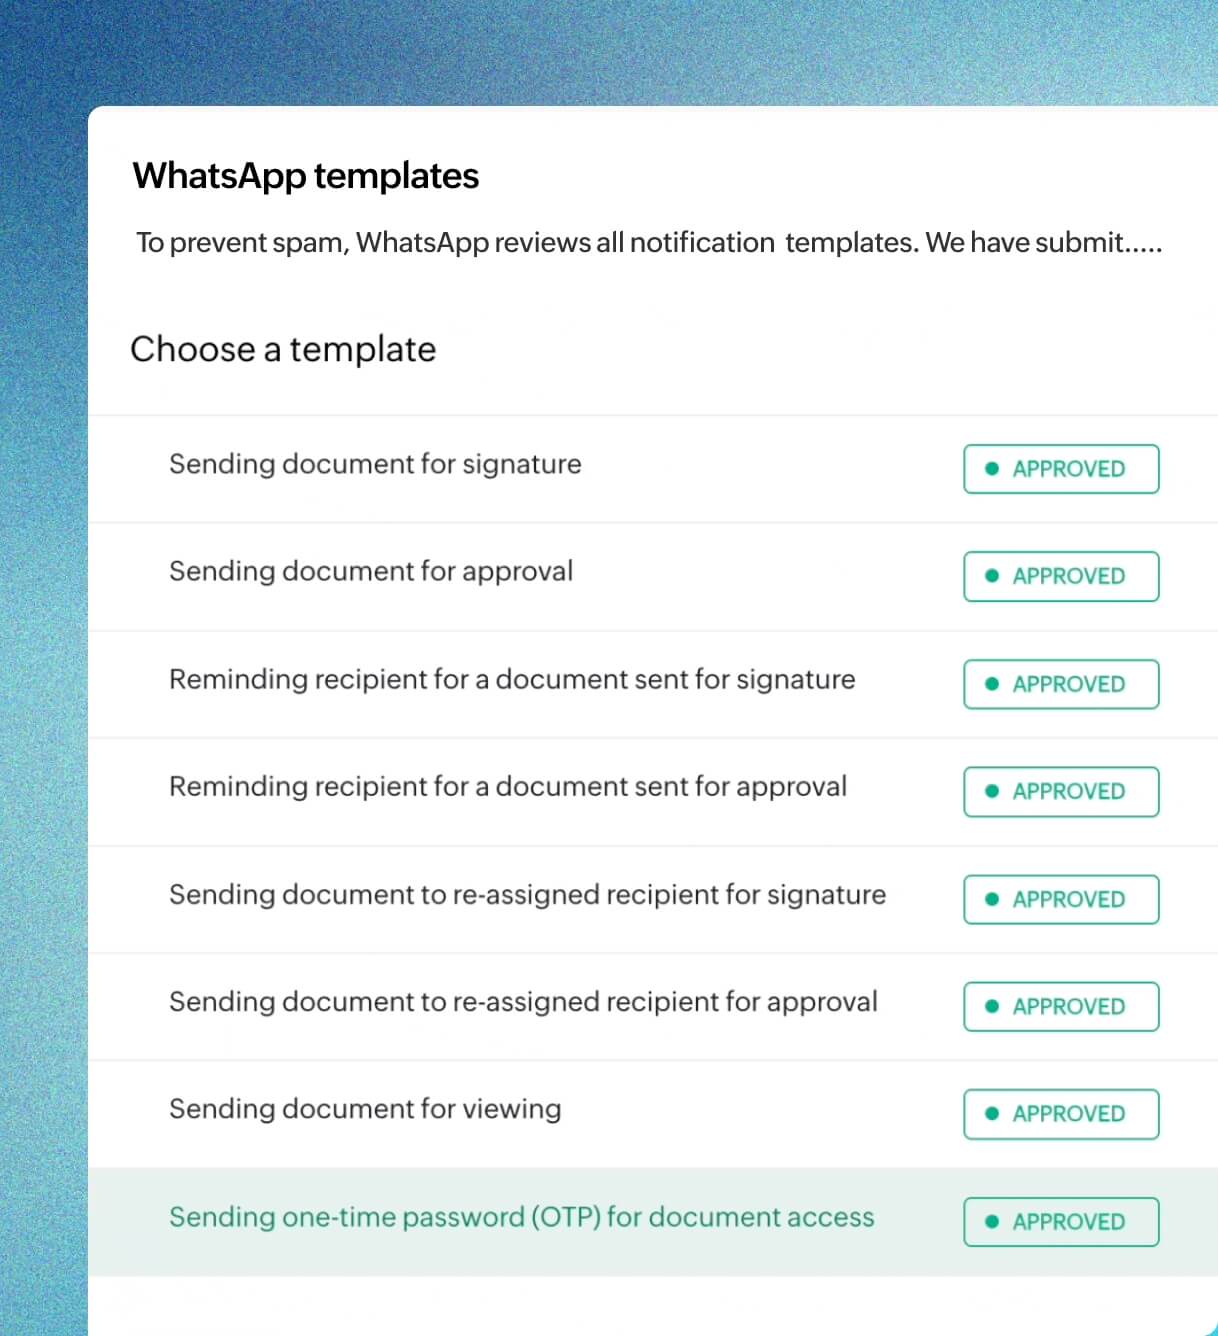
Get message templates approved and ready to go
Zoho Sign sends your predefined WhatsApp message templates for approval; think of it as getting the double tick from WhatsApp itself. Once they're approved, you're all set to start sending documents.
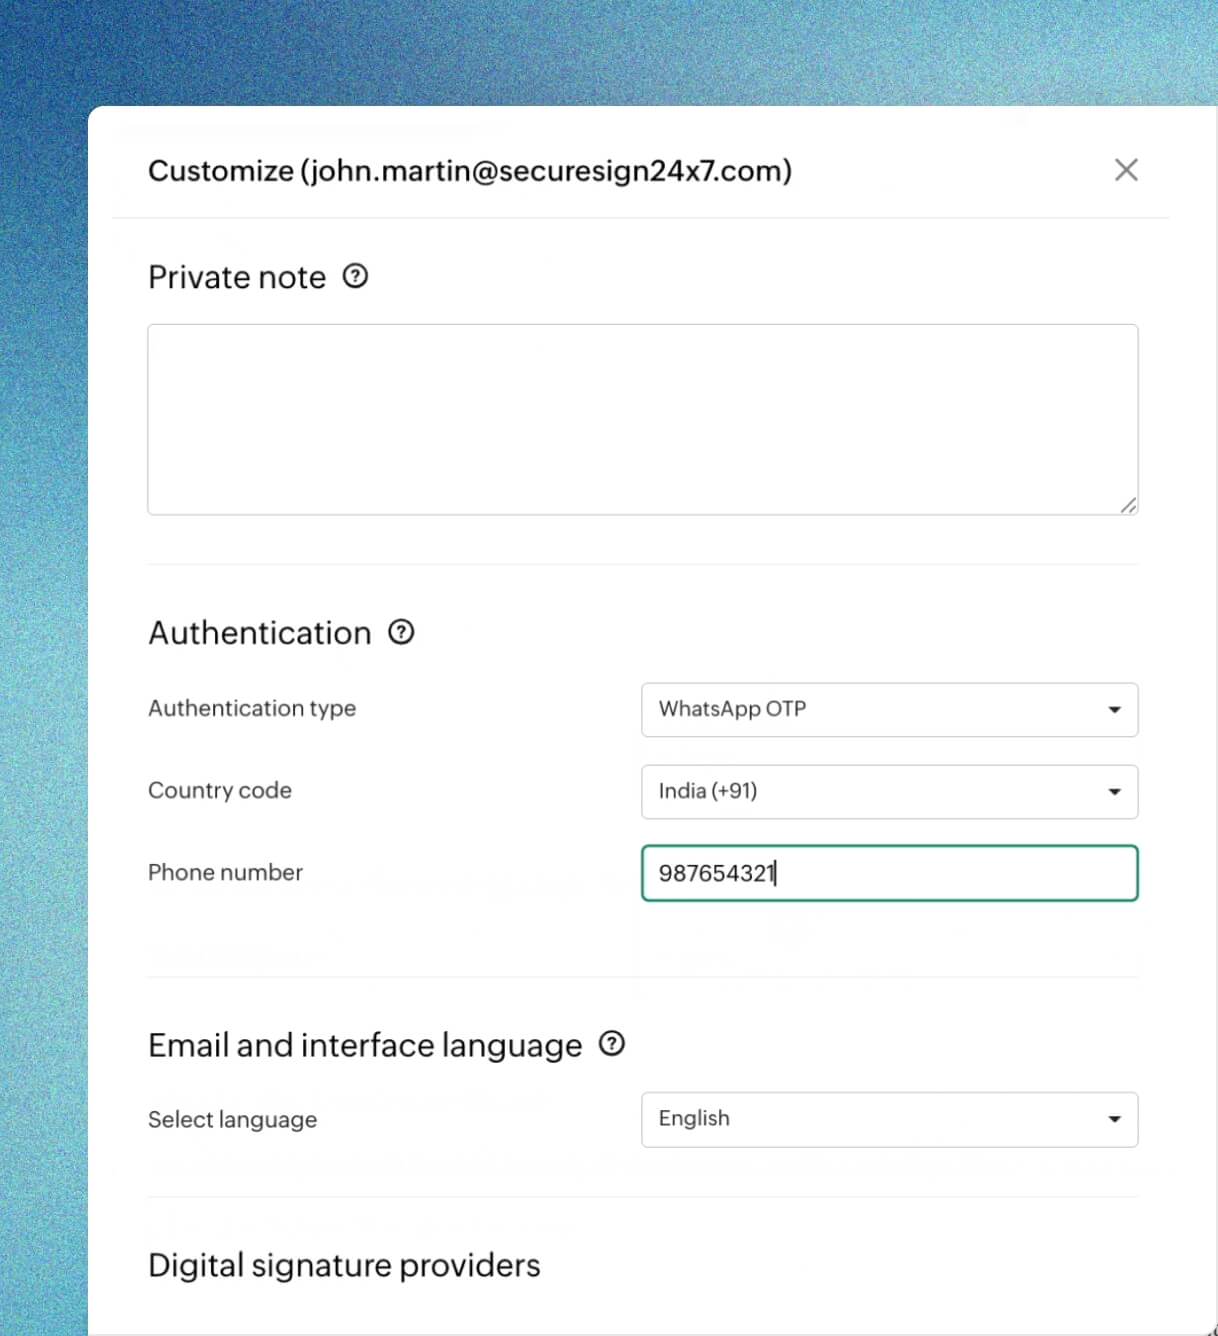
Double ticks need double checks
Add an extra layer of "are-you-really-you?" by enabling OTP-based identity authentication. Recipients will receive a one-time password on WhatsApp before accessing the document, so only the right person can view and sign.
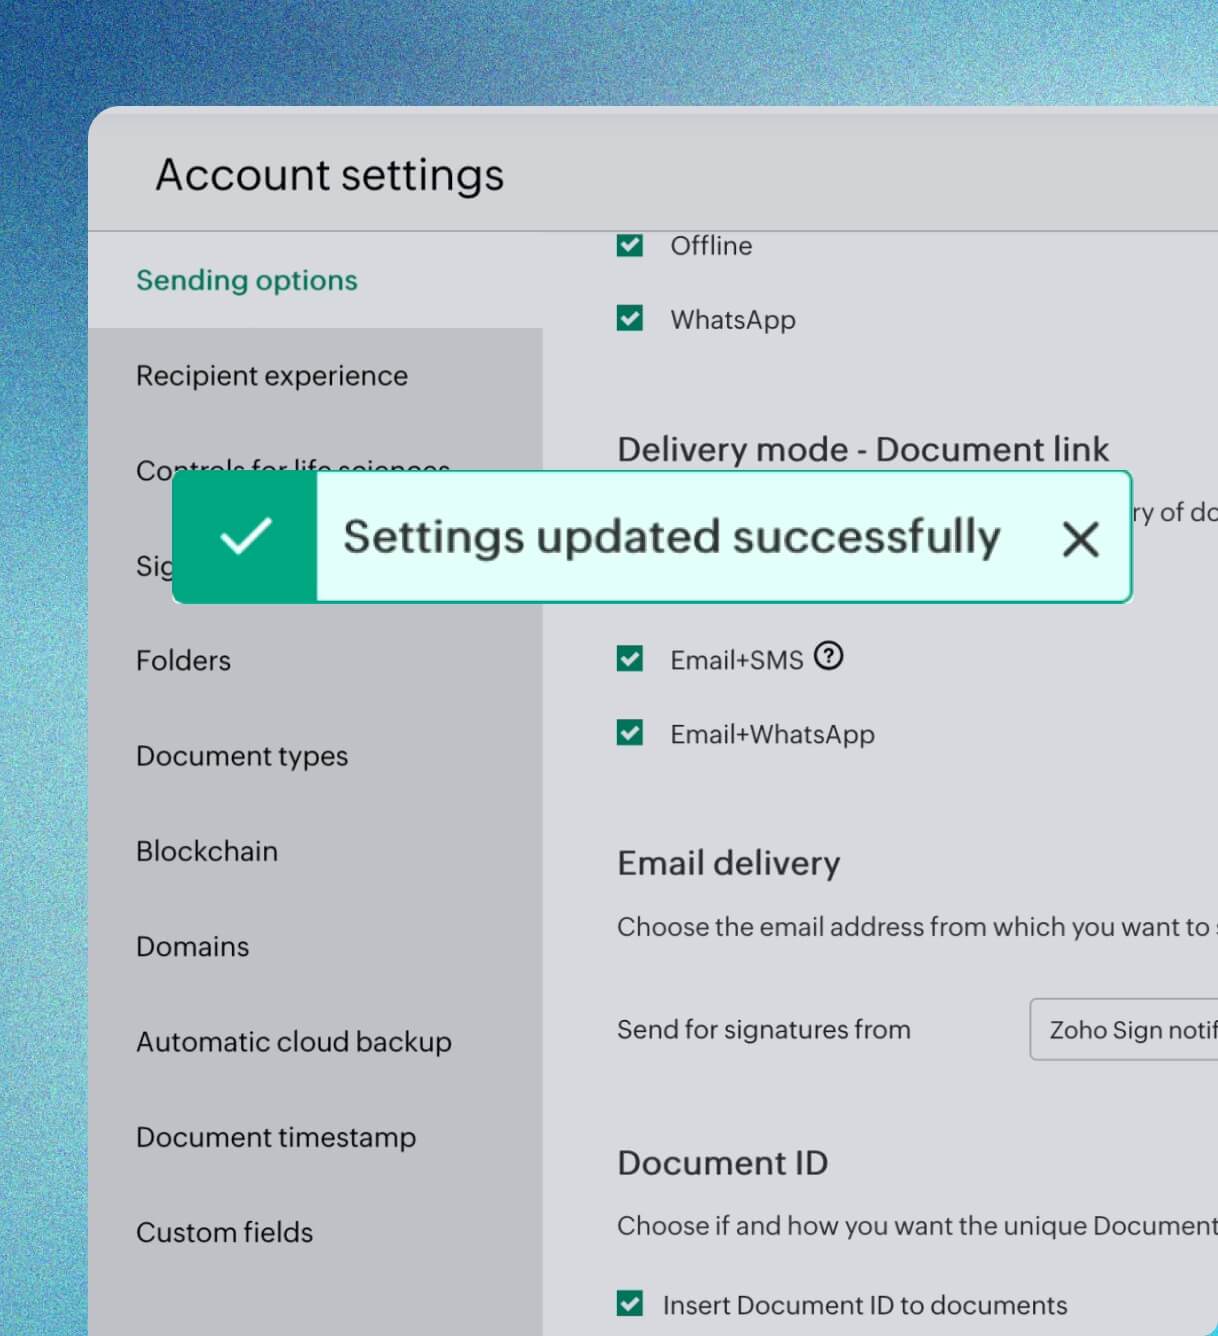
Available: WhatsApp delivery mode
Why stick to just email and SMS when you can level up? Head to Settings and enable Email + WhatsApp as your delivery method to start sending documents where people actually stay connected.
WhatsApp + Zoho Sign starter pack
Here's everything you need to enable the integration and start sending documents in minutes.
- A paid Zoho Sign subscription
- Zoho Sign administrator access
- Adequate Zoho Sign credits (or IM credits if you're on Zoho One)
- A registered Facebook/Meta business account
Set up in seven simple steps
Go to the Integrations page in Zoho Sign and enable WhatsApp Business.
Link your Meta Business account, or create a new one.
Choose the WhatsApp Business number you'll use to send documents.
Zoho Sign auto-submits predefined message templates to WhatsApp for approval (takes up to 24 hours). To check their status, go to Settings > Branding > WhatsApp templates.
Once templates are approved, go to Account Settings > Sending Options and select Email + WhatsApp as your preferred delivery method.
While setting up your document, choose Email + WhatsApp as the delivery option.
For added security, enable WhatsApp OTP under Authentication Settings during workflow setup.
What's app-roved for your business
- WhatsApp messages pop up as real-time push notifications, helping businesses cut through the noise and get quicker responses.
- Recipients don't need to install anything new or create an account. They can review and sign documents directly from the app they already use every day.
- Compared to formal email threads, WhatsApp feels more personal and familiar, making the signing experience faster and more intuitive.
- When documents come from your official WhatsApp Business account, clients instantly recognize the source. That added credibility builds trust and confidence.
- Using pre-approved message templates help keep communication clear, consistent, and true to your brand voice.
- Going digital also means reducing the need for printing, scanning, and paper. It's smoother for your workflow, and gentler on the environment.
- With WhatsApp's built-in, end-to-end encryption, your documents stay exactly where they should be: private, secure, and tamper-proof.
FAQs
Getting started is simple. Just follow the steps in our help guide to start sending signature requests through WhatsApp.
You must either create a new Meta Business Account or link your existing one. Then, agree to the WhatsApp Client ISV Terms and Client Terms before connecting your Meta Business Account to Zoho Sign.
Zoho Sign will submit predefined message templates for WhatsApp's review. Once approved (usually within 24 hours), you can start using them to send documents.
Upload your document and enter recipient details. From the delivery mode dropdown, select Email + WhatsApp. Enter your recipient's phone number. If the recipient's phone number isn't saved, enter it manually with the correct country code. Then, complete the fields and send the document for signature.
Yes. Documents sent via WhatsApp will consume Zoho Sign credits (or IM credits if you're on Zoho One). To monitor your usage, navigate to Settings > Subscription Details > More actions > Usage history.