Setup Workflows
To set up a workflow in SalesIQ:
- From your SalesIQ dashboard, go to Settings > Developers > Workflows.
- Select the type of workflow:
- Admin Workflow:
- Supported modules: Operators, Departments, Brands, Tags
- Use this for backend or portal-level changes. Ideal when you want to trigger actions for things like an operator being added or a department being updated.
- Data Workflow:
- Supported modules: Conversations, Visitors, Contacts, Leads
- Use this to track visitor activity and automate responses based on visitor/user behavior.
- Admin Workflow:

- Click Add to create a new workflow.
- Fill in the workflow’s name and description.
- Select the brand(s): The workflow will only trigger for the brands you select.
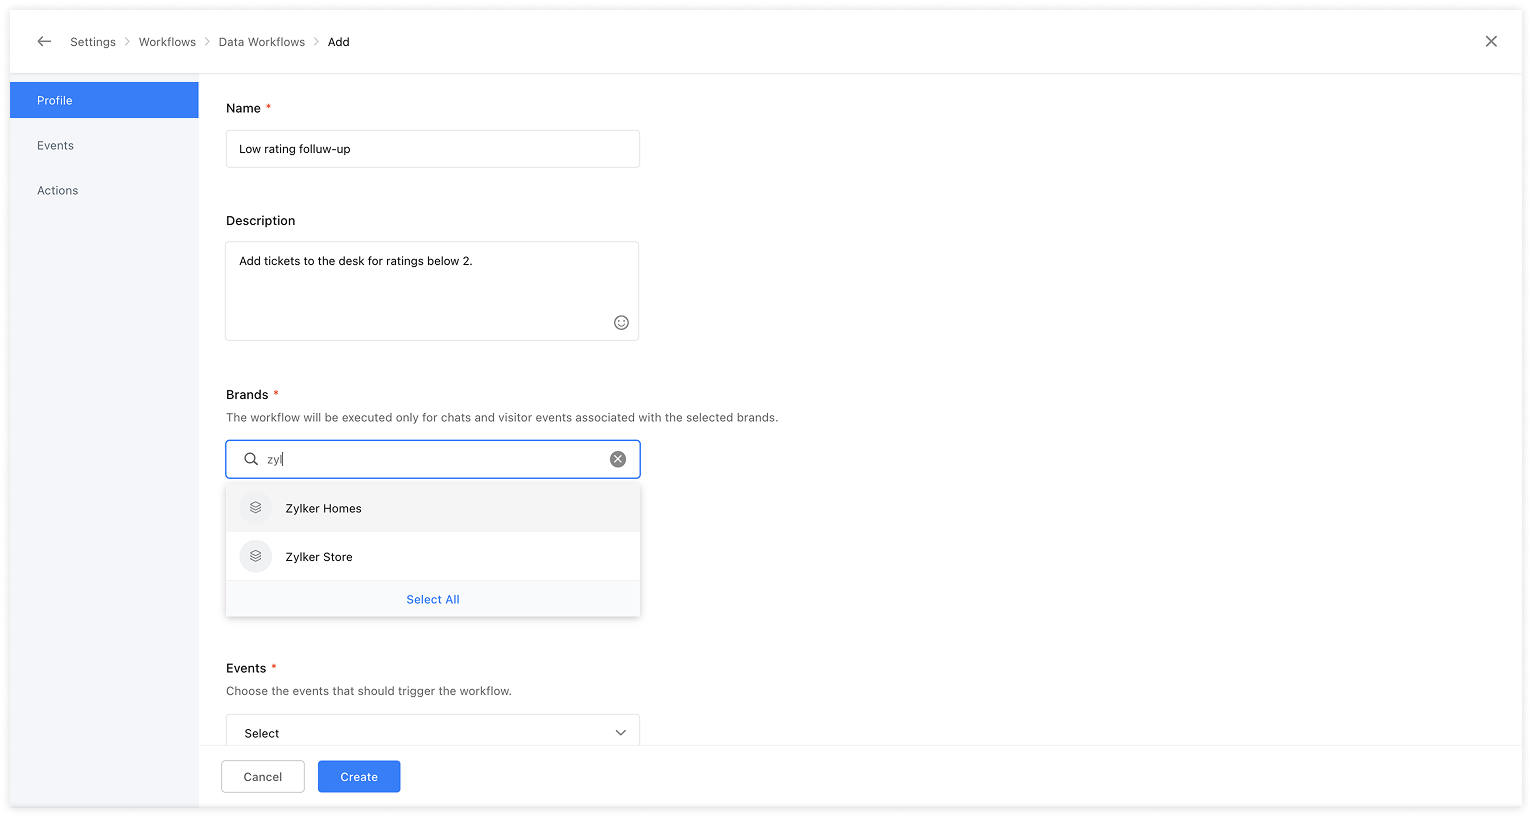
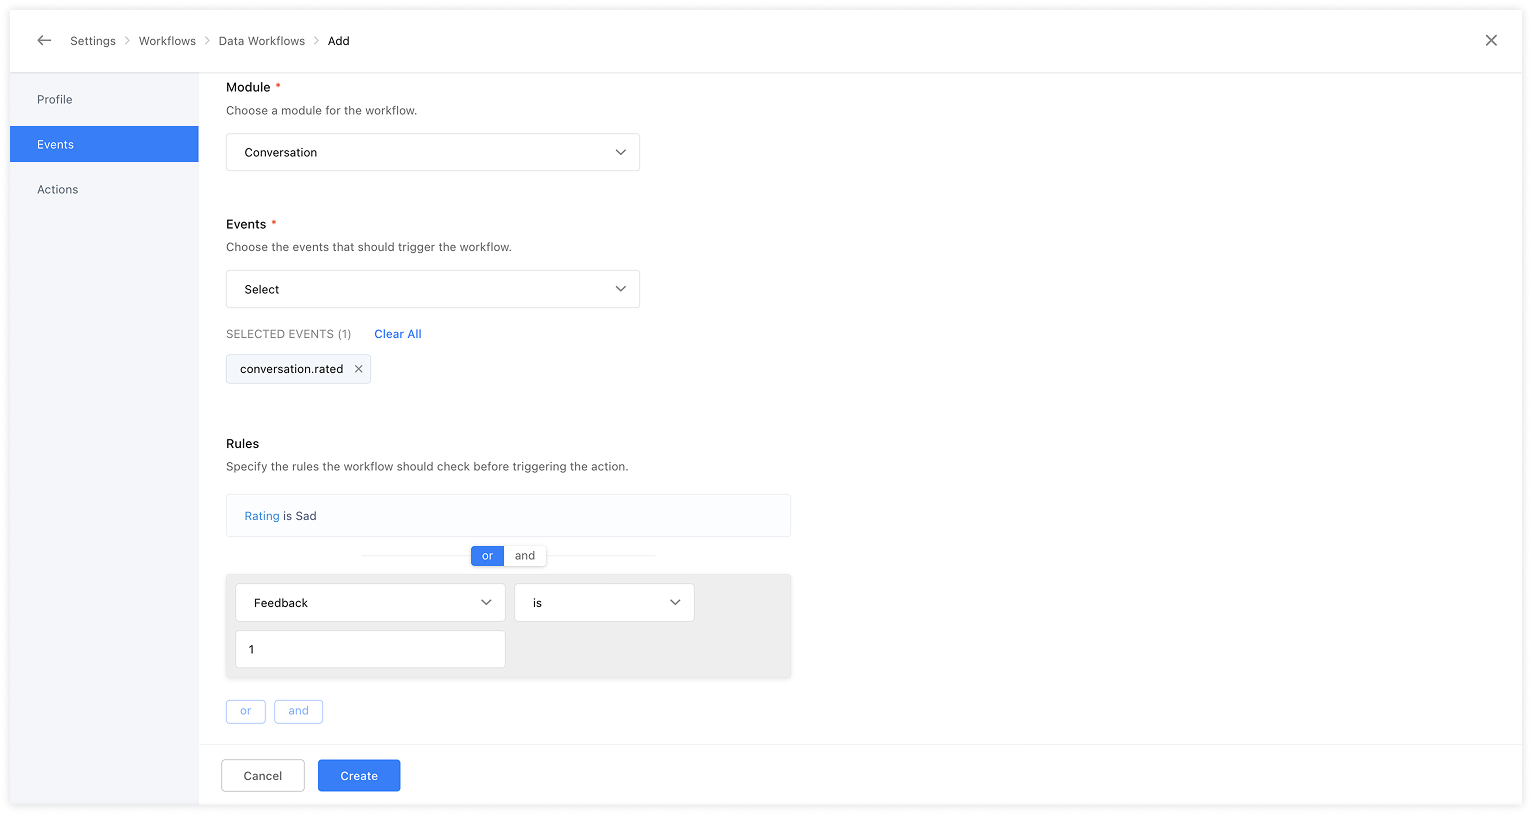
- Choose the module: Modules are listed based on the type of workflow selected earlier. Note: Only one module can be selected.
- Select the event(s): Events are listed based on the selected module. (Multiple events can be selected)
- Set up rules: Rules let you define conditions under each selected event. The workflow will only be triggered when the event happens and the rule matches.
- For example, If the event is conversation.rated, you can add a rule like “Rating is 1”, the action will only be executed if the conversation receives exactly "Sad" rating.
- Select the action platform:
- Webhooks: Enter the request POST URL to send event data to an external service.

- Deluge Script: Write Deluge code to execute custom logic, including API calls.

Once saved, the workflow will be active and trigger whenever the selected events and rule conditions are met.