Basics of Watson Assistant
To get started:
- Login to IBM Cloud. In the left menu, choose Watson.
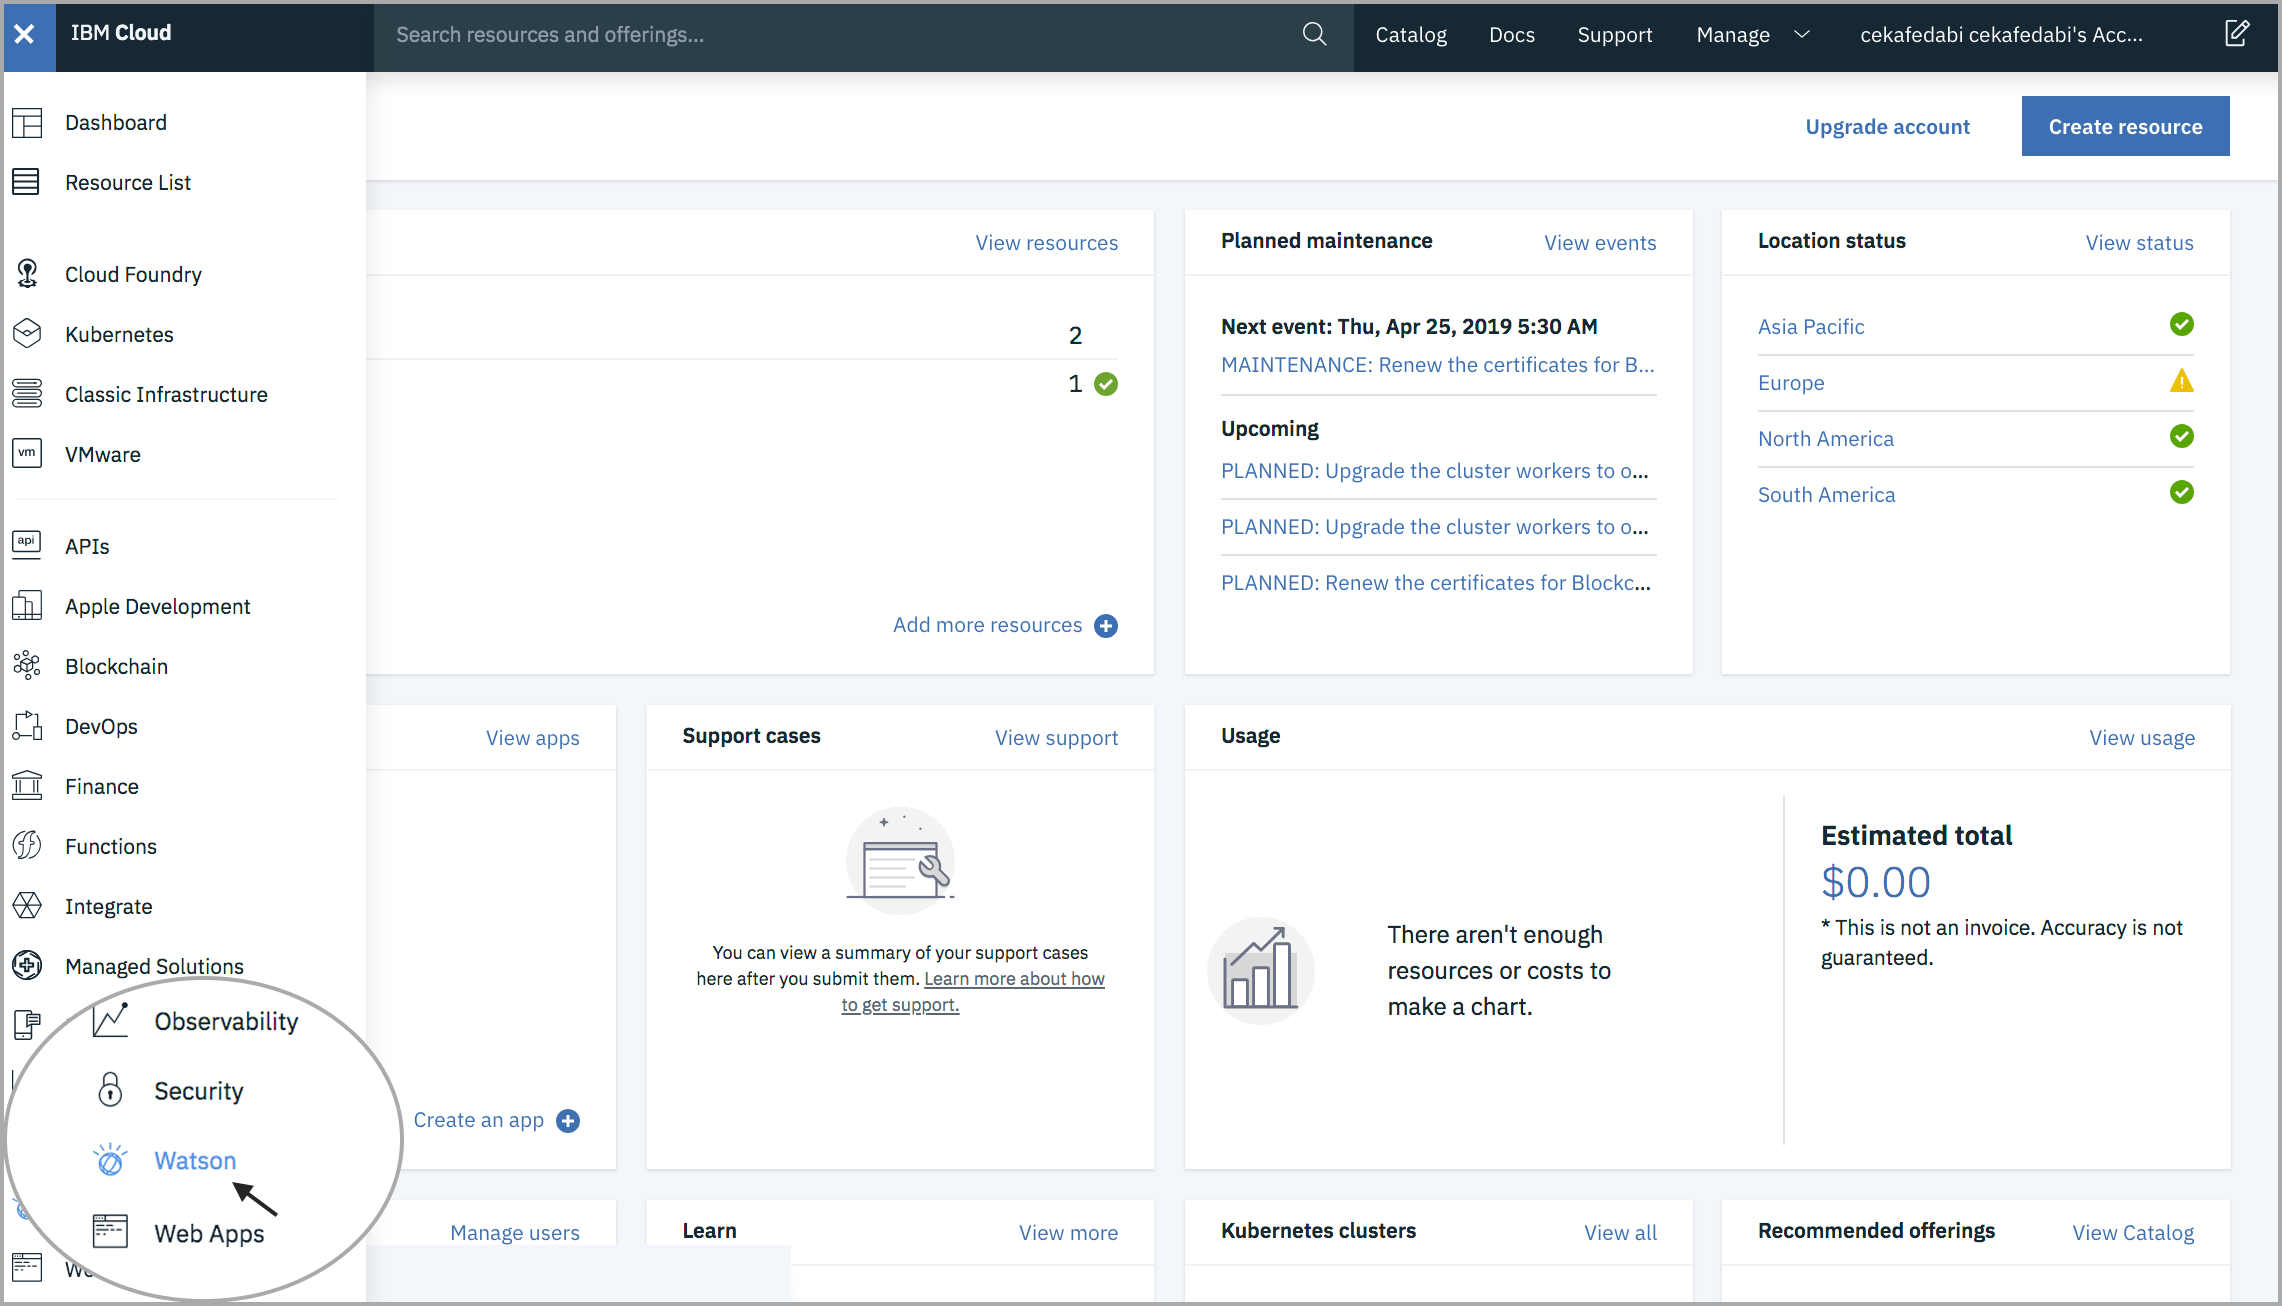
You'll land on the Build with Watson page, click Watson services.
- If you're a new user, then you can create a service by clicking Browse service and choose one or more APIs from the catalog, click Add Services,
- If you have an exisiting service then you can click on the Existing Service and choose the Service name under Services option
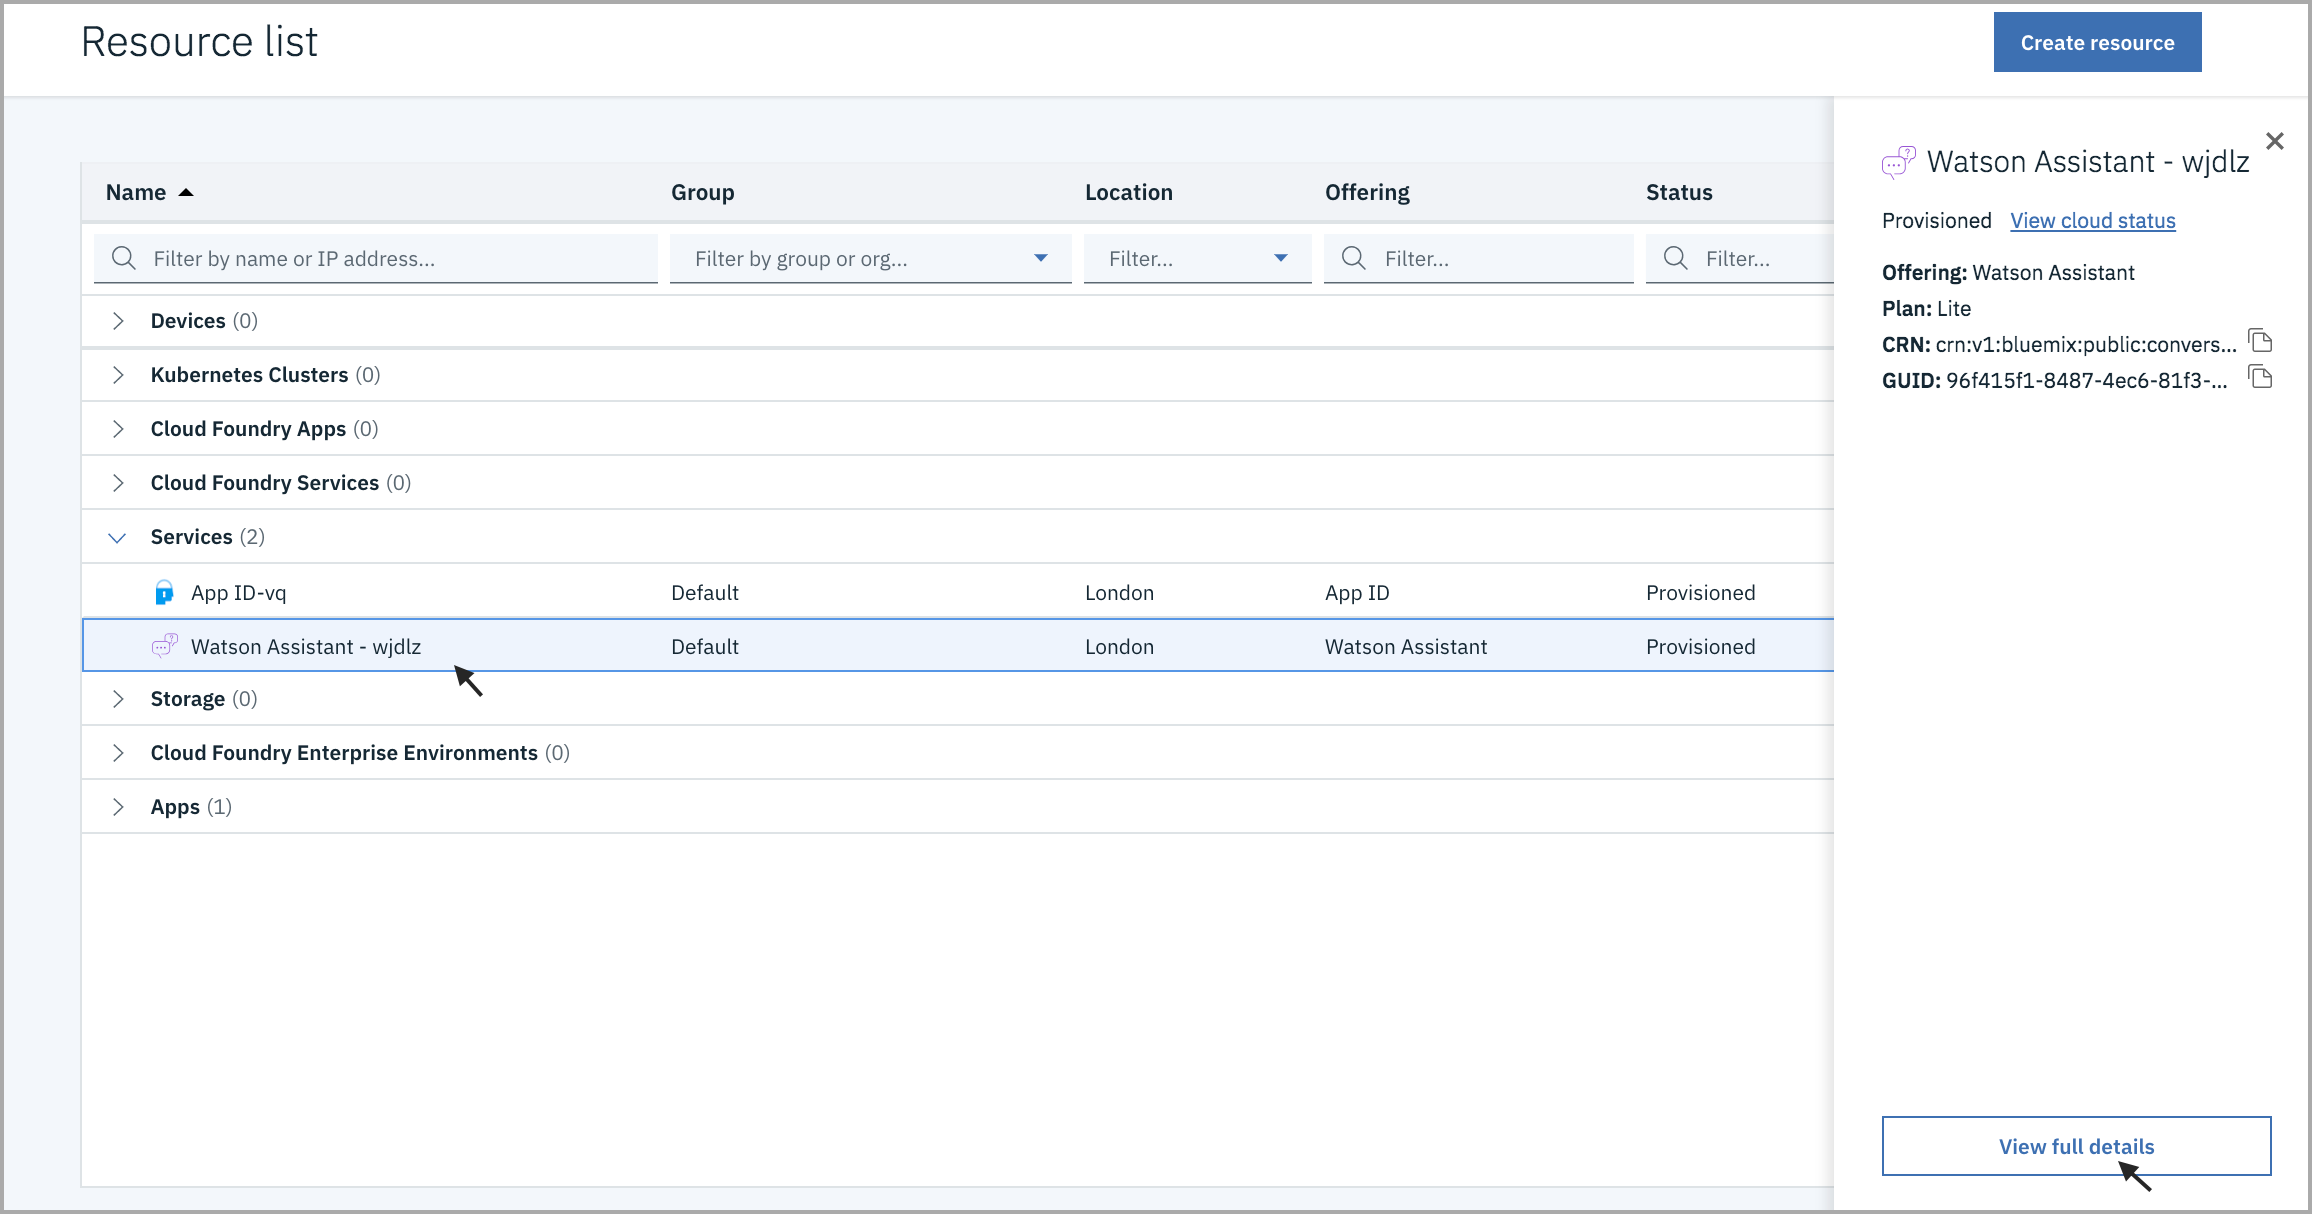
- You can get the API Key and URL.

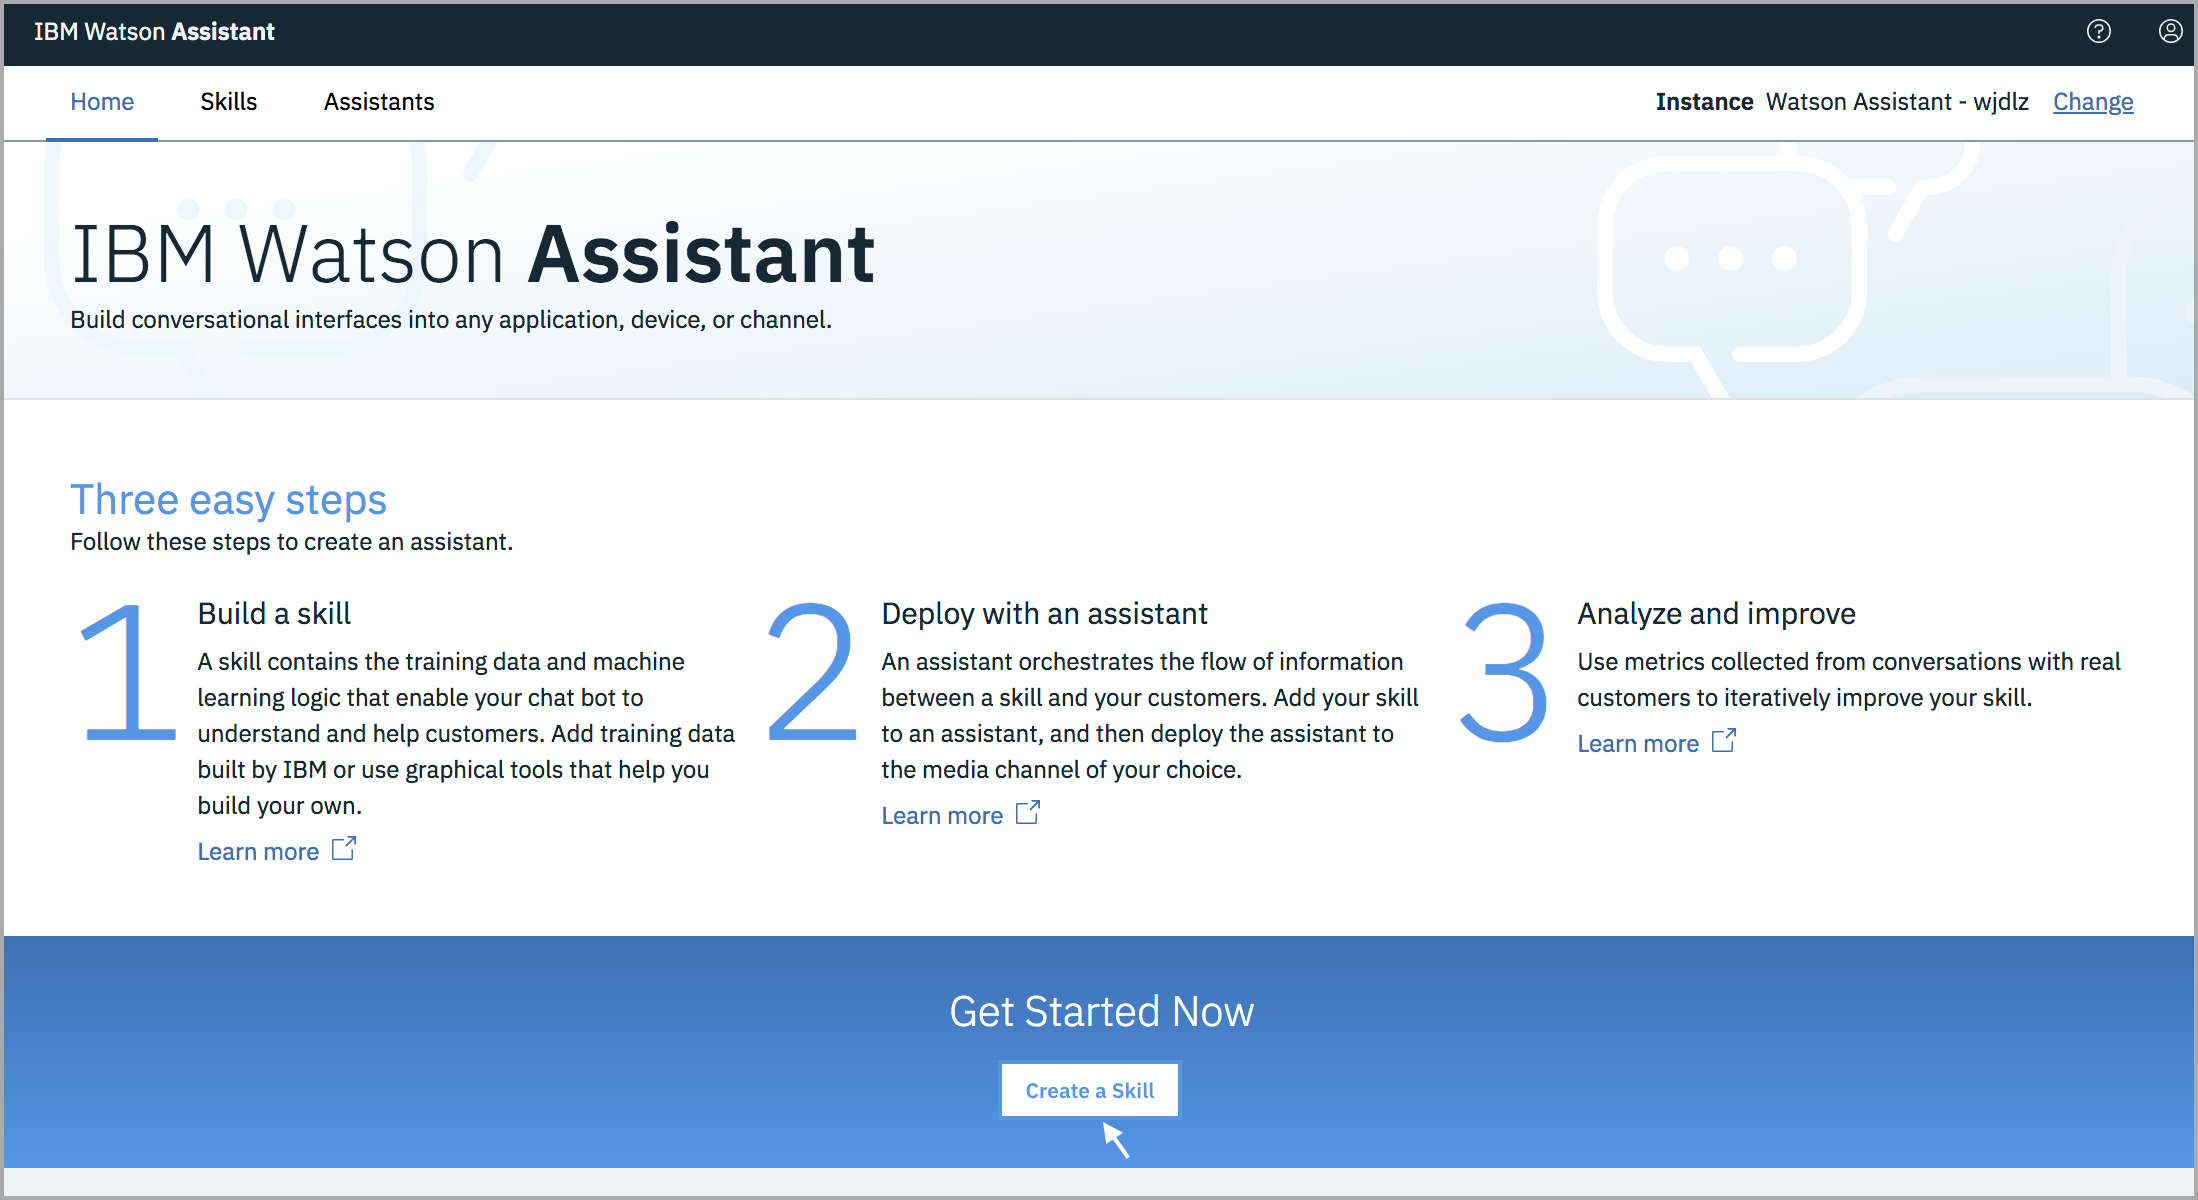
- Then click Launch tool. If you're prompted to log in to the tool, provide your IBM Cloud credentials. You'll be landing on the home page of the IBM Watson Assistant.

Creating a Dialog Skill
A dialog skill is a container for the artifacts that define the flow of a conversation that your assistant can have with your website visitors.
To create a skill:
- From the home page of the Watson Assistant tool, click Create a Skill.
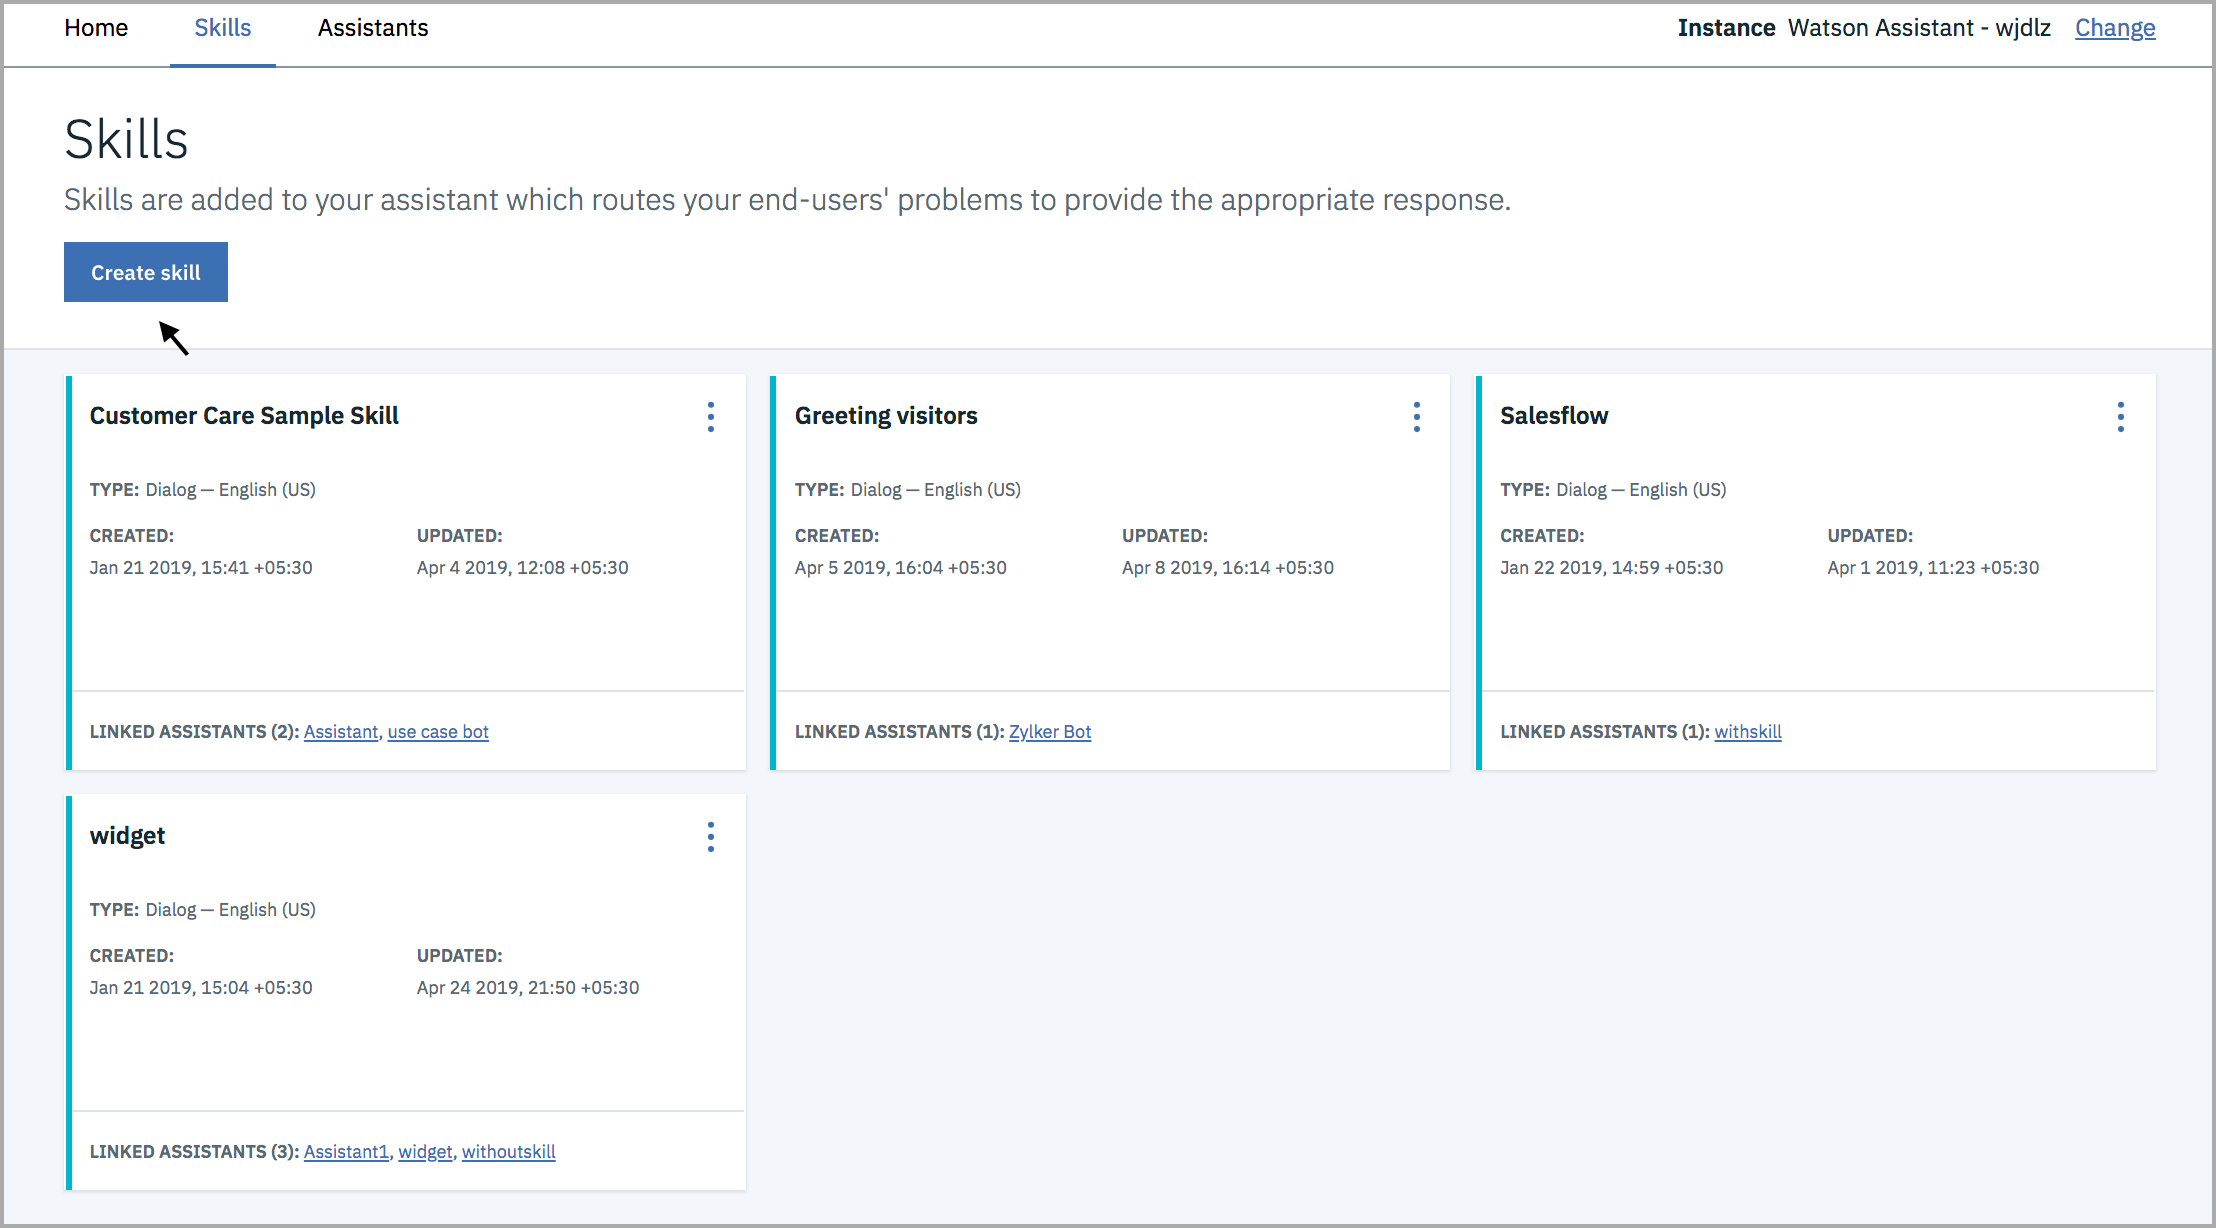
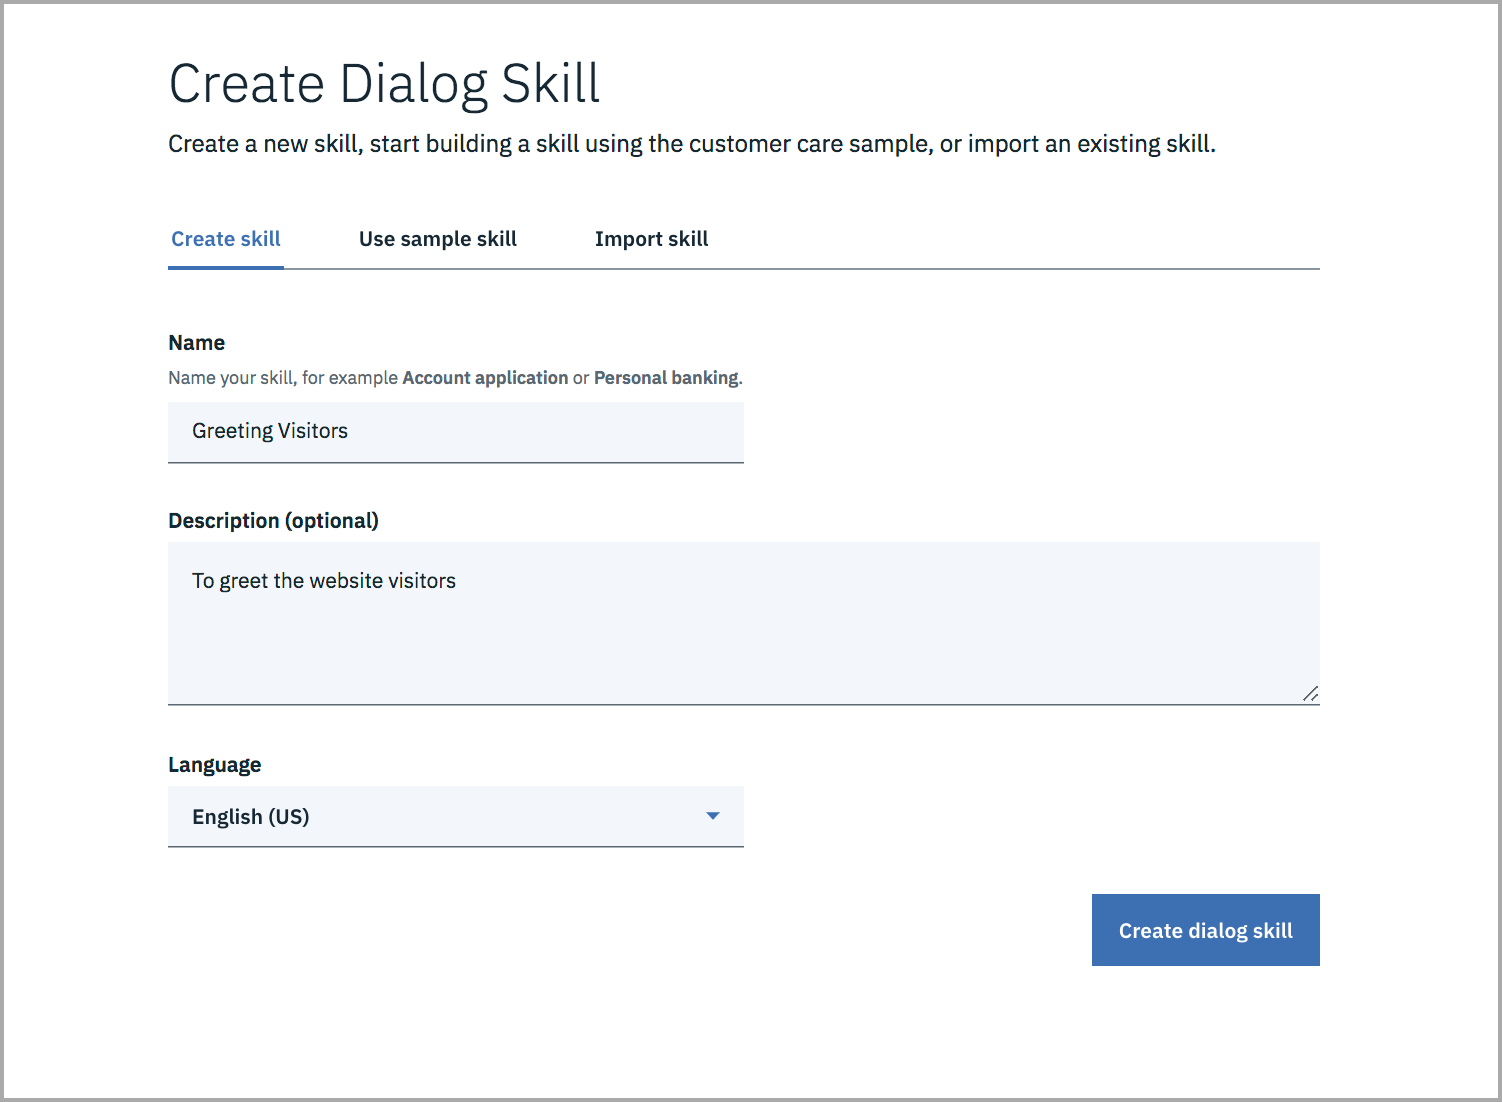
- Click Create Skill.
- Give your skill the name and description. If the dialog you plan to build will use a language other than English, then choose the appropriate language from the list.
- Click Create. You land on the Intents page of the tool.
Create Intents
Add training data that was built by IBM to your workspace by adding intents from a content catalog. In particular, you will give your assistant access to the General content catalog so your dialog can greet users, and end conversations with them.
- In the Watson Assistant tool, Intents tab. Click Create Intent
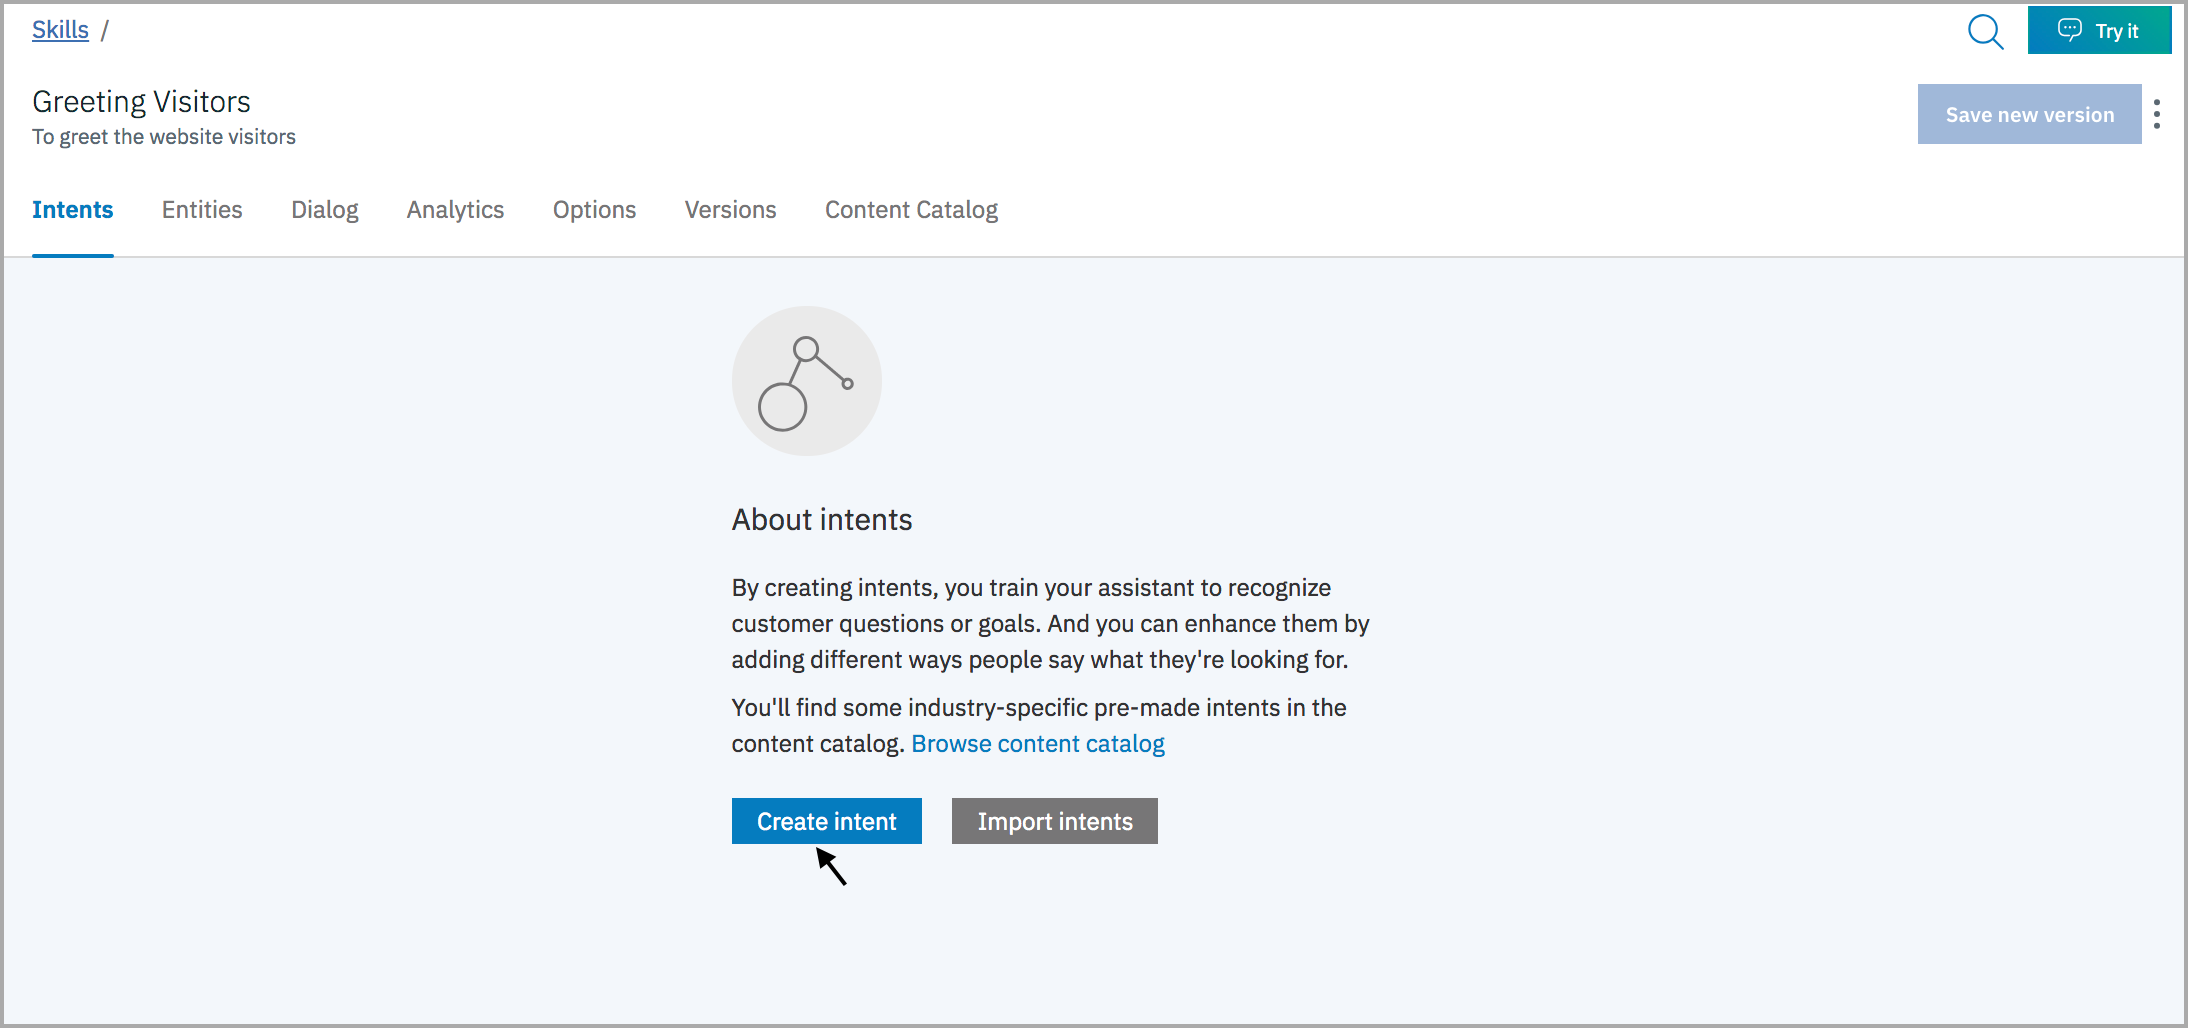
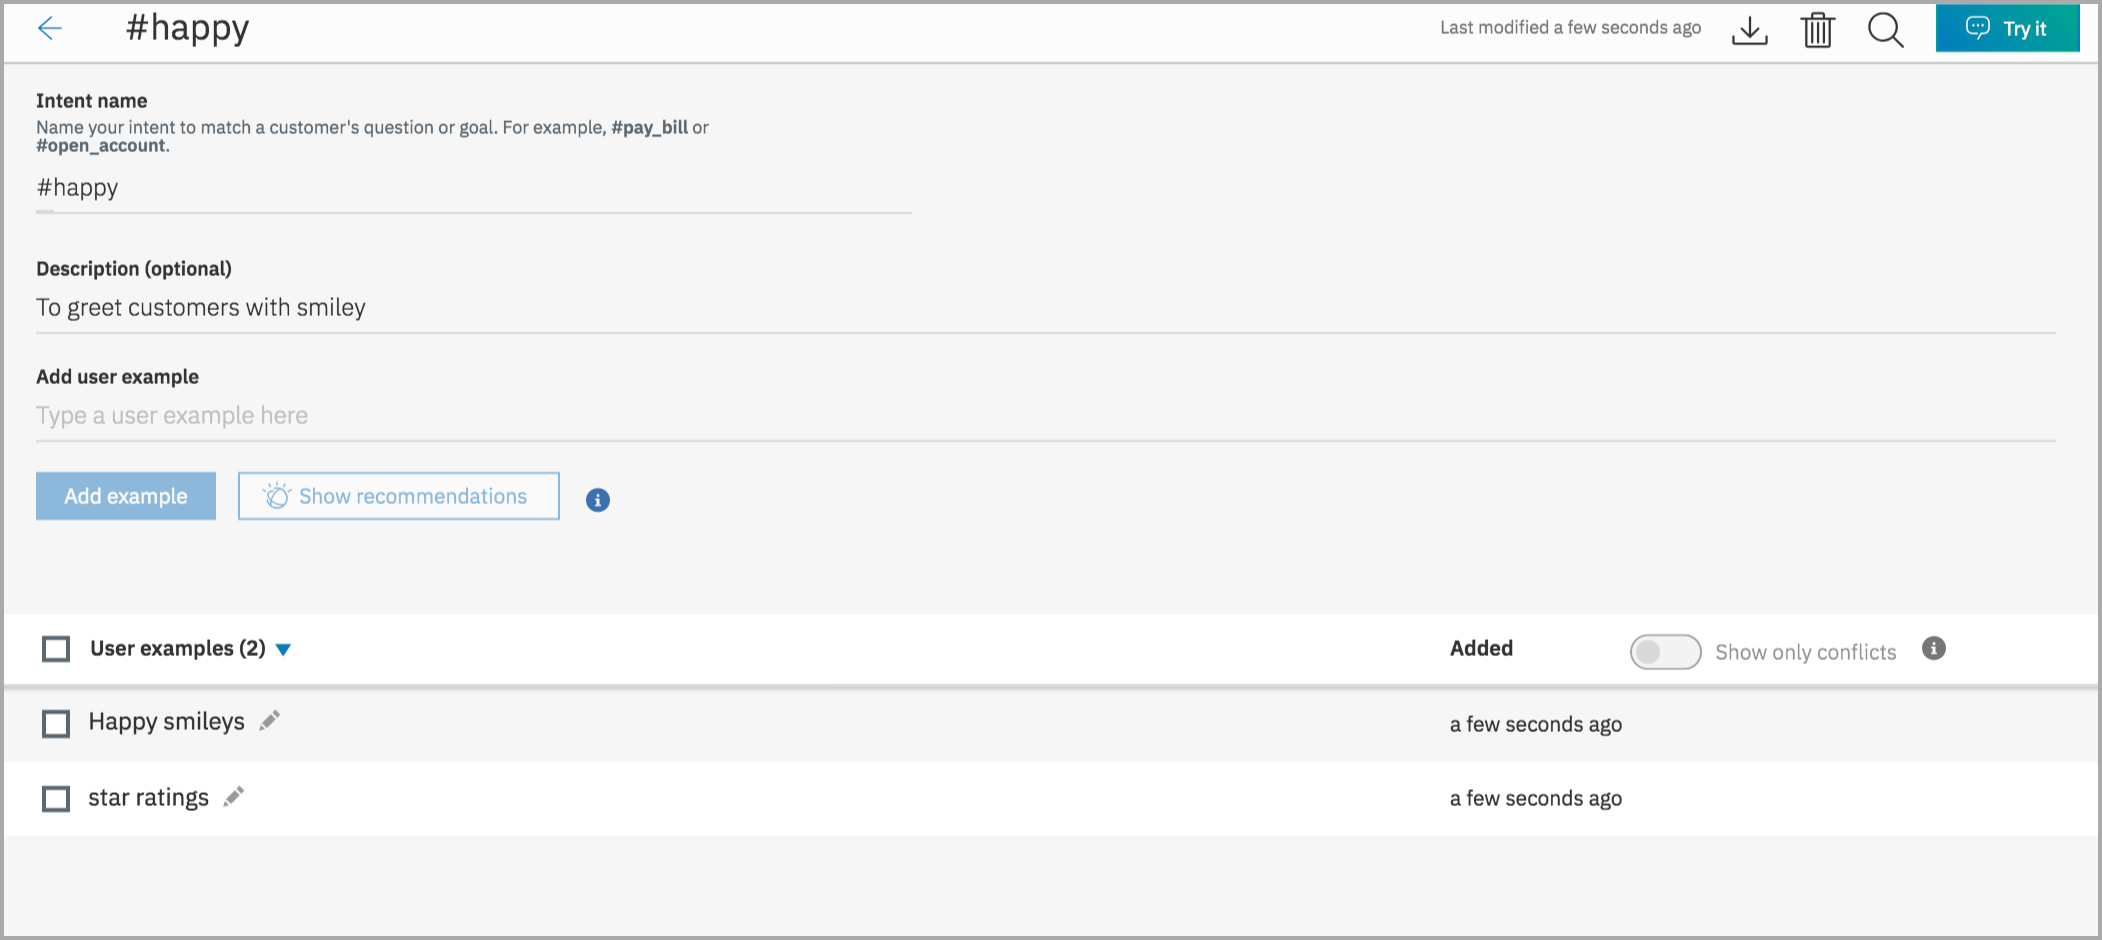
- Give your intent a name, description and add user examples to the intent. You can also build your training data by adding prebuilt content from IBM.
Build a dialog
A dialog defines the flow of your conversation in the form of a logic tree. It matches intents (what users say) to responses (what the bot says back). Each node of the tree has a condition that triggers it, based on user input.
We'll create a simple dialog that handles greeting and ending intents, each with a single node.
Adding a start node
- In the Watson Assistant tool, click the Dialog tab.
- Click Create dialog.
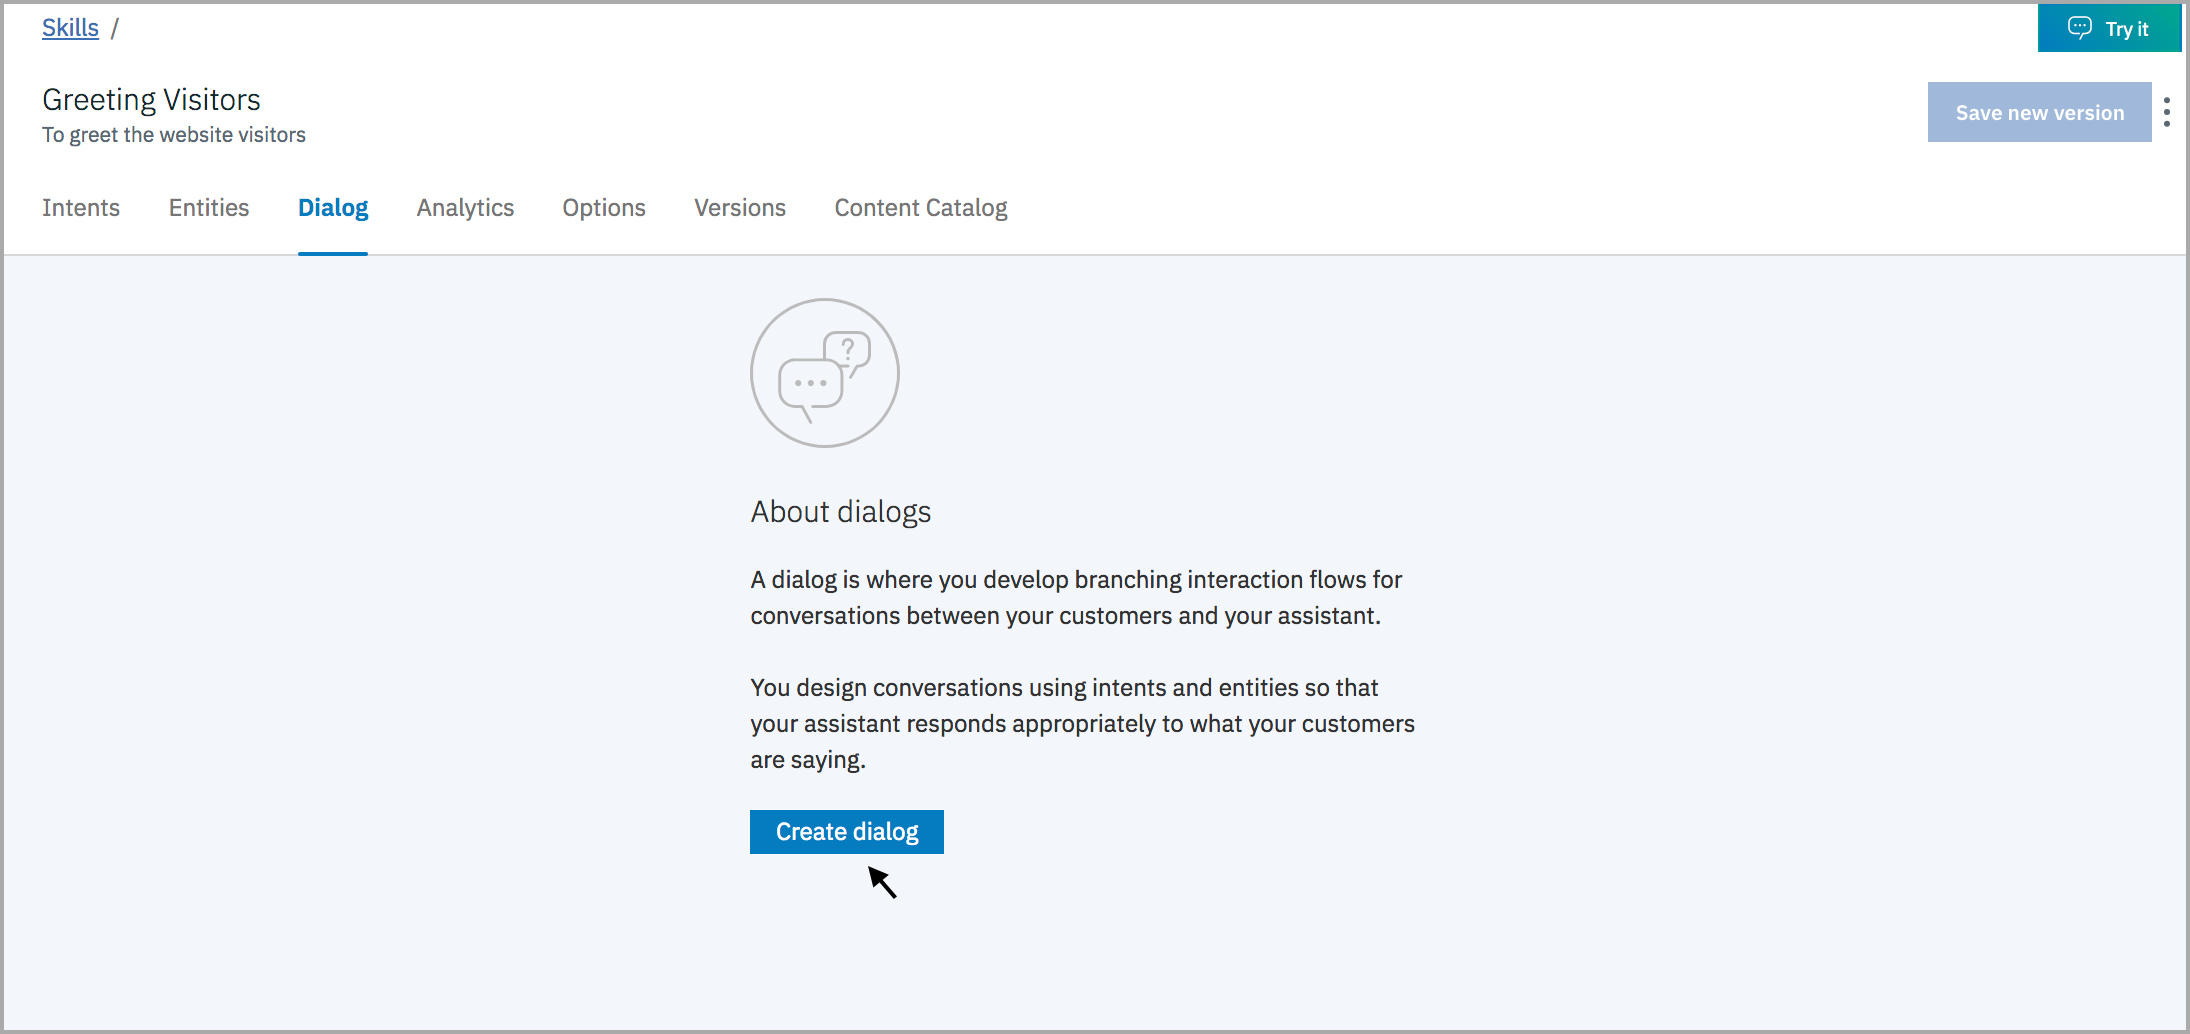
- You see two nodes: 1. Welcome: Contains a greeting that is displayed to your users when they first engage with the assistant. 2. Anything else: Contains phrases that are used to reply to users when their input is not recognized. [A new dialog with two built-in nodes]
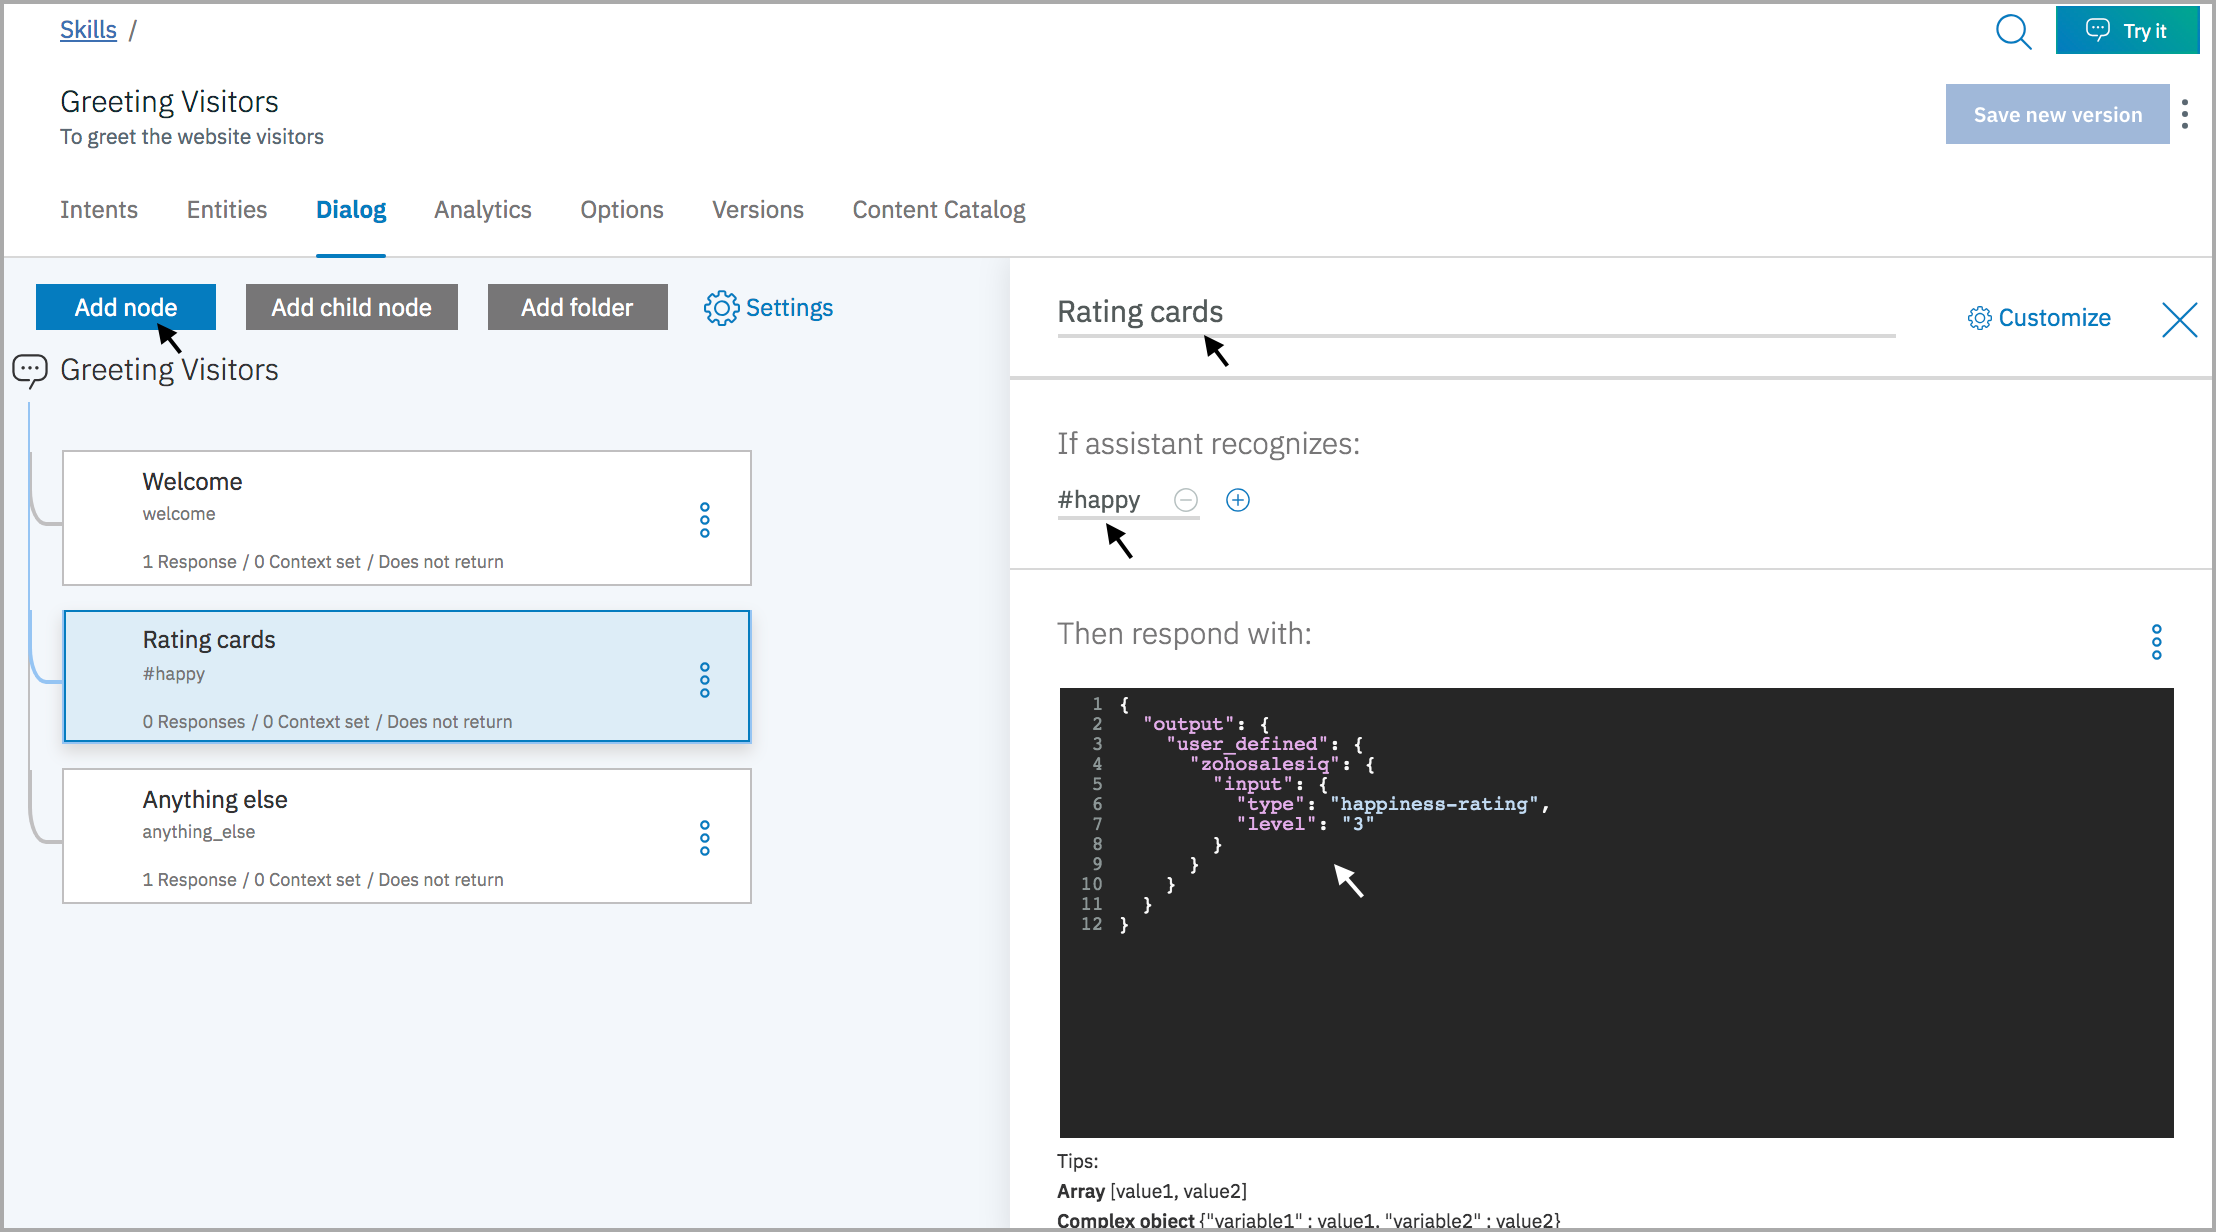
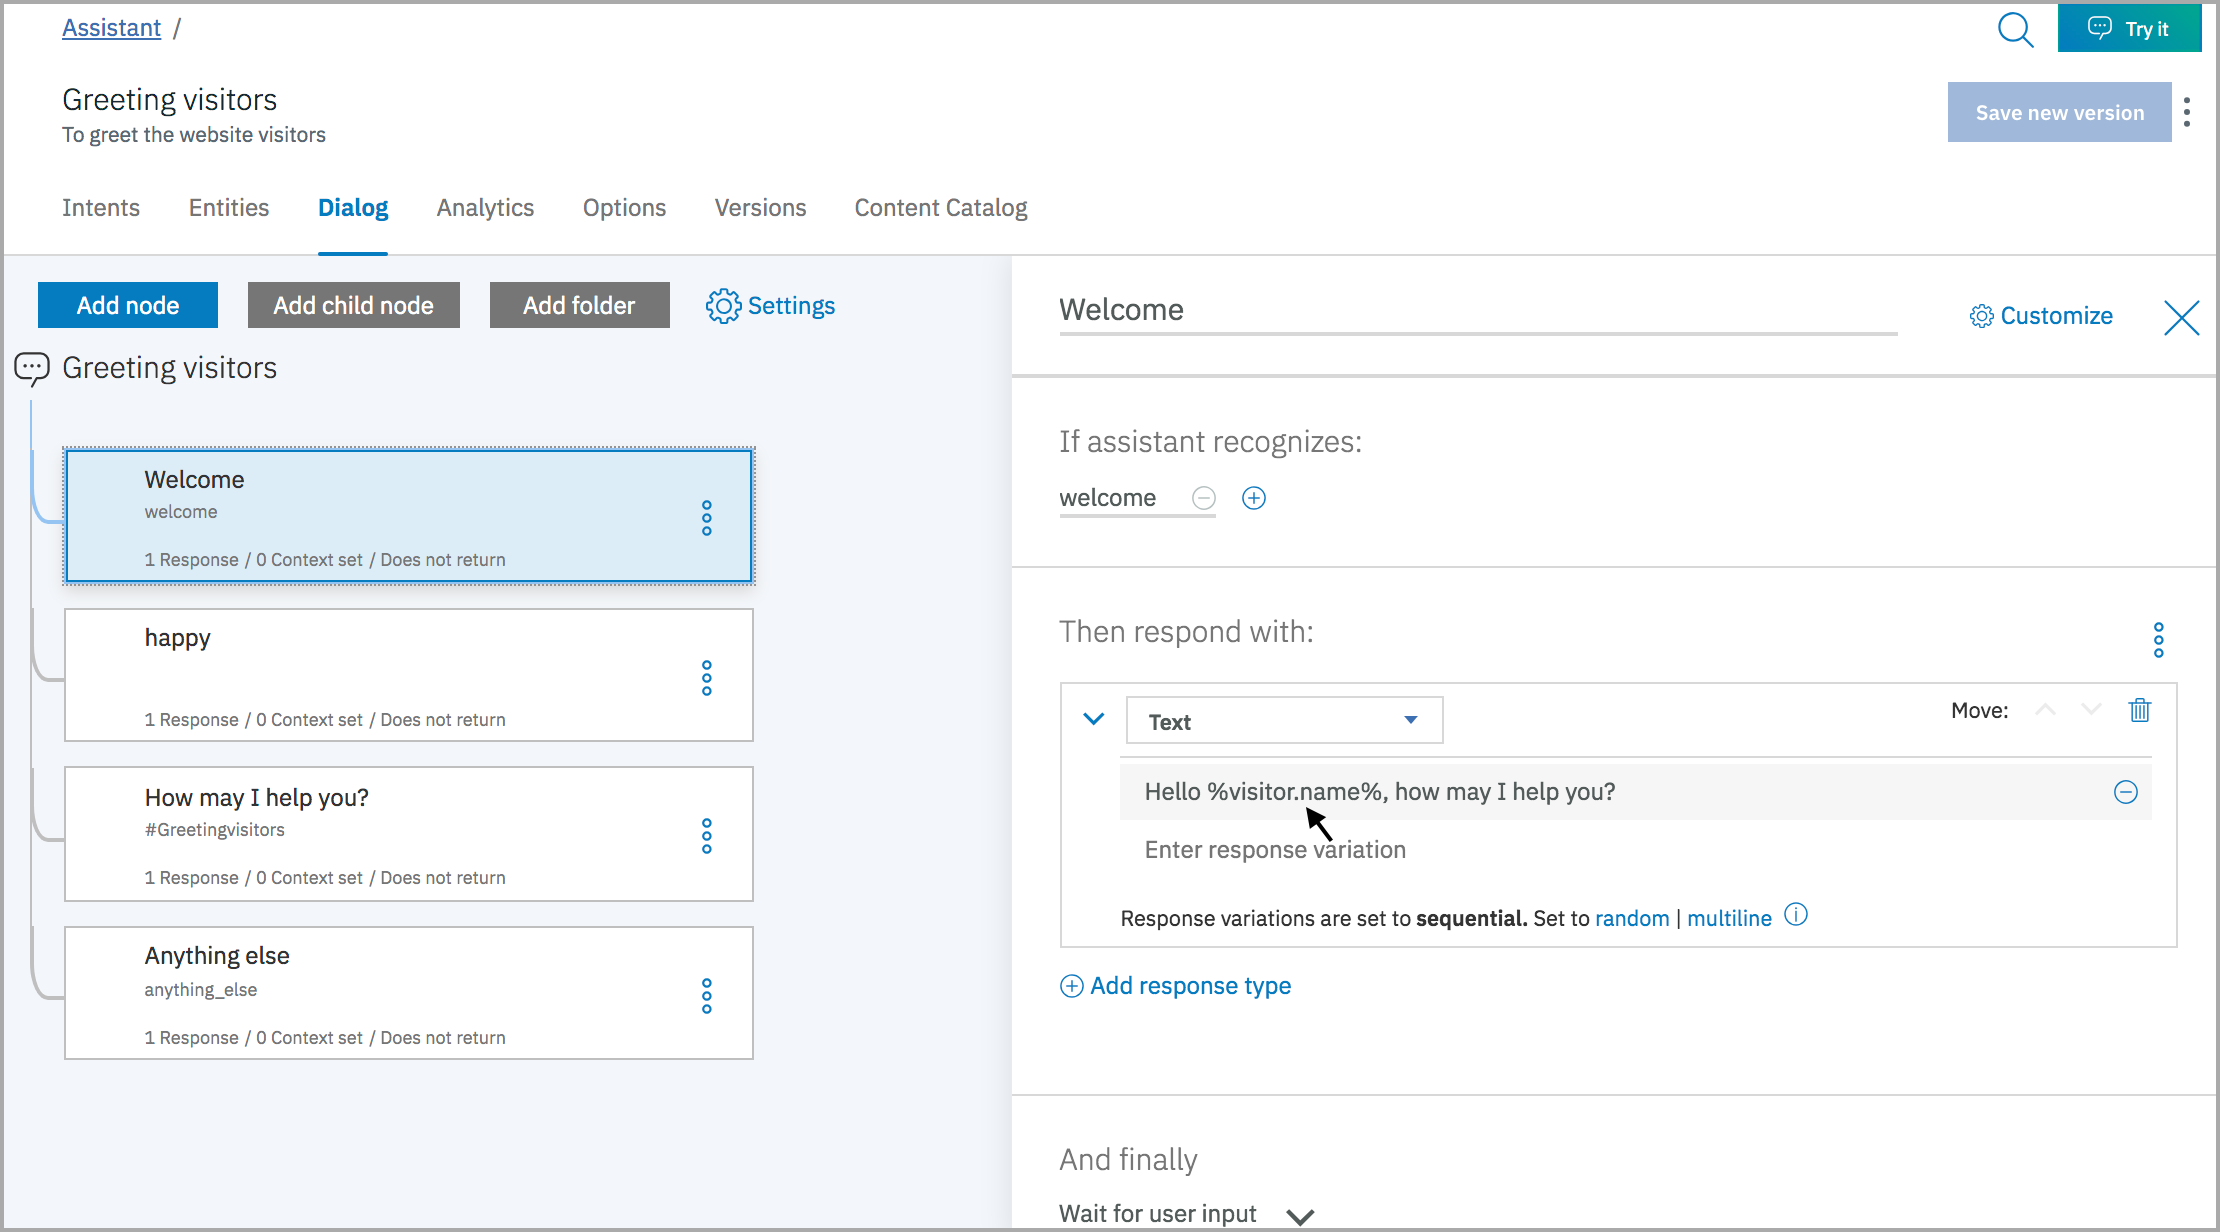
- You can edit the existing node or click Add Node and create a new one.
- You can add a name, and how will the assistant regonise the visitor query in the "If assistant recognizes" option. Then, provide a response syou would feed for the query in "Then respond with" section. The response may be a text or any of the SalesIQ input/display cards.
- Click Close to close the edit view.
Create an assistant
An assistant is a cognitive bot to which you add a skill that enables it to interact with your customers in useful ways.
- Click the Assistants tab.
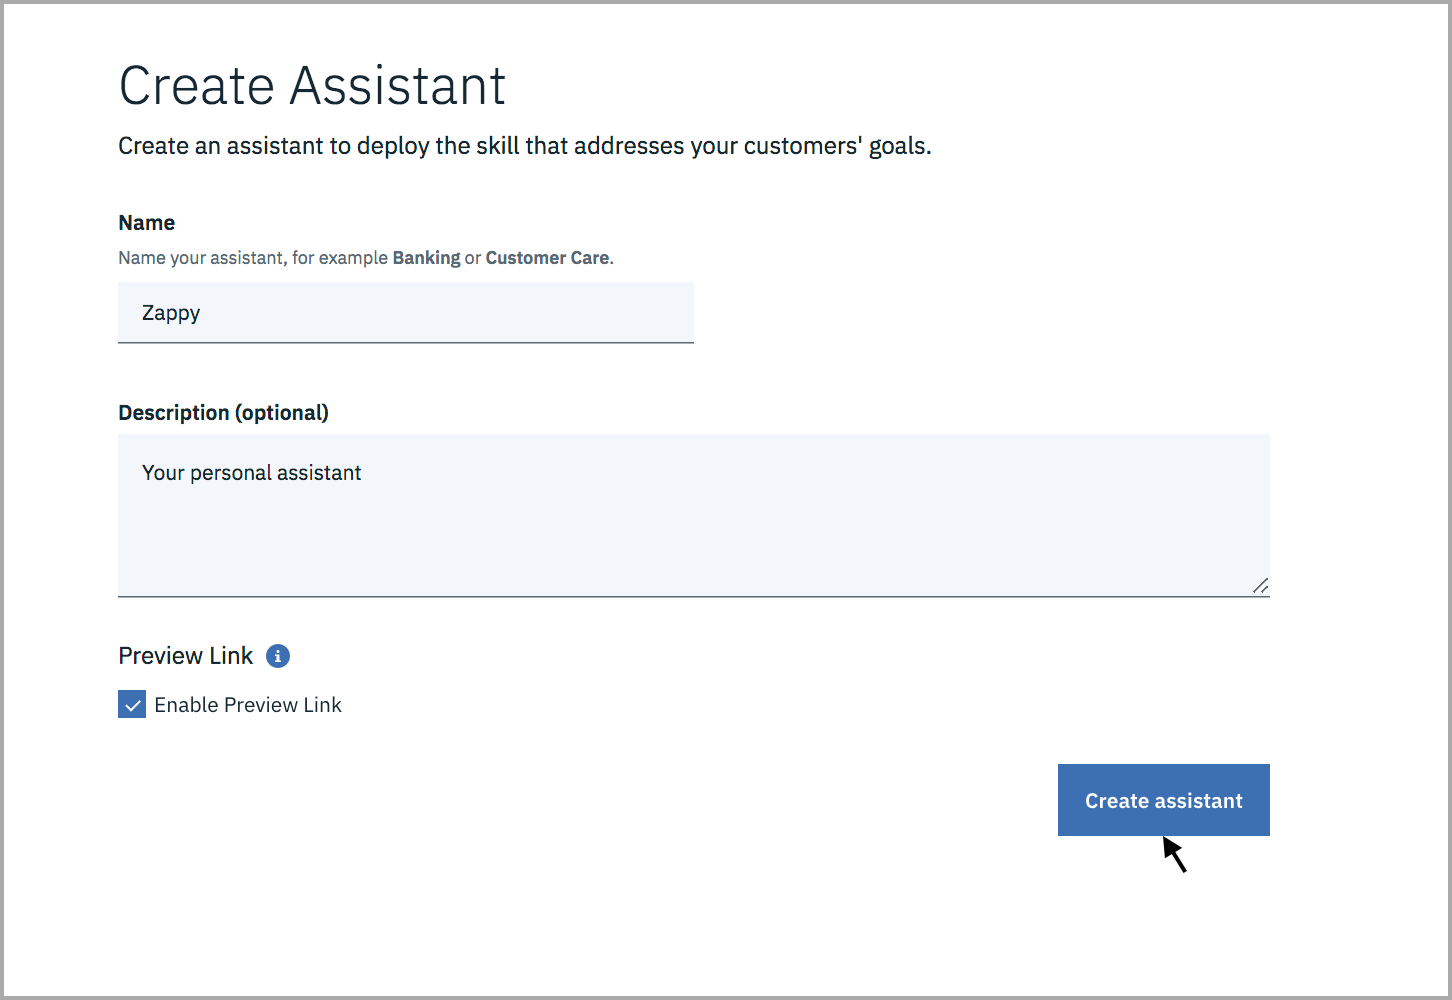
- Click Create new.
- Name the assistant, enter a description and click Create.
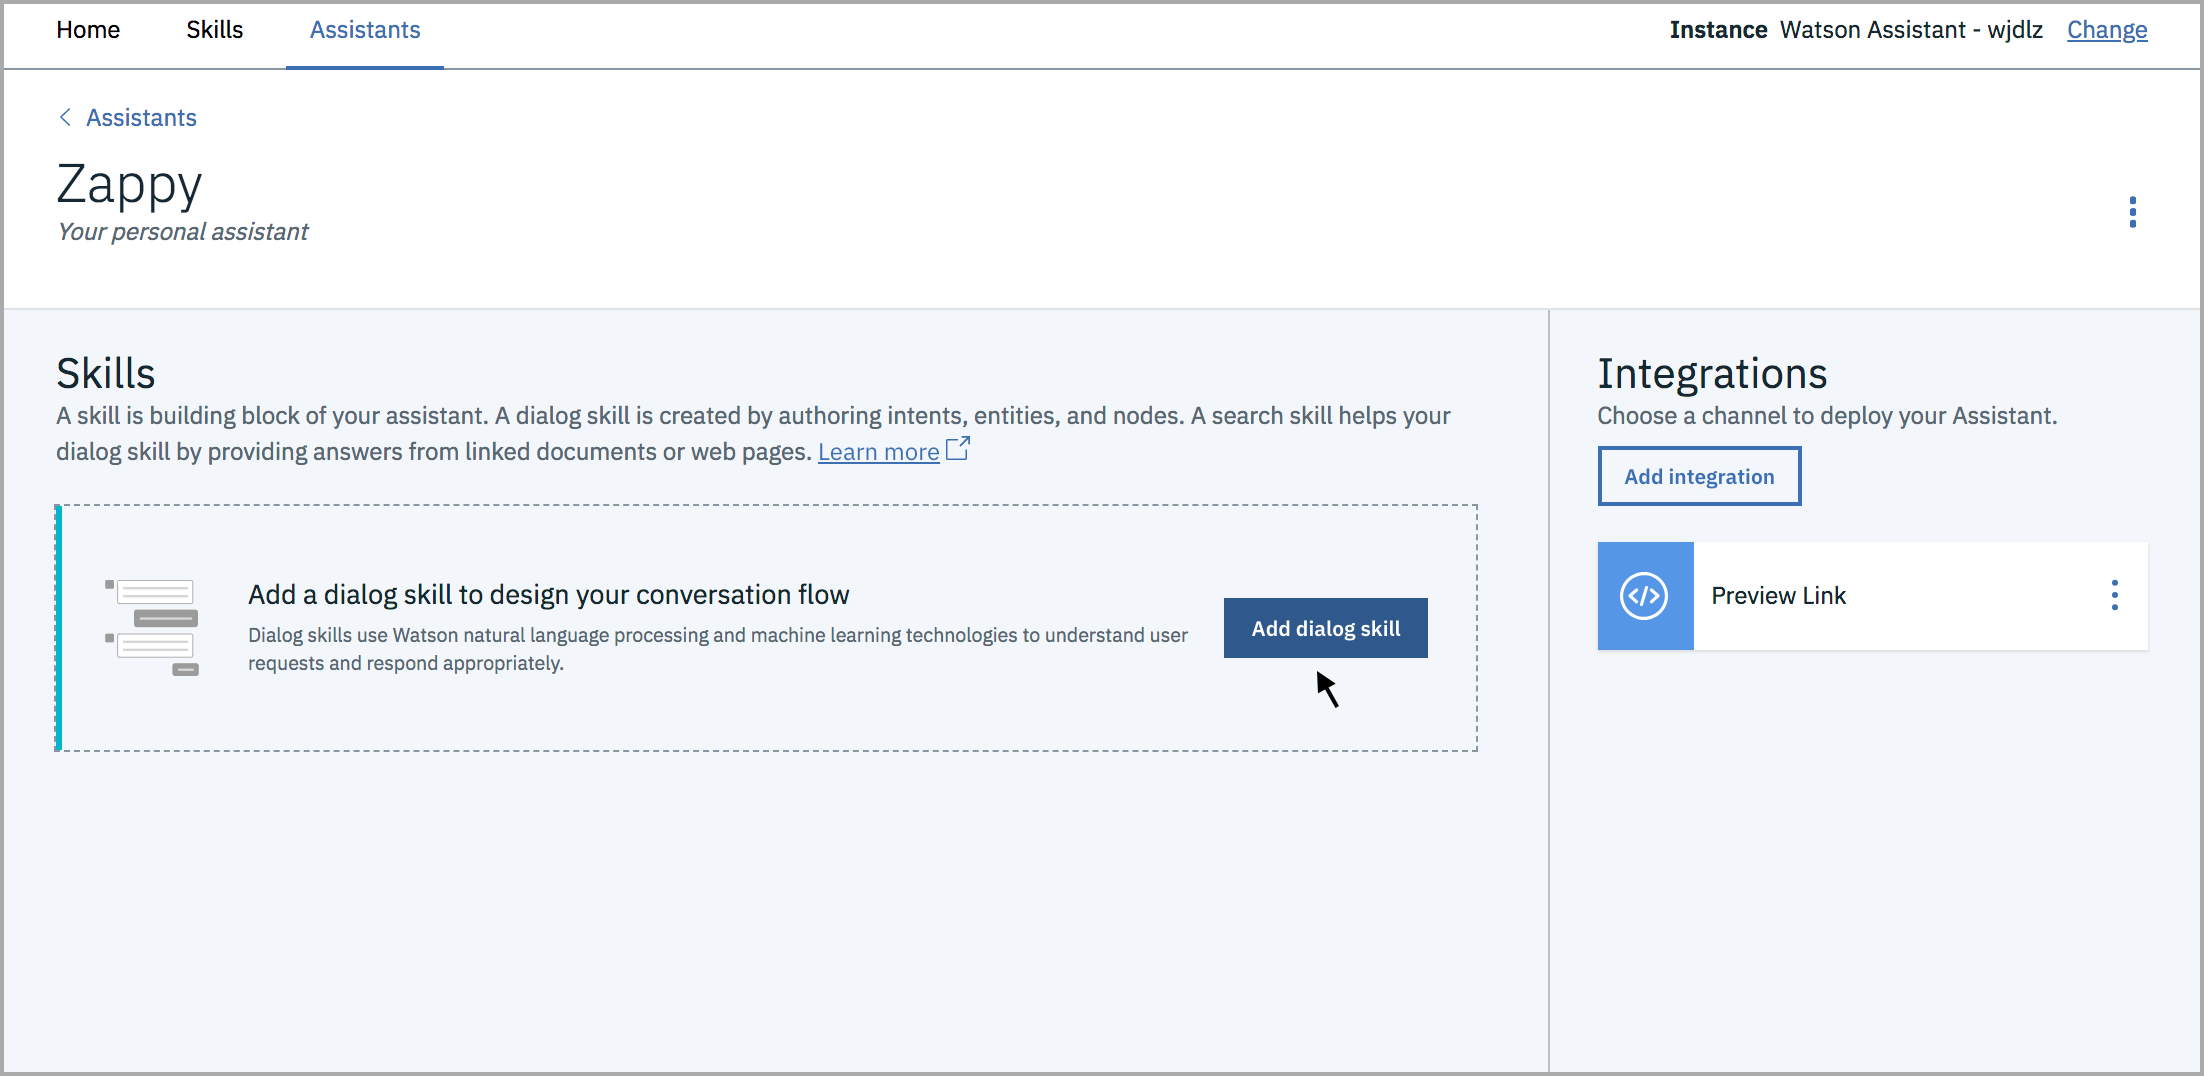
Add your skill to your assistant
- From the new assistant page, click Add dialog skill.
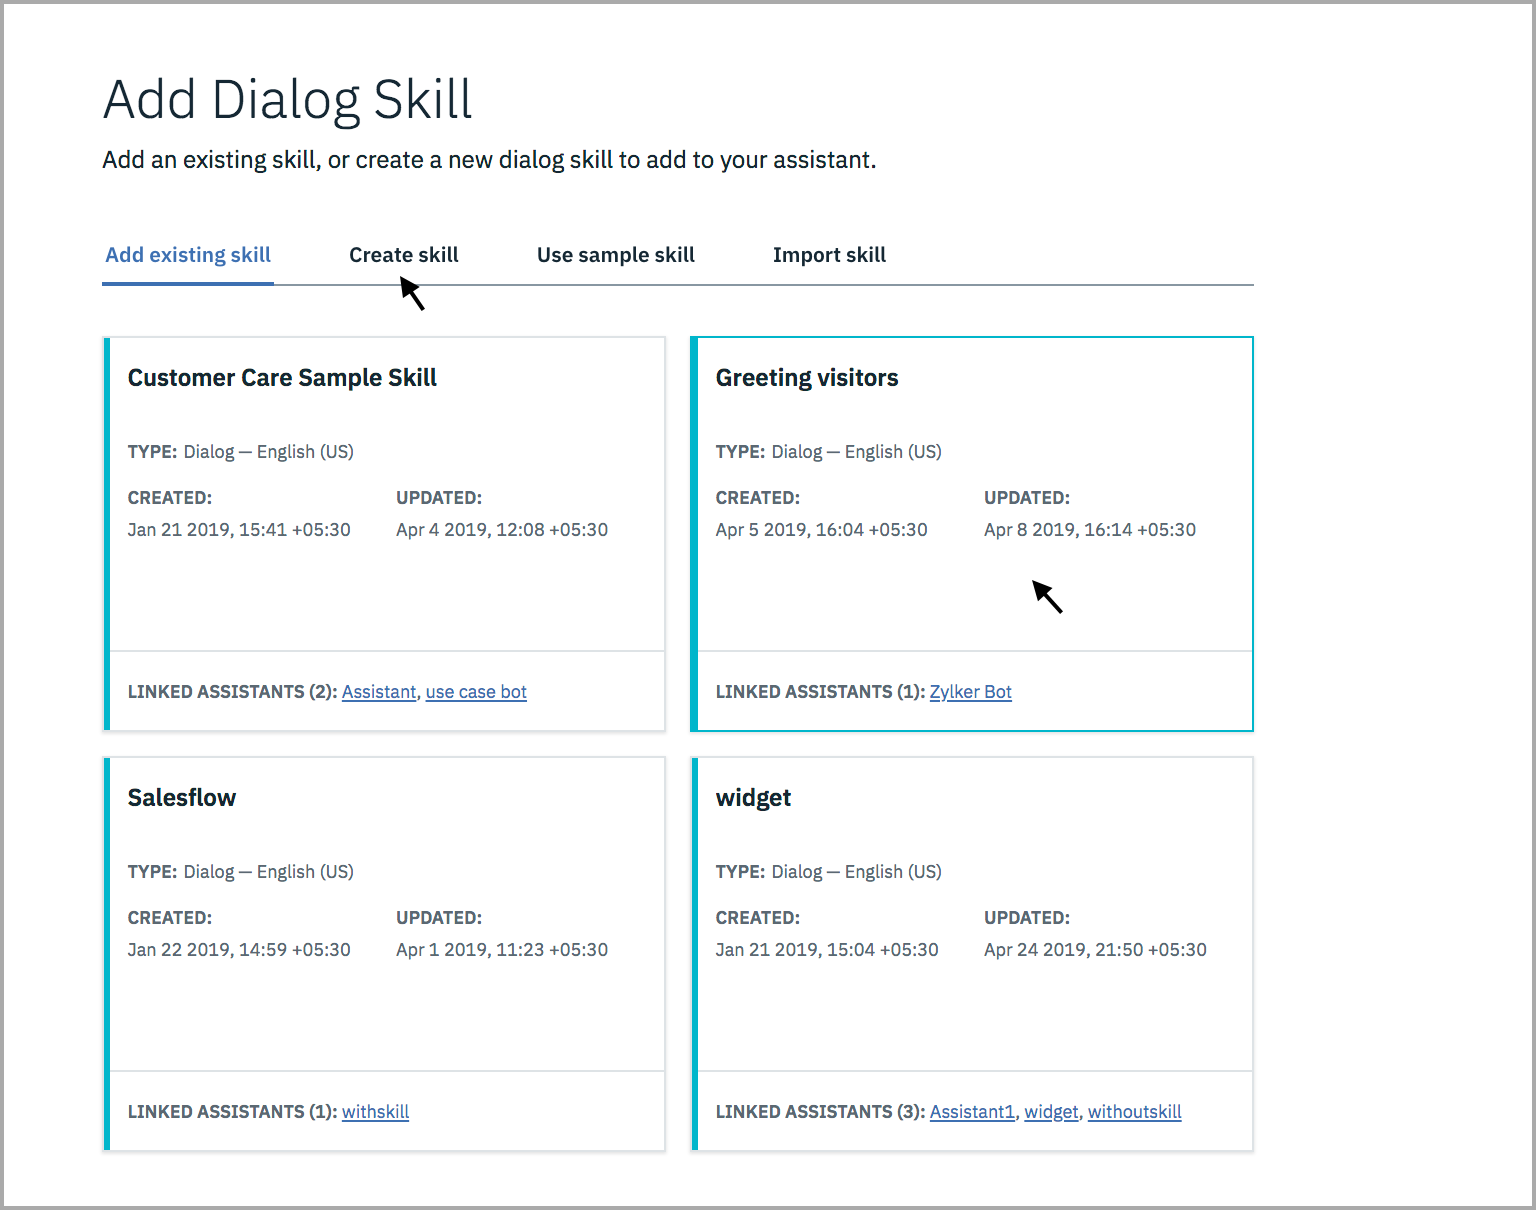
- If you created or were given developer role access to any workspaces that were built with the generally available version of the Watson Assistant service, you will see them listed on the Skills page as conversational skills.
- Choose to add the skill that you created earlier to the assistan or you can create a new skill.
Integrate the assistant with Zobot
Now that you have an assistant in the IBM watson, you can map the assistant with Zoho SalesIQ's Zobot and let them serve your website visitors. To link with Zobot:
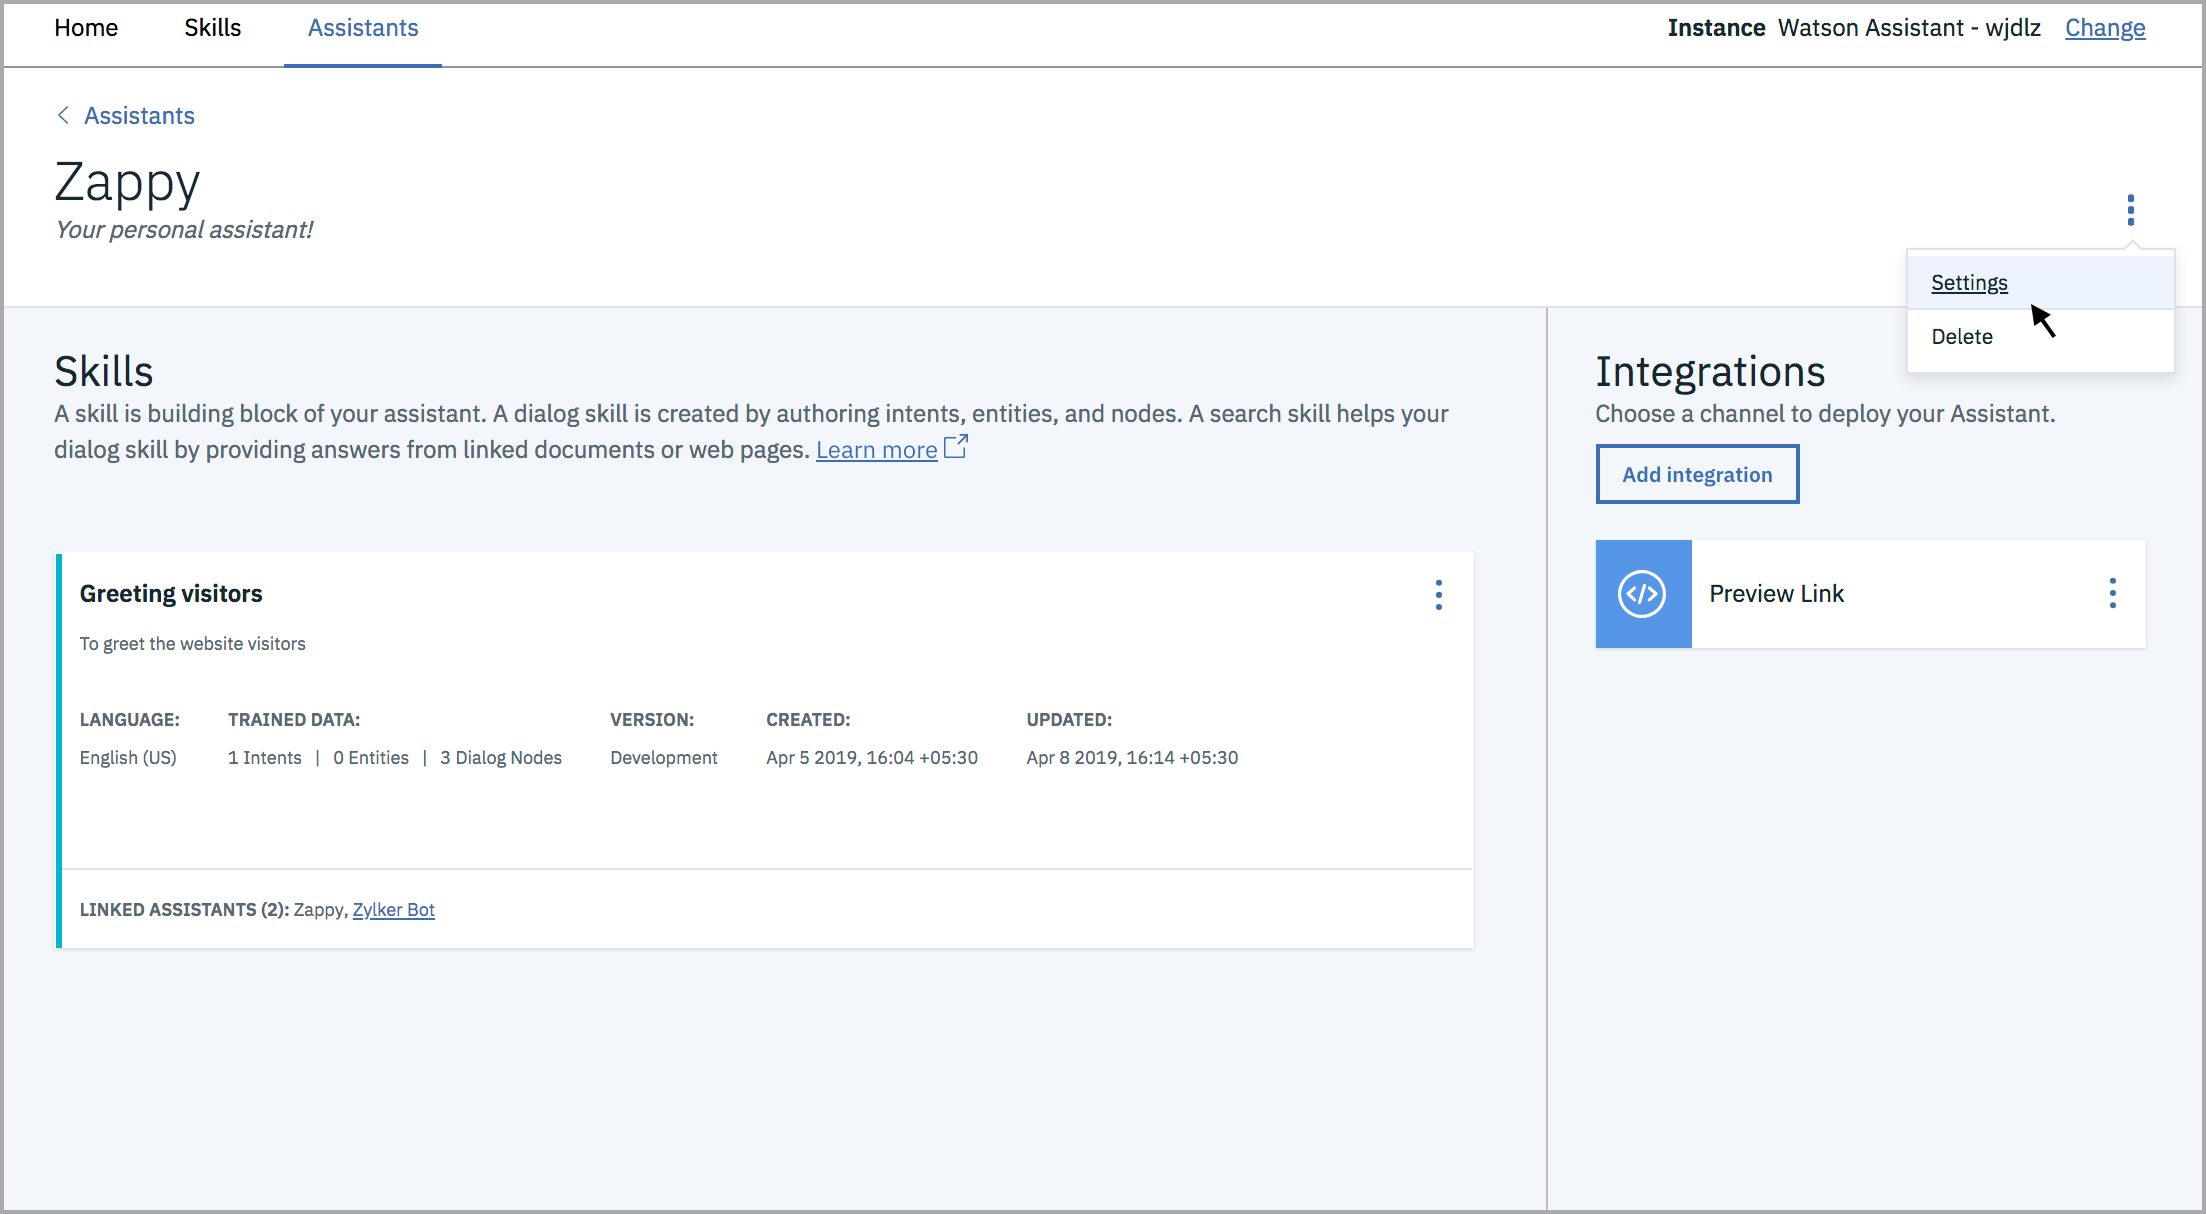
- Click the options icon and click Settings in the right corner of each assistant.
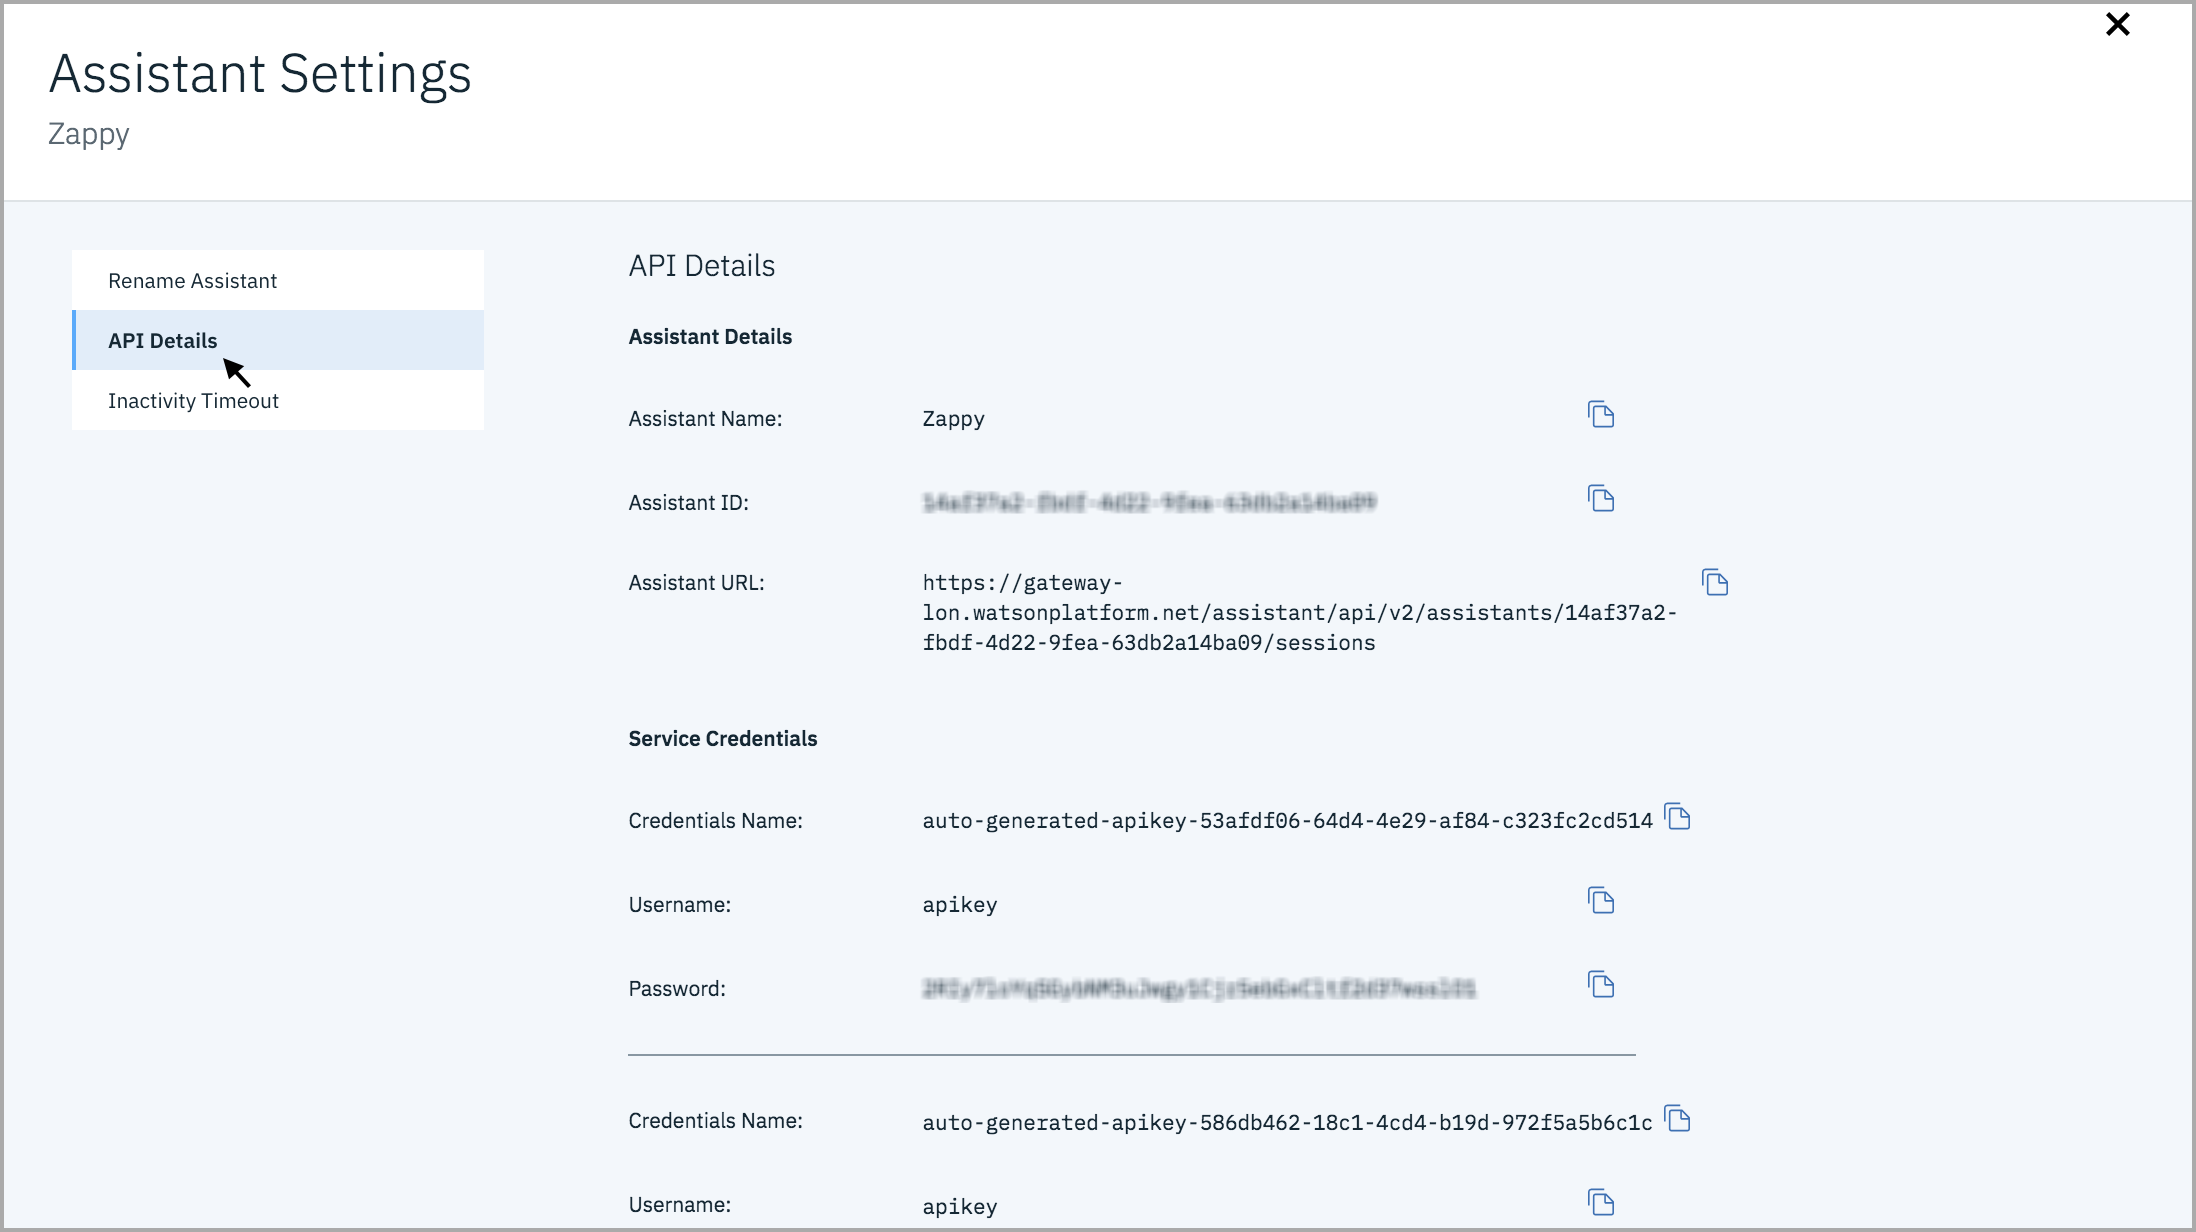
- The Watson Assistant Settings page appear, click API Details and copy the Assistant ID from the page.
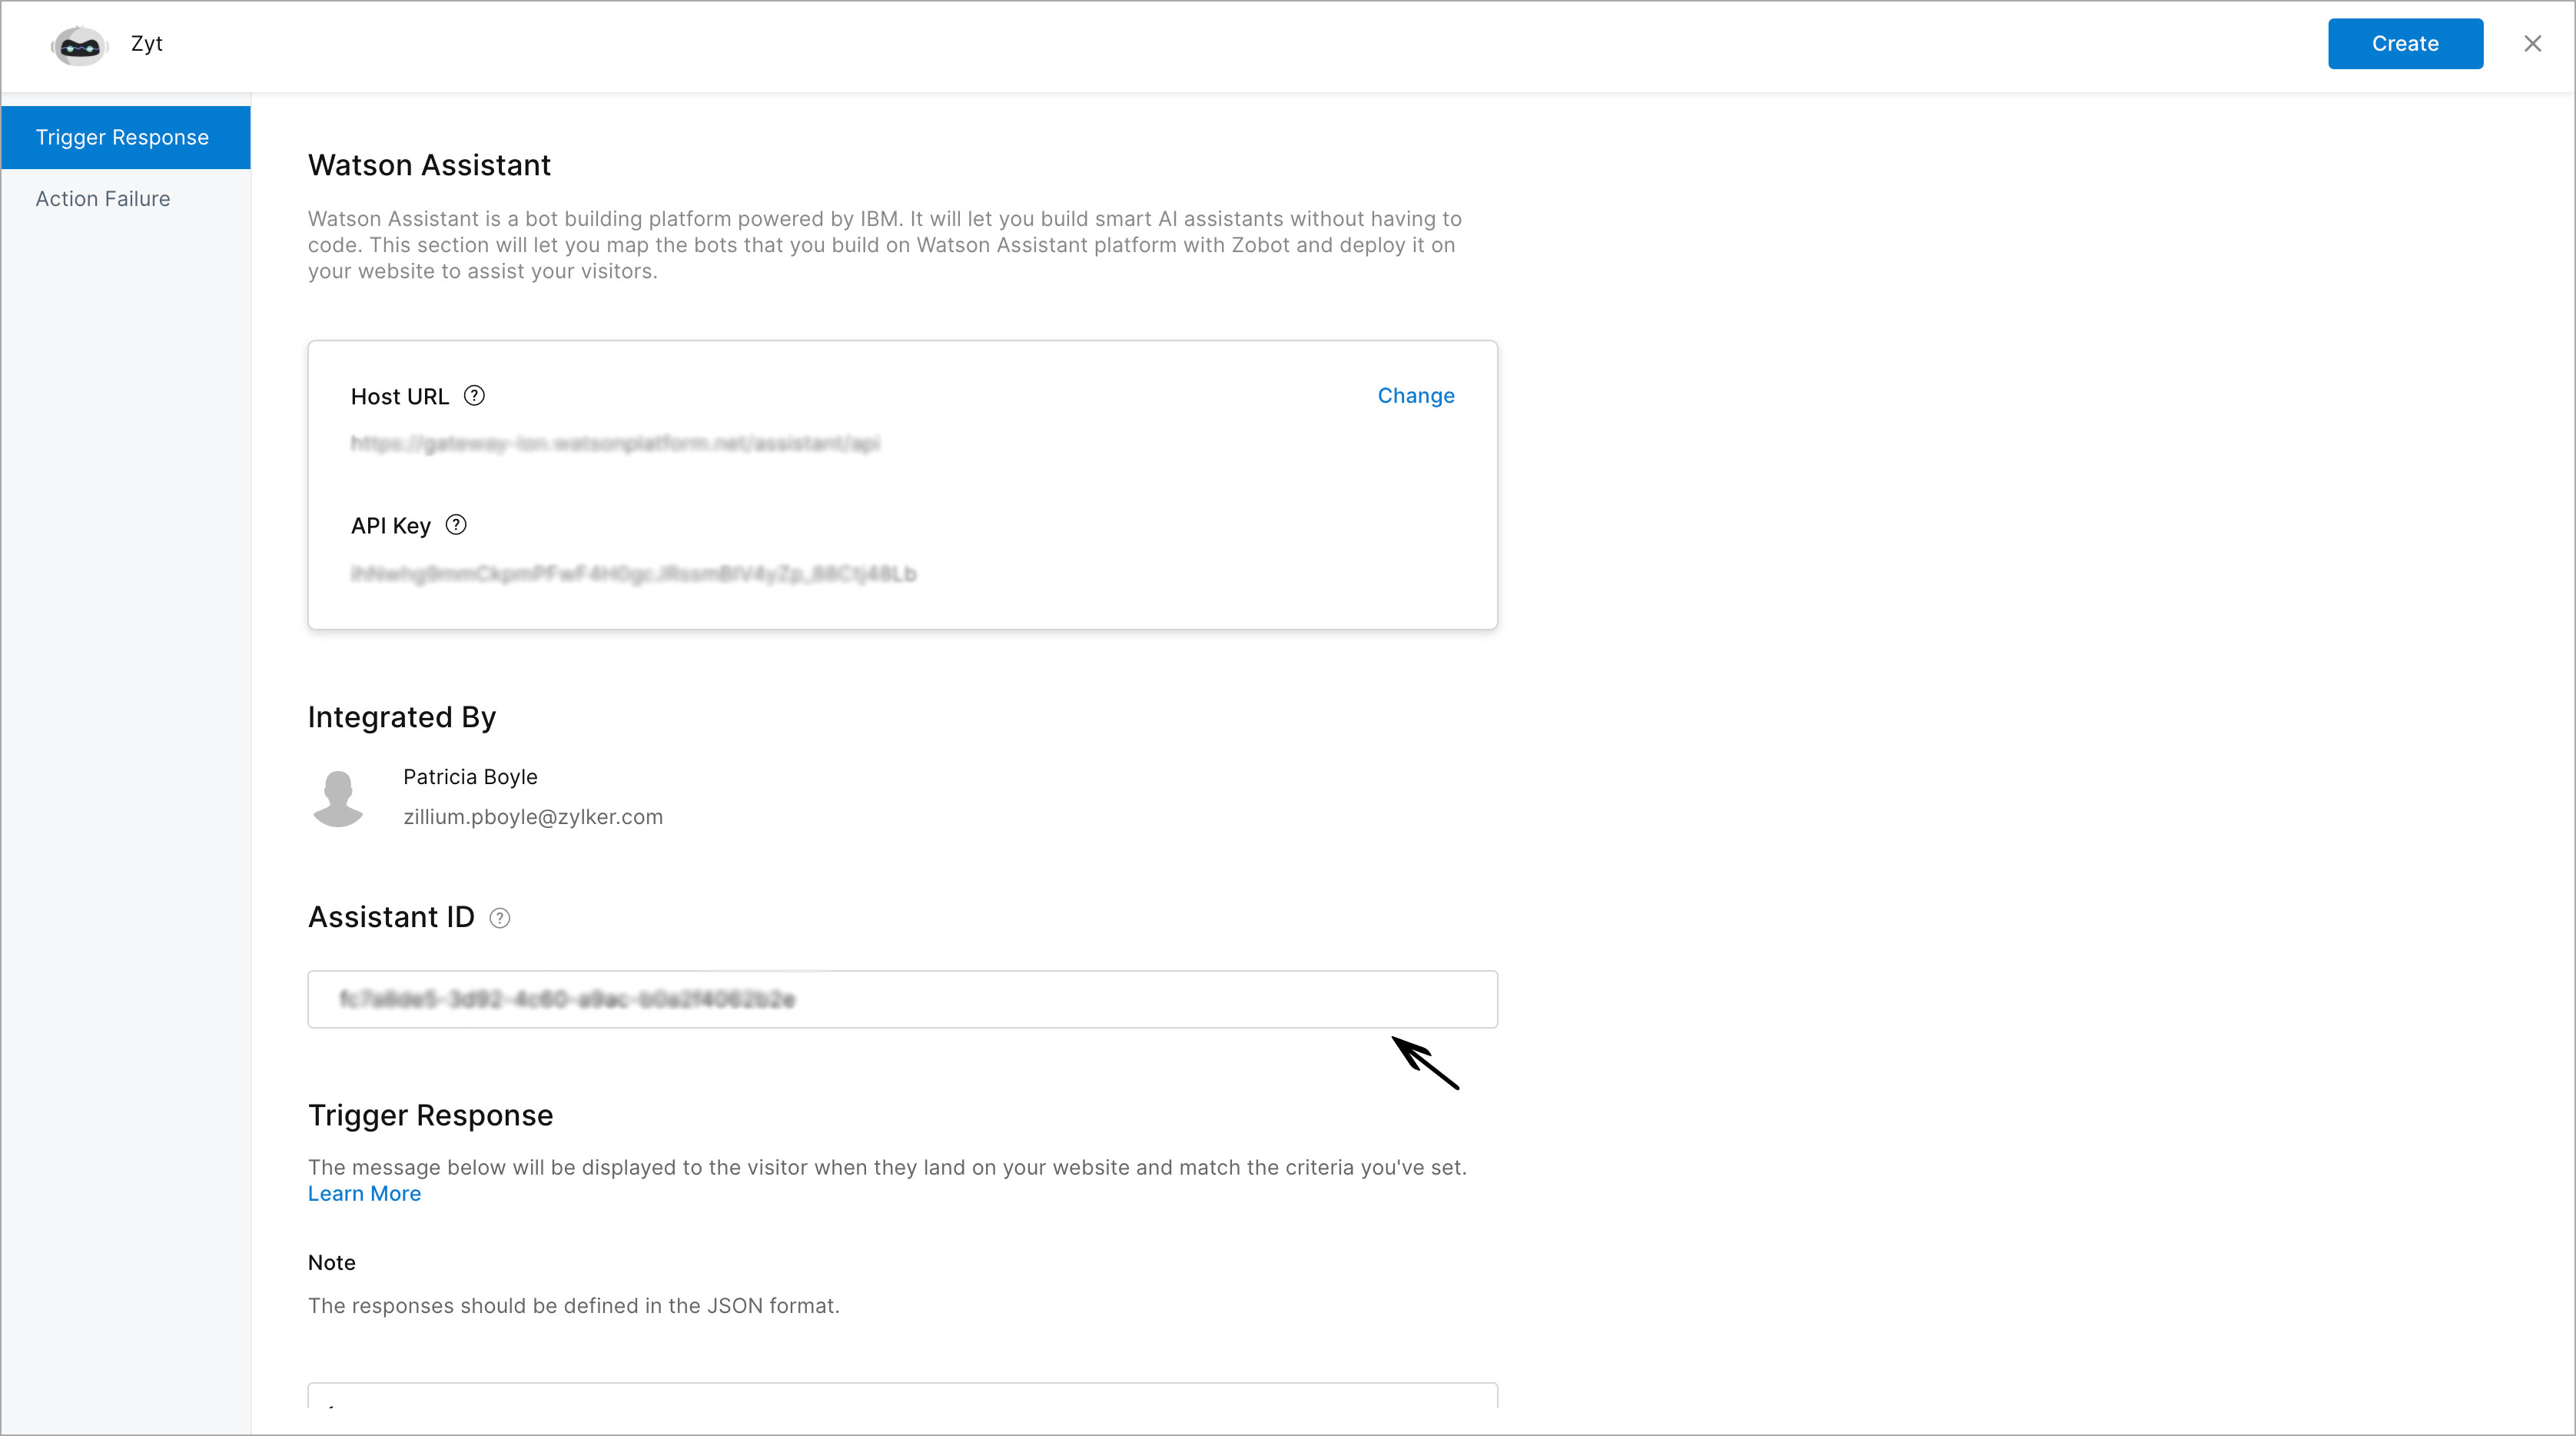
- Navigate to Zoho SalesIQ > Settings > Zobot > Choose your watson bot, and in the zobot configuration page, provide the Host URL and API key and configure. Then, paste the Assistant ID and click create. Your Watson Assistant is integrated with Zobot and ready to assist your website visitors
How to use dynamic text?
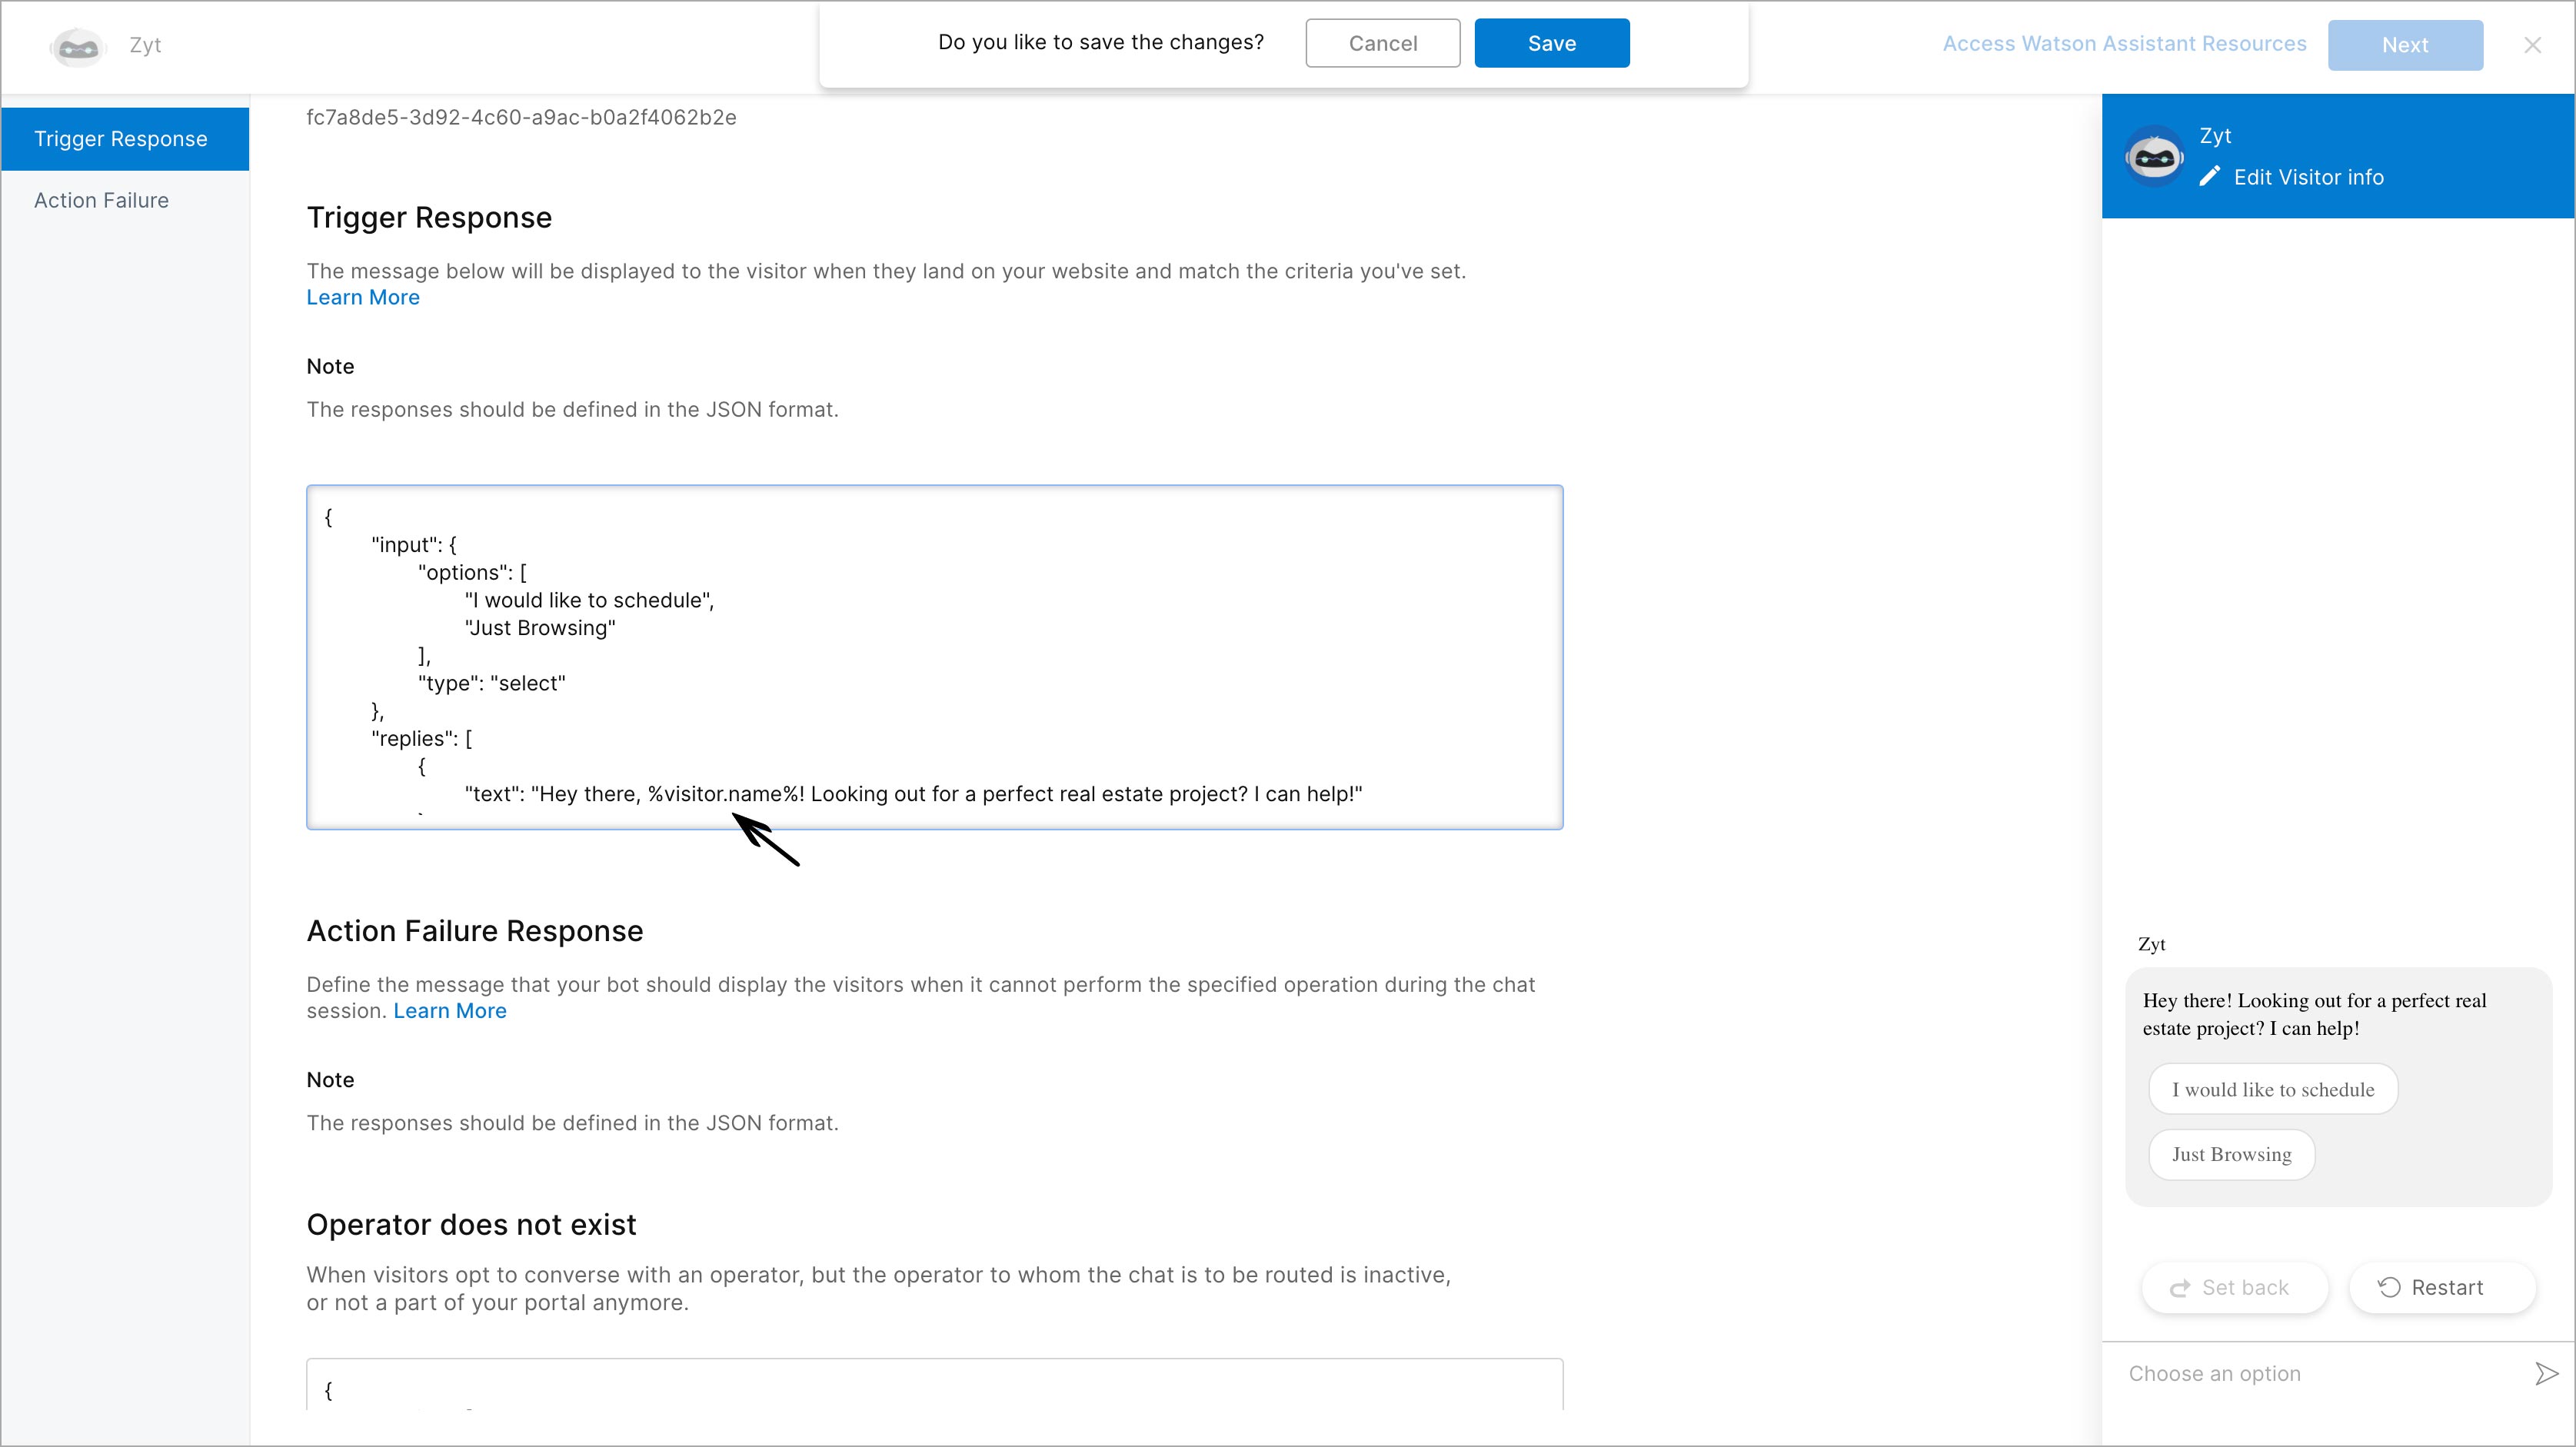
Using dynamic text in trigger messages:
- In Zobot dashboard > Trigger Message text box, type % followed by the format along with the message.
- Messages will be triggered dynamically to each visitor.
Using dynamic text in Watson Assistant:
- In Watson Assistant, Navigate to Skills dashboard > Dialog > choose a dialog.
- In the Text, you can use the dynamic text to respond to visitors dynamically.
List of dynamic text you can use in your triggers messages and Watson Assistant Platform:
| Dynamic Text Format | What it represents | Use in Trigger Message | Use in Watson Assistant |
| %visitor.name% | Name of the visitor in the website. | ✔ | ✔ |
| %visitor.id% | Reference ID for the visitor in the website. | ✔ | |
| %visitor.email% | Email Address of the visitor in the website. | ✔ | ✔ |
| %visitor.phone% | Contact number of the visitor. | ✔ | ✔ |
| %visitor.department% | Name of the department to which the visitor has initiated the chat. | ✔ | ✔ |
| %visitor.question% | Question raised by the visitor while initiating the chat. | ✔ | |
| %visitor.ip% | IP address of the visitor visiting the website. | ✔ | ✔ |
| %attender.name% | Name of the operator attending the chat. | ✔ | ✔ |
| %visitor.pagetitle% | Title of the page, from where the visitor has initiated the chat. | ✔ | ✔ |
| %visitor.pageurl% | URL of the page, from where the visitor has initiated the chat. | ✔ | ✔ |
| %visitor.referrer% | Source from where the visitor is referred from. | ✔ | ✔ |
| %visitor.state% | State/Province of the visitor located in. | ✔ | ✔ |
| %visitor.city% | City of the visitor located in. | ✔ | ✔ |
| %visitor.country% | Country of the visitor accessing the website. | ✔ | ✔ |
| %visitor.timezone% | Time zone of the visitor accessing the website. | ✔ | ✔ |
| %visitor.latitude% | Latitude of the visitor. | ✔ | |
| %visitor.longitude% | Longitude of the visitor. | ✔ | |
| %visitor.operating.system% | The operating system used by the visitor. | ✔ | ✔ |
| %visitor.browser% | The browser used by the visitor. | ✔ | ✔ |
| %visitor.browser.version% | The browser version used by the visitor. | ✔ | |
| %web.embed.name% | The web embed where the visitor has initiated the chat. | ✔ | ✔ |
| %platform% | The platform used by the visitor's in their system. | ✔ | |
| %screen.resolution% | Screen resolution of the visitor's system. | ✔ | |
| %search.engine% | Search engine used by the visitor to reach the website. | ✔ | |
| %search.query% | Search Query (Keyword)used by the visitor to reach the website. | ✔ | |
| %attender.email% | Email address of the attender who attends the chat. | ✔ | ✔ |
| %smart.timenow% | Timeperiod in the sequence of the day (Eg. Morning, Evening). | ✔ | ✔ |
| %company.name% | Company name mentioned in Clearbit. | ✔ | ✔ |
| %company.type% | Company type mentioned in Clearbit. | ✔ | ✔ |
| %company.sector% | Company sector mentioned in Clearbit. | ✔ | ✔ |
| %company.location% | Company location mentioned in Clearbit. | ✔ | ✔ |
| %company.website% | Company website mentioned in Clearbit. | ✔ | ✔ |
| %company.employeecount% | Compny's employee count mentioned in Clearbit. | ✔ | ✔ |
| %company.annualrevenue% | Company's annual revenue mentioned in Clearbit. | ✔ | ✔ |
| %company.marketcapital% | Company's market capital mentioned in Clearbit. | ✔ | ✔ |
| %company.fundraised% | Company fund details present in Clearbit. | ✔ | ✔ |
| %company.twitterfollowers% | Your company's twitter followers from Clearbit. | ✔ | ✔ |
| %company.facebooklikes% | The likes you got in Facebook registered in Clearbit. | ✔ | ✔ |
| %company.industrytype% | The industry type your company belongs to. | ✔ | ✔ |
Note: Some of the dynamic text might not work in the Zobot preview window.
Passing visitor info and attachments
Visitor info will be passed on to Watson for framing an assistant reply based on the visitor information like visitor name, visitor region, etc. While processing the node response inside the dialog, the values will be available inside the context variables. Here, two variables will be received:
- visitor - you can retrieve the visitor info mentioned here
- attachments - if the visitor attaches a file during a bot conversation, it will be available inside this object. Otherwise, an empty array will be passed.
Note:
You can directly get the visitor/attachment values using $visitor.name
      "attachments": [
        {
          "name": "Screenshot.png",
          "url": "https://salesiq.zoho.com/api/v2/vicky123/attachments/330340647f6b1386d7373d2b2933b0fde58837d874086b95b2909d87f663272f5aba596670294baa?file_name=Screenshot.png&chat_id=LD_2242276011928302370_1664693403&purpose=chat_attachment",
          "contenttype": "image/png"
        }
      ],
      "visitor": {
        "current_page_url": "http://htmledit.squarefree.com/",
        "uvid": "fbe9a8d9-d1be-4799-b2ff-f64573f4eb92",
        "landing_page_url": "http://htmledit.squarefree.com/",
        "last_call_attender": "318242000000556023",
        "in_time": "1561026289397",
        "uts_session_id": "-8438009772243006363",
        "browser": "Google Chrome",
        "country": "",
        "ip": "125.19.26.35",
        "country_code": "IN",
        "language": "en",
        "question": "hi",
        "phone": "",
        "number_of_past_chats": "1",
        "lead_score": "1",
        "number_of_past_visits": "1",
        "visitid": 252,
        "visitor_id": 318242000001314000,
        "os": "Apple Macintosh",
        "email": "",
        "name": "Visitor 974826",
        "uuid": "e6c49e0c-fbf0-4b1d-86b2-b7db6cf6f13b_a0",
        "department_id": 318242000000002000
      }
    }