Manage your Connections
What are Connections?
Connections are interfaces used to integrate third-party services with your Zoho Service, in this case, Zoho SalesIQ. These connections are used in an URL invocation task to access authenticated data. To establish a connection, it is necessary to provide a Connection Name and Authentication Type amongst other details.
Steps to connect Zoho SalesIQ with third-party services:
- In the Zoho SalesIQ dashboard, navigate to Settings > Bot > Zobot > Add a new bot (or) Edit an existing bot.
- Enter the name, description, choose the platform as SalesIQ Scripts, provide the necessary details for the bot profile, and click Next.
- The SalesIQ Scripts code builder will appear.
- Then, select Connections at the bottom left of the screen.
On the Connections page, you'll find three categories :
- My Connection
- Shared Connection
- Internal Connection
My Connection
Connections created by you will be listed under the own connection section.
Shared Connection
Connections created by others and authenticated by you will be listed under the shared connection section.
Internal Connection
Connections made by built-in integration will be listed here.
Types of Connections
Connections are listed under two sections
- Default - Services listed under the Pick Your Service Category are considered as Default Connections.
- Custom - If you would like to create a connection with a service that is not listed under the Pick Your Service Category, then you can create a Custom connection.
How to add a new connection?
Click the Add Connection option in the top right corner of the Connections page.
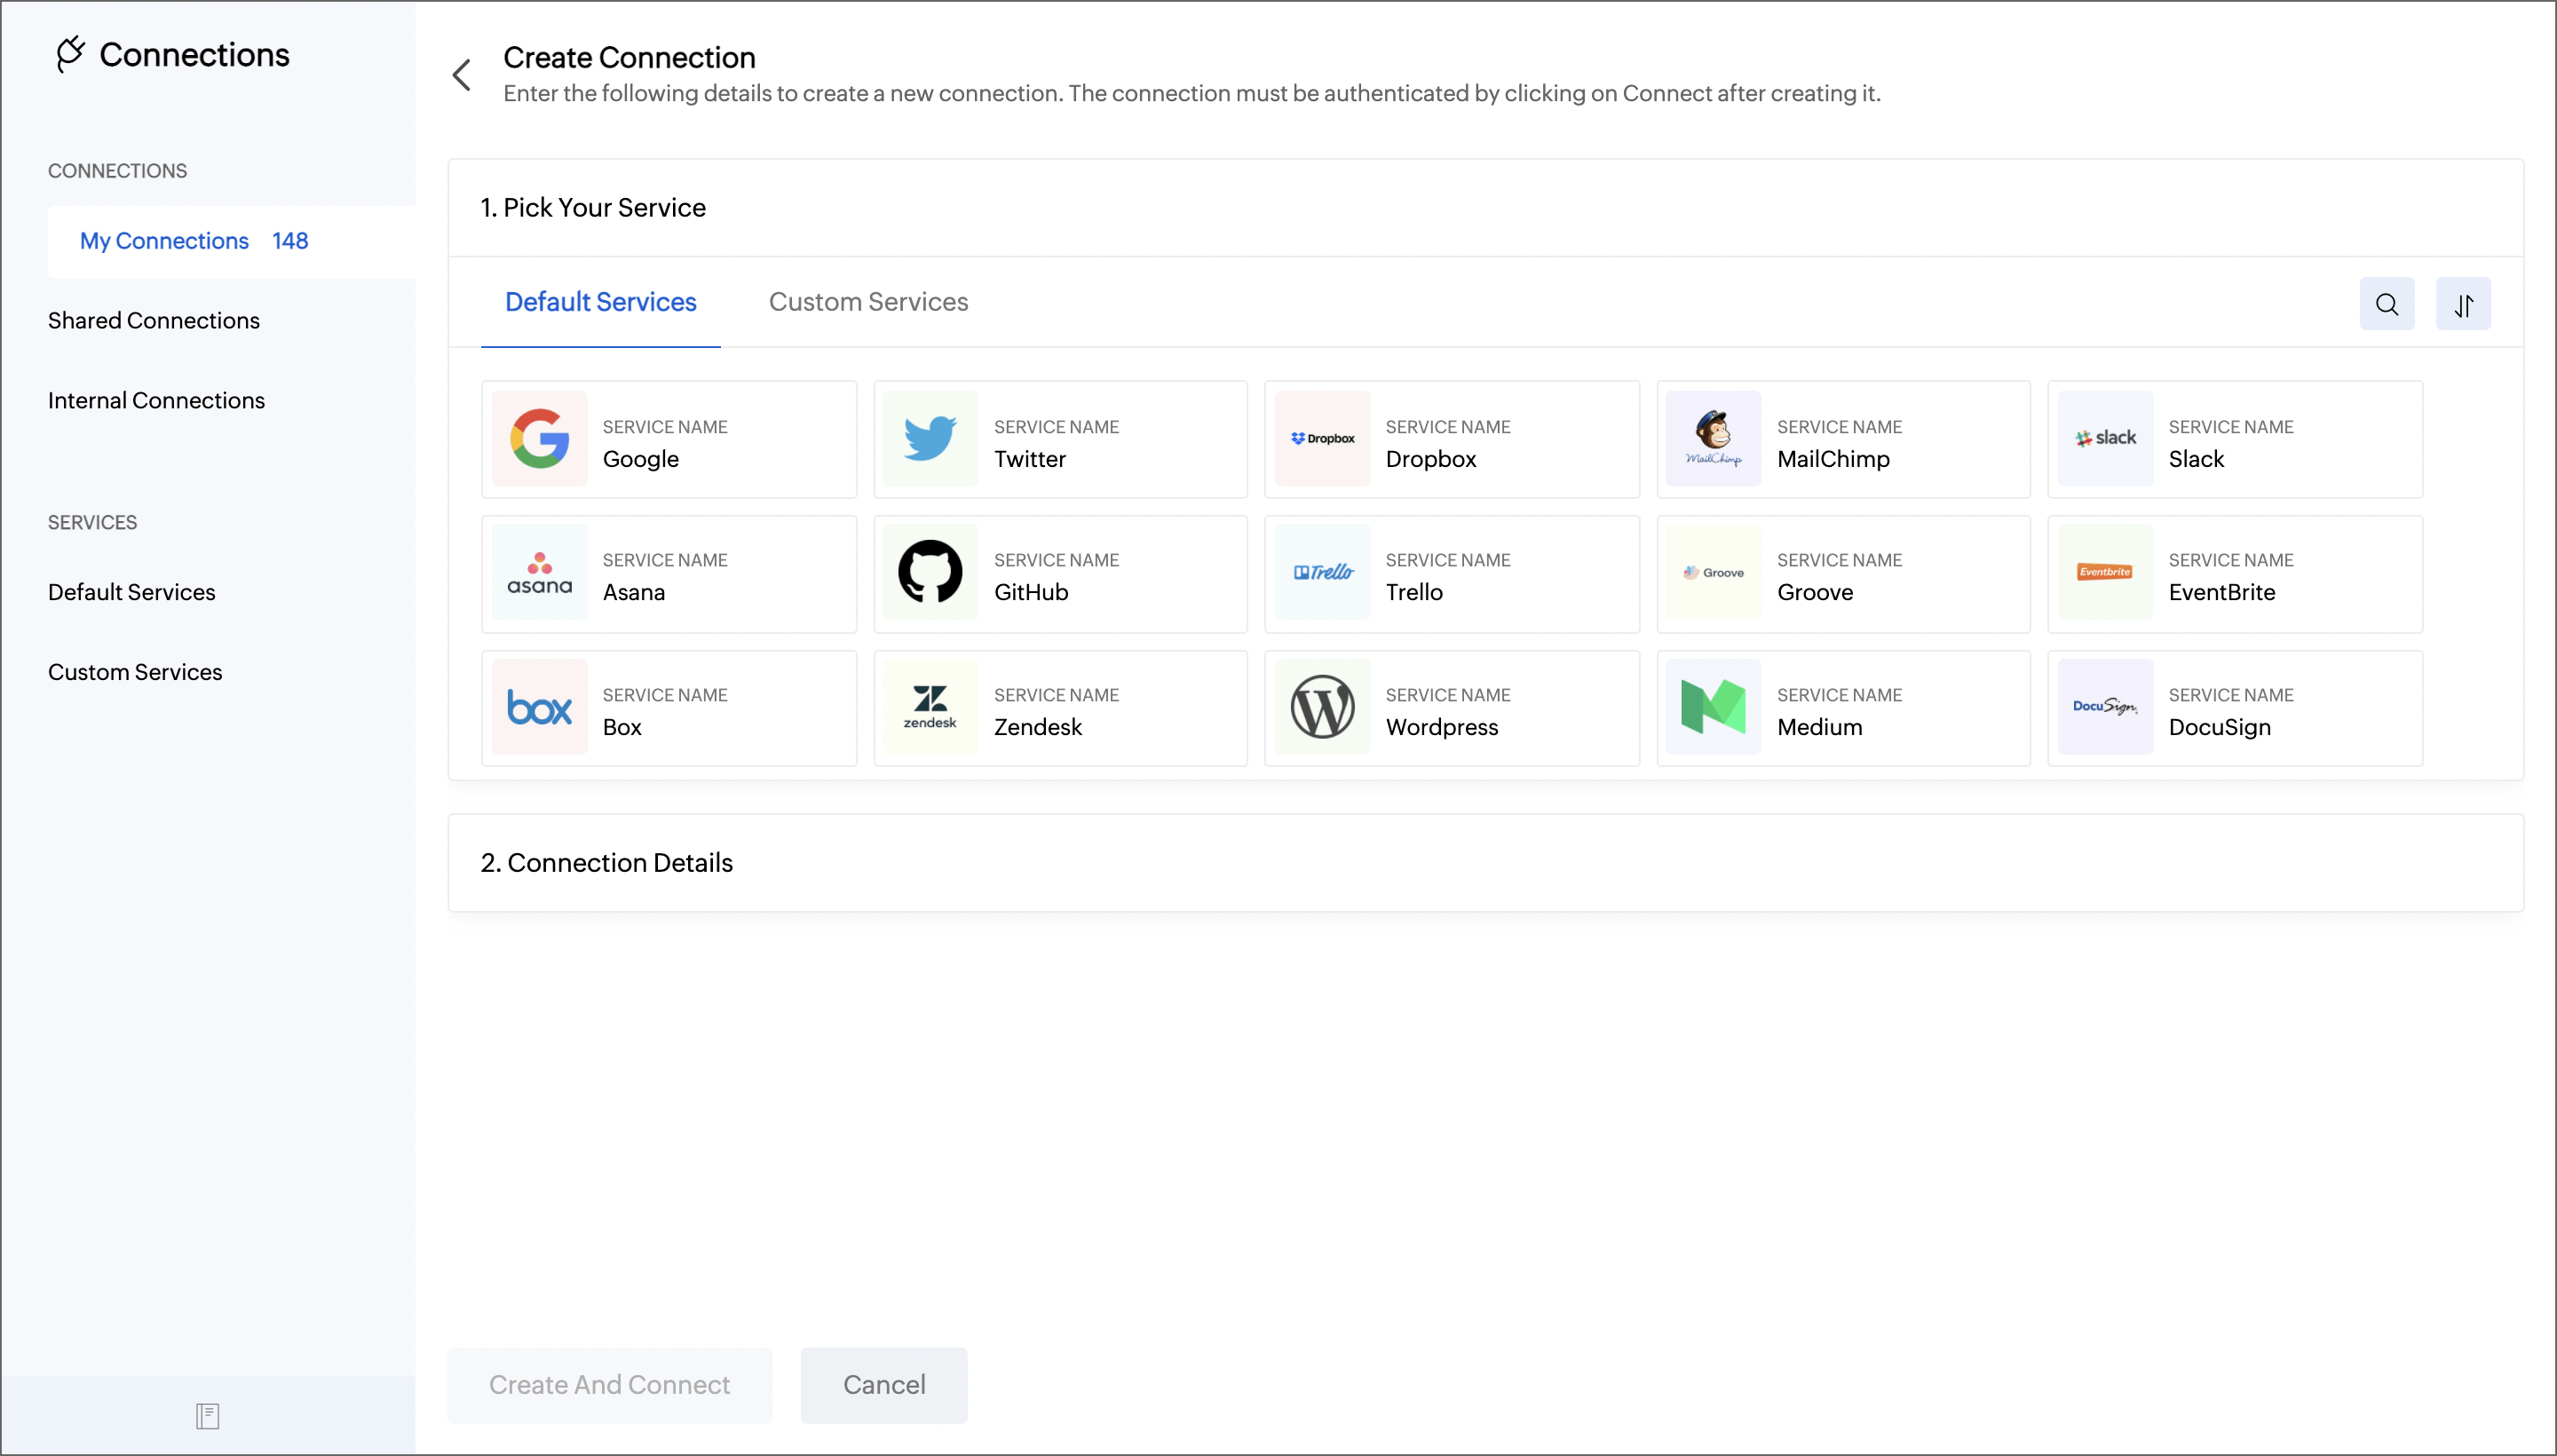
- Under the Pick your Service, you will find two options, Default and Custom Service.
- The Default Service contains a list of third-party services pre-registered with Zoho SalesIQ.
- You can select the Custom Service option to create a connection in case the service you are looking for is not available in the pre-registered services list.
Using a Default Service:
- When the service you want to integrate is available in the Pick your service section, you can make use of it by just choosing the service and giving the connection details.
- Click Create And Connect.
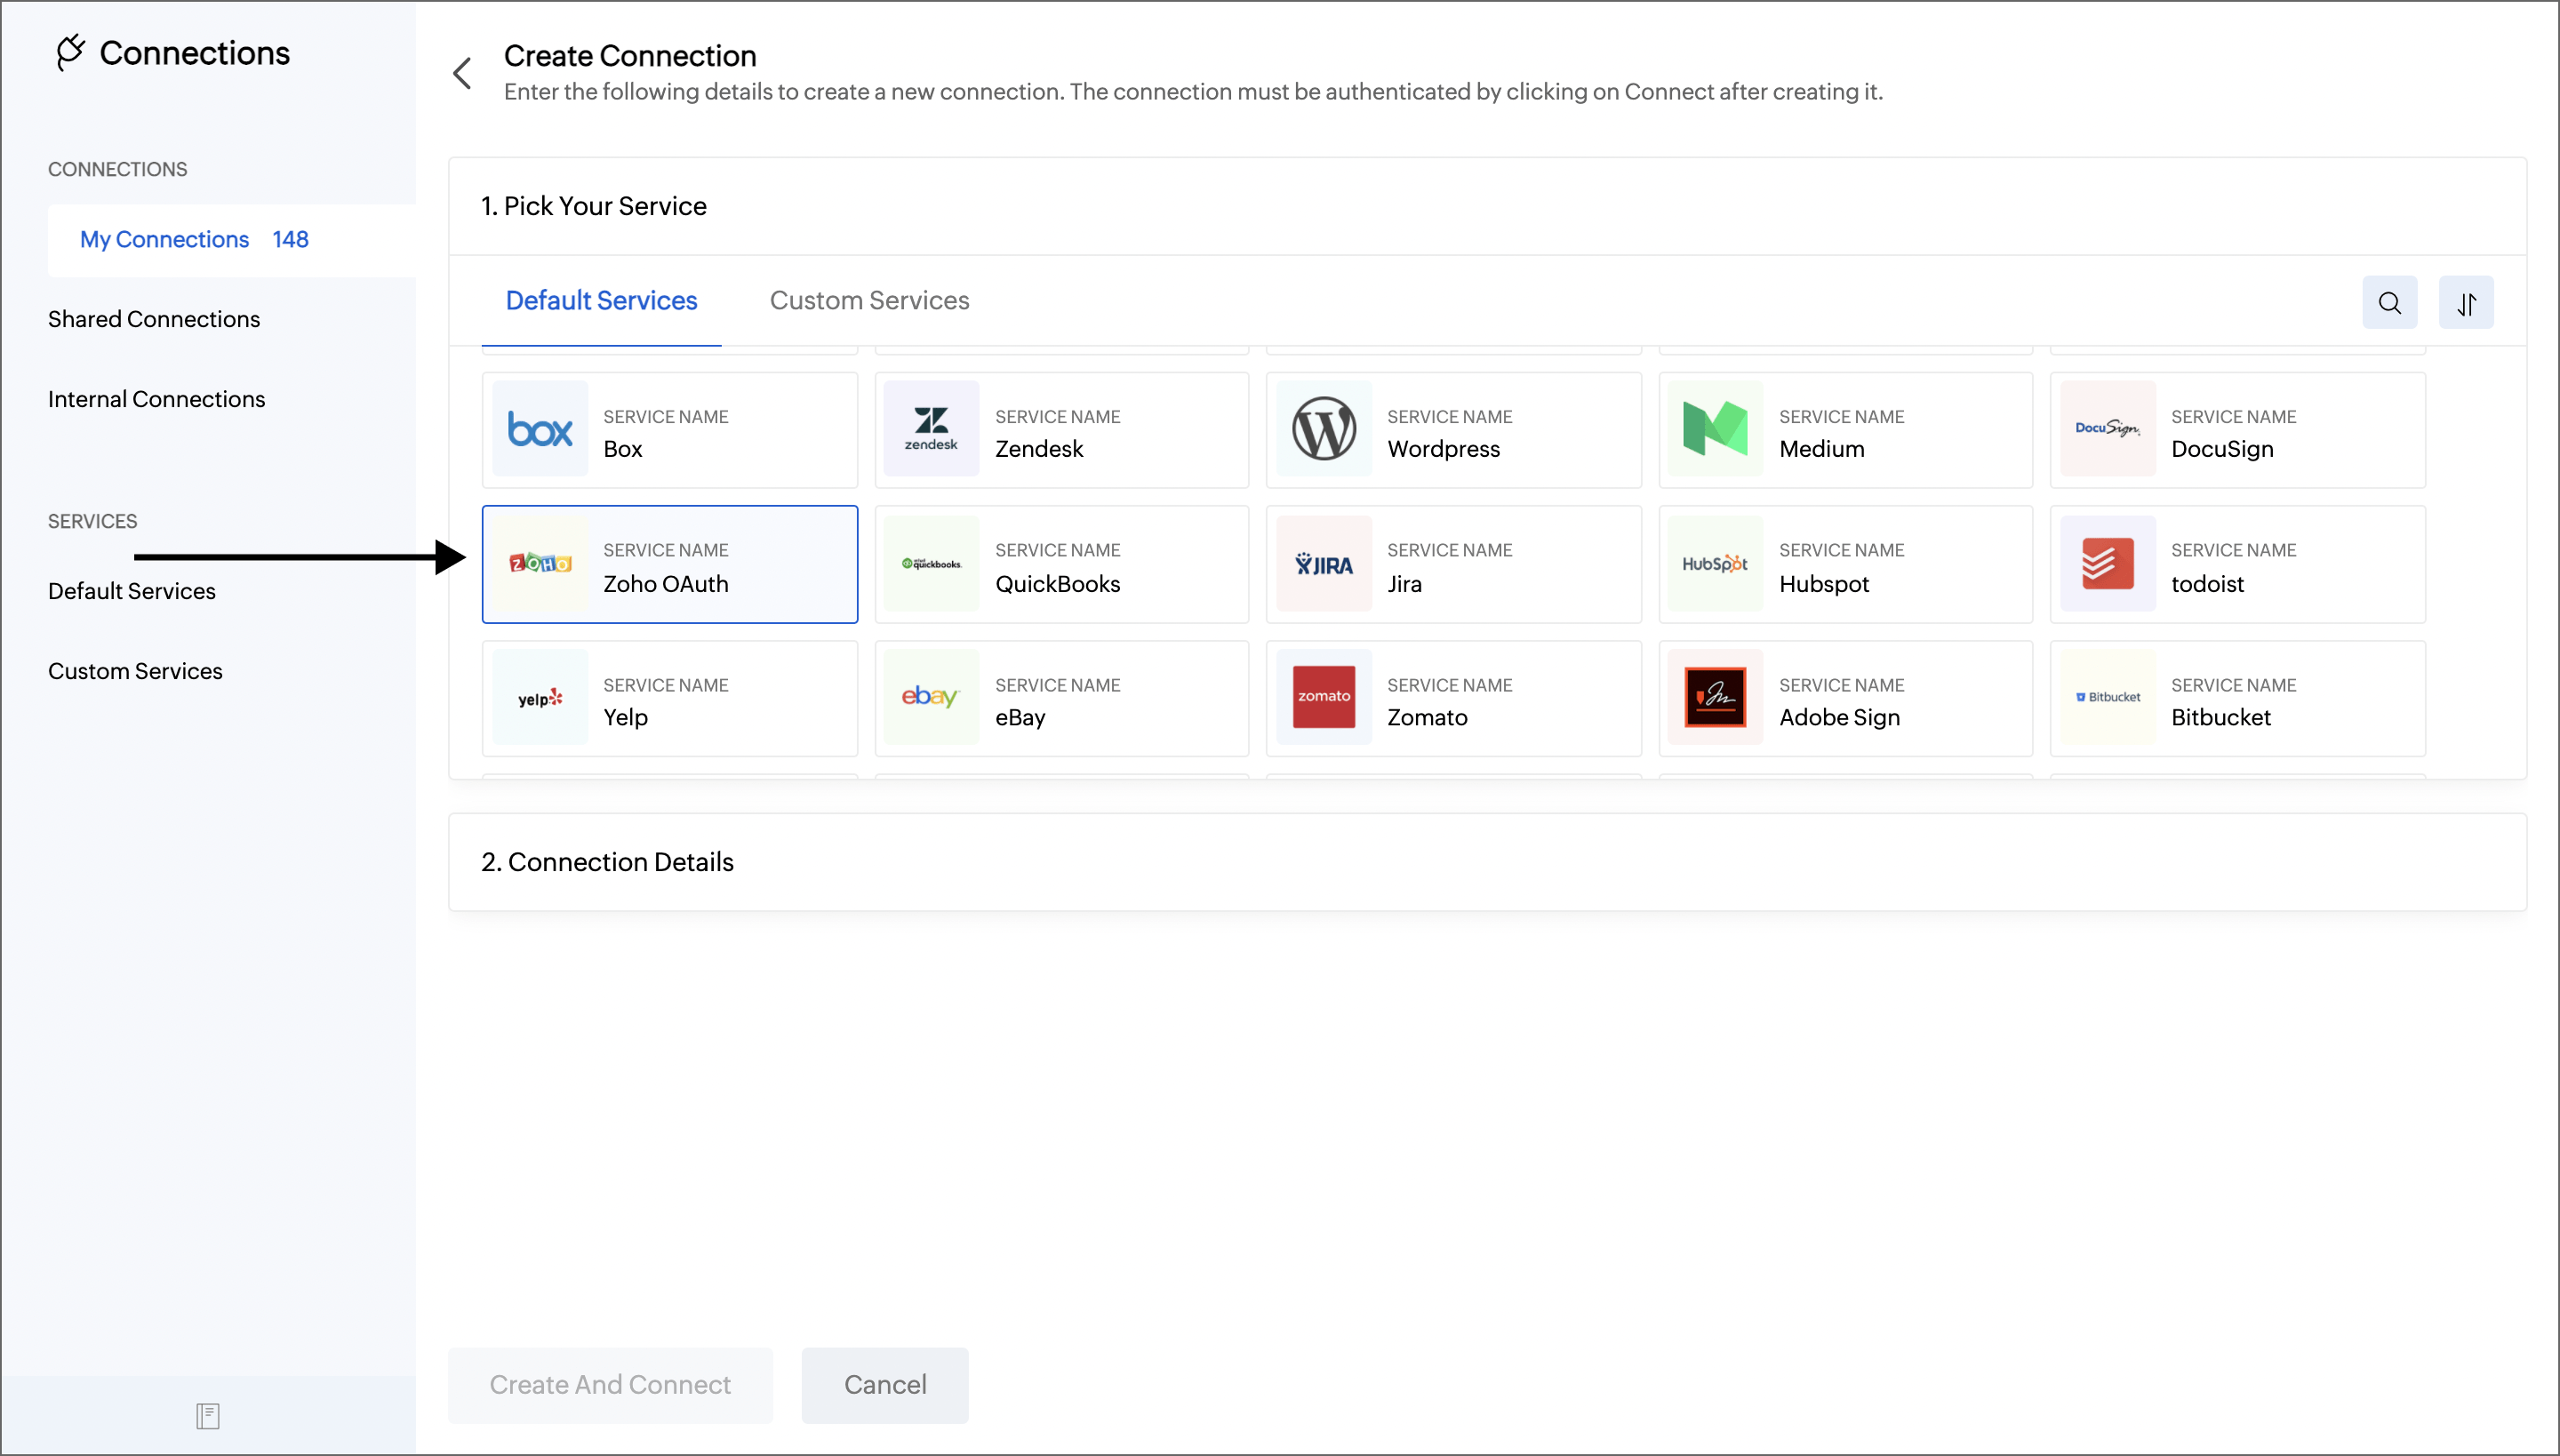
Here's a sample connection with the service called Zoho OAuth. Using Zoho OAuth, other Zoho products can be integrated. A sample connection for the Zoho Desk is created here.
- Click Create Connection on the top right corner.

- Then, select Zoho OAuth from the list of services available under the Pick Your Service - Default Service category.
- Then, fill in the Connection details.
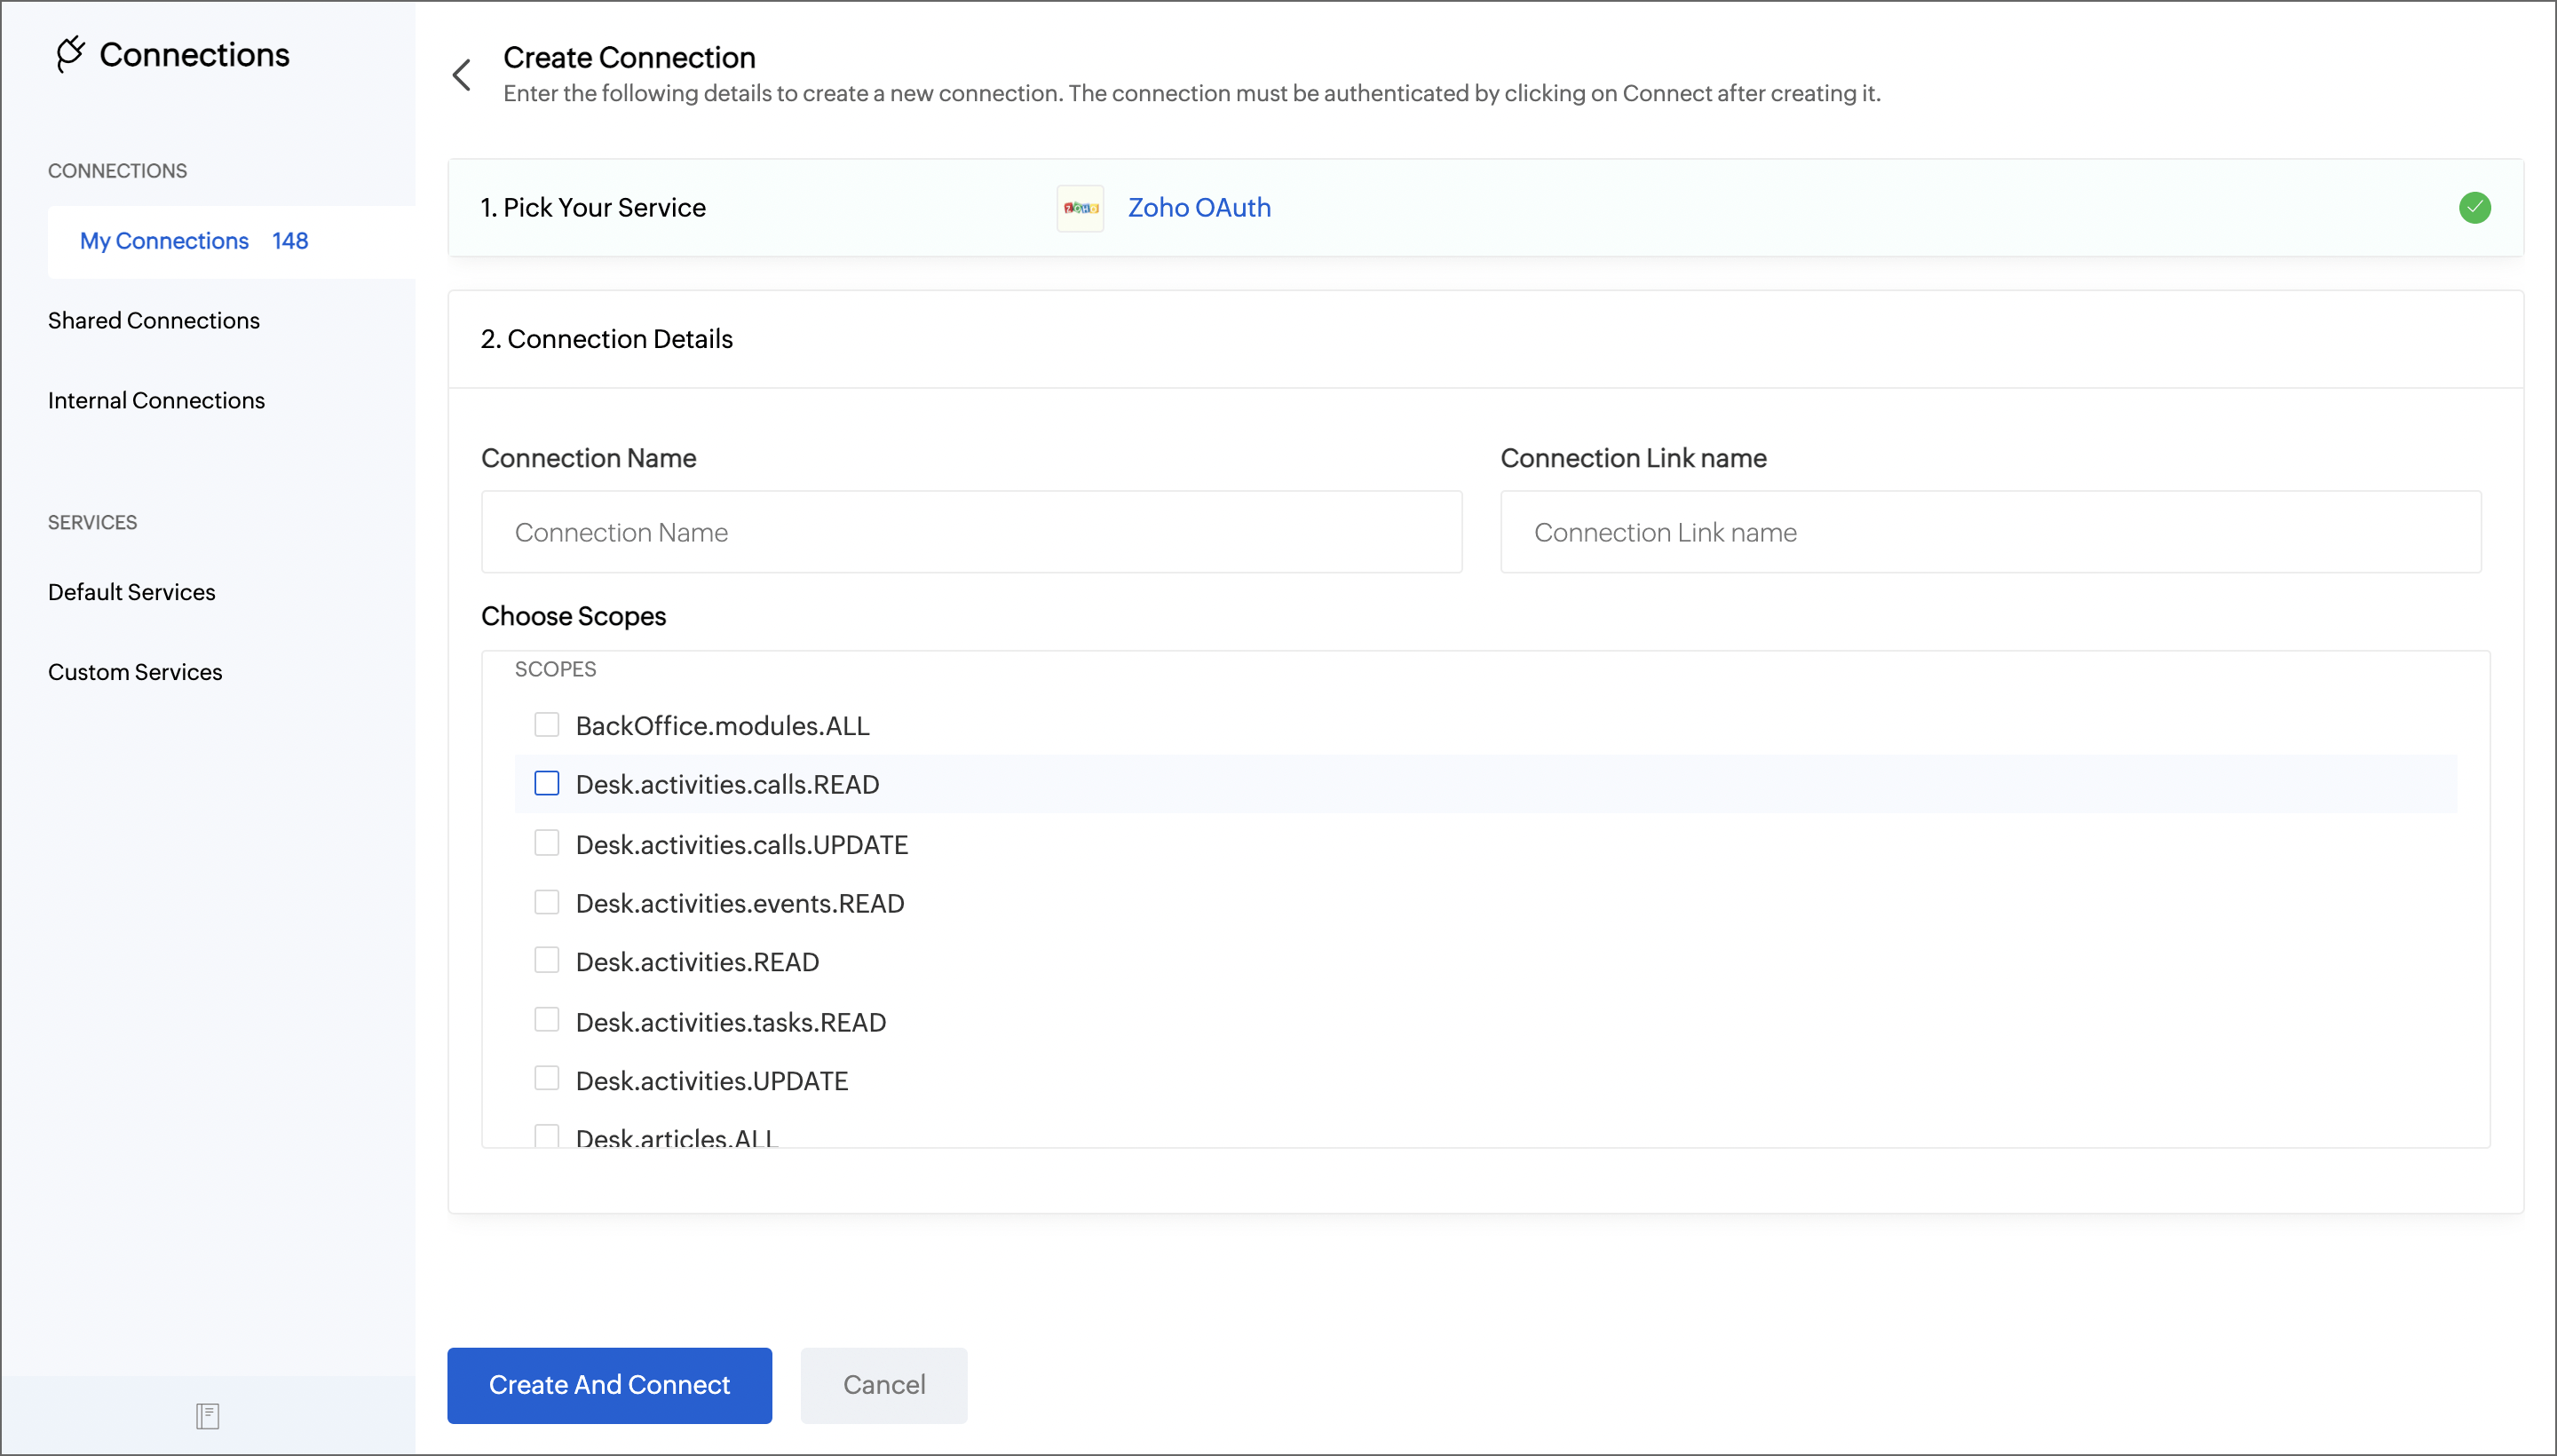
- Create your connection by giving a Connection Name, Connection Link Name, and selecting the required scopes.
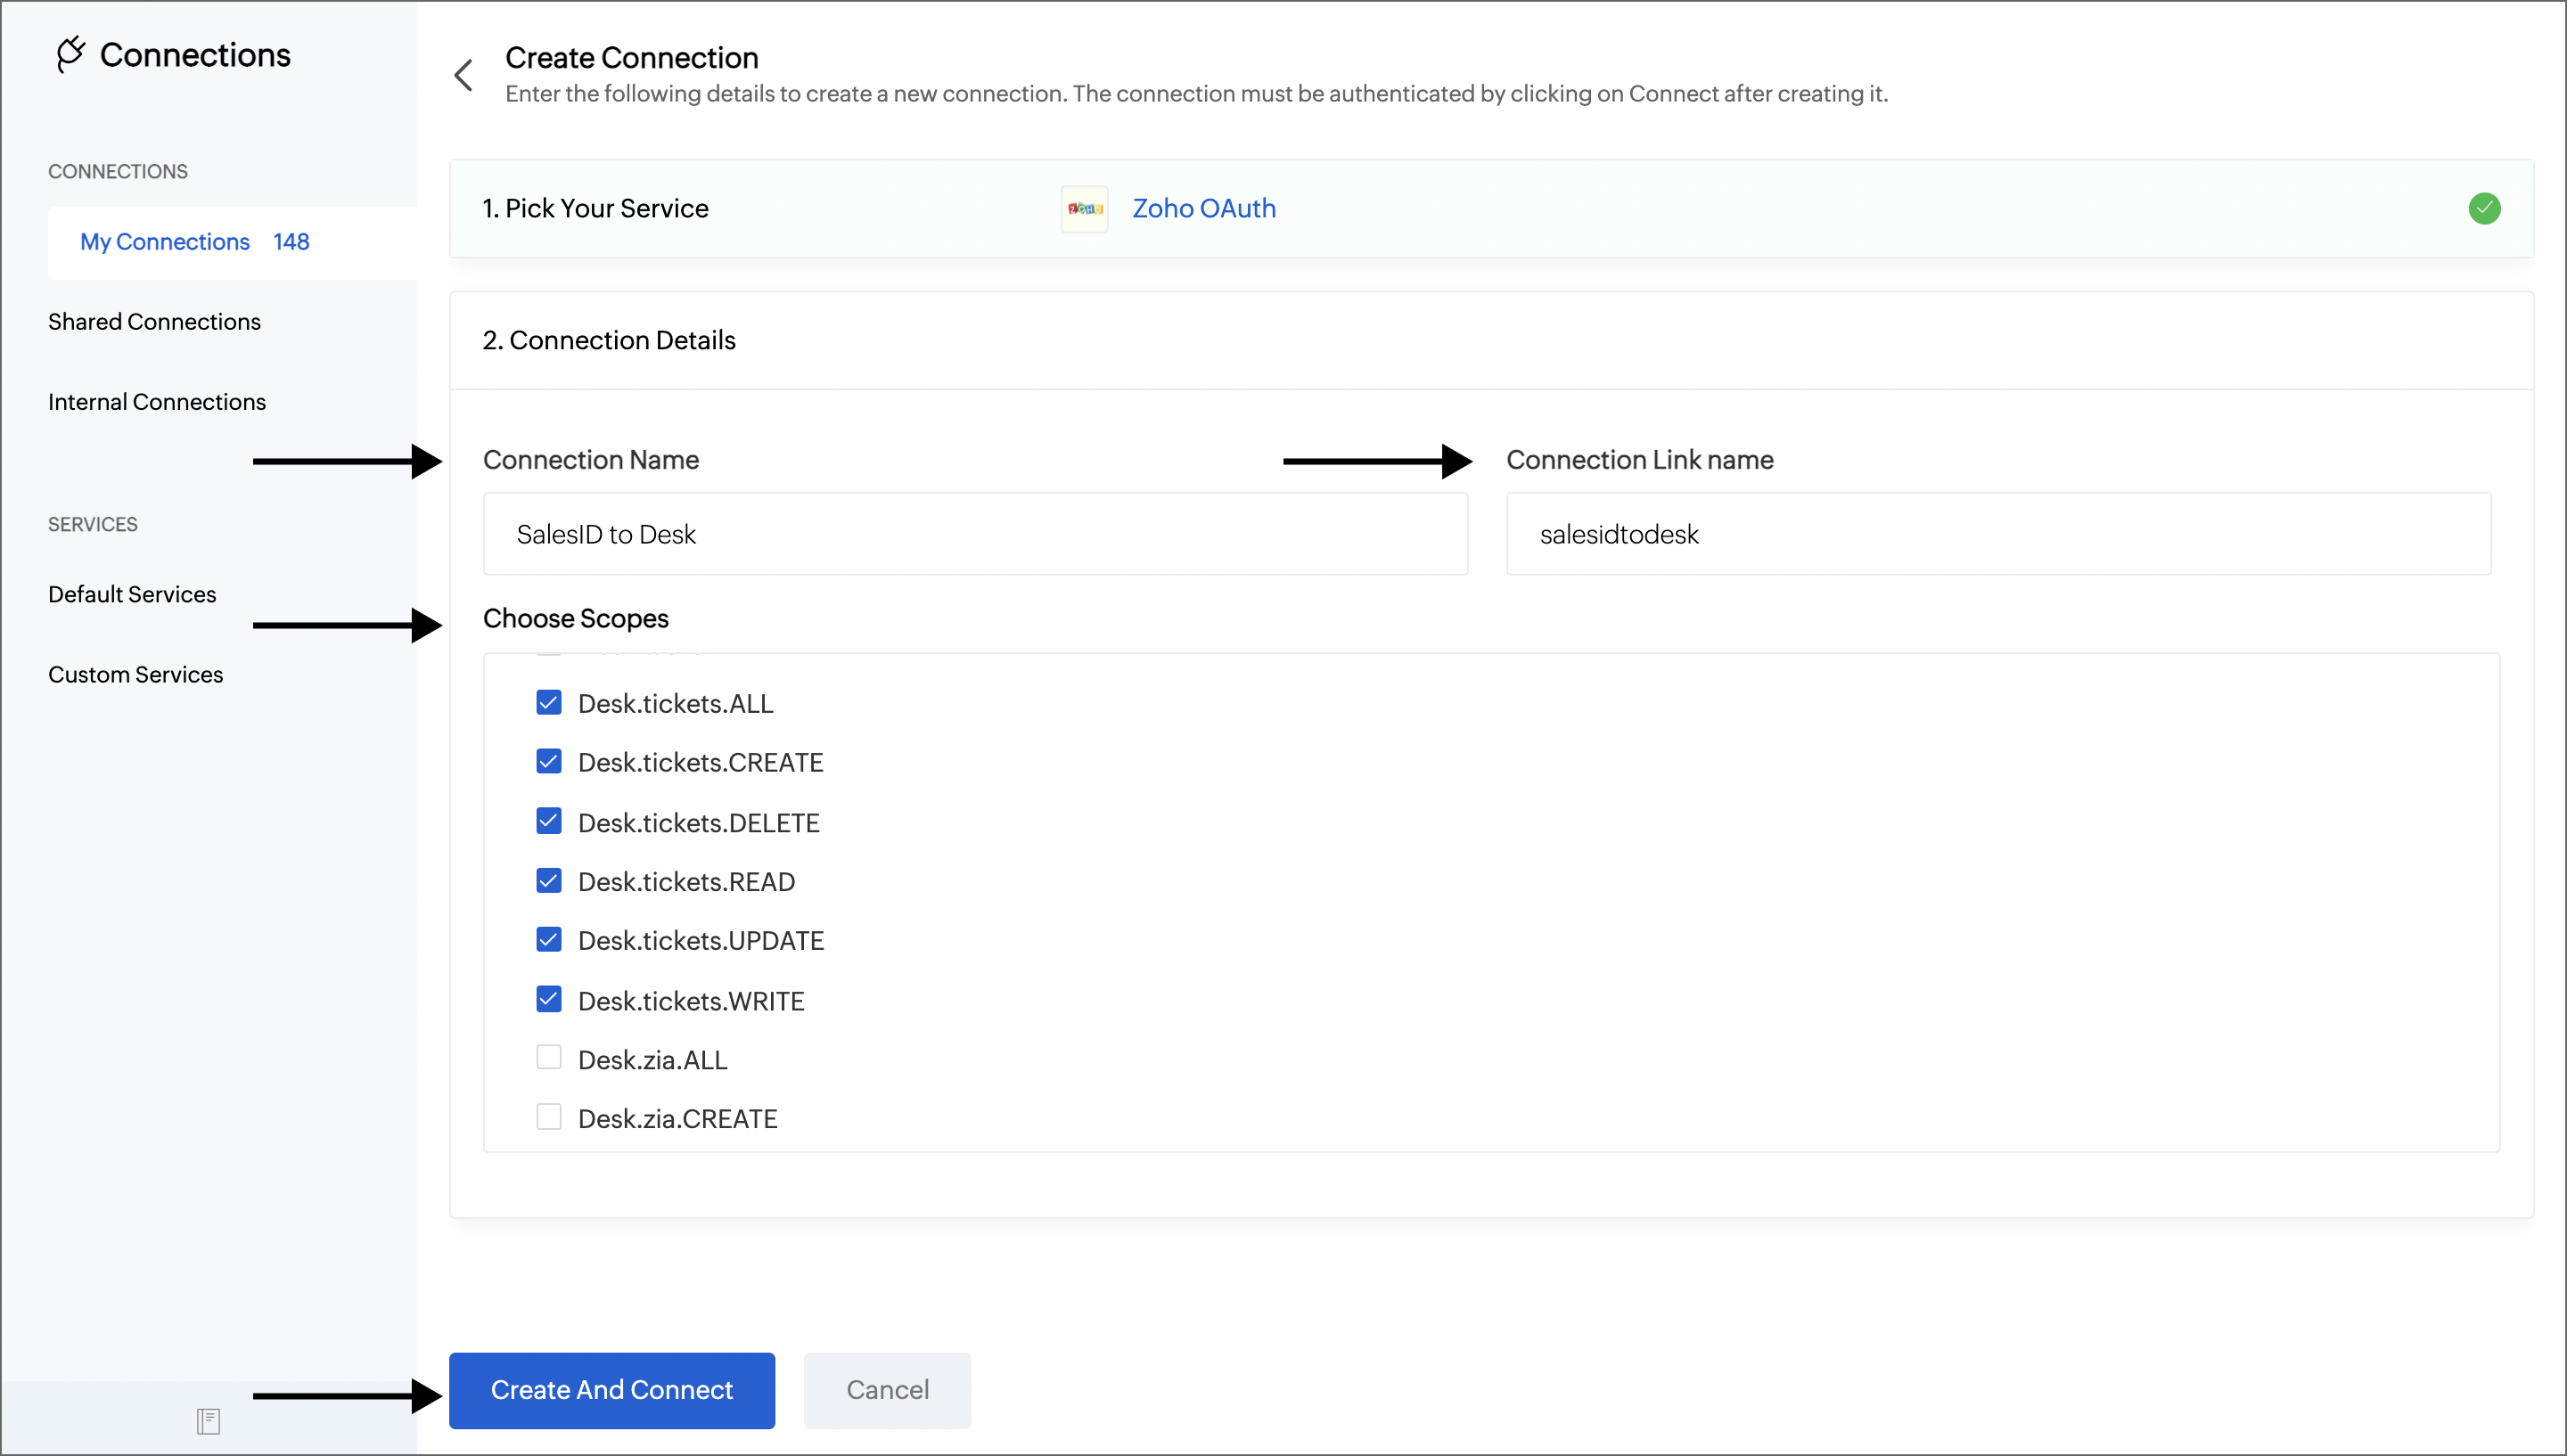
Note: The Connection Link Name will be used in scripts to invoke URL tasks.
- Select Create And Connect to create the connection.
Upon successful authorization, your connection will be created and listed under My connections.
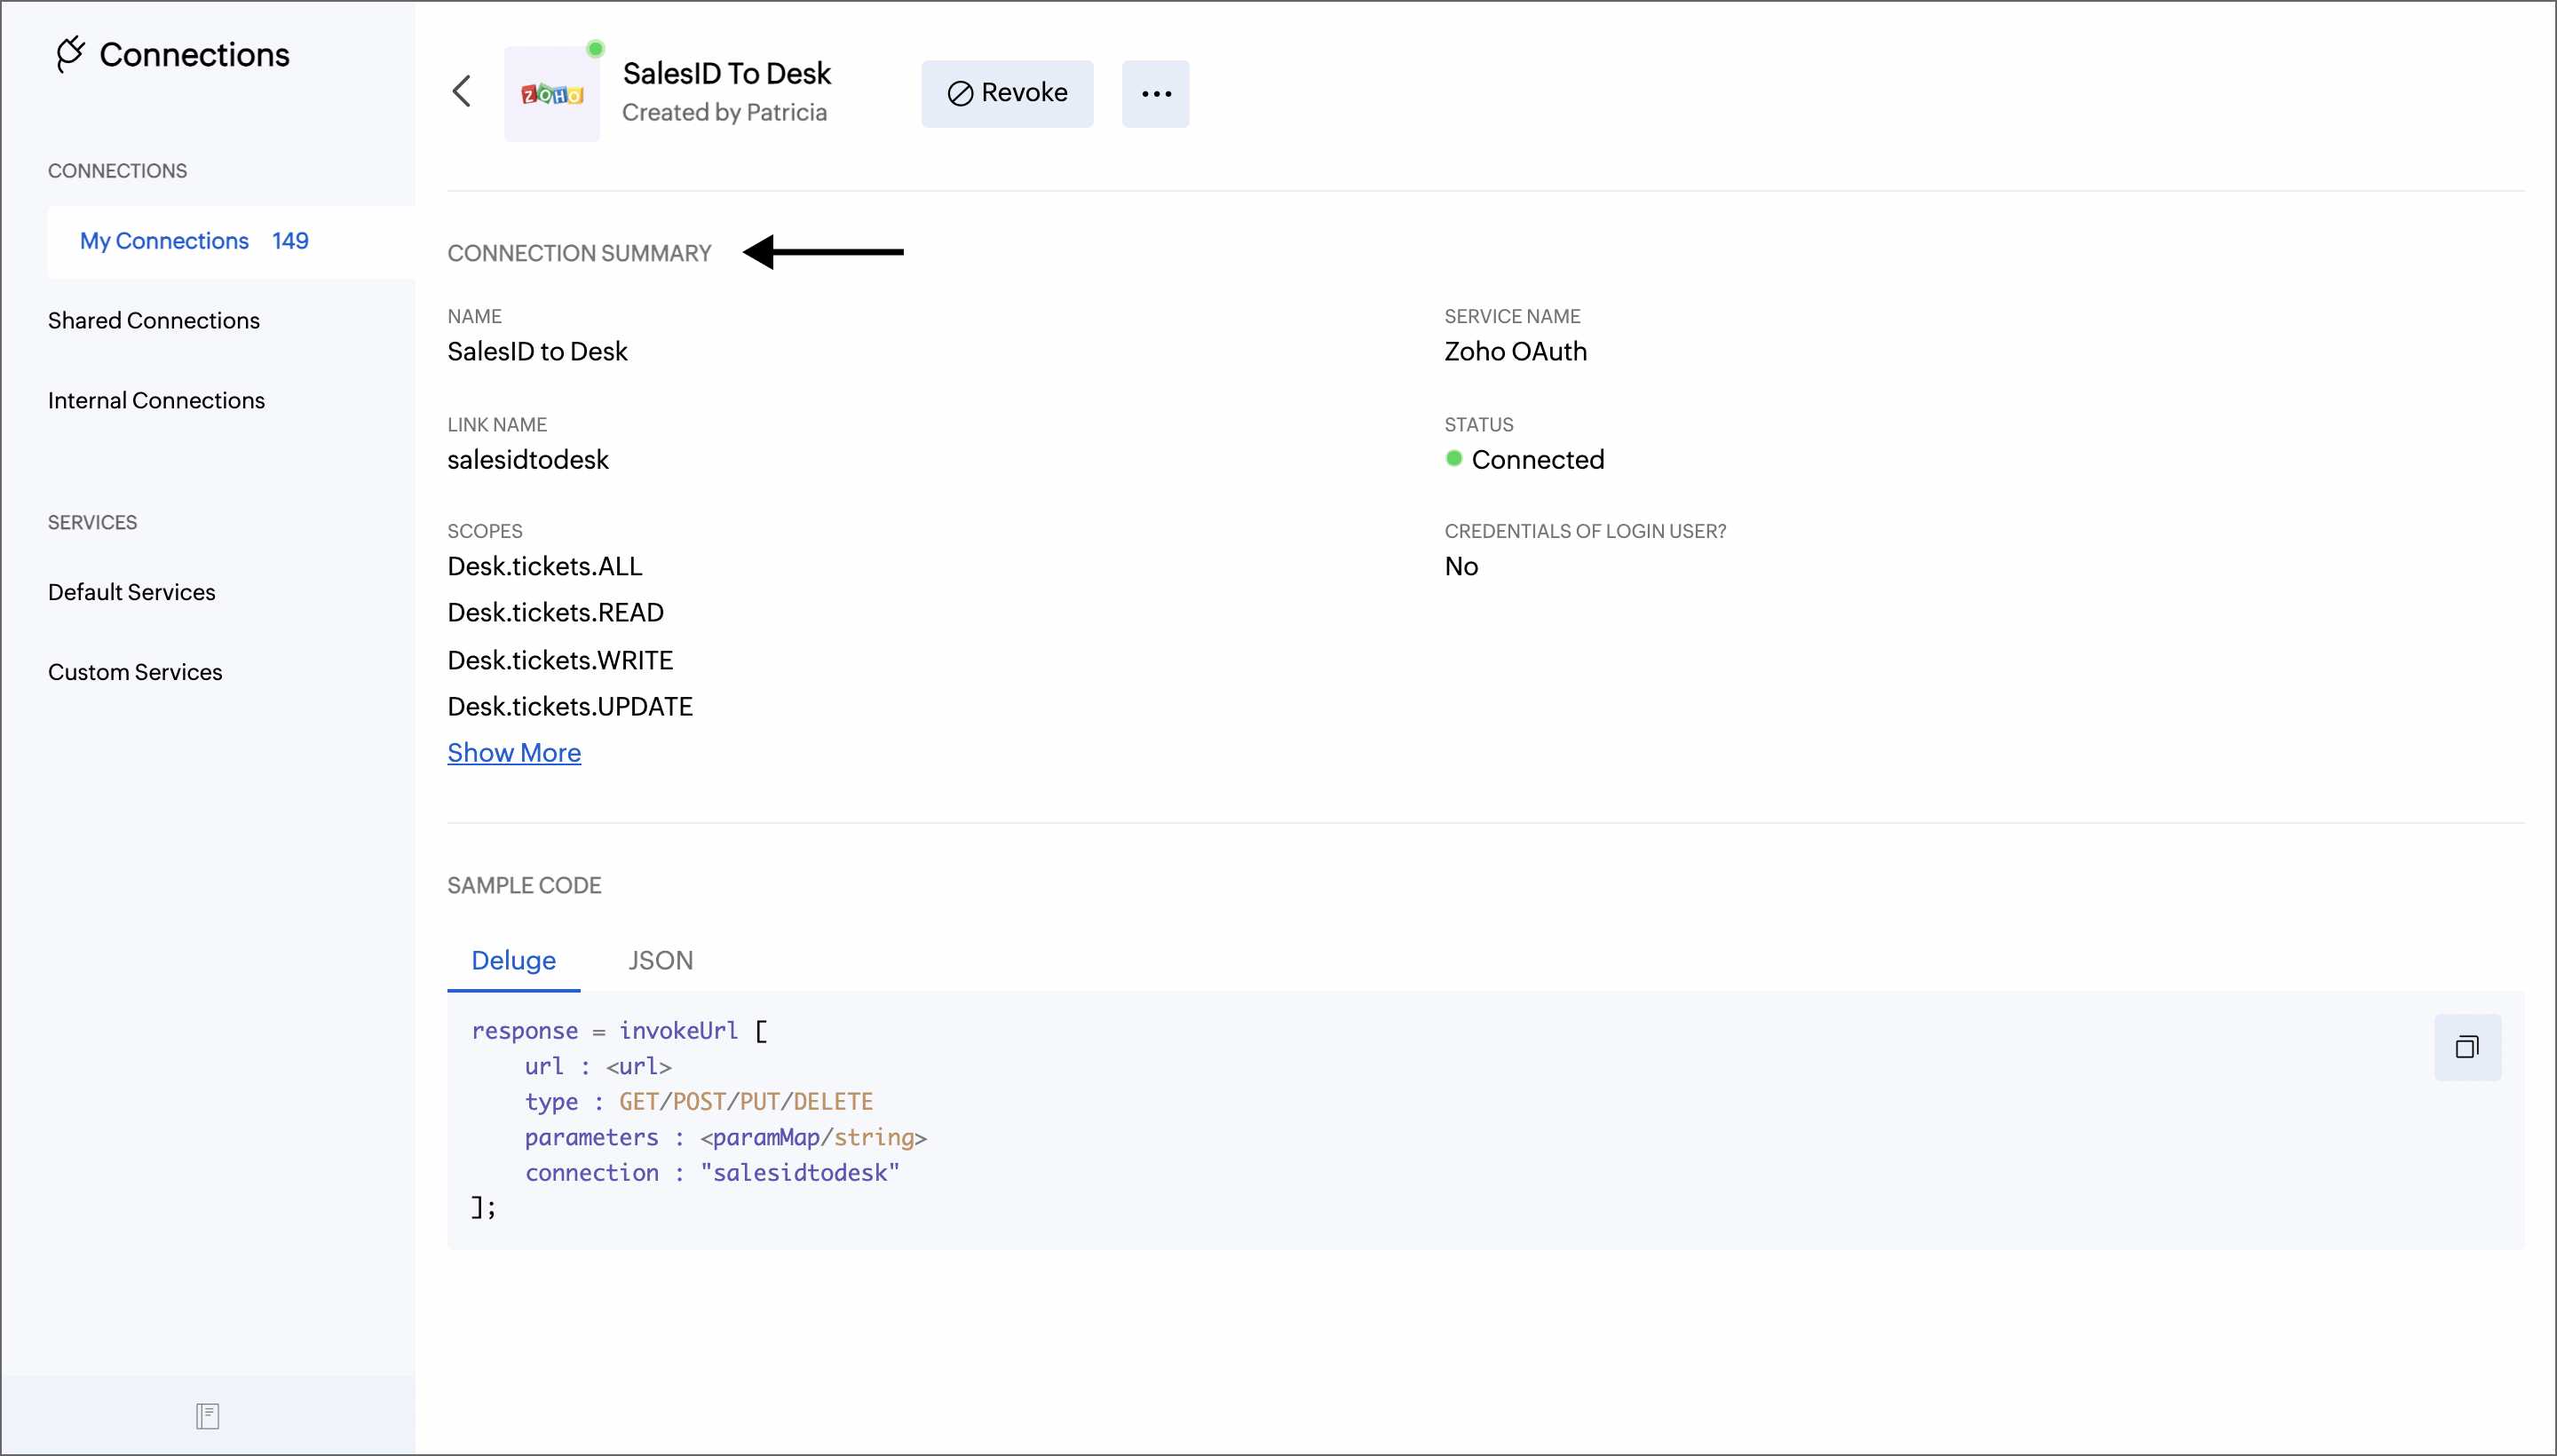
Here,
- You can find the user who created the connection under the top Service name.
- Under the Connection Summary, you can find your connection name, connection link name, the status of the connection, and the scopes you have selected.
Using a Custom Service:
If the service you are looking for is unavailable in the pre-registered services list, you can to create a custom connection. This would require you to create and configure settings in Zoho SalesIQ as well as in the third-party service.
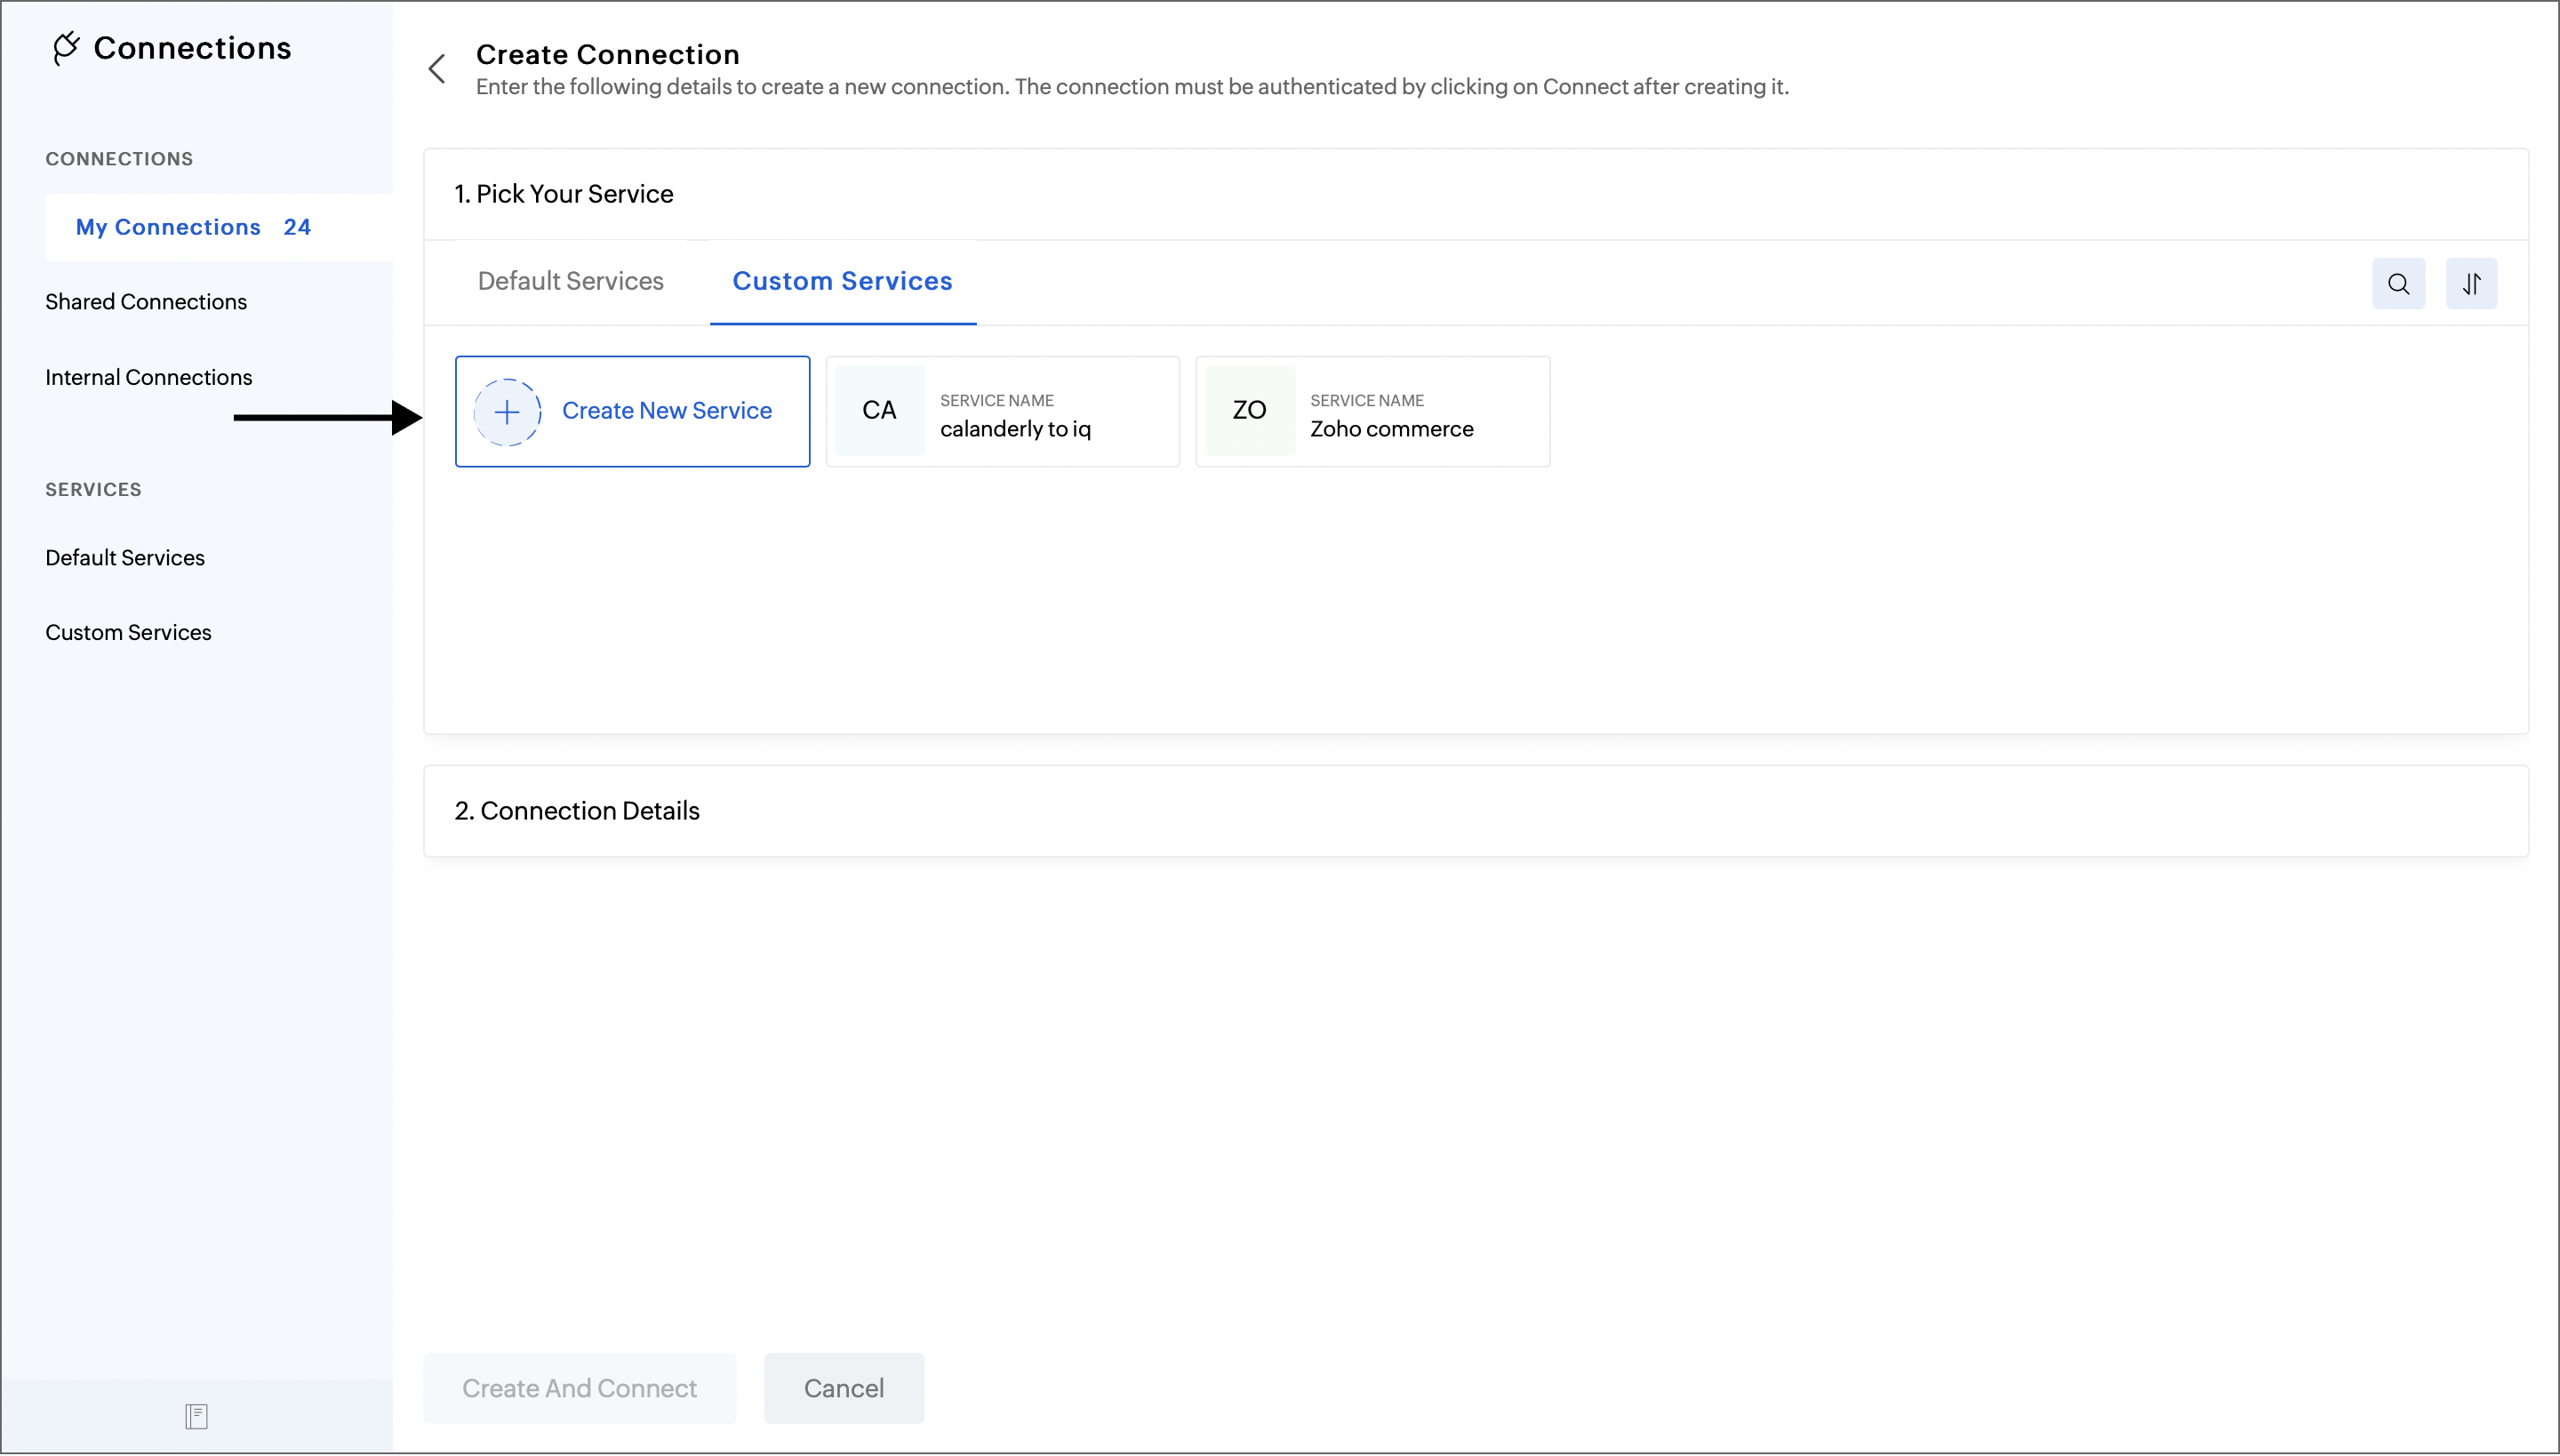
- Click the Custom Service option under Pick Your Service to create a custom connection.
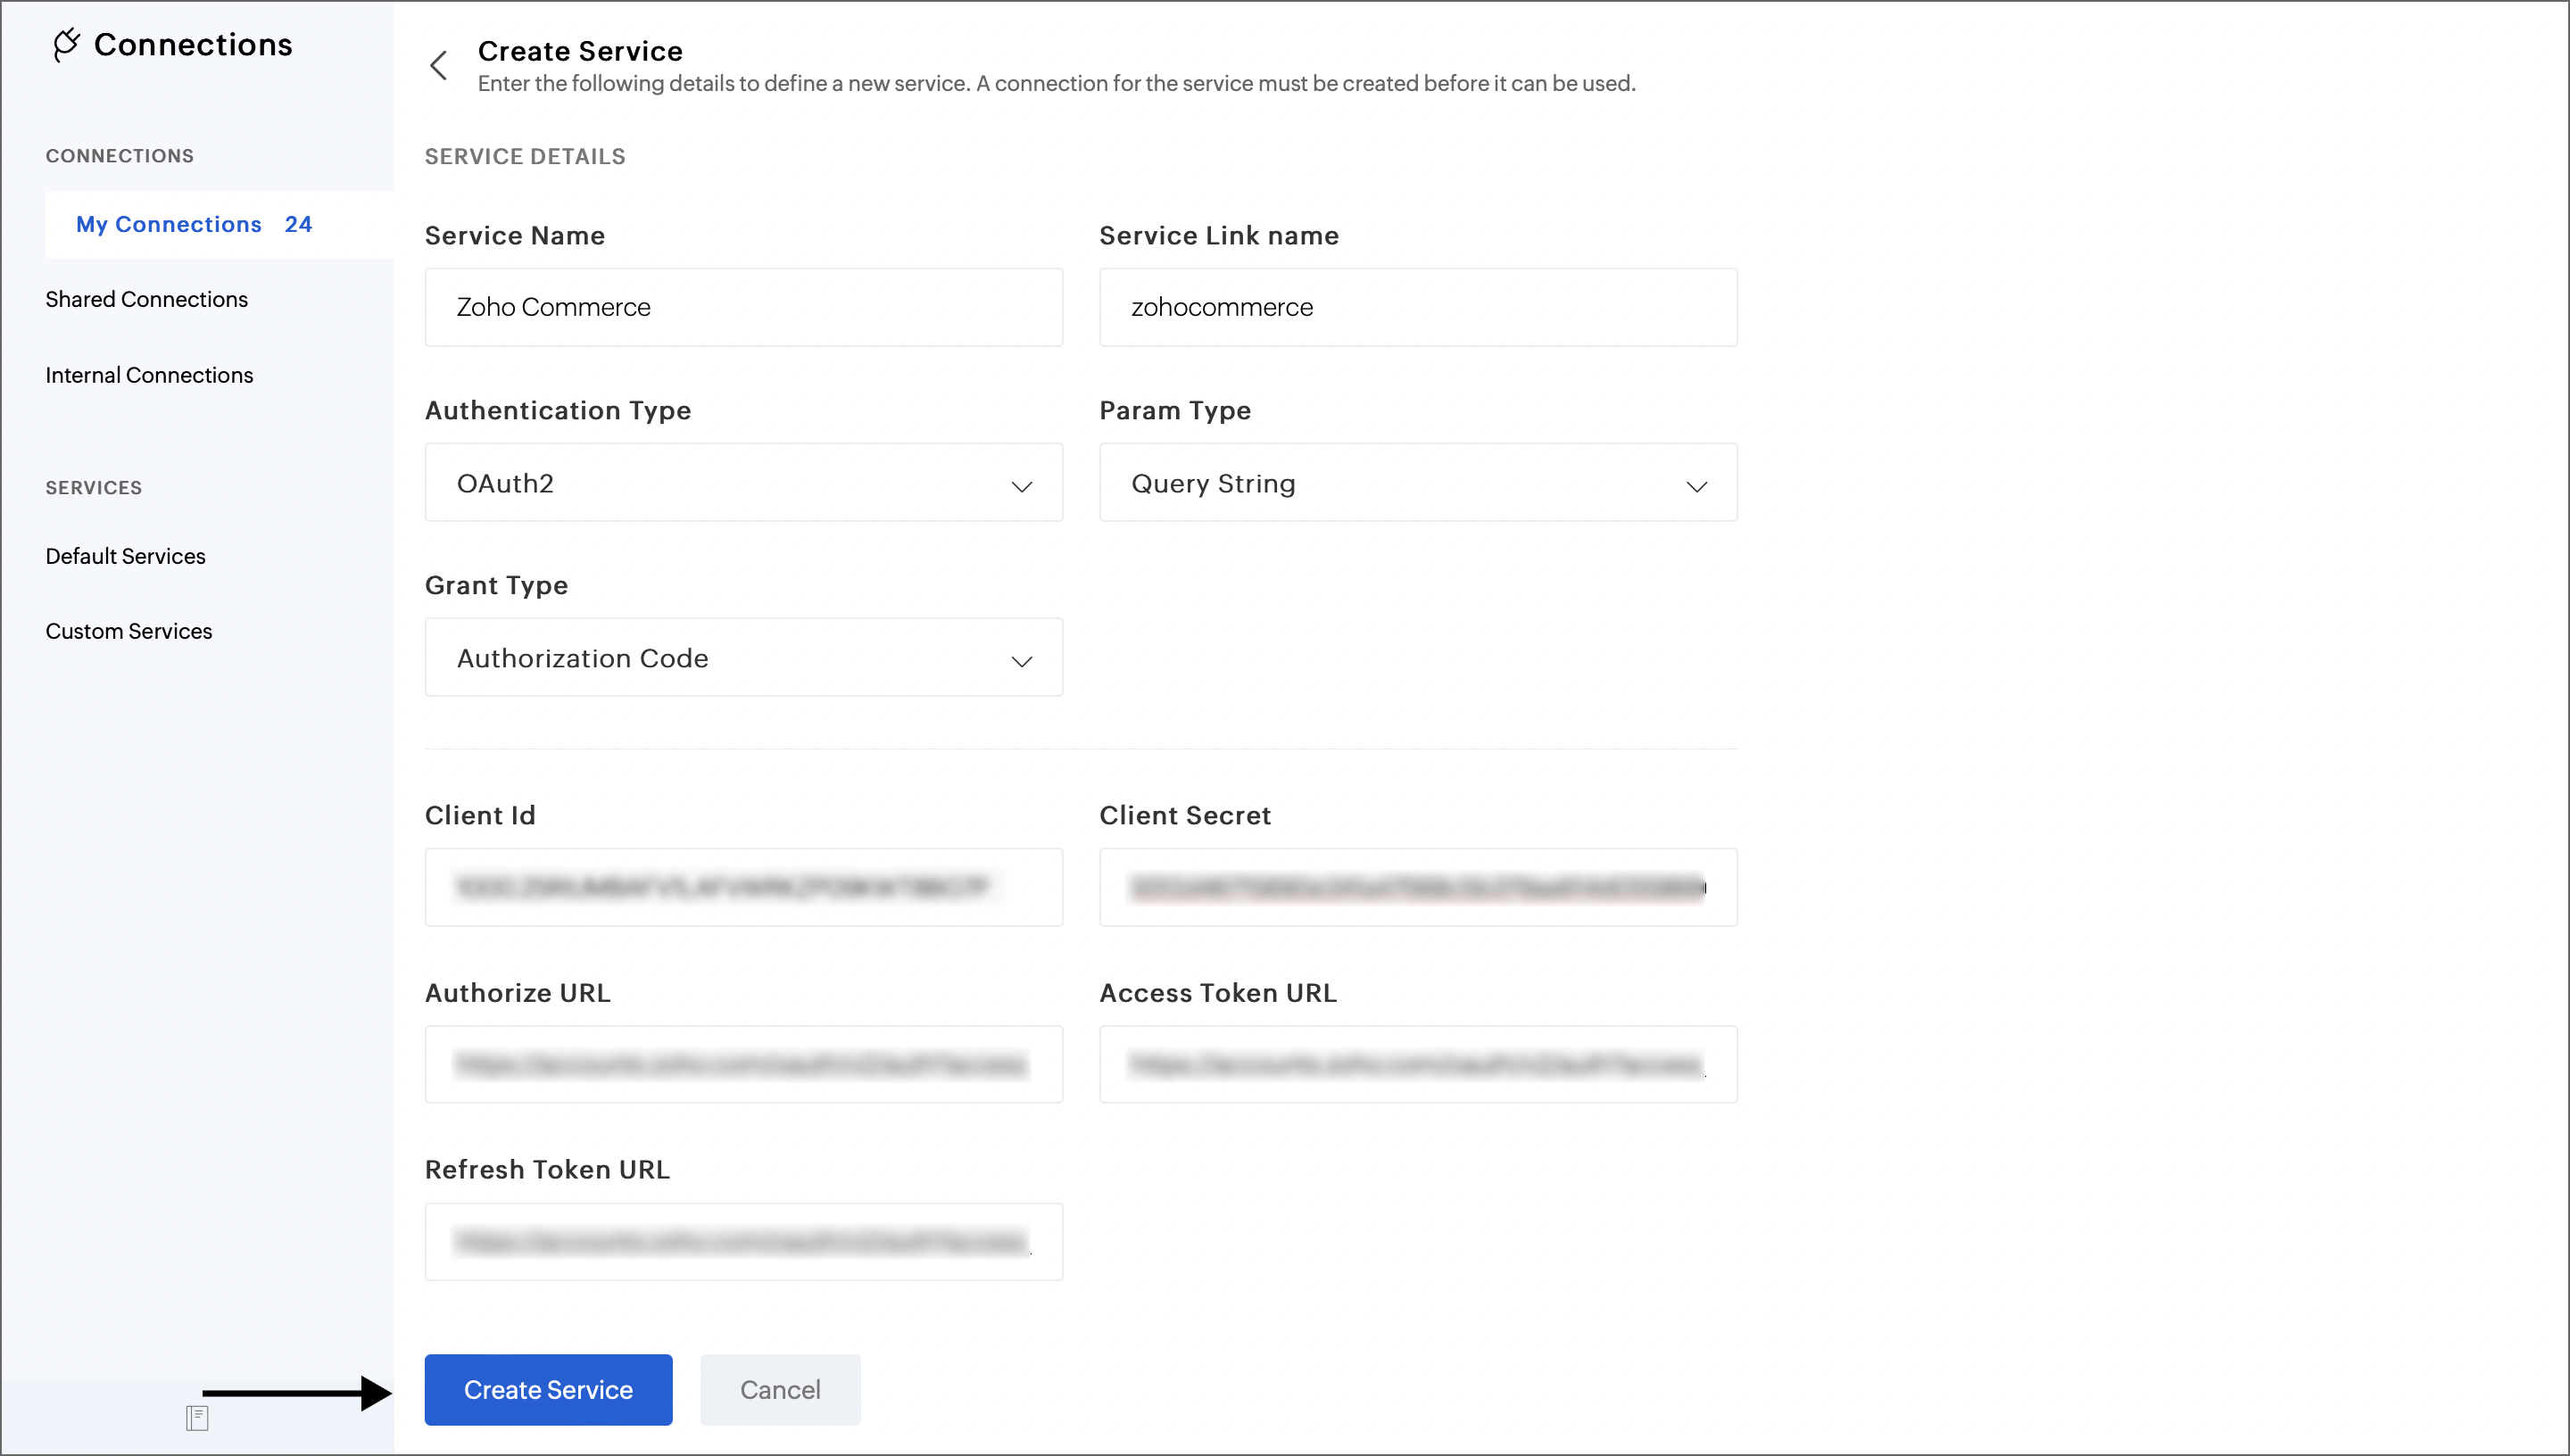
- Click the Create New Service, and provide the following.
Service Details
- Service Name - Name of the third-party service you are building an integration.
- Service Link Name - Provide a name for the Service connection.
- Authentication Type (API Key /Basic / OAuth1 /OAuth 2) - Select the authentication method followed by the respective service.
- Param Type - Every service will have its own way of accepting the necessary parameters. Choose the parameter type from the list that follows: Query String, Form Data, Headers.
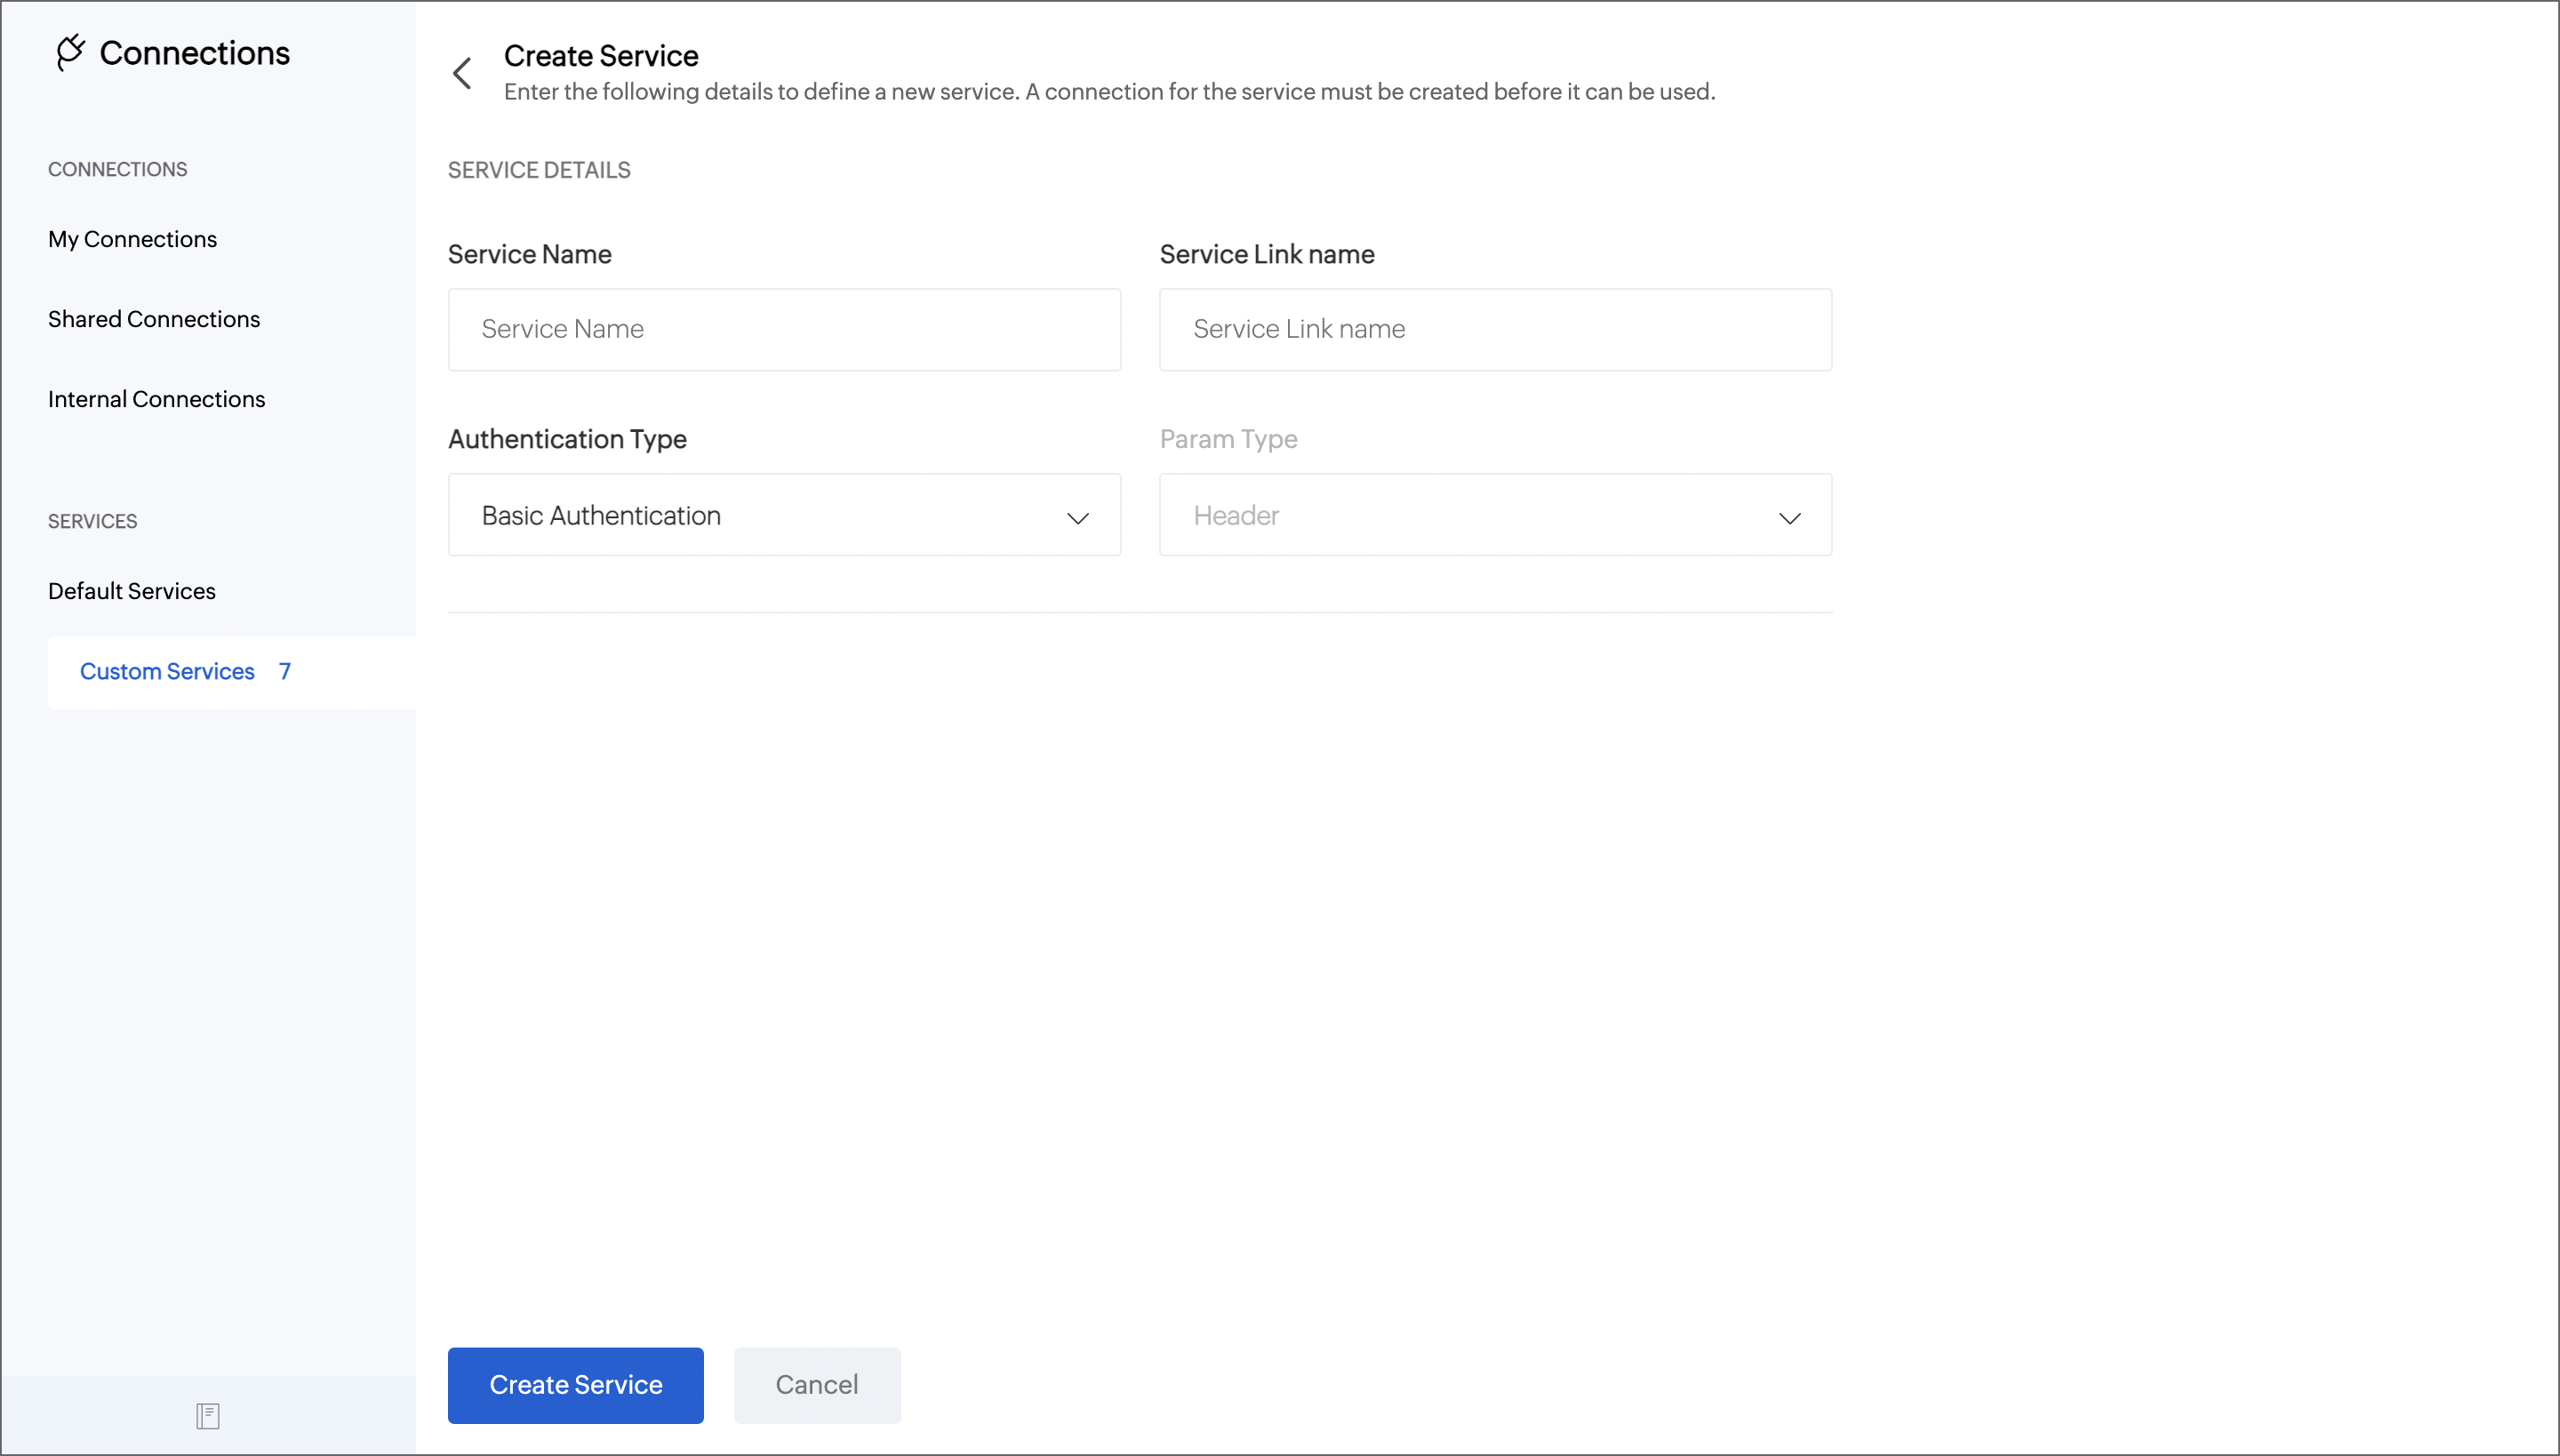
- Click on Create Service.
- Upon successful authorization, your service will be created and listed under the Custom Service.
Here's a sample connection for the Zoho Commerce service by Custom Service.
- Click Create Connection on the top right corner.
- Then, click the Custom Service option under Pick Your Service, and Create New Service.
- Provide the necessary information for the service connection and click Create Service. Learn more about Authentication types here.
- Upon successful authorization, your service will be created and listed under the Custom Service.
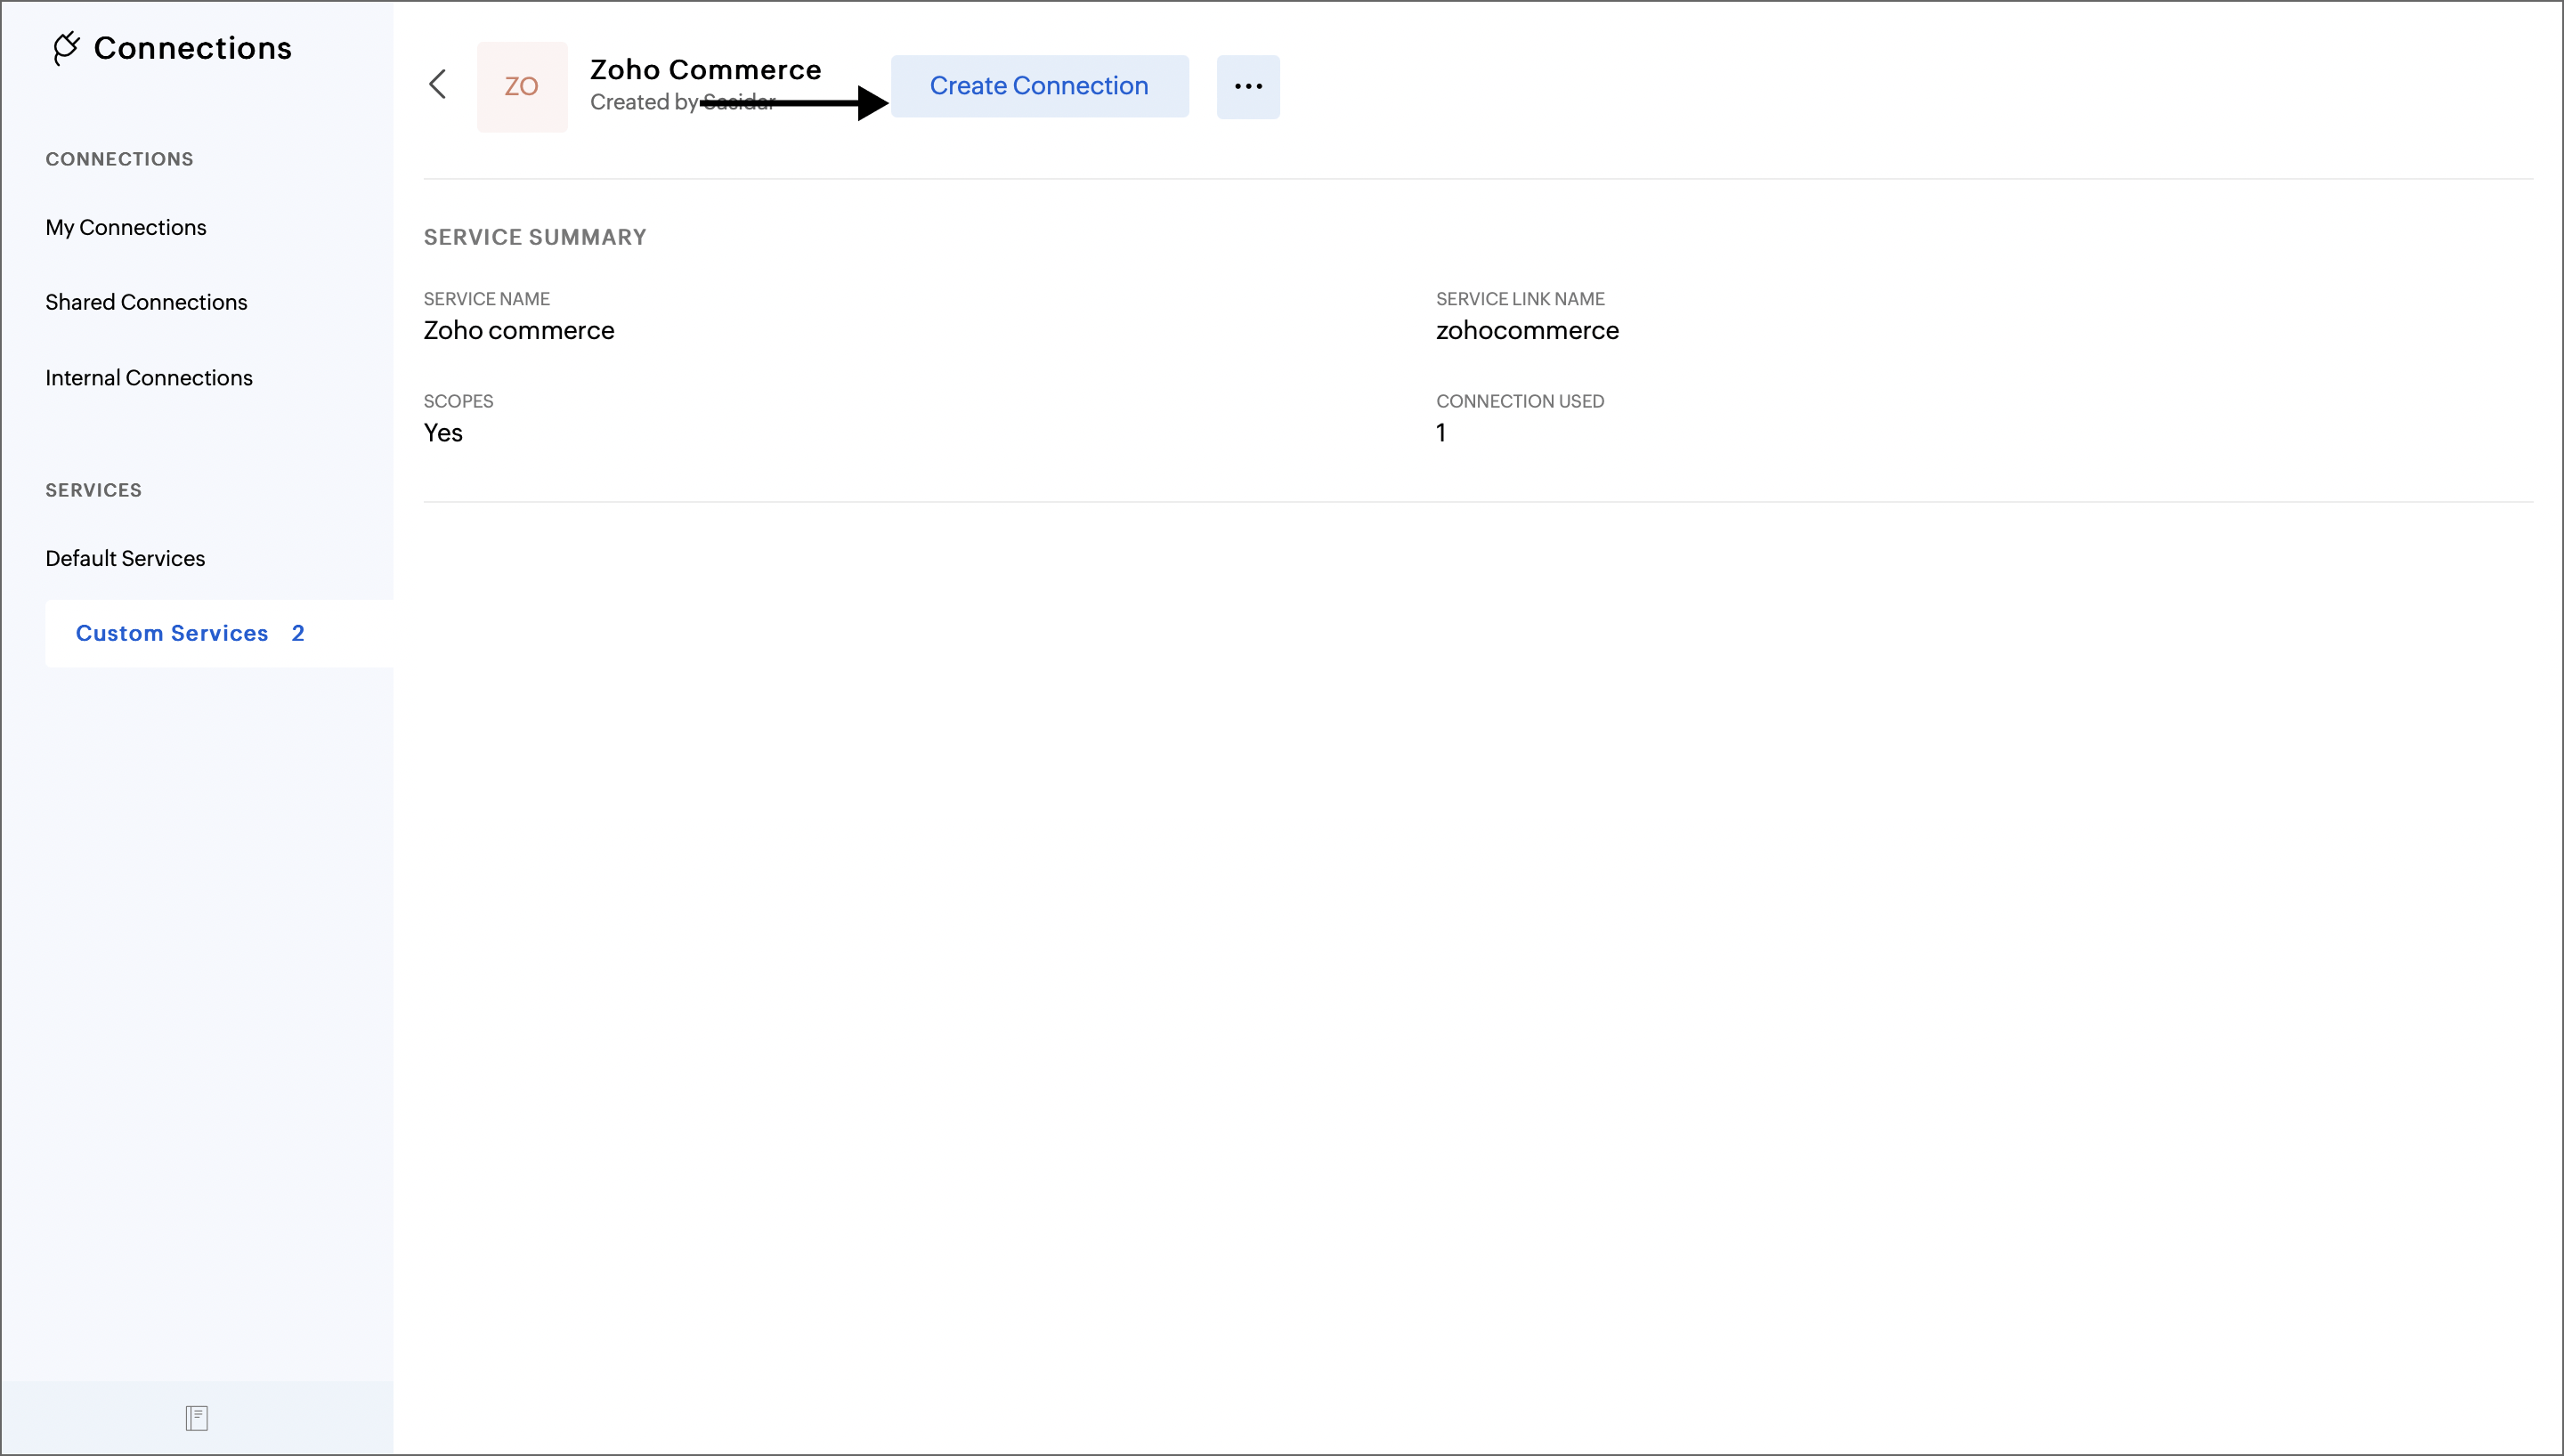
The service is created now, similar to the Default services. Hence you can now create various connections to the service. In this case, the Zoho Commerce service connection is made. To create a new connection to service,
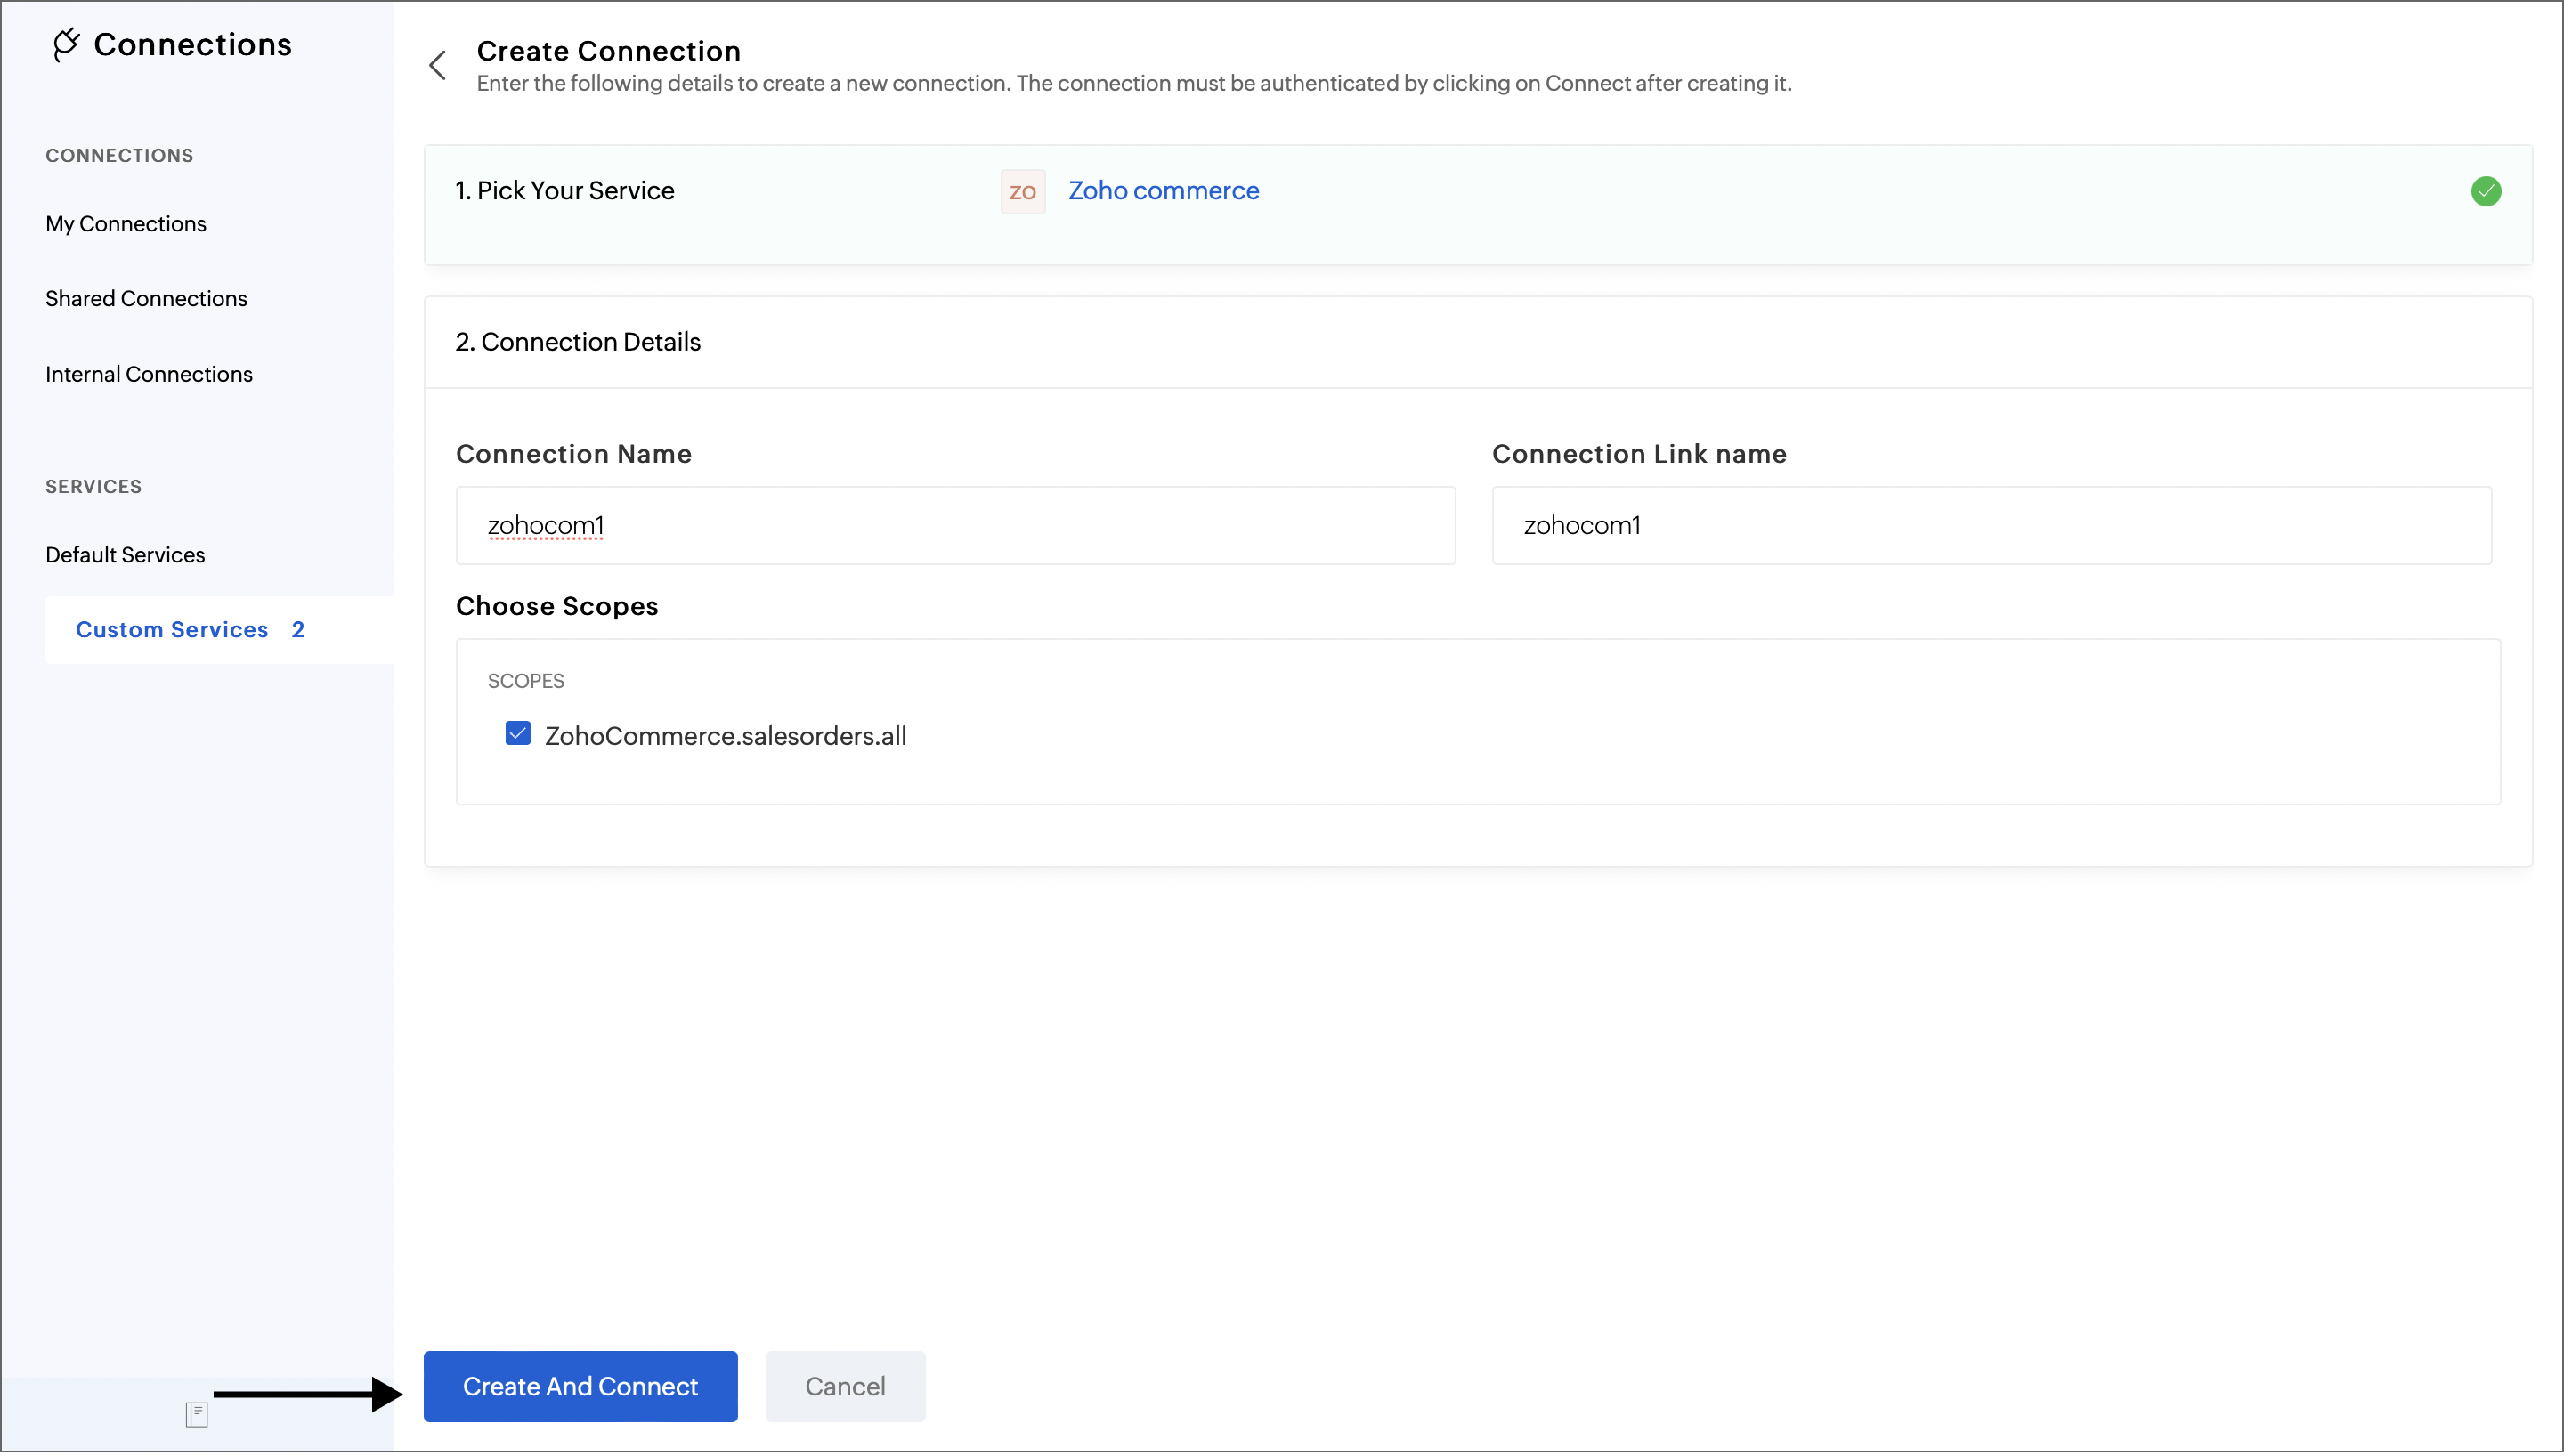
- Click on Create Connection, and provide the Connection Details
Connection Details
- Connection Name - The name of your connection.
- Connection Link Name - The link name for the connection which has to be used in Scripts.
- Scope - Define what information can be accessed by the connection (Only specified scope while creating the service will be listed here).
- Then, click Create And Connect.
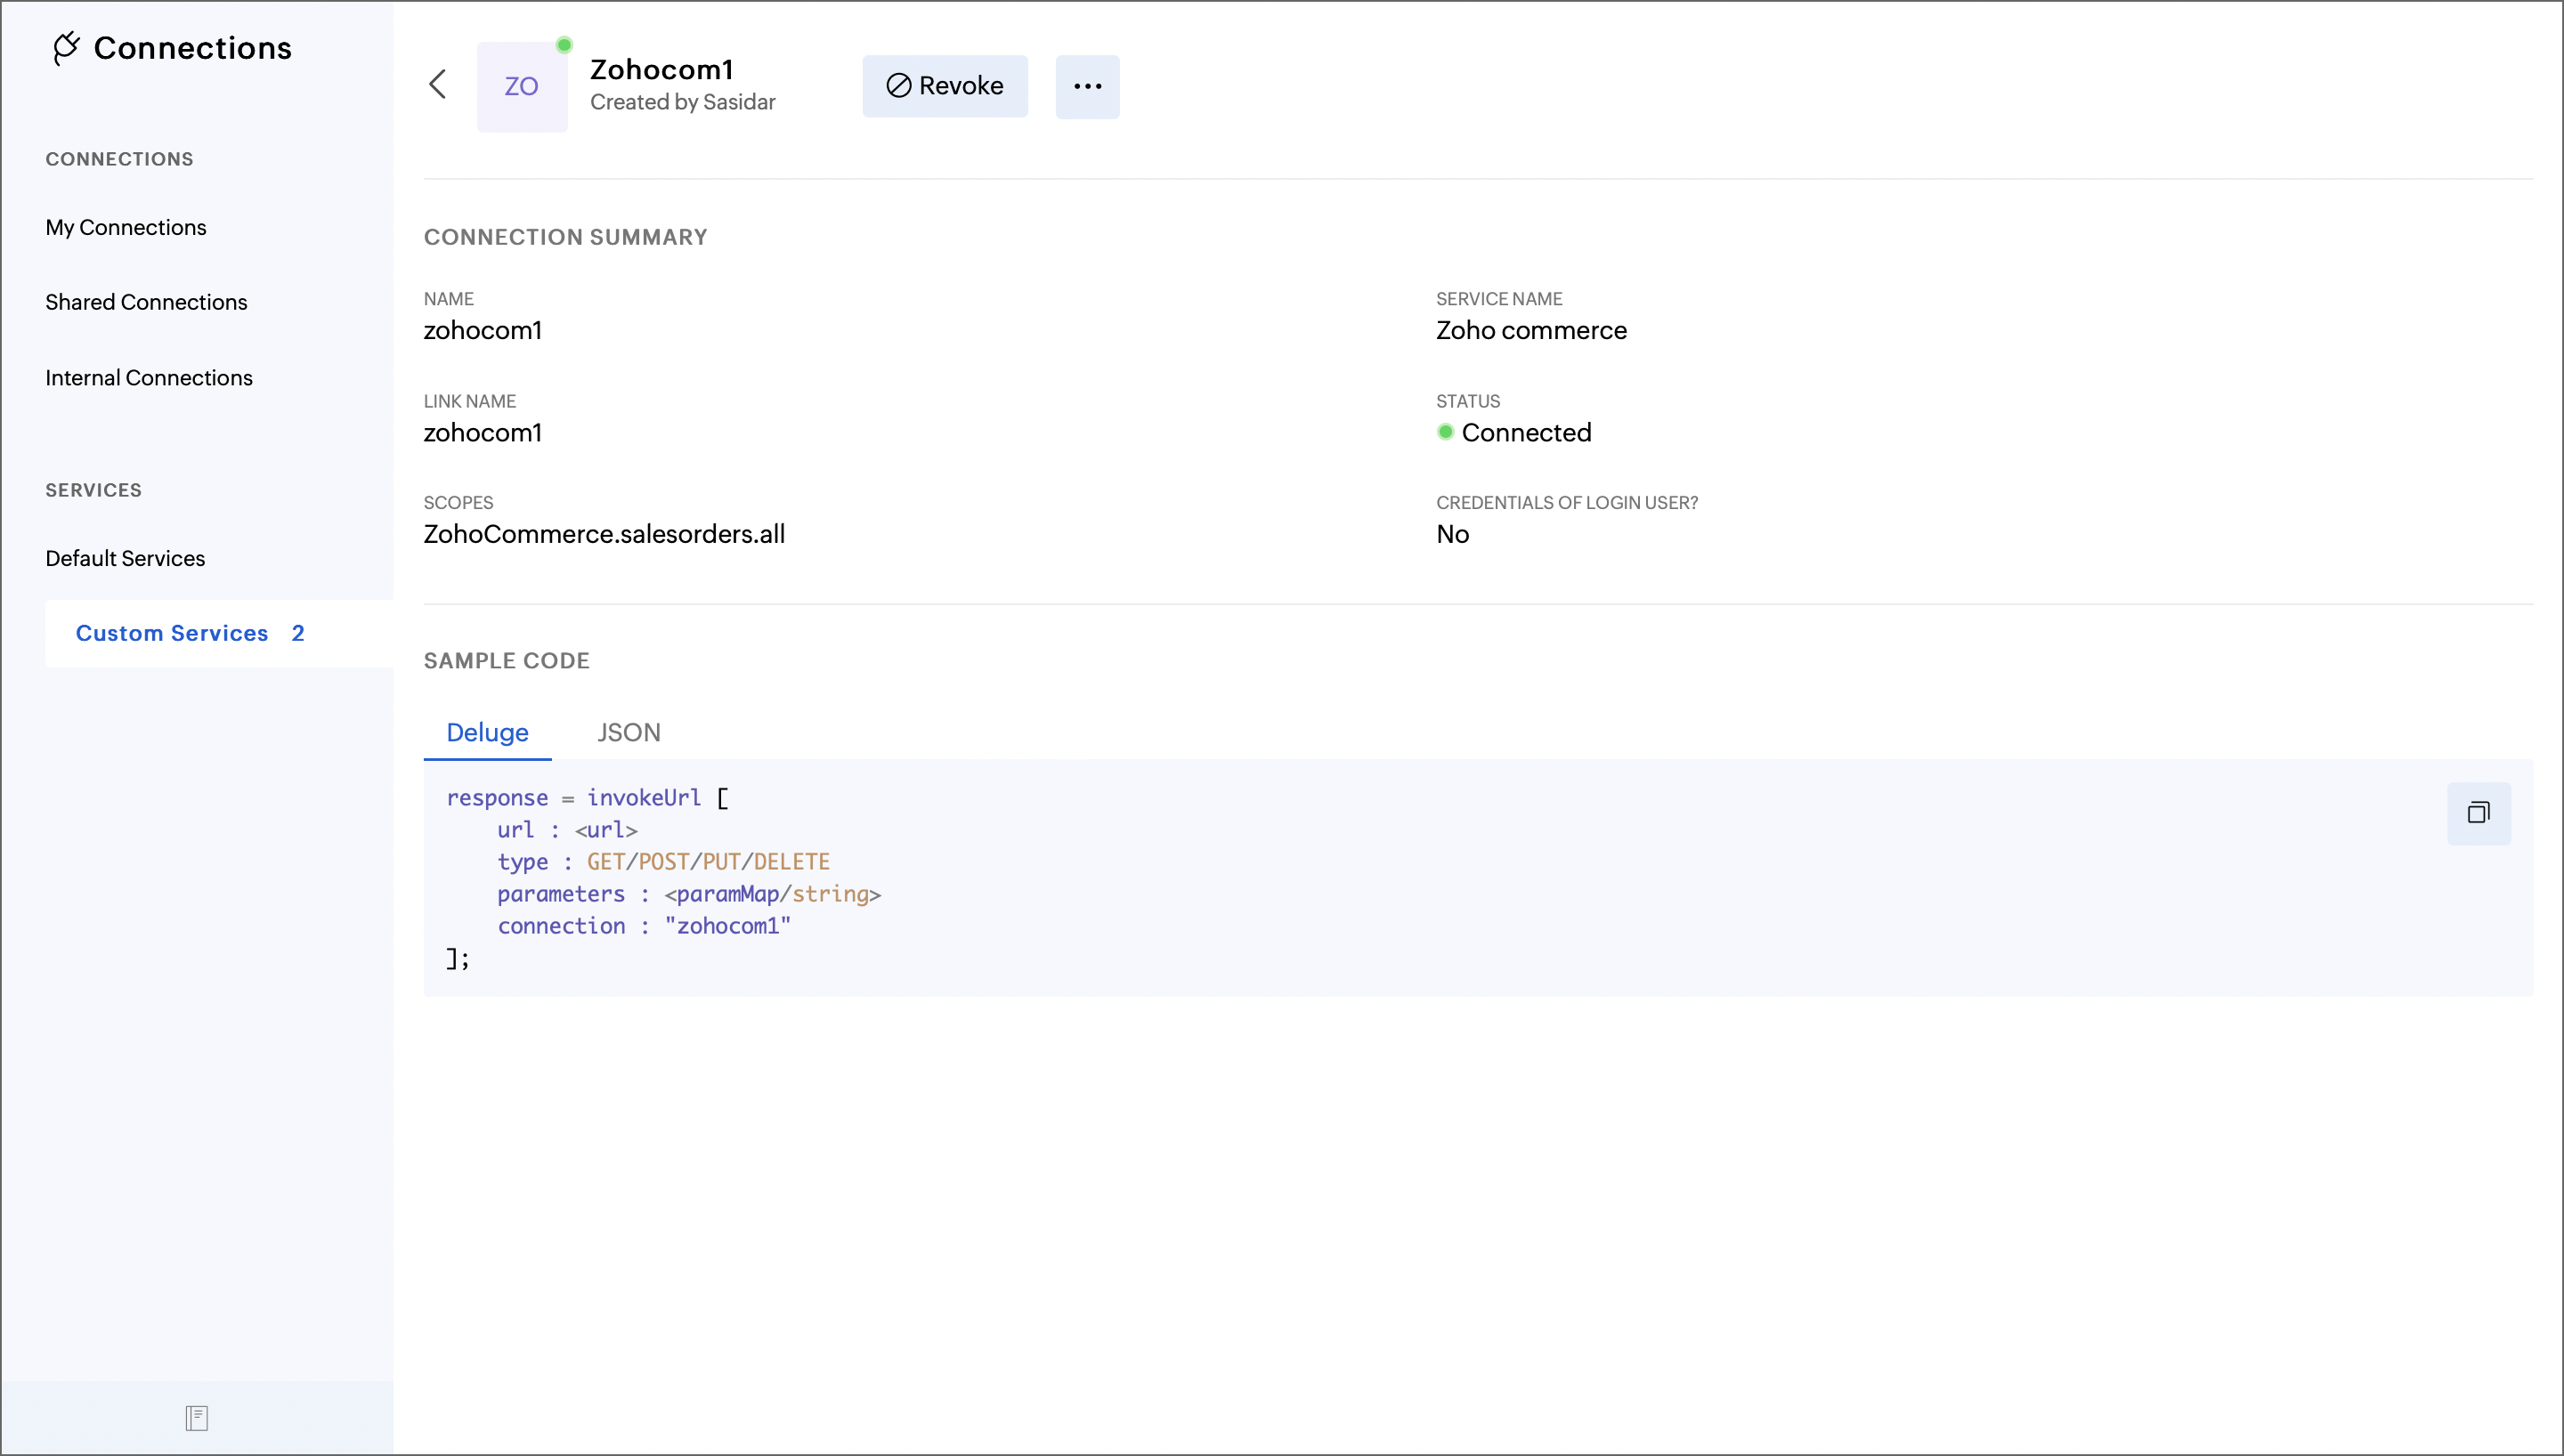
- Under the Connection Summary, you can find your connection name, connection link name, the status of the connection, and the scopes you have selected.
Callback URL
Configure the callback URL given below in the third-party service to connect with Zoho SalesIQ.
Callback URL: https://deluge.zoho.com/delugeauth/callback
Invoke URL :
The invoke URL task is used to access the third-party services from Zoho SalesIQ via Connections. To implement a connection that is created, you can use the Invoke URL deluge code that is displayed upon creating the connection. The task and its parameters are explained on the Invoke URL page.