Managing Emails
Manage filters in Zoho SalesInbox
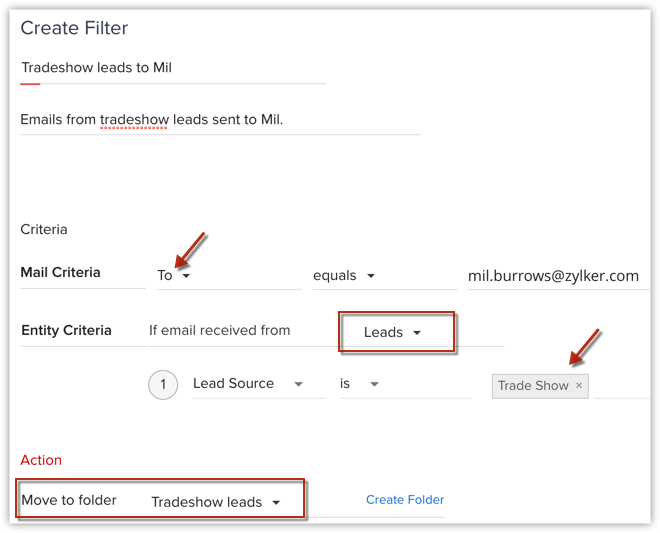
- Mail criteria - To equals <your email ID>
- Entity Criteria - If email received from Leads, where the Lead Source is Tradeshow.
- Click Settings on the left panel.
- In the Email Settings screen, click Filters.
- You'll see a list of default filters. Click the Add icon next to Filters.
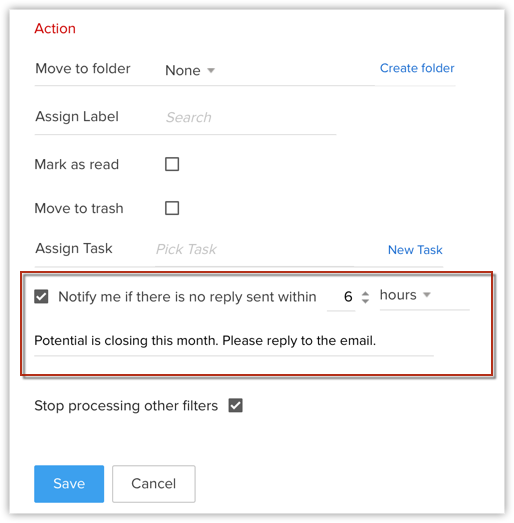
- Enter a name and description for the new filter, choose the criteria, and assign any further actions if needed.
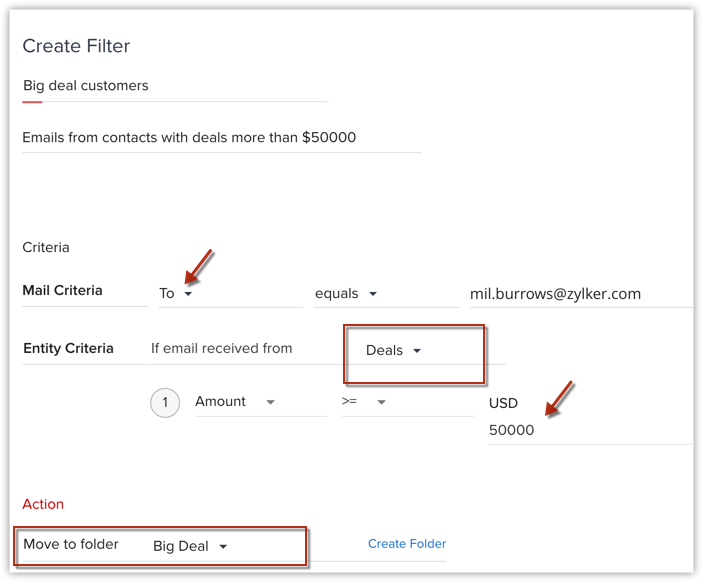 For example, a filter for "Top Customers", which will display emails from customers with deals worth greater than or equal to $30000.
 - Click Save.
Alternatively, you can also create a filter while creating a new folder.
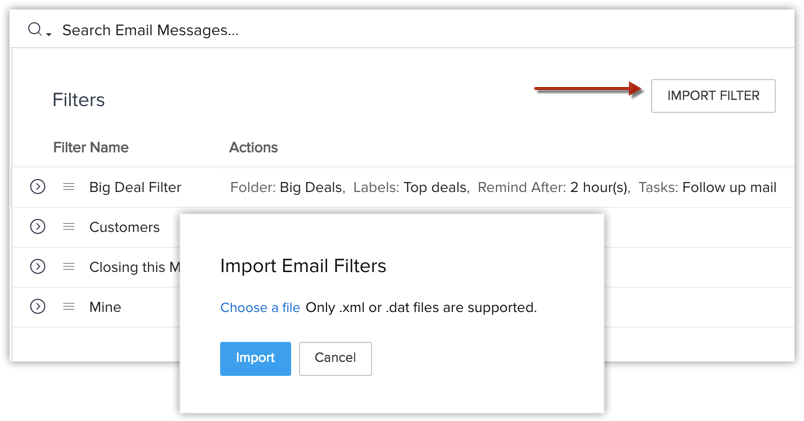
- First export your Filters file from your email service and save it to your Desktop.
- In the SalesInbox tab, click Settings > Filters.
- In the Filters page, click Import Filter.
- Choose the import file. Only .xml or .dat files are supported.
- Click Import.
- Click Settings > Filters.
- Click on this icon on the desired filter.
- In the Run-through Filter screen, point your mouse to the folder through which you want run the filter and click Run through filter.
- After a few moments, you will see that the existing emails that meet the filter's criteria have also been categorised into the specified folder.
- Click Settings on the left panel.
- In the Email Settings screen, click Filters.
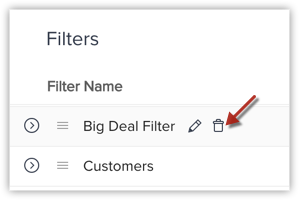
- Hover over the filter that you want to edit, and click the Edit icon that appears.
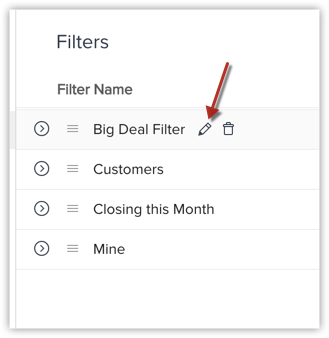
- Alternatively, you can click the filter to view its details, and then click the blue Edit icon on that screen.
- Make the necessary changes, and click Save.
Alternatively, you can also edit filters from the Folders section of the Mail Settings screen.
- Click Settings on the left panel.
- In the Email Settings screen, click Filters.
- Hover over the filter that you want to delete, and click the Delete icon that appears. (Alternatively, you can click the filter to view its details, and then click the blue Delete icon on that screen.)
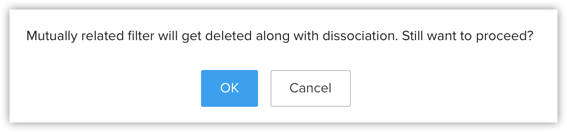
- Click OK on the confirmation pop-up that appears.
- Click Settings on the left panel.
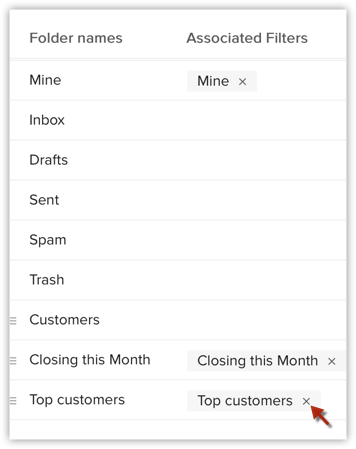
- In the Folders section of the Email Settings screen, you can view your folders and the filters set for each folder in a list.
- Hover over the filter you want to delete, and click the Delete icon.
- In the confirmation pop-up that appears, click OK.

Note:
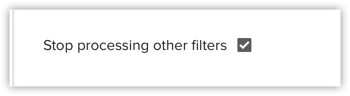
- Select the Stop processing other filters checkbox if you wish for only the filter in question to be active.
Manage Folders in Zoho SalesInbox
- Mine
- Inbox
- Drafts
- Scheduled
- Sent
- Spam
- Trash
- Unread
- Deals Closing This Month
- Customers
- The folder Mine displays all emails that are directly addressed to you. That is, emails in which the To/CC fields contain your email address.
- The folder Inbox, on the other hand, displays emails addressed to your email aliases and email groups that you are a part of.
- If you wish to see all these emails in a single place, you can choose the All Messages view.
- The folder Scheduled contains all the emails that you have scheduled for a specific delivery time. See also: Composing, Organise and Configure Emails
- See also: Email Views
- In the SalesInbox tab, click Settings.
- In the Email Settings page, click the Add icon next to Folders on the left panel. Alternatively click the Add icon next to Folders on the left pane.
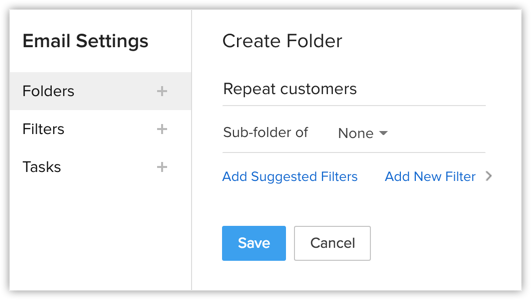
- In the Create Folder page, do the following:
- Enter the Folder Name.
- Choose a Sub-folder, if required.
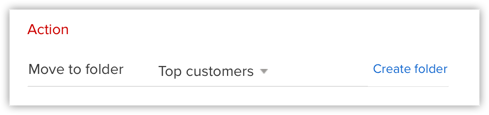
- Add Suggested Filters or Add New Filter as required.
- Click Save. You can also create a folder while creating/editing a filter.
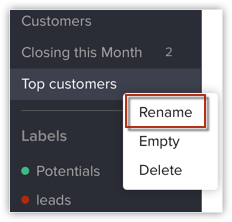
- Go to Folders on the left panel.
- Right-click on the folder, and click Rename.
- Rename it, and click Save.
- Go to Folders on the left panel.
- Right-click on the folder, and click Empty.
- Click OK on the confirmation pop-up.
- Click Settings on the left panel.
- In the Email Settings page, hover over the folder you want to delete.
- Click the Delete icon that appears on the right.
- In the confirmation pop-up, click OK.
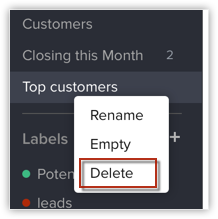
Alternatively, you can also delete a folder by choosing Delete on right-clicking the folder from the left panel.
Manage Tasks in Zoho SalesInbox
A task is a function assigned to a filter, enabling it to notify you regarding any follow-up activity to emails passing through that filter. For example, you can set a task to remind/notify you about contacting an important customer regarding a product demo two days after you receive their email.
You can create tasks individually so that they can be associated to a one or more filters or create a task upon creating a filter.
To create a task
- Click Settings on the left panel.
- In the Email Settings screen, click Tasks.
- Click the Add icon next to Tasks.
- In the New Mail Workflow Task screen, enter the required details and choose whether to be notified and/or reminded of the task, and when.
- Click Save.
Alternatively, you can create a task by clicking on New Task when you create or edit a filter.
Note:
- The limit to the number of tasks you can create is 100.
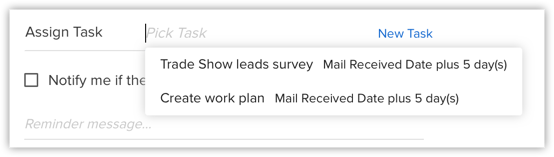
You can assign a task to a new filter or an existing filter.
- Click Settings on the left panel.
- Click Filters on the Email Settings screen.
- Click the Edit icon on the filter you want to assign a task to.
Alternatively, you can also create a new filter and assign tasks to it.
In the Assign Task field, select an existing task or create a new task. - Click Save.
Note:
- A maximum of 5 tasks can be assigned to one filter.
To edit a task
- Click Settings on the left panel.
- In the Email Settings screen, click Tasks.
- Click the task you want to edit.
- In the details view, click the blue Edit icon.
- Make the necessary changes, and click Save.
To delete a task
- Click Settings on the left panel.
- In the Email Settings screen, click Tasks.
- Click the task you want to delete.
- In the details view, click the blue Delete icon.
- Click OK in the confirmation pop-up.
Note:
- Tasks in SalesInbox are not associated with tasks in Zoho CRM. SalesInbox tasks are only related to email, and the execution of follow-up activities pertaining to received mail.
Automate lead/contact creation
Often you may need to add a bunch of email senders as leads or contacts in Zoho CRM. For example, you have attended a tradeshow and you receive a bunch of emails from a lot of people who attended the tradeshow. If you wanted to add all of them as leads to CRM, you need to spend a lot of time and efforts.
In Zoho SalesInbox, this can be done in a jiffy. You can automate adding senders of emails as leads and contacts in CRM. All you need to do is create a workflow rule in order to achieve this.
Set up email workflow rules
To add an email sender as a lead/contact in Zoho CRM automatically
- In your Zoho CRM account, go to Setup > Automation > WorkflowAutomation.
- In the Workflow Rules section, click Create Rule.
- In the Create New Rule popup, select the Module as Emails, enter a Rule Name and Description.
- Click Next.
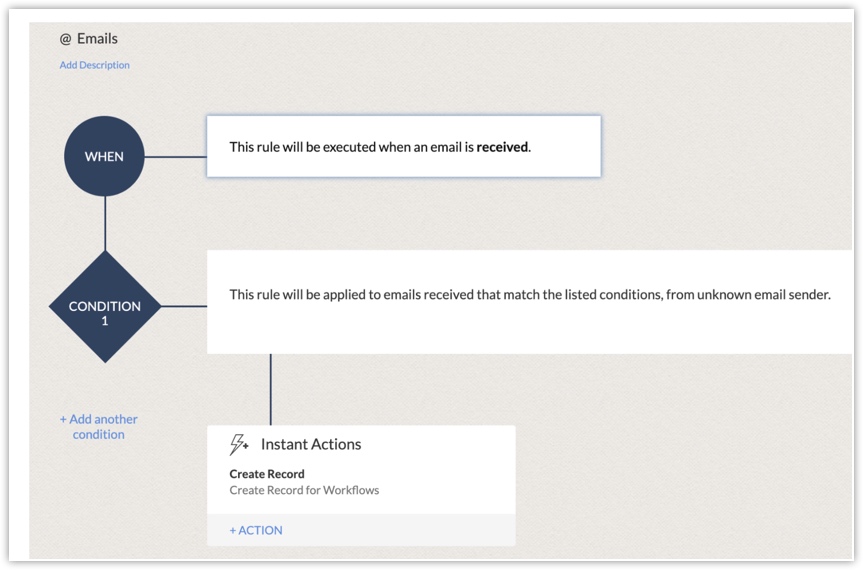
- The When component is pre-populated by default as When an email is received from an email address that is not in your CRM...
This is because that is the only instance when the rule will be executed. - For the Which Emails section, enter a criteria to define which emails should be filtered in order for the email senders to be added as leads/contacts.
- In Apply this Rule to, as Unknown.
Only if you choose Unknown, the option to create a record will be displayed.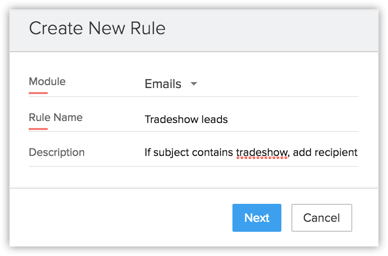
- Click Next.
- Click Instant Actions and click Create Record.
The only instant action here is to create a record. - In the Create Record popup, specify the Record Type as Lead or Contact.This way, whenever you receive emails that satisy the criteria specified in the Which Emails section, the sender of those emails will be added as a lead or contact as specified here.
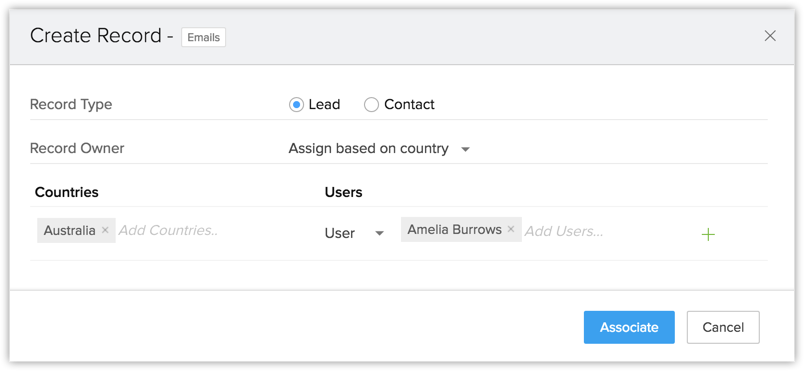
- Specify the Record Owner for leads/contacts thus created. You can select among User and Role.
It is mandatory to select a user/s to whom these records will be assigned. - You can also assign records based on the region/country. To do this, select the Assign based on country option from the dropdown list.
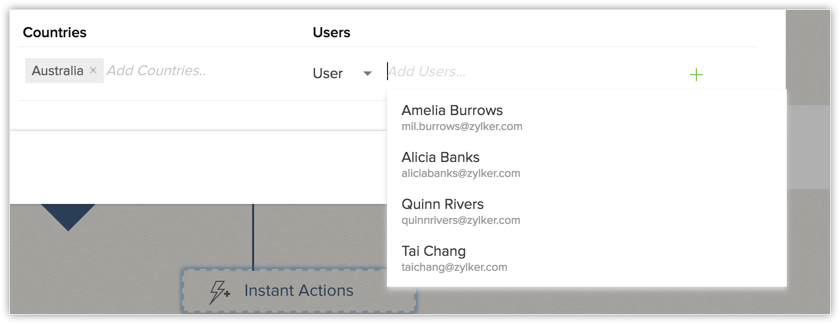
- In the Countries section, select the country and select the corresponding User/Role for that country.
- Click Associate.
- Once you have reviewed the rule and certain about the criteria and actions, click Save.
Manage Labels in Zoho SalesInbox
Labels can be assigned to emails to tag and categorize them for your convenience.
To create a new label
- In the left panel of SalesInbox, click the Add icon near Label.
- Name the label, and assign it a color from the given options.
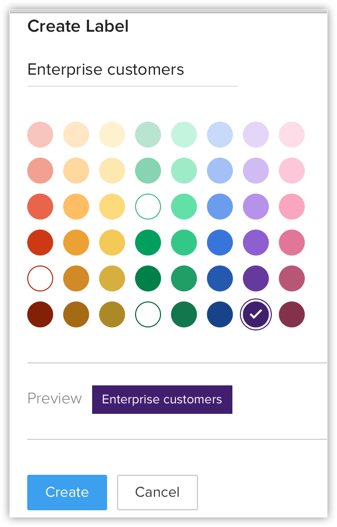
- Click Create.
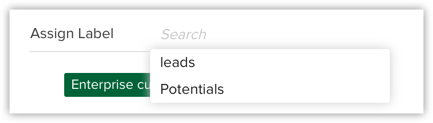
To assign a label
- Choose a label from the Label list in the left panel of SalesInbox.
- Click on the label you want to assign, drag it to the particular email you want tagged, and then drop it.
Alternatively, you can also assign labels as a action while creating or editing a filter as well as the Email Details page.
To edit a label
- In the left panel, under Label, go to the label you want to edit.
- Right-click on the label, and select Edit.
- Make the necessary changes, and click Update.
To remove a label
- Open the email you want to remove the label from.
- Just below the subject of the email, you will notice the label assigned to it.
- Click the Remove icon.
To delete a label
- In the left panel, go to the label you want to delete, under Label.
- Right-click on the label, and select Delete.
- Click OK in the confirmation pop-up.
Zoho CRM Training Programs
Learn how to use the best tools for sales force automation and better customer engagement from Zoho's implementation specialists.
Zoho DataPrep Personalized Demo
If you'd like a personalized walk-through of our data preparation tool, please request a demo and we'll be happy to show you how to get the best out of Zoho DataPrep.
- Zoho Workerly Home
- Forums
- Connect With Us:


- Zoho Recruit Home
- Forums
- Connect With Us:
You are currently viewing the help pages of Qntrl’s earlier version. Click here to view our latest version—Qntrl 3.0's help articles.


Zoho Sheet Resources
Zoho Forms Resources
Zoho Sign Resources
Sign, Paperless!
Zoho TeamInbox Resources
Zoho DataPrep Resources
Design. Discuss. Deliver.
Related Articles
FAQs: Workflow for Emails
What's workflow rules for emails and why do I need it? In Zoho CRM, workflow rules for emails allow you to automate and streamline your communication processes. Workflow rules are a set of instructions that you can define to trigger automatic actions ...FAQs: Emails
How can I view the status of emails sent or received in my CRM account? A CRM user can view the status of emails sent or received to the customers on the record detail page under the Emails related list. What are the different Email delivery status ...Compose, Organize and Configure Emails
Zoho SalesInbox lets you compose and send an email to your leads, contacts and others easily. Following are some useful features in SalesInbox with respect to composing an email. When you compose your email, SalesInbox suggests contacts and leads ...FAQs: Mass Emails
1. How do I send mass emails from CRM using my SMTP server? Mass emails can be sent via your SMTP servers using email relay. To set up email relays, you will have to connect your SMTP server with the Zoho CRM server. To configure email relay settings ...POP/POP3 Emails Tab
Users have the capability to seamlessly send emails to their customers directly from their CRM platform. In this guide, we'll walk you through the steps to accomplish this using the POP/POP3 protocols. This feature is available for POP users in old ...