Validation Rules
Validation Rules can be used to set conditions to validate the data entered in a field before it is recorded. If any of the conditions are met, an alert message will be displayed and the user will not be able to proceed with the transaction until they provide an acceptable value.
Note: This feature is available only for selective pricing plans and is supported in Sales Orders, Purchase Orders, Invoices and Bills.
Scenario: Peter runs a catering business where he takes orders from his clients and provides them services. During payment, he provides a small discount as a thank you. When Peter is unavailable, his team reaches out to the customers. Sometimes, his staff tends to give a higher discount that Peter might not really approve of. To prevent this, Peter sets up a validation rule not to create an invoice with more than 10% discount.
Create Validation Rule
To create a validation rule for a field in Zoho Inventory:
Go to Settings in the top right corner.
Select the module for which you want to create the lock configuration under Module Settings.(for example, Invoices).
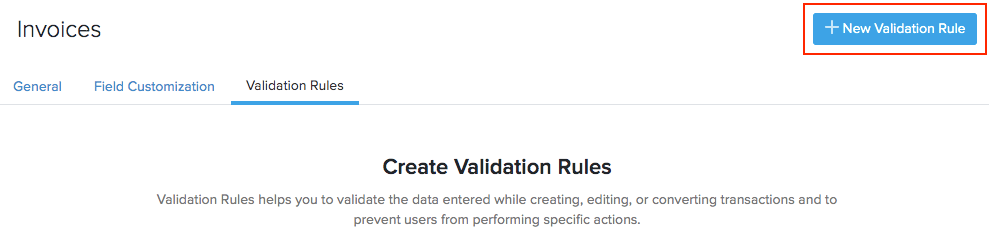
Go to the Validation Rules tab and click + New Validation Rule.
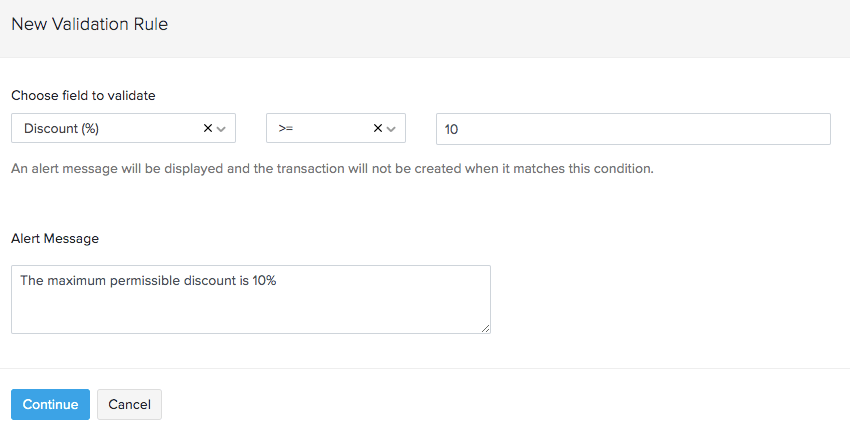
Select a field. It can either be a custom field or any of the default fields in the module.
Specify the criteria.
Enter the alert message to be displayed when the rule is violated.
Click Continue.
If you want to add another rule for the same field click + Add Another Validation and repeat the steps mentioned above.
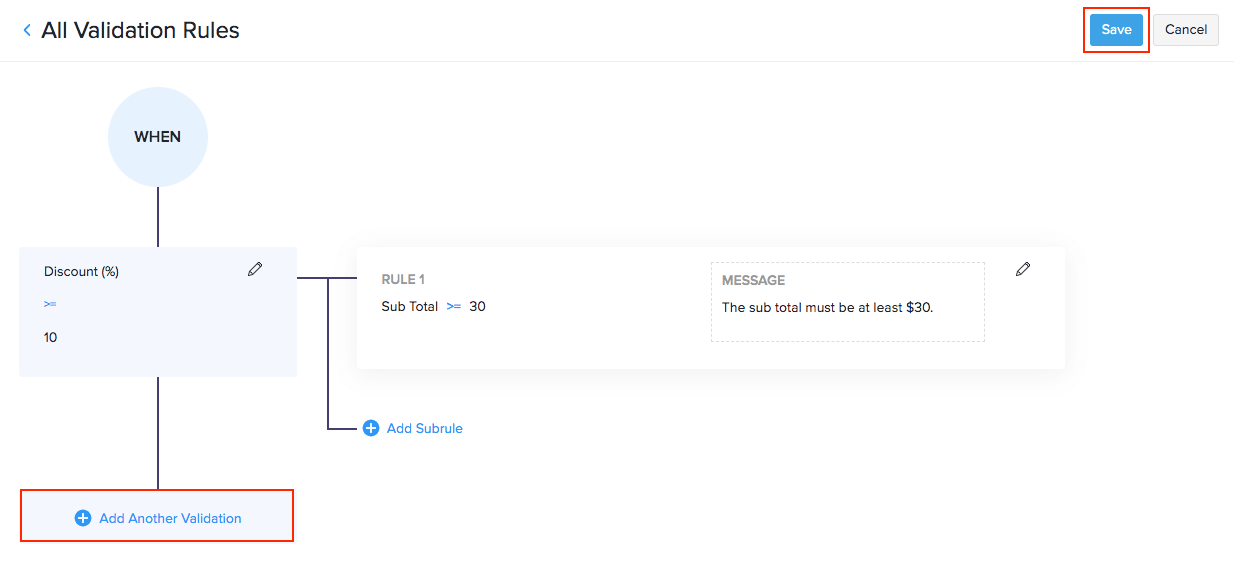
Click Save at the top right corner.
Insight:
- The validation rules created in Zoho Inventory will apply to the other integrated Zoho apps as well.
- You can only create up to 10 validation rules for a module.
Multiple Criteria and Subrules
When you create a validation rule for a field, it applies to all transactions created in the particular module. If you want it to be applied only on selected transactions, you can specify the criteria under which the rule must be executed, which you can do in two ways:
Multiple Criteria
Scenario: Peter had created a validation rule where the invoice discount cannot exceed 10%. However, he provides a discount only when the invoice total amounts to at least $30. So, he customizes the existing rule by adding a criteria with the transaction total to be >= $30.
To add a criteria to a rule:
Go to Settings in the top right corner.
Select the module for which you want to create the lock configuration under Module Settings.(for example, Invoices).
Go to the Validation Rules tab.
Click the pencil icon near the rule you want to edit.

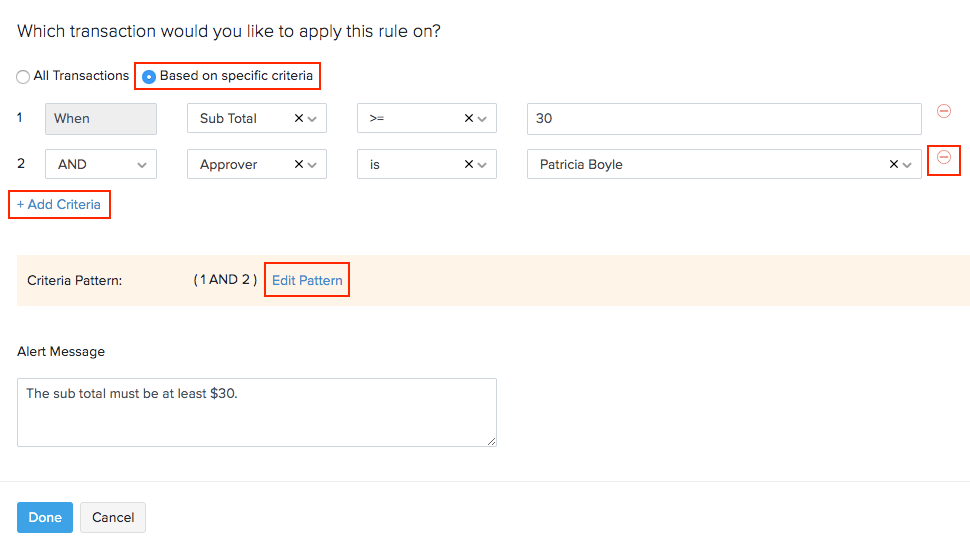
Click the option Based on a specific criteria in the following pop-up.
Set the criteria using the options provided.
Click + Add Criteria to add another criteria for the rule.
Click Edit Pattern to change the criteria pattern based on your preferences.
Click Done to save your changes to the rule.
Subrules
You can include additional rules called subrules to an existing condition.
Scenario: Peter had created a rule where the invoice discount cannot exceed 10%. Now, he would like to use the same rule (<= 10% discount) but add another condition to it where it is applicable only from July to November. So he creates a subrule with the transaction date to be >= July 1. This will prevent his staff from giving discounts on other months.
Here’s how you can add a subrule:
Go to Settings in the top right corner.
Click Sales Orders or Invoices under Sales in Module Settings.
Click the Validation Rules tab.
Click on the field name for which want to add a subrule.
Go to an existing rule and make sure it is set based on a critera. If not, click the pencil icon to change it and save it.
Click + Add Subrule.
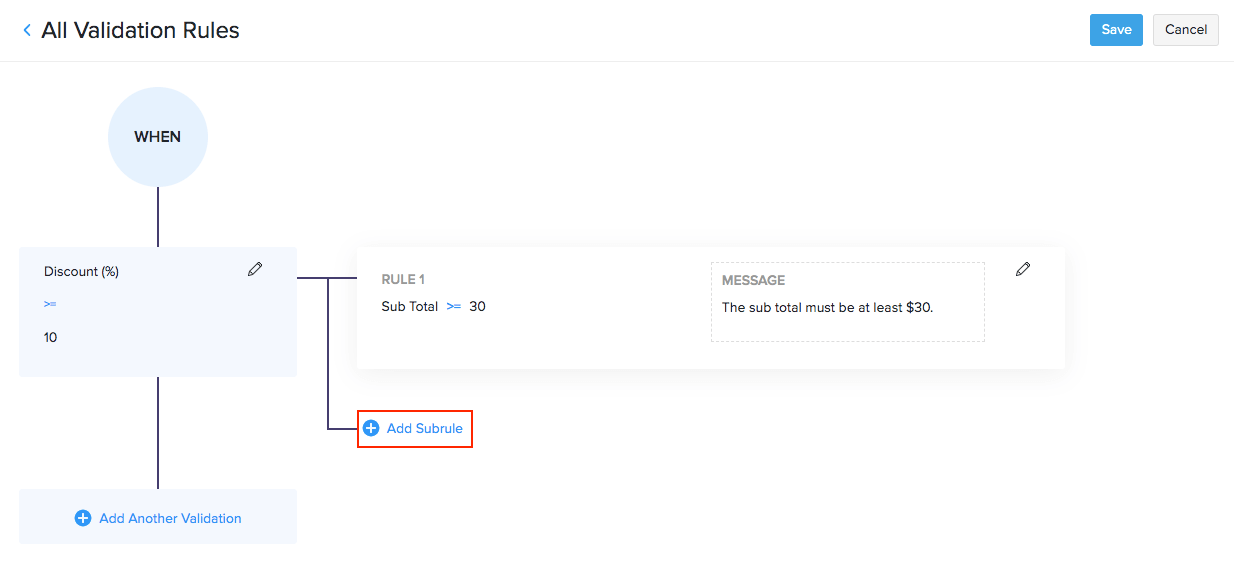
Specify the conditions and enter the alert message to display.
Click Done.
Click Save at the top right corner to activate the subrule.
Other Actions
You will be able to edit, delete or mark a validation rule as inactive. Here’s how:
Go to Settings in the top right corner.
Navigate to the module for which you’ve enabled validation rules under Module Settings (for example, Invoices)
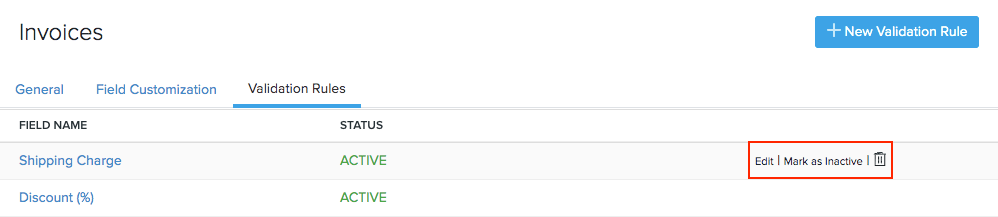
Hover over the validation rule to perform the following actions:
- Edit: Change the message or the criteria of a validation rule.
- Mark as Inactive: Disables the validation rule temporarily. You can enable it again by clicking Mark as Active.
- Delete: Click the Trash icon to discard the validation rule permanently.