
Creating Reports
Create a Report
Zoho Expense makes creating, submitting, and tracking expense reports effortless across web and iOS. You can quickly turn your business expenses into structured, compliant reports, group expenses by trip or project, and attach the necessary documentation so every report is clear and audit-ready. At a glance, you can see where each report stands—whether it’s in draft, submitted, approved, or reimbursed, along with any policy checks that apply.
In this help document, you’ll learn how to create expense reports using the Zoho Expense web and iOS applications.
To create a report using the web app:
- Go to Reports on the left sidebar and click the + New Report button.
(OR)
Click the icon next to Reports on the left sidebar.

- A new report page will open.
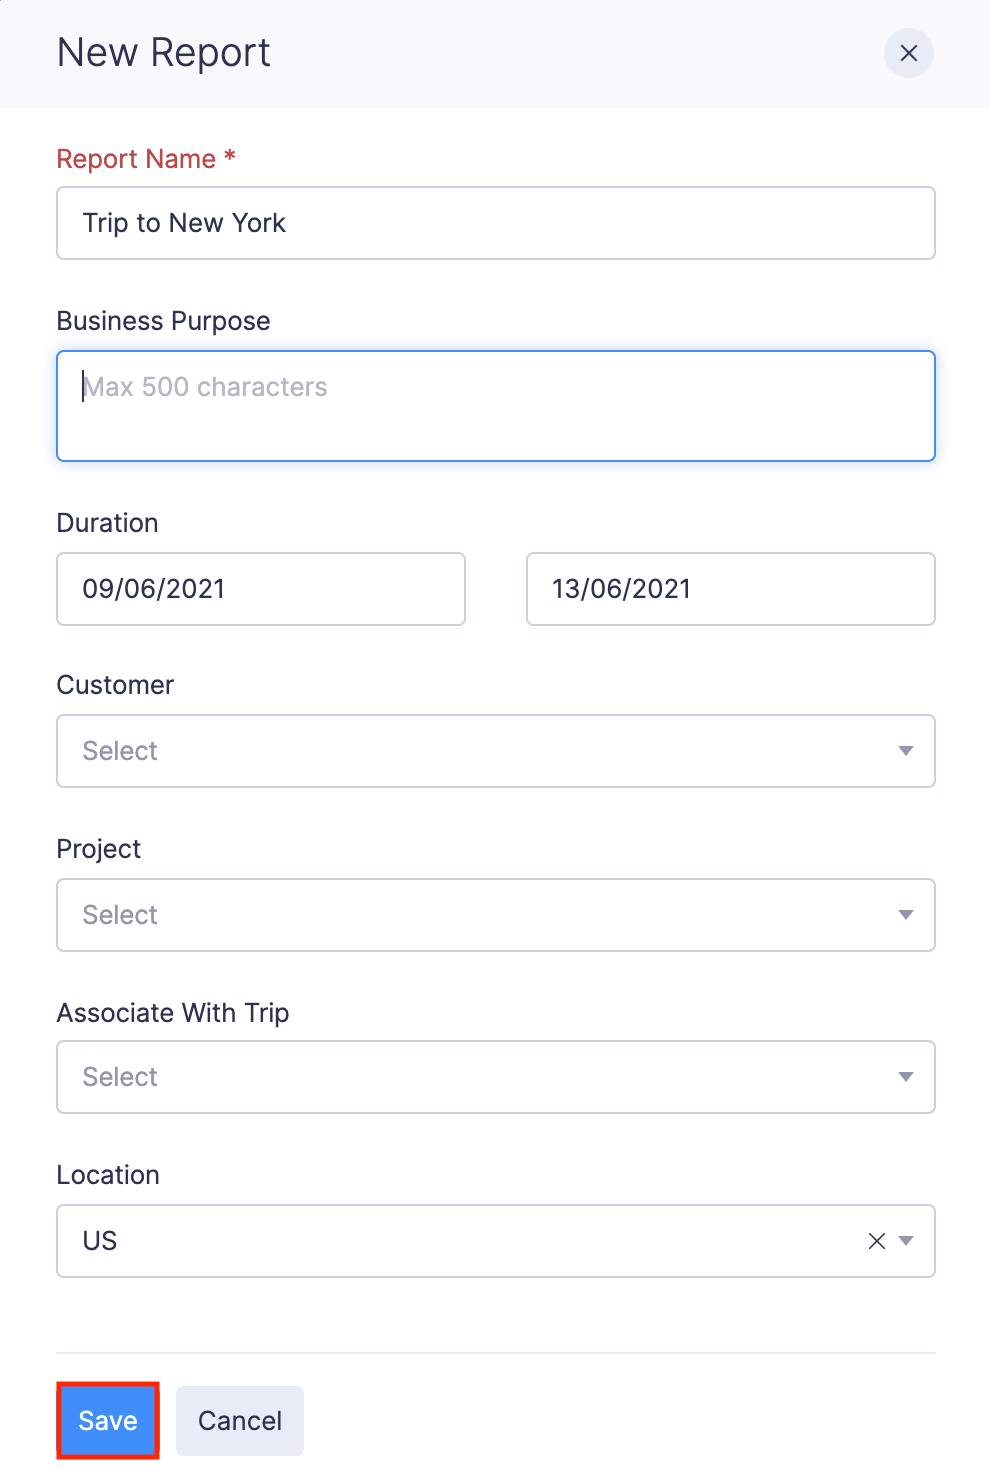
- Fill in the following fields:
Fields Description Report Name A name for the expense report. Business Purpose The business event or purpose for which you’ve incurred the expenses that are added to the report. Duration The duration for which you’ve incurred the expenses that are added to the report. Associate With Trip If you are reporting expenses that you incurred while on a trip, select the trip. Alternatively, you can directly create a report from the trip request. Tags Select the tag you want to associate with your reports. Learn more about tags.
- Fill in the following fields:
- Click Save. A new report will be created and you can start adding expenses to the report.
Create Reports from Expenses
You can add the unreported expenses to an existing report or a new report. To do this:
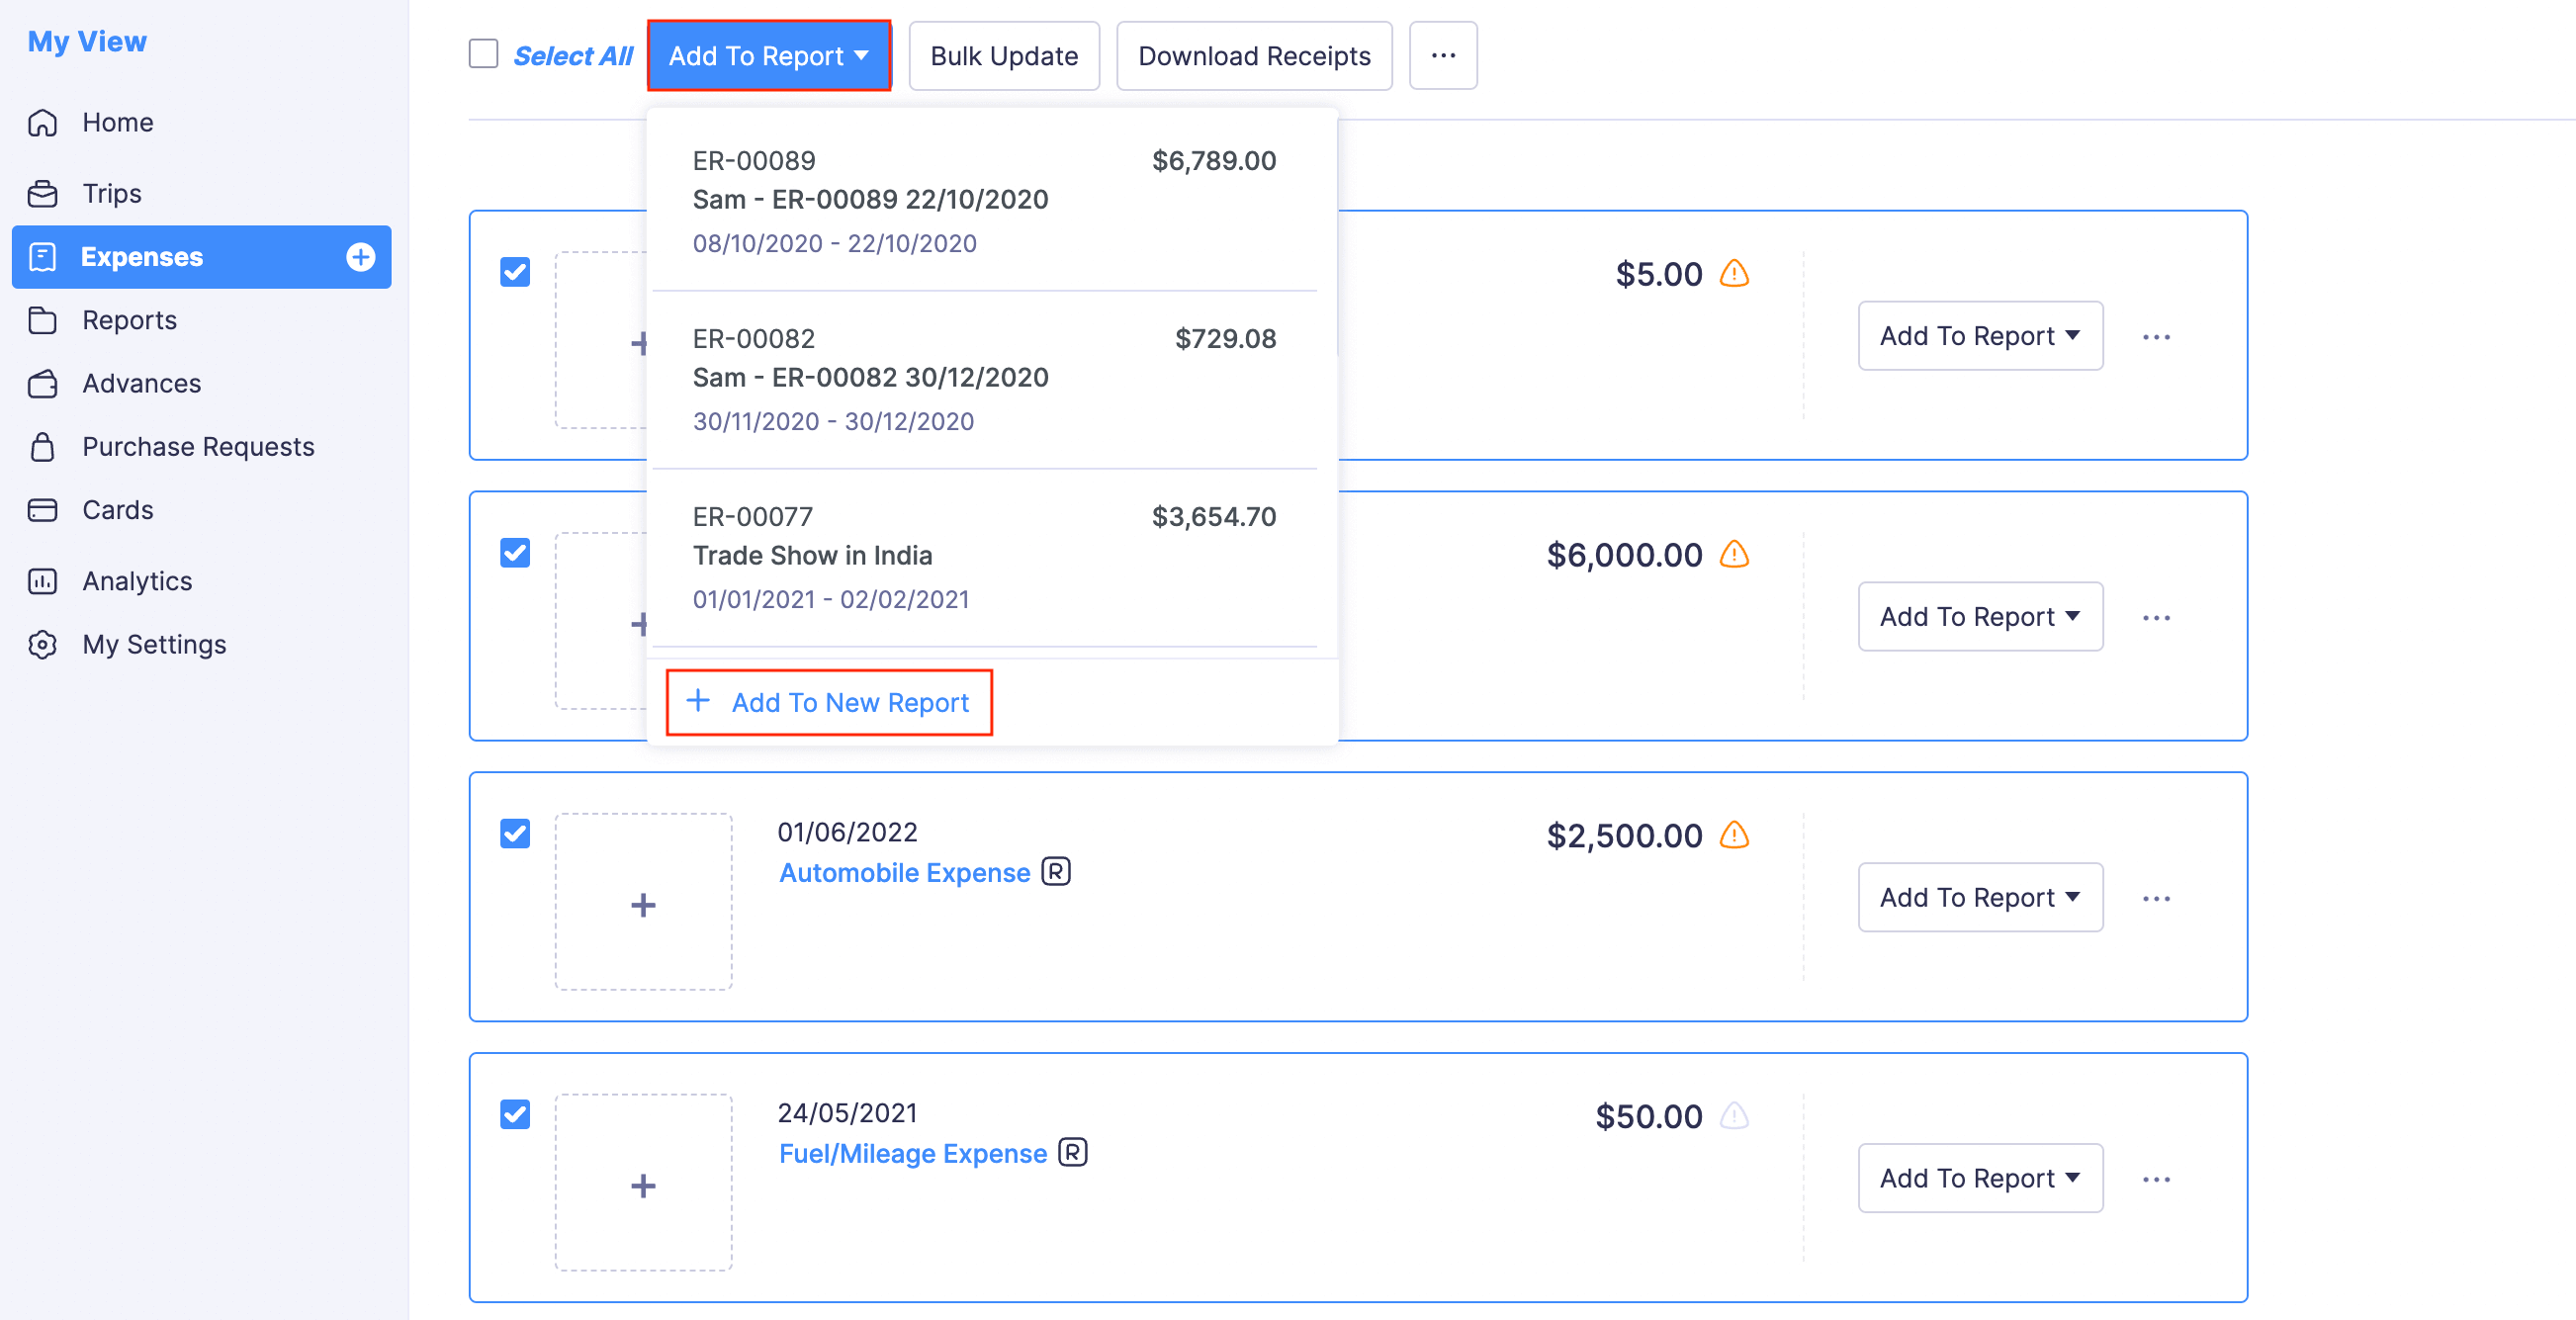
- Go to Expenses on the left sidebar.
- In the Unreported Expenses tab, select the unreported expenses you want to add to a report.
- Click the Add to Report dropdown on top of the page.
- Select a report from the dropdown. All the expenses you’ve selected will be added to that report.
- If you want to create a new report using the selected expenses, click + Add to New Report from the dropdown.
Create Reports from Advances
You can apply your pending advances to an existing draft report or create a new report and apply to it. To do this:
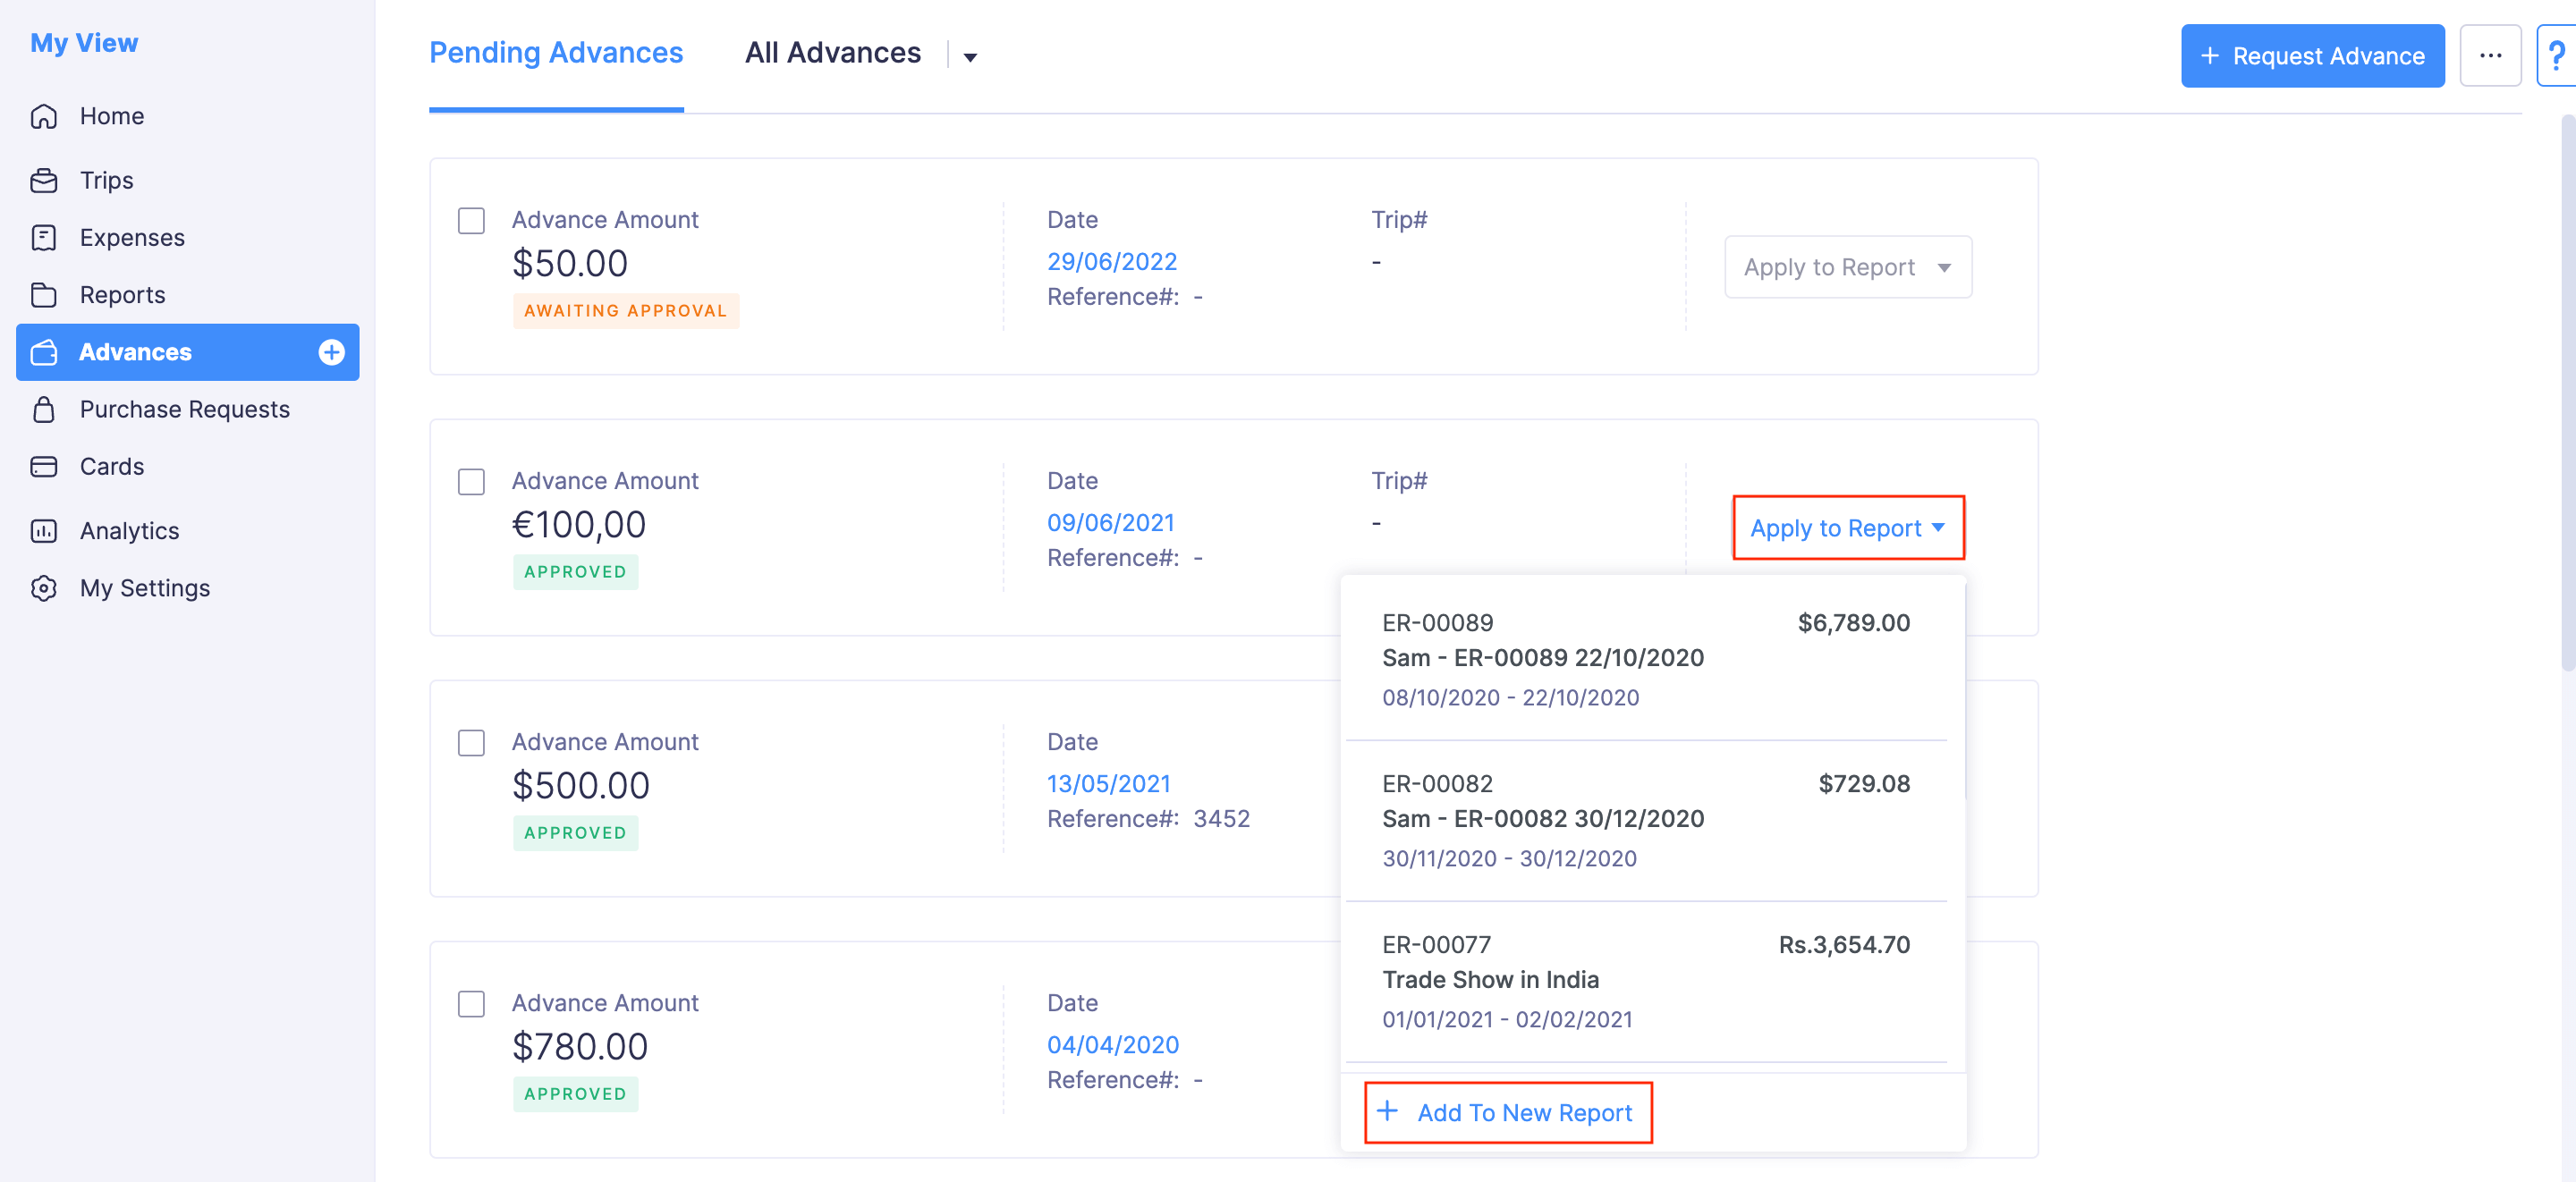
- Go to Advances on the left sidebar.
- In the Pending Advances tab, click the Apply to Report dropdown at the right corner of the advance.
- Click + Add To New Report to create a new report and apply the selected advance.
Import Reports
Reports can be imported in the following formats:
- CSV - Comma Separated Values
- TSV - Tab Separated Values
To import reports:
- Go to Reports on the left sidebar.
- Click the More icon at the top right corner of the page.
- Select Import Reports.

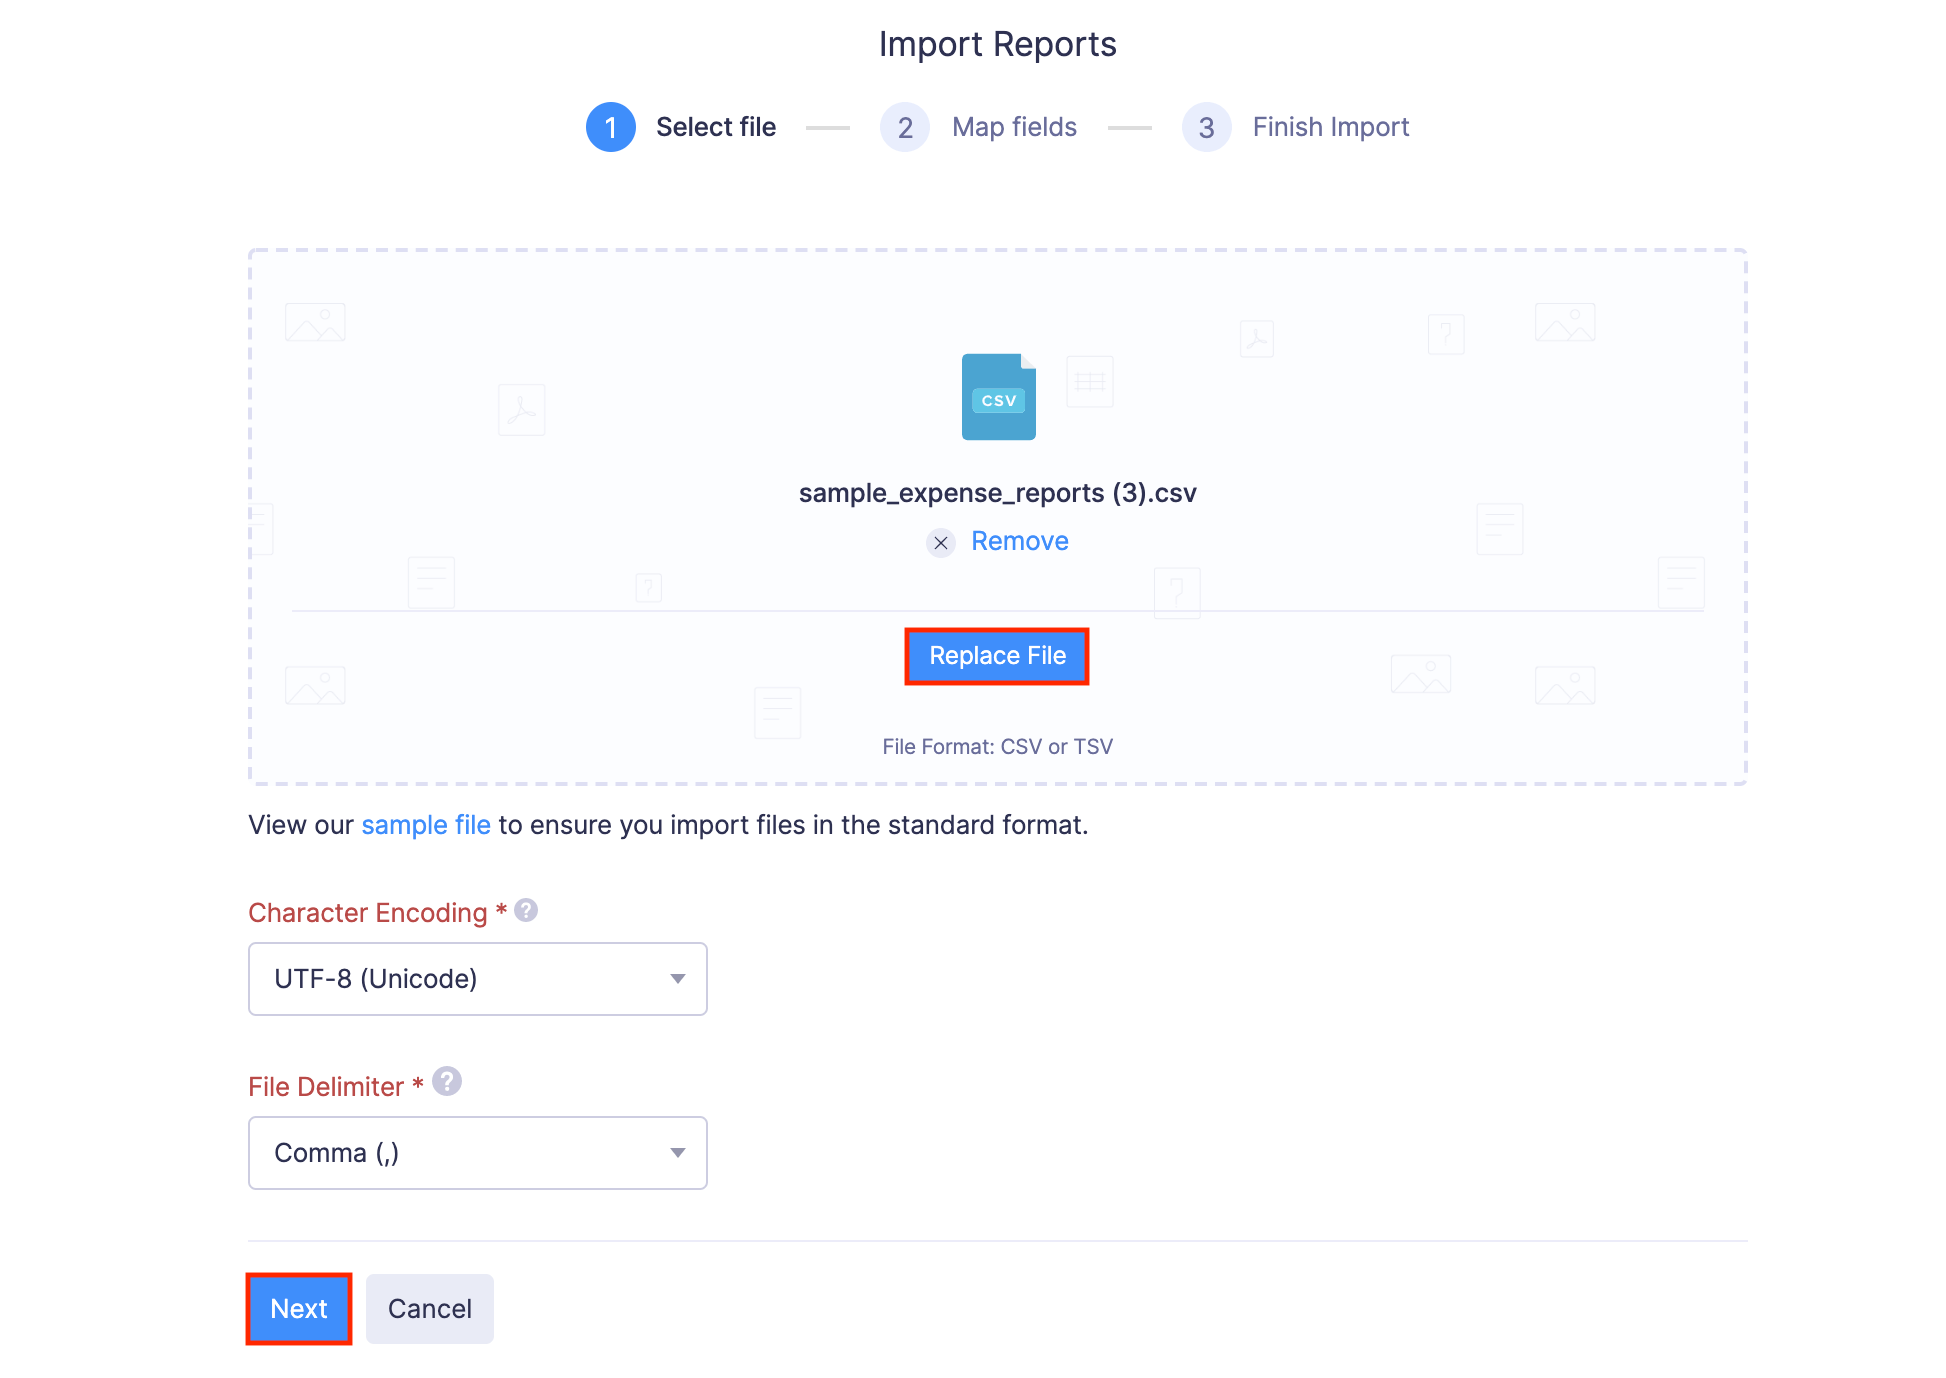
- In the first step, drag and drop a file you want to upload or click Choose File to choose the import file from your desktop or a cloud account. If you want to upload another file instead of the selected file, click Replace File and choose another file.
- Click Next.
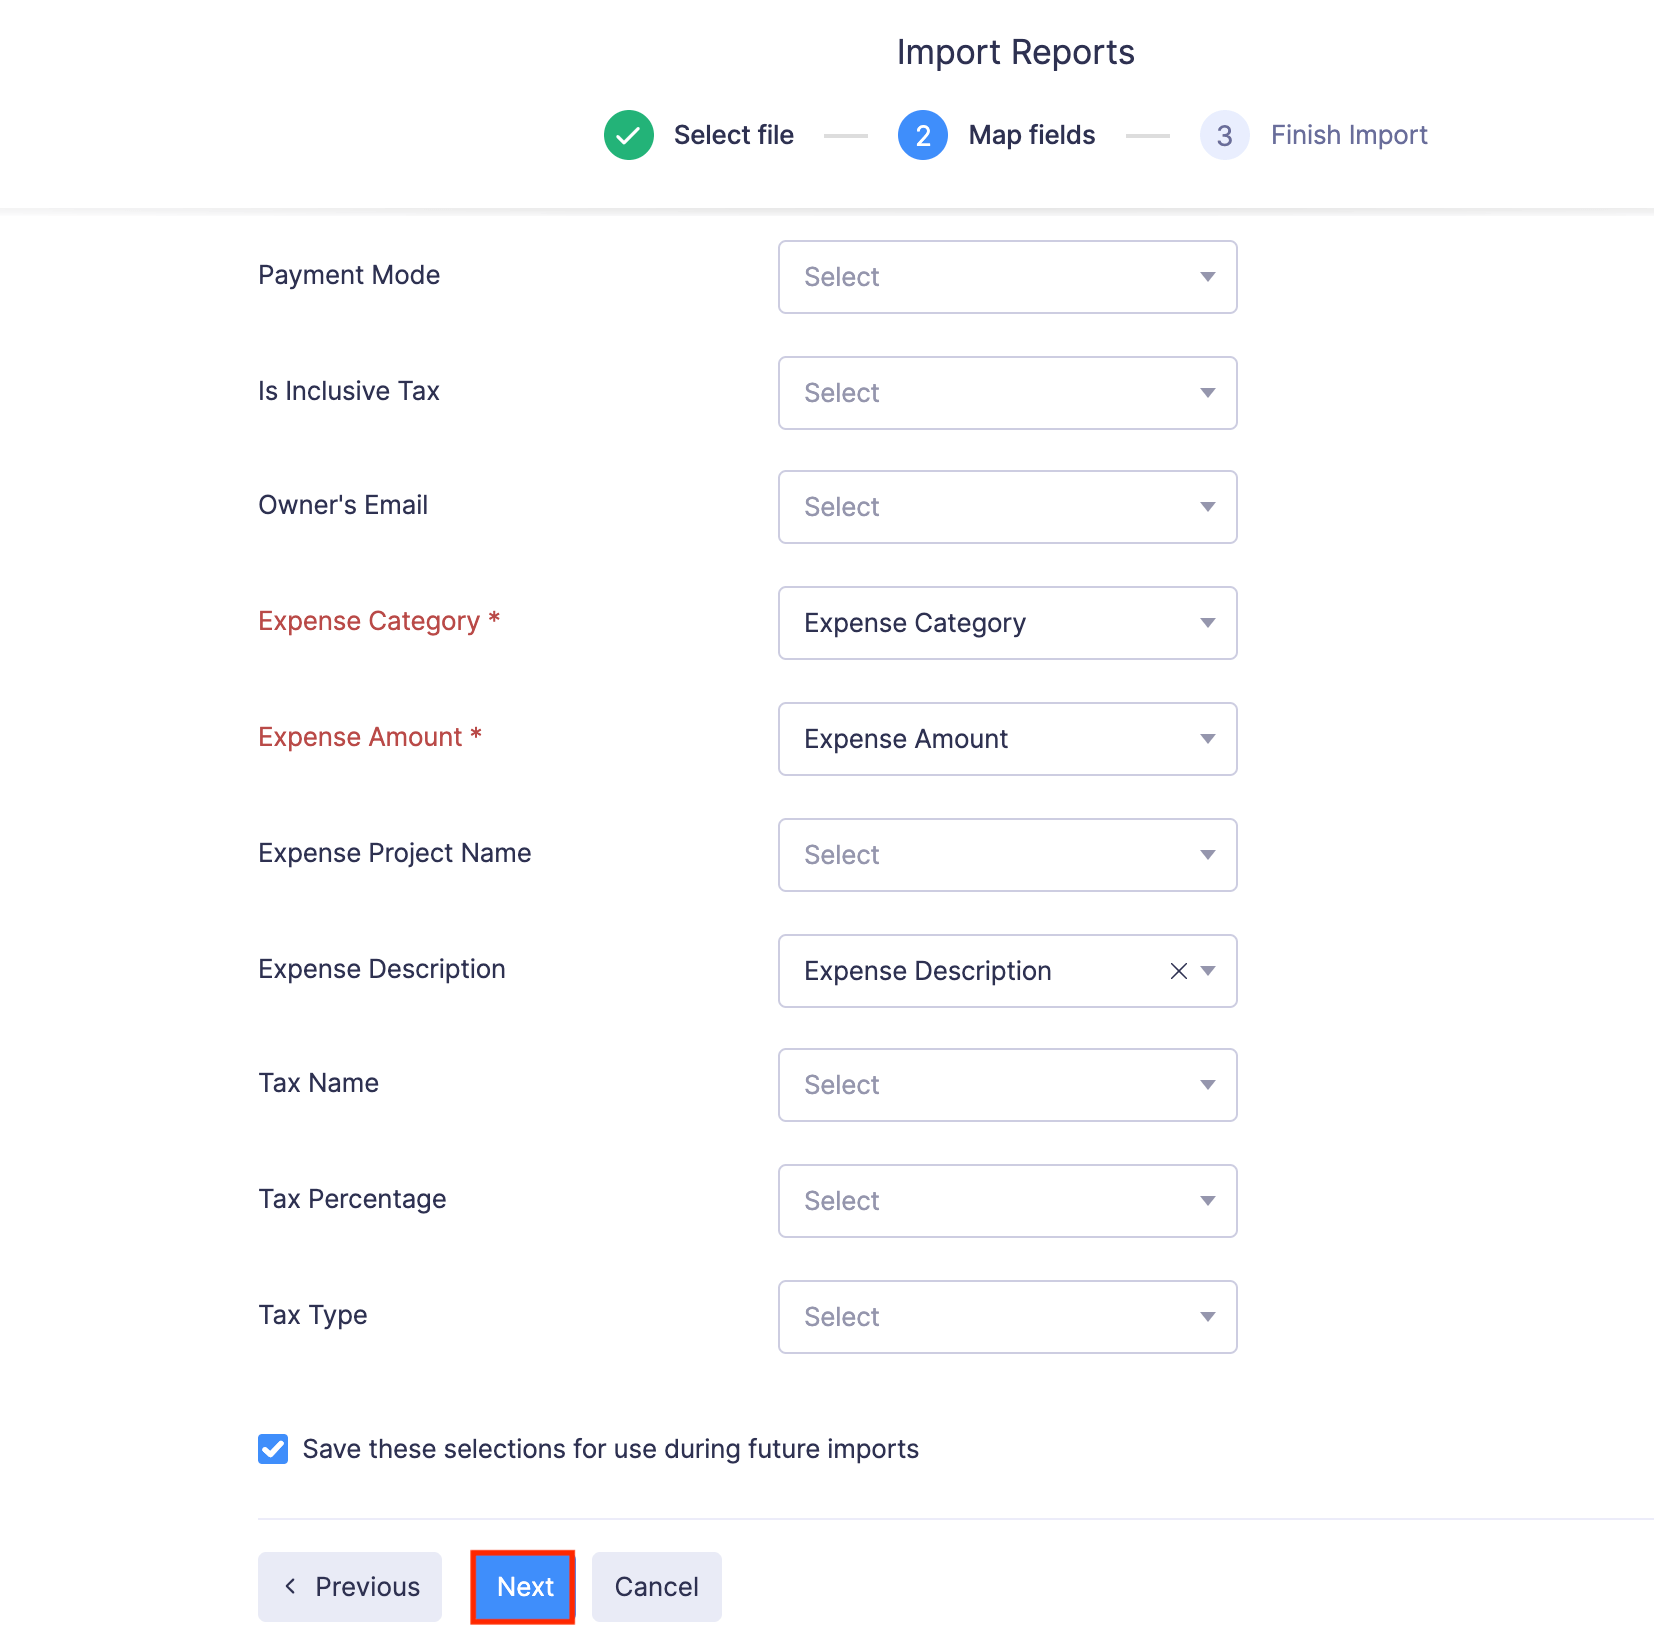
- In the next step, the best match to each field in Zoho Expense will be auto-mapped with the fields in the imported file. If there are unmapped fields, you can map them manually. If you want to save the existing mapping for future imports, mark the Save these selections for use during future imports checkbox.
- Click Next.
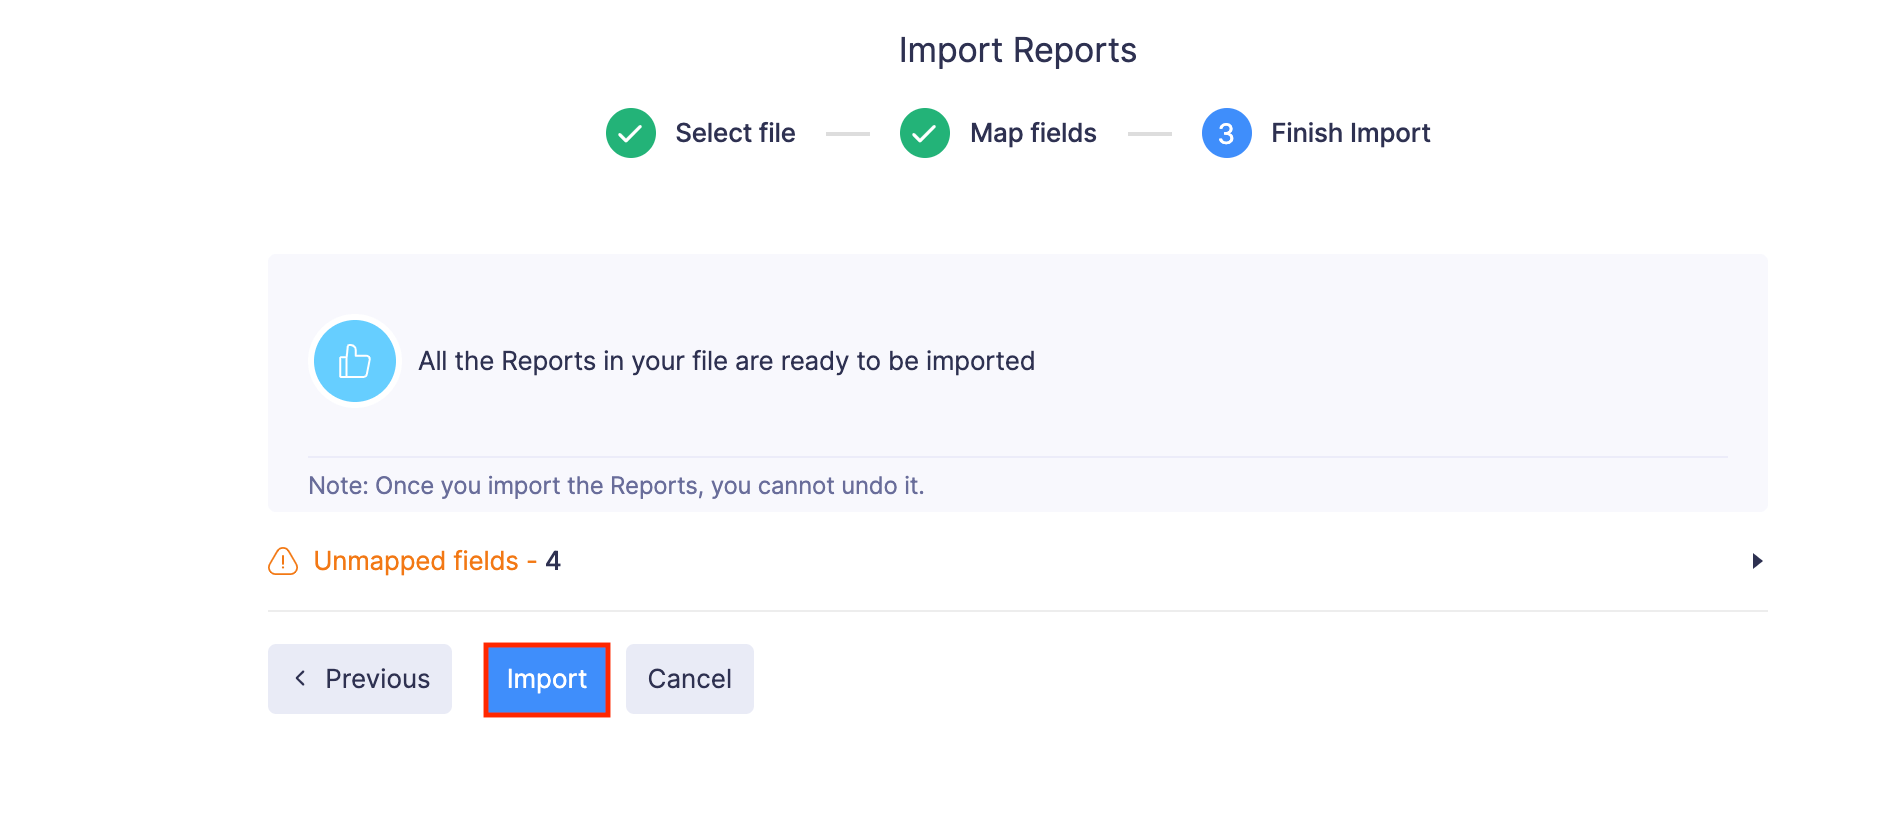
- The data in the unmapped fields will not be imported into Zoho Expense. If you want to map those fields, click Previous and map the unmapped fields.
- Once you have mapped all the relevant fields, click Import to import reports into Zoho Expense. All the imported reports will be listed under Pending Reports in the Reports module.
Create Expense Report
- Open the Zoho Expense app on your device.
- Tap the + icon in the top right corner.
- Select Report
(OR)
Tap the Menu icon in the top left corner. Go to Reports. Tap the + icon in the top right corner to create a new report. - Fill in the following fields:
- Report Type: Select the Report type. You can identify the purpose of the reports using report types. This field is available only if report types have been created by your admin.
- Report Name: Enter a name for the expense report. It will be auto-generated if Report Name Automation has been enabled in your organization.
- Business Purpose: Enter the business event or purpose for which you’ve incurred the expenses that are added to the report.
- Duration: Select the duration for which you’ve incurred the expenses that are added to the report.
- Associate With Trip: If you are reporting expenses that you incurred while on a trip, select the trip. Alternatively, you can directly create a report from the trip request.
- Tags: Select the tag you want to associate with your reports.
- Tap Save. A new report will be created, and you can start adding expenses to the report.
Create Reports from Expenses
You can add the unreported expenses to an existing report or a new report. To do this:
- Open the Zoho Expense app on your device.
- Go to the Expenses module.
- Apply the Unreported Expenses filter, select the unreported expenses you want to add to a report.
- Tap Add to Report at the bottom of the screen.
- Select a report. All the expenses you’ve selected will be added to that report.
- If you want to create a new report using the selected expenses, tap the +, enter the necessary details, and tap Save.
 Yes
No
Yes
No
Thank you for your feedback!