Approvals
- Approvals for Timesheets
- Automatic Timesheet submission
- Re-submitting Rejected Time Logs
- Re-submitting Rejected Time Sheets
Approvals for Timesheets
You can set approvals for Timesheets by following the steps given below.
- From your home page, go to Timesheets > Settings > Approvals Settings
- Enter Name of the Approval and set criteria if needed
You can either configure approver or allow the system to auto approve or auto reject the record based on the criteria requirements.
Follow the steps given below to configure an approver:
- Click Configure Approver
In the first tab, there are various options like Reporting to, department lead, out of which, you can select one.
Note: Approval can be created using the Project Manager or Project Head. While choosing the Approver, you can select 'Project' option from the drop down and select either Head or Manager.
There is also an option where an employee can select the approver while adding the record. Approvals can be set up to five levels of Reporting To.
Under message, there are system options for you to select. Based on your selection, the email will go to the respective person.
Approver - If you select this option, the email will go to the Approver who is configured.
Team mail id of the person performing this action - If you select this option, the follow-up email will be sent to the Team mail id of the person who submitted the approval request.
Person performing this action - If you select this option, the email will be sent to the person who sent the request for approval.
Reporting Manager of login user - If you select this option, the email will be sent to the reporting manager of the person who submitted the approval request.
Other than this, there are lists of Users, Roles, and Departments from which you can select the recipient of the email.
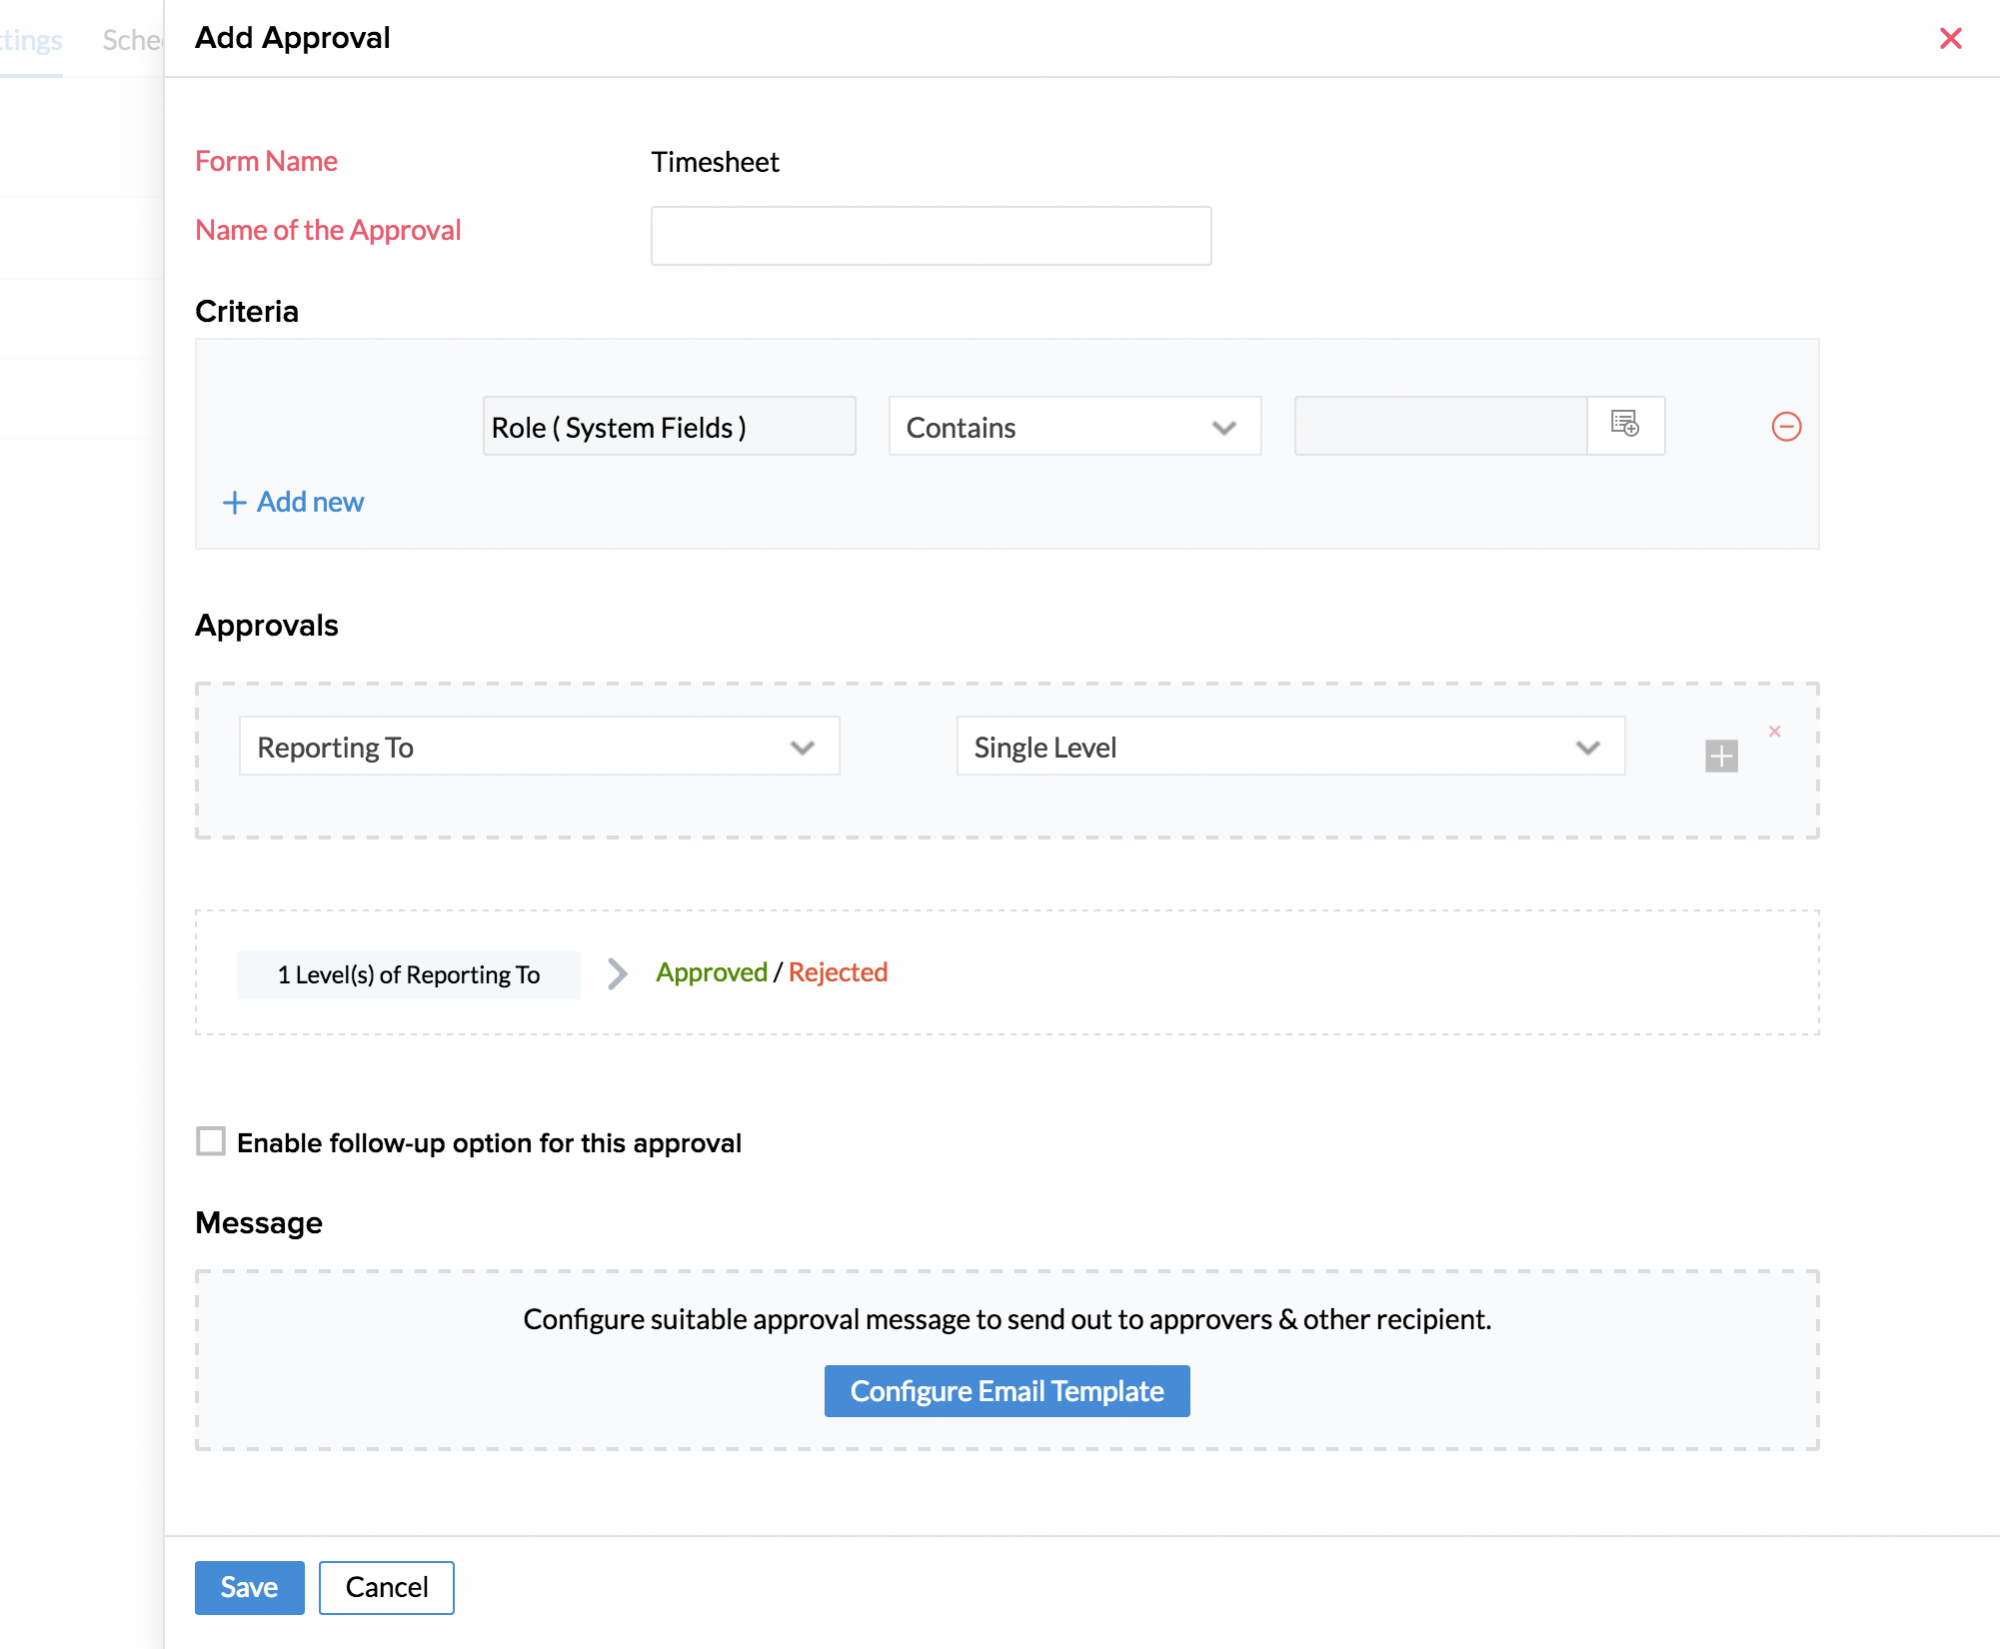
- Click Save once you are done
Note: In the absence of Approval configuration, the data that is shown under Time Logs(both List View and Calendar View) as well as in the Reports will be filtered based on the parameters chosen in the other filters. The Approval Status filter will remain passive since there is no Approval configuration done.
It is possible to disable the approvals that have been configured by making use of the enable/disable options for each Approval configuration under Settings > Approval Settings
You can view the timesheet that needs your approval under 'My Approvals'.
- From your home page, go to Timesheets > Timesheets > My Approvals
This will show you the list of timesheets that have been sent for your approval.
You can also approve or reject multiple timesheets under 'My Approvals'
To approve or reject timesheets,
- From your home page, go to Timesheets > Timesheets > My Approvals
- Select the timesheets that you would like to approve/reject and click Approve/Reject
- Enter comments if any and select Approve or Reject
Use Case : Configuring approval based on minimum hours criteria for timesheet submission
An organization wants to send timesheets for approval when employees log less than 8 hours a day or less than 40 hours a week. Follow these steps to set this up.
First, you need to enable Minimum hours criteria for timesheet submission.
- Navigate to Timesheet > Settings > General Settings.
- Go to the Timesheet Settings section.
- Enable Minimum hours criteria for timesheet submission.
- Enter '8 hours' for Per Day and '40 hours' for Per Week.
- Click Submit.
Next, configure the approval to automatically send timesheets that do not meet the minimum of 8 hours per day , or 40 hours per week criteria, for approval.
- Navigate to Timesheet > Settings > Approval Settings.
- Click +Add Approval.
- Enter a name for the approval, in this case, Minimum hours criteria.
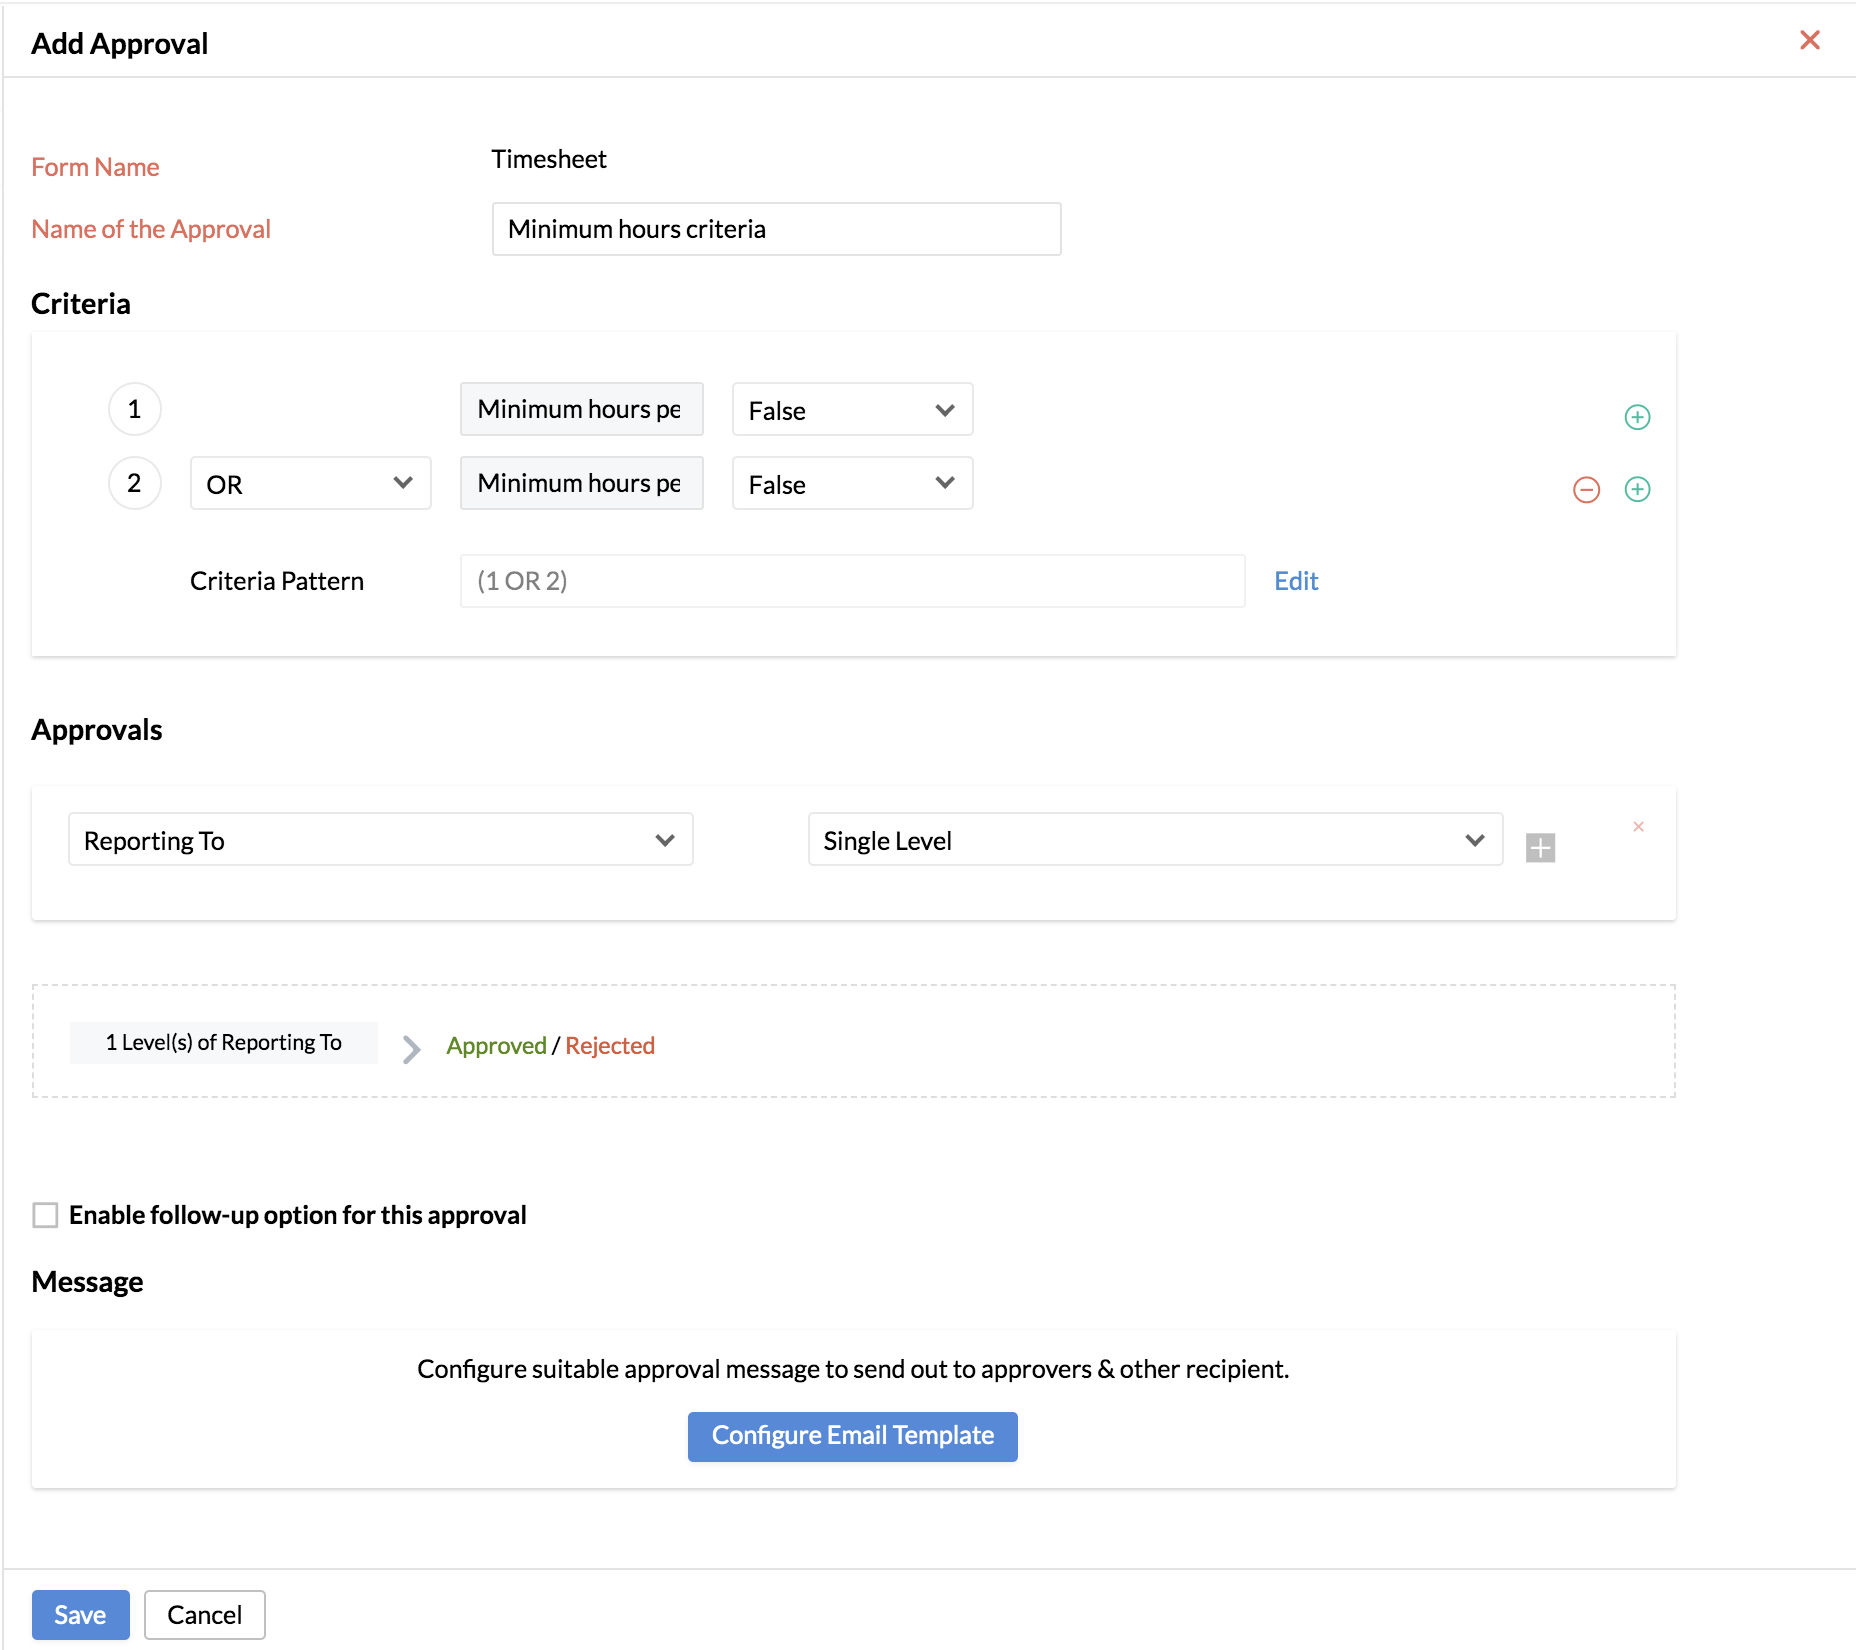
- Click Set Criteria under Criteria.
- Click Cumulative fields.
- Click Minimum hours per day was met.
- Select False.
- Click the + icon to add another criteria.
- Select OR condition.
- Select Minimum hours per week was met for Cumulative fields.
- Select False.
- Click Configure Approver and select the approver who will approve the timesheets.
- Add an email template, if required.
- Click Save.
Automatic Timesheet Submission
Sometimes, employees forget to submit their timesheets in spite of reminders. To handle this, you can schedule reminders to remind employees to submit their timesheets.
To set reminders for timesheet submission,
- From your home page, go to Timesheets > Settings > Scheduler settings > Add Schedule
- Enter the details
- Under Applicable For, select the options as required
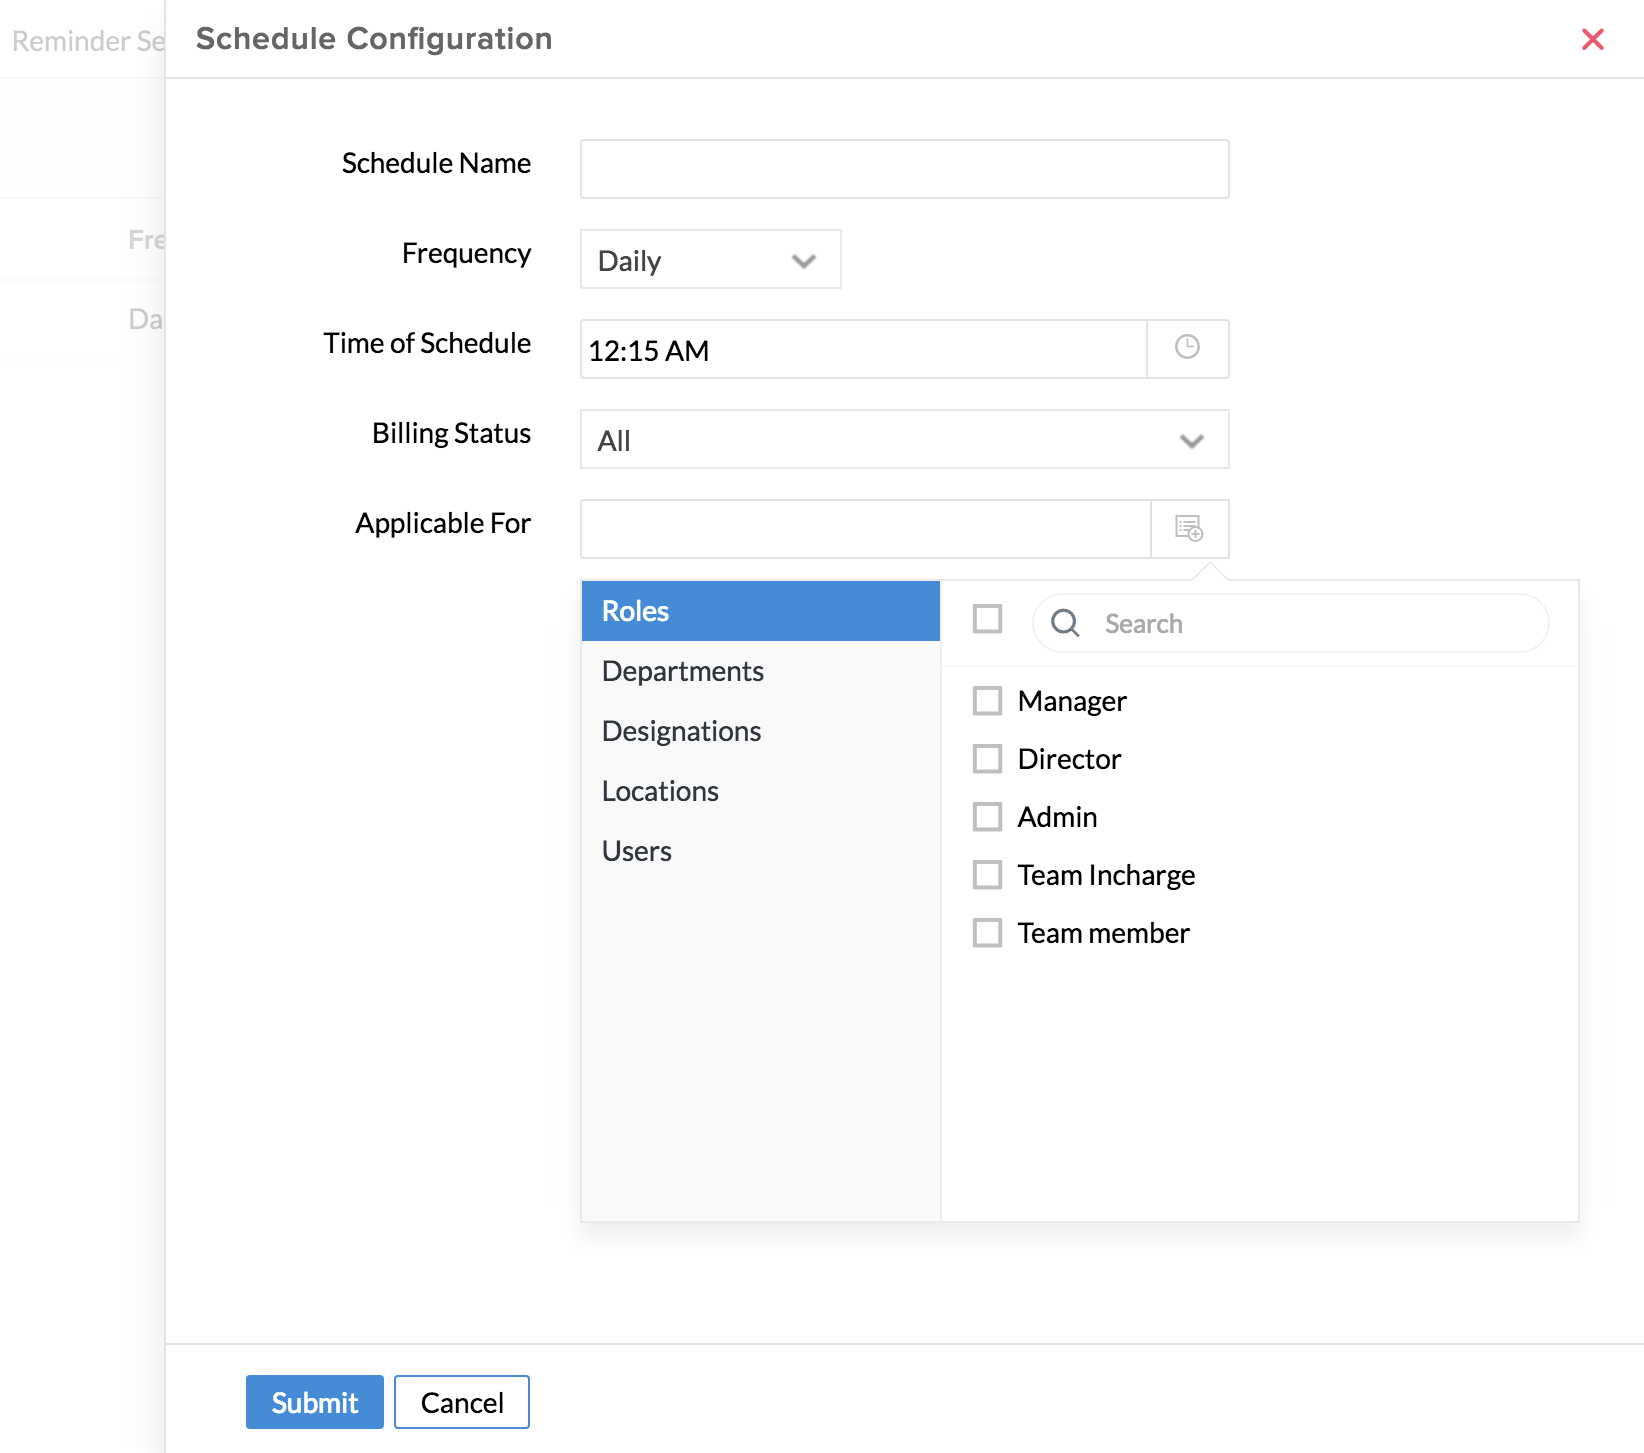
- Click Submit
This scheduler will collate the Timesheets and push it for approval automatically at the time that is selected.
Re-submitting rejected Time Logs
In the scenario, where an employee would like to re-submit a rejected time log, the employee should create a new log and submit it as another timesheet. He/She cannot include it as part of the existing timesheet.
Re-submitting rejected Time Sheets
When an entire timesheet is rejected, the employee can go to the Timesheet, make changes in the timesheet by making use of the edit icon(pencil icon) wherever required and click submit to submit the timesheet again for approval.