Data Permissions
Global Permissions
For certain functions that you can perform across various modules in Zoho People, you can have permissions configured for Users of a particular Role. Follow the steps given below.
- Navigate to Settings, and then to Permissions.
- Under Global Permissions tab, select the role for which permission has to be set.
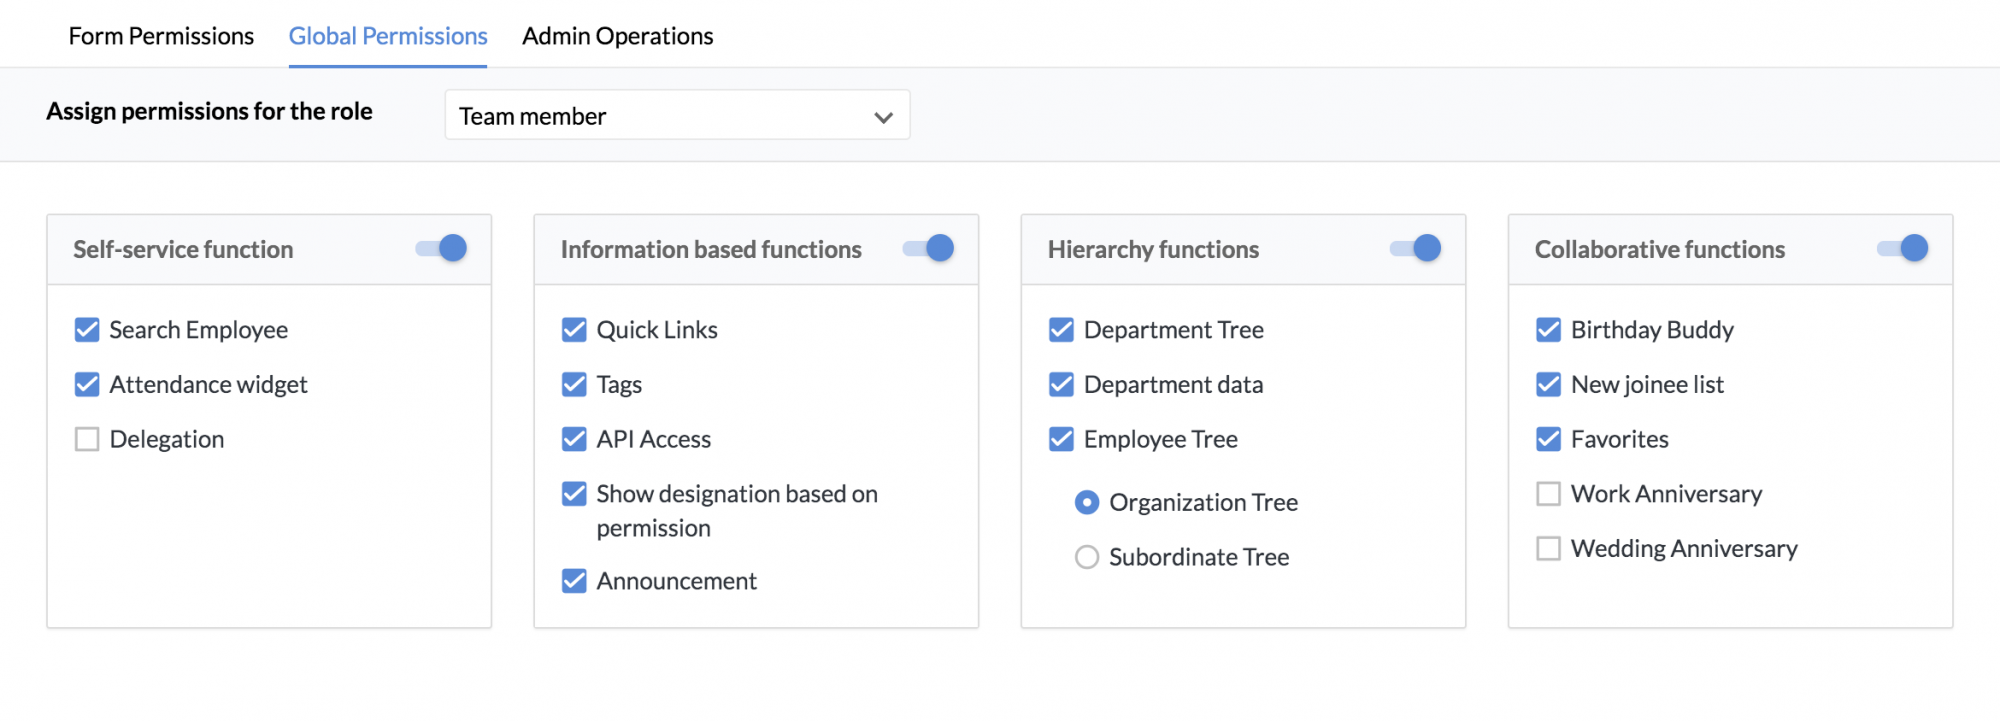
- Select the functions for which permission needs to be set
The users under that role will be able to access only the selected functions.
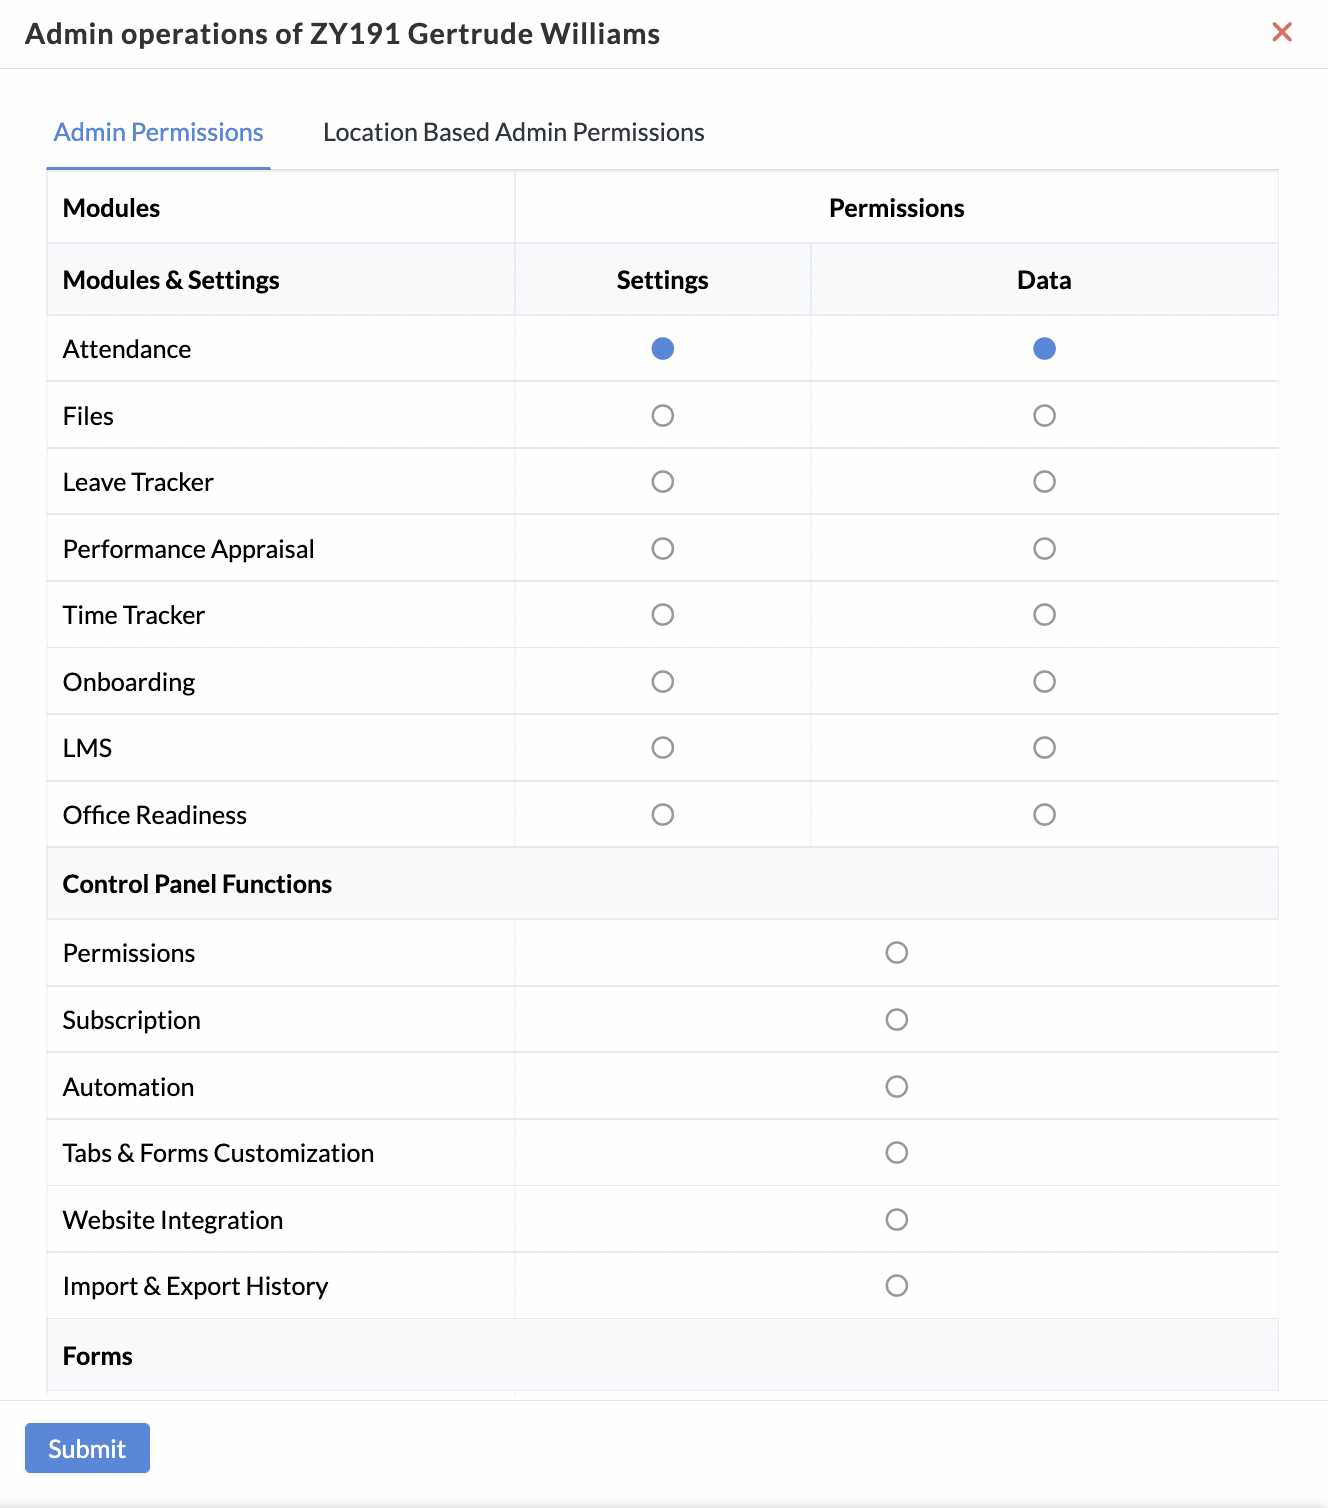
Admin Operations for specific users
In this section, we can add specific users to act as admins for various modules, functions and forms.They can also be added as location admins. These users are not administrators otherwise.
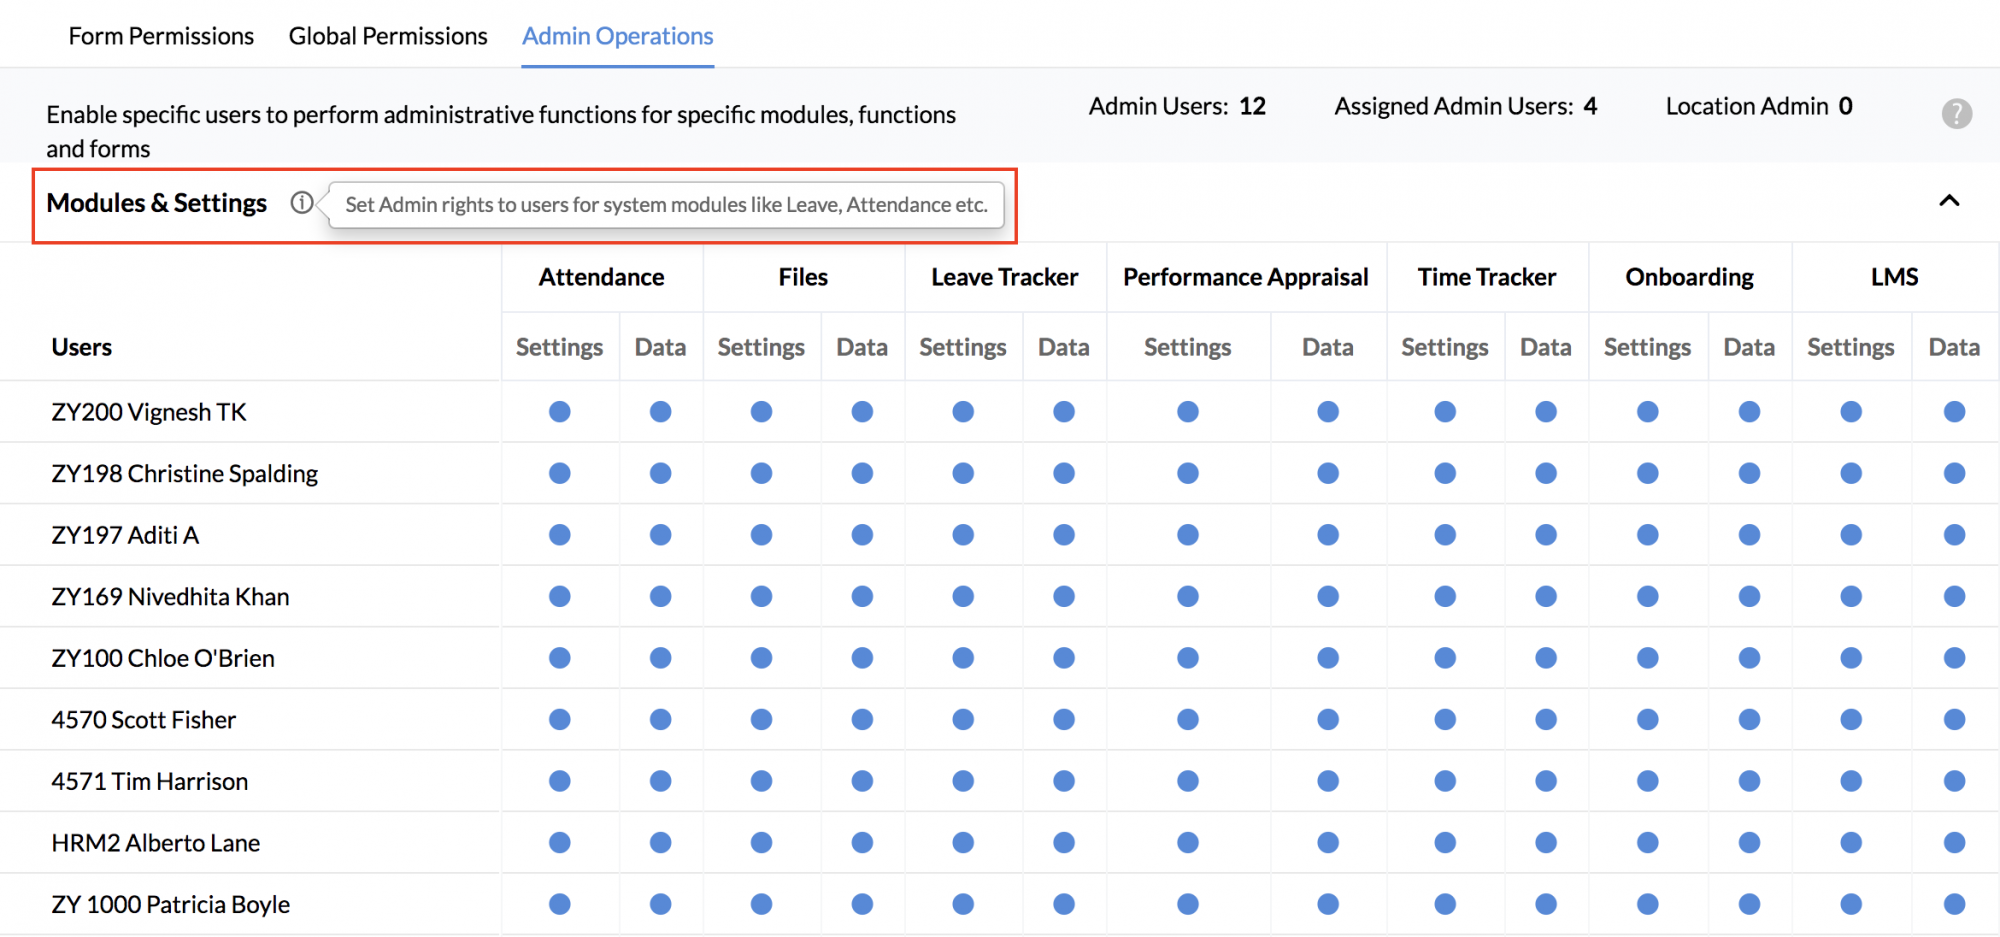
The added user can be given permission to specifically access only Settings or only Data or both. Select the options accordingly.
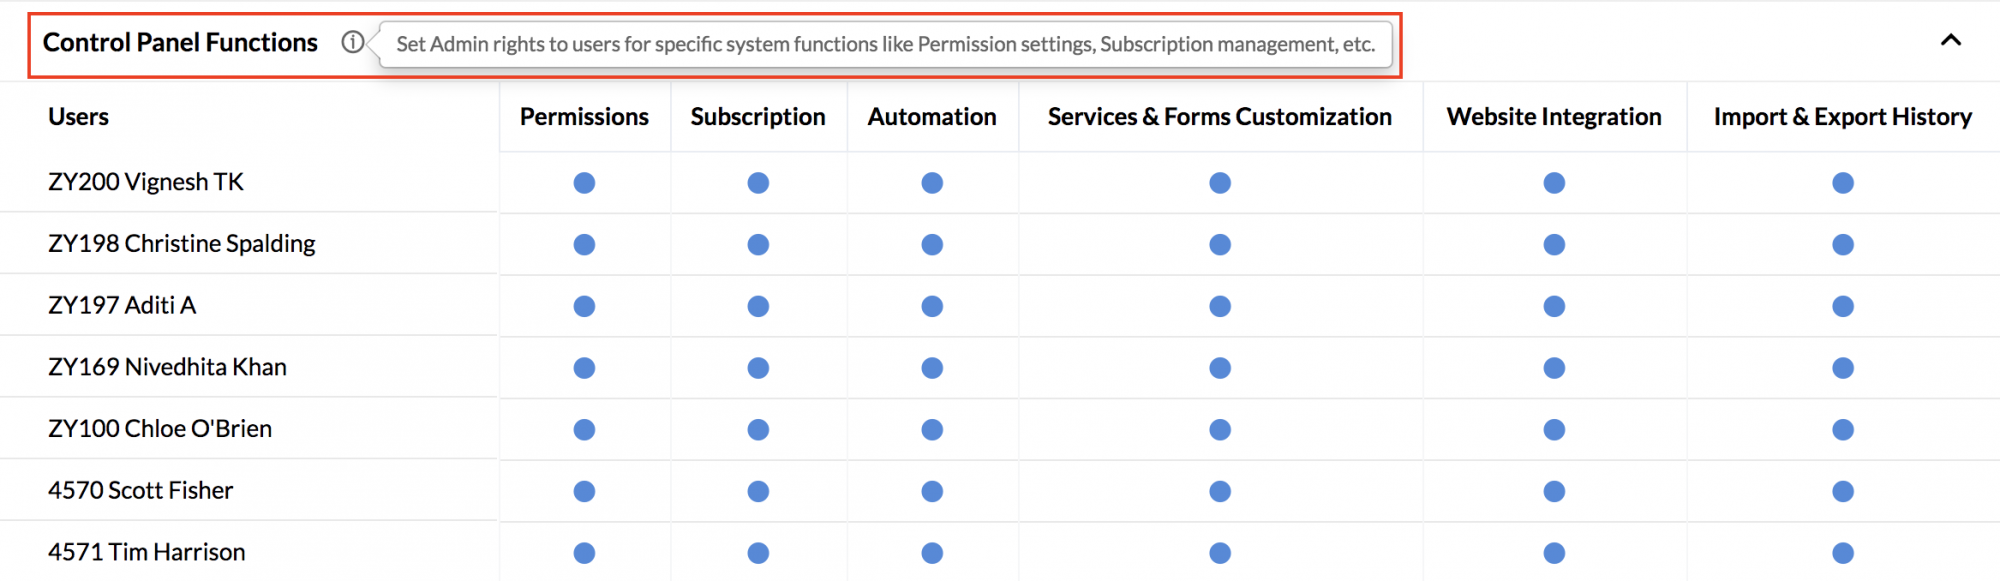
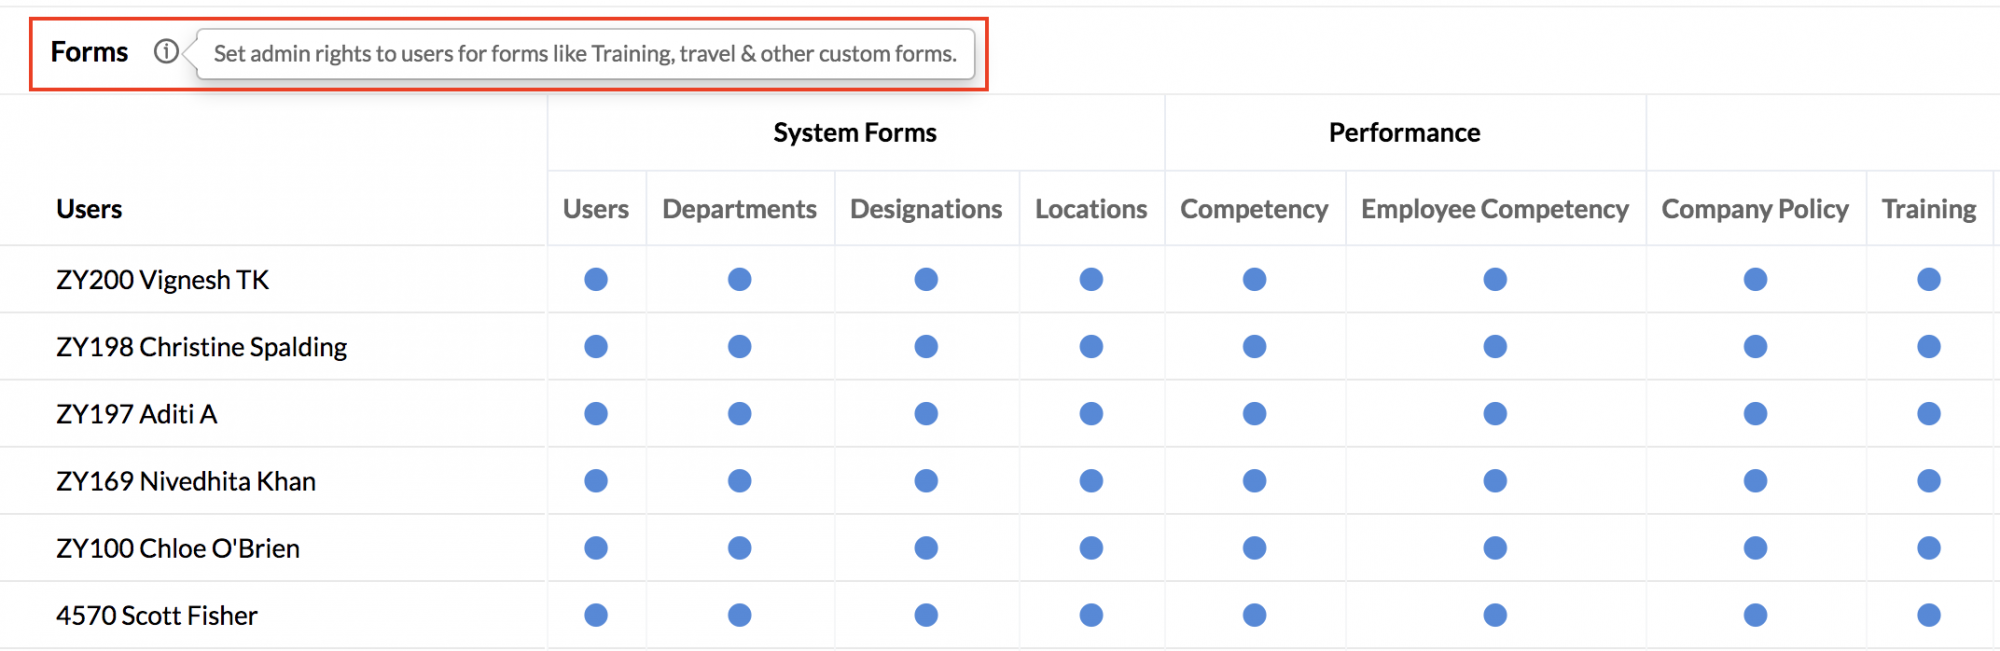
Click the add icon at the bottom of the relevant section, search for the users to enable admin functions for them.
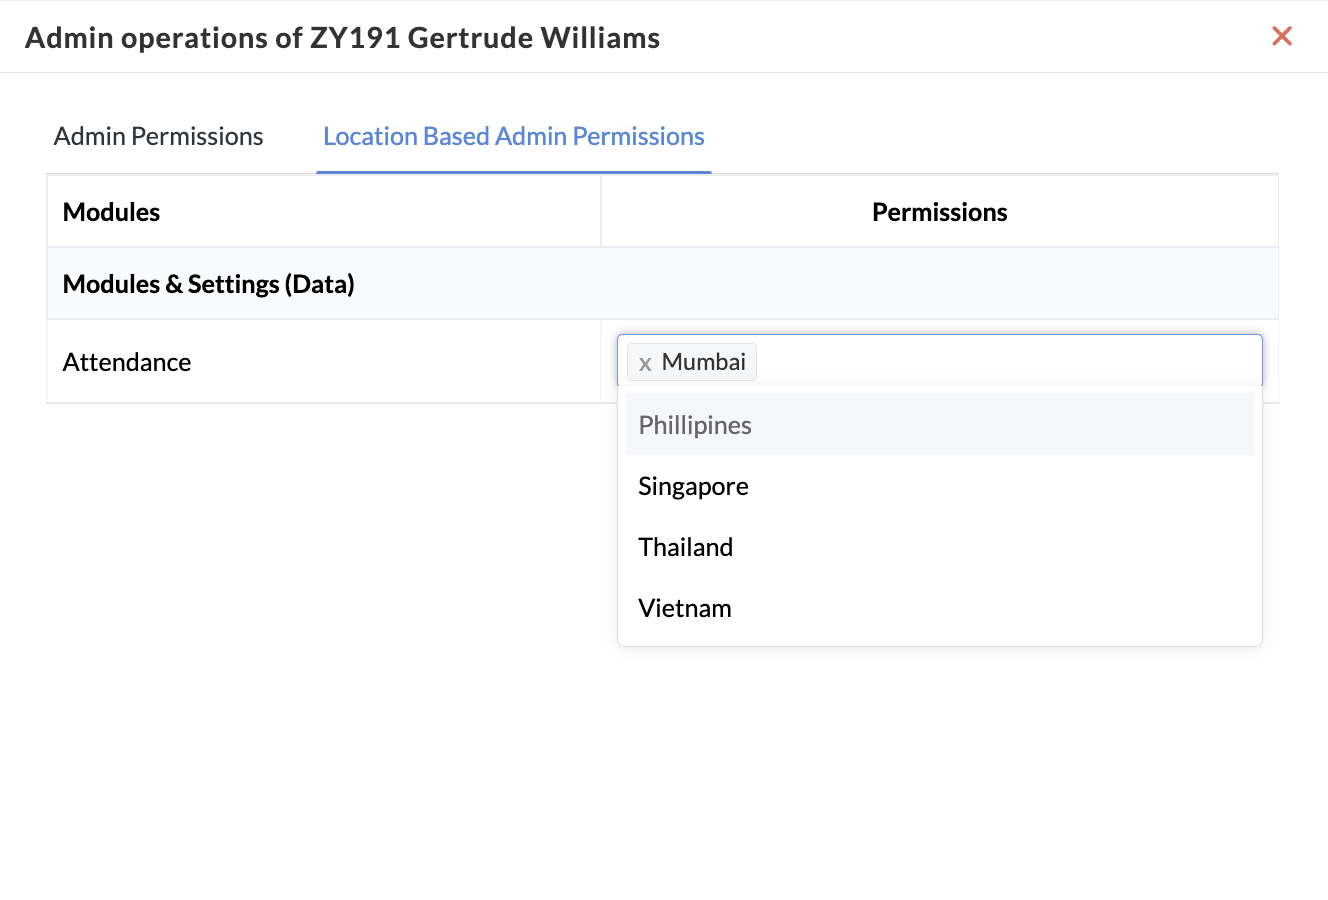
For the modules you have enabled them as Admins, you can make them location admins by selecting only specific locations within that module.
Setting IP and Geo restrictions
IP Restrictions
Zoho People's IP restrictions lets you set restrictions from accessing certain modules such as attendance, timesheet, and files. For instance, if you would like to prevent employees from marking attendance from outside the office, adding IP restrictions will help you achieve this. If there is an IP range specified by your administrator, then your employees will not be able to mark their attendance from anywhere outside the range. IP restrictions can be set based on roles.
- Click Settings (gear icon) > User Access Control > Allowed IPs > Add IP Restriction
- Give the IP range
- Choose the Module
- Under Applicable, select the location, department, designation, role or employee. A combination of what is selected under location, department, designation, and role will be considered as the applicable group. For example, if HR is chosen under Department and Team member is chosen under Role, then this IP restriction will apply to all HRs who are team members.
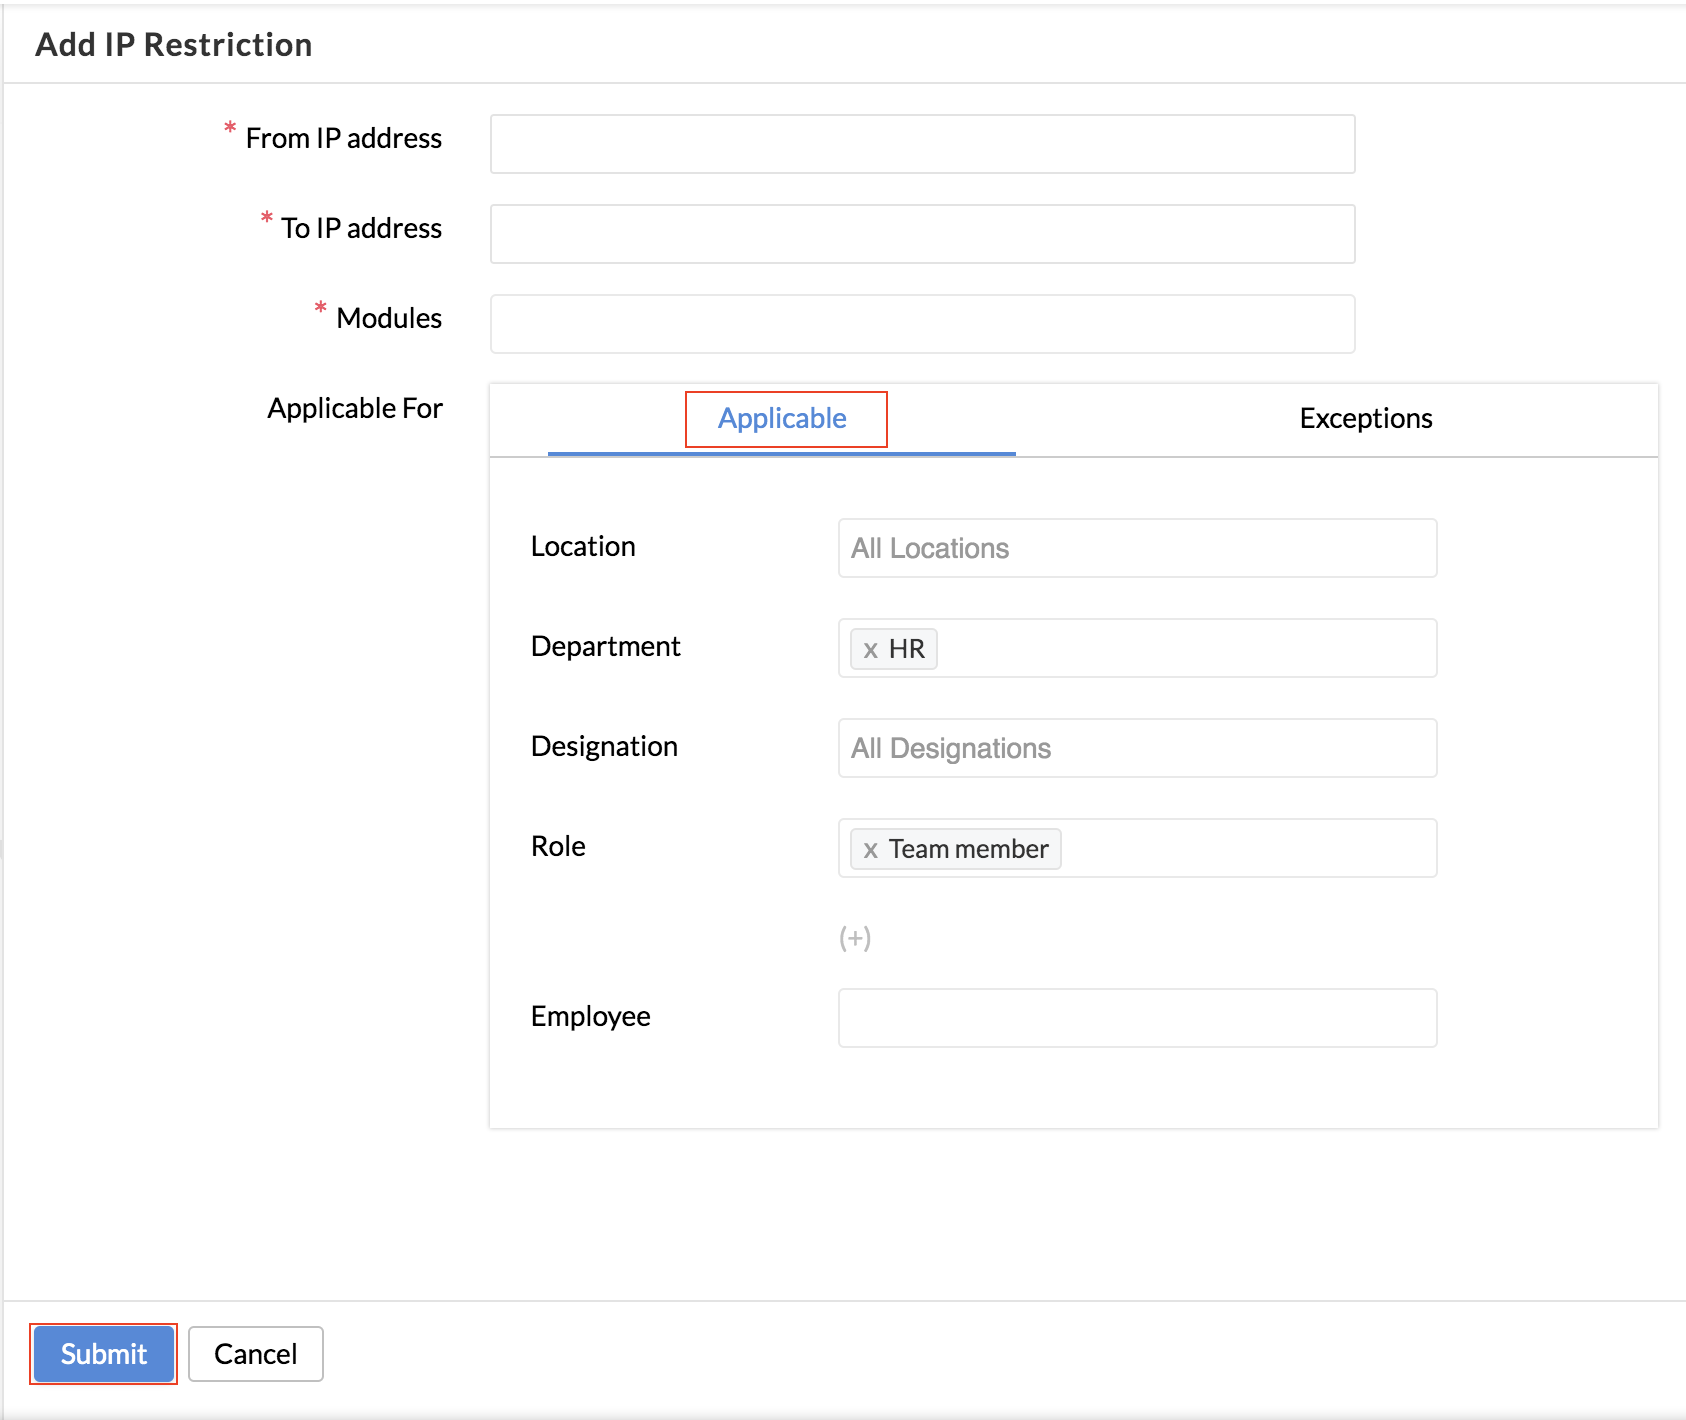
- Under Exceptions, you can select the location, designation or employee that you want to exclude if required. As per the above example, the IP restriction will apply for all HRs who are team members except those located in Chennai.

- Click Submit.
You can set IP restrictions for three modules - Attendance, Time Tracker and File storage.
Note: When Configuring IP restrictions, we always recommend using Static IP Addresses as the Dynamic IP Address gets refreshed in every 72 hours. Hence please check with your ISP to get a Static Public IP address to implement the same in Zoho People. Please do let us know at support@zohopeople.com for any further assistance.
Set geo-boundaries within which your employees can access files, timesheet or attendance. For example, if you would like to define a location range within which employees can mark their attendance, this is possible by adding geo-restrictions. You can set a range on the map and prevent employees from marking their attendance from any range that is outside of the one which is specified by the organization. This restriction can be set even for specific teams, designations, etc making it useful for you to track the attendance of specific teams like sales, marketing, etc.
Follow the steps given below to do this.
- From your home page, go to Settings (gear icon) > User Access Control > Geo Restriction.

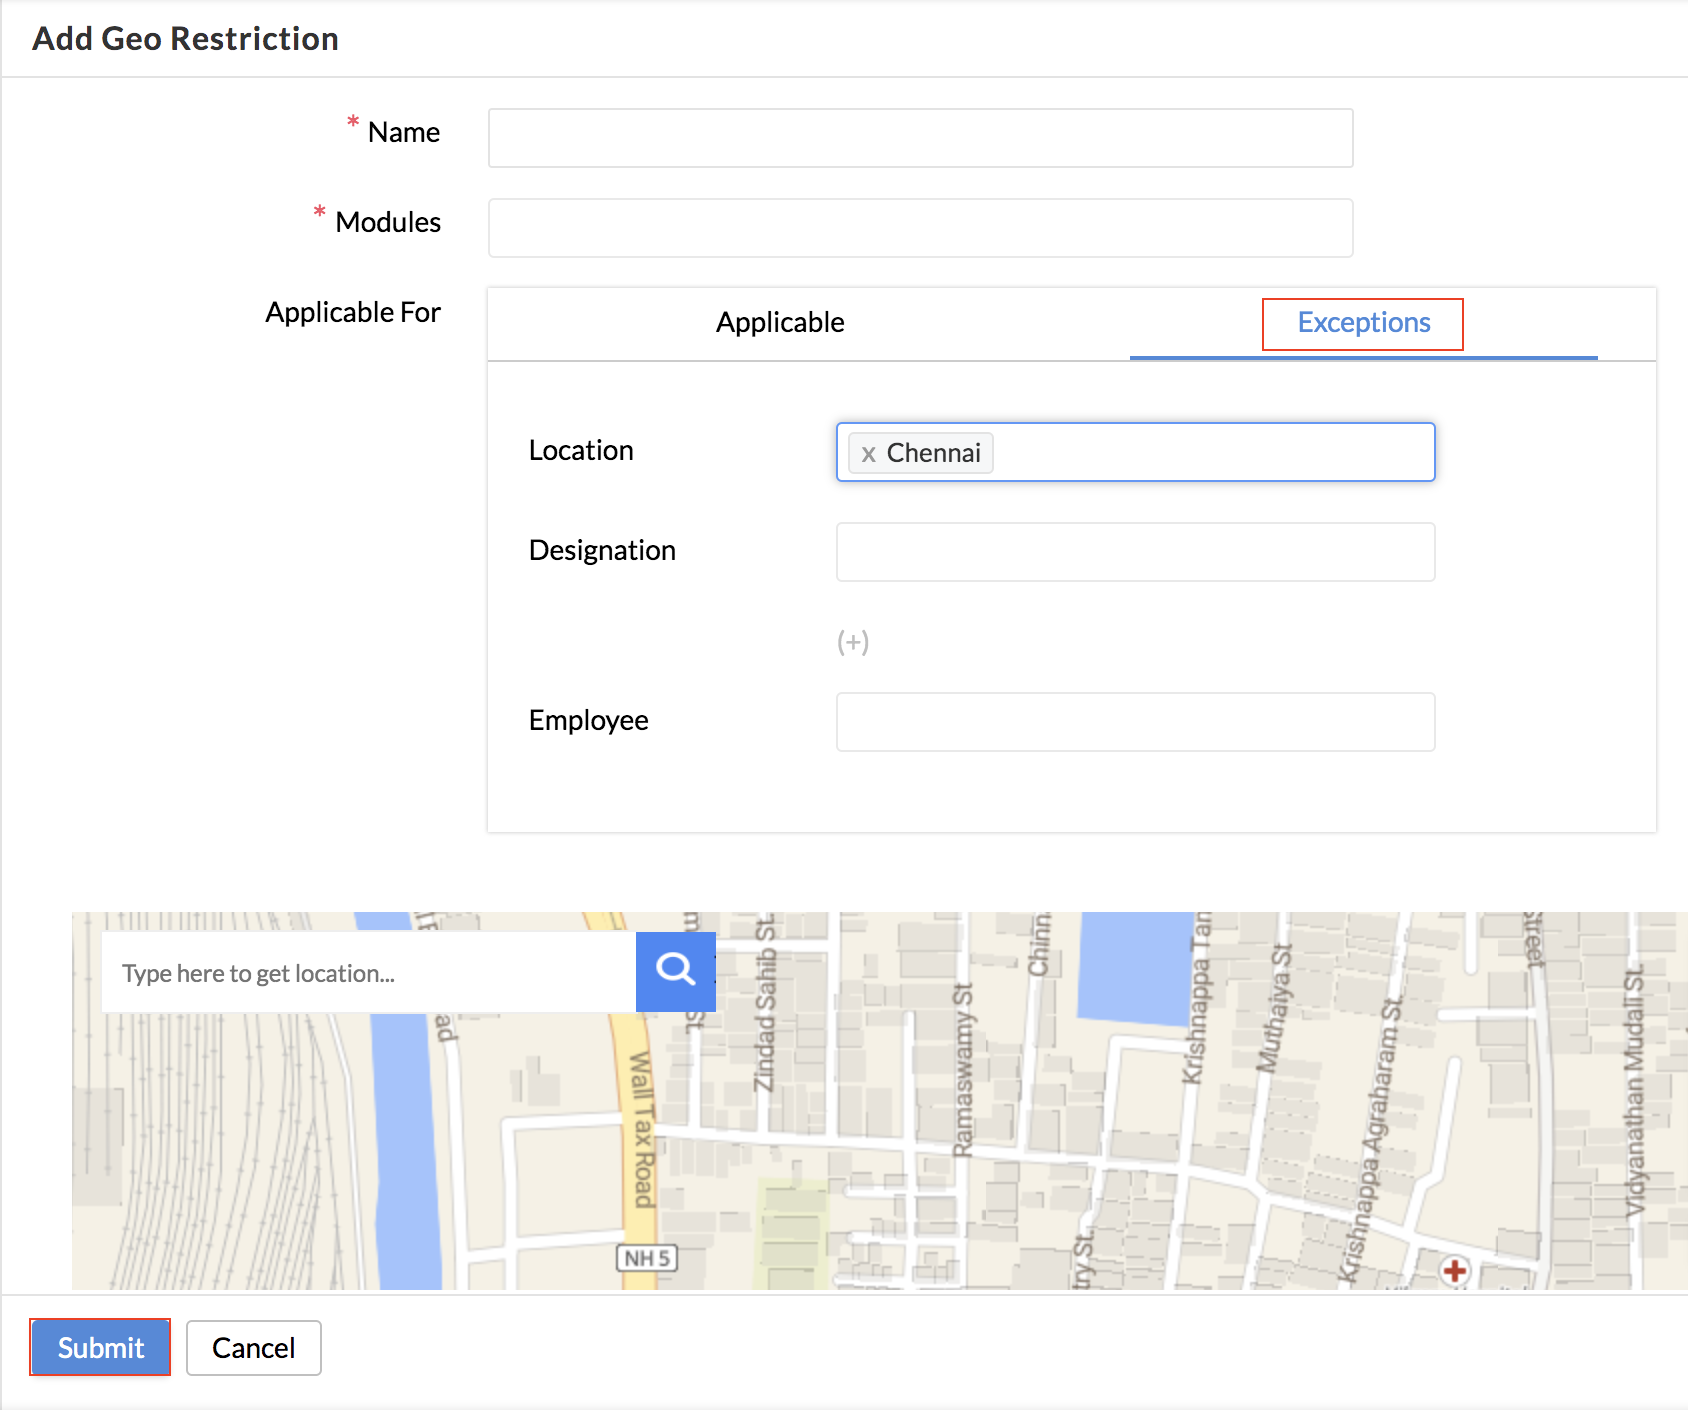
- Click Add Geo Restriction.
- Give a name.
- Select the applicable modules.
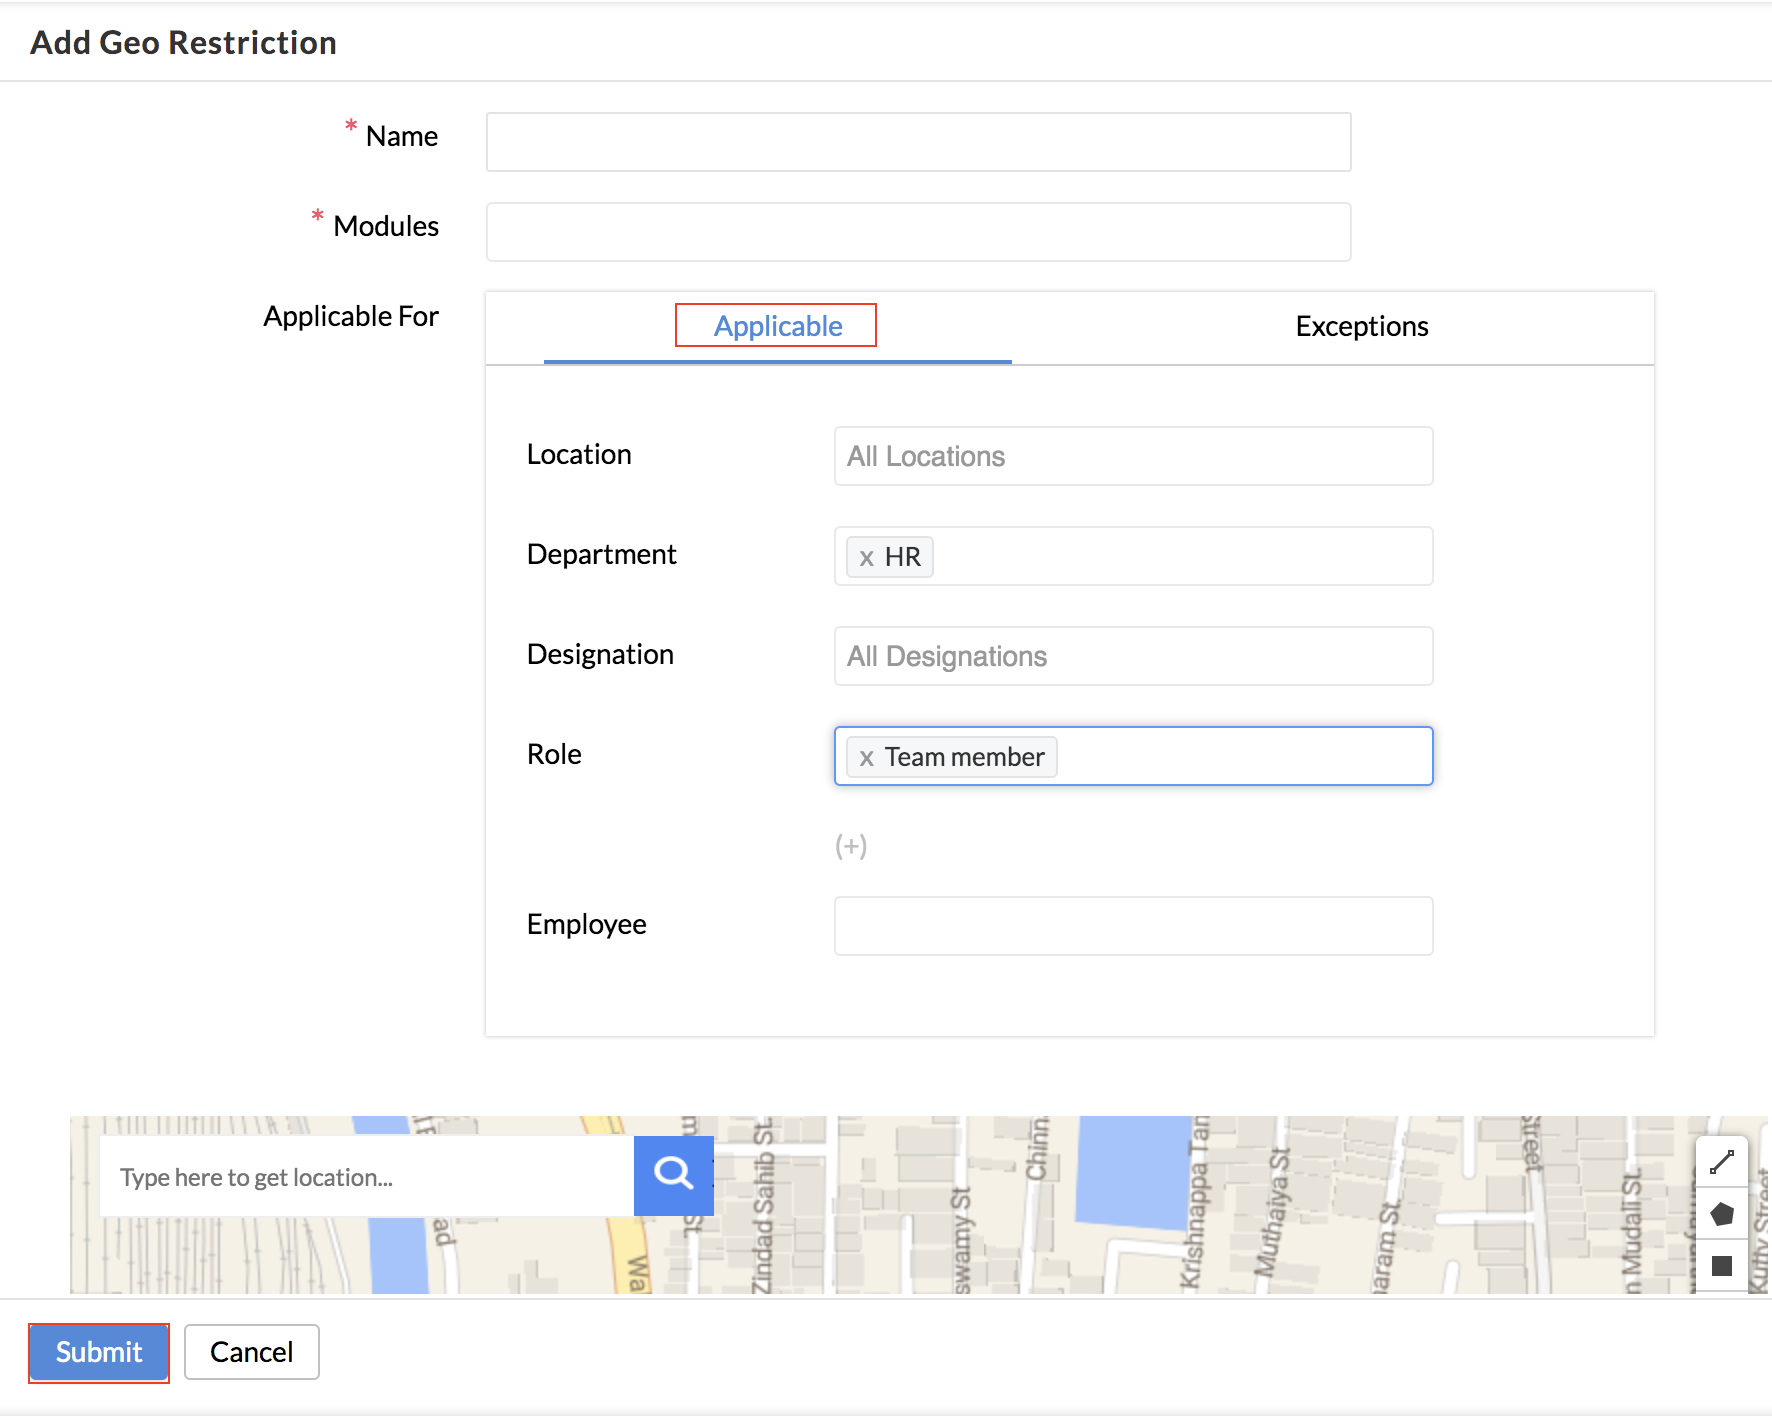
- Under Applicable, select the location, department, designation, role or employee. A combination of what is selected under location, department, designation, and role will be considered as the applicable group. For example, if HR is chosen under Department and Team member is chosen under Role, then this Geo restriction will apply to all HRs who are team members.
- Under Exceptions, you can select the location, designation or employee that you want to exclude if required. As per the above example, the geo restriction will apply for all HRs who are team members except those located in Chennai.
- Use the Search tab to search for the starting location of your range.
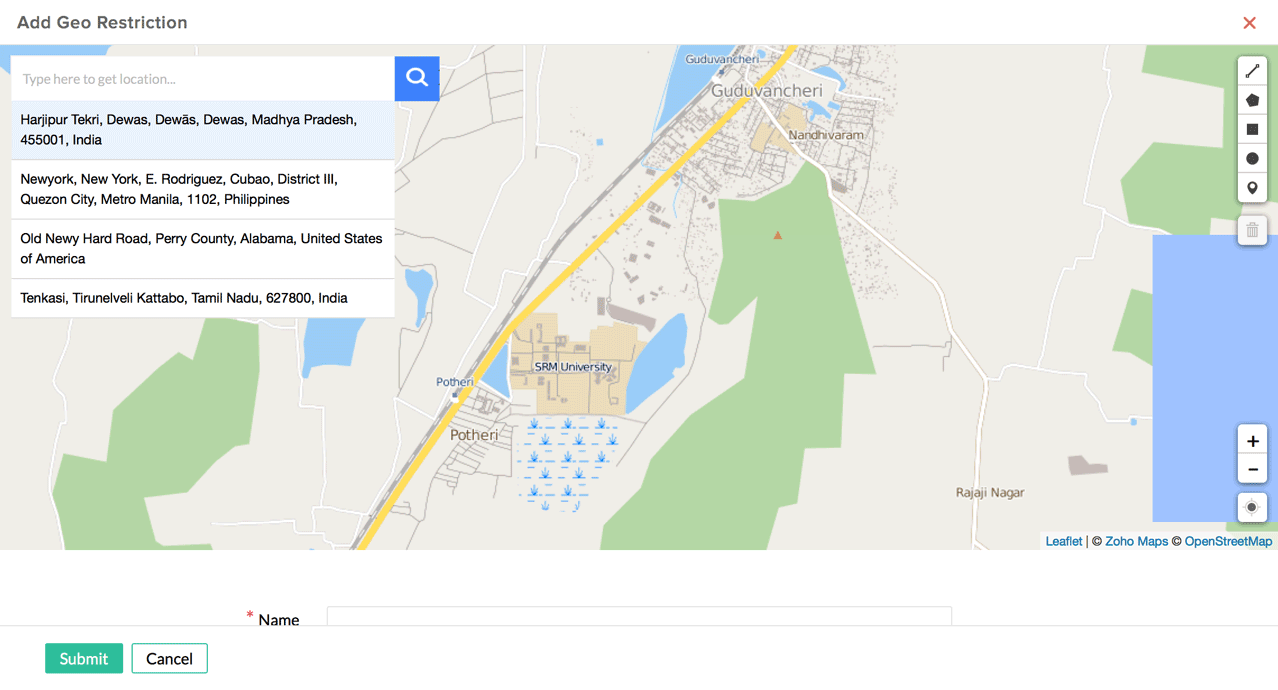
- Use the drawing tool (choosing from a variety of shapes like circle, rectangle, polygon, etc) bar at the right-hand side to select the range.
- Click on the 'Show My Location' icon to come back to the current location.
![]() Using IP restriction, you can only define a particular IP address from which employees can access the modules. However, using geo-restriction, you can define a range (in location) within which the modules can be accessed.
Using IP restriction, you can only define a particular IP address from which employees can access the modules. However, using geo-restriction, you can define a range (in location) within which the modules can be accessed.
Note: You can enable both IP restrictions and geo-restriction for your organization and make them applicable to employees based on the need.
Setting geo-restrictions for multiple locations
For organizations operating in multiple locations, you can have geo-restrictions set for multiple locations as well. You can mark your office address, residence of your employees and more as per your organizational needs.
Consider this scenario, If you would like to enable attendance to be marked for a particular employee from another location of our organization and also from his/her residence, this is possible.
In this scenario, you can create two types of geo restrictions.
- Office location
- From home
To define geo-restriction for another location of your organization, follow the steps given below.
- From your home page, go to Settings > User Access Control > Geo Restriction > Add Geo Restriction
- Give a name.
- Select the applicable modules.
- Under Applicable and Exceptions, select the required fields.
- Use the Search tab to search for the starting location of your range.
- Use the drawing tool (choosing from a variety of shapes like circle, rectangle, polygon etc) bar at the right-hand side to select the range.
- Click on the 'Show My Location' icon to come back to the current location.
- Click Submit.
To define the next geo-restriction (work from home), follow the same steps as above and in the range, select the employee's residence range.
Now, the employee will be able to mark attendance at the other location of your organization and also from his/her residence.
Editing/Deleting a geo-restriction
You can make changes to a geo-restriction which has been added. Follow the steps given below.
- From your home page, go to Settings > User Access Control > Geo Restriction
- Hover your mouse and select the edit icon of the geo-restriction

- Make the changes and click Submit
To delete :
- From your home page, go to Attendance > Geo Restriction.
- Hover your mouse and select the delete icon of the geo restriction.
Note: IP and Geo restrictions can be also be configured from Attendance > Settings or Timesheet > Settings.