Introduction:
Employee self-service is an essential part of any HRMS. It provides employees access to their personal records. Apart from this, employees are also enabled to do much of their HR operations like applying for leave, accessing their timesheets, viewing necessary policy documents and more. An efficient ESS not just empowers employees to handle their basic activities by themselves, it also helps HR save time.
As an admin, everything that is pertaining to an employee can be viewed right on the self-service page. All it takes is a quick search with the employee's name or other keywords like a nickname or mobile number. All the details of the employee like leave, attendance, files shared and related forms can be seen here. List of team members can be viewed and they can be contacted right from this page.
Personal Settings
The personal settings is an exclusive space for each employee to personalize their account and information. Learn more about Personal Settings.
Self-service tabs
For the User, the Self-service page serves as a focal point from where many of their day to day activities like applying for leave, viewing leave balance, logging attendance, logging time, updating personal information and much more can be done effortlessly, without the need to scuffle between tabs.
Apart from the self-service, employees can look up for information from several other tabs. The first one is the organization tab. Here is where employees can view everything pertaining to the org set up. For example, if employees want to see the org tree or the department tree, this is where they will go to. The announcements, departments, designations, etc can also be seen here. If there are groups or tasks that a User is assigned to, then they will be able to see them populated here. Similarly, any reports that are shared with a User can be seen here. If a reporting manager would like to approve requests raised by subordinates, then it can be done in the 'Approvals' tab.
The Self-service page gives a complete view of the following:
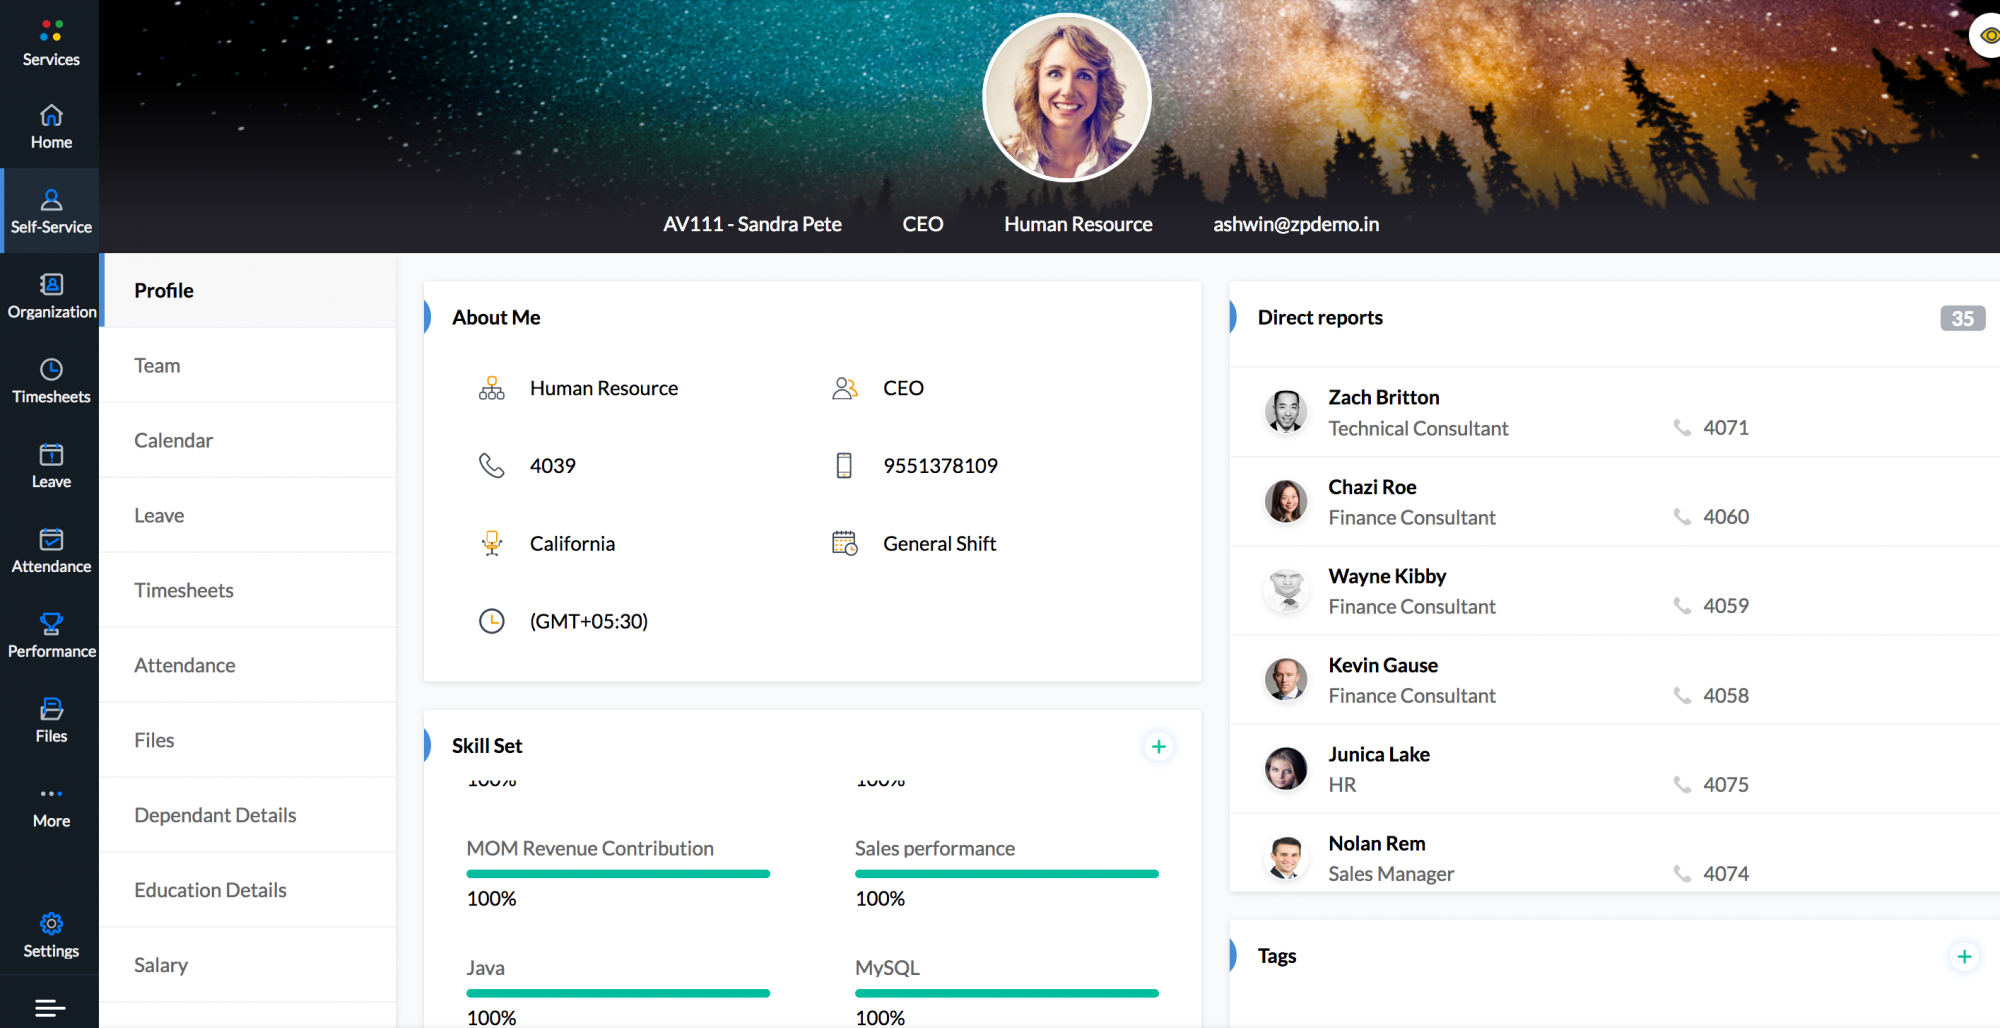
Profile:
You will be able to view your complete profile like personal details, Skill Sets, your Reporting Manager and the list of your reportees.
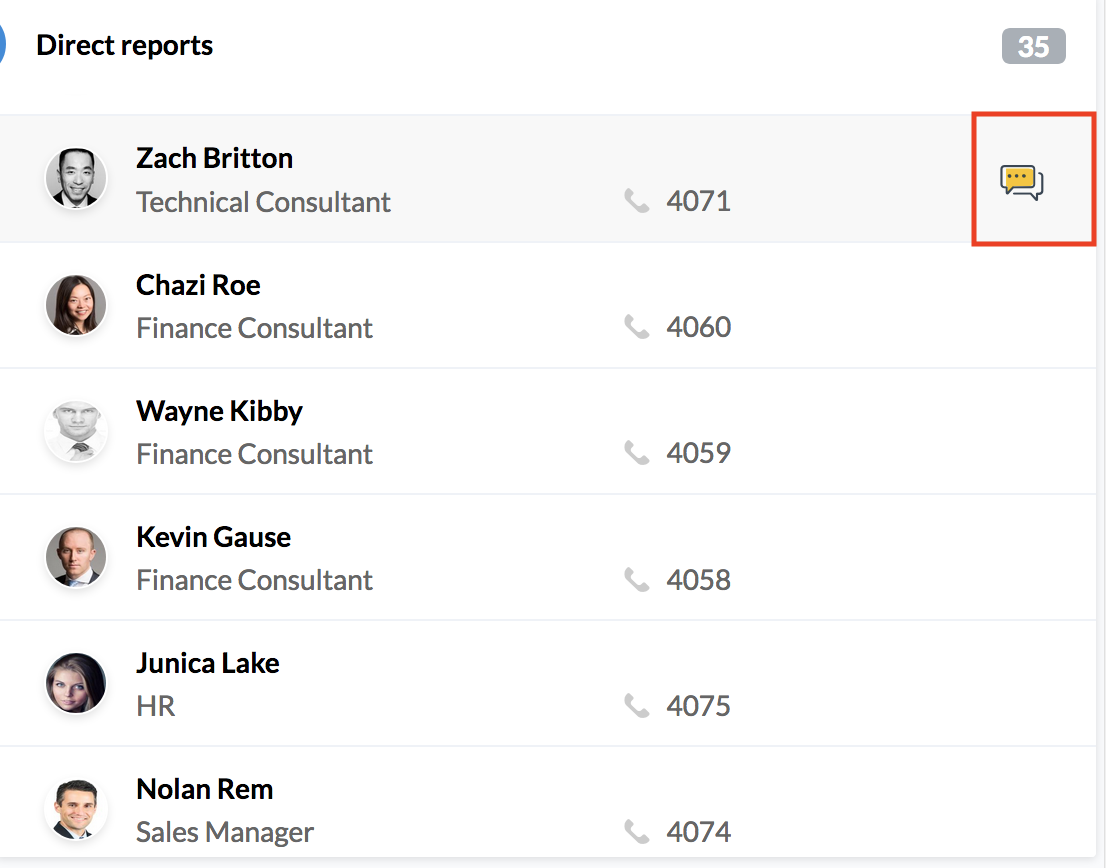
To start a conversation:
- Hover the cursor over the name of the Reporting Manager or any of the reportees
- Click on the 'Chat' icon to start chatting
Team:
In the 'Team' tab, you will be able to see the members of your team. The members of your team will be listed depending on their designations. You can see details like the Department Head, Department email id also displayed.
To start a conversation:
- Hover the cursor over the name
- Click on the 'Chat' icon to start chatting
You will be able to go to the User's profile by clicking on the name.
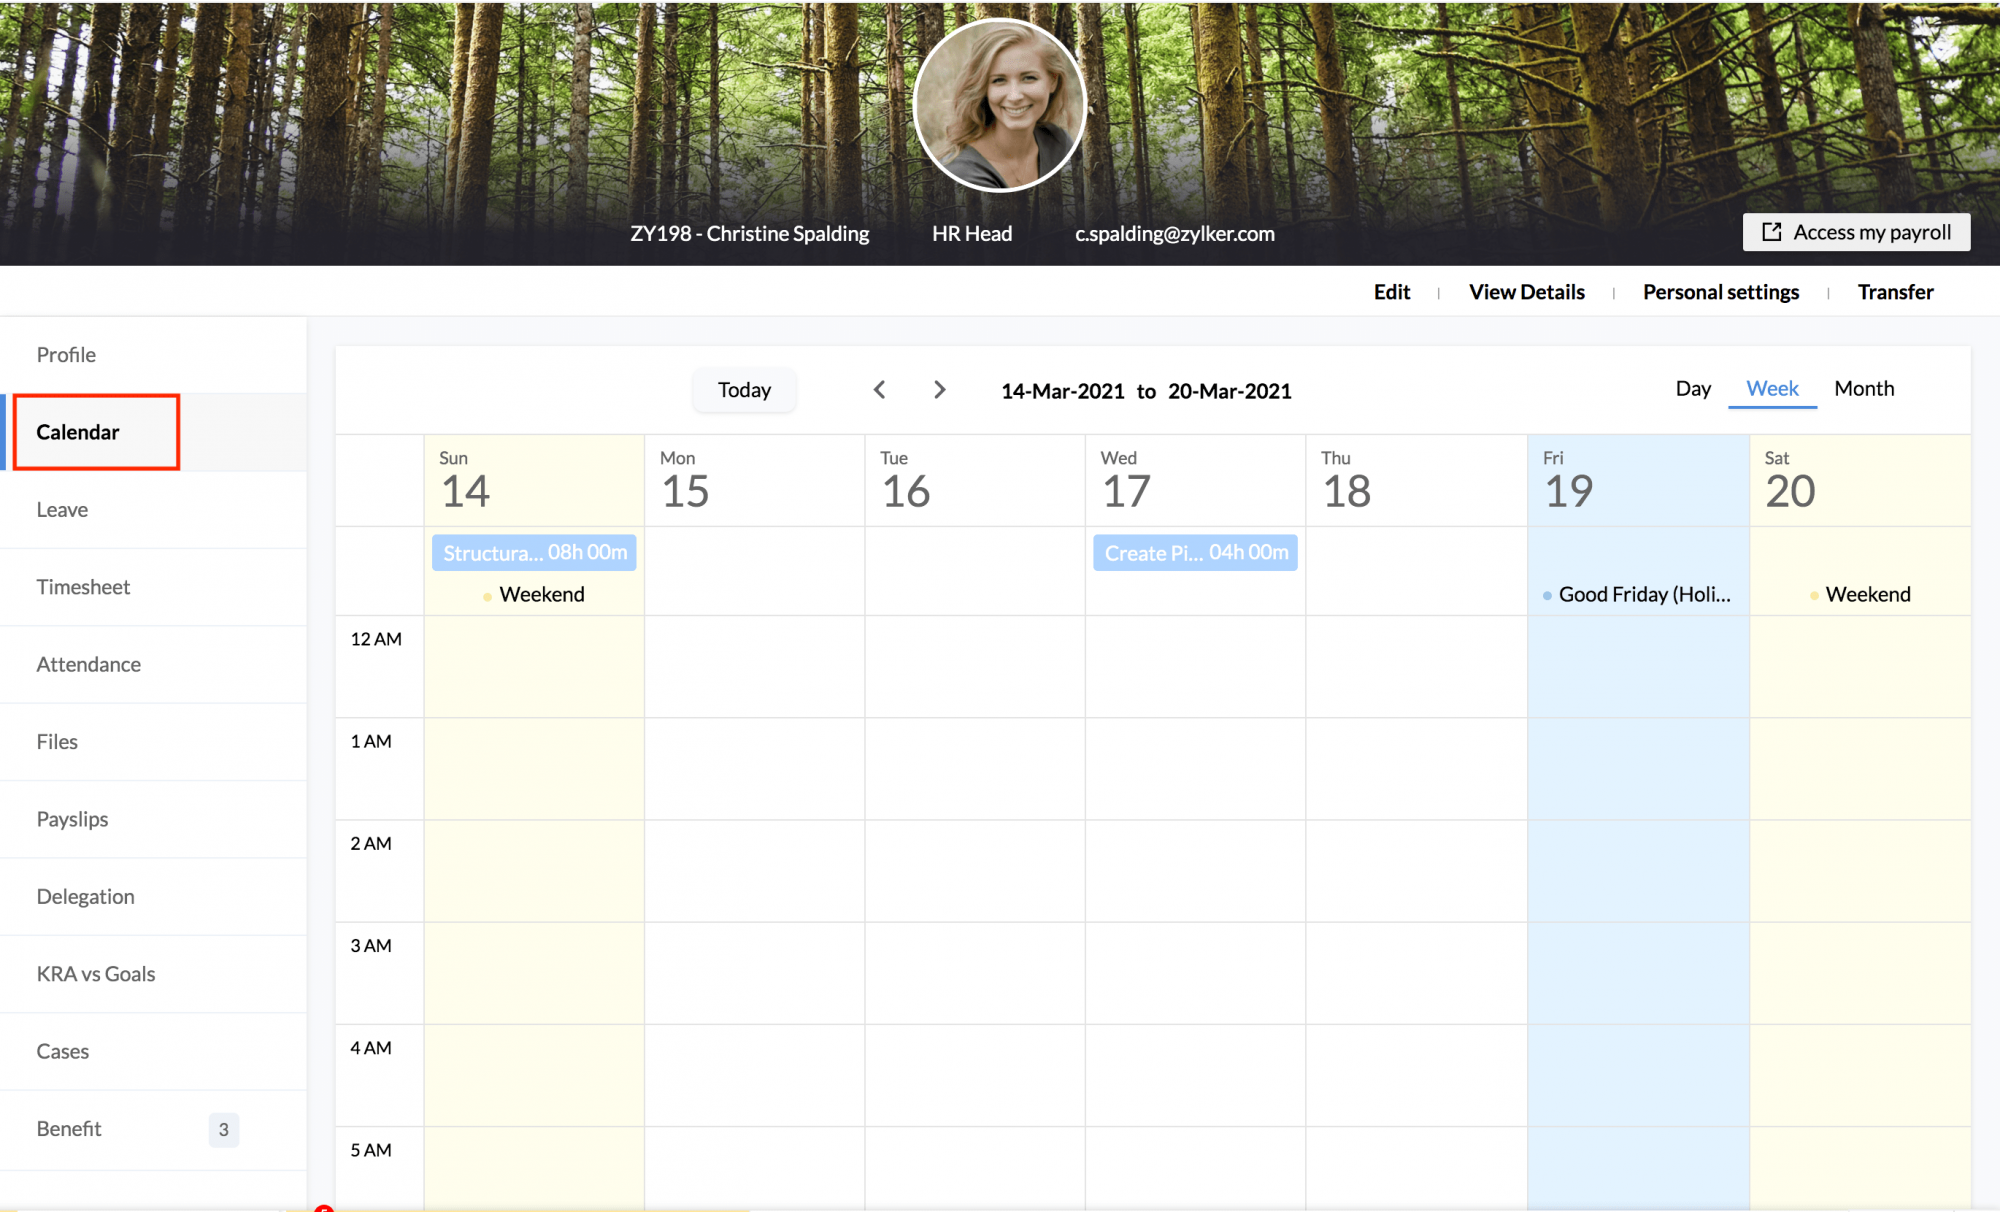
Calendar
This is a comprehensive calendar where all the holidays, leave and time logs can be seen in the same calendar. An employee can also apply for leave or add a time log directly from the calendar by clicking on the specific date tile.
Leave:
In the 'Leave' tab, you can
Apply for leave:
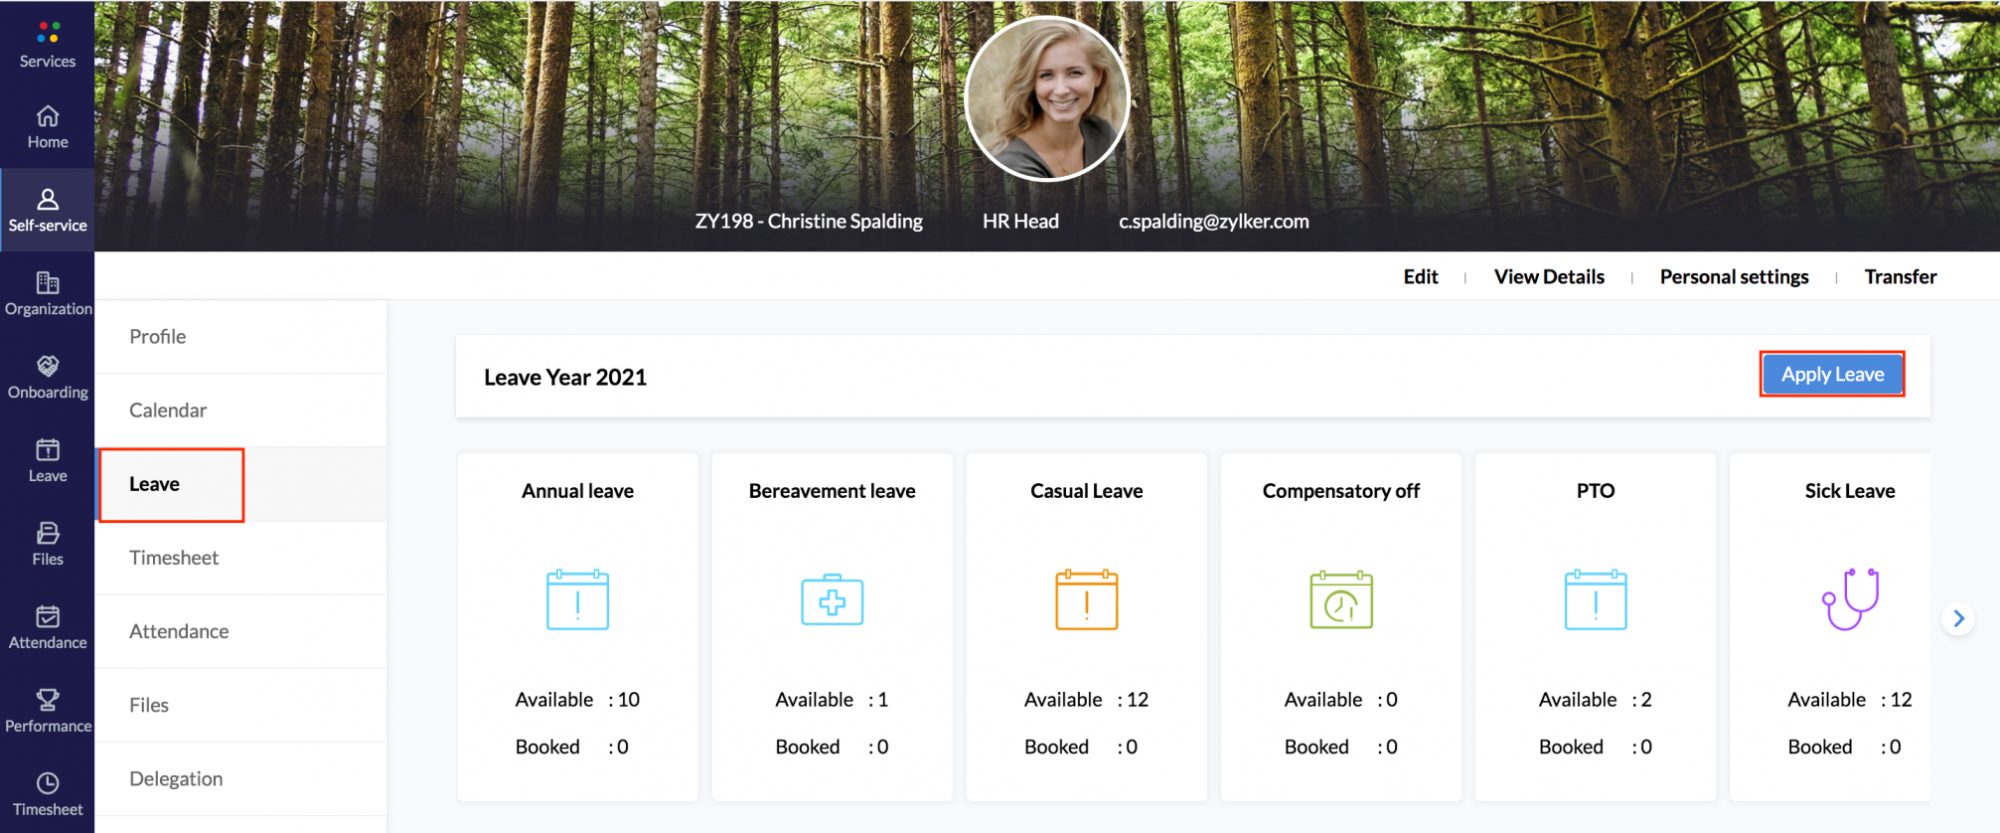
- Click on Apply Leave.
- Select the leave type and the date/date range.
- Give a reason if required and click Submit.
You will also be able to see the leave balance against each leave type at the bottom band.
You will also be able to view the status of the leave when you hover the cursor over the leave date/range
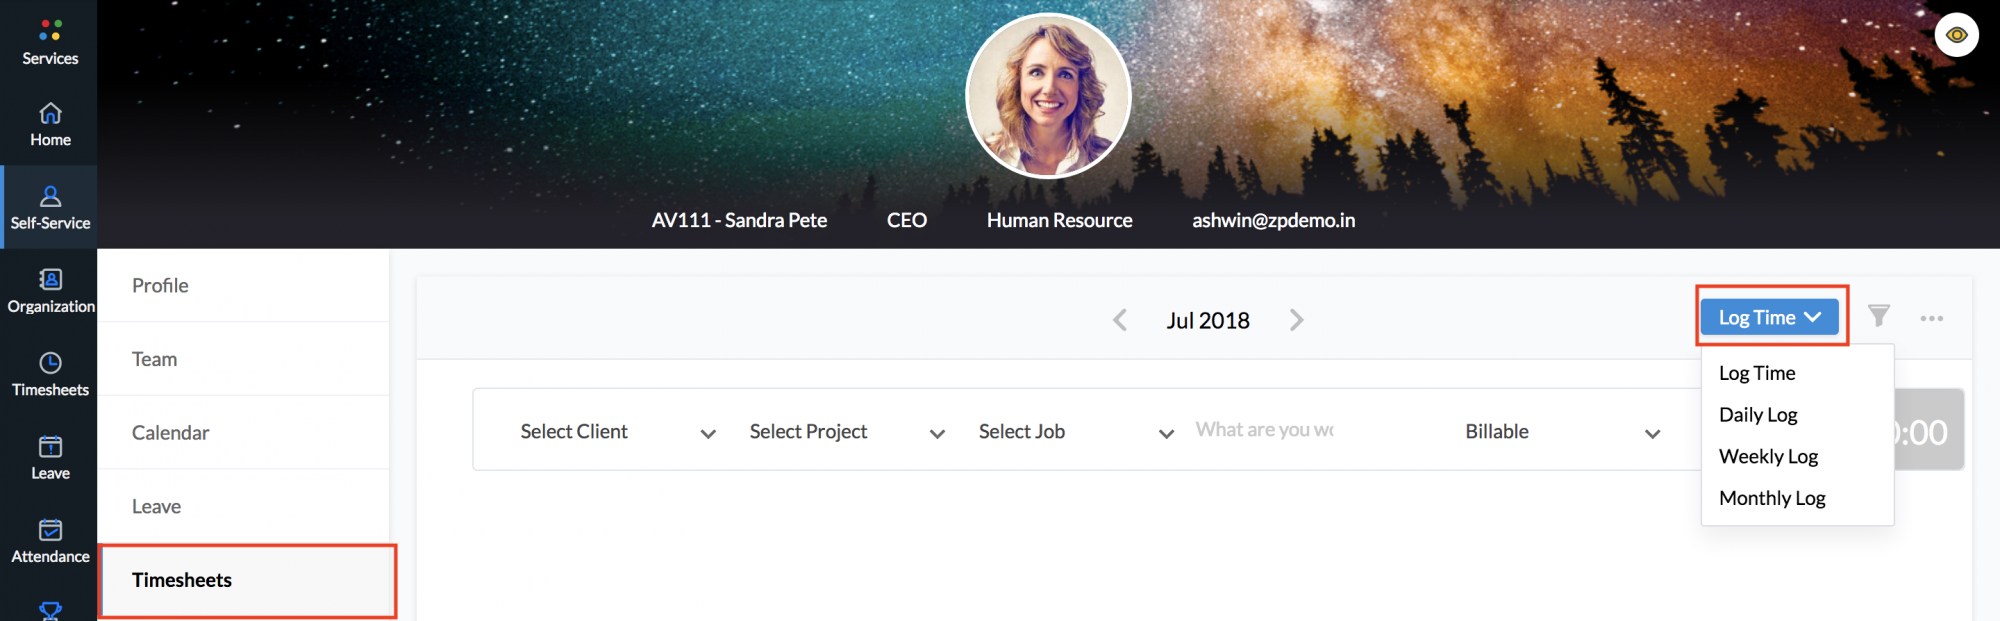
Timesheets:
In this tab, you can log time for the jobs that you do. Time logging can be done using timers or through manual methods.
Click here to know more about time logging.
Filters:
When you click on the filter on the right top corner, you can filter your time logs based on criteria like period, Clients, Jobs and Projects.
Import and Export:
To import time logs:
Click on the ellipsis icon next to the filter icon and click on 'Import'
A sample format is given for you to know the format in which you should upload your time logs
- Click on 'Import File'
- Map the fields and click 'Next'
Note: Import should be done in .xls/.xlsx/.csv formats
To export time logs:
Click on the ellipsis icon next to the filter icon and select 'Export'.
- Select the format (.xls or .csv) in which you would like to export to be done
- Click Export
To submit your time logs for approval:
Time logs that are created can be sent for approval by clicking on the 'Not Submitted'.
Click here to know more on how to submit time logs for approval.
Delegation
When an employee wishes to delegate approvals to another employee during a specific duration or permanently, this can be done with the help of the Delegation feature.
Delegation can also be accessed by the administrator from Settings > Organization > Delegation, other than the Self Service portal.
Learn more about Delegation.
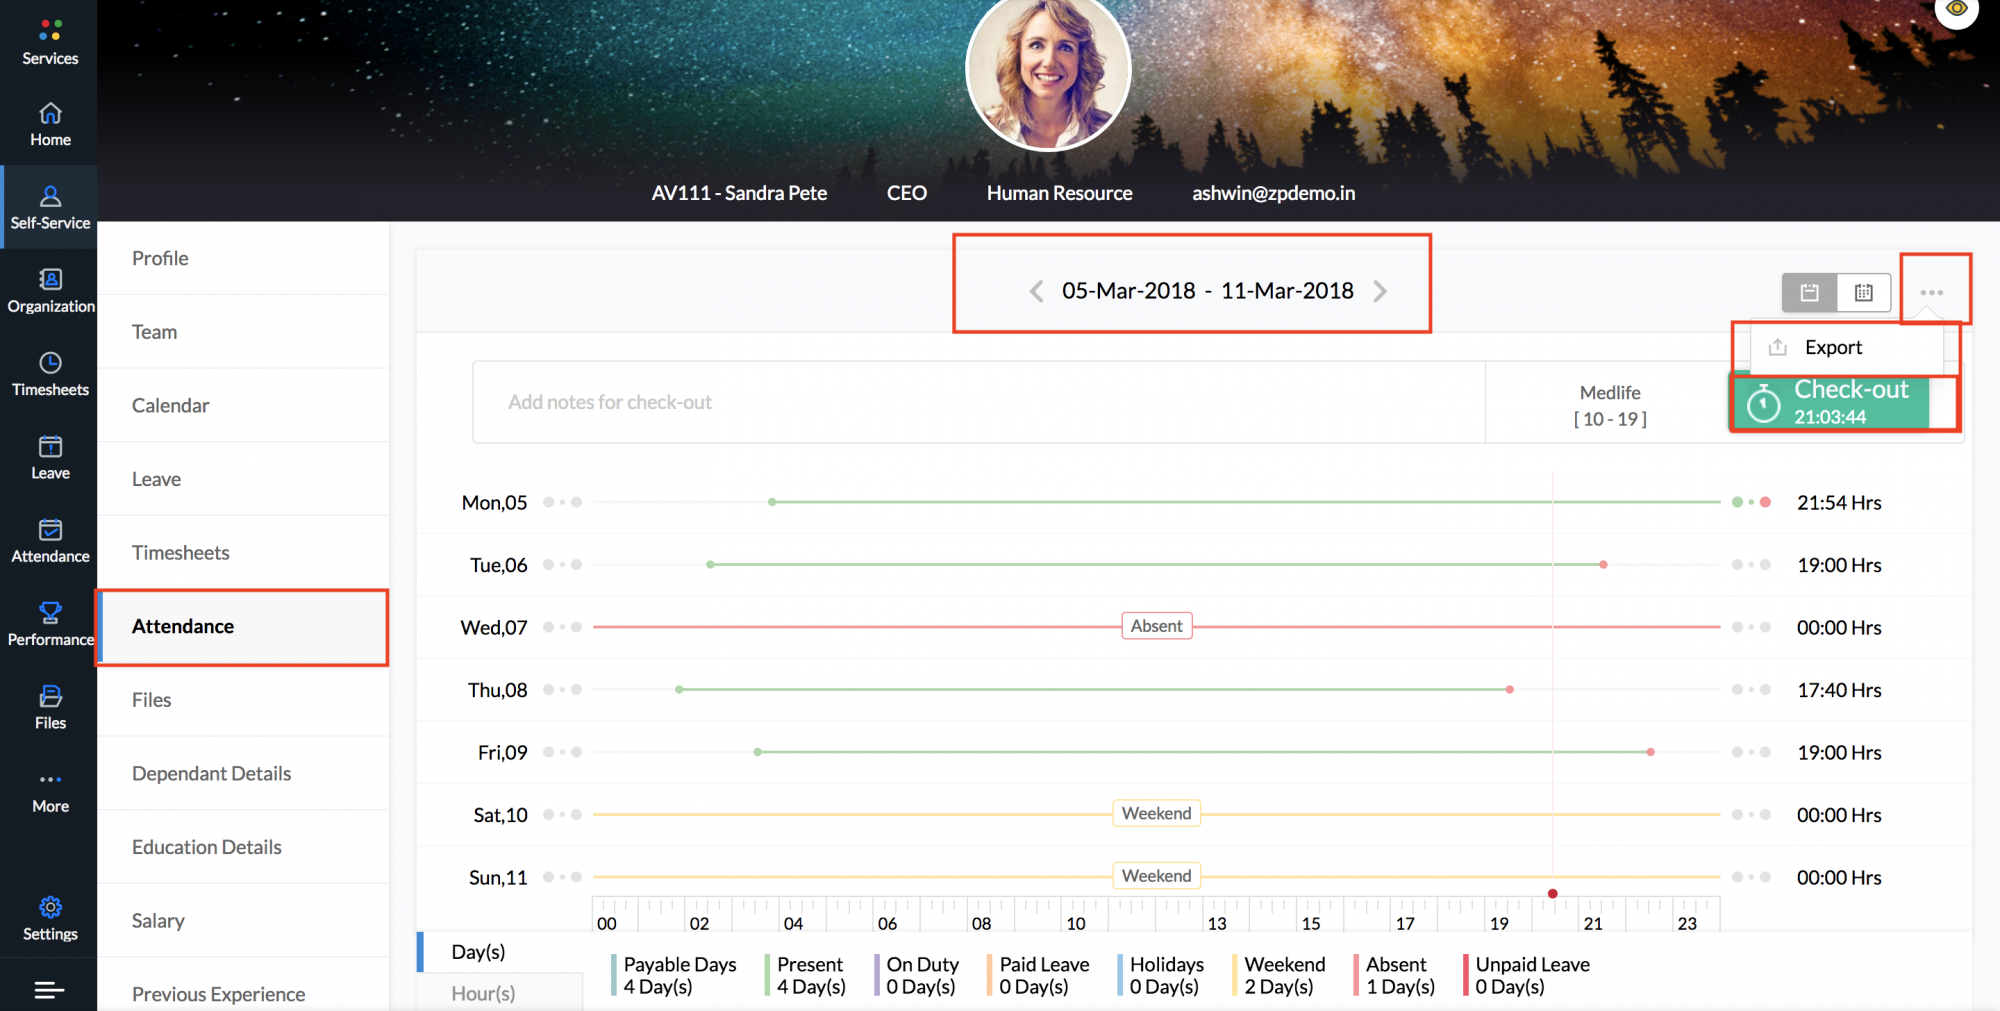
Attendance:
In the Attendance tab, you can :
- Click on the check-in/check-out button to do a web check-in/check-out
- View the total hours logged per day
- View the payable days, weekends and more for the whole week
- Navigate to the previous week to view previous attendance details
- Click on the week/month view icons to take a look at a week or month's attendance
- Have the attendance data exported by clicking on the ellipsis icon
Note: Export can be done only in .xls/.csv formats
Files:
In the 'Files' tab, you can view the Organization Files and the Employee Files.
Note: As an administrator, you can also add new Employee Files by click on '+Add'
Click here to know more files
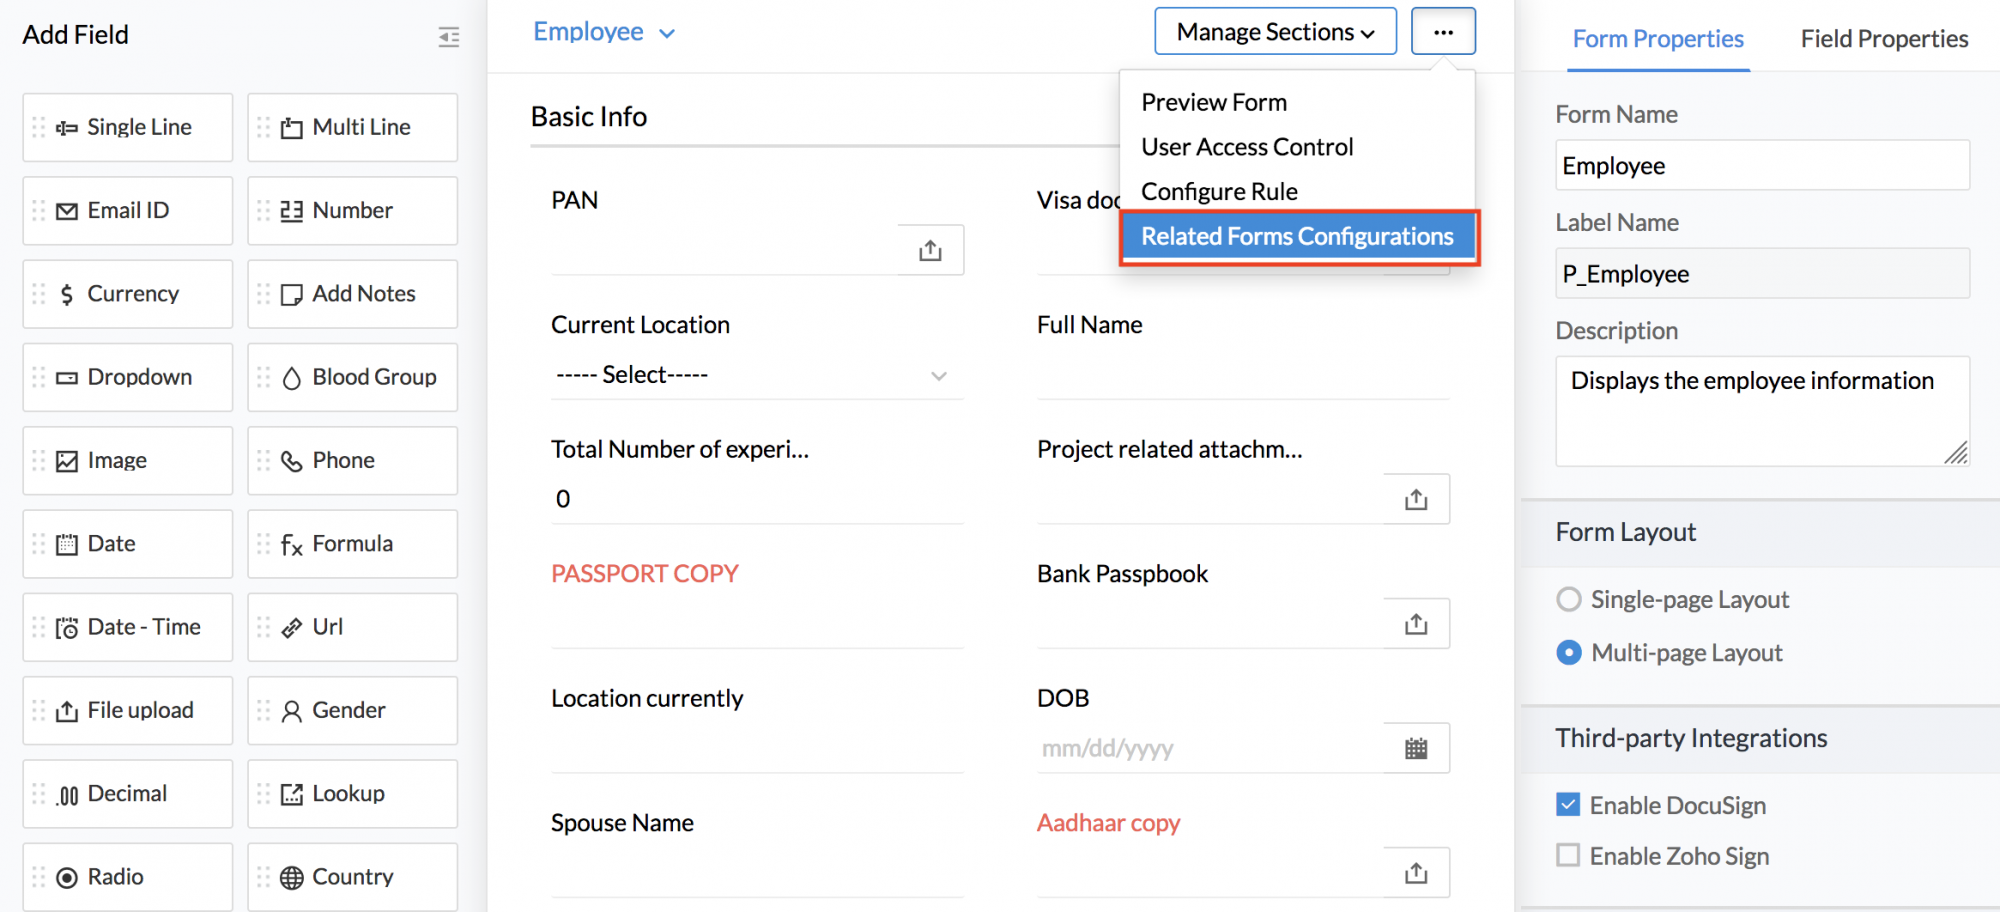
Related forms:
In the Self-service page, you will be able to view all the related forms. Related Forms Configuration lets you view records or add records of a form which is related to the original form by means of a lookup field. If there is a form (F1) and a form (F2) with the second form being the related form for the first one, then the records of the second form can be viewed or added from the first form itself.
For eg, if there is an asset request added by the employee or a training registration done by the employee in the training registration form, (with the employee form as the base form) then the employee will be able to see these requests in the self-service page itself.
Apart from all that has been listed above, an employee will be able to see the tabular columns of the employee form also in the Self-service page. For eg., if the educational qualification and previous work experience details are available as tabular columns, then it will show as separate tabs in the Self-service page.