Roles
Roles define the hierarchical pattern of your organization. You can create roles and assign different permissions in terms of accessing data, performing various actions across the system and more.
Roles in Zoho People can be classified as General Role and Specific Roles.
- Adding a New General Role
- Assigning an Admin for a Location or Department
- Adding a New Specific Role
- Configuring Permissions
General Role
The General Role is the default role in Zoho People, General roles include a few preset roles such as Admin, Director, Manager, Team Member, and Team Incharge. All presets have customizable access to various forms and modules and can also be fine-tuned at a later point (except Admin role). The person setting up the product (owner) would be an Administrator and other users can be assigned as Admin too. (Admins have complete access to all forms and settings). All invited users by default would be a Team member under General Role.
Specific Role
In addition to a standard General Role, a company might require an employee to have an additional role, such as handling the HR operations of a specific location or department. This can be achieved by creating specific roles. Data Admin Role provides complete Data access over all forms and modules for the specified location and department.
Note: By default, only specific role (data admin) will be available. For creating custom specific roles contact support@zohopeople.com
Adding a New General Role
Follow the steps given below to create a new role.
- From your Home page, go to Settings (gear icon) > User Access Control > Roles
- Click on '+ Add New Role'
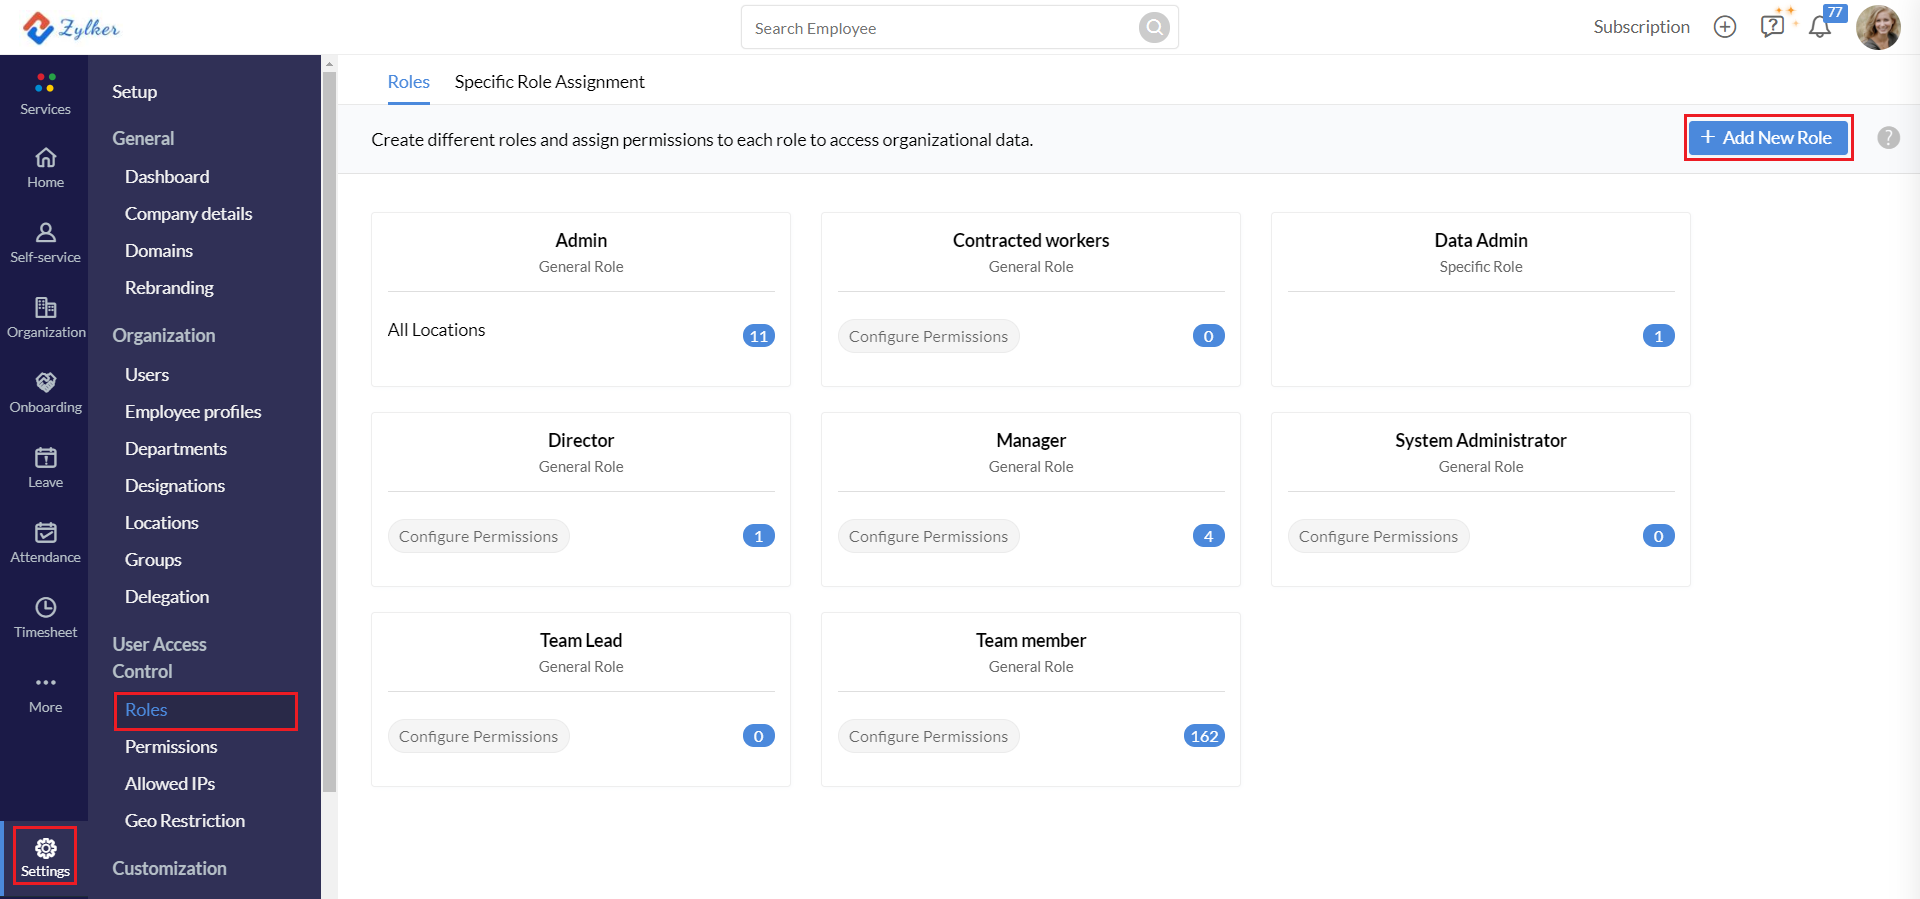
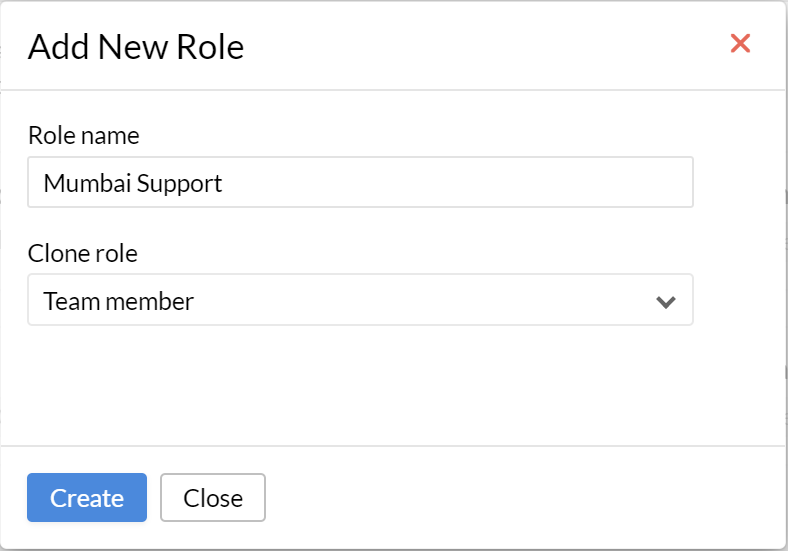
- Enter a suitable name for the role that you would like to create
- Select a particular role from the Clone role drop-down thereby allowing to create a role that is similar to that of an existing role. This means that the same set of permissions or access will be applicable to the cloned role as well.
- Click Create
Assigning an Admin for a Specific Location or Department
You can create new admin roles for particular locations or department. The assigned user will become the administrator only for the location, department that is tagged with the created role.
- From your homepage, click on Settings (gear icon) > User Access Control > Roles
- Go to Specific Role Assignment tab.
- Click Assign New Role
- Select the employee who you wish to assign as Admin.
- Under Applicability select the Location and Department.
- Click Save
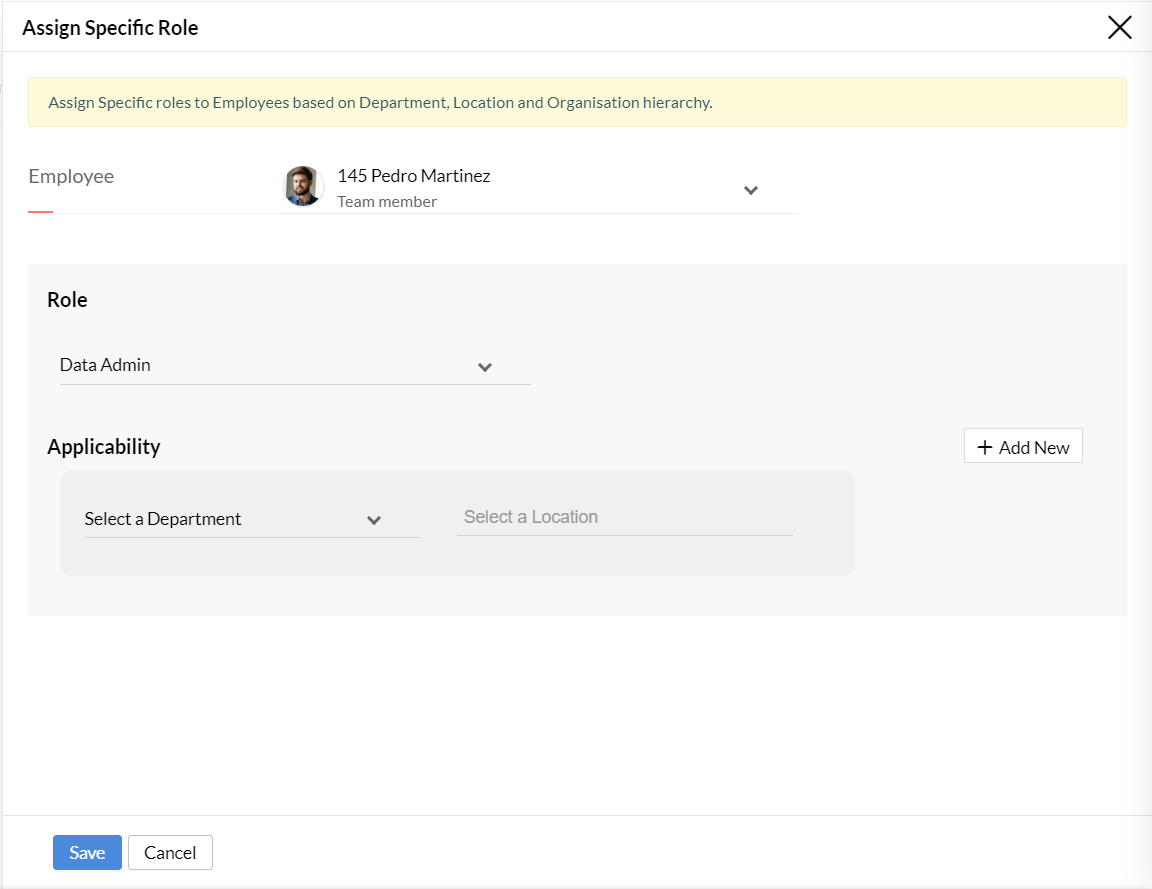
Note: If Organizaton Structure feature is enabled under general settings, in addition to Location and Department, Legal Entity, Business Units, Division settings are also included under Applicability. The screenshot below shows all applicability options with Organization Structure enabled. To know more click here.

Adding a New Specific Role
In your organization, there could be employees who besides their general roles might also need to handle payroll, transport, event planning and so on. However, they do not really require Data Admin access for a complete department or location, but rather they would be needing access for a specific form. Specific Roles can be created and view, edit, add ,delete permissions can be granted as required for specific forms.
- From your homepage, click on Settings (gear icon) > User Access Control > Roles
- under Roles tab, select + Add New Role. Select Specific Role radio-button
![]()
- Enter name, click Create.
- Now in the Roles page, click configure permissions within the newly created specific role.
![]()
- Select the form you wish to give access to, and permissions can be configured here.
- Now go to Specific Role Assignment screen, assign the created specific role to an employee.
![]()
Note: The created specific role can be directly assigned to any number of employees who could be under the same role. No need to create new roles everytime.
Configuring Permissions for a Role
To configure permissions:
- Under Setup (gear icon) > User Access Control > Roles, you will see all the roles
- Go to the role for which you need to configure permissions and click Configure Permissions
- Select the form for which you would like to set permissions
- Go to the View/Edit/Add/Delete section based on the type of permission you would like to give
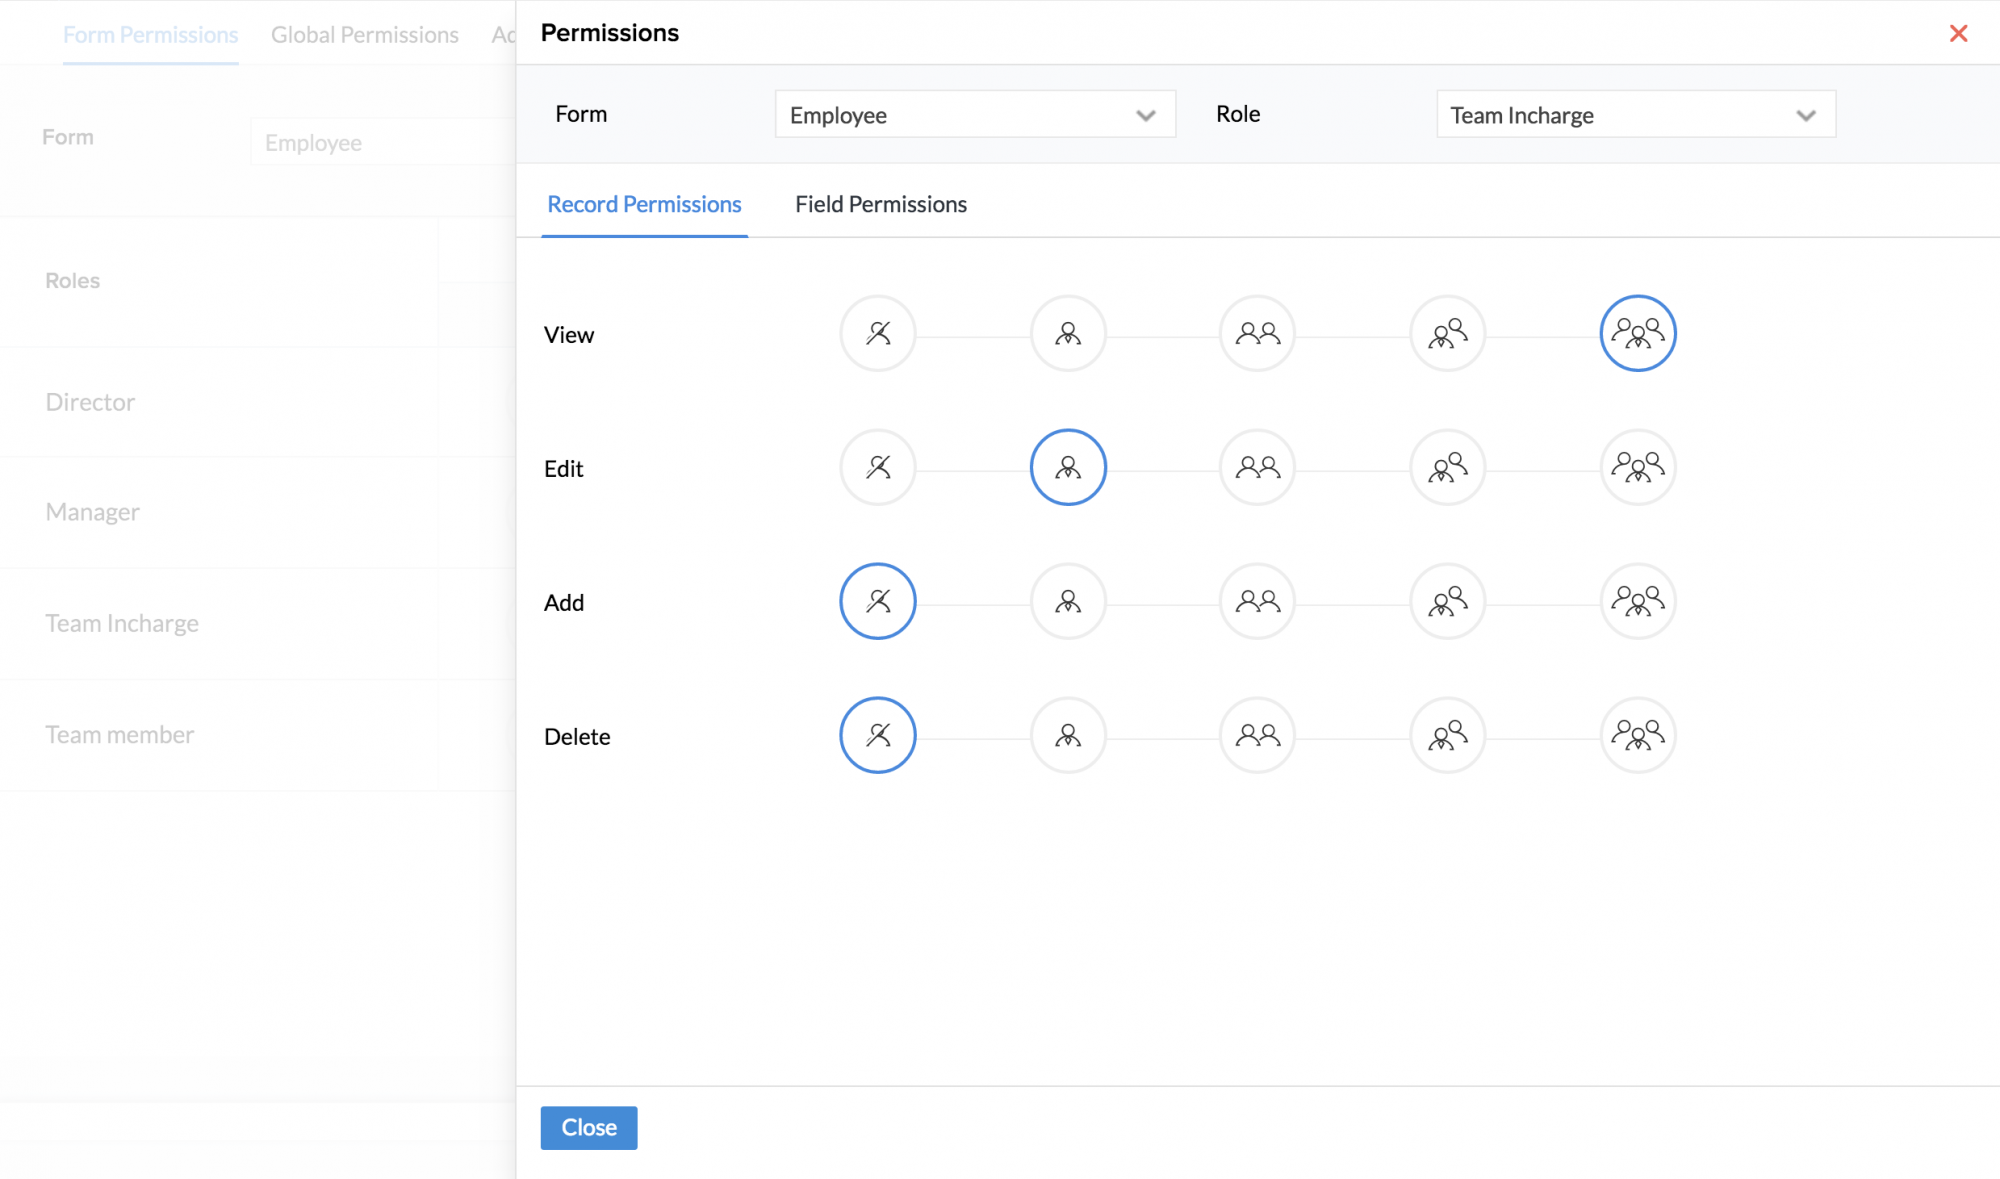
- Select the type of data (No data/My data/reportees' data/reportees' data + My data/All Data) for which you would like to set permissions
Note:To set Add or Edit permissions for a record, you should have first configured View permissions for the same. Also, if you would like to give Edit/Add permission for reportees' data + My data, you cannot do it unless you have given View permission for reportees' data + My data. In other words, permissions to view records should be set before setting permissions to edit or add the same record.