Based on the type of course created, the following features can be added within the course modules.
For Self-Paced courses:
For Blended Course:
Let us take a closer look at these features
Online Test
Create a test that learners can take up online within the Zoho People interface. Handpick questions from the question bank or use the random question generator. New questions can be added too. Single, multi-choice, and true or false types of questions can be added and the result is shown as soon as the learner completes the test. Unlike the offline test which essentially involves uploading a soft copy question paper, Online tests are carried out online as part of the course, it is also possible to grade learners.
Here are some of the key points to know about online test
- Single, multi-choice, true or false, fill in the blanks, match the following, hotspot type questions can be added.
- Test duration can be specified.
- Questions can be added when creating a test or from the question bank. Random questions can be added using the Random Question Generator as well.
- Clicking on ’Start’ will be counted as an attempt.
- All questions must be answered within the given duration. Answers cannot be changed later.
- Unanswered questions will be considered as incorrect answers.
- Even if there are unanswered questions when time concludes, it still counts as one attempt.
- Results are auto-calculated and you can choose to display or hide the result at the end of the test.
- Based on account settings, and course grade configurations, it is also possible to grade online tests.
- Navigate to the module tab in an existing course (LMS > My Courses > select a particular course > Module tab)
or
Create a new course (LMS > My Courses > + > Course > select blended or self-paced and add a new batch (a batch is only required for blended learning) - Now create a new module and add a test or from an existing module, click the add + icon and select Online Test

- Now in the Add Online Test window, enter the name and description. You can mark the test as mandatory if required.
- Use the Maximum allowed attempts option to specifically limit the number of attempts or allow unlimited attempts.
- Choose Grade Category if applicable and click Save to proceed to the next tab.

- Click on Add Assessment to begin. Use the 3 cards namely Assessment Details, Assessment Preferences, and Score Preferences to tune the assessment to your preference.
- If you want the test to carry a time limit use the Assessment time limit setting, which allows you to limit time for the entire test or on a per-question basis.
- If you want to shuffle questions with every attempt enable the Shuffle questions checkbox.
- Within Score Preferences, you can enforce a pass percentage. Specify which score is to be considered as the final score (either the last attempt score or the highest of any attempt).
- Finally, enable the show marks to learner option to display marks scored, answers, etc as per your preference at the end of the test.

- Once all information is added and options set, click Next to proceed.
- You will now be viewing the Questions tab where you will add the questions of the assessment. This tab also holds the editable Introduction and Thank You sections.

- Click on Add Questions to add a new question from scratch or use the drop-down option to access Add from Question Bank and Add Random Question option. There are 8 types of questions you can add to your test:You can use the Random Questions Generator to automatically search and add the required number of questions based on the specified criteria from your question bank. The Add from Question Bank option lets you manually choose and add questions from the question bank (which comprises of the questions previously added when creating other tests). When using the question bank option, you can also import questions (moodle XML format) by using the Import button.

- Now that you have your questions added click Next to move to the Security tab to enable additional options that can improve the credibility of answers in the test.

- Now navigate to the next tab - Publish for a quick glance at the assessment and test link. (The course should be published before the test can be taken by learners). You can also click on Preview to see a preview of the assessment.

- The assessment is now marked ready. You will again be redirected to the Add Online Test page. Navigate to the Test Completion tab.
- The Test Completion tab allows you to specify when the test is to be marked as completed. You also have the option to mark certain course entities as incomplete when the learner scores below the specified percentage. Click on Save and head to the Lock Properties tab.

- Use the Lock Properties tab to lock the test until a specific point in time or unless a specific course entity is completed. Finally, you can use the Resources tab to add any additional reference materials for the test. Finally, click Save to complete

Question Types - Description & Example
Note 1: Partial marks are only available for multiple, fill in the blanks, and match the following question types.
Note 2: When Allow partial marking is disabled, (default) Candidates must get the answer completely correct to gain marks (choose all the correct choices / make the correct matches / fill the correct answers).
Note 3: When Allow partial marking is enabled, the total marks will be split between the correct choices (total marks / total number of correct answers) thus, the resulting partial marks will be awarded for each correct answer.
- Single - only one correct answer.
Use the radio button to mark one of the answer options as the correct answer. - Multiple - multiple choices can be added and partial marks can be given for partially correct answers.
Use checkboxes to mark some of the answer options as correct answers. - True or False- only one correct answer.
Use the radio button to indicate if the correct answer is true or false. - Fill in the blanks - Use the Insert Blank option to insert blank spaces within a sentence. Multiple blanks can be added and partial marks can be given for partially correct answers. Candidate must fill in the blanks to answer, (choose either Exact Match or Contains to control how the answers are validated). Enable the Case Sensitive radio button if required.
- Match the following - matches are added, Use the left and right columns to add options and corresponding matches. The choices will be automatically shuffled during the test and candidates will have to match choices correctly. Partial marks are also supported.
- Hotspot - an image is added, and a circle or a rectangular area is marked as the right answer. Candidates must click the correct area to score marks.
- Dropdown - Use the Insert Dropdown button to insert a dropdown within a sentence. Add multiple answers and use the radio button to indicate the correct answer. Candidate must select the correct answer from the list of dropdown options.
- Descriptive - The candidate must provide an elaborate answer, a word limit can be enforced. Once the candidate answers the question, an email will be sent to the course administrator/trainer to evaluate the answer and enter the marks. They can also share feedback on the answer.
Editing an Online Test
An online test can be edited by clicking on Edit from the ellipsis icon

Some important points to note regarding editing a test:
- Tests can be edited at any time, even after a test is marked ready or after a learner has attempted the test.
- Changes within the Basic Info tab (except duration), Lock Properties tab, and Resources tab will be updated immediately.
- When duration is updated, the updated duration will only be reflected in all new attempts of the test. (in case of any current ongoing attempts)
- New questions can be added, new questions will only be shown in new attempts of the test.
- Existing questions can also be edited. However, if a learner has taken the test already, the learner will have to re-attempt the test as the updated question will only be shown in new attempts.
- If the updated question is from the question bank, edit history can be seen by accessing the question bank. i.e, for questions with previously taken attempts the edit history is stored in the system.
Learners view of an Online Test (Taking an online test)
An eligible learner can take up the test on a valid date (he must be part of the batch in case of blended learning course type and if the test was locked until a specific date, then it will be available post unlock date)
The learner must pay attention to all the highlighted sections shown below. Duration, Questions count, Total Marks, Instructions, Notes etc.
Click START to start the first attempt.

The test screen is shown below, note that for multichoice questions, all correct answers must be selected, there are no marks for partially correct answers.
The remaining time and question status is displayed in center. Some tests can have a per question-based timer, while some tests can have a test-wide duration.

Once all questions are answered, click View Result to access the results screen (Test author / Admins can opt to hide results if required). If the test was tagged to a specific Grade Category, then the result will also reflect in the learner's grade book.


Offline Test
An offline test, in essence, involves taking up the test offline by downloading the attached question material. Since this test happens offline, Corrections or results calculation does not happen online like in the case of an online test.
This is useful for situations where exams/tests are conducted and evaluated within the office premises. The marks can be updated online later in the Gradebook.
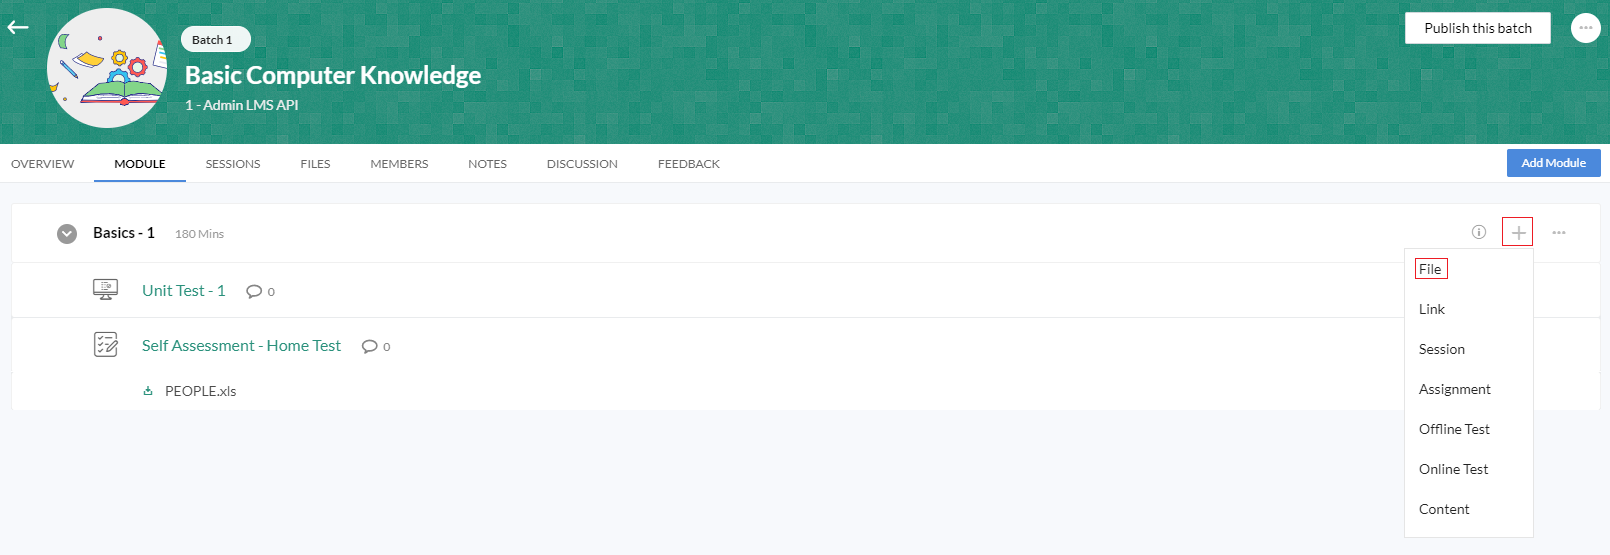
To add an Offline Test. Within a module click + (Add Icon) > Offline Test

Enter the basic information such as the name, duration, and marks in the Basic Info tab, Use the Test Lock tab to lock the test until a specific date. Resources tab is where the question paper is uploaded. You can also the mark the test as mandatory if required. (Test will be required to mark as completed for the learner to successfully complete the course)

The learner will essentially download the attached resource when he or she takes the test, evaluation happens offline and the trainer can update the marks in the grade book after the test is completed. The duration here is simply suggestive.
File
Files comes in handy when you want learners who are part of a course to go through and learn a specific file such as a book/pdf etc. To add a file, within a module, Click + (Add Icon) and select File
The Basic Info tab holds the basic information about the file, such as the name, description, and suggested duration. Use the Upload option to upload the required file. You can also mark the file as mandatory (learner must download the file to be able to complete the course). The file can also be marked as an introductory file, suggesting to the learner to start here as he begins the course.

Session
Single or multiple sessions can be conducted under each module. Each session will have a trainer, and the type of training can be either classroom or e-learning (or both). Sessions can be created only for Blended learning courses.
To add a session,
- Go to the respective module.
- Click Session under the + (add icon).

- Give a name for the session.
- If this is a mandatory session, check Mark as mandatory.
- Select the trainer and the type of training.
- Enter the date and start and end time for the course.
- Select the room.
- If you wish to Lock the session until a specific date, you can do some from Session Lock tab.
- Additional resources can be uploaded from the Resources tab.

If e-learning is selected as the type of training, you will have the option of facilitating a webinar with the Zoho Meeting integration.
To start an e-learning session, click Start beside the session, and you will be redirected to Zoho Meeting.

If a webinar was recorded in Zoho Meeting, once the meeting is over, you can access the recorded session under that session in Zoho People.
Link
Link is useful when you want learners to access a video/webpage form an external source, such as a youtube page or a Wikipedia page, etc.
To add a link, within a module click + (add icon) > Link.

In the Basic Info tab enter the name, insert the Embed URL and provide a description about the link. Enable Mark link as mandatory, if you require the learner to view this link to complete the course.
Additionally, you can lock the link until a specific date using the Link Lock tab and also add any additional resources in the Resources tab.

Assignment
Assignments can be used to help learners practice what they have learned. An assignment topic/material is uploaded as a Resource file, which the learners can download and write offline. Assignments can also carry marks and can be included as part of a graded course.
To add an assignment, within a module click + (add icon) > Assignment.

Enter the name, description, date, and maximum marks in the Basic Info tab, you can also lock the assignment until a specific date using the Assignment Lock tab, and add any assignment-related resource from the Resources tab.

Content
Want to add your own content for learners?, Type, format, and edit using the content editor feature. Content lets you add your own custom content and make it part of the course.
To add content, within an existing module click + (add icon) > Content.

Fill in the basic information such as the content title, read duration, and description in the Basic Info tab, you can also make the content mandatory using the Mark content as a mandatory tab.
Mark as Intro content is useful when the content added here serves as an introduction to the course.
Now navigate to the Content Editor tab to type your own content, and use the toolbar on the top, to format your text.
