Permissions
In most organizations, employees often request a short recess to complete personal errands during working hours. There is no defined process to track these requests and often managers respond using their discretion and ask the employees to apply for leave if they allow it.
What is Permissions?
Permissions lets organizations define boundaries and track the short periods of time away from work that employees request, during working hours without having to make them apply for leave.
Why is it useful?
Permissions give organizations a way to clearly define and specify the permission duration and other related criteria. This way, these short absences from work are recorded and tracked separately, and restricted to a reasonable level according to the needs of the organization.
Multiple permissions that apply within a week or a month can be configured based on the applicable group, frequency and duration.
To configure a new permission,
- Go to Attendance > Settings > Permissions.
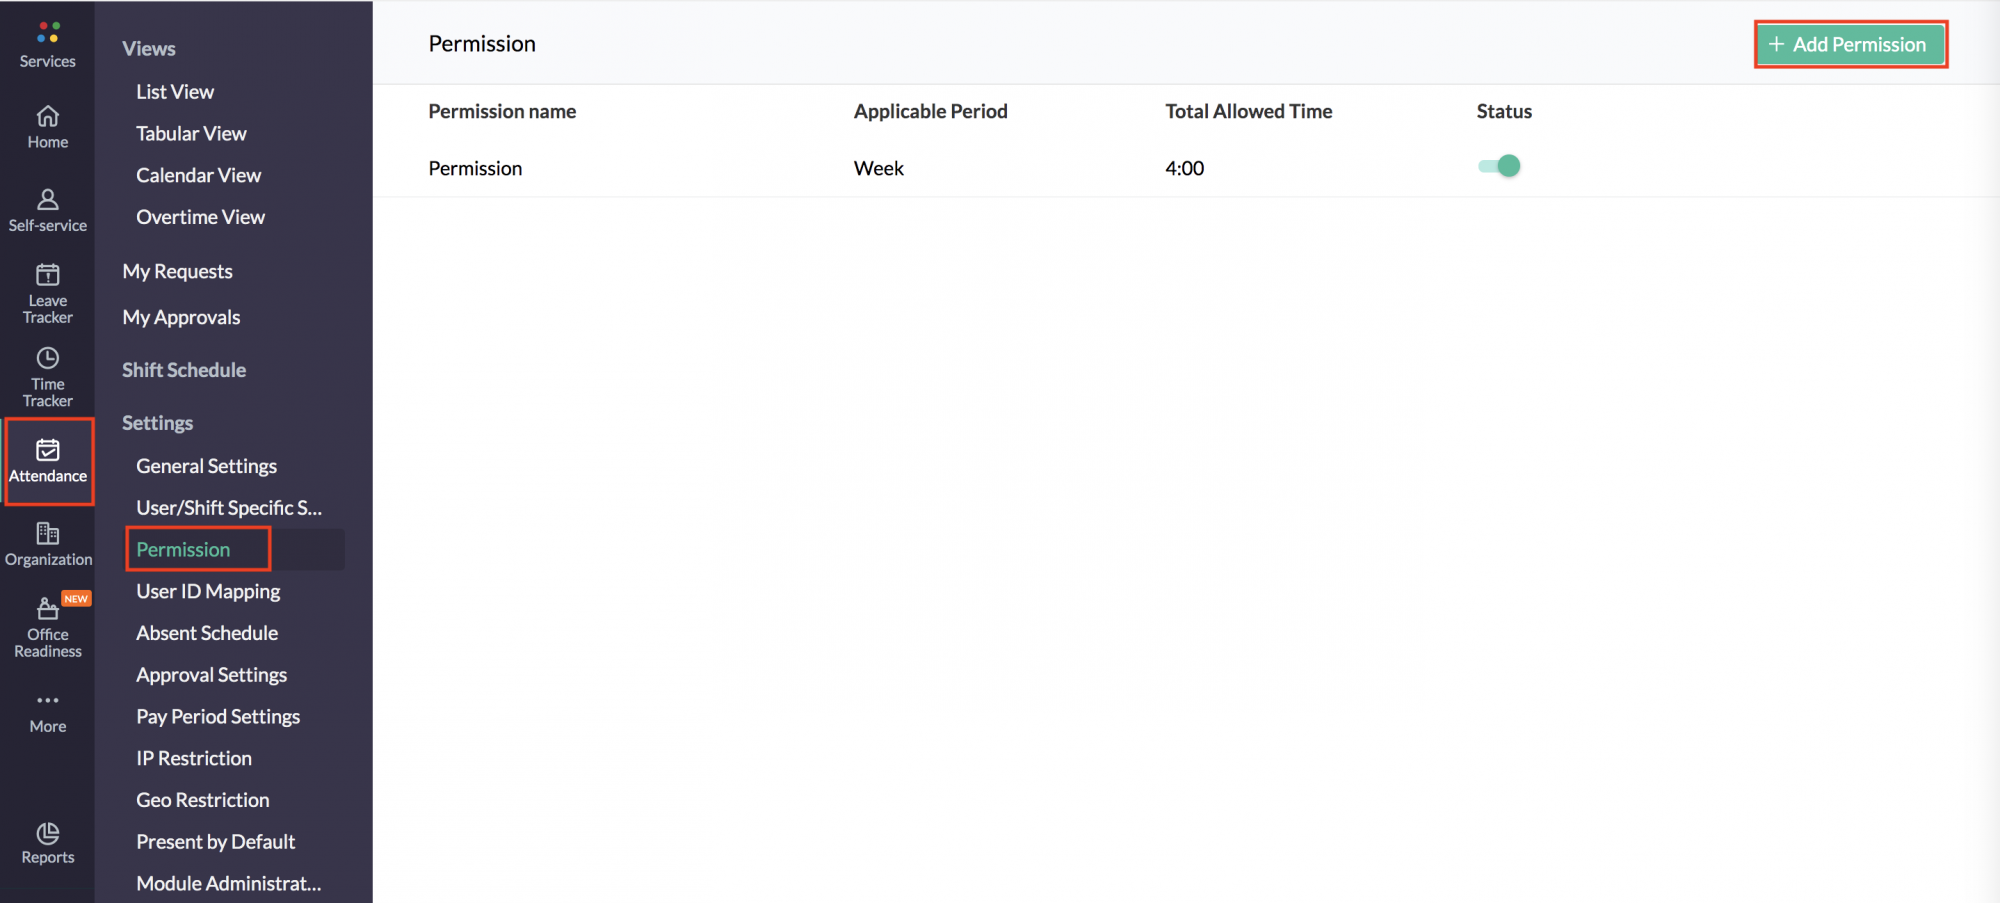
- Click Add Permission.
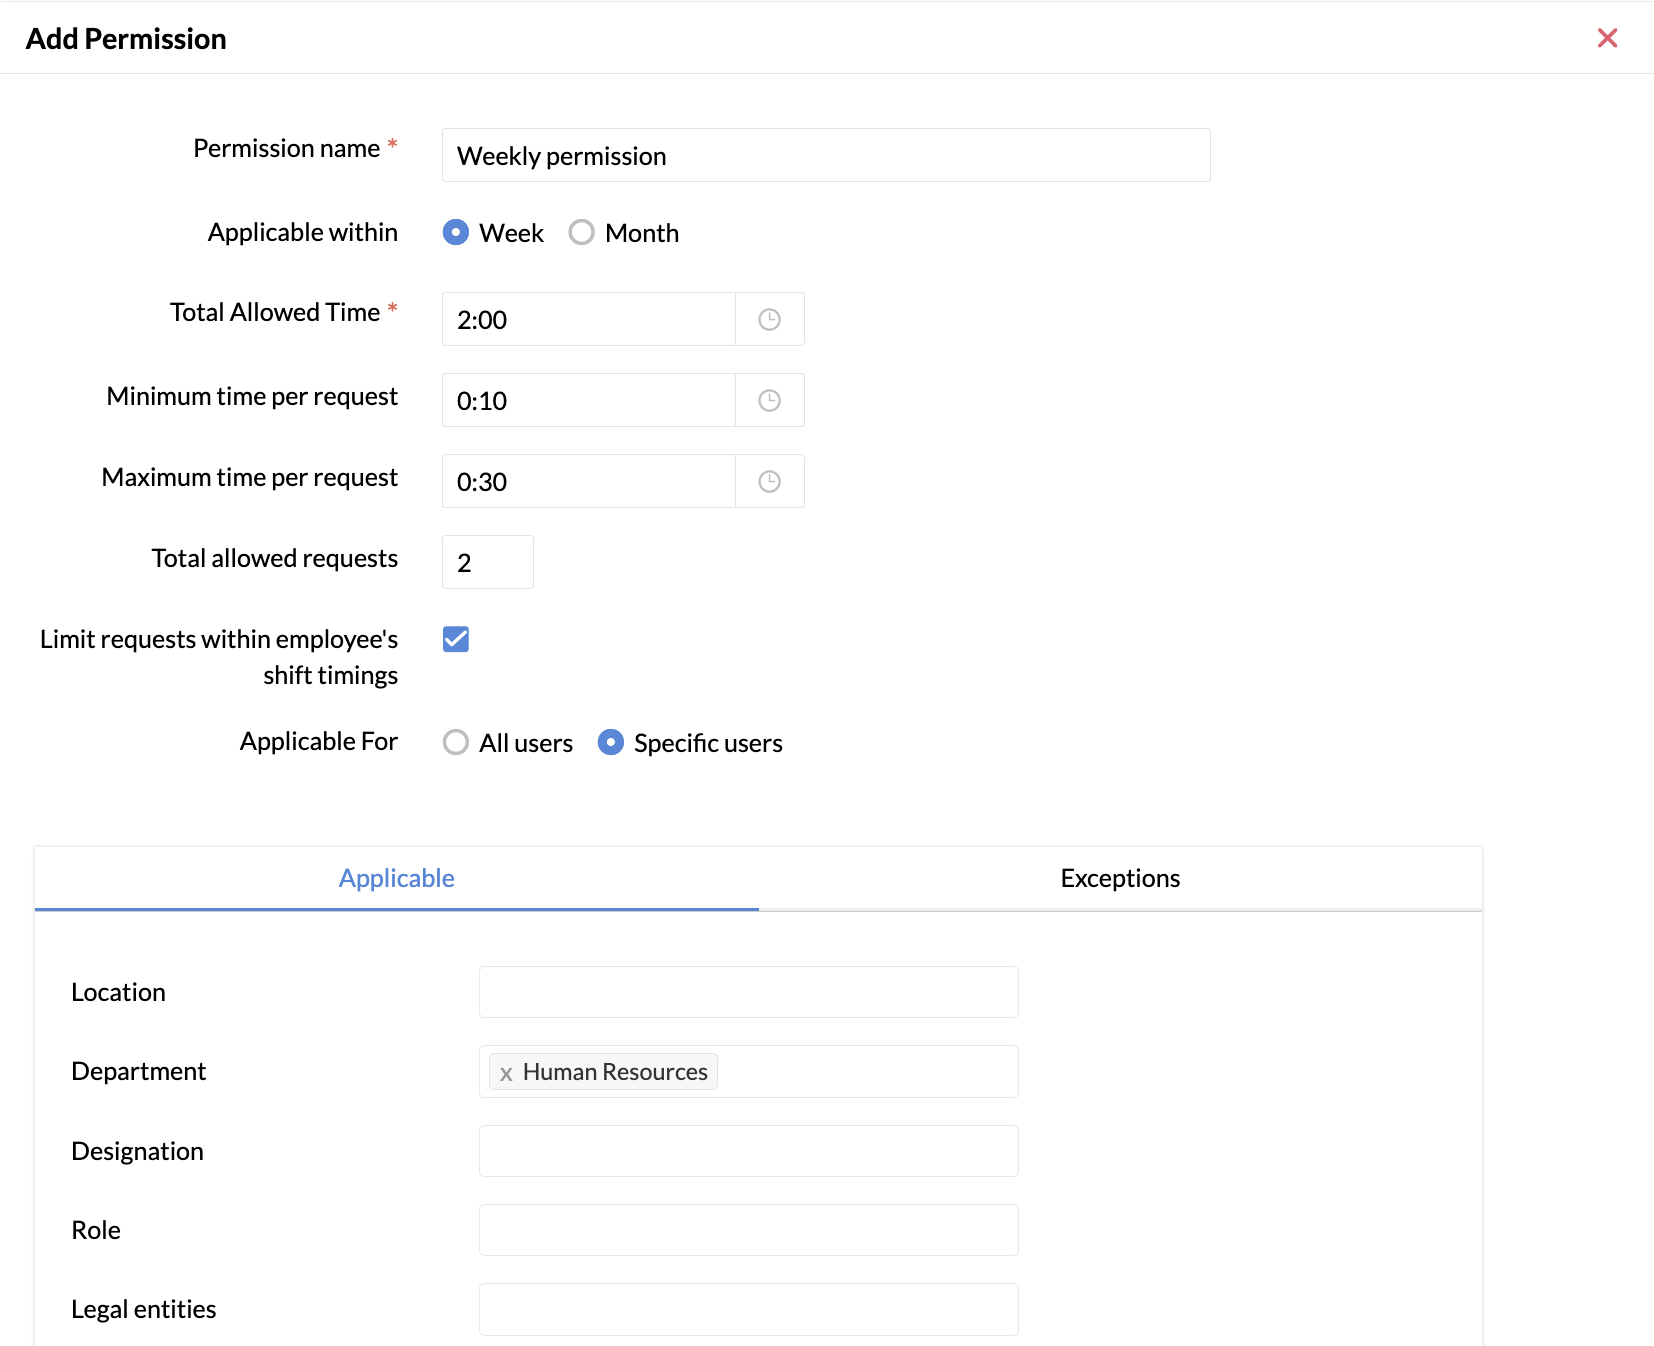
- Enter a name for the permission.
- Select the period this permission is Applicable within - Week or Month. All the configurations are confined within the option selected here.
- Enter the Total Allowed Time.
- Enter the minimum duration of permission under Minimum time per request, if required.
- Enter a maximum duration of permission under Maximum time per request, if required.
- Enter the total number of requests allowed under Total allowed requests, if required.
- If you want to allow permission requests only within the employee's shift timings, check Limit requests within employee's shift timings.
- Define if this permission is applicable for All users or Specific users.
- If Specific users is selected, define your applicable group under Applicable and those exempt under Exceptions.
- Click Submit.
Applying for Permission
Learn more about how an employee can apply for permission.
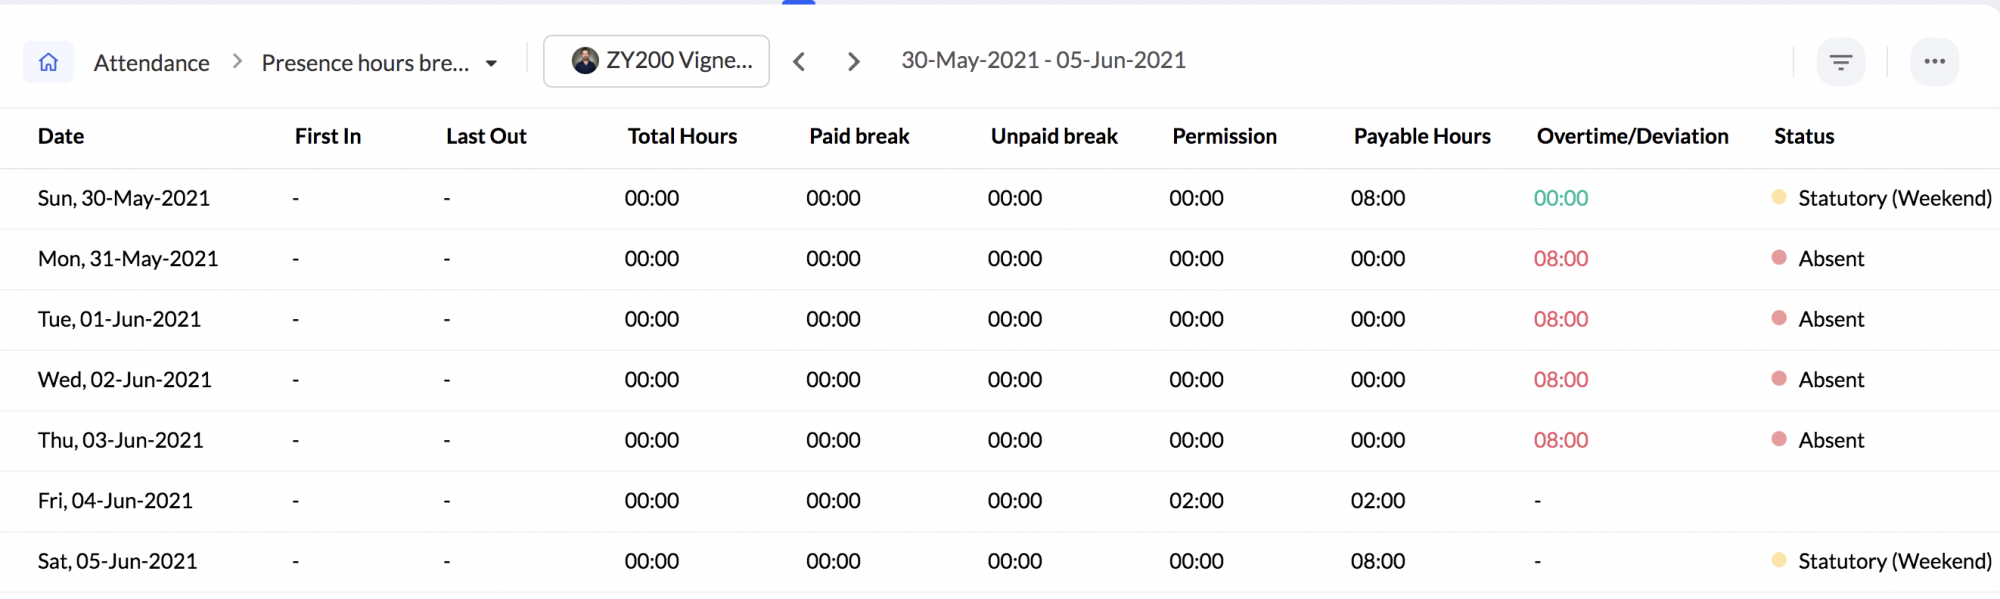
The permission taken by the user will be reflected under various reports.
Presence hours break-up
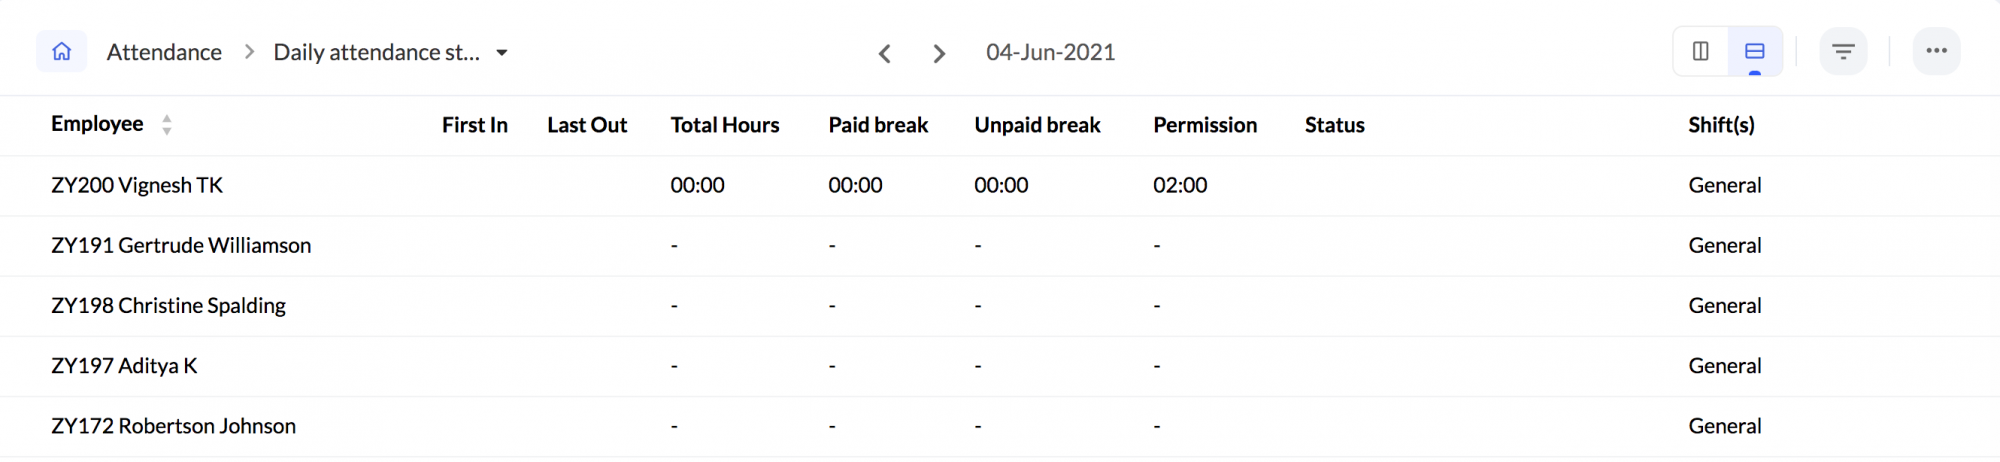
Daily attendance status
If an employee does not use the allowed permission time, that time will expire within the selected applicable period, be it a week or month.
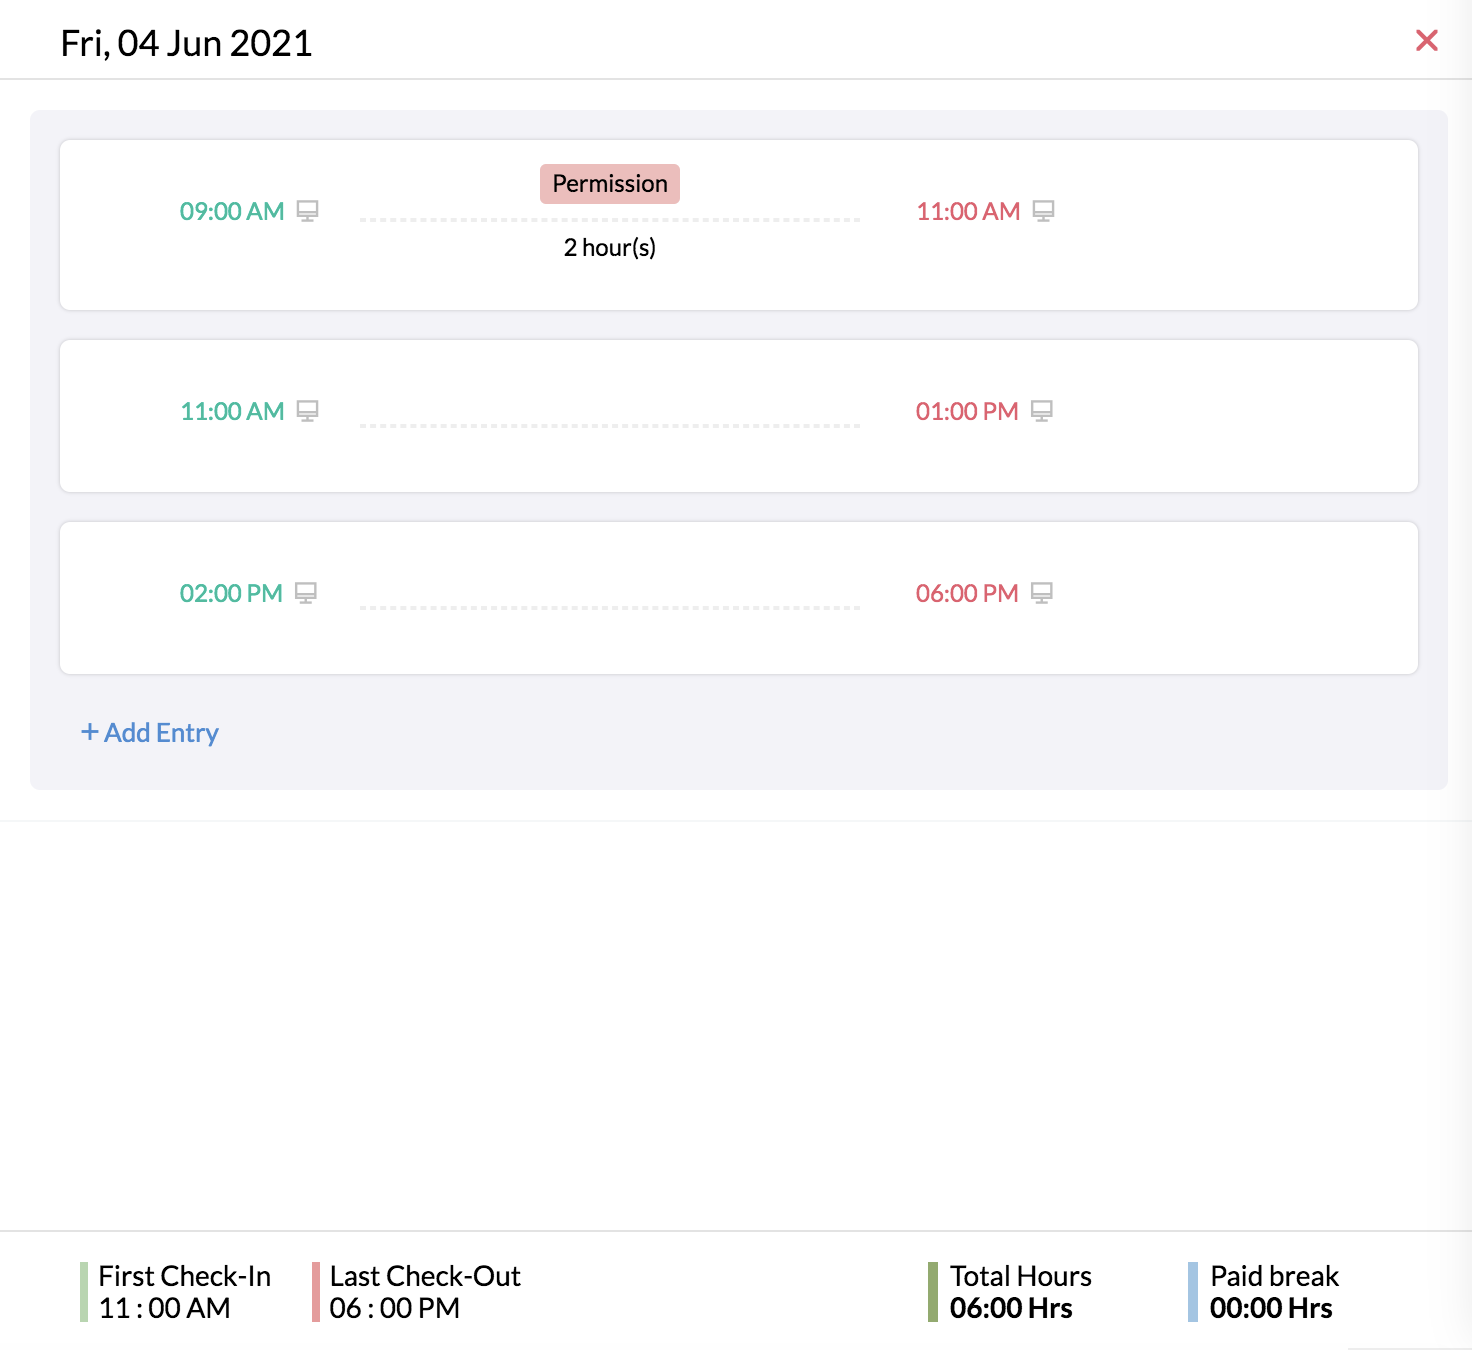
Permission will also be marked as a separate entry under each day's attendance. Go to Attendance > List View.
Use case
An organization wants to provide four hours of permission in a month, allowing a maximum of 4 requests, subject to the manager's approval.
The first step is to add a new permission.
- Go to Attendance > Settings > Permissions.
- Click Add Permission.
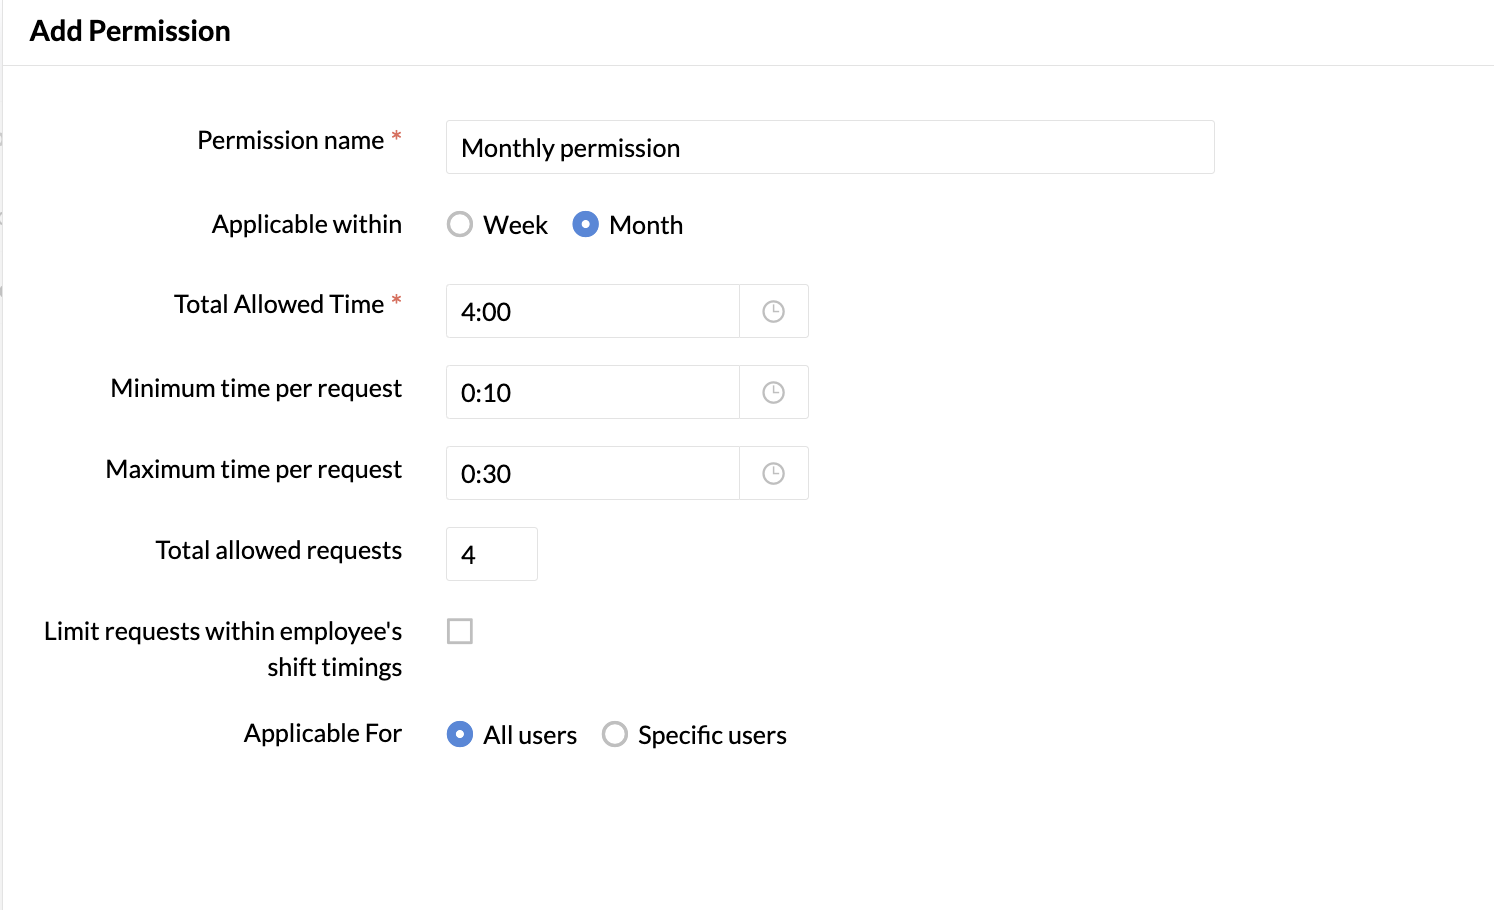
- Enter the name of the permission, in this case Monthly permission.
- Select Month under Applicable within.
- Enter 4 hours under Total Allowed Time.
- Enter 4 under Total allowed requests.
- Under Applicable For, select All users.
- Click Submit.
Next, configure an approval for permissions.
- Go to Settings > Automation > Approvals.
- Select the Permissions form from the drop-down.
- Click Add Approval.
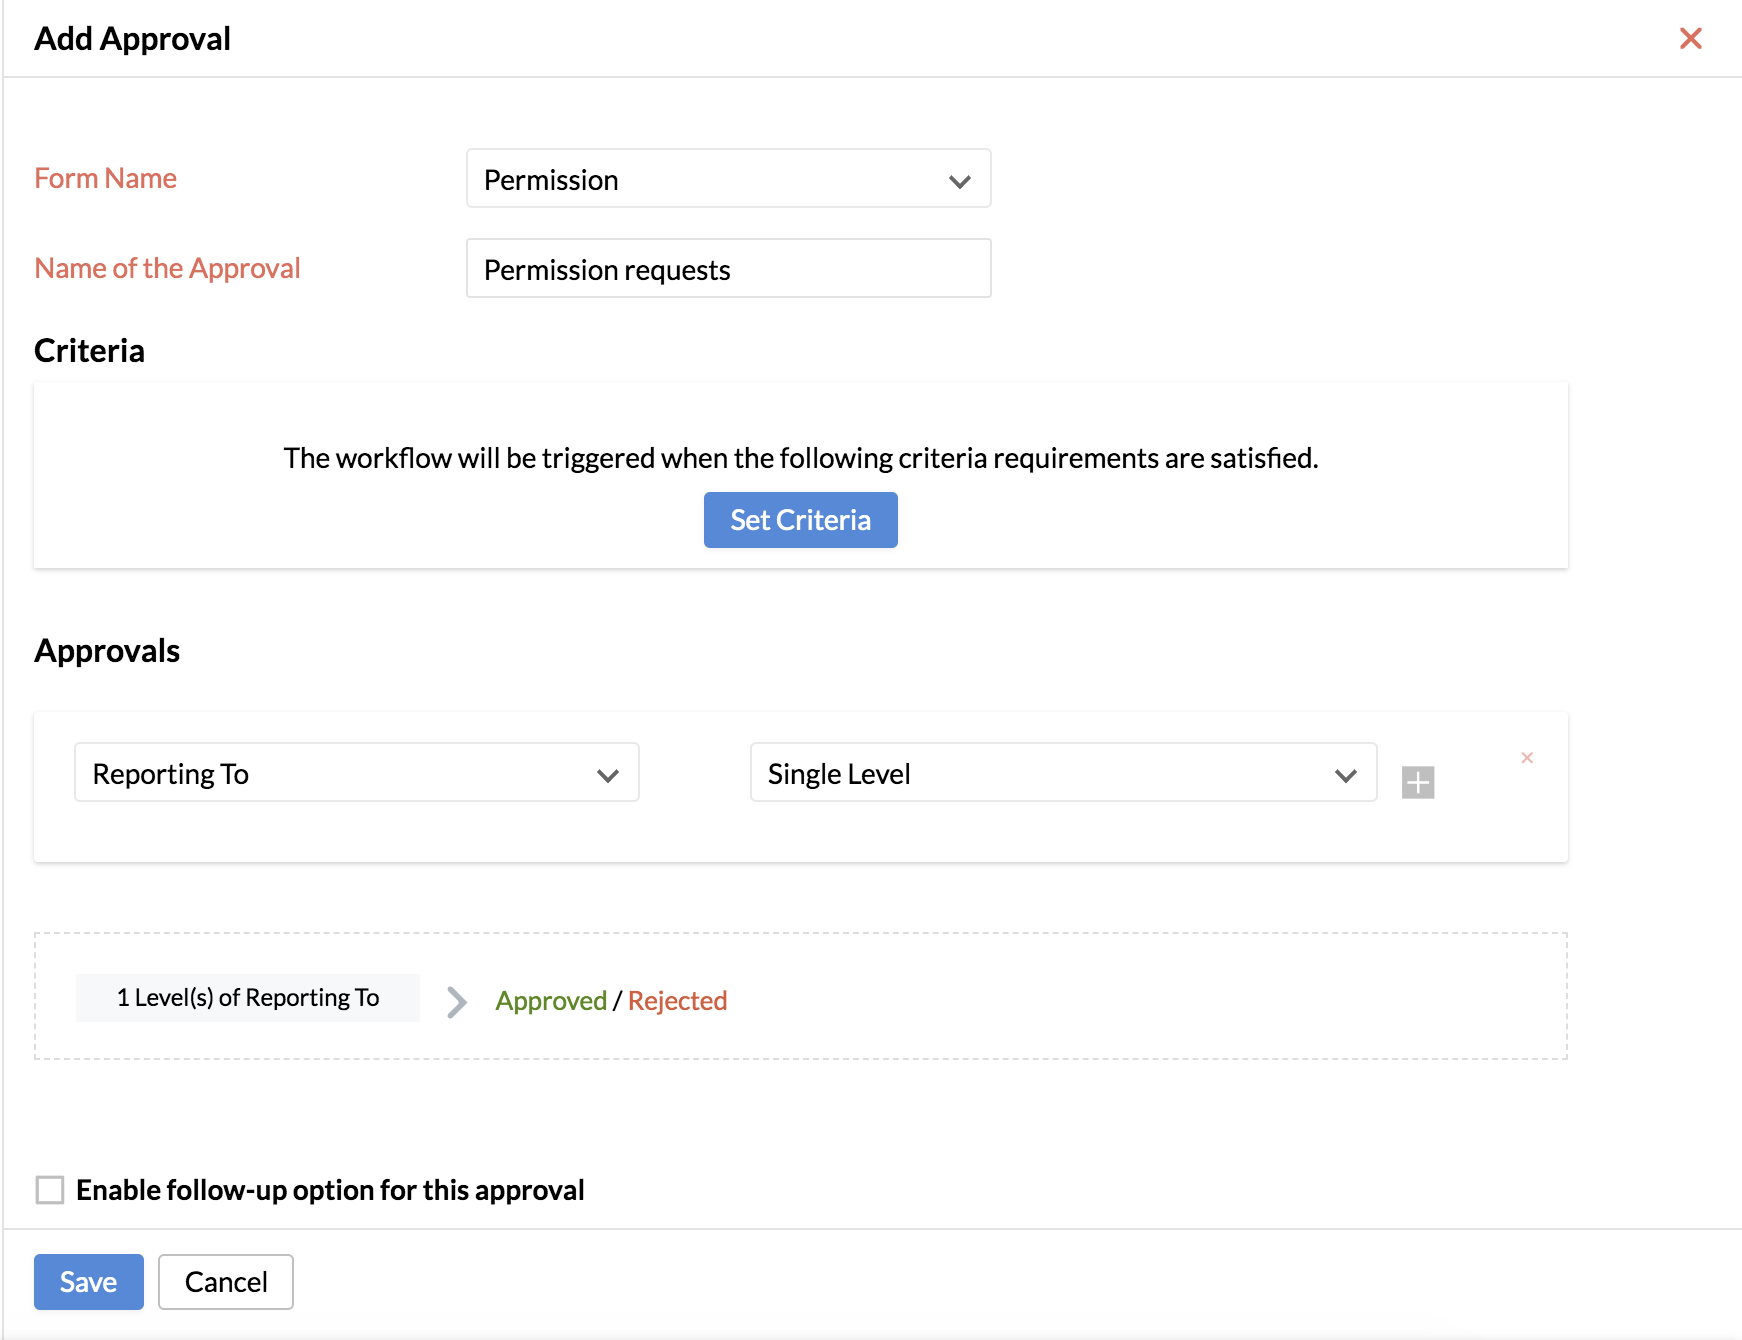
- Give a name for the approval such as Permission requests.
- Under Approvals, select Reporting To , Single level.
- Click Save.
Once the employee submits a permission request as per the defined configuration, it will go to their manager for approval.
The manager can view the request under Approvals > My Approvals and approve or reject the request.
