Announcements
- Adding an Announcement
- Adding a Sticky Announcement
- Editing an Announcement
- Deleting and Disabling an Announcement
- Viewing an Announcement
- Disabling comments in Announcements
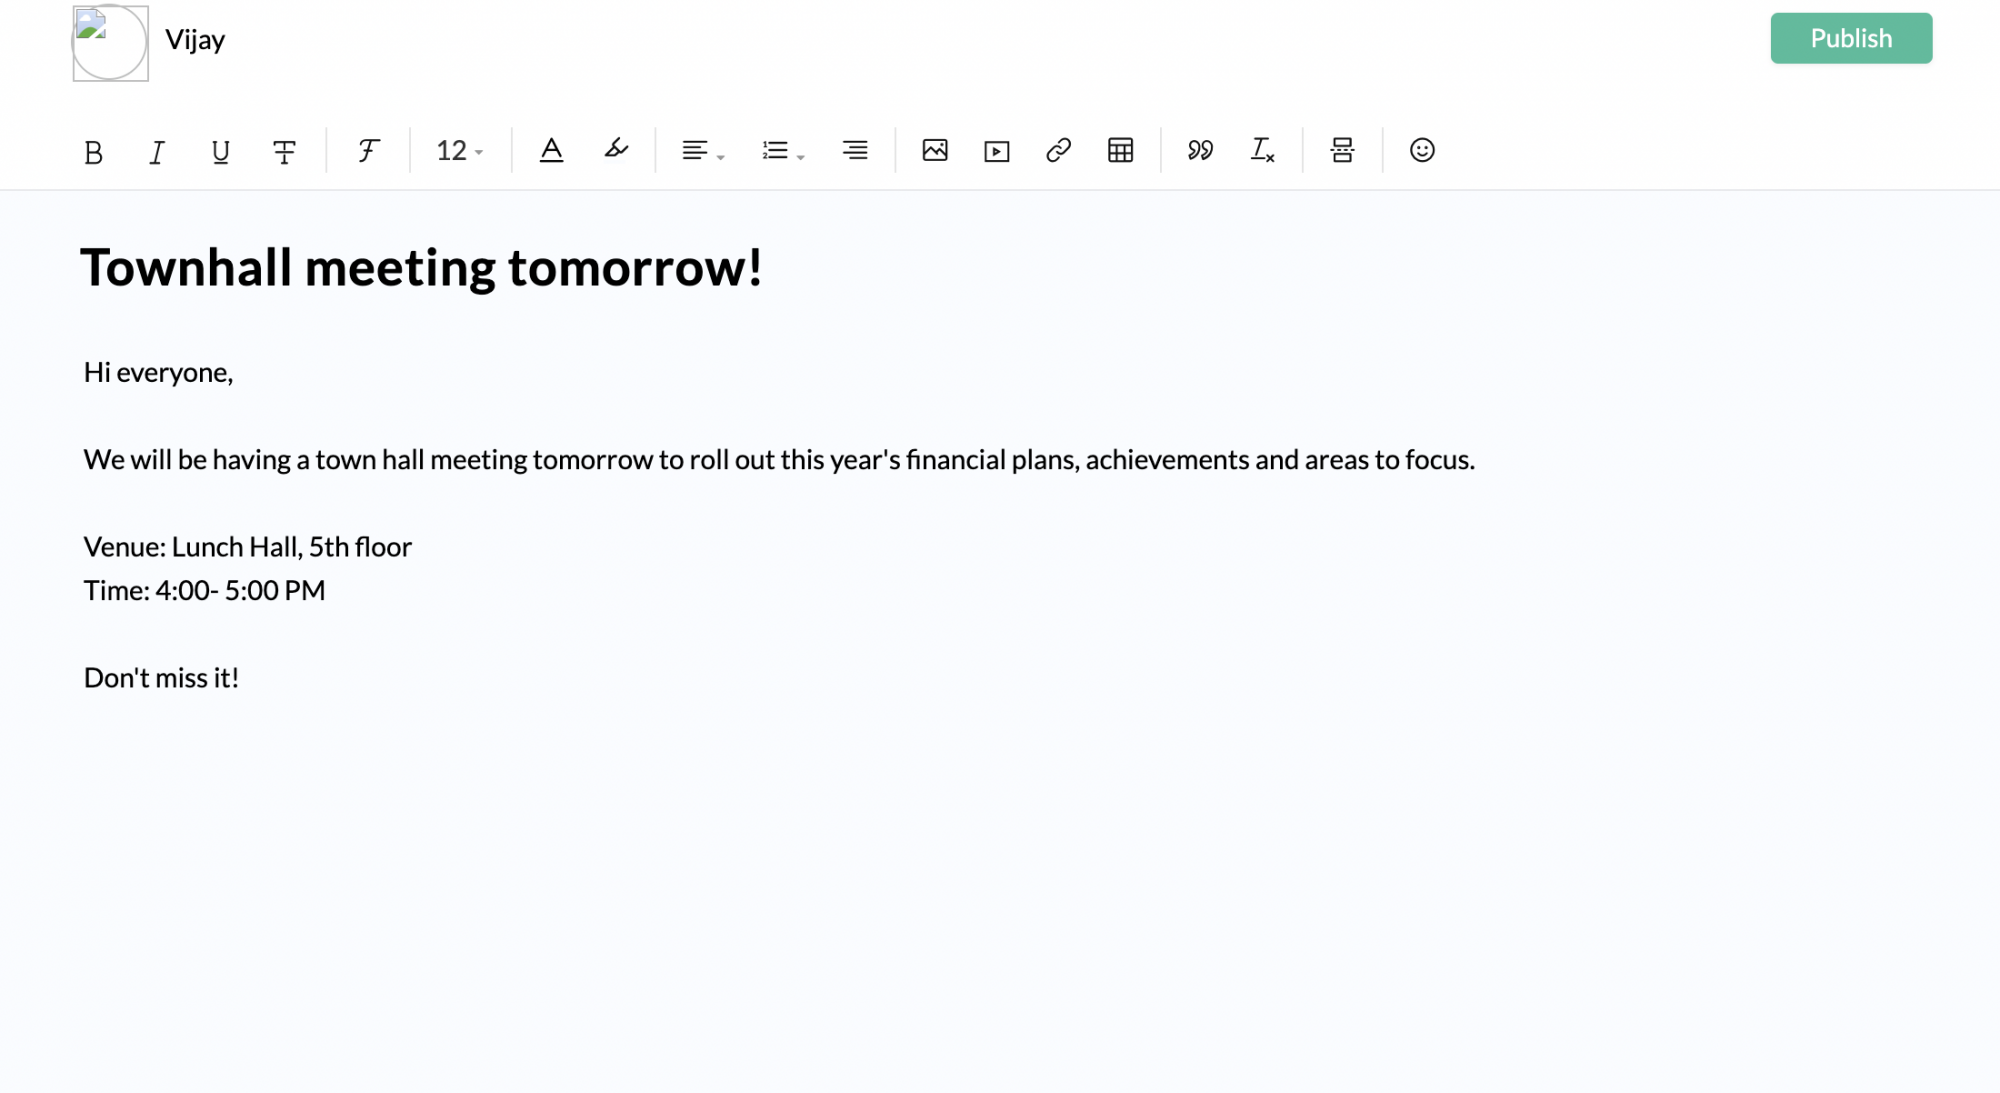
Adding an Announcement
Announcements makes it easy for you to communicate with your employees about general company information. Announcements will appear on the dashboard of employees those who are located in the specified location.
- From home, go to Announcements.
- Give a title and message.
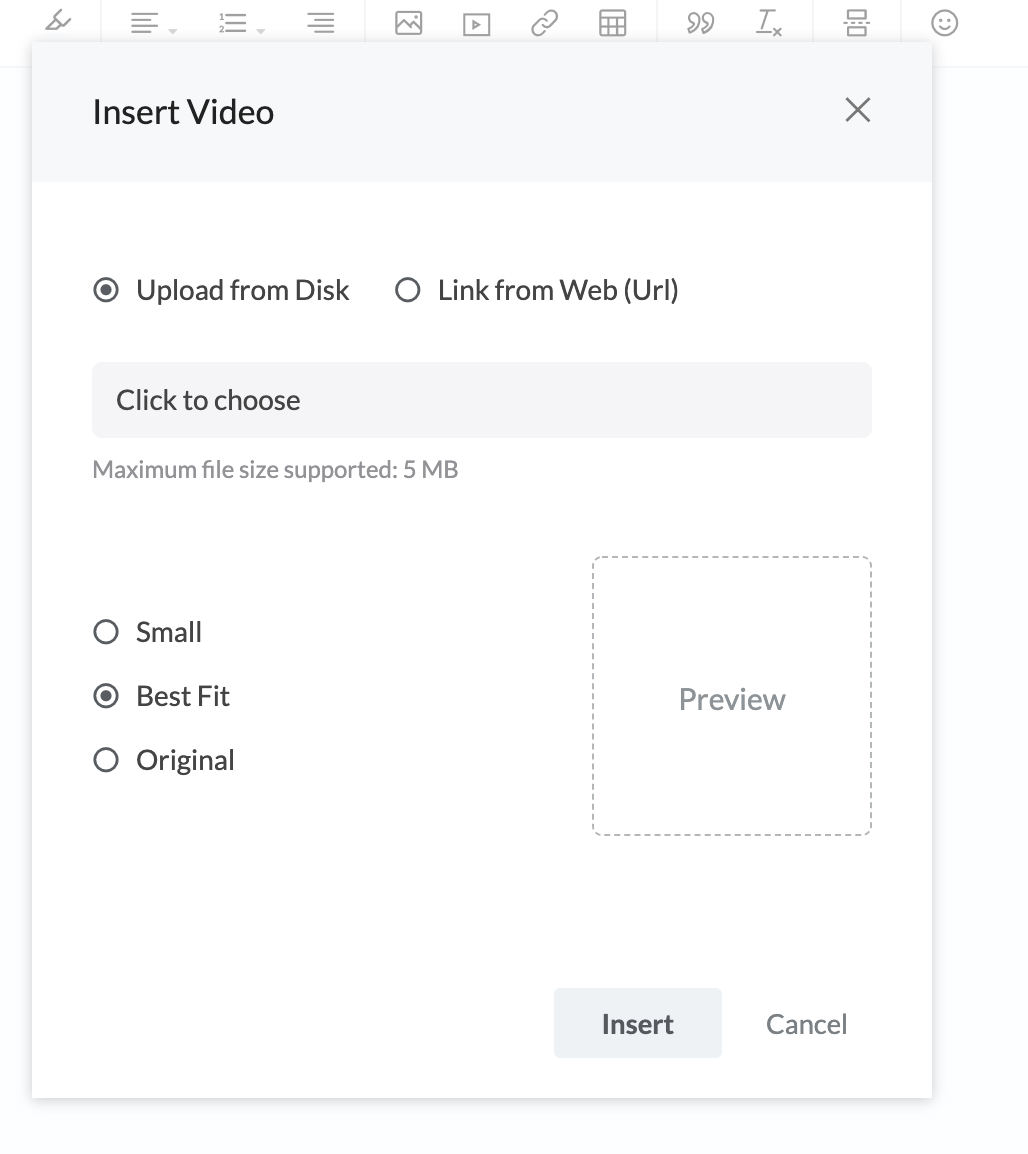
- Insert a video by clicking the video icon on top, if required.
- Attach any files for reference if needed.
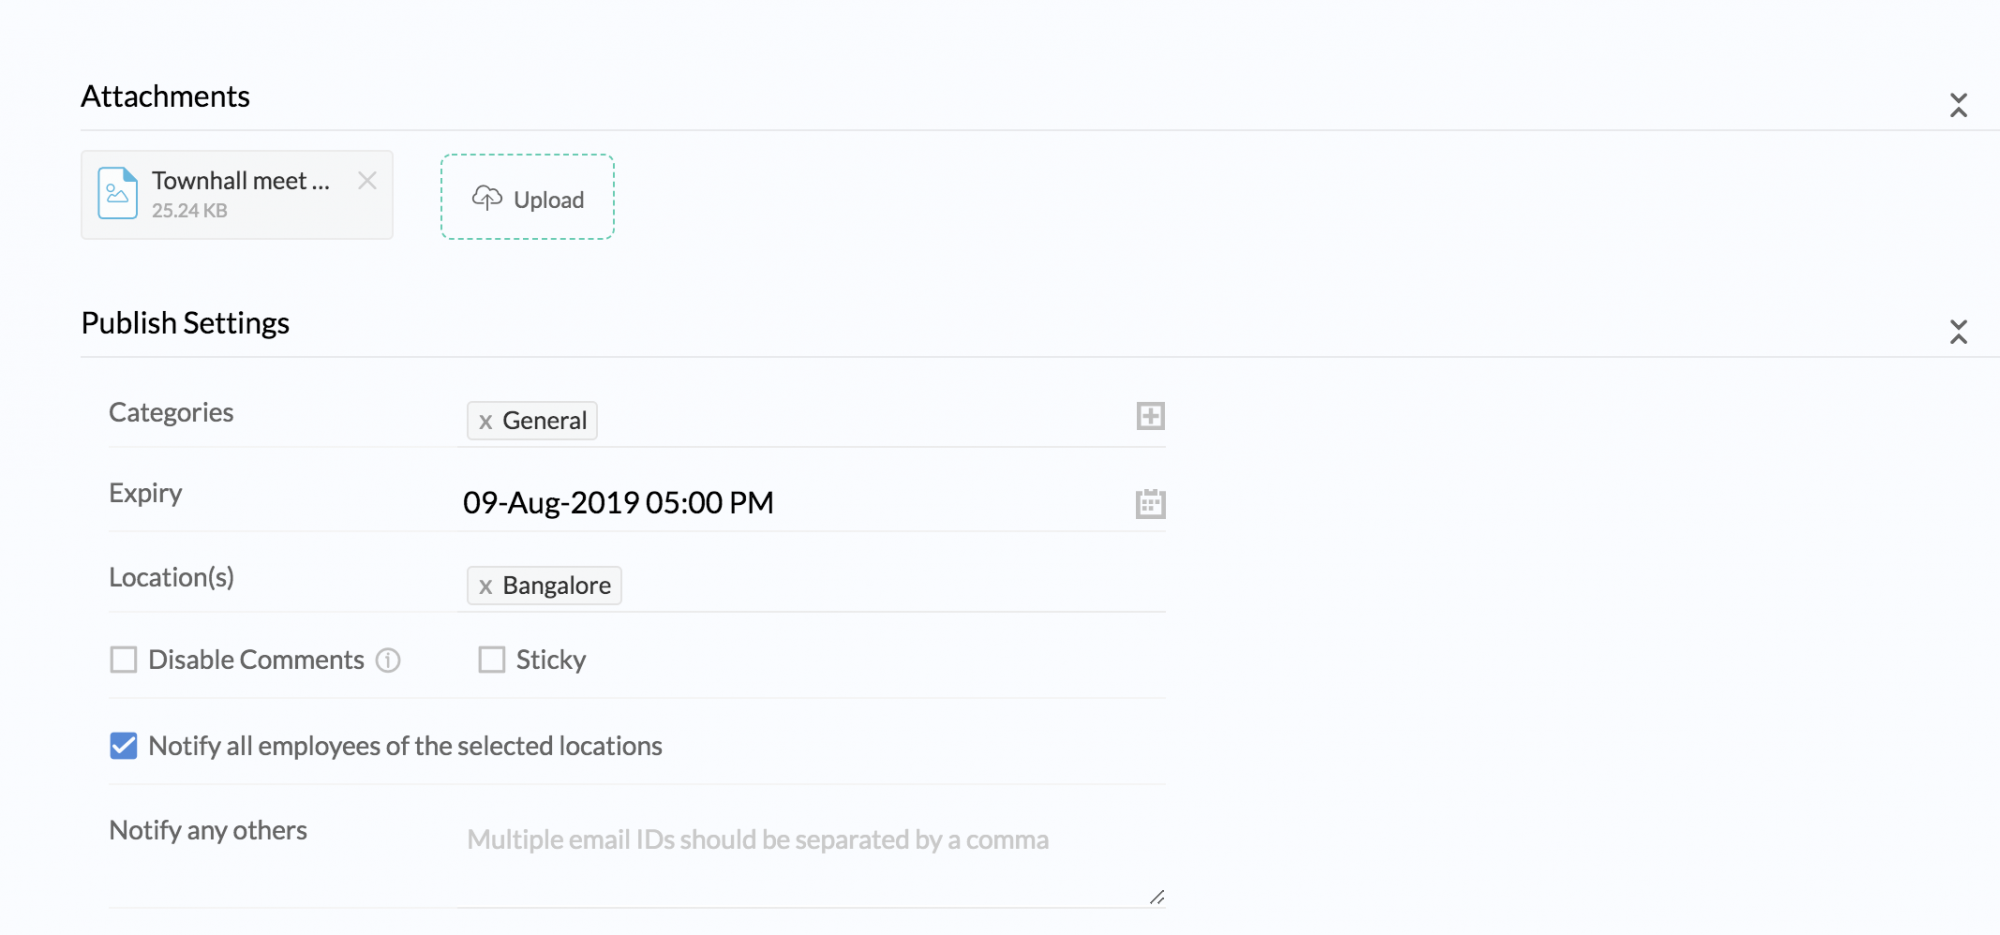
- Under Publish Settings, select the category for this announcement.
- Give an expiry date if needed.
- Select the location.
- If you do not want users to comment on the announcement, tick Disable Comments.
- If you want this announcement to always be visible to employees, tick Sticky.
- Enable Notify all employees if you would like the announcement to be viewed by all employees of the selected locations.
- Enable Notify any others if you would like to email the announcement to anybody else apart from the selected group.
- Click Publish.
Your announcement can include texts, images, and URLs. You also have the option of formatting your announcement.
Adding a Sticky Announcement
Sticky announcements are those announcements that should always be available for the view of employees. In the Announcement tab, as and when new announcements are posted, the old ones are pushed down. However, if an announcement is created as a Sticky announcement, then it will always be available for employees to view.
If you would like to tag any of your announcements as important, then you can mark them as 'Sticky' so that these can be viewed at any time by your employees.
To create a sticky announcement
- From your home, go to Announcements.
- Give a title and a message.
- Attach any files for reference if needed.
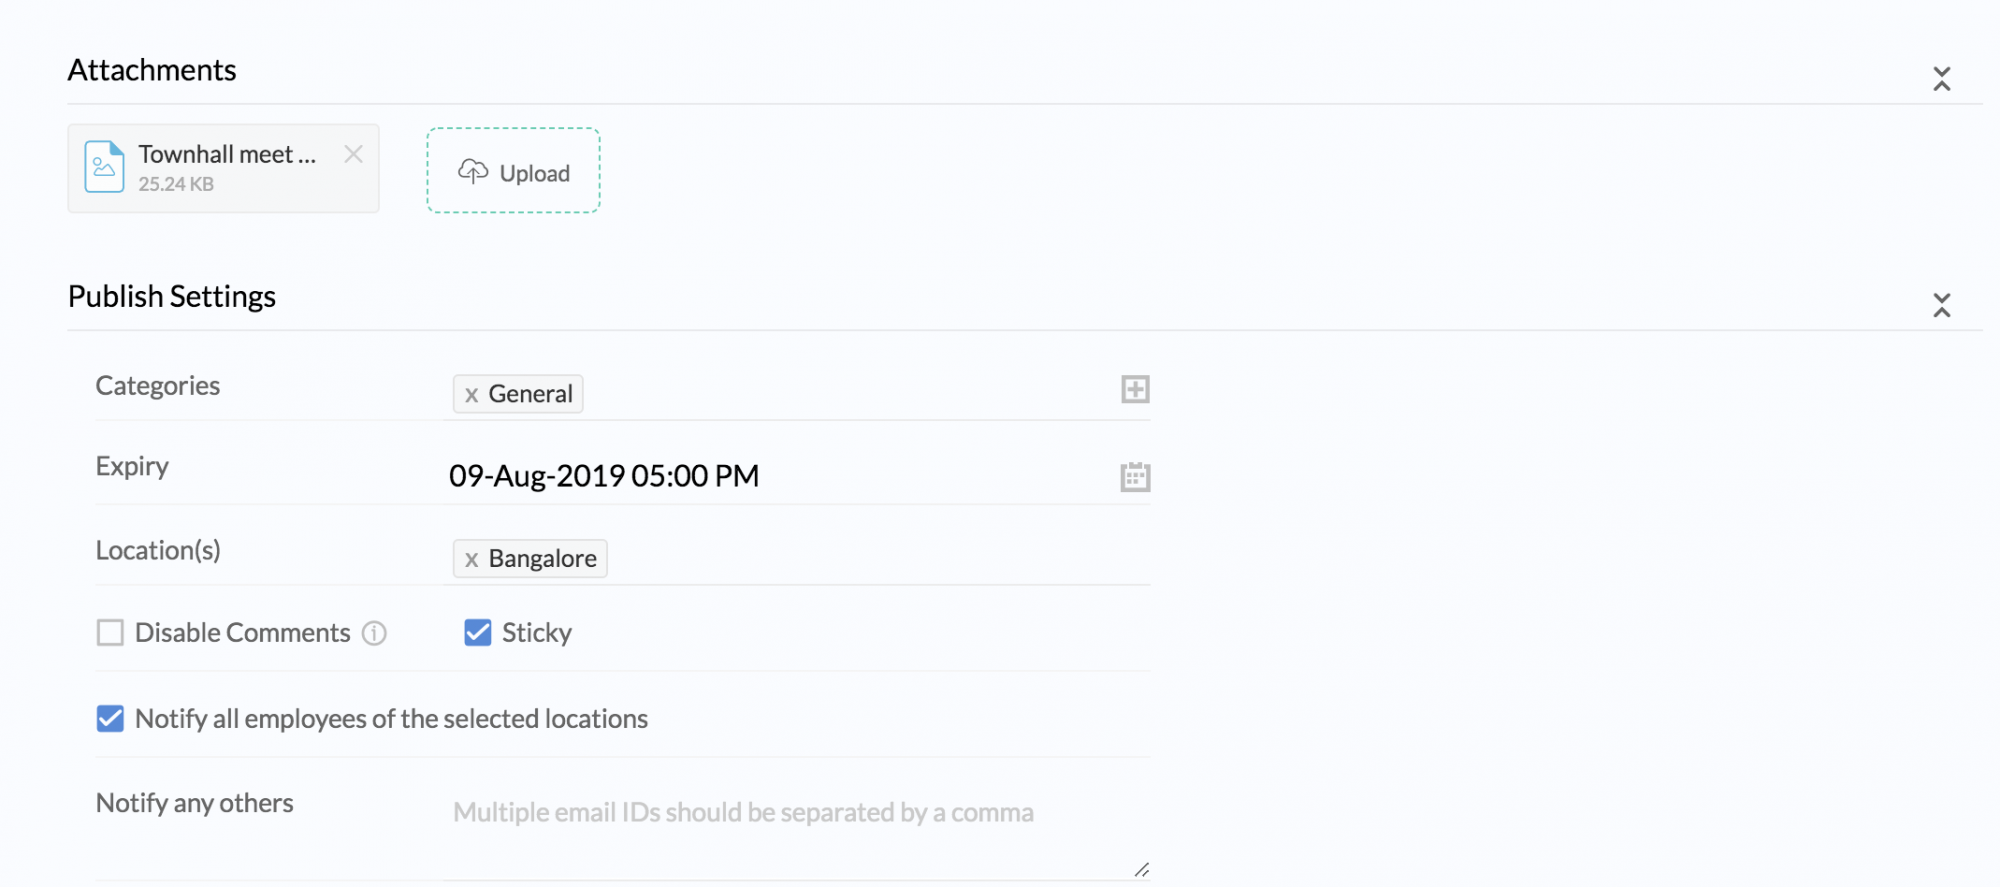
- Under Publish Settings, select the category for this announcement.
- Give an expiry date if needed.
- Select the location.
- If you do not want users to comment on the announcement, tick Disable Comments.
- If you want this announcement to always be visible to employees, tick Sticky.
- Enable Notify all employees if you would like the announcement to be viewed by all employees of the selected locations.
- Enable Notify any others if you would like to email the announcement to anybody else apart from the selected group.
- Click Publish.
Editing an Announcement
- Go to Announcements
- Click the announcement that you want to edit
- Click the ellipsis icon
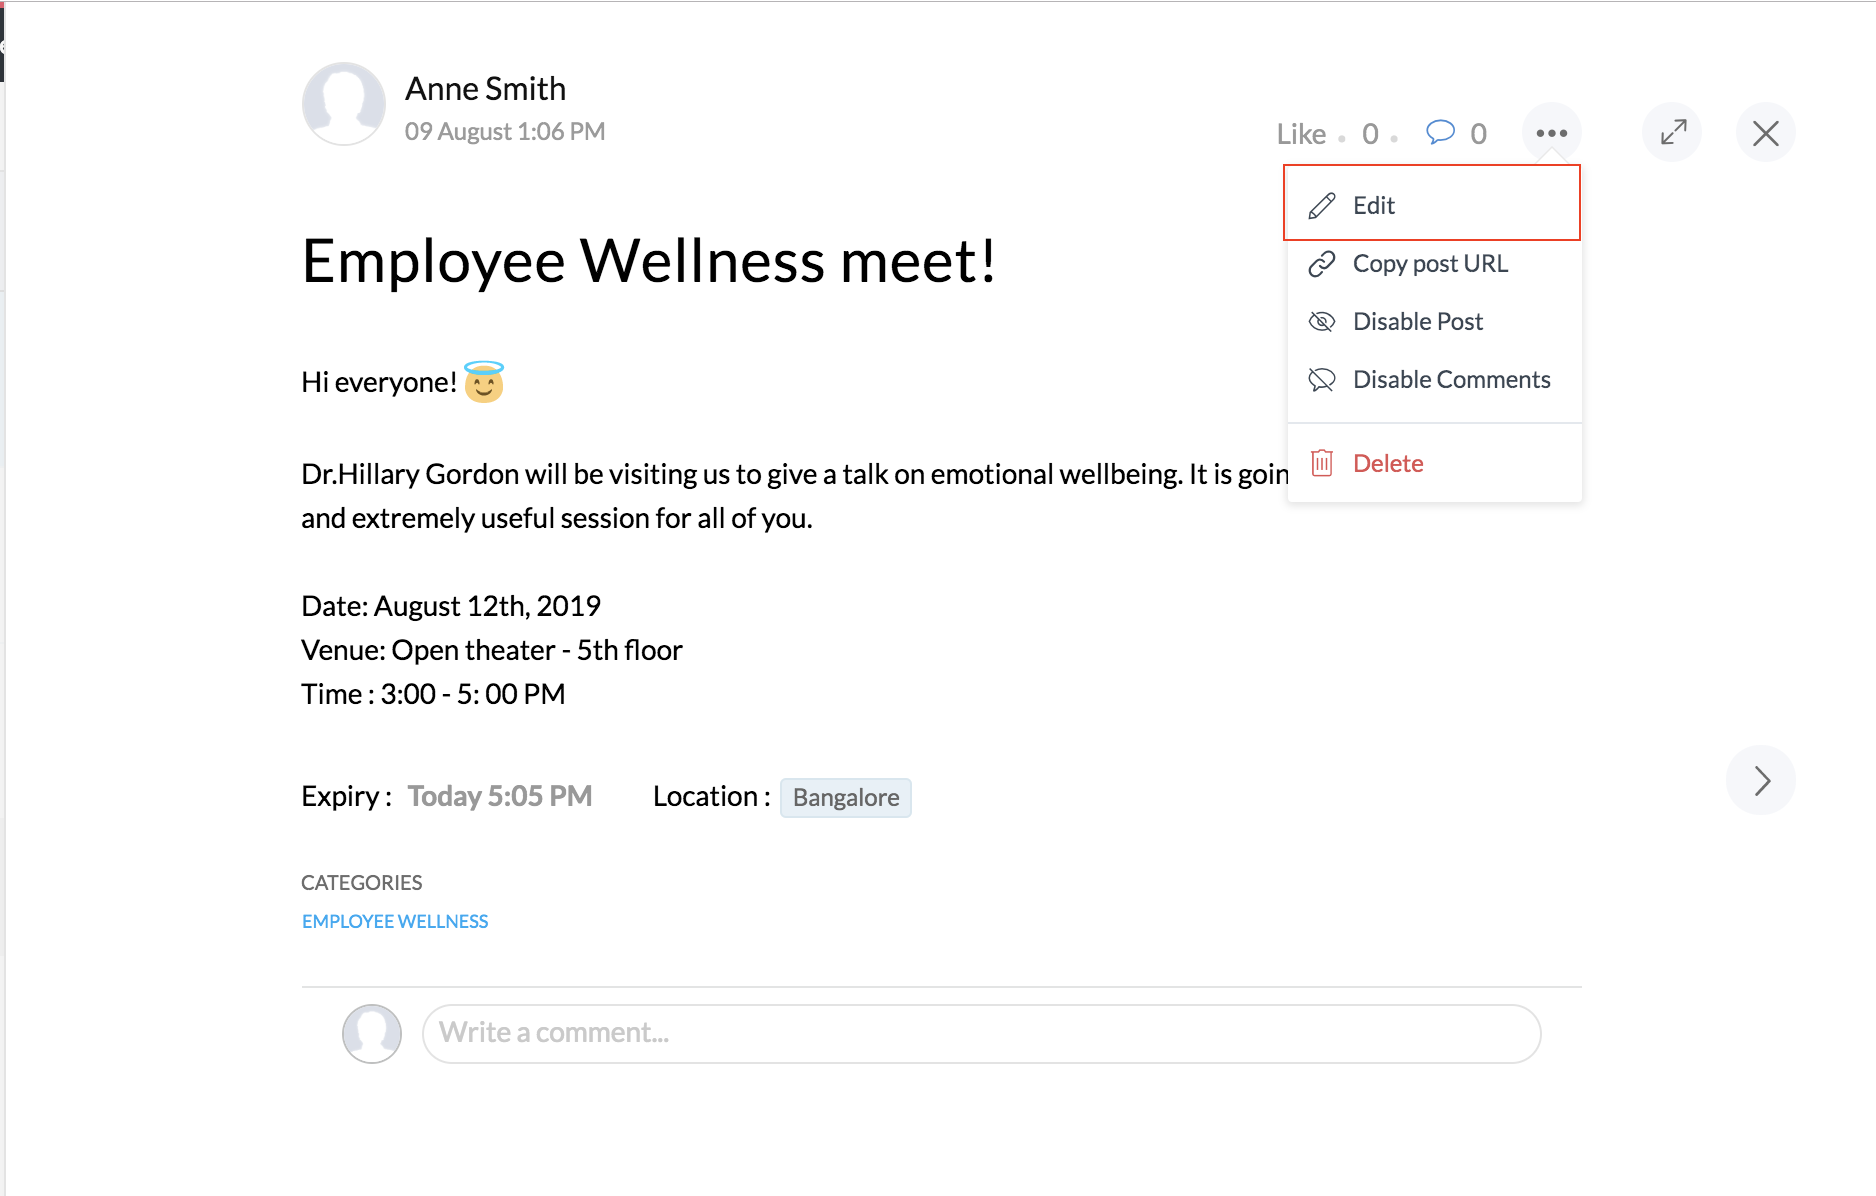
- Click Edit.
Deleting and Disabling an Announcement
To delete an Announcement,
- Go to Announcements.
- Click the announcement that you want to delete.
- Click the ellipsis icon
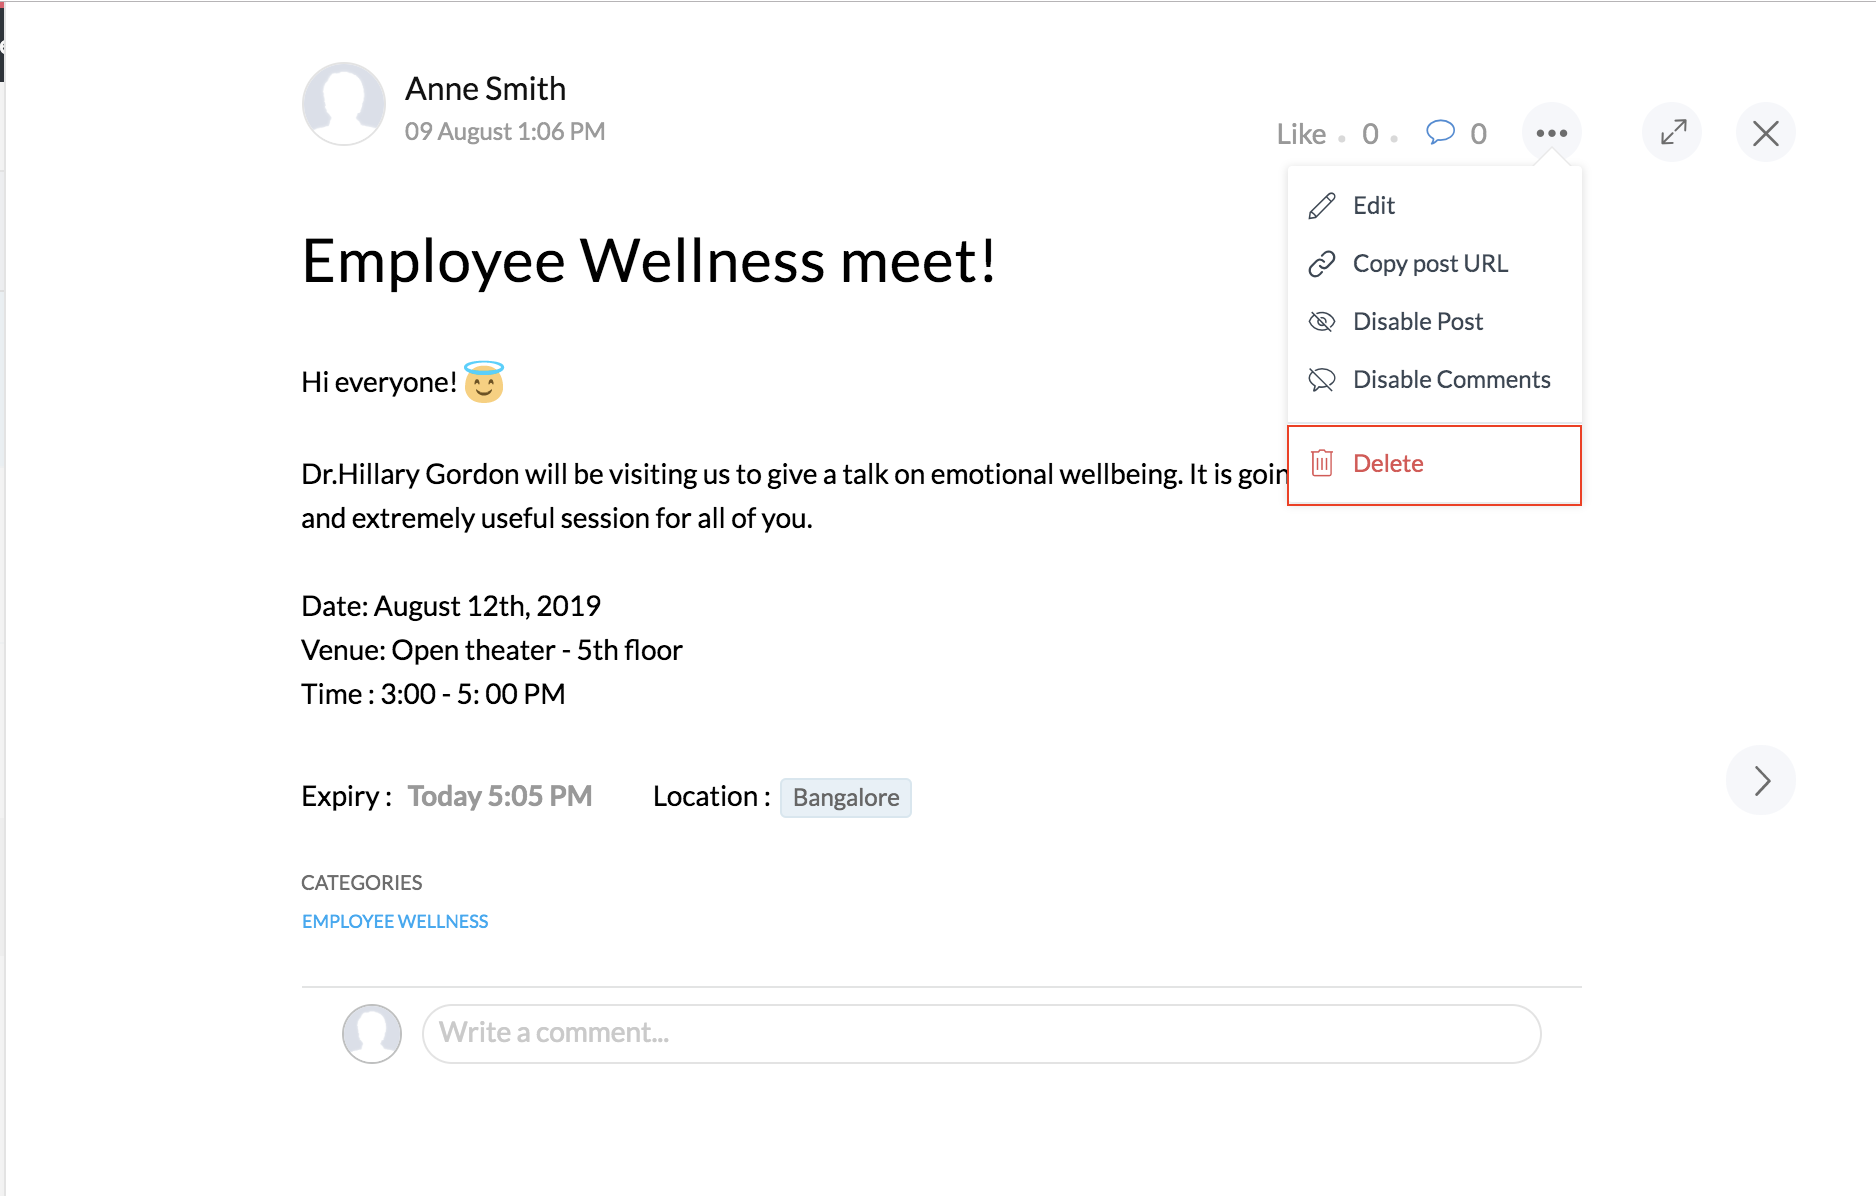
- Click Delete.
To disable an Announcement,
- Go to Announcements.
- Click the announcement you want to disable.
- Click the ellipsis icon.

- Click Disable Post.
Viewing an Announcement
You can use the search tab and find the announcement that you need. Follow the steps given below.
- Go to Announcements
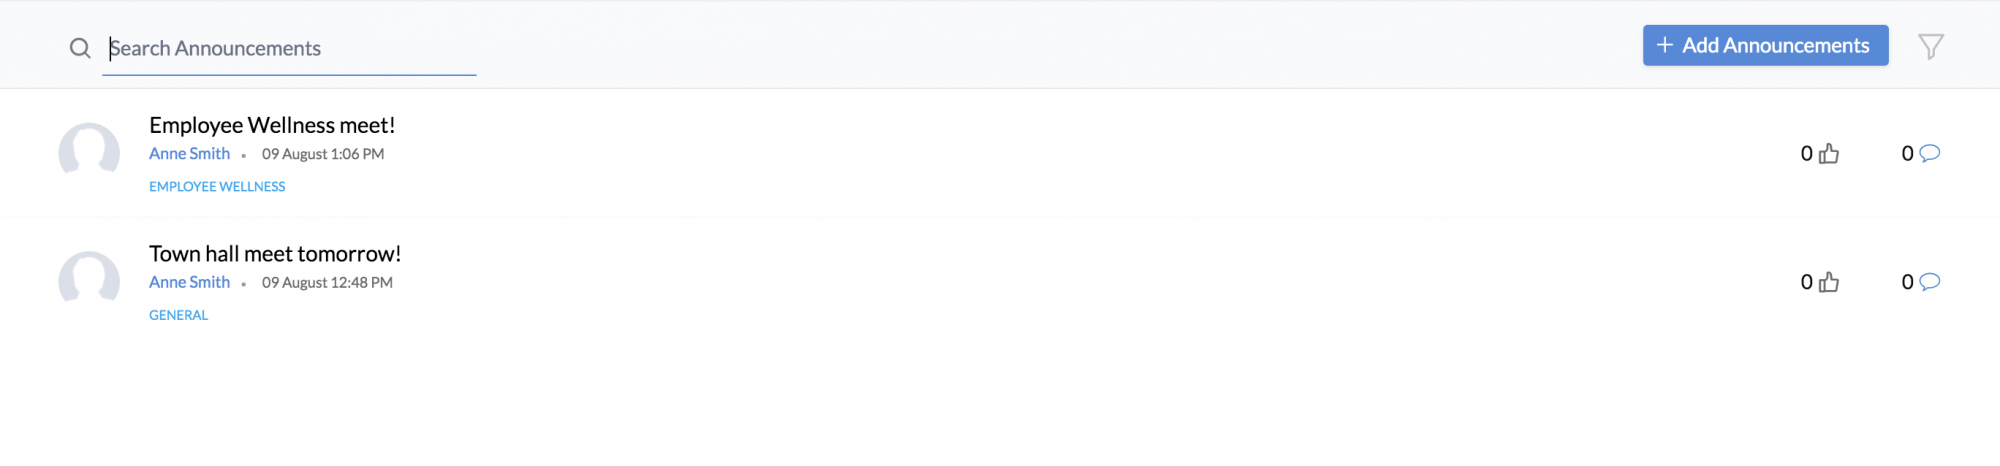
- Give the keywords in the Search tab and press enter
You can also use @ tags to search for announcements or comments that are made by specific users.
Note: The Key word could be from the subject or from the content of the announcement. The announcements that are even in the disabled status can be pulled out using this method. The same applies for Sticky Announcements too.
Other than this, Announcements can be easily accessed right from your Dashboard, provided it is enabled as a widget in your customizable dashboard.
You can react or like an announcement using a variety of emojis.
Disabling comments in Announcements
If you do not want the users to comment on an Announcement, you can disable the comments.
To disable comments,
- Go to Announcements
- Click on the announcement you want to disable comments for.
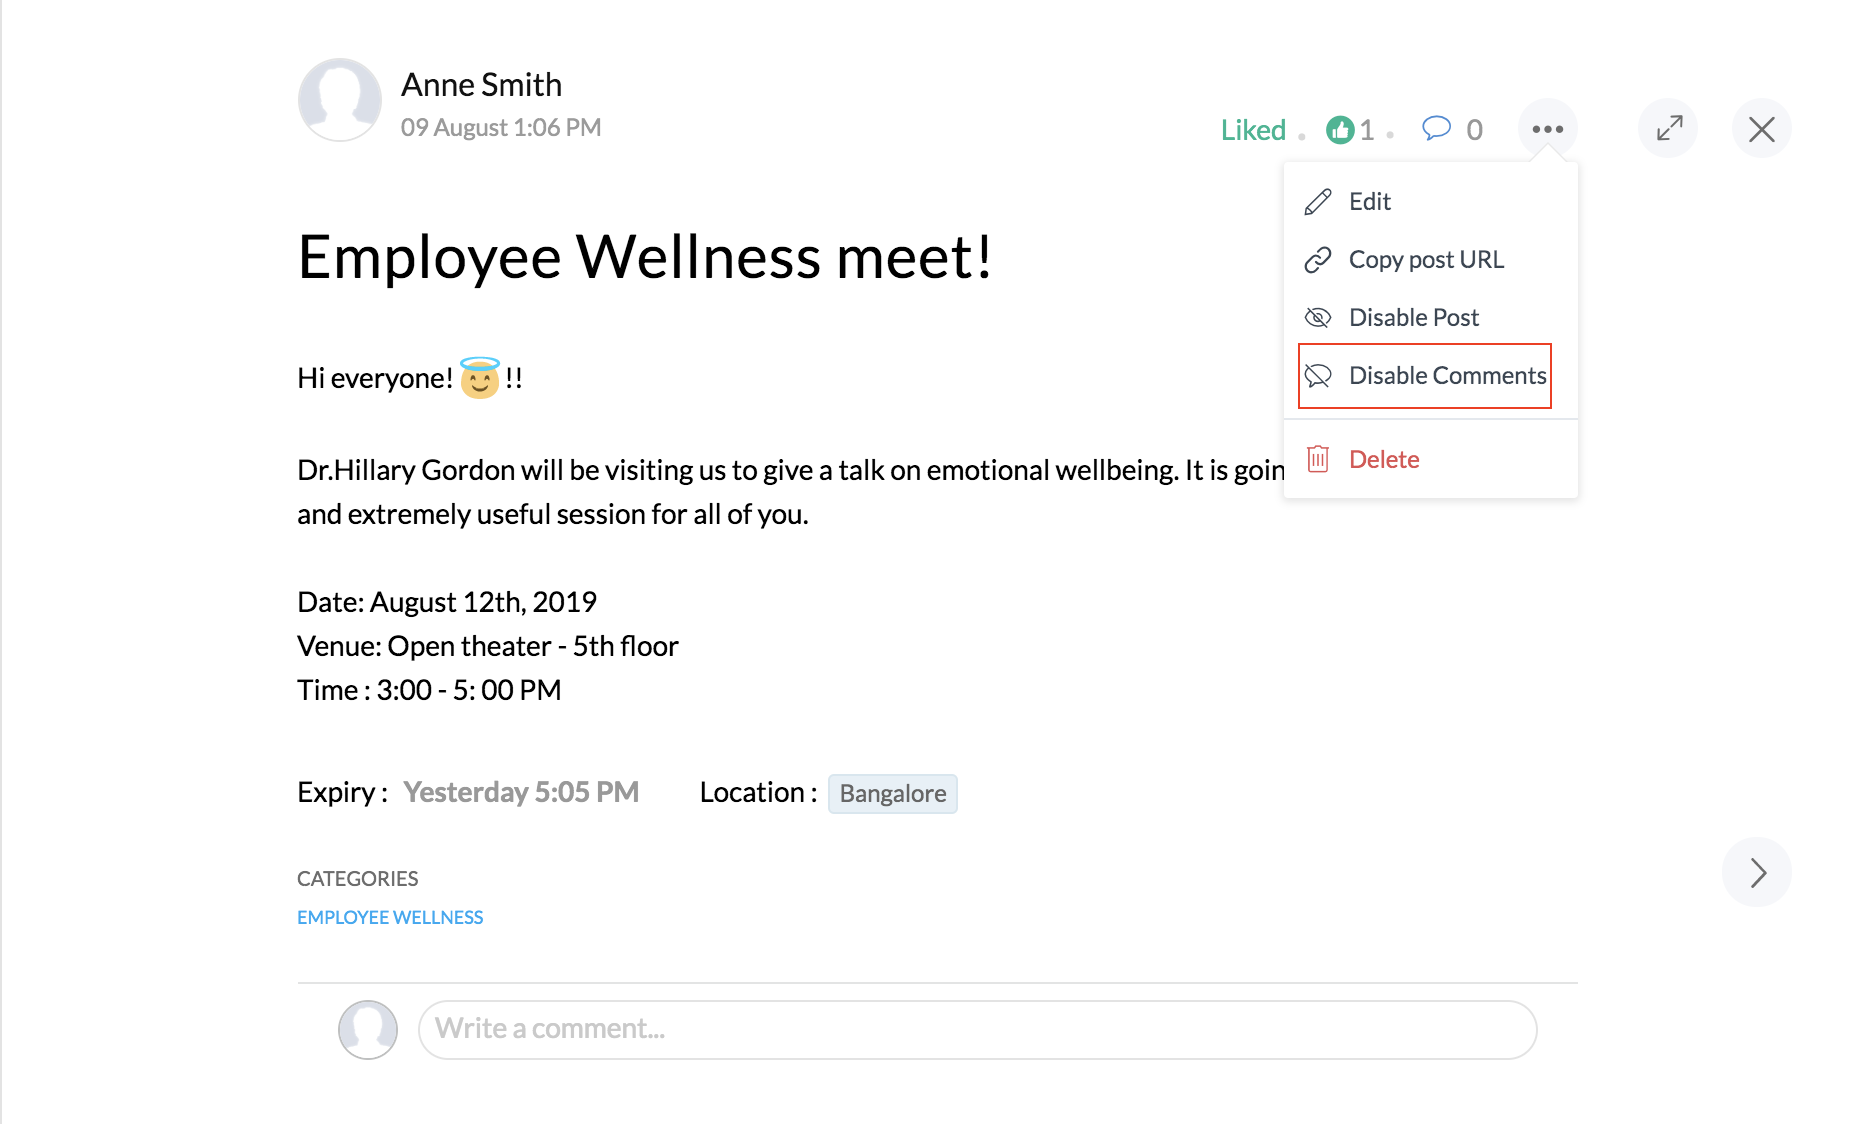
- Click Disable comments.
Now the comments space will not be visible to users and they will not be able to post comments.
Note: Admins will be able to see the comments space and post comments.