
Basic Functions in Payment Links
Let’s take a look at how you can enable and create a payment link in Zoho Books.
Enable Payment Links
To create payment links in Zoho Books, you will have to enable the Payment Links module first. To do this:
- Go to Settings on the top right corner of the page.
- Select General under Preferences*.
- Mark the Payment Links option.
- Click Save.
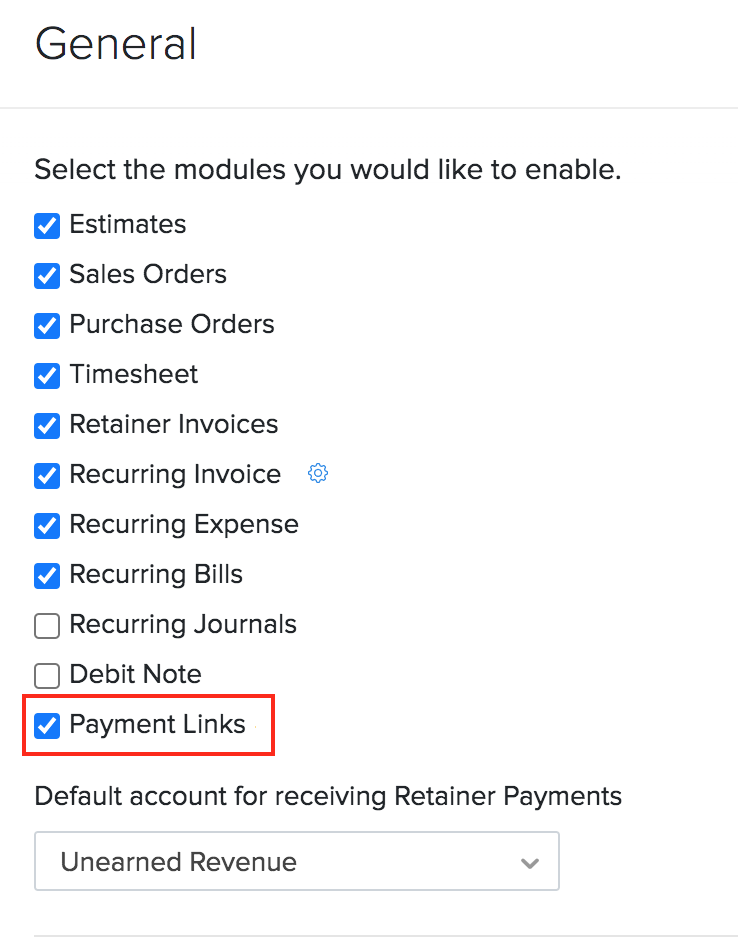
Once you enable this option, the Payment Links module will be available in the left sidebar under Sales.
Create Payment Link
To create a new payment link:
- Go to the Payment Links module in the left sidebar.
- Click the + New button on the top right corner of the page.
- Fill in the required details.
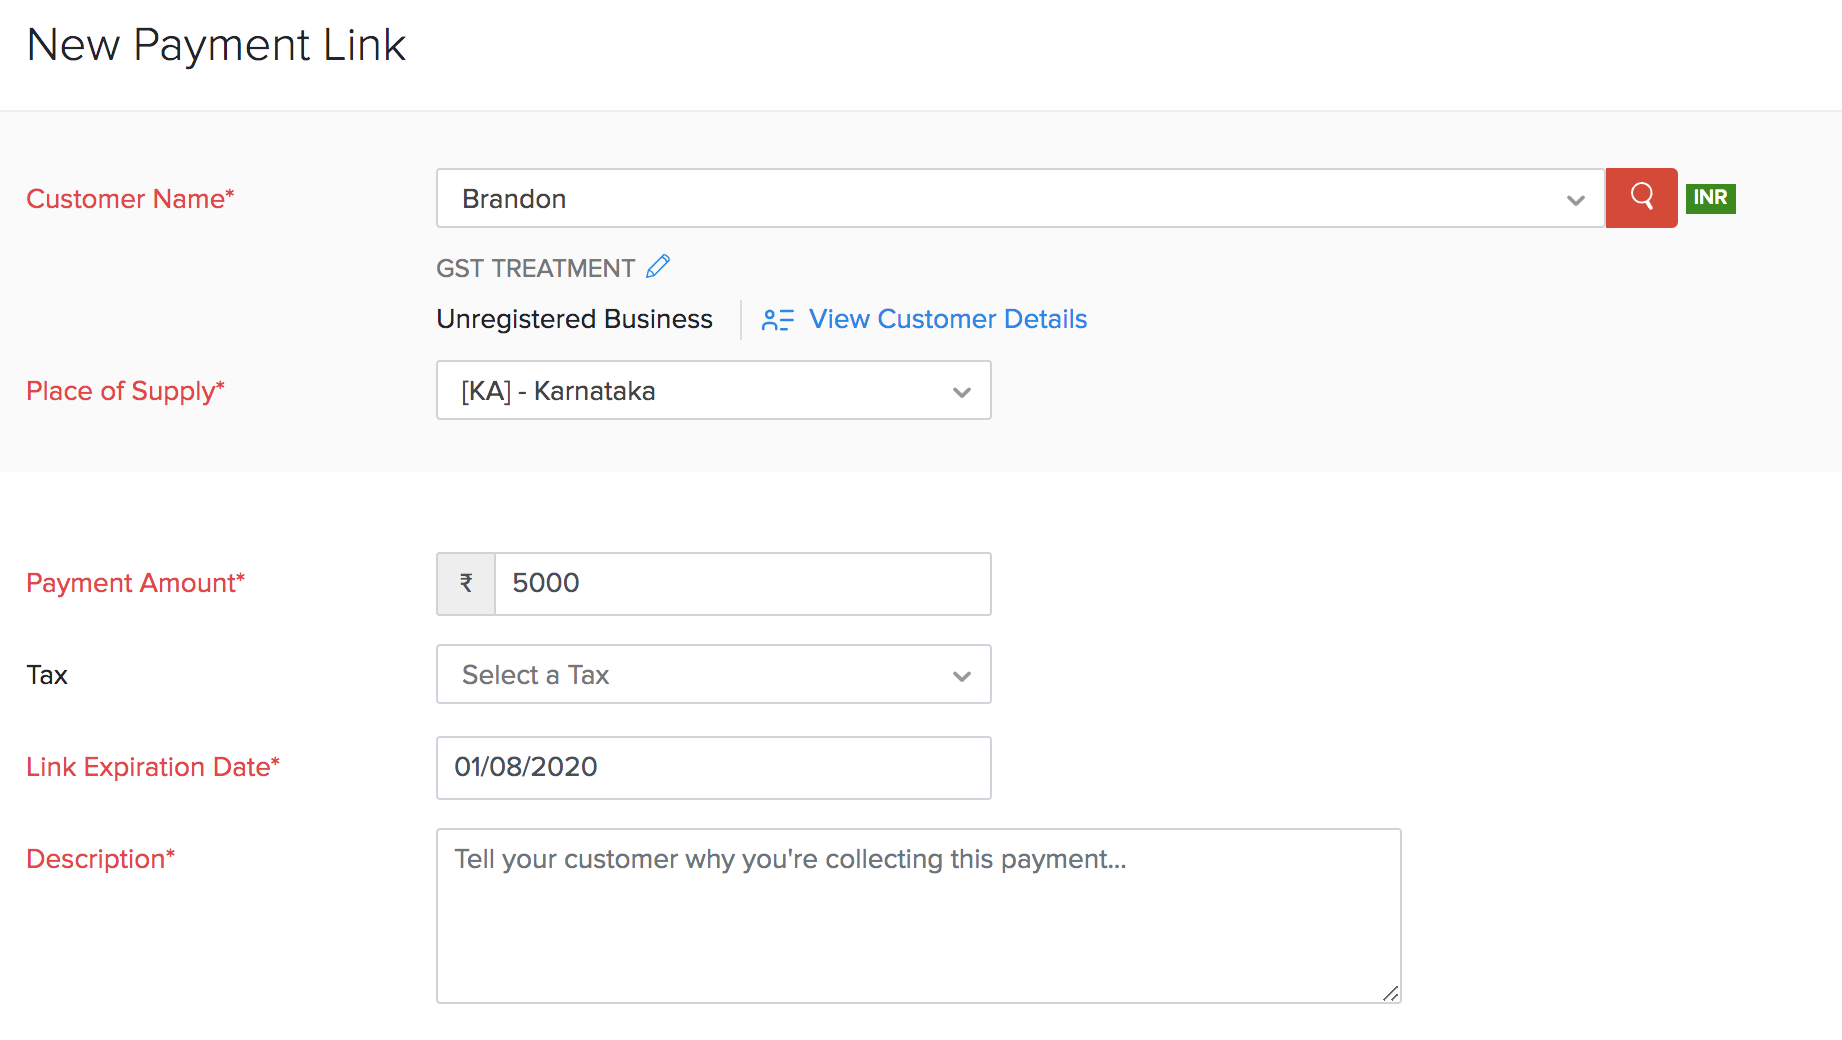
| Fields | Description |
|---|---|
| Customer Name | Select the customer for whom you are creating the payment link. |
| Payment Amount | Enter the amount that you want to request from the customer. |
| Link Expiration Date | Select the date on which the payment link should expire. By default, this will be 15 days from the date of creating the link. Once expired, the payment link cannot be accessed. |
| Description | Enter a short note on why you’re collecting this payment. This will be visible to your customers in the payment page. |
- Click Save or Save and Share.
Once you’ve created the payment link, a shortened URL and an automated Reference # will be generated for the link.
Send Payment Link
You can share the payment link with your customer through an email, requesting them to pay you online. Here’s how:
- Go to the Payment Links module in the left sidebar.
- Select the payment link that you want to send.
- Click the Overflow icon on the top right corner.
- Click the Share icon on the top right corner.
- The customer’s email address, along with their contact person’s email addresses (if any), will be displayed in the next page.
- Click Add Contact Person if you want to add a new contact person’s email address.
- Choose the required email address(es).
- Click Send.
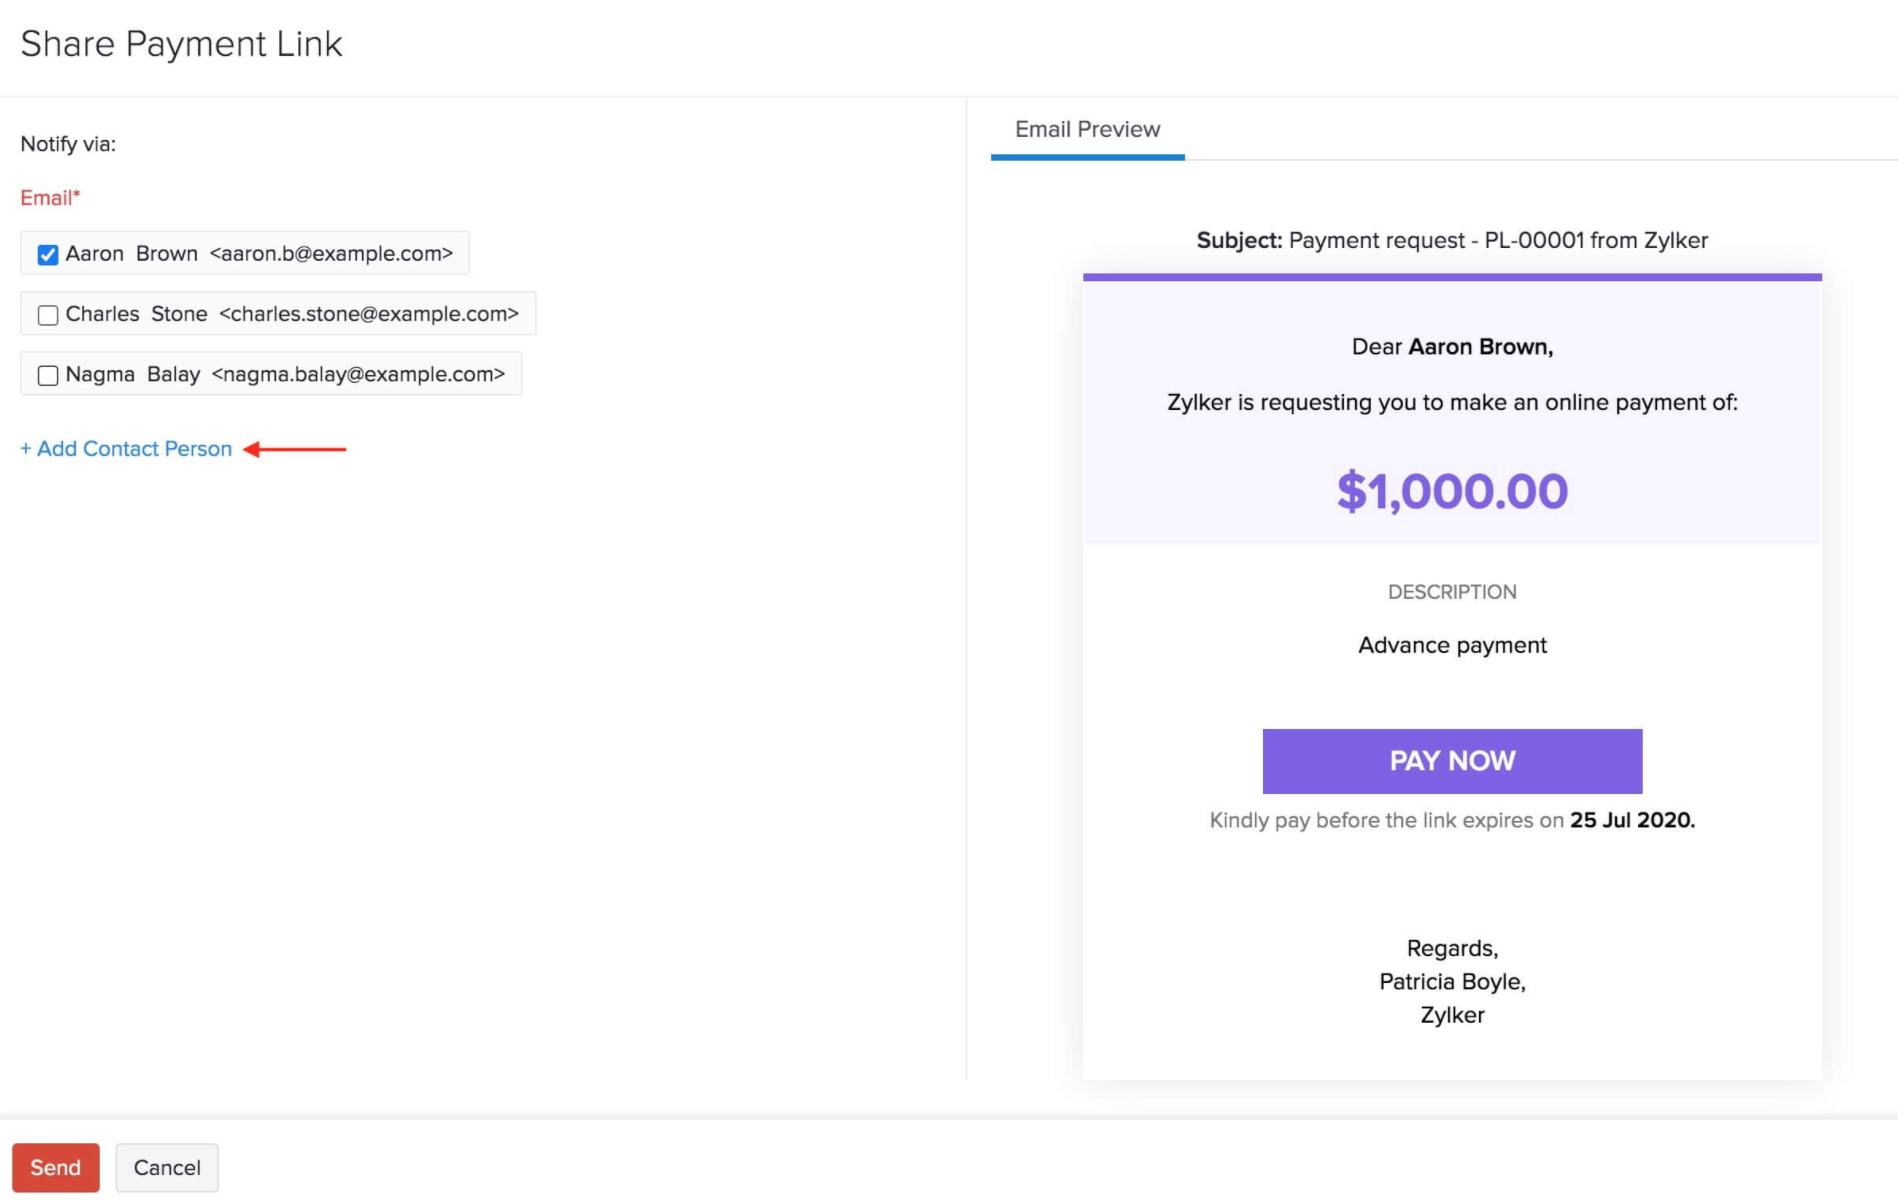
An email, as shown in the Email Preview, will be sent to your customer requesting them to pay you online using the payment link.
Pro Tip: You can also copy the payment link by clicking Copy Link and then share it with your customers directly.
Insight: You can check if your customer has viewed the payment link. When a customer has viewed a payment link, an eye icon will be displayed next to the corresponding payment link’s status.
 Yes
No
Yes
No
Thank you for your feedback!