Manage Expenses
Expenses in Zoho Books can have different statuses. They can also be filtered, sorted or exported based on various criteria.
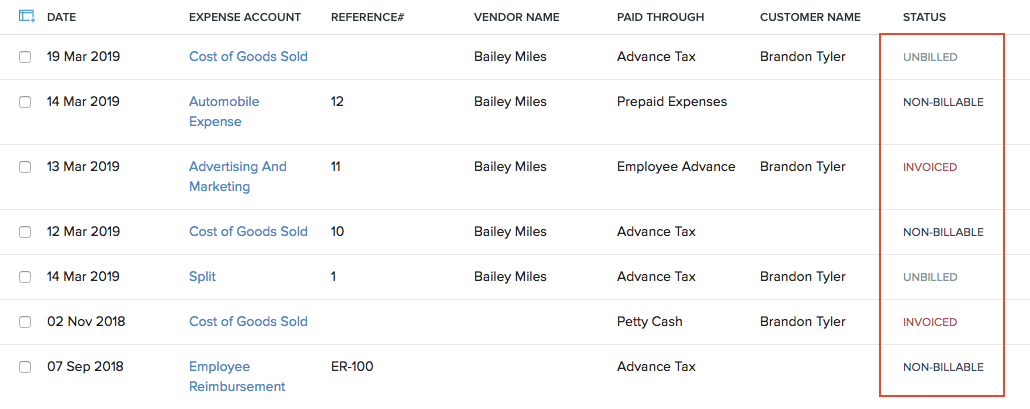
Status of an Expense
An expense in Zoho Books can have any one of the following statuses.
| Status | Description |
|---|---|
| Non-Billable | The expense cannot be added to invoices you create for your customers. |
| Unbilled | The expense has been marked billable for a customer but has not been added or billed in an invoice yet. |
| Invoiced | The expense has been added or billed in an invoice. |
| Reimbursed | The expense has been successfully reimbursed by the user. |
Filter Expenses
You can filter recurring invoices based on their statuses. Here’s how:
- Go to Purchases > Expenses (or press shift + x).
- Click the All Expenses dropdown on top of the page.
- Select the status based on which you want to want to filter the expenses.
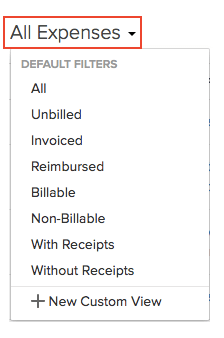
If you want to filter expenses based on your own criteria, click + New Custom View. Learn more about Custom Views.
Custom Views
You can create custom views to filter expenses based on criteria you set. Learn more about Custom Views.
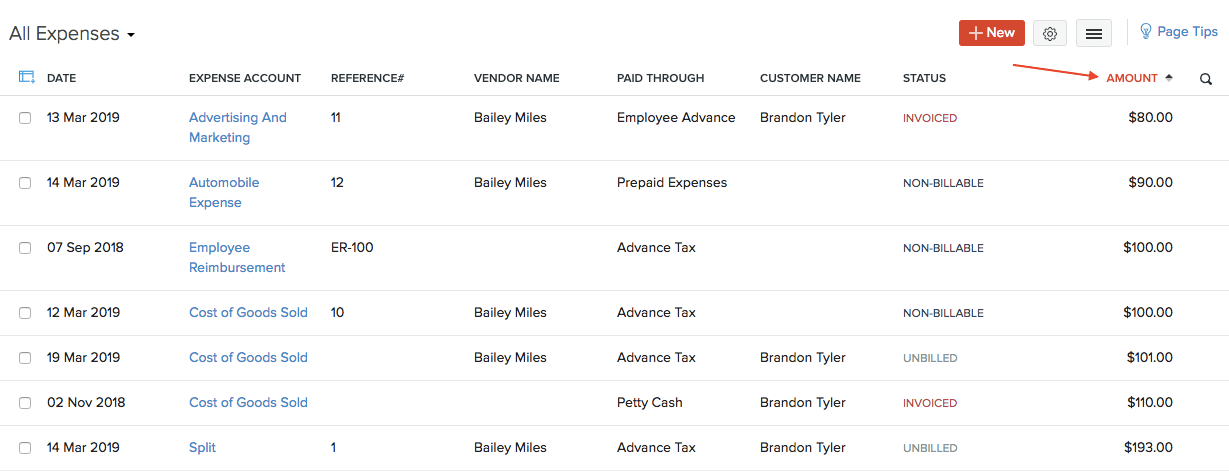
Sort Expenses
You can sort expenses based on the different columns or fields of the expense. Here’s how:
- Go to Purchases > Expenses (or press shift + x).
- Click the column which you want to sort.
- The sorting can be done based on the ascending or descending order (based on the arrow). Click the field again to change the sorting order.
Rearrange Columns
In the Expenses module, you can choose which fields are displayed and which are not in the main page. You can also rearrange the columns or fields in the same page. Here’s how:
- Go to Purchases > Expenses (or press shift + x).
- Click the Table icon in the left side of the page.
- Select the fields that you want to display.
- Rearrange the order of the columns by dragging and dropping the icons next to them.
- After making the changes, click Save.
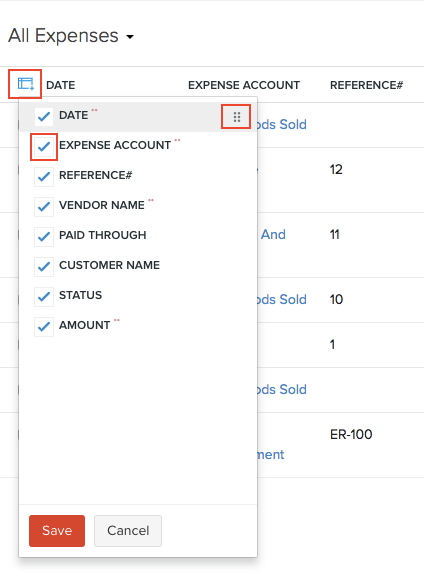
Insight: Fields which are mandatory (marked by **) cannot be unchecked.
Export Current View
If you have filtered your expenses, or rearranged the columns in your expenses, then you can export that particular view of your expenses. Here’s how:
- Go to Purchases > Expenses (or press shift + x).
- Filter your expenses and/or arrange the expense columns as per your requirements.
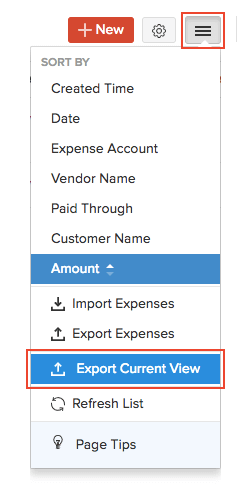
- Click the More icon in the top right corner of the page.
- Select Export Current View.
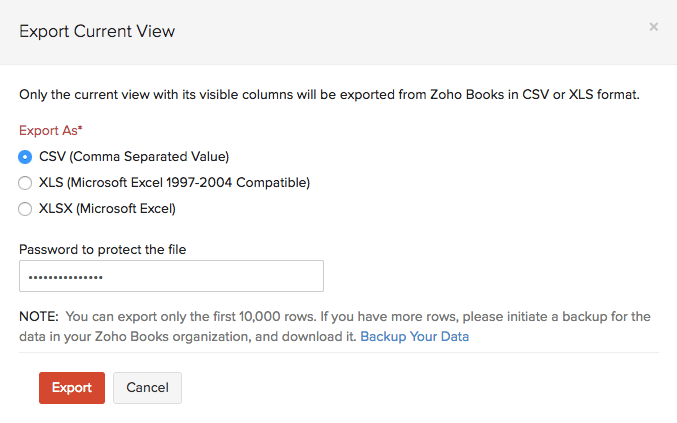
- Select the format for export under Export As and enter a Password to secure your export.
- Click Export.
Next >
Mileage Expenses
Related
 Yes
No
Yes
No
Thank you for your feedback!