Zoho Desk Extension
Zoho Desk is an online context-aware help desk software that aids your support technicians in managing the tickets assigned to them. You can create, assign, search, and view your tickets from Zoho Desk in eWidget. This integration enables you to view the information on the tickets assigned to you in eWidget as you read the corresponding emails.
You need to set up the Zoho Desk integration in Zoho Mail to use it from eWidget.
Setting up Zoho Desk Extension
- Log in to your Zoho Mail account
- Go to Settings > Integrations card.
- Navigate to Zoho Desk and click on it.
- Choose a portal from the drop-down to finish setting up.
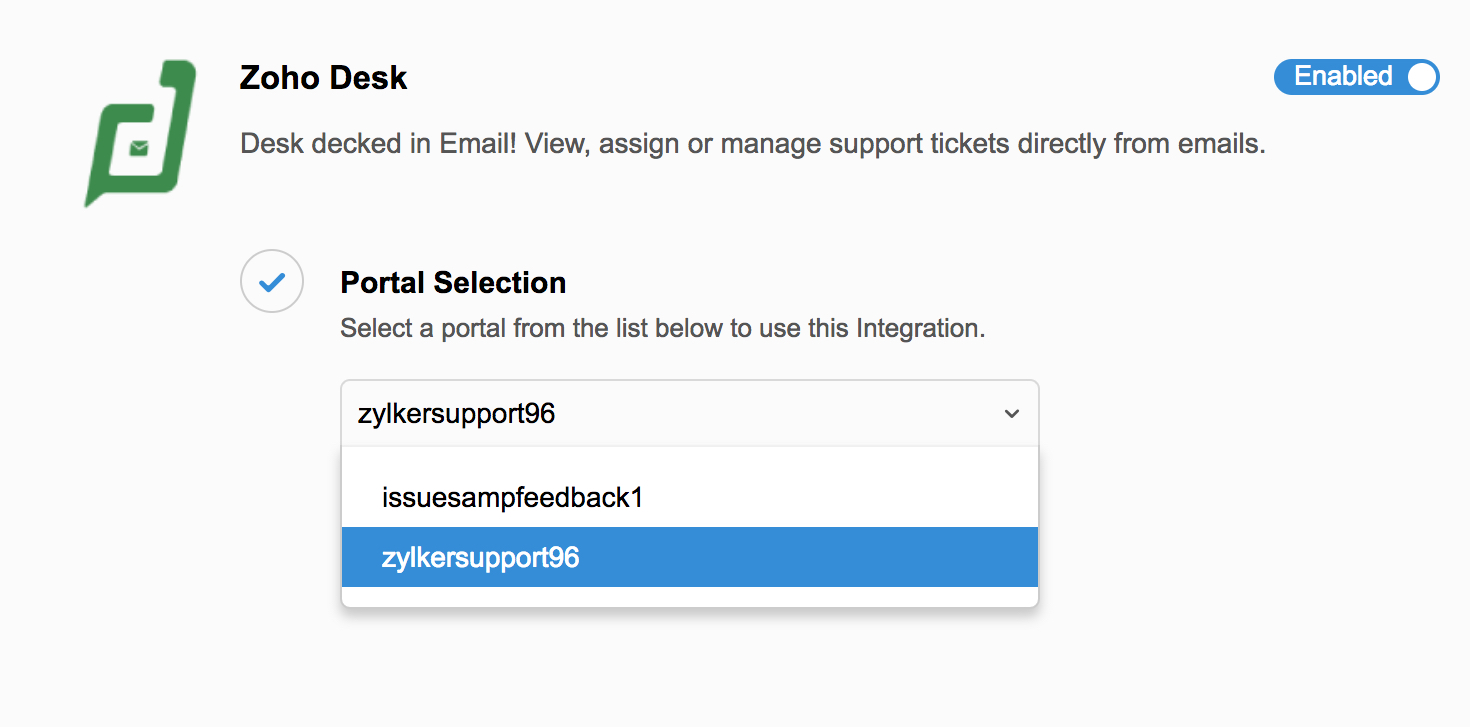
- Zoho Desk will be listed in the app menu in eWidget.

Using Zoho Desk Extension
After setting up, follow these steps to use the Zoho Desk integration in eWidget:
- Click on the Zoho desk eWidget icon on the right pane or the eWidget icon on the bottom-right corner of your mailbox and select Zoho Desk from the app menu.
- You will have options to open, view, edit, search, create, and access the tickets in that specific portal.
You can also comment on the tickets to communicate internally with your support staff and assign the unassigned tickets through the eWidget.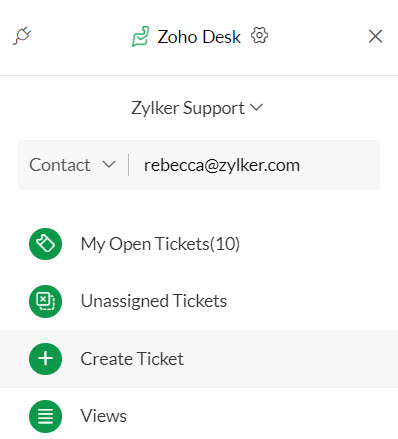
Note:
Before creating, editing, or viewing the tickets, make sure you select the relevant department if you are a part of many.

My open tickets
This section displays all the open tickets assigned to you in that specific portal and lets you comment on them. You can choose the department from which you want to view the open tickets by using the drop-down at the top of the eWidget window.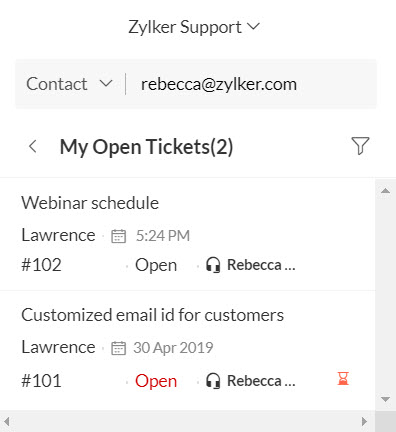
You can use the filters to view the tickets based on status and/ or channel.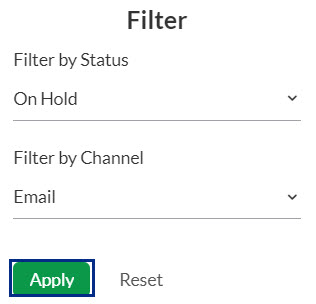
Unassigned tickets
The Unassigned tickets are listed under this section and can be filtered according to the predefined set of Status or Channel parameters you’ve set in Zoho Desk. This makes it easier to identify and assign the tickets to the respective support team members.
For example, if you had created the Status parameter ‘Follow up’ in Zoho Desk, it will be listed as a parameter under Status in the filter menu of the Unassigned tasks section.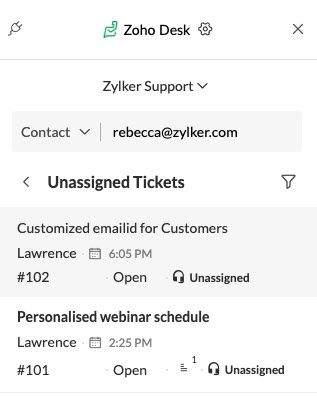
Create ticket
You can directly create and assign a ticket from the Zoho Desk eWidget in Zoho Mail which will automatically be synced and reflected in Zoho Desk.
- Click on the Zoho desk eWidget icon or the eWidget icon on the right pane of your mailbox and select Zoho Desk from the app menu.
- Select Create ticket.
- Fill in all the necessary details in their respective fields. Select the Status of the ticket.
- Assign the ticket to a person by entering their name or choosing from the drop-down list in the Ticket Owner field, Add an attachment related to the ticket from your desktop and click Create.
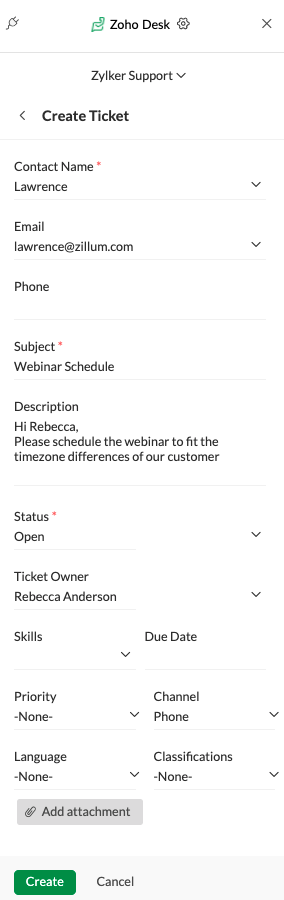

You can also create tickets from an email using the Create ticket option. You can open the email with your Zoho Desk eWidget open. The details in the email will get populated in the appropriate fields for you to create a ticket with ease. If there is any attachment in the email it will be fetched by the Create event window and will be attached to the Add attachment field.
View Tickets
View tickets section is set by default to All cases and lists all the tickets from the department selected in one place. If you have created custom Views filters in Zoho Desk, you can select it from the drop-down menu to list the tickets from that specific view.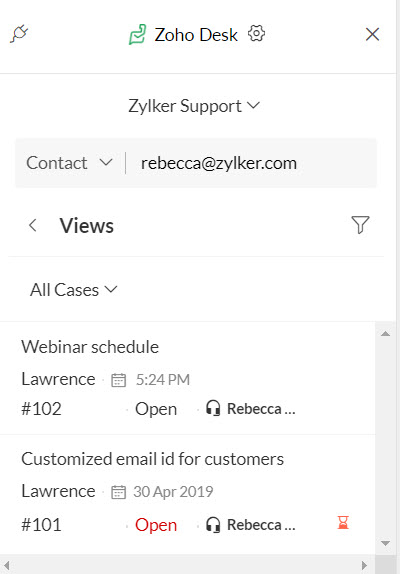
Apply the filters in this section (status and channel), in addition to the Views to effectively refine your search.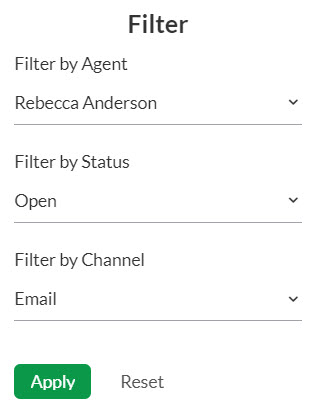
Edit tickets
You can edit a ticket to make changes to the ticket details such as title, assignee, status, etc. To edit a ticket, navigate to the Zoho Desk extension in the eWidget. Select the ticket you want to edit from the open tickets, unassigned tickets, or any of the ticket views sections. Click the More options icon on the top-right corner of the ticket and choose the Edit ticket option.

Make changes to the ticket details and click Save.

Mark a ticket as spam
In the Zoho Desk extension, you have the option to mark a ticket as spam and also mark all the tickets associated with a particular contact as spam. Once you mark it as spam, you cannot edit/ re-assign/ comment on the ticket(s).
To mark a ticket as spam, navigate to the Zoho Desk extension in the eWidget. Select the ticket you want to mark as spam from the open tickets, unassigned tickets, or any of the ticket views sections. Click the More options icon on the top-right corner of the ticket and choose the Mark as spam option.

You can also choose to mark all the tickets associated with the contact as spam from the Mark ticket as spam confirmation dialog box.

The spam tickets will be moved to the Spam cases in the Views section.

You can unmark a ticket as spam by selecting them from the spam cases section and clicking the Not spam button.

Search tickets
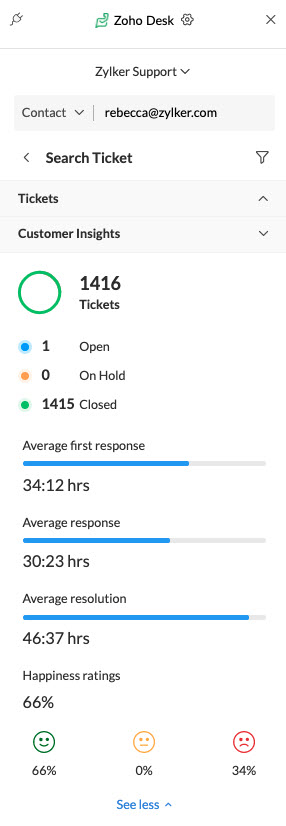
Three efficient filter parameters in the Search Ticket section will help you narrow down your search.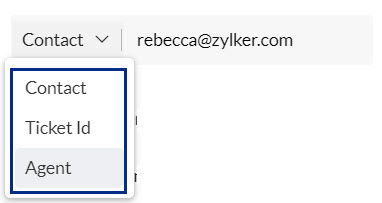
- Contact - Customer’s email address.
- Ticket ID - Ticket reference number.
- Agent - Person to whom the ticket was assigned to.
When you preview a ticket mail from your inbox with Zoho Desk eWidget open, the tickets related to the user will be listed along with the Customer's email address. If the ticket mail is from a support email address the details of the ticket will be fetched and shown in the Search ticket window. If the ticket mail is from a customer email address all the tickets from that customer along with the Customer Insights will be shown.