Web Tabs
Using Web Tabs in Zoho Mail, you can effortlessly access other external applications, tools, and websites—all within the Zoho Mail interface—eliminating the need to switch between multiple browser tabs. This provides a seamless workflow where you can integrate frequently used platforms such as your CRM, to-do list, cloud storage services, or even custom URLs. Whether you are referring a document in WorkDrive, monitoring tickets in Zoho Desk, or collaborating with a third-party chat application, Web Tabs make it possible to keep everything centralized and within reach.
Note:
- The Web Tabs feature is being rolled out in a phased manner and may not be available to all users at this time.
- Certain websites prevent their content from being embedded in other applications, which can cause them to fail to load within Web Tabs in the Zoho Mail interface.
- Additionally, if your browser blocks third-party cookies, certain sites might not display or function properly inside a Web Tab.
Create Web Tabs
You can create Web Tabs either from Mail settings or from your left pane in Mailbox. Follow the steps mentioned below to create Web Tabs:
To create Web Tabs from Mail settings:
- Log into your Zoho Mail account.
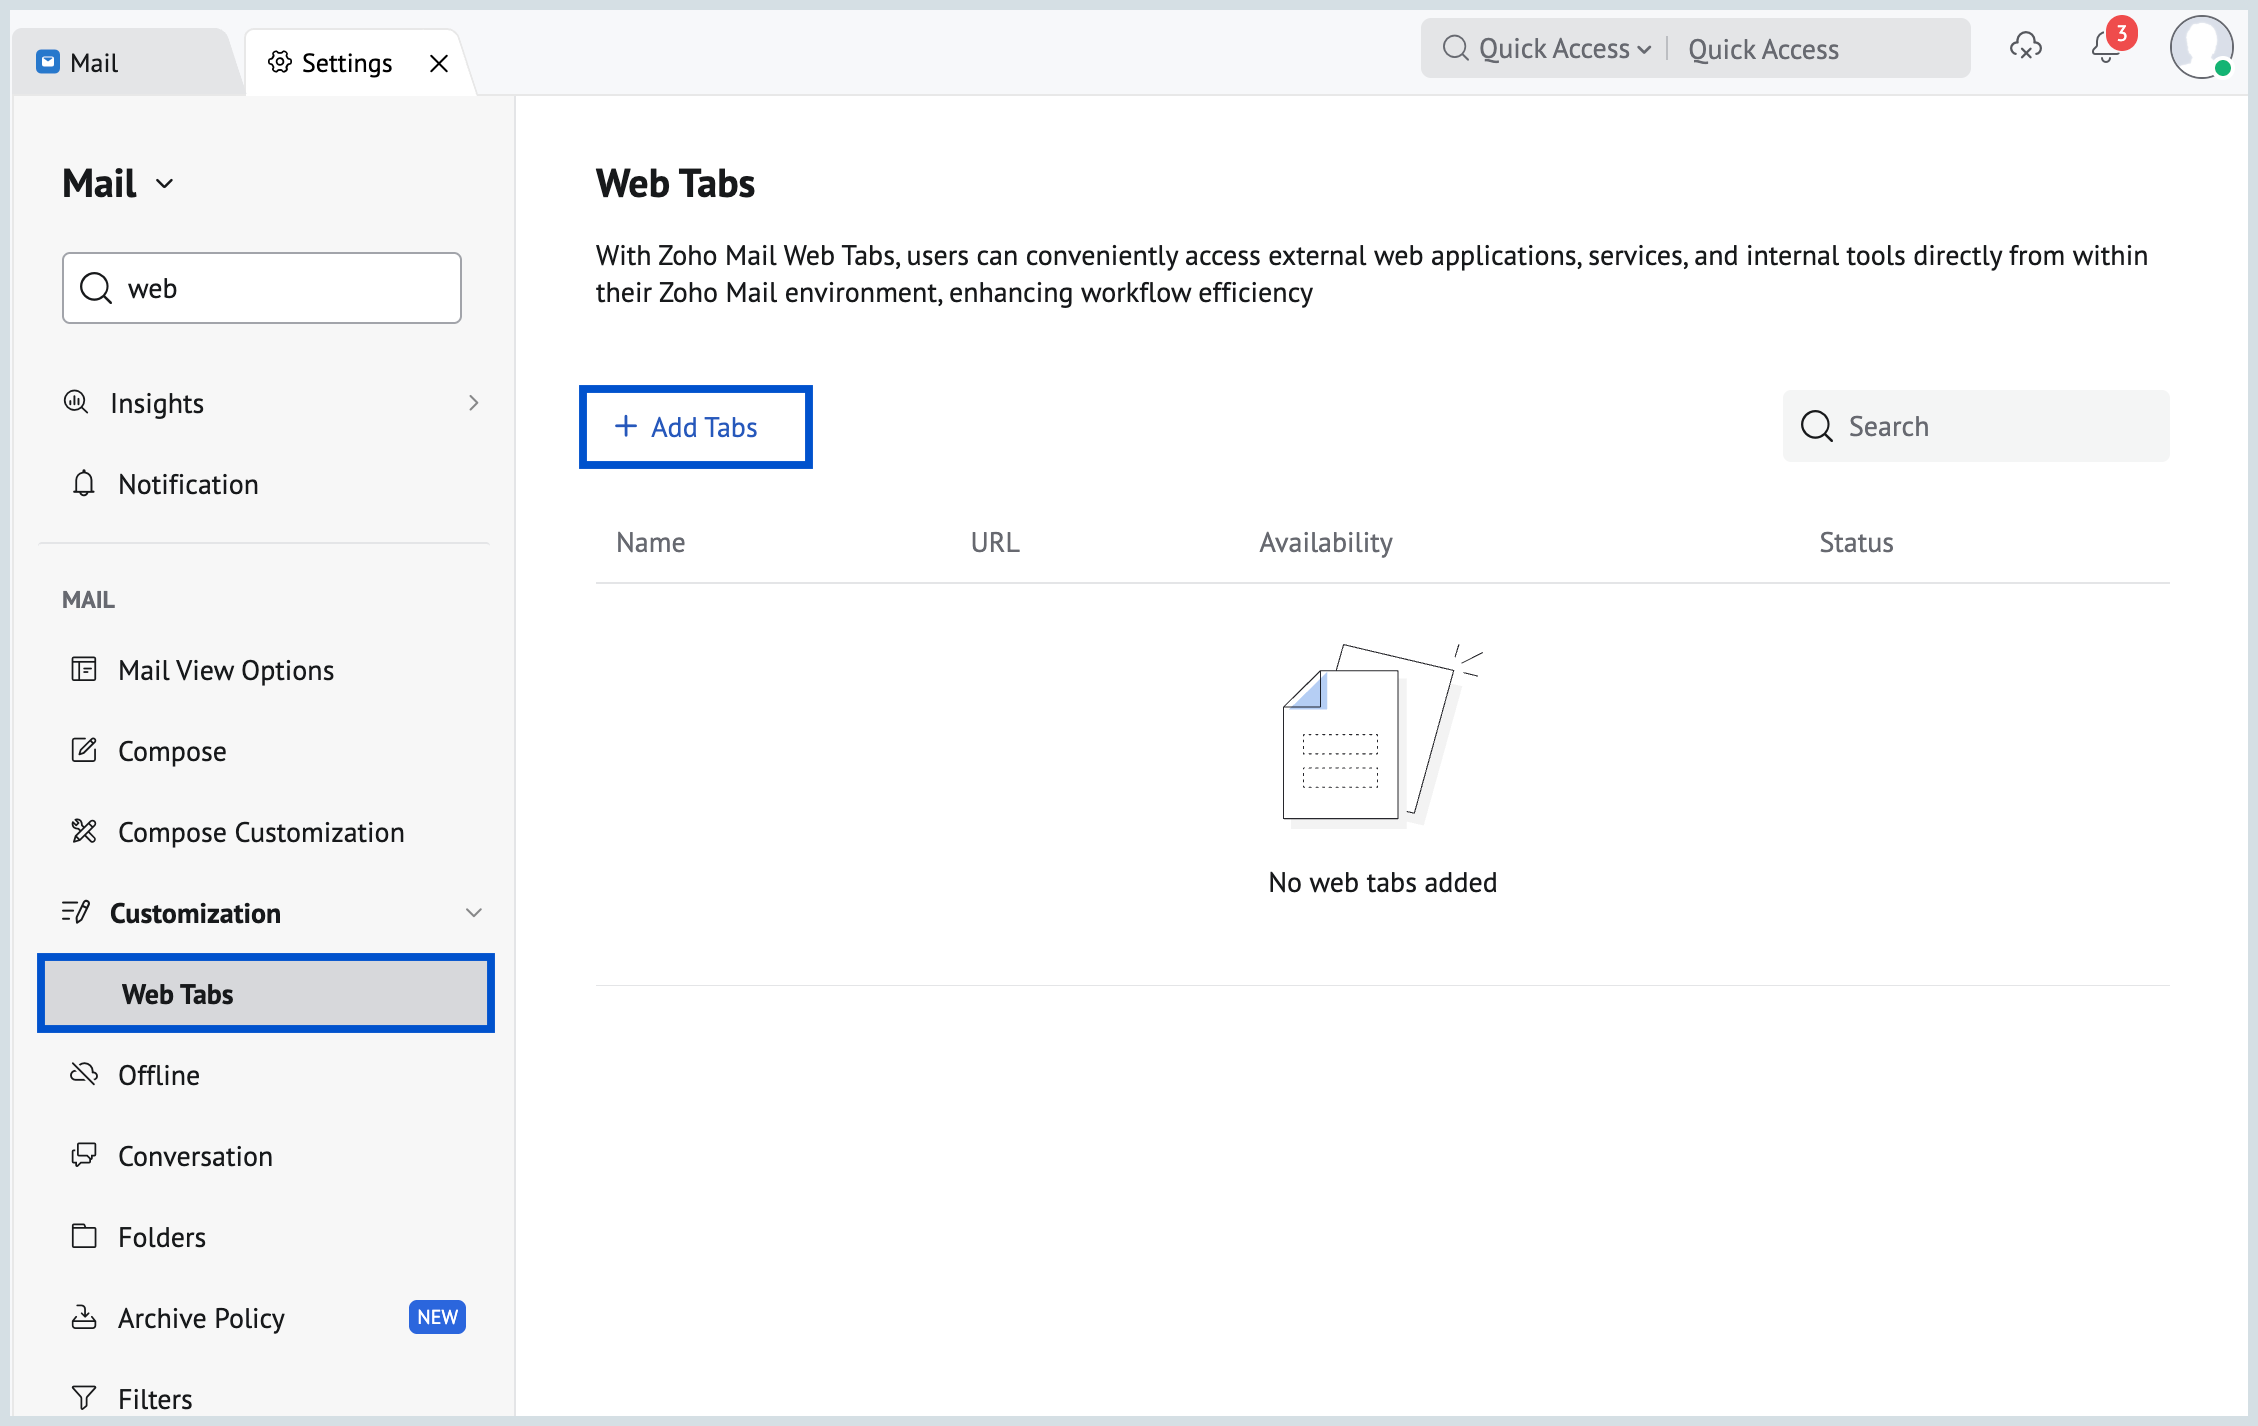
- Navigate to Mail Settings > Customization > Web Tabs.
- All the Web Tabs you have created will be listed.
- Click on the Add Tabs icon to create a new Web Tab.
- Enter the website URL, Name and Icon in the Add Tabs tab.
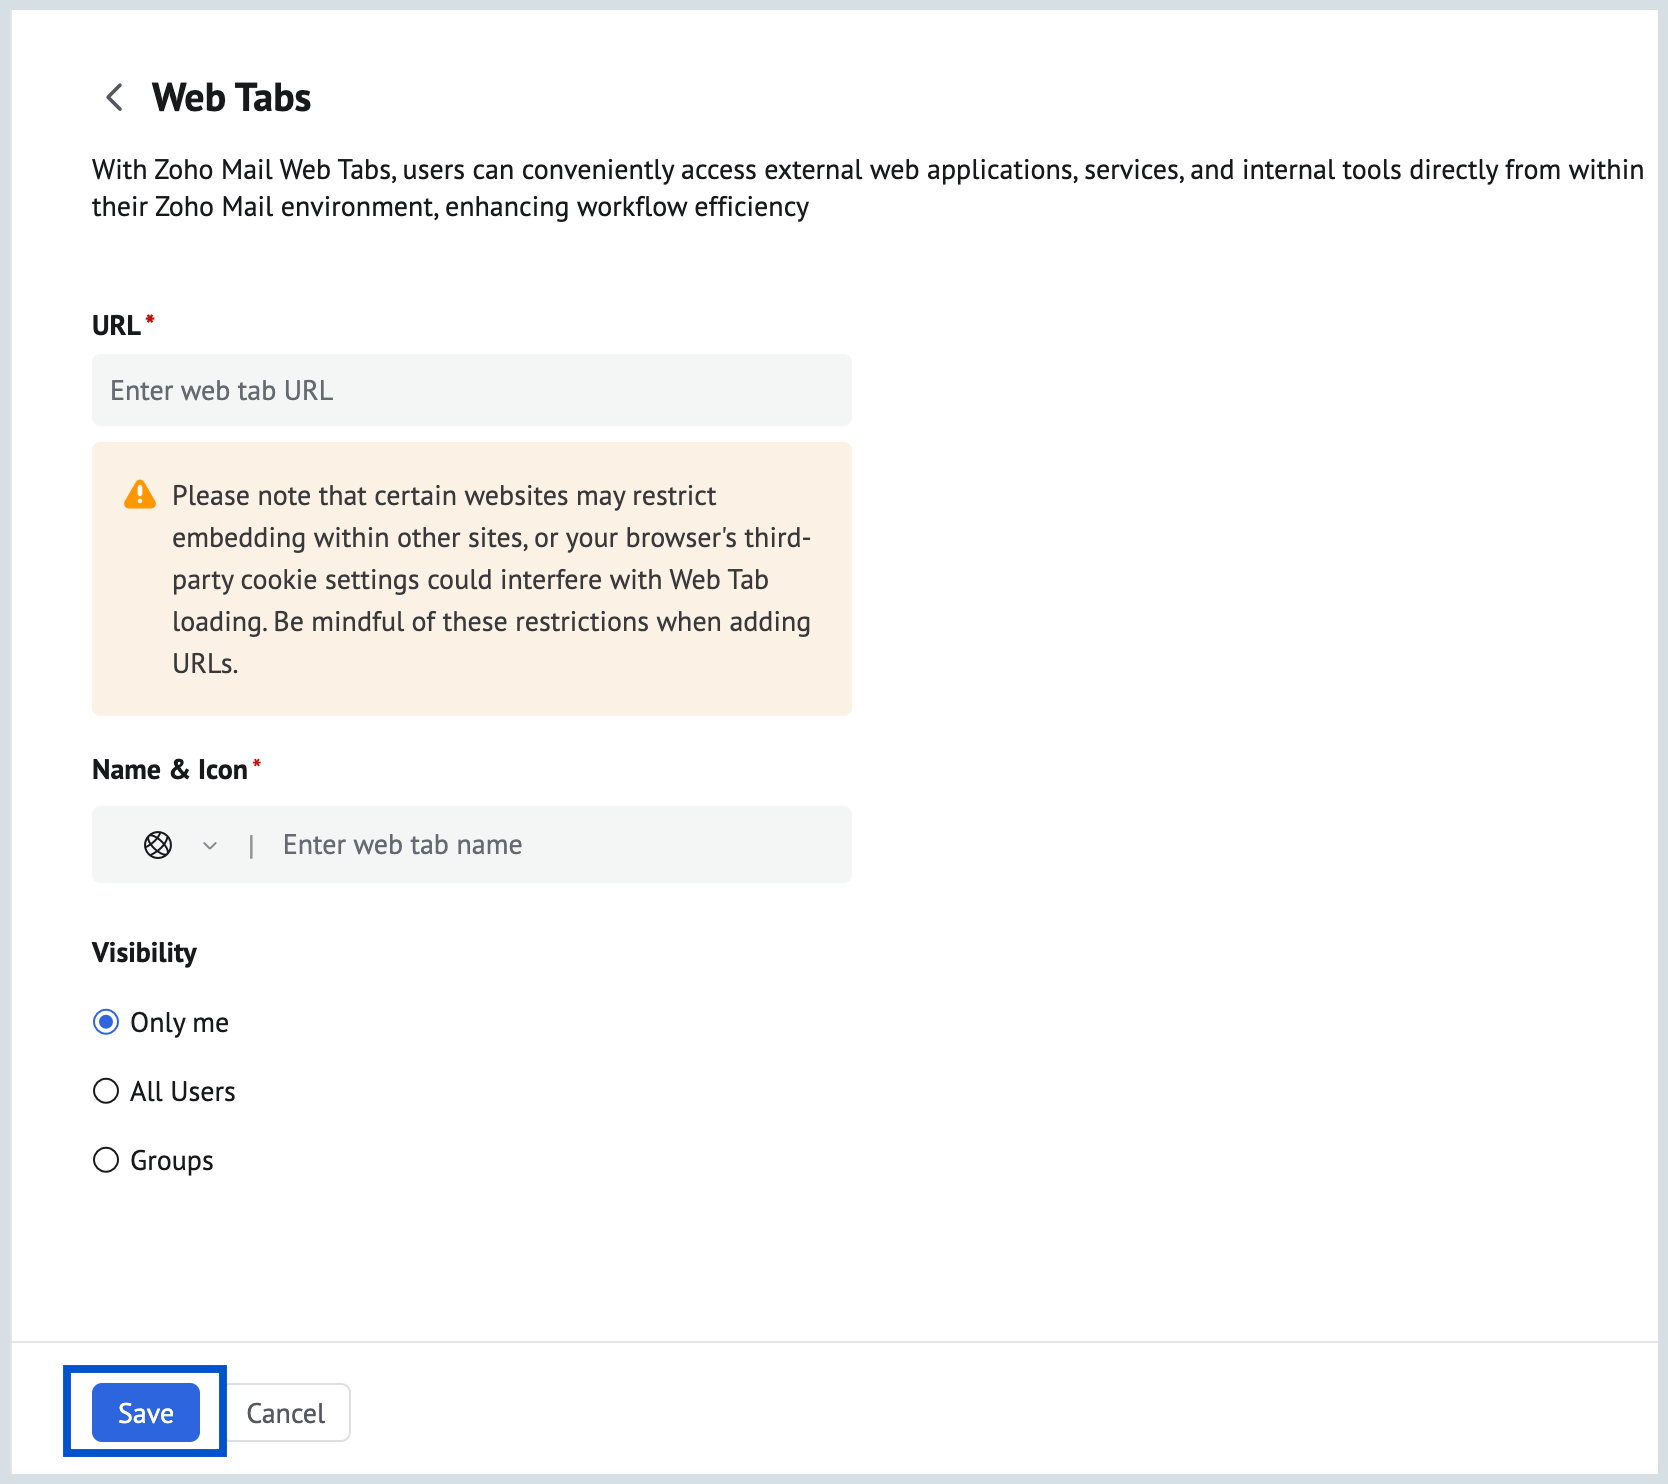
- You can choose to make the Web Tab visible:
- Only for me: The Web Tab will be visible only to you.
- Organization(All users): If you are an Organization Admin, you can make the Web Tab visible to all users in your organization.
- Groups: The Web Tab will be visible only to Groups where you are either the Group owner or a moderator.
- Click Save to create a Web Tab. All the created Web Tabs will be listed.
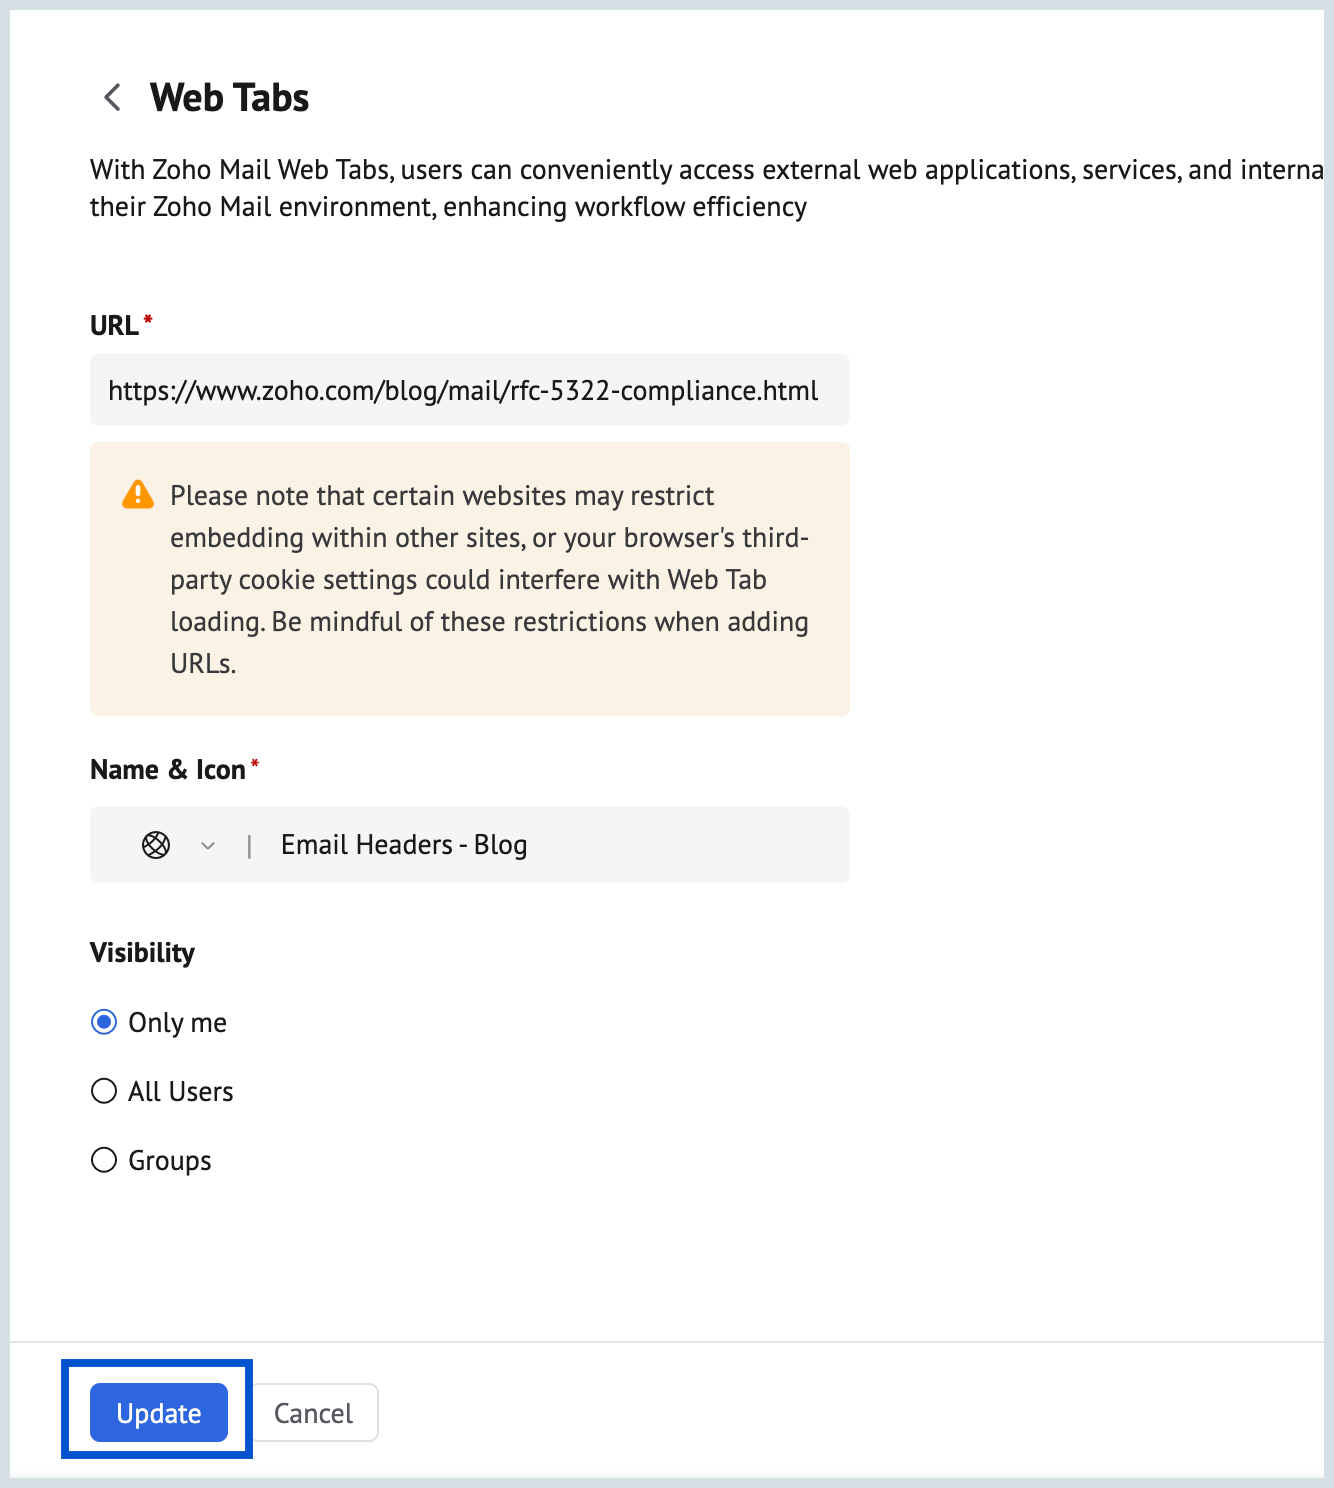
- You can click on any of the Web Tabs from the Web Tabs listing to make any changes if required and Click Update to save the changes.
To create Web Tabs from Left pane:
- Log into your Zoho Mail account.
- In your left pane of your Mail Inbox, click on the Web Tabs icon located below Resources.
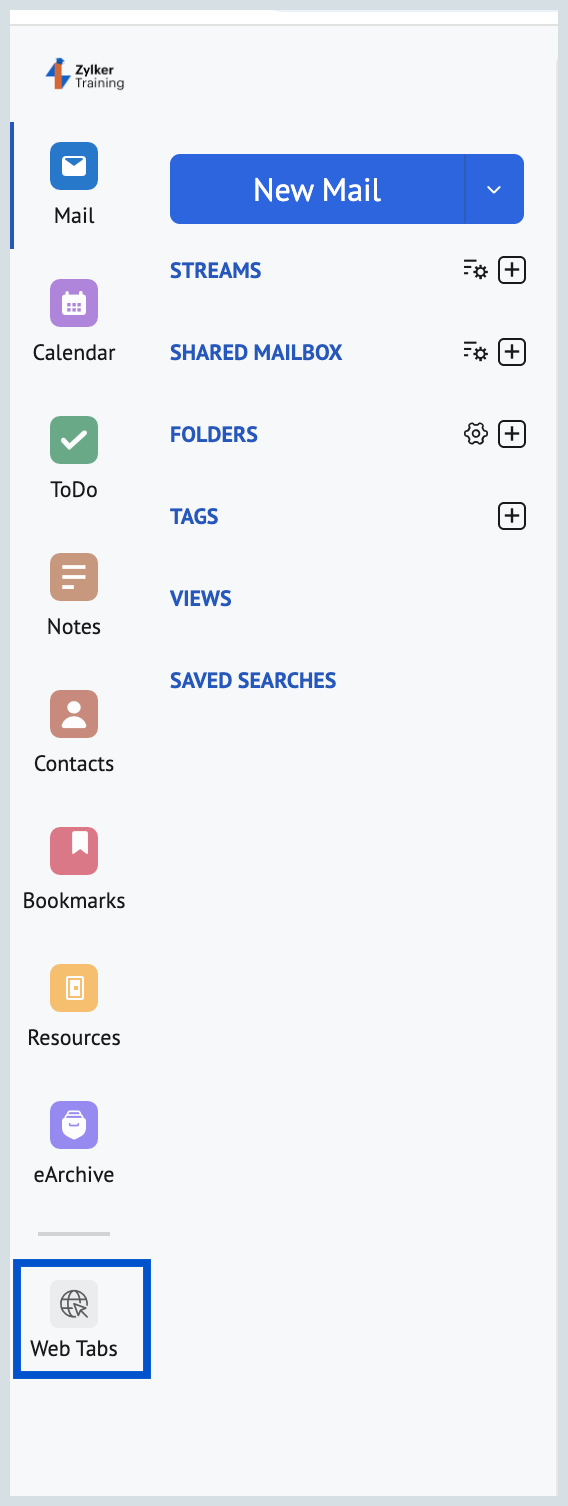
- All your created Web Tabs both personal and groups will be listed.
- Click on the + icon in the Web Tabs pop-up.
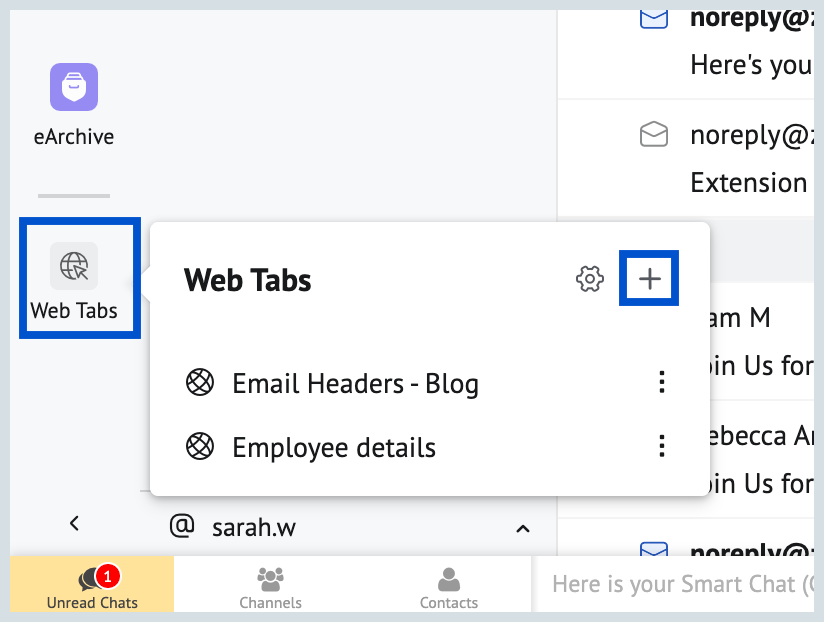
- The create New Web tab pop-will be displayed.
- Enter the website URL, Name and Icon.
- You can choose to make the Web Tab visible:
- Only for me: The Web Tab will be visible only to you.
- Organization(All users): If you are an Organization Admin, you can make the Web Tab visible to all users in your organization.
- Click Save to create a Web Tab.
Web Tabs in Streams
Web Tabs created for your Groups are accessible within your Streams. All members of your Streams group can easily view and access these Web Tabs. Each Web Tab appears in the Streams header, positioned right next to Attachments. Within the Web Tabs section in Streams, you have the options to Refresh the Web Tab, Open it in a New Window, or Copy its Link to share with others.
To create Streams Web Tabs, follow the steps mentioned below:
- Log into your Zoho Mail account.
- Navigate to Streams.
- Click on the +Add Tab icon at the top bar next to drafts section.
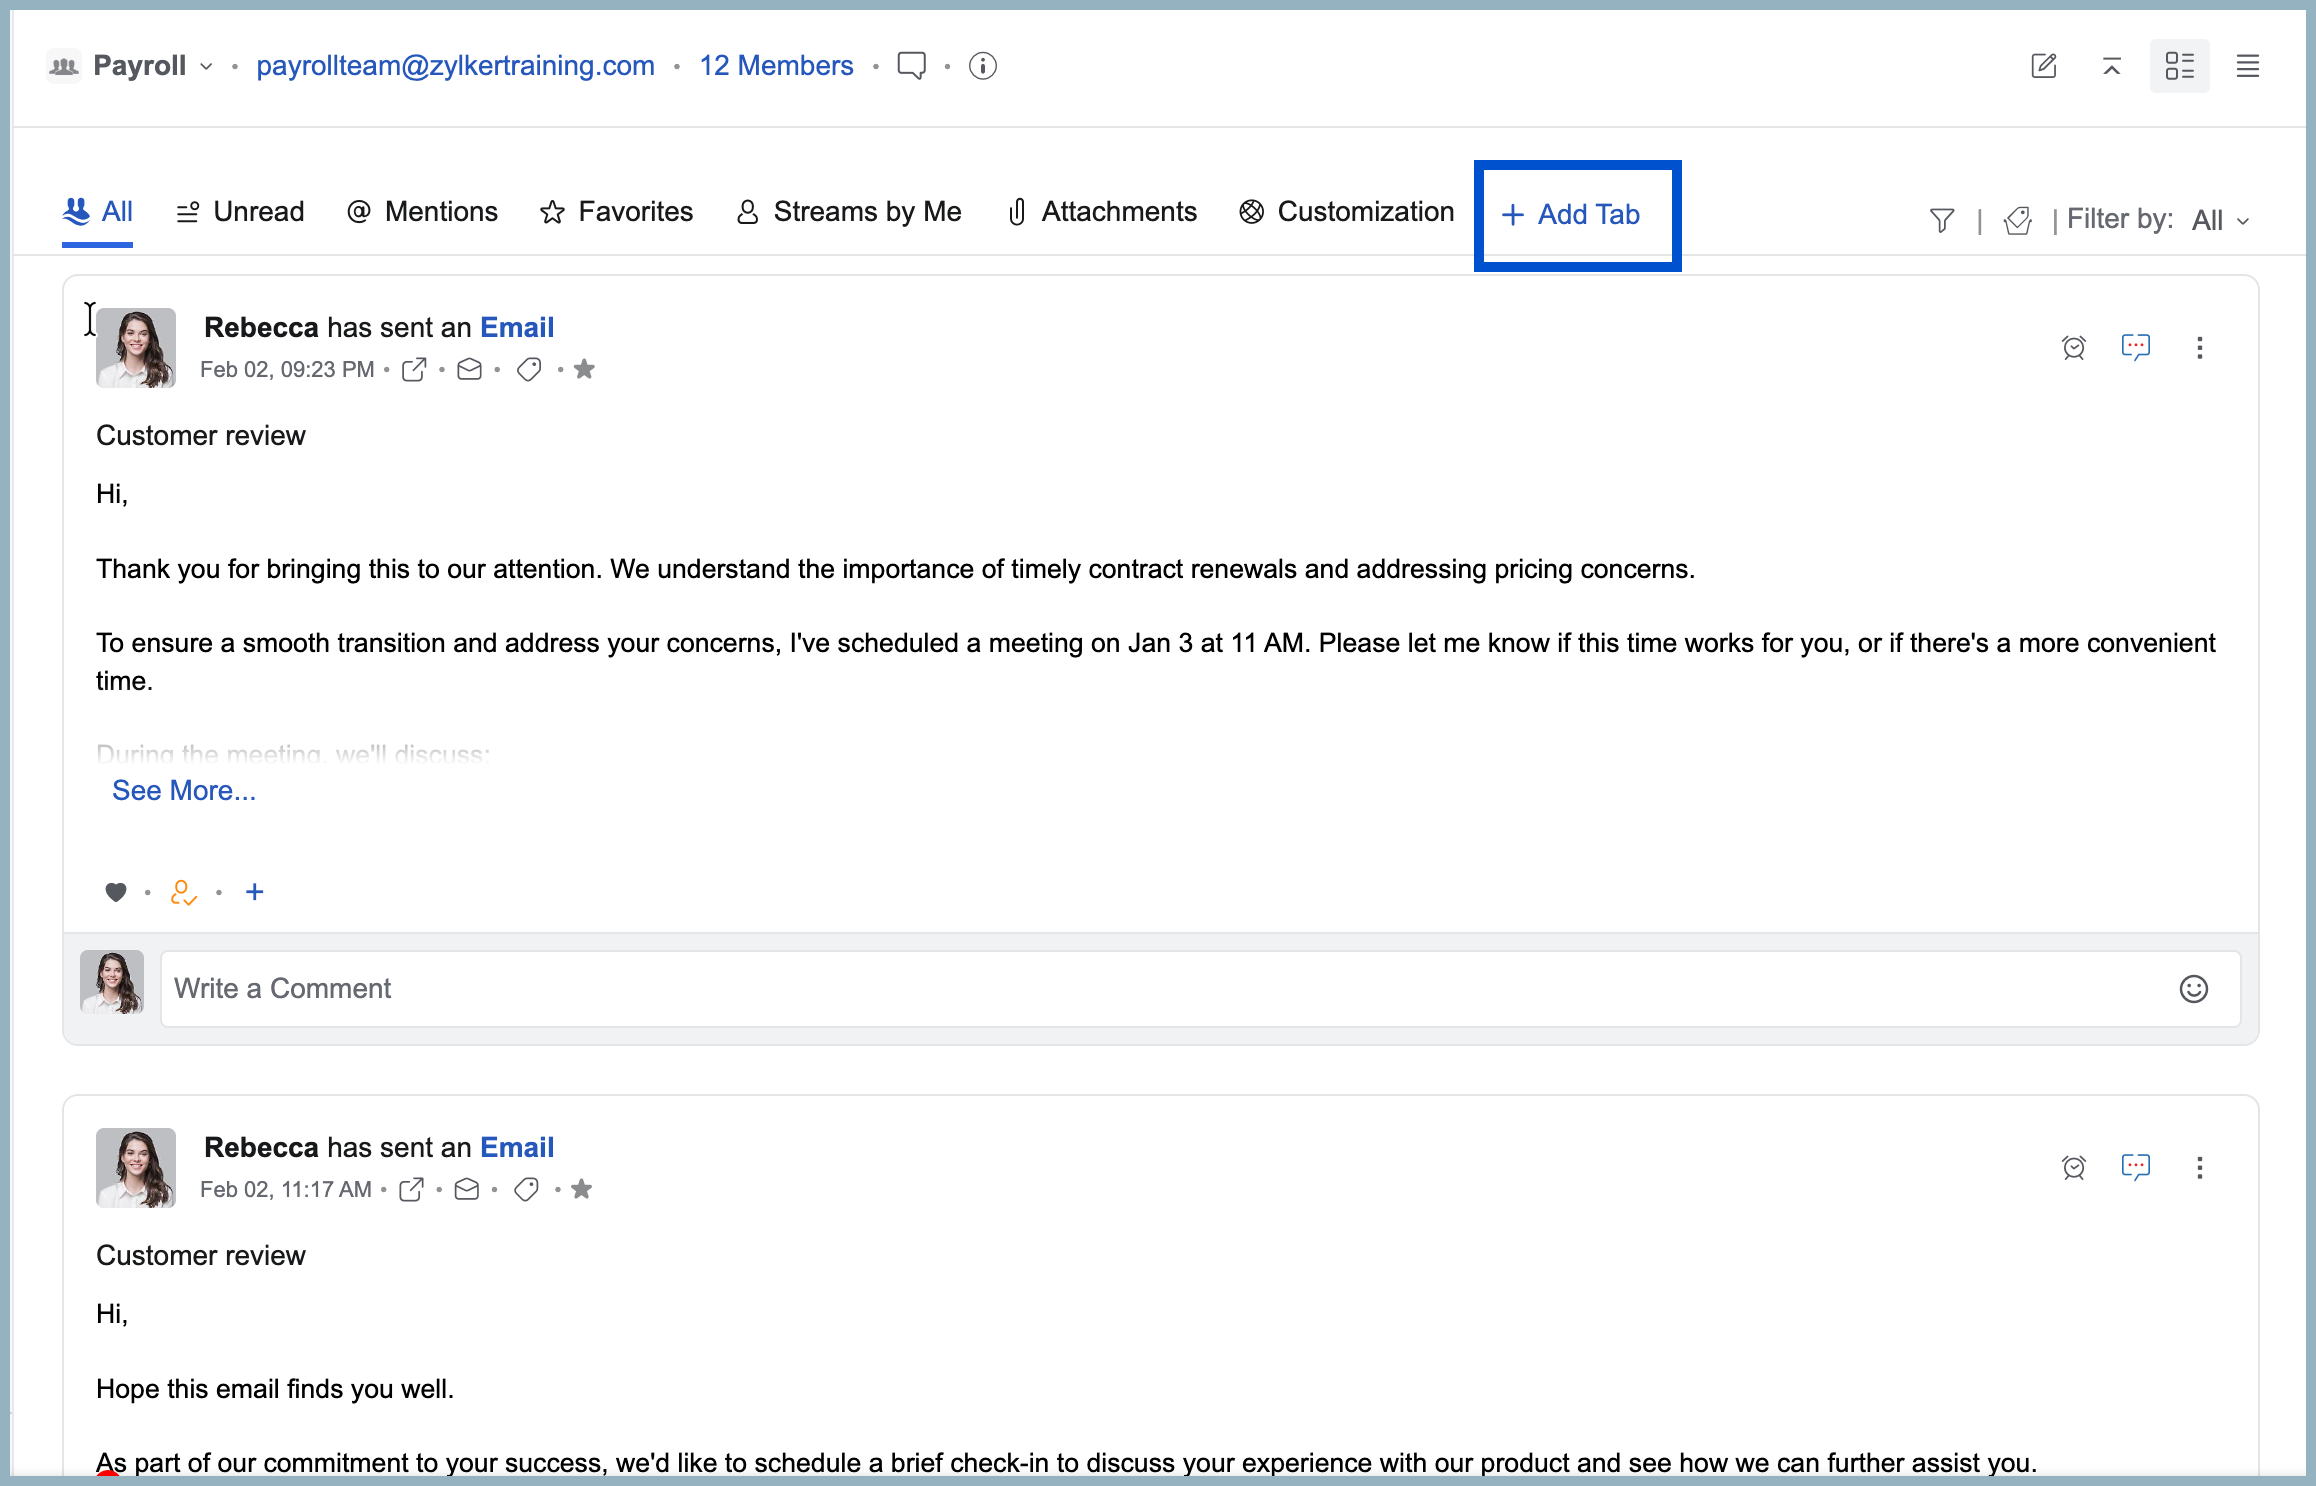
- Enter the required details and save.
Note:
Only the Group Owner or a Moderator can create Web Tabs for Groups.
Access Web Tabs
You can easily access all your Web Tabs right from the left pane of your Mailbox by clicking the Web Tabs icon. From there, you can also: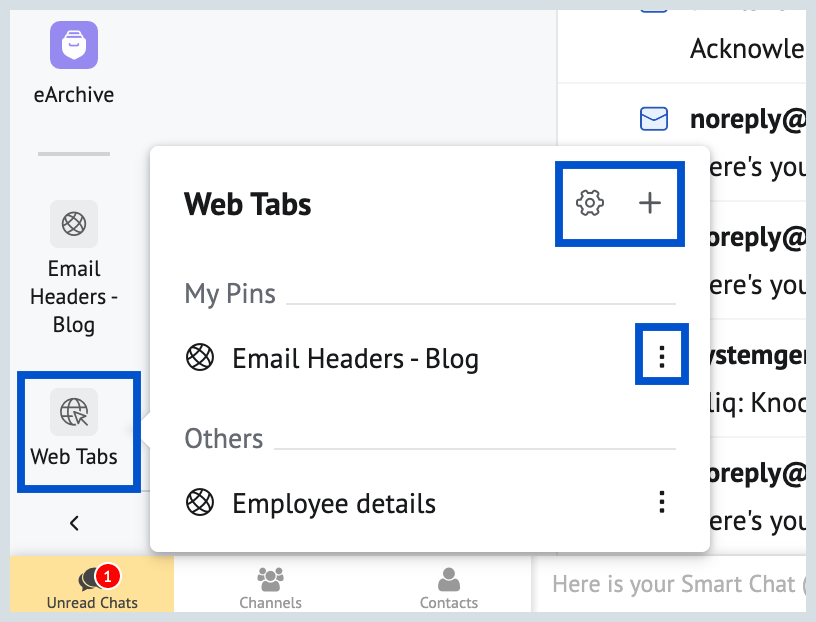
- View all your created Web Tabs( Personal and Organization wide Web Tabs)
- Create upto 10 new Web Tabs(Including Personal and Organization wide Web Tabs).
- Pin Web Tabs for easy access.
- Access Web Tabs settings.
- Manage Web Tabs through More options.
More Options
Web Tabs in Zoho Mail provide you with several options that let you manage and personalize your Web Tabs experience. You can access More Options(⋮) from the left pane. Here’s what you can do: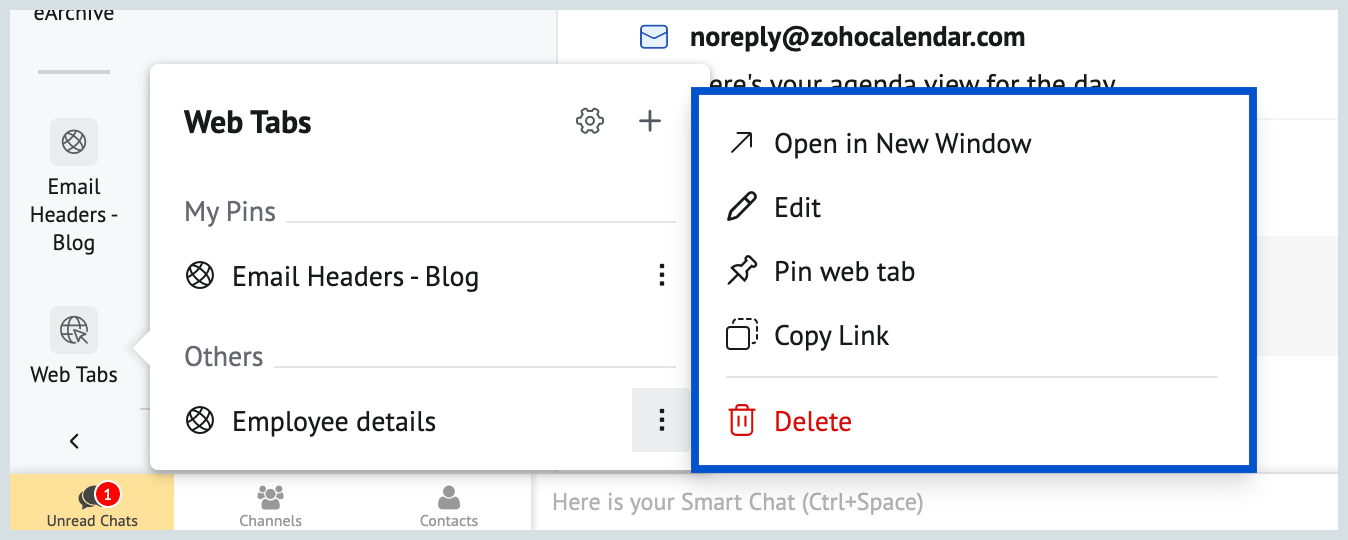
- Open in New Window - If you prefer your Web Tab to be displayed in a separate window, you can choose to open any Web Tab outside the Zoho Mail interface for a distraction-free view.
- Edit - To update a Web Tab details, you can simply click on the Edit option to modify the URL, name, or other settings as needed.
- Pin - For quick and easy access, you can pin up to 5 Web Tabs. Pinned tabs appear in the left pane, right above your productivity apps, making them readily available at all times.
- Copy Link - Share your Web Tabs with your colleagues or other users by simply using the Copy Link option to copy the URL and share it directly.
- Delete - No longer need a particular Web Tab? Click Delete and confirm your action in the pop-up dialog to remove it permanently from your list. You can only delete Web Tabs that you created or those where you are the Creator or Moderator of the Group Web Tab.
View Web Tabs
All the web tabs you have created will appear in the left pane, below the productivity apps. If you have pinned any tabs, you can open them directly by clicking on their names. Otherwise, click the Web Tabs icon to view and access all your created tabs.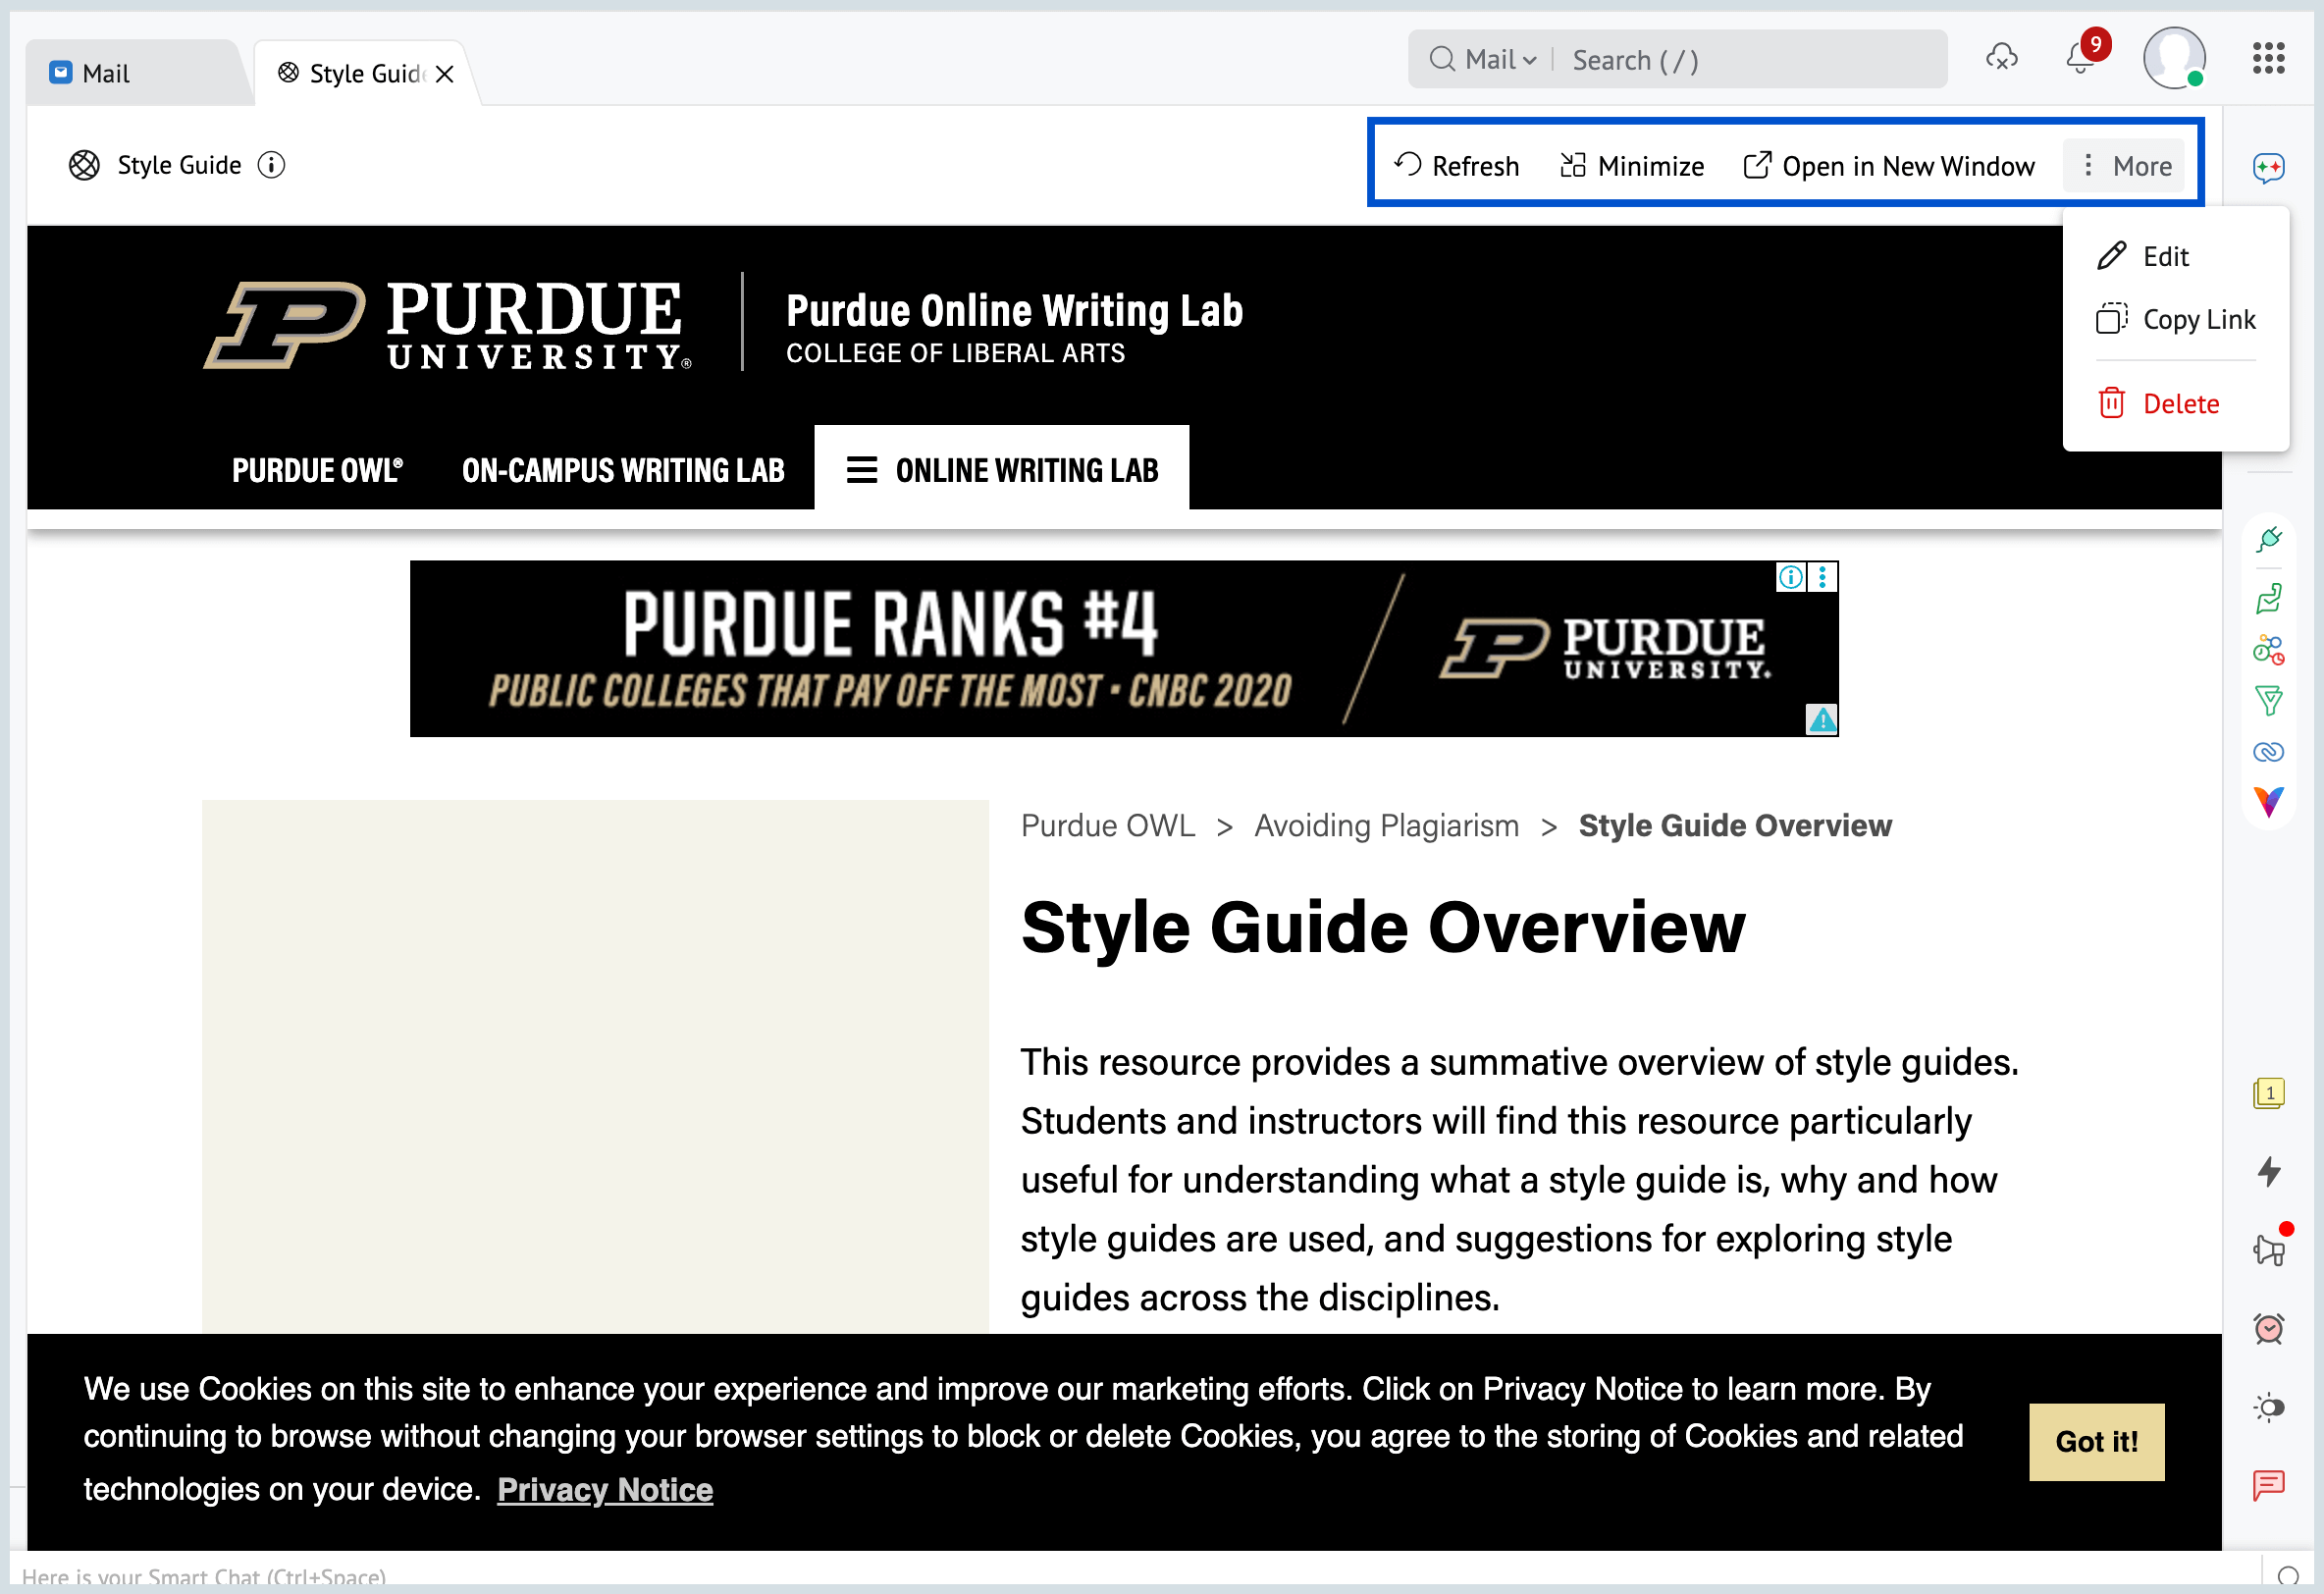
- Web Tabs open in a separate tab within the Mail interface.
- Use the Refresh icon to reload a Web Tab’s content.
- Click the Minimize icon to switch the Web Tab to Picture-in-Picture view.
- Select Open in New Window to move the Web Tab to its own window.
- Use the More Options icon to Edit the Web Tab, Copy link to share it, or Delete the tab when it’s no longer needed.
Picture-in-Picture
If you would like to switch to another tab within the Zoho Mail interface while keeping your Web Tab visible, you can use the Picture-in-Picture option to continue viewing it on your screen. You can view only Personal and Organization based Web Tabs in Picture-in-Picture view. To view Web Tabs in Picture-in-Picture view, follow the steps mentioned below:
- Log into your Zoho Mail account.
- Navigate to your Web Tab and click on it to view.
- On the top right corner, click on the Minimize option.
- You Web Tab will be minimized in Picture-in-Picture mode and displayed in the bottom right corner of your screen. You can switch to other tabs in Zoho Mail while also viewing your Web Tab.
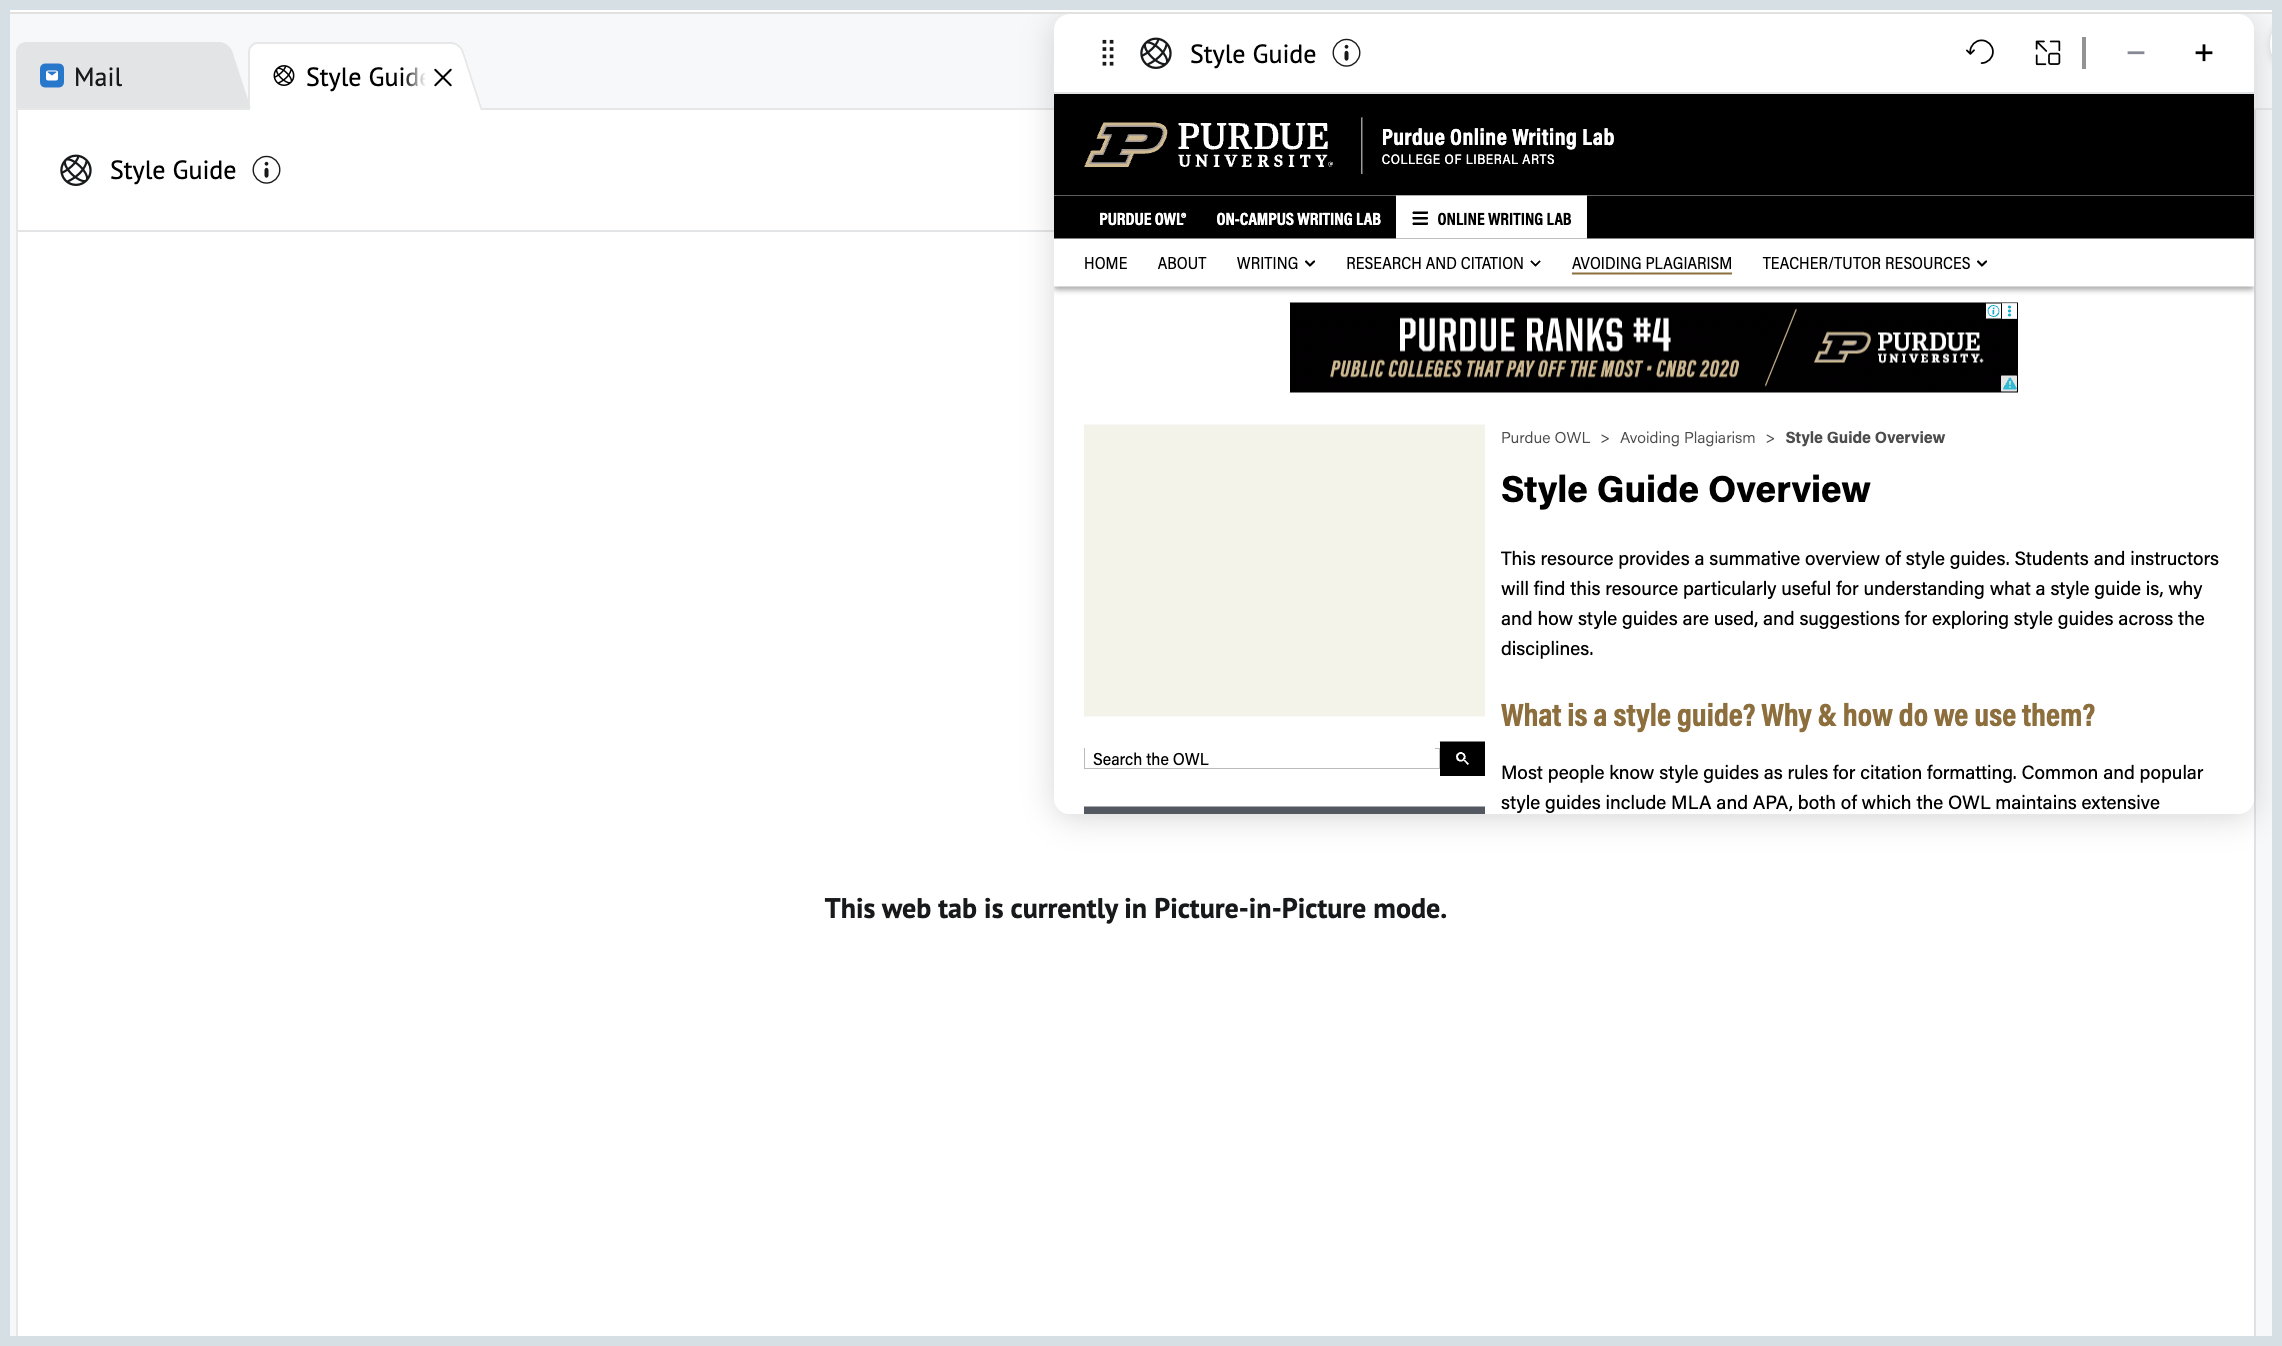
- You can hold and Drag the Grip icon available at the top left corner of your Picture-in-Picture view to move your Web Tab around the page.
- You can refresh the page content using the Refresh option.
- If you want your Web Tab back to its original view, use the Maximize option to do so.
- For a better view of the content of your Web Tab, you can use the Zoom Out and Zoom In option.
Web Tab Settings
Manage all your Web Tabs in one place through the Zoho Mail Web Tabs settings. Here, you can view, edit, organize, and delete your Web Tabs with ease. Customize your Web Tabs to suit your workflow and keep everything accessible and up to date.
- Log into your Zoho Mail account.
- Navigate to Mail Settings > Customization > Web Tabs.
- All the Web Tabs will be displayed along with their Name, URL, Availability(Group, Private or Org) and the Status of the Web Tabs.
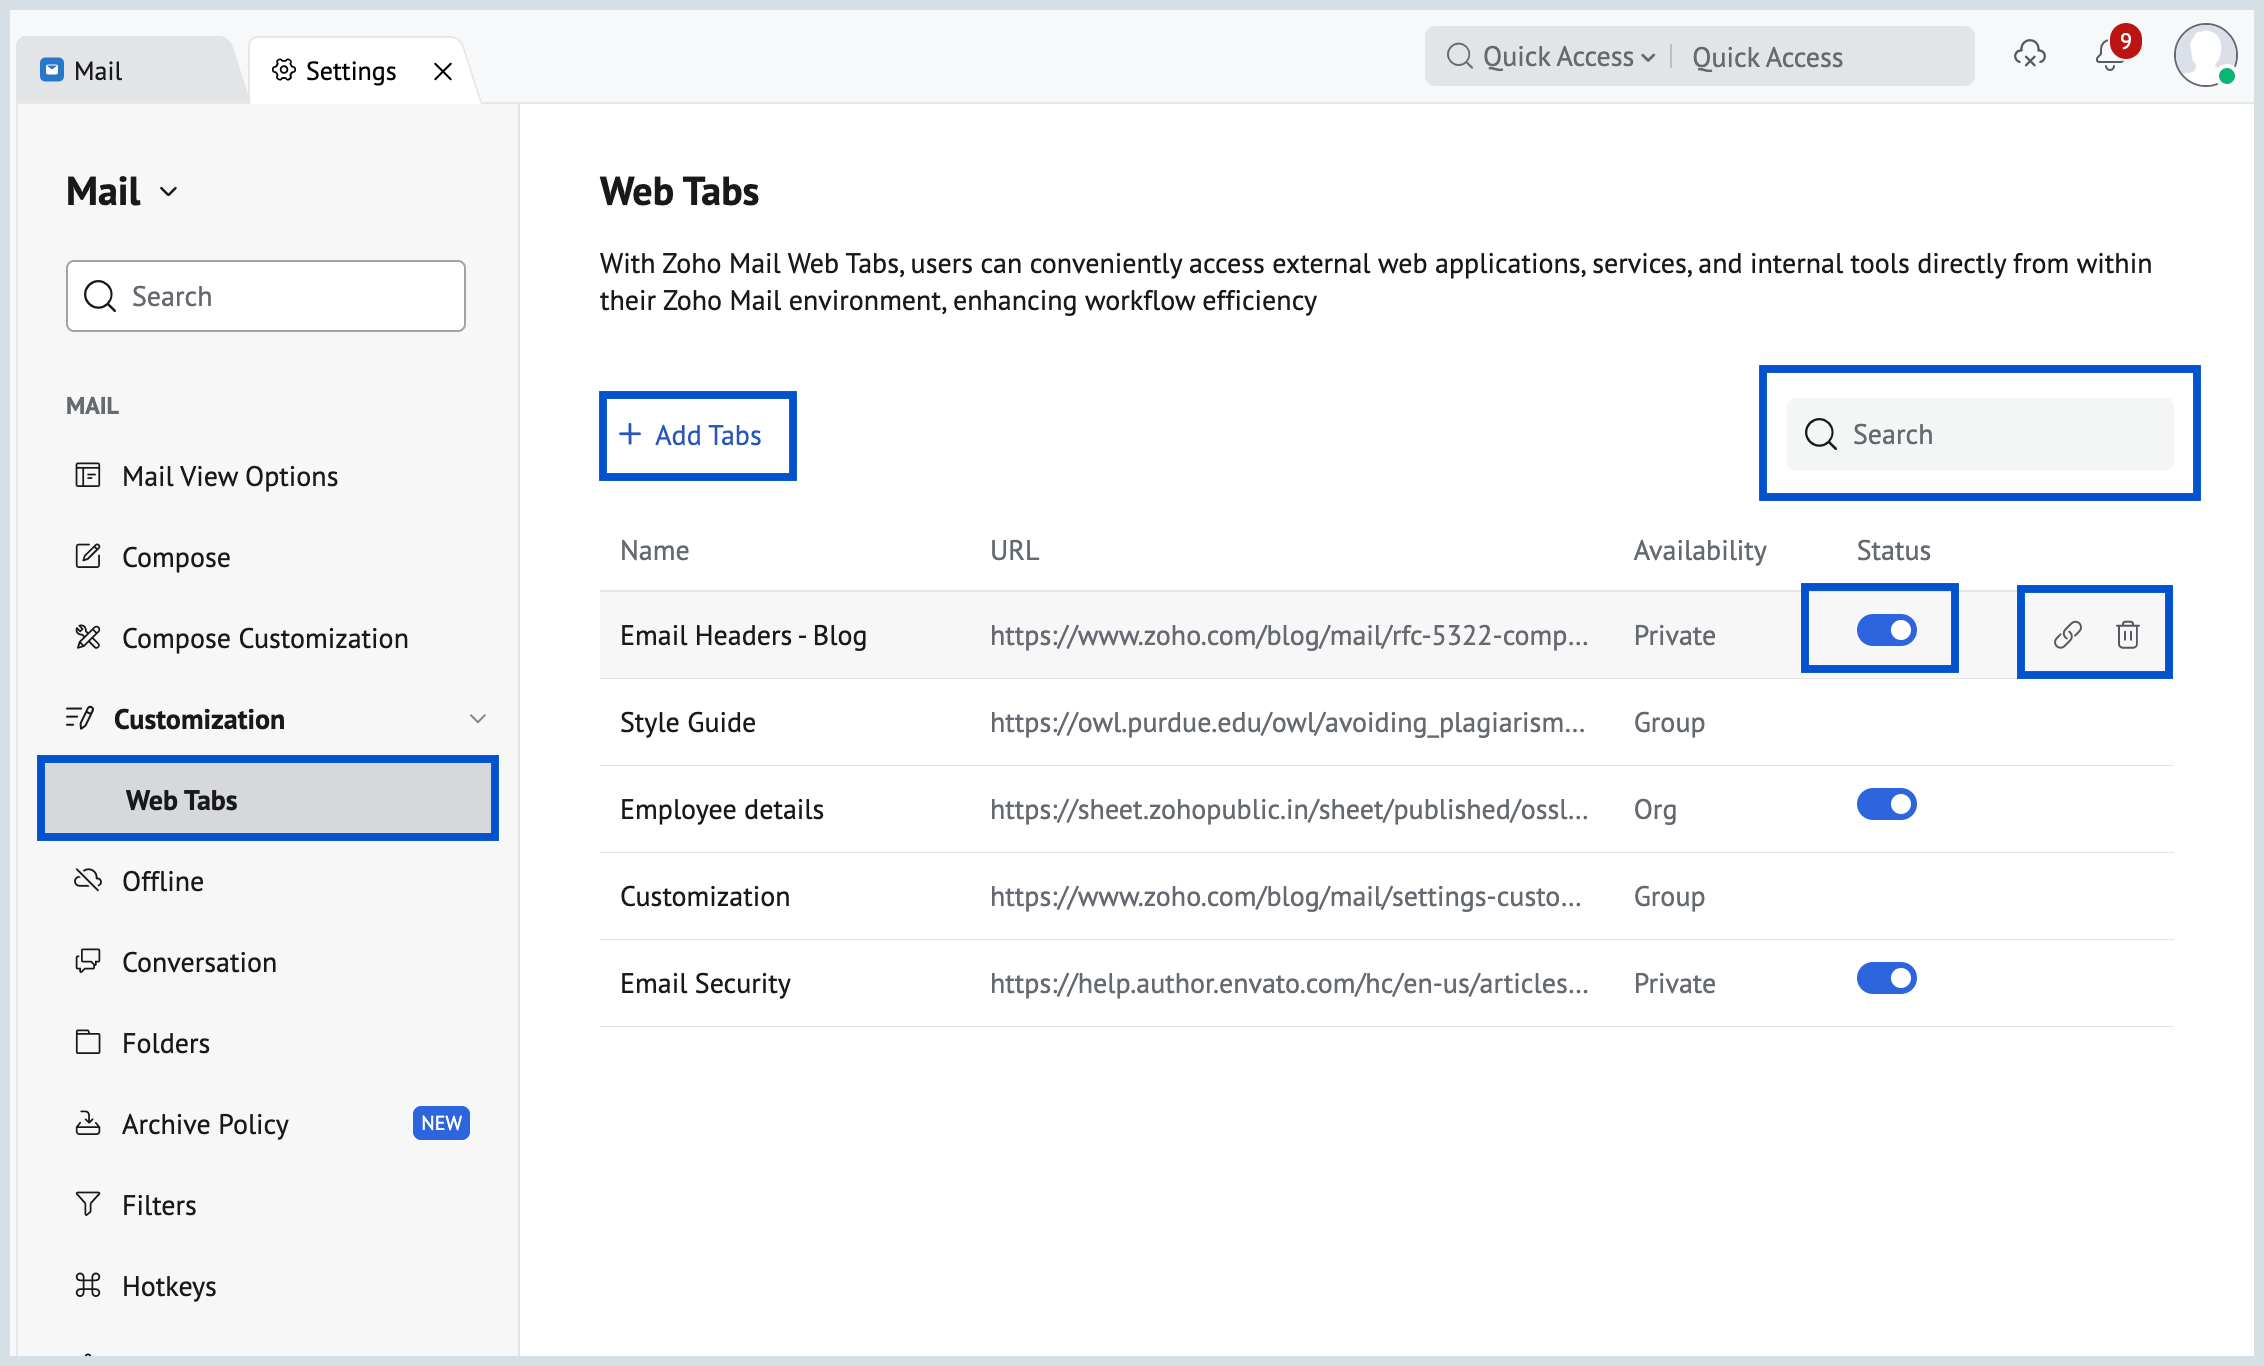
- You can also create a Web Tab using the +Add Tabs option and search for a specific Web Tab from the list of Web Tabs using the Search bar.
- You can enable/ disable the status of your Web Tab using the toggle button. You can only change the status of the Web Tabs you have created(Private).
- Hover over the Web Tabs to copy the Web Tabs links using the Copy link icon.
- You can delete a Web Tab using the Delete icon when you hover over the Web Tab. You can only delete the Web Tabs you have created(Private).
Group Web Tab Settings
Apart from managing Group Web Tabs in Web Tabs settings, you can also further manage your Group specific Web Tabs in Group settings.
- Log into your Zoho Mail account.
- Navigate to Mail Settings > Groups.
- Click on the Group for which Web tabs have been created.
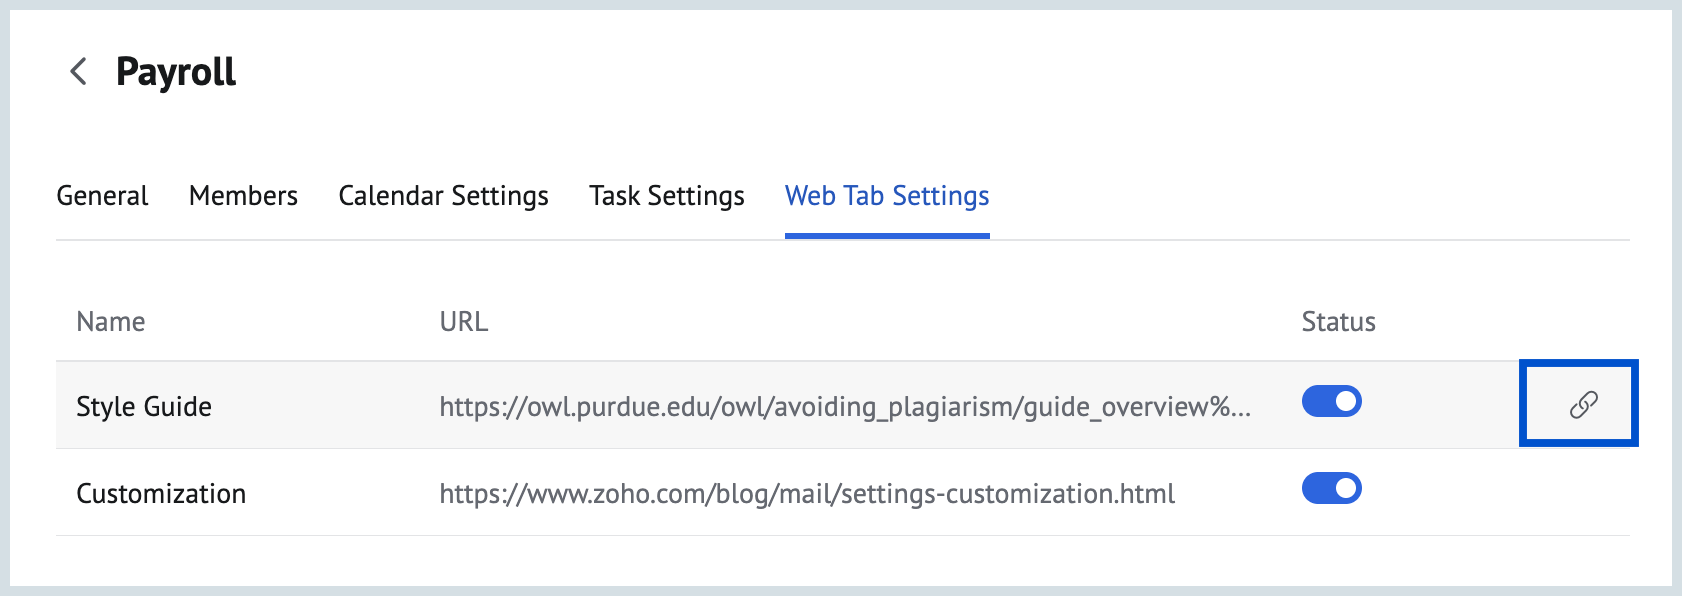
- The Web Tab Settings will be available next to the Task Settings in the header.
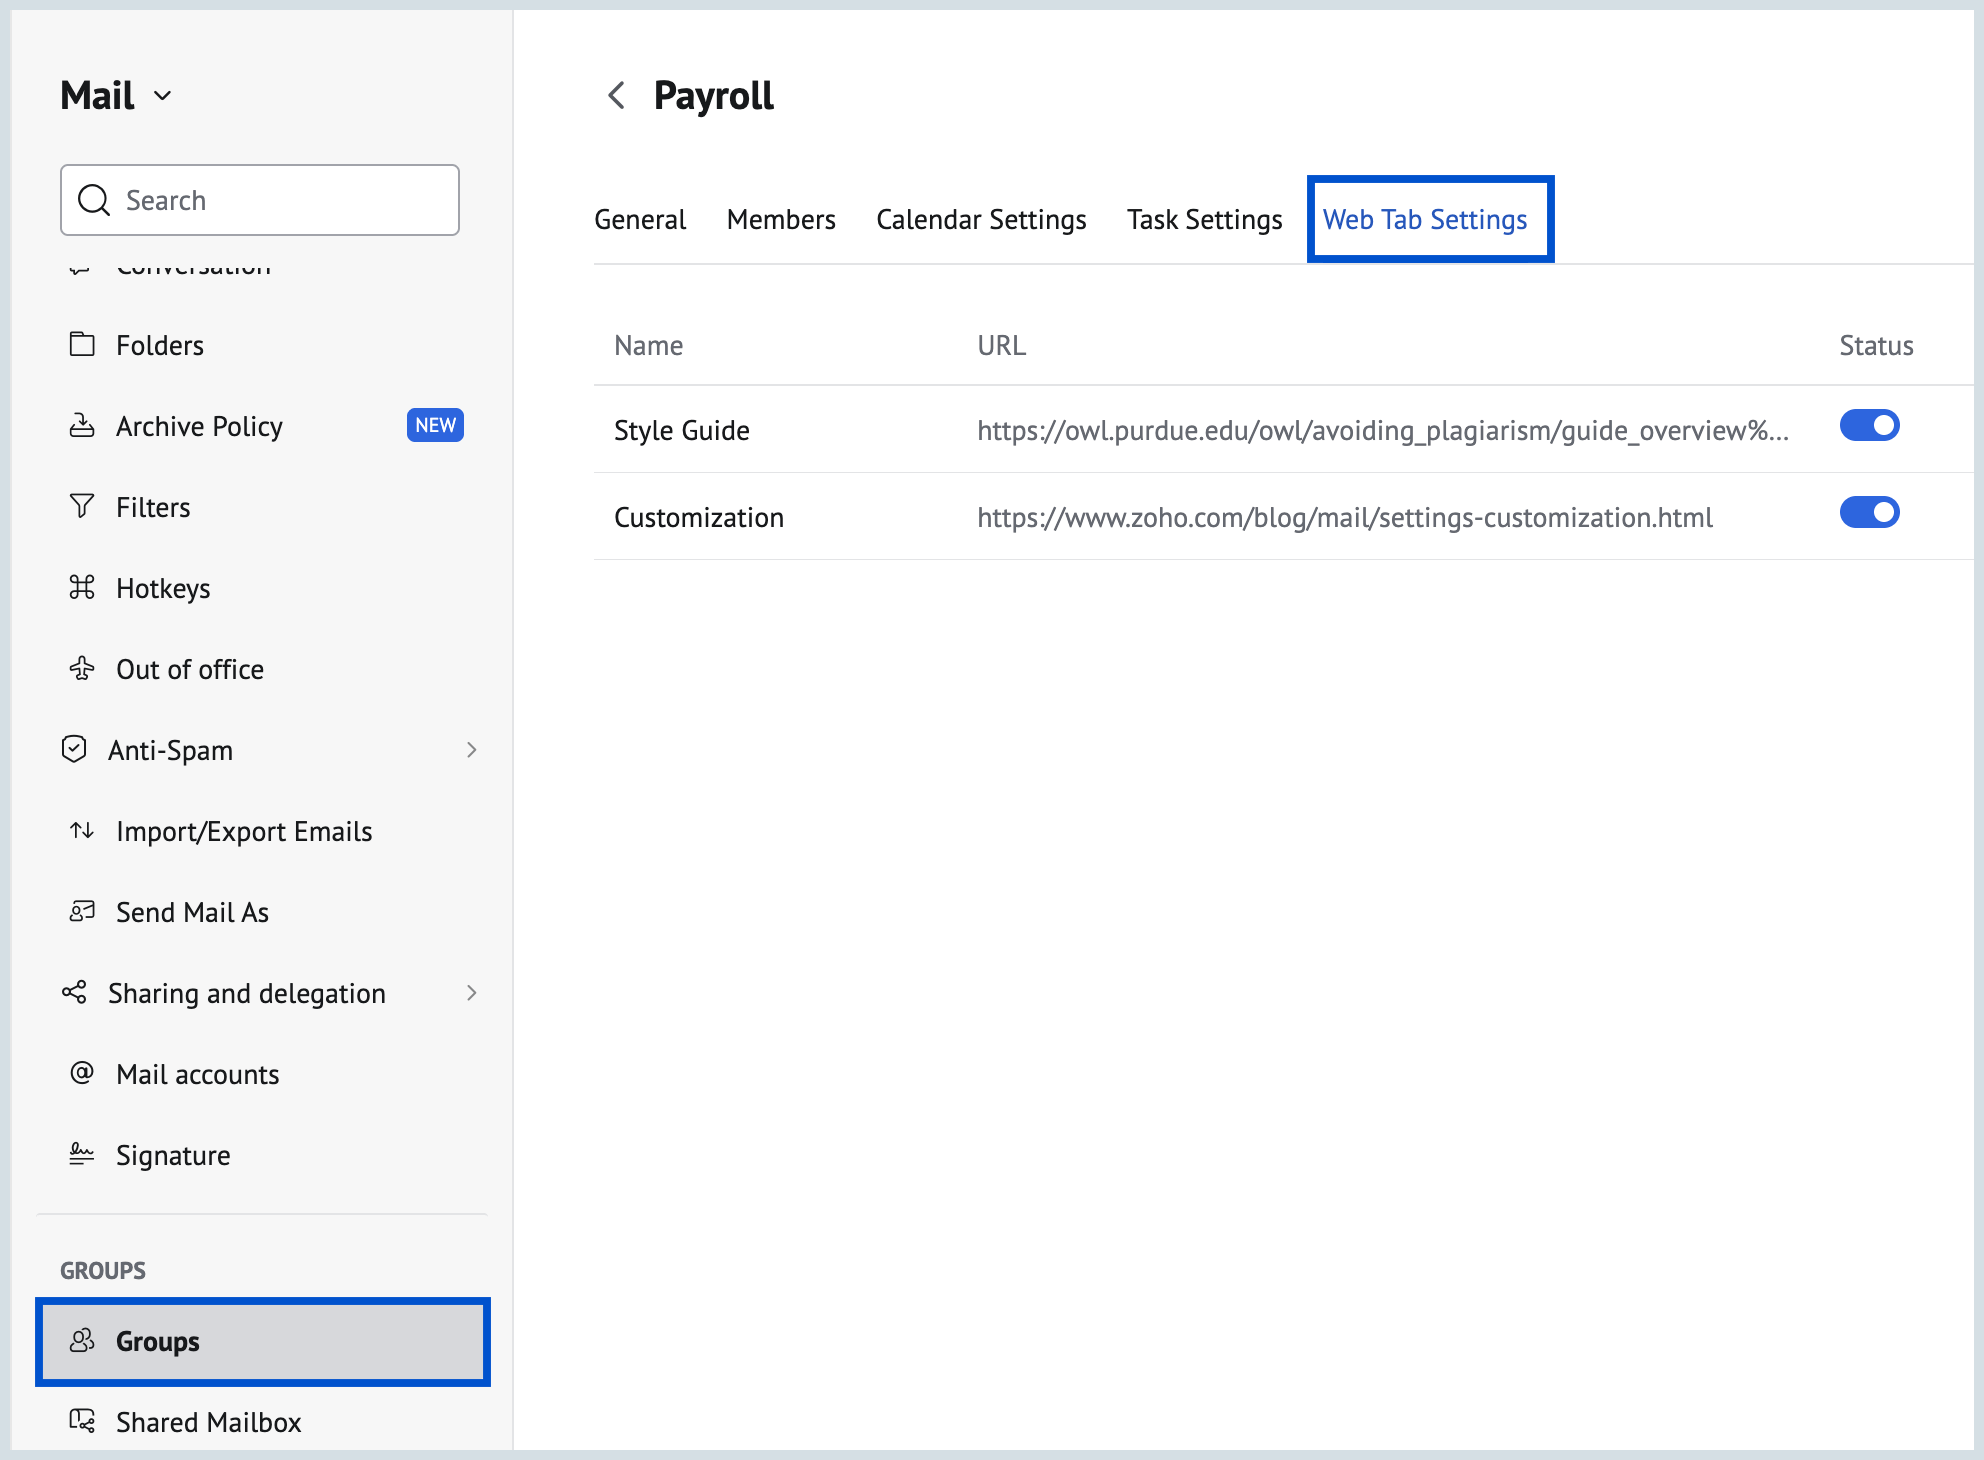
- All the Group Web Tabs will be displayed along with their Name, URL, and the Status of the Web Tabs.
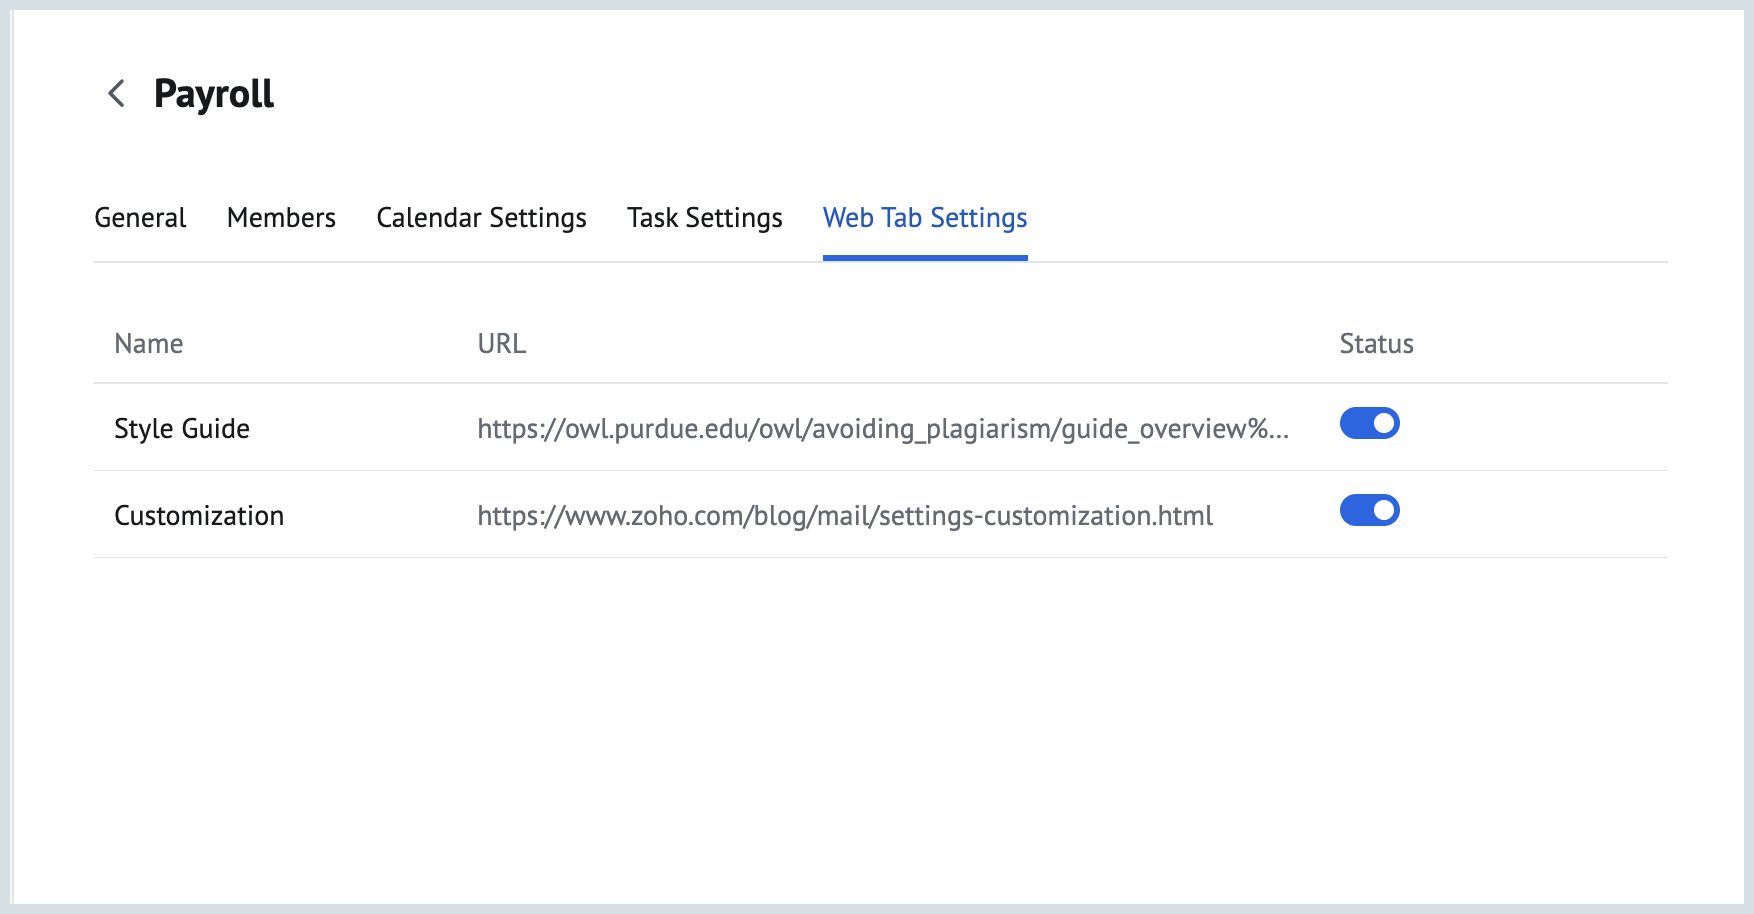
- You can enable/ disable the status of your Web Tab using the toggle button
- Hover over the Web Tabs to copy the Web Tabs links using the Copy link icon.