Steps to connect Zoho Mail MCP with Cursor
Table of Contents
Note:
The steps mentioned below are for free plan users on Cursor desktop application.
As a prerequisite, please download Cursor desktop app to proceed.
Automatic configuration
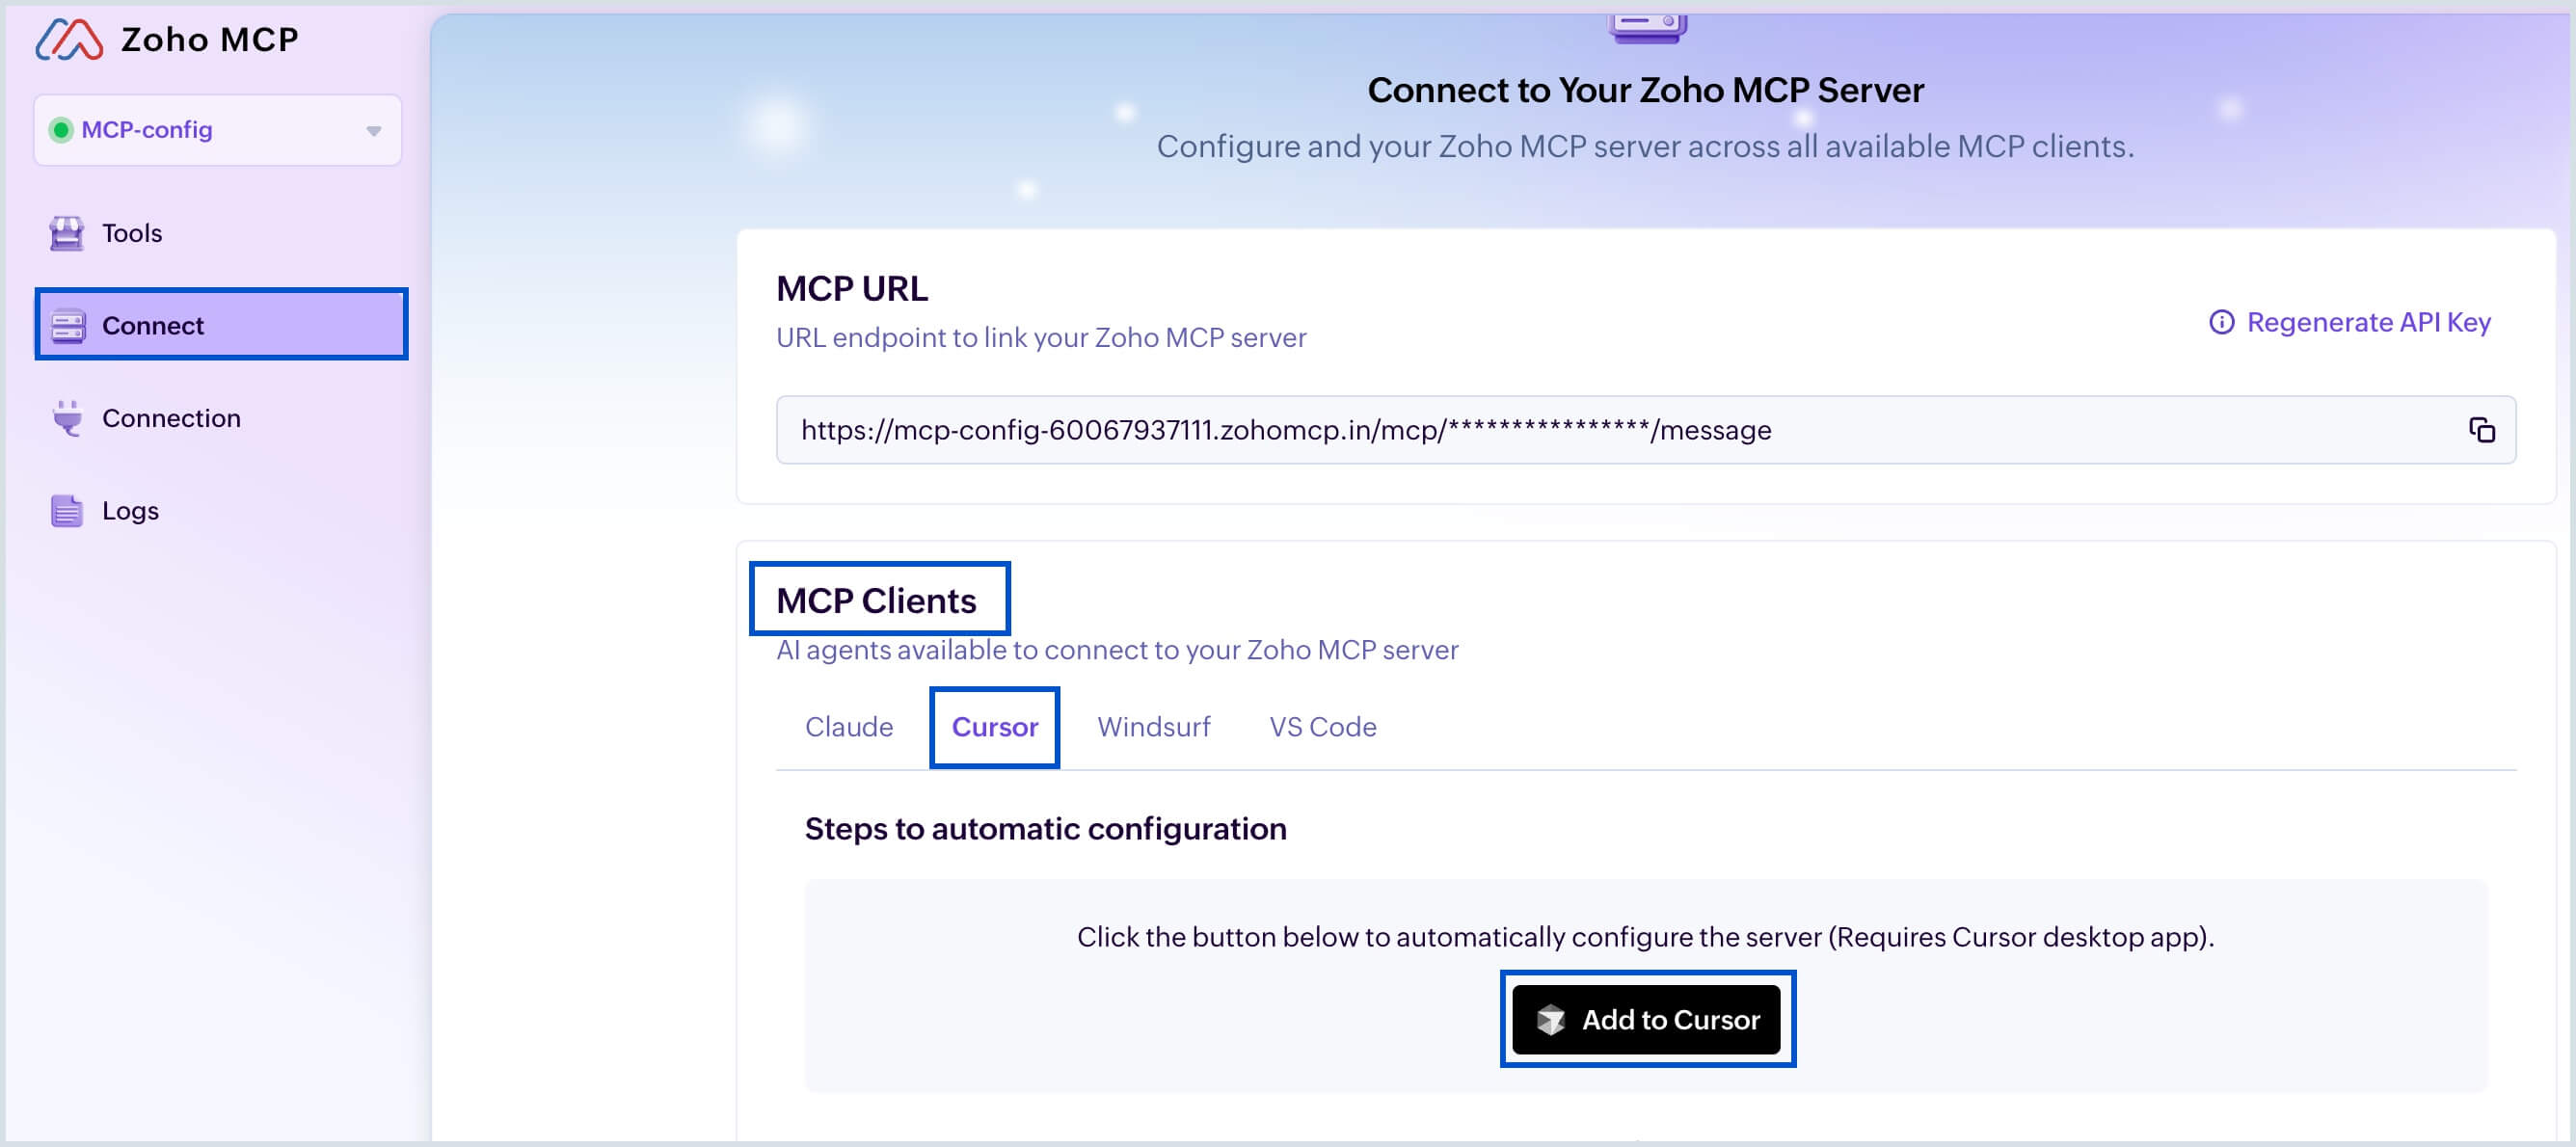
- Login to Zoho MCP console and navigate to Connect > MCP Clients > Cursor tab.
- Select Add to Cursor button under Steps to automatic configuration section.
- Click Open Cursor in the pop-up window that appears.
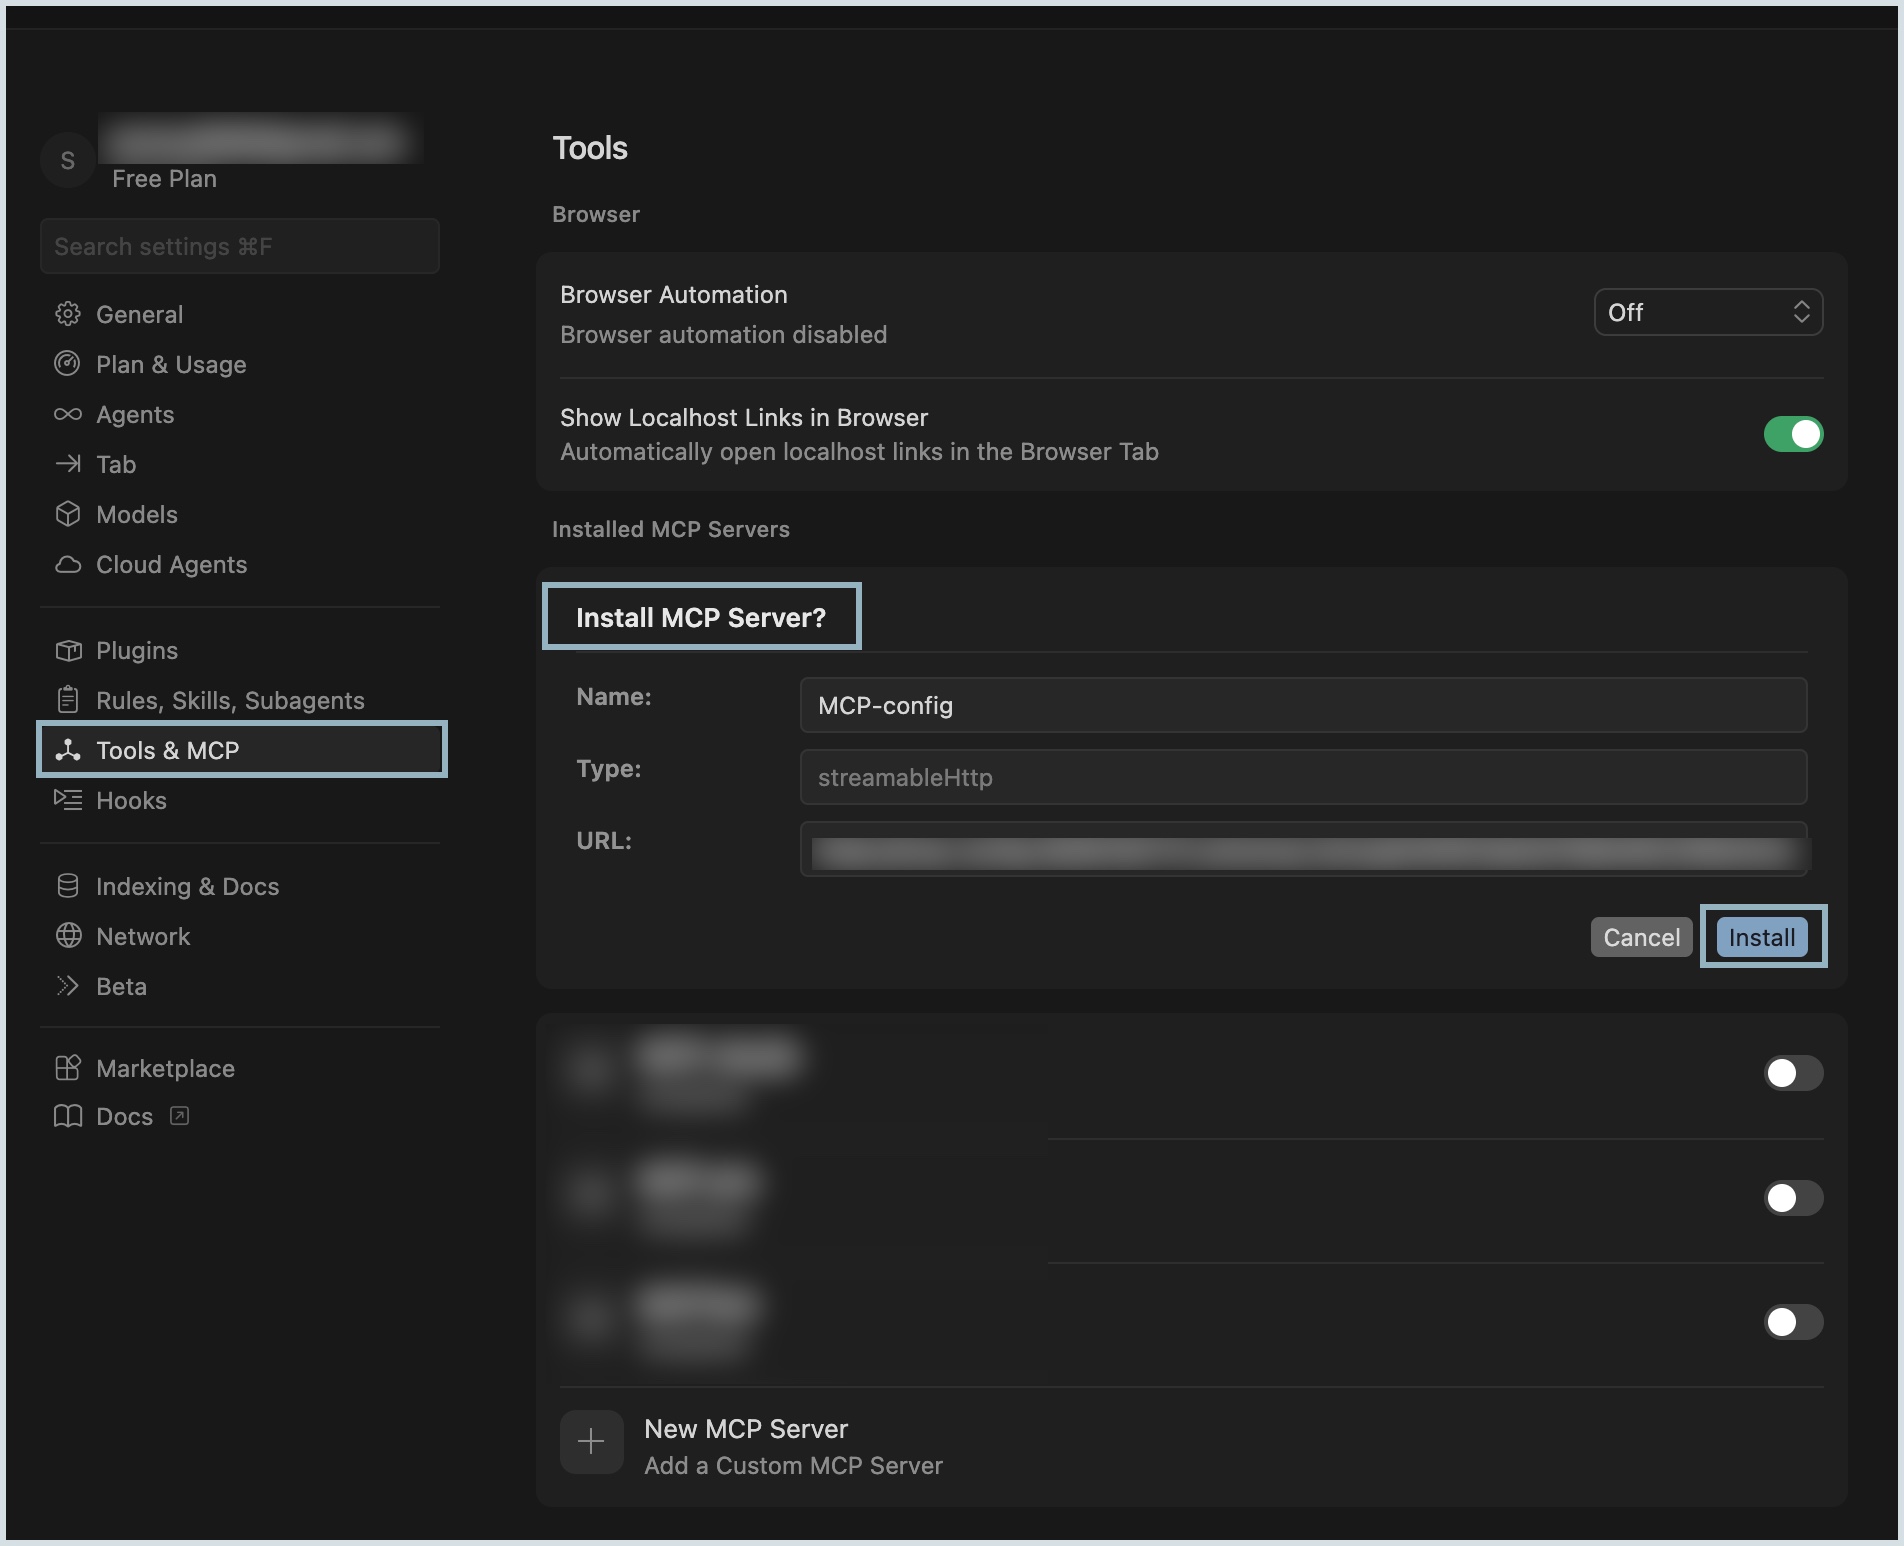
- The Cursor app opens automatically. Select Install under Tools > Install MCP Server? section.
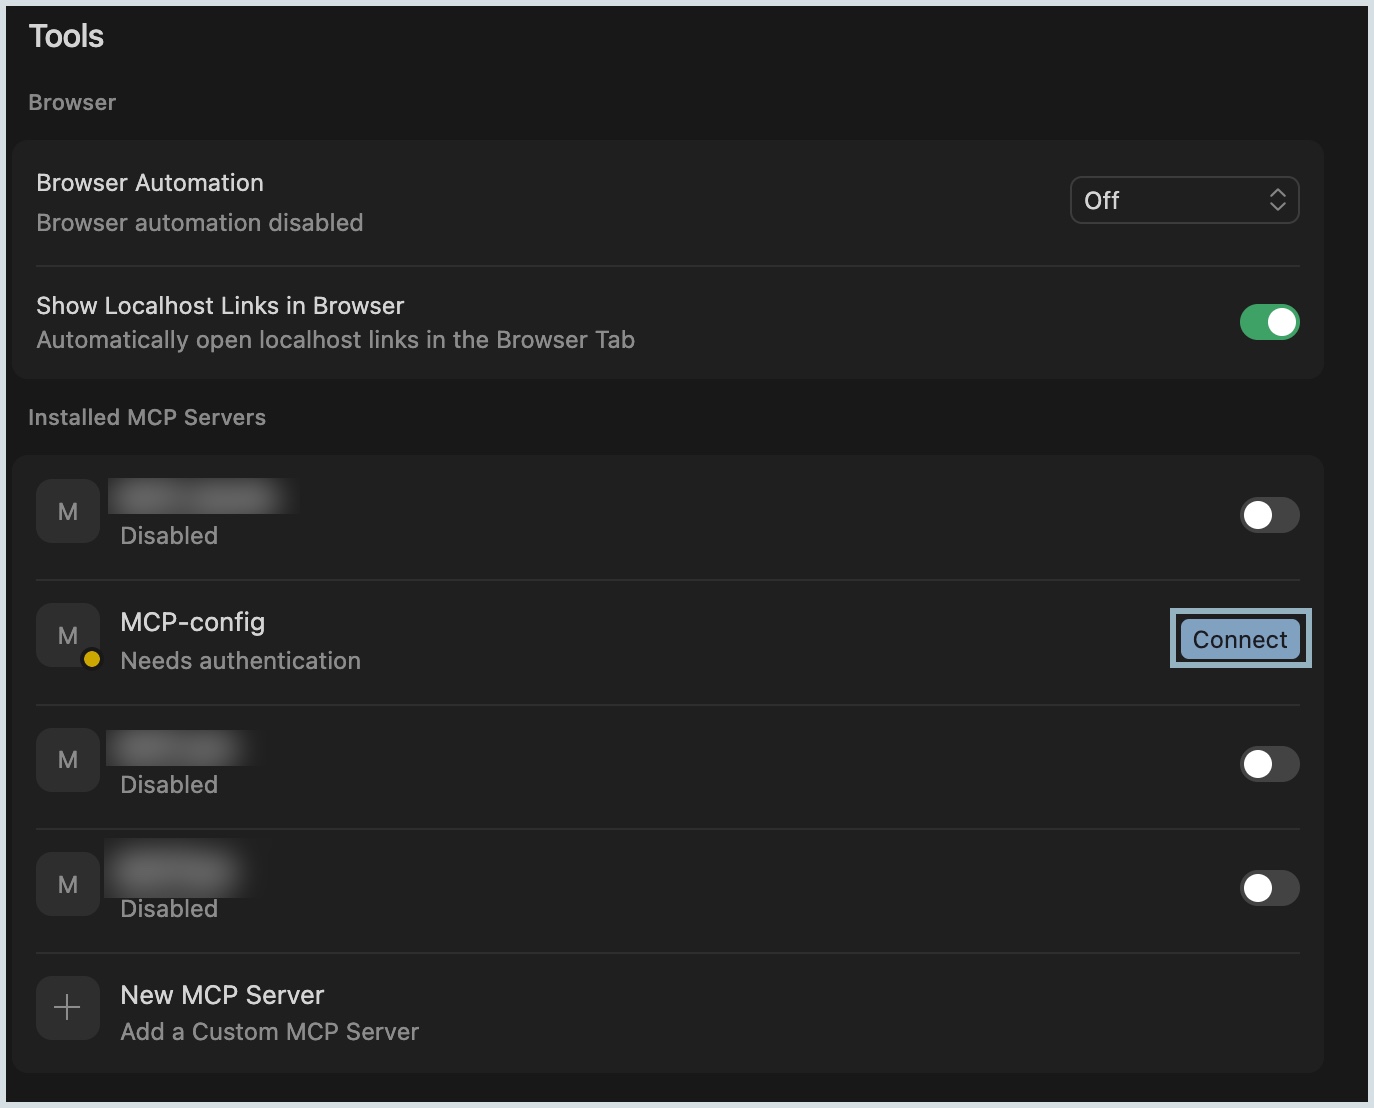
- Click Connect against your configured MCP server to complete the authentication.
- You will be directed to the Zoho MCP authorization screen in your local host. Click Allow.
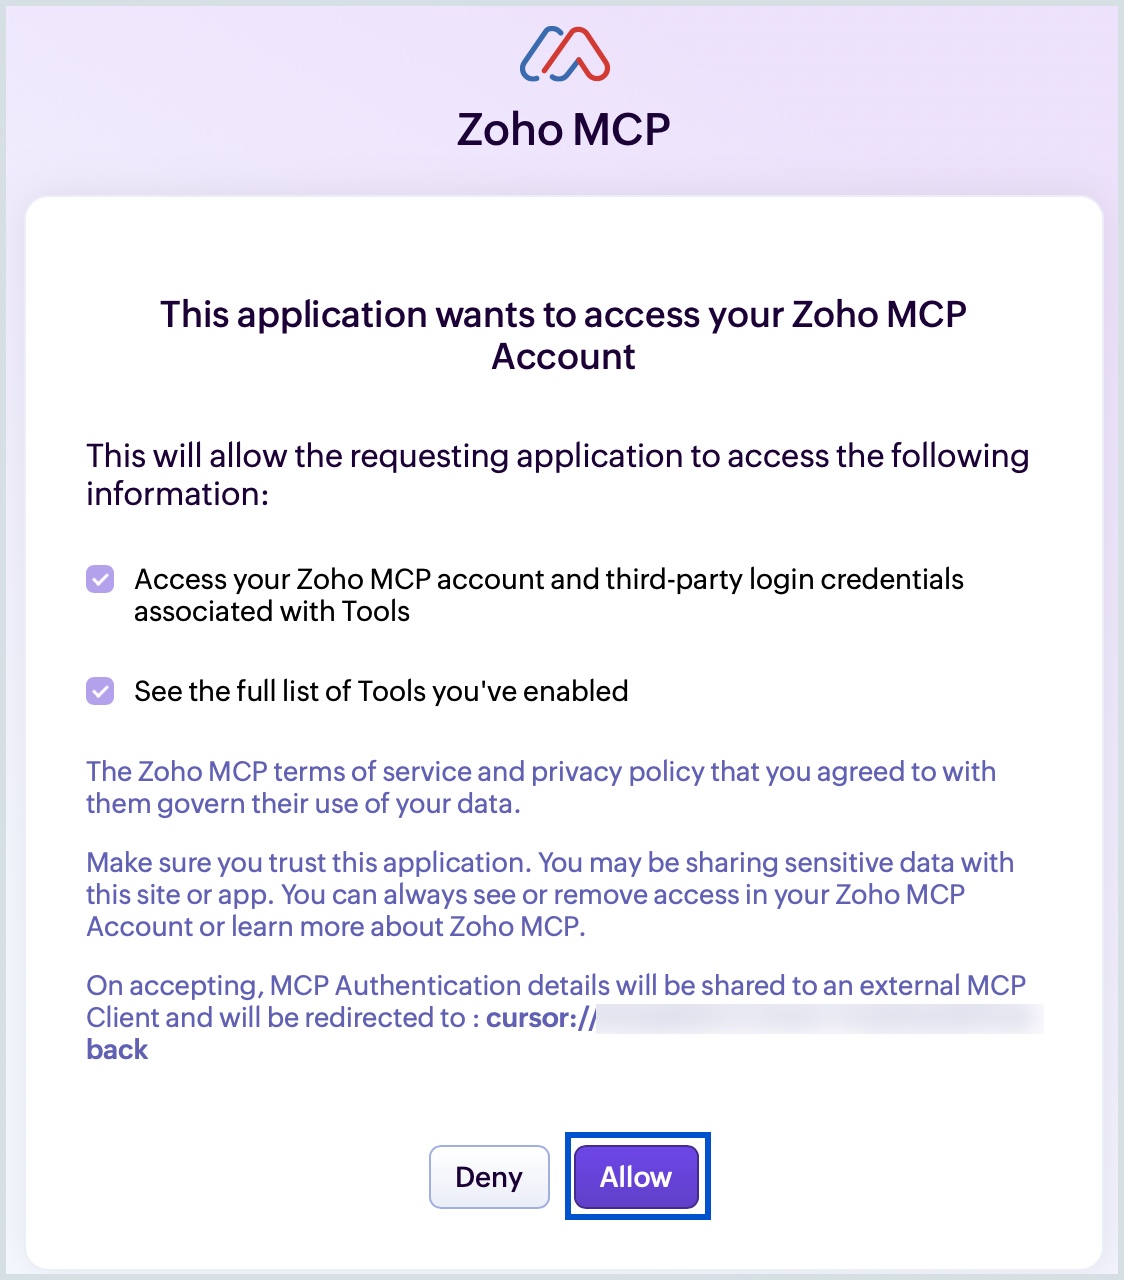
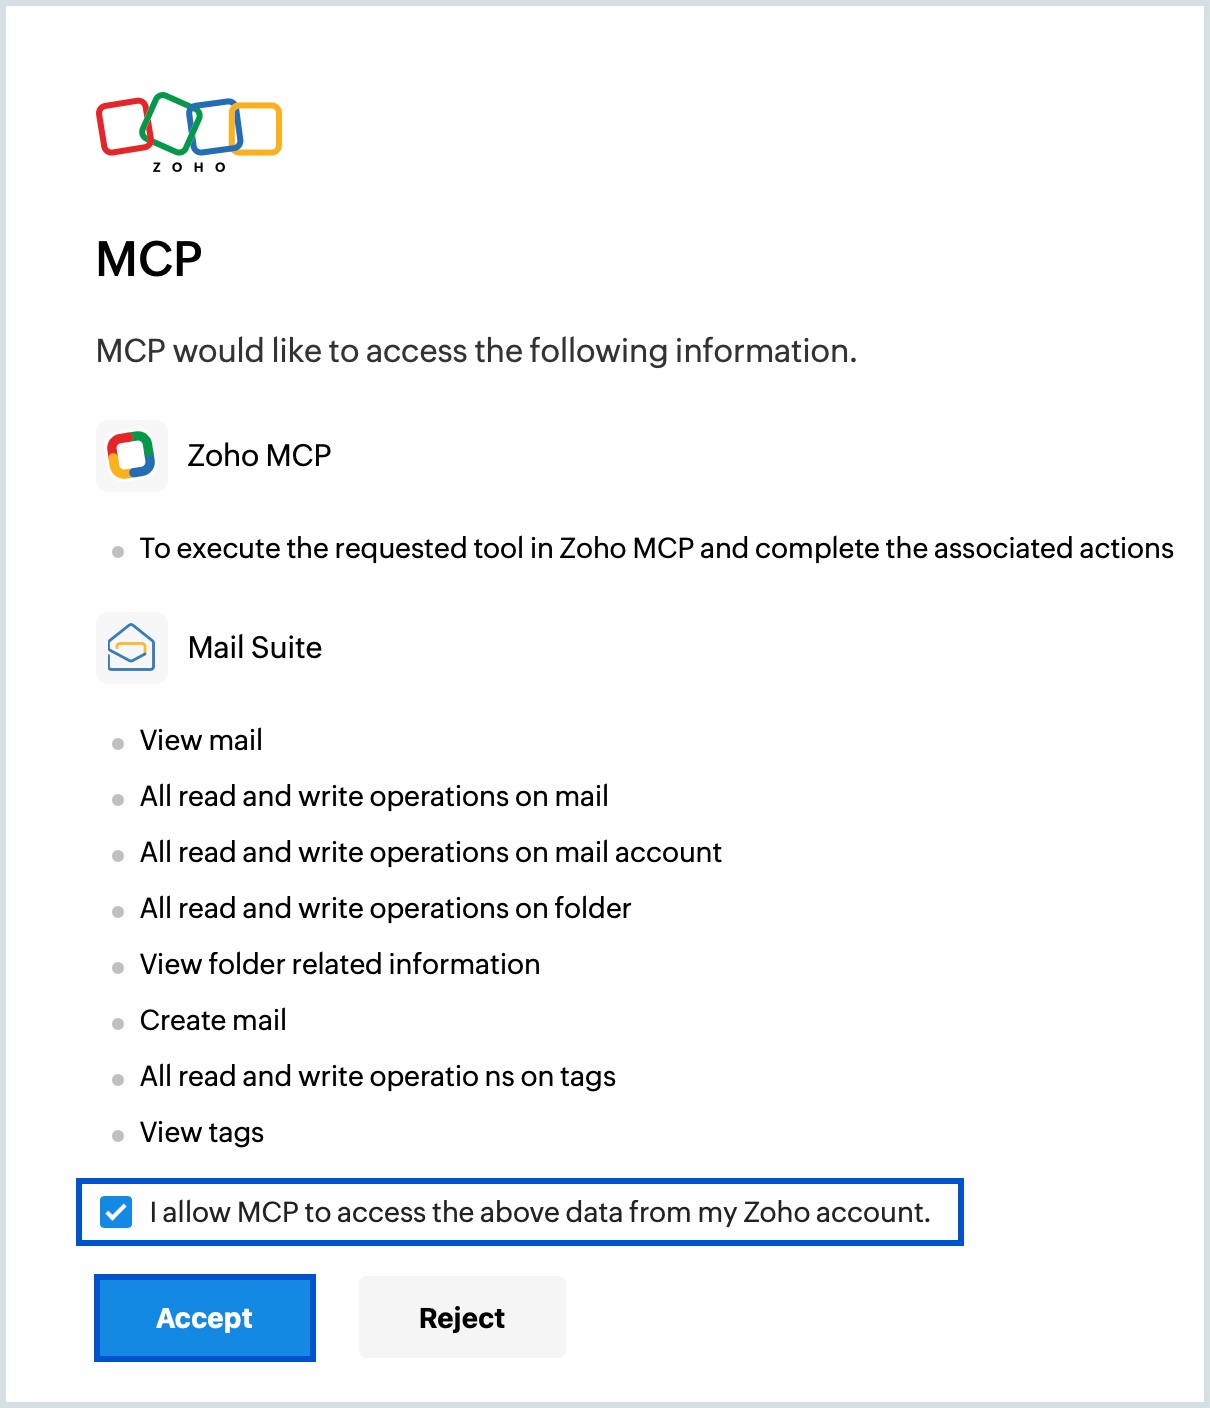
- Select the check box to grant permission and click Accept in the MCP authentication page and click Allow when prompted.


Now, your configured Zoho MCP server is enabled in Cursor app along with the added tools.
Manual configuration
To configure your Zoho MCP to Cursor app manually, follow the below steps:
- Open Cursor desktop app and navigate to Settings.
- Select Tools & MCP from the left pane and click New MCP Server/Add Custom MCP.

- Copy the JSON configuration code snippet available under the Connect > MCP Clients > Cursor tab from the Zoho MCP server console.

- Now paste this copied code snippet to the mcp.json file in Cursor settings and click Save.
- You will be directed to the Zoho MCP authorization screen in your local host. Click Allow.
- Select the check box to grant permission and click Accept in the MCP authentication page and click Allow when prompted.


Now, your configured Zoho MCP server is enabled in Cursor app along with the added tools.
